background image

Operating Instructions
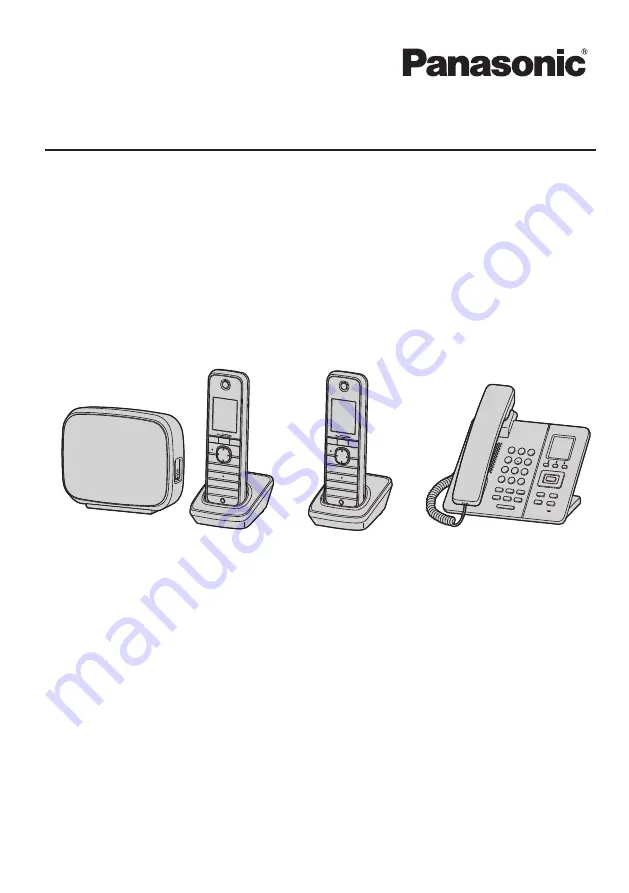
SIP Cordless Phone

SIP Cordless Handset

KX-TGP600

KX-TPA60

Model No.

Model No.

KX-TGP600

KX-TPA60

KX-TPA65

SIP Wireless Desk Phone

KX-TPA65

Model No.

Thank you for purchasing this Panasonic product.
Please read this manual carefully before using this product and save this manual for future
use.
Please use only the batteries provided and charge the batteries for about 6 hours before using
the handset for the first time. For details, see  “Charging the Batteries”, Page 82 in this
manual.

Note

R

In this manual, the suffix of each model number is omitted unless necessary.

R

The illustrations such as some keys may differ from the appearance of the actual product.

R

Certain products and features described in this document may not be available in your
country or area. Contact your phone system dealer/service provider.

R

The contents and design of the software are subject to change without notice.

Document Version: 2015-02

Summary of Contents for KX-TGP600

Page 1: ...e batteries for about 6 hours before using the handset for the first time For details see Charging the Batteries Page 82 in this manual Note R In this manual the suffix of each model number is omitted...

Page 2: ...e at http panasonic net pcc support sipphone For Future Reference Record the information in the space below for future reference Note R The serial number of this product may be found on the labels aff...

Page 3: ...Calls 47 Basic Calling 47 Easy Dialing 48 Making a Multicast Voice Paging Call 51 Receiving Calls Receiving Calls 52 Answering Calls 52 Hands free Mode 53 Answering an Intercom Call 54 Silent Mode 54...

Page 4: ...be mixed with general household waste For proper treatment recovery and recycling of old products and used batteries please take them to applicable collection points in accordance with your national l...

Page 5: ...ting Center Panasonic Marketing Europe GmbH Winsbergring 15 22525 Hamburg Germany Ecodesign information Ecodesign information under EU Regulation EC No 1275 2008 amended by EU Regulation No 801 2013 P...

Page 6: ...or calls to or from the PSTN refer to ITU E Model requirements in the design of their networks The overall aim is to minimize delay distortion and other transmission impairments particularly for those...

Page 7: ...following two conditions 1 this device may not cause harmful interference and 2 this device must accept any interference received including interference that may cause undesired operation WHEN PROGRA...

Page 8: ...ommunications may not be ensured when using this phone R Some wireless telephones operate at frequencies that may cause interference to nearby TVs and VCRs To minimize or prevent such interference the...

Page 9: ...enna or transmitter R The handset may be carried and operated with only the specific provided belt clip Other non tested belt clips or similar body worn accessories may not comply and must be avoided...

Page 10: ...nerate electrical noise such as fluorescent lamps and motors These noise sources can interfere with performance of the product R Do not place the product in rooms where the temperature is less than 0...

Page 11: ...ndset cannot be operated 1 If the low battery warning occurs during a conversation after 1 minute the conversation will be disconnected and after 1 more minute the handset will turn off Replacing the...

Page 12: ...effect Therefore you should discharge the batteries completely i e use them in the handset until the battery level indicator displays as empty Then recharge them as described in the manual After the...

Page 13: ...andable to cordless handsets desk phones KX TPA60 KX TPA65 KX UDT 1 series except for KX UDT111 Up to 8 phones in total R Up to 8 simultaneous calls Narrowband mode or up to 4 simultaneous calls Wideb...

Page 14: ...d and used with any base unit that supports this standard This manual describes how to connect to a base unit other than the KX TGP600 but the availability of certain features and the specifications o...

Page 15: ...LV219BX KX TGP600UK PQLV219E AC adaptor for Charger 1 1 DC Output 5 5 V Model No Part No KX TPA60 KX TPA60C KX TPA60LA PNLV226 KX TPA60AL PNLV226AL KX TPA60CE KX TPA60RU PNLV226CE KX TPA60LC PNLV226BX...

Page 16: ...Belt Clip 1 1 Rechargeable AAA Ni MH 1 2 V 630 mAh batteries KX TPA65 AC adaptor for Desk phone 1 DC Output 6 5 V Model No Part No KX TPA65 KX TPA65C KX TPA65LA PQLV219 KX TPA65AL PQLV219AL KX TPA65CE...

Page 17: ...Optional Accessories KX TPA65 Item Model No Wall mount kit KX TPA65 KX TPA65C KX A440 KX TPA65AL KX TPA65CE KX TPA65LA KX TPA65LC KX TPA65RU KX TPA65UK KX A440X 17 Before Operating the Telephones...

Page 18: ...downloading data Do not disconnect the Ethernet cable or AC adaptor from the base unit until the STATUS indicator stops flashing and lights in steady green Quick Flashing R The handset desk phone is...

Page 19: ...set the unit then reconnect the AC adaptor If the STATUS indicator is still flashing rapidly there may be a problem with the base unit hardware Contact your phone system dealer service provider Slow s...

Page 20: ...er models Ringer Charge Message Indicator Status Meaning Color Light pattern Red On Charging Slow Flashing There is a new missed call or voice mail Quick Flashing Receiving a call Off Fully charged or...

Page 21: ...honebook 1 DOWN Used to display the Outgoing call log CENTER Used to display the Menu In this manual when a procedure instructs you to press OK you can also press the CENTER key to confirm the selecti...

Page 22: ...transfer a call to another party or to clear digits or characters FUNC Key Pressing this key followed by a keypad number 0 9 allows you to perform various common functions quickly For details see Fun...

Page 23: ...Desk Phone KX TPA65 A C B D E Q K M O H I J L N P F G 23 Before Operating the Telephones...

Page 24: ...KX TPA65AL KX TPA65LA KX TPA65LC KX TPA65UK KX TPA65X A C B D E Q K M O F G H I J L N P 24 Before Operating the Telephones...

Page 25: ...KX TPA65C A C B D E Q K M O F G H I J L N P 25 Before Operating the Telephones...

Page 26: ...KX TPA65CE A C B D E Q K M O H I J L N P F G 26 Before Operating the Telephones...

Page 27: ...icator blinks in accordance with the LED pattern setting Status Meanings Color Light pattern Blue Slow Flashing There is a new missed call or voice mail Quick Flashing Receiving a call Off Power off D...

Page 28: ...ailbox FUNCTION Key Pressing this key followed by a keypad number 0 9 allows you to perform various common functions quickly For details see Function Keys Page 40 REDIAL Key Used to redial the last di...

Page 29: ...Battery Indicator 1 Low Signal Strength Indicator Very weak Battery Indicator 1 Very low Signal Strength Indicator Out of range Battery Indicator 1 Needs to be charged Off hook Status Incoming Call Lo...

Page 30: ...DND Do Not Disturb 1 1 Not displayed when connecting to a base unit other than the KX TGP600 Time Display Date New Message or Missed Call Display Handset Desk phone number and Name when connecting to...

Page 31: ...locks the phonebook temporarily Pressing for more than 2 seconds then entering the password default not registered unlocks the phonebook If no password has been set you cannot lock the phonebook For d...

Page 32: ...Pressing this key for more than 2 seconds unlocks the keys Turns the ringer off Soft Key C Right key Suffix Meaning none C LA LC UK AL RU CE NEXT Advances to the next display Displays the Outgoing Ca...

Page 33: ...Reject an incoming call 4 Used to set clear the Auto Answer mode when in standby mode During a conversation turns the microphone mute feature on or off For details about the Mute Auto Answer function...

Page 34: ...y Edit a OK 5 D C Select a desired soft key a OK 6 D C Standby Talking a OK 7 D C Function Key a OK 8 D C Select the desired item a OK Assigning Hot Key Dial keys In standby mode 1 MENU 2 D C F E a OK...

Page 35: ...OK R If you press a dial key when displaying the line status only the limited line is displayed R The line name can be changed Contact your administrator for further information Status Indication 1 St...

Page 36: ...an Anonymous Call is specified For details about operation see Call Settings Page 100 Displayed when Call Forwarding is specified Displayed when Do Not Disturb DND is specified Displayed when the Priv...

Page 37: ...Incoming Call Log 1 The Line Status screen is different depending on whether connected to a KX TGP600 or another base unit For details see LINE Key Page 35 2 FUNCTION for the KX TPA65 3 The Function...

Page 38: ...R To search for an item in the Phonebook see Using the Phonebook Page 62 38 Before Operating the Telephones...

Page 39: ...g System Settings Page 75 Accesses the System Settings setting Memo Alarm Page 73 Accesses the Memo Alarm setting Sub Menu While Off hook During a Conversation Phonebook Page 66 Opens the Phonebook Ne...

Page 40: ...ge 41 Makes a call using the Incoming Call Log 7 Outgoing Log Page 41 Makes a call using the Outgoing Call Log 8 Phonebook Page 62 Makes a call using the Phonebook 9 Call Park 2 Page 57 Used to park o...

Page 41: ...vel will also be used for subsequent calls When using a KX TPA65 the volume can also be adjusted by using VOL To turn the ringer off 1 Incoming Outgoing Call Log When connecting the desk phone and han...

Page 42: ...TPA65 only By using a desk phone as a master desk phone KX TPA65 a handset KX TPA60 can be set to be paired with it so that the phone number account of the master desk phone is applied to the slave p...

Page 43: ...esk phone is in standby mode One of 4 key lock types can be selected For details see Key Option Page 93 Note R If you select Manual Password or Auto Password for Key Lock Type you need to enter the pa...

Page 44: ...f the character modes by pressing the Right Soft Key while entering a name The function icon above the soft key displays the current character mode For available characters see Character Mode Table Pa...

Page 45: ...ER CLR KX TPA65 Press and hold TRANSFER for more than 1 second R To move the cursor press the Navigator Key F E D or C Power On Off KX TPA60 only To turn the power of the handset on or off press and h...

Page 46: ...ess SP PHONE when using a headset R Press LINE and then press a dial key or D C to select the line number Note R Certain soft keys such as function like the SP PHONE key Going on hook In this manual w...

Page 47: ...l dialing press KX TPA60 KX TPA65 CANCEL R If flashes move closer to the base unit and dial again R To insert a 3 second pause between phone numbers press P 1 It is useful when you want to operate voi...

Page 48: ...Using the Redial List The last phone number dialed is stored in the redial list each 32 digits max In standby mode 1 FUNC FUNCTION a 1 Note R If the Redial key is not assigned to dial key 1 press the...

Page 49: ...your administrator has configured this function you can make a call to a registered phone number automatically Contact your administrator for further information In standby mode 1 KX TPA60 KX TPA65 O...

Page 50: ...ct your phone system dealer service provider R For details about making a call using the Handset Phonebook see Searching for an Item in the Handset Phonebook Page 66 Using the Base unit Phonebook when...

Page 51: ...layed automatically Note R If the Remote Phonebook is not permitted this feature cannot be used For details contact your phone system dealer service provider R For details about making a call using th...

Page 52: ...coming call log and displayed on the handset desk phone If a call from a number matching a number entered in the phonebook is received the name registered in the phonebook for that number will be disp...

Page 53: ...ervice users only Page 76 Hands free Mode In hands free mode you can talk and hear the other party in a conversation without using the handset This mode is useful for performing other tasks during a c...

Page 54: ...Mode is set confirmation tones for setting the ring pattern or ring volume will not play To set or cancel 1 KX TPA60 Press and hold for more than 2 seconds KX TPA65 Press and hold for more than 2 sec...

Page 55: ...ing or disabling Noise Reduction In standby mode 1 MENU 2 D C F E a OK 3 D C Talk Option a OK 4 D C Noise Reduction Voice Clarity a OK 5 D C On Off a OK Temporarily enabling or disabling Noise Reducti...

Page 56: ...l before the transfer destination answers press CANCEL To do a blind transfer when connected to the KX TGP600 only 1 Press BLIND 1 during a conversation 2 Dial the party you want to transfer to a CALL...

Page 57: ...flashing green LINE indicator a OK Holding in a System Parking Zone Call Park You can use this feature as a transferring feature When Call Park is permitted the Call Park item is available in the Func...

Page 58: ...res such as conference calls with four or more parties In this case the procedures for handling a conference call may be different from those explained in this section For details contact your phone s...

Page 59: ...the speaker or the handset To set cancel 1 MUTE Note R When MUTE is blinking Mute is on If the MUTE soft key is not displayed on the LCD MUTE is displayed on the 1st line of the LCD R During Mute even...

Page 60: ...Monitor KX TPA65 only During a two party conversation with the corded handset you can allow other people to listen to the conversation through the speaker while you continue the conversation using th...

Page 61: ...if you do not answer the call within a certain amount of time 4 If a Forward setting is selected enter a new forward destination number or confirm and modify a previously set forward destination numbe...

Page 62: ...d to the KX TGP600 only If your telephone company provides the remote phonebook service you can use it For details contact your phone system dealer service provider Handset Phonebook Base unit Phonebo...

Page 63: ...ovider supports the following phonebook data you can download it via the network In a name that exceeds 24 characters the exceeding characters will be deleted Phone numbers that exceed 32 digits are i...

Page 64: ...Default TEL No a OK 10 D C Select the number to use as the default number a OK 11 SAVE Note R Steps 7 and 8 can be omitted if you do not want to assign a category R Steps 9 and 10 can be omitted if y...

Page 65: ...ng a Stored Item in the Handset Phonebook Editing a Stored Item In standby mode 1 2 D C Phonebook a OK 1 3 Enter the name or the first character s of the desired name a OK 4 D C Select the desired ite...

Page 66: ...3 Enter the name or the first character s of the desired name a OK 4 D C Select the desired item 5 MENU 6 D C Delete a OK 2 7 D C Yes a OK 1 If only Handset Phonebook is permitted this step is skippe...

Page 67: ...en the phonebook list is displayed 1 Press the dial keys to enter the desired name in accordance with the character tables 1 1 For details about the characters assigned to the dial keys see the follow...

Page 68: ...the phonebook while the handset desk phone is in standby mode If no password has been set you cannot lock the phonebook For details about setting the password see Setting the Password Page 43 Locking...

Page 69: ...valid digits are 0 through 9 G B J R If an item with the same name and number exists the new information added will be merged with the existing item R To enter characters see Entering Characters Page...

Page 70: ...Phonebook Searching by Name You can also search for an item in the phonebook by entering a name In standby mode 1 2 D C Base Phonebook a OK 3 Enter the name or the first character s of the desired na...

Page 71: ...an Item in the Remote Phonebook Searching by Name You can also search for an item in the phonebook by entering a name In standby mode 1 2 D C Remote Phonebook 1 a OK 3 Enter the name or the first cha...

Page 72: ...to be used as a Hot Key 1 In standby mode press and hold a dial key 0 9 for more than 1 second 2 MENU 3 D C Select Copy from P book a OK 4 Enter the desired name a OK 5 D C Select a number a OK 6 Save...

Page 73: ...f a base unit Note R You can select the ringer pattern for each Memo Alarm For details see Incoming Option Page 91 R If you are on a call at the time that the alarm is set to sound it will sound after...

Page 74: ...D C Select an alarm number 1 3 a DELETE 4 D C Yes a OK Stopping a Memo Alarm While the alarm is ringing 1 KX TPA60 XFER CLR or set the handset on the charger KX TPA65 CANCEL TRANSFER or Changing the F...

Page 75: ...Handset Name Category Name Date Format Time Format Caller ID Disp Colour Scheme Color Scheme Base Monitor Tone Option Key Tone Range Alarm Page 96 System Option Register H S Cancel Base Select Base Pa...

Page 76: ...C Block Anonymous a OK 5 D C Select a desired line a OK 6 D C On Off a OK Incoming Call Barring Caller ID service users only This feature allows the unit to reject calls from specified phone numbers t...

Page 77: ...fore making a call specify the following IMPORTANT R We recommend setting with your administrator Contact your administrator for further information 1 MENU 2 D C F E a OK 3 D C Call Settings a OK 4 D...

Page 78: ...Number select for making call R Phonebook import and export Note R Each time you want to access the Web user interface you must enable Web programming Embedded Web See Other Option Page 97 78 Customi...

Page 79: ...ssive heat resulting in a fire R Regularly remove any dust etc from the AC adaptor power plug by pulling it from the power outlet then wiping with a dry cloth Accumulated dust may cause an insulation...

Page 80: ...n Low Position PUSH PUSH R Low Position High Position PUSH PUSH Removing the Stand KX TPA65 Tilt the stand in the direction indicated while pushing the PUSH marks with both hands PUSH PUSH 80 Installa...

Page 81: ...AC adaptor and the Ethernet cable to the base unit Hub PQLV219xx R The initial setting for the KX TGP600 IP address is DHCP Auto For information about your network environment contact your administra...

Page 82: ...belt by following the steps below 1 Push the clip onto the back of the handset 2 Insert the clip into the designated notches in the handset Charging the Batteries At the time of shipment the batteries...

Page 83: ...asher 3 Drive the screw to this point KX TPA65 Desk phone 1 Connect the handset cord 2 Insert the tabs of the wall mounting adaptor into the designated openings in the base and then slide the wall mou...

Page 84: ...electrical cables etc that may be present buried R The screw heads should not be flush to the wall R Certain types of wall may require plugs to be anchored in the wall before the screws are inserted H...

Page 85: ...ote R If you failed in the update contact your administrator Registering Deregistering a Handset Desk Phone to the KX TGP600 Registering a Handset Desk Phone to the KX TGP600 You can register a handse...

Page 86: ...the handset desk phone number during registration you can use a registered handset desk phone to add new handsets desk phones Before operating the handset desk phone confirm that the STATUS indicator...

Page 87: ...Enter handset desk phone registration mode 2 Handset desk phone Using an unregistered handset desk phone press OK and follow the on screen instructions until registration is complete Deregistering the...

Page 88: ...haracter press KX TPA60 KX TPA65 R Pressing a key repeatedly will cycle through the characters associated with that key For example to enter the letter C in Latin Mode press 2 3 times R Characters tha...

Page 89: ...A60 KX TPA65 R Pressing a key repeatedly will cycle through the characters associated with that key For example to enter the letter C in Latin Mode press 2 3 times R Characters that are entered using...

Page 90: ...A65 R Pressing a key repeatedly will cycle through the characters associated with that key For example to enter the letter C in Latin Mode press 2 3 times R Pressing a key repeatedly will cycle throug...

Page 91: ...Ring Ringtone 1 19 25 32 Colour Pattern Color Pattern 2 Selects the color pattern for each type of call Normal Yellow Red Ring On Charger KX TPA60 only Selects the ringing mode On or Off while a hands...

Page 92: ...ion when the handset is put on the charger during a conversation On Off Off Equalizer Adjusts the upper register of the receiver Normal Treble Normal Answer Option Sub Item Description Setting Default...

Page 93: ...al Fwd DND 1 Flash Recall Auto Answer Conference Incoming Log Outgoing Log Phonebook Call Park 2 3 Intercom Pause 3 Alarm Noise Reduction Voice Clarity 4 Paging 2 3 None 1 Redial 2 Fwd DND 1 3 Flash R...

Page 94: ...when connected to a base unit other than the KX TGP600 2 Not available when connected to a base unit other than the KX TGP600 3 Call Park Pause and Paging are displayed only when they are enabled in...

Page 95: ...ish Espa ol Portugu s Auto Backlight Turns on the backlight of the LCD and keypad 2 Can be set for each of the following R Receiving R Talking R Standby KX TPA65 only On Off Receiving Off Talking On S...

Page 96: ...Monitor Selects the base number display mode in the maintenance mode Off Current Base Current Scanned Off 1 Cannot be selected when connected to a base unit other than the KX TGP600 2 The keypad backl...

Page 97: ...hone password 4 digits used for unlocking the Handset Phonebook using the Reset Handset option and unlocking the key lock Enter Old Password 3 Enter New Password Verify New Password Not registered Res...

Page 98: ...Address 2 Prefix 2 Default Gateway 2 DNS 2 MAC Address Displays the MAC address of the base unit LLDP Display LLDP status On Off VLAN Display VLAN ID and priority 1 If this item is not set 0 0 0 0 is...

Page 99: ...Full 100M Half 10M Full 10M Half Auto System Settings Sub Item Description Setting Default Register H S Registers the handset desk phone selected from the list to the base unit currently connected Sel...

Page 100: ...or further information 2 After selecting the line selects the handset s desk phone s assigned to the line This function is enabled by default for all handsets desk phones 3 After selecting the handset...

Page 101: ...tact your administrator for further information System Setting Menu Layout when connected to a base unit other than the KX TGP600 System Settings Sub Item Description Setting Default Change Base PIN C...

Page 102: ...taneous Voice Calls Wideband Mode Talk 4 Conference 2 AMR WB Talk 2 Dimensions Width Depth Height 118 7 mm 45 0 mm 88 1 mm 4 67 in 1 77 in 3 47 in Weight 126 g 0 28 lb KX TPA60 KX TPA65 Item KX TPA60...

Page 103: ...m 7 56 in 7 28 in 5 91 in Weight 117 g 0 26 lb 675 g 1 49 lb RF Specifications KX TGP600 KX TPA60 KX TPA65 Item USA Canada Latin America Other countries areas Wireless Interface DECT 6 0 DECT DECT Fre...

Page 104: ...see Silent Mode on Page 54 It is difficult to have a conversation when in Hands free mode The microphone is facing the wrong direction or is obstructed during the conversation The front of the handset...

Page 105: ...Place the handset desk phone and base unit away from other electrical appliances R Move closer to the base unit Two short beeps are heard during a conversation The radio signal is weak Move closer to...

Page 106: ...harging correctly due to an electrical failure Unplug the AC adaptor from the AC outlet remove the battery from the handset and contact your phone system dealer service provider A wrong type of batter...

Page 107: ...en stored See Storing an Item in the Handset Phonebook on Page 63 When trying to view the Incoming or Outgoing Call Log No logs have been stored Memory Full The Phonebook is full and cannot store the...

Page 108: ...ve the screws into the wall as indicated 2 Hook the unit onto the screw heads Note Make sure to set the print size to correspond with the size of this page If the dimensions of the paper output still...

Page 109: ...109 Notes...

Page 110: ...110 Notes...

Page 111: ...111 Notes...

Page 112: ...m sip 5770 Ambler Drive Mississauga Ontario L4W 2T3 Web Site http www panasonic ca Copyright This material is copyrighted by Panasonic System Networks Co Ltd and may be reproduced for internal use onl...

Reviews: