background image

Operating Instructions

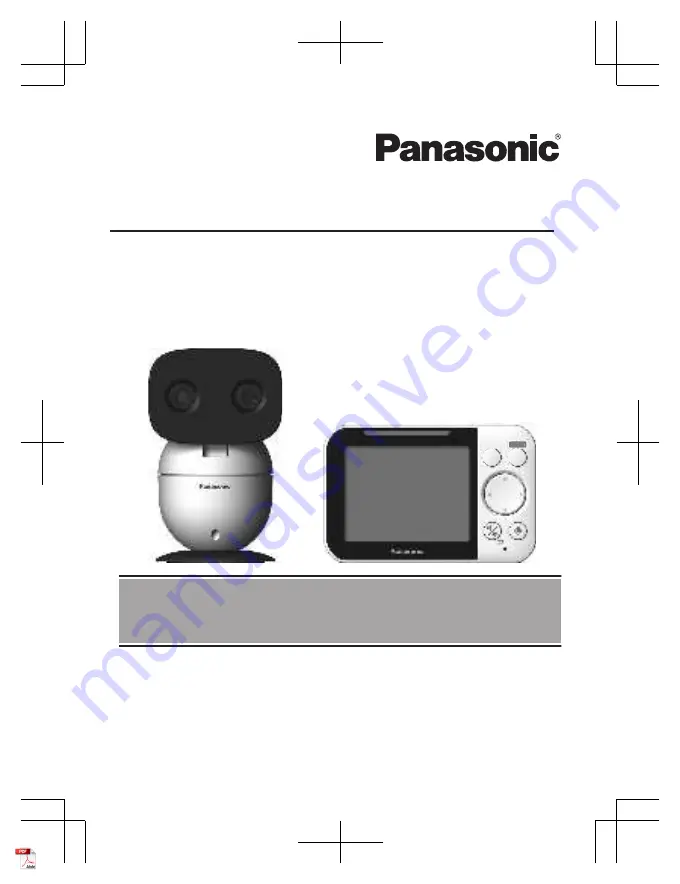
Baby Monitor


Model No.

KX-HN3051C

(Camera Model No. 

KX-HNC300

)

(Monitor Model No. 

KX-HNM300

)


Before initial use, see “Getting Started”

on page 9.

Thank you for purchasing a Panasonic product.

Please read these operating instructions before using the unit and save them for

future reference.

For assistance, please visit our support page on:

www.panasonic.ca/english/support

HN3051C̲(en̲en)̲0228̲ver.040.pdf   1

2018/02/28   16:25:28

Summary of Contents for KX-HN3051C

Page 1: ...initial use see Getting Started on page 9 Thank you for purchasing a Panasonic product Please read these operating instructions before using the unit and save them for future reference For assistance please visit our support page on www panasonic ca english support HN3051C en en 0228 ver 040 pdf 1 2018 02 28 16 25 28 ...

Page 2: ...ge area 17 Testing the baby monitor system 17 Using the Baby Monitor Baby monitor 19 Viewing live camera images 19 Listening talking to the camera unit 19 Adjusting the speaker volume 20 Adjusting the chime beep volume 20 Adjusting the brightness of camera images 20 Adjusting the sleep mode 20 Configuring the temperature sensor 20 Playing cancelling lullabies manually 21 Selecting camera units usi...

Page 3: ... baby The system s smart features give you peace of mind to go about your day For example you can use auto lullaby page 26 to play a lullaby automatically when your baby is crying and smart notification page 26 to display notifications on the monitor unit when your baby wakes or cries Model composition Model No Monitor unit Camera unit Part No Part No Quantity KX HN3051C KX HNM300 KX HNC300 1 Acce...

Page 4: ...l camera units 3 max to the monitor unit Other information R Design and specifications are subject to change without notice R The illustrations in these instructions may vary slightly from the actual product 4 For assistance visit www panasonic ca english support Introduction HN3051C en en 0228 ver 040 pdf 4 2018 02 28 16 25 28 ...

Page 5: ... any eventuality R The system s wireless features are subject to interference therefore functionality in all situations cannot be guaranteed Panasonic will not be held responsible for injury or damage to property that occurs in the event of wireless communication error or failure R If a power failure occurs or the power is disconnected the temperature will not be accurate for up to an hour For you...

Page 6: ...ildren There is a risk of swallowing In the event they are swallowed seek medical advice immediately Operating safeguards R Unplug the product from power outlets before cleaning Do not use liquid or aerosol cleaners R Do not disassemble the product R Never put metal objects inside the product If metal objects enter the product turn off the circuit breaker and contact an authorized service centre M...

Page 7: ...es and or the conductive material to overheat and cause burns R Do not put any conductive materials such as coins or hairpins onto the battery terminals This can result in the risk of overheating R Charge the battery provided with or identified for use with this product only in accordance with the instructions and limitations specified in this manual Attention The lithium ion polymer battery you h...

Page 8: ...ves etc It should not be placed in rooms where the temperature is less than 0 C 32 F or greater than 40 C 104 F Damp basements should also be avoided R Operating the product near electrical appliances may cause interference Move away from the electrical appliances Other information Routine care R Wipe the outer surface of the product with a soft moist cloth R Do not use benzine thinner or any abra...

Page 9: ... to secure the camera base page 13 or wall mounting adaptor to the camera unit page 12 LED indicator You can use the LED indicator to confirm the camera unit s status Check the colour of the LED indicator after connecting the camera unit page 12 Indicator Status Off No power Green lit Normal operation Green blinking slowly Registration mode Green blinking quickly Device malfunction For assistance ...

Page 10: ...rightness M N Back J Antenna K Speaker L micro USB connector M Battery cover N Stand Setting up the camera unit Information about pan tilt range The pan tilt can be used to adjust the area viewable from the camera unit by using MFN MEN MDN or MCN on the monitor unit If the area that you wish to view is not visible even after adjusting the pan tilt change the location or position of the camera unit...

Page 11: ... camera image are monitored for motion detection Temperature sensor The sensor is triggered when the set temperature range is exceeded Note R The temperature sensor may not detect temperature accurately if the camera unit is exposed to warm or cool breezes from heating cooling systems R If a power failure occurs or the power is disconnected the temperature will not be accurate for up to an hour R ...

Page 12: ...y use the supplied screw that is attached to the camera base when attaching the wall mounting adaptor to the camera unit Do not use user supplied screws This may cause the camera unit to become loose from the wall mounting adaptor R Mount the camera unit on the stable location where the unit can be adequately supported when installing R Use a string or wire to prevent the camera unit from falling ...

Page 13: ...5 31 mm 1 7 32 inches 4 5 6 Adjust the angle of the camera unit by using MFN MEN MDN or MCN on the monitor unit Reattaching the camera base 1 Take the camera unit off from the wall 2 Remove the screw and then remove the wall mounting adaptor from the camera unit 1 1 Supplied screw page 9 3 Attach the camera base to the camera unit 4 Drive the supplied screw into the camera unit 1 1 Supplied screw ...

Page 14: ... Insert the AC adaptor plug A firmly into the monitor unit s micro USB connector 2 Connect the AC adaptor B to the power outlet A B Charge for about 8 hours Note R Use only the supplied AC adaptor S006AKU0500100 R When the AC adaptor plug is connected to the monitor unit s micro USB connector is displayed on the screen R It is normal for the monitor unit to feel warm during charging R The monitor ...

Page 15: ...ry cover B 2 1 6 Drive the screw into the battery cover Battery level Icon Battery level High Medium Low Needs charging 1 1 Two beeps sound from the monitor unit every 3 minutes when the battery needs charging Lithium Ion Li Ion Polymer battery performance supplied battery Operation Operating time In continuous use 5 hours max Not in use standby 13 hours max For assistance visit www panasonic ca e...

Page 16: ...smart LED indicator and displays the motion and sound icons according to the level of motion or sound detected The smart LED indicator also lights when temperature is detected outside of the specified limits page 20 Smart LED indicator colour Display icon colour Status Off Off No detections Off White only Normal operations Green Green Motion or sound detected at the lower threshold level Example W...

Page 17: ...nit and camera unit on separate floors or in different buildings Note R is displayed on the monitor unit when the camera unit is out of range Usage area cautions Using the monitor unit in the following areas may cause deformation malfunction or operational failure R In direct sunlight R Areas exposed to grease or steam such as kitchens R Near fire or heating devices R Near magnetic fields such as ...

Page 18: ...ary Note R You can adjust the area detectable by the motion sensor page 27 Testing the camera unit s microphone To test the camera unit s microphone speak loudly and clearly into the microphone while a monitor unit user is viewing live images from the camera unit Testing the camera unit s speaker To test the camera unit s speaker press and hold M N and talk into the monitor unit while someone is l...

Page 19: ... or MDN to adjust the tilt range Note R The sound sensor and motion sensor do not function during and for 5 seconds after pan tilt operations R Only adjust the pan tilt with operations from the monitor unit Do not adjust the pan tilt of the camera unit by hand Camera zoom The camera zoom can be used to zoom in on images displayed on the monitor unit 1 MSMARTN 2 MCN Select the desired setting a MME...

Page 20: ... specified period of time You can select how long the monitor unit is inactive for before it enters sleep mode or turn off sleep mode 1 MMENUN 2 MbN Monitor Settings a MOKN 3 MbN Sleep Mode a MOKN 4 MbN Select the desired setting R To turn off sleep mode MbN OFF 5 MOKN a MMENUN repeatedly to exit Configuring the temperature sensor You can specify how the temperature units Celsius or Fahrenheit are...

Page 21: ...rom camera unit for the specified time Selecting a lullaby play time You can specify the time that lullabies play for 1 MMENUN 2 MbN Lullaby a MOKN 3 MbN Play Time a MOKN 4 MbN Select the desired play time 5 MOKN a MMENUN repeatedly to exit Selecting camera units using auto scan If there are multiple camera units registered to the monitor unit you can select which camera unit s images to view and ...

Page 22: ...tting Display the menu tree Main menu Sub menu 1 Sub menu 2 Settings Page Camera Zoom 1X 2X 19 Lullaby 1 Sound List 1 Lullaby1 10 Heart beat OFF 21 Play Time 5 min 120 min 15 min 21 Smart Notification Sound Notification Screen lit Notify Screen lit only OFF 26 Motion Notification Screen lit Notify Screen lit only OFF 26 Auto Lullaby Sound List 1 Lullaby1 10 Heart beat Random OFF 26 Sound Detect Le...

Page 23: ...u 1 Sub menu 2 Settings Page Timer Once 1H 2H 3H 4H 5H 6H 28 Repeat 1H 2H 3H 4H 5H 6H 28 OFF 28 For assistance visit www panasonic ca english support 23 Programming HN3051C en en 0228 ver 040 pdf 23 2018 02 28 16 25 29 ...

Page 24: ...nds 4 High baby sounds 5 Mid baby sounds 5 Low baby sounds 4 5 27 Temperature Sensor Units C F 20 Alert Range Upper Limit 33 104 F 1 40 C 80 F 27 C 20 Lower Limit 32 103 F 0 39 C 60 F 16 C 20 Camera Speaker Vol Level 1 6 3 OFF 20 Camera Brightness Level 1 5 3 20 Camera Management Add Camera 28 Delete Camera Yes No 28 Reset Yes No 28 24 For assistance visit www panasonic ca english support Programm...

Page 25: ...n amber 5 Reduces false detections from sounds other than your baby s voice by reducing these sounds from the surrounding area If your baby s voice is not detected when using these settings select a baby sounds setting with a higher sensitivity If your baby s voice is still not detected select an all sounds setting 6 Can only be selected when there are multiple camera units registered to the monit...

Page 26: ...ications MbN OFF 5 MOKN a MMENUN repeatedly to exit Auto lullaby You can configure lullabies to be played automatically from the camera unit when sound is detected Note R Make sure to check the camera unit s speaker volume before playing lullabies page 20 R Auto lullaby does not function during the following while using or for 5 seconds after using the pan tilt while talking to the camera unit whi...

Page 27: ...ring the motion sensor sensitivity Motion sensor sensitivity is configured using a combination of the following the distance from the camera unit to your baby the age of your baby in months Change the settings in accordance with the growth of your baby 1 MMENUN 2 MbN Sensor Settings a MOKN 3 MbN Motion Sensor a MOKN 4 MbN Sensitivity a MOKN R A message is displayed Press MOKN to continue 5 MbN Sel...

Page 28: ...s MOKN to continue R Complete the following step within 90 seconds Camera unit 1 Press and hold M N for 3 seconds until the LED indicator starts blinking Note R A message is displayed on the monitor unit to show if the registration was successful or not and a beep sounds Resetting the settings for a camera unit The camera unit settings saved on a monitor unit can be reset Note R All camera unit se...

Page 29: ... the display language setting page 16 is displayed R The monitor unit is too far from the camera unit Move the monitor unit closer to the camera unit R The camera unit s AC adaptor is not properly connected Reconnect the AC adaptor to the camera unit R The camera unit has not been registered to the monitor unit Register the camera unit page 28 The monitor unit display is blank R The monitor unit i...

Page 30: ...baby monitor Do not use this mode if it is unnecessary because all functions except the baby monitor s battery charge are disabled with this mode n To activate the charge only mode 1 Press M N power for about 2 seconds until the baby monitor shuts down 2 Connect the charger to the baby monitor After the LED indicator on the top of the baby monitor illuminates in amber color for about 30 seconds th...

Page 31: ...y R Angular field of view camera angle Horizontal approx 37 Vertical approx 28 R Motion detection method Visual sensor R Detection range Motion sensor Horizontal approx 37 Vertical approx 28 R Adjustable mounting angles Horizontal 136 Vertical facing forward facing down approx 0 to 44 movable range with the pan tilt R Dimensions height width depth Camera unit Approx 123 mm 77 mm 69 mm 4 13 16 inch...

Page 32: ...any interference including interference that may cause undesired operation of the device RF Exposure Warning R This product complies with ISED radiation exposure limits set forth for an uncontrolled environment R To comply with ISED RF exposure requirements the device must be installed and operated 20 cm 8 inches or more between product and all person s body 32 For assistance visit www panasonic c...

Page 33: ... Included model only One 1 year Panasonic Canada Inc 5770 Ambler Drive Mississauga Ontario L4W 2T3 PANASONIC PRODUCT LIMITED WARRANTY Panasonic Canada Inc warrants this product to be free from defects in material and workmanship under normal use and for a period as stated below from the date of original purchase agrees to at its option either a repair your product with new or refurbished parts b r...

Page 34: ...34 Notes HN3051C en en 0228 ver 040 pdf 34 2018 02 28 16 25 29 ...

Page 35: ...35 Notes HN3051C en en 0228 ver 040 pdf 35 2018 02 28 16 25 29 ...

Page 36: ...r warranty Serial No Date of purchase found on the rear of the unit Name and address of dealer Attach your purchase receipt here 5770 Ambler Drive Mississauga Ontario L4W 2T3 Panasonic Corporation 2018 Printed in China PNQX8730ZA PNQX8730ZA PNQX8730ZA CC0218YK0 E HN3051C en en 0228 ver 040 pdf 36 2018 02 28 16 25 29 ...

Reviews: