background image

Please read these Operating 
Instructions before using the unit 
and save for future reference.

This model is designed to be 
used only in Canada.
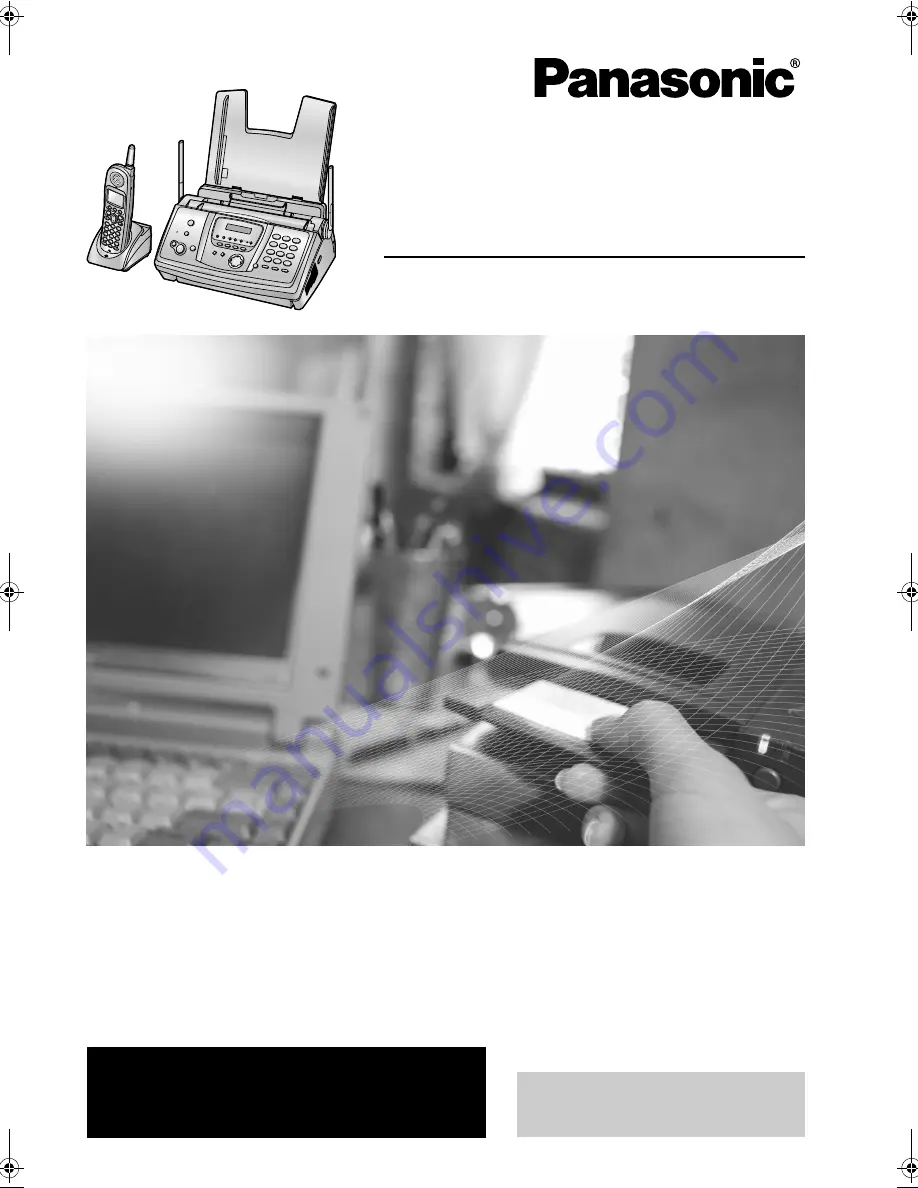
5.8 GHz Expandable

Cordless Phone System with FAX and Copier

Operating Instructions

Model No.


KX-FPG391C

For assistance, please call
1-800-300-4644 or visit us at 
www.panasonic.ca

This unit is compatible with 
Call Display. To use this 
feature, you must subscribe 
to the appropriate service of 
your service provider.

FPG391C-PFQX2077Z

B

-en.

PDF

  Page 1  Tuesday, August 31, 2004  10:12 AM

Summary of Contents for KX-FPG391C

Page 1: ...d only in Canada 5 8 GHz Expandable Cordless Phone System with FAX and Copier Operating Instructions Model No KX FPG391C For assistance please call 1 800 300 4644 or visit us at www panasonic ca This unit is compatible with Call Display To use this feature you must subscribe to the appropriate service of your service provider ...

Page 2: ...i Location of Controls How to use the operating instructions When following operating instructions always keep the front cover page next page open for easy reference to the buttons OPEN ...

Page 3: ... CALL DISPLAY C HOLD F SET K CONF E LOCATOR INTERCOM B SP PHONE S COPY J MAILBOX G STOP L ERASE D MEMO O TONE I FAX START K MENU N TRANSFER B FLASH CALL WAIT U MIC A VOLUME Q GREETING CHECK R MUTE T GREETING REC P NAVIGATOR Q A K B C E D F G H I J L M N OP Q R S T U V A J B C D E G H F I Buttons FLASH CALL WAIT I HOLD INTERCOM E MENU H Navigator F OFF G REDIAL J Soft keys A SP PHONE C TALK B TONE ...

Page 4: ...ied or received documents will remain on the used ink film Use discretion when disposing of the used ink film L Do not rub or use an eraser on the printed side of recording paper as the print may smear Copyright L This material is copyrighted by Panasonic Communications Co Ltd and may be reproduced for internal use only All other reproduction in whole or in part is prohibited without the written c...

Page 5: ...ct reassembly can cause electric shock when the unit is subsequently used 13 Unplug this unit from power outlets and refer servicing to an authorized service centre when the following conditions occur A When the power cord is damaged or frayed B If liquid has been spilled into the unit C If the unit has been exposed to rain or water D If the unit does not work normally by following the operating i...

Page 6: ...ed L Exercise care when handling the battery ies Do not allow conductive materials such as rings bracelets or keys to touch the battery ies otherwise a short circuit may cause the battery ies and or the conductive material to overheat and cause burns L Charge the battery ies provided with or identified for use with this product only in accordance with the instructions and limitations specified in ...

Page 7: ...erature and vibration L The unit should not be exposed to direct sunlight L Do not place heavy objects on top of the unit L When you leave the unit unused for a long period of time unplug this unit from power outlet L The unit should be kept away from heat sources such as heaters kitchen stoves etc It should not be placed in rooms where the temperature is less than 5 C 41 F or greater than 35 C 95...

Page 8: ... can be registered to the base unit See page 10 for accessory information Up to 3 accessory handsets can be added L Any combination of the 2 different accessory handsets is possible The included handset is pre registered at the factory and assigned the extension number 1 After purchasing accessory handsets you must register each to the base unit Please read the accessory handset s installation man...

Page 9: ... 38 3 4 Making a phone call using the phone book 39 3 5 Editing a stored item 40 3 6 Erasing a stored item 41 3 7 Copying phone book items 41 Call Display 3 8 Call Display service 43 3 9 Viewing and calling back using caller information 44 3 10 Erasing caller information 46 3 11 Storing caller information into the phone book 47 Other Features 3 12 Intercom 48 3 13 Transferring a call 48 3 14 Confe...

Page 10: ...g features 88 9 Option Handset Registration 9 1 Cancelling the handset registration 91 9 2 Re registering the handset 91 10 Help Error Messages 10 1 Error messages Reports 93 10 2 Error messages Display 93 Troubleshooting 10 3 When a function does not work check here 98 Jams 10 4 Recording paper jams 103 10 5 Document jams sending 106 Cleaning 10 6 Document feeder scanner glass cleaning 106 10 7 T...

Page 11: ...ipping and transportation of the unit No Item Part number 1 Quantity Notes 1 Power cord PFJA1030Z 1 2 Telephone line cord PQJA10075Z 1 3 Cordless handset 1 4 Battery cover PQKK10142Z1 1 5 Battery HHR P104 1 6 Belt clip PQKE10377Z1 1 7 Charger unit Charger PQLV30024YM AC adaptor KX TCA1 G KX TCA1 1 8 Paper tray PFKS1088Z1 1 9 Ink film 10 metres long 1 prints about 30 letter sized pages 2 j Operatin...

Page 12: ... To page or locate the handset page 48 L To transfer a call page 49 C CALL DISPLAY L To use Call Display features page 45 D ERASE L To erase recorded messages page 68 L To erase a recorded greeting message page 66 E CONF L To make a conference call page 50 F HOLD L To put a call on hold page 36 G MAILBOX L To use mailbox feature page 67 H AUTO ANSWER L To turn the AUTO ANSWER setting ON OFF page 5...

Page 13: ...epending on the state of usage Example PLAY is displayed above the middle soft key 1 and C is displayed above the right soft key 2 To select PLAY function press the middle soft key 1 To select C function press the right soft key 2 L When a function does not appear above a soft key the soft key has no function B TALK L To make answer calls page 35 37 C SP PHONE L For speakerphone operation page 35 ...

Page 14: ...one icon L This icon will be displayed when you are using the handset speakerphone 3 Voice enhancer icon L This icon will be displayed when the voice enhancer feature is ON page 35 4 PRIVACY icon L This icon will be displayed when the call privacy feature is ON page 50 The base unit and other handsets cannot join your conversation 5 Battery icon L This icon shows the battery strength page 22 6 Ext...

Page 15: ...ecording paper guide 5 Recording paper entrance 6 Recording paper exit 7 Tension plate 8 Front cover 9 Document entrance j Document exit k Speaker l Green button Back cover release button m Back cover 5 9 j 8 l m 3 4 7 6 k 2 1 1 Ringer Message alert indicator 2 Antenna 3 Receiver 4 Headset jack 5 Microphone 6 Speaker 1 4 2 3 5 6 ...

Page 16: ...ease the back cover by pushing the green button 1 L You can also release the back cover by pushing in the green lever 2 3 Open the back cover 4 Insert the front ink film roll by inserting its blue gear into the left slot of the unit 1 Insert the rear ink film roll by inserting its white gear into the left slot of the unit 2 L The ink film is safe to touch and will not rub off on your hands like ca...

Page 17: ...ilm is tight 2 L Make sure that the ink film is wrapped around the blue core 3 at least once 6 Close the back cover securely by pushing down on the notched area at both ends 1 7 Close the front cover securely Correct 1 2 Tight 1 turn 3 Incorrect The ink film is not wrapped around the blue core Slack Crease Reverse 1 ...

Page 18: ...e to the unit or degradation of print quality which may occur from the use of non Panasonic replacement film 1 Open the covers see steps 1 to 3 on page 14 2 Remove the used core 1 and used ink film 2 3 Remove the stoppers 1 and tags 2 from the new ink film 3 4 Insert the ink film and close the covers see steps 4 to 7 on page 14 1 7 Paper tray Insert the tabs on the paper tray 1 into the slots on t...

Page 19: ...per No more than 20 sheets of legal paper Please refer to page 111 for information on recording paper 1 Pull the tension plate forward 1 2 Fan the paper to prevent paper jams 3 Insert the paper print side down 1 4 Push the tension plate back 1 L If the paper is not inserted correctly readjust the paper or the paper may jam Installation Handset 1 Correct Incorrect 1 1 ...

Page 20: ... 68885 are displayed the battery needs to be replaced Please use only Panasonic batteries See page 10 for accessory information L Only use rechargeable batteries If you install non rechargeable batteries and start charging them the batteries may leak electrolyte 1 Press the notch on the battery cover firmly and slide the cover 2 Replace the old battery with a new one and close the cover see the ba...

Page 21: ... pull the right edge in the direction of the arrow 2 1 12 Headset optional Connecting an optional headset to the handset allows hands free phone conversations Please use only a Panasonic headset See page 10 for accessory information To connect an optional headset to the handset L Model shown is KX TCA86 1 2 To switch to the speakerphone while using the headset Press SP PHONE To return to the heads...

Page 22: ...service Fax transmission reception may be disturbed noise interference may be heard during telephone conversation or Call Display page 43 may not function properly A filter to prevent this is provided from your service company Please attach the filter 1 to the telephone line cord of the fax machine 2 1 2 Charger unit Note L USE ONLY WITH the included Panasonic AC adaptor L The AC adaptor must rema...

Page 23: ...ting the charger The charger can be wall mounted Install screws 1 using the wall template below Mount the charger 2 slide it down 3 then slide down to the right 4 until it is secured 2 3 4 2 45 cm 31 32 1 Wall Template 2 45 cm 31 32 ...

Page 24: ...Note L Battery power is consumed whenever the handset is off the charger even when the handset is not in use The longer you leave the handset off the charger the time you can actually talk on the handset will be shortened Actual battery performance depends on a combination of how often the handset is in use in conversation and how often it is not in use off the charger L Once the battery is fully ...

Page 25: ...Telephone Answering Machine Fax page 24 Case 2 Distinctive Ring 1 phone line with 2 or more phone numbers page 25 Case 3 TEL ONLY page 26 Case 4 FAX ONLY page 28 1 Press MENU 2 Press then 0 0 QUICK SETUP PRESS SET 3 Press SET PRINT SETUP YES SET NO STOP 4 Press SET again to print the Quick Setup Guide L If you do not wish to print it press STOP 5 Press A or B repeatedly to display the desired sett...

Page 26: ...llowing SELECT A SETUP TAM FAX 6 Press SET L The AUTO ANSWER indicator turns ON 7 Press MENU Note L You can change the ring setting in TAM FAX mode feature 06 on page 75 or page 84 L Do not connect an answering machine to the same telephone line If one is connected set the automatic answer feature on this unit to OFF 2 5 3 How phone calls and faxes are received When receiving calls the unit works ...

Page 27: ...print the Quick Setup Guide L If you do not wish to print it press STOP 6 Press A or B repeatedly to display the following SELECT A SETUP DIST RING 7 Press SET L The AUTO ANSWER indicator turns ON 8 Press MENU Note L You can change the ring setting in TAM FAX mode feature 06 on page 75 or page 84 2 6 3 How phone calls and faxes are received If the number assigned for phone calls is called the fax ...

Page 28: ... or no sound is heard press FAX START L The fax machine will start fax reception With the handset 1 Lift the handset and press TALK or SP PHONE to answer the call 2 When document reception is required a fax calling tone slow beep is heard or no sound is heard press 9 default fax activation code firmly L The fax machine will start fax reception L You can also press FAX START on the base unit Note L...

Page 29: ...2 Preparation 27 Note L To receive fax documents using the extension telephone make sure remote fax activation is turned ON feature 41 on page 77 beforehand The default setting is OFF ...

Page 30: ...ET again to print the Quick Setup Guide L If you do not wish to print it press STOP 5 Press A or B repeatedly to display the following SELECT A SETUP FAX ONLY 6 Press SET L The AUTO ANSWER indicator turns ON 7 Press MENU Note L You can change the ring setting in feature 06 page 75 2 8 3 How faxes are received Leave AUTO ANSWER turned ON When the other party sends a fax the fax machine will receive...

Page 31: ... being used The handset must be operated near the base unit and while OFF the charger 1 Press MENU 2 Press the soft key SELECT at Ringer setting 3 Press the soft key SELECT at Ringer volume 4 Press v or e to select the desired volume 5 Press the soft key SAVE To turn the ringer OFF Press v repeatedly until Off is displayed in step 4 L The handset will display Ringer off while not in use L The hand...

Page 32: ... repeatedly to display RINGER OFF OK 2 Press SET L The base unit will not ring for outside calls The base unit will ring at the low level for intercom calls L To turn the ringer back ON press A Ringer tone L You can select the base unit ringer tone from one of 7 patterns for outside calls feature 17 on page 75 or page 83 Speaker volume 8 levels high to low are available While using the speakerphon...

Page 33: ...t key SAVE L If the handset beeps 3 times the setting is not correct Start again from step 4 7 Press OFF Note L If you select French for the language feature 48 on page 78 the time is set using a 24 hour clock Example 15 15 Press 1 5 1 5 To check the date and time Repeat steps 1 to 3 L The date and time will be displayed When finished press OFF To correct a mistake Press the soft key or v or e to ...

Page 34: ... hour clock Example 15 15 Press 1 5 1 5 L The accuracy of the clock is approximately 60 seconds a month To correct a mistake Press or to move the cursor to the incorrect number and make the correction If you have subscribed to a Call Display service The date and time will be automatically set according to the received caller information L If the time has not previously been set Call Display will n...

Page 35: ...ss or to move the cursor to the character you want to delete and press STOP L To erase all of the characters press and hold STOP To select characters using A or B Instead of pressing the dial keys you can select characters using A or B 1 Press B repeatedly to display the desired character Characters will be displayed in the following order 1 Lowercase letters 2 Number 3 Symbol 4 Uppercase letters ...

Page 36: ...NU to exit Note L Your fax number will be printed on the top of each page sent from your unit L The button enters a and the button enters a space Example 234 5678 Press 2 3 4 5 6 7 8 L To enter a hyphen in a telephone number press FLASH CALL WAIT To correct a mistake Press or to move the cursor to the incorrect number and make the correction To delete a number Press or to move the cursor to the nu...

Page 37: ... sound clarity when the handset is used in an area where there may be interference During an outside call this feature will be turned ON automatically when necessary This feature will turn OFF when you hang up put a call on hold or make a conference call It will not turn OFF automatically during a call You can also turn this feature ON or OFF manually 1 Press MENU during an outside call 2 Press 2 ...

Page 38: ...s SP PHONE 2 Dial the telephone number L When the other party answers talk into MIC 3 When finished talking press SP PHONE To mute your conversation During a call you can mute your unit so the other party cannot listen to you When the call is muted you will be able to hear the other party Press MUTE L SP PHONE MUTE will be displayed L To release the mute press MUTE To put a call on hold Press HOLD...

Page 39: ...t the handset and press SP PHONE and talk into the microphone 1 2 When finished talking press OFF or place the handset on the charger Auto talk feature Handset This feature allows you to answer a call by simply lifting the handset off the charger without pressing TALK or SP PHONE The default setting is OFF To activate this feature see page 86 3 2 2 With the base unit 1 Press SP PHONE and talk into...

Page 40: ...er the telephone number up to 32 digits L To enter a pause press the soft key PAUSE 6 Press v 7 Press the soft key SAVE L To program other items repeat steps 2 to 7 8 Press OFF To select characters with the dial keypad Note L To enter another character that is located on the same dial key press the soft key to move the cursor to the next space To correct a name Press the soft key or to move the cu...

Page 41: ...en for button locations 3 4 1 With the handset Make sure the handset is not being used 1 Press the soft key C L You can press the soft key SEARCH to display the first item 2 Press v or e repeatedly to display the desired item 3 Press TALK SP PHONE or the soft key CALL L The unit will start dialing automatically To search for a name by initial Example LISA 1 Press the soft key C 2 Press 5 repeatedl...

Page 42: ...To dial the displayed number press SP PHONE 3 5 Editing a stored item L Keep the front cover page open for button locations 3 5 1 With the handset Make sure the handset is not being used 1 Press the soft key C 2 Press v or e repeatedly to display the desired item 3 Press the soft key EDIT L If you do not need to edit the name skip to step 5 4 Edit the name For further details see the storing proce...

Page 43: ...cations Important L Make sure the base unit your handset and the destination unit are not being used when copying directory items Handsets must be operated near the base unit and while OFF the charger L Once copying has started do not place your handset on the charger until it is complete otherwise copying will be stopped L If an outside call is received during the phone book copy copying will be ...

Page 44: ...OFF 3 7 2 From the base unit to a handset Copying one phone book item 1 Press MENU 2 Press then 5 9 3 Press A or B repeatedly to display 1 ITEM 4 Press SET 5 Enter the extension number 1 to 4 L You can also select the extension number by pressing A or B 1 to 4 6 Press SET 7 Press A or B repeatedly to display the desired item L To search for the item by initial see page 40 8 Press SET L When the it...

Page 45: ...If the handset has lost communication with the base unit when a call is received caller information will not be recorded in the handset To confirm caller information using the callers list Base unit only To print manually see page 109 To print automatically after every 30 new calls activate feature 26 page 77 Call Waiting Call Display feature If you subscribe to both Call Display and Call Waiting ...

Page 46: ...ill not announce the caller s name If Toll saver is selected and there is a new message the unit will not announce the caller s name The TAM FAX ring setting can be changed by feature 06 on page 75 or page 84 3 9 Viewing and calling back using caller information Using caller information you can easily see who has called you and return their calls Important L Calling back will not be possible if th...

Page 47: ...he handset storing procedure on page 47 3 9 2 With the base unit 1 Press CALL DISPLAY 2 Press B to search from the most recently received caller information L If you press A the display order will be reversed 3 Press SP PHONE to return the call L The unit will start dialing automatically L To send a fax insert the document FACE DOWN and press FAX START Note L When the unit could not receive a name...

Page 48: ...With the handset Make sure the handset is not being used 1 Press the soft key CID v or e to display Caller list 2 Press the soft key ERASE L To cancel erasing press the soft key NO 3 Press the soft key YES With the base unit 1 Press MENU repeatedly to display CALLER SETUP 2 Press SET L CALL LIST ERASE will be displayed 3 Press SET L To cancel erasing press STOP 2 times 4 Press SET 5 Press STOP 3 1...

Page 49: ...L If there is no name information for the caller Enter name will be displayed You can enter a name by performing the following steps 1 Enter the name see page 38 for instructions 2 Press v and 3 Press the soft key SAVE If a name is not required press v then press the soft key SAVE L To continue storing other items repeat from step 2 4 Press OFF to exit 3 11 2 Into the base unit 1 Press CALL DISPLA...

Page 50: ... Voice paging feature L You can talk with the handset user who answers first 3 When the paged party answers talk into MIC 4 To end the intercom press SP PHONE or LOCATOR INTERCOM 3 12 2 Answering intercom calls Handset When a handset is being paged it will ring and the Ringer Message alert indicator will flash rapidly The display will show the paging extension s number 1 Press TALK SP PHONE or HOL...

Page 51: ...hold 2 To page a handset enter its extension number 1 to 4 To page all handsets press 0 L If you do not wish to announce the transfer skip to step 4 3 Wait for the paged party to answer L If the paged party does not answer press SP PHONE 2 times to return to the outside call 4 To complete the transfer press SP PHONE Note L Even if you call all handsets only the handset user who answers first can t...

Page 52: ...ies can continue the conversation During a conference call L The phone call can be put on hold by pressing HOLD INTERCOM on the handset or HOLD on the base unit Communications between extensions are not suspended Only the person who placed the call on hold can resume the full conference by pressing the soft key CONF on the handset or CONF on the base unit L One more extension can join the conferen...

Page 53: ...key MONITOR 3 To call the base unit press 0 To call another handset enter its extension number 1 to 4 L Your handset will start to monitor the room through the destination unit L To monitor from the speaker press SP PHONE To switch back to the receiver press TALK L The monitored unit will display Room monitor 4 To end monitoring press OFF L The base unit user can stop being monitored by pressing L...

Page 54: ... local telephone company for details and availability of this service in your area Display Signification Ans Answer Answers the second call while keeping the first call on hold Hold Plays the pre recorded hold message from the telephone company for the second caller and the second call is put on hold Annc Announcement Plays the pre recorded busy message from the telephone company for the second ca...

Page 55: ...ting is changed during feeding it will be effective from the next page To redial the last number 1 Press REDIAL PAUSE 2 Press FAX START L If the line is busy the unit will automatically redial the number L To cancel redialing press STOP To send more than 10 pages at a time Insert the first 10 pages of the document Add the other pages up to 10 at a time before the last page feeds into the unit Pre ...

Page 56: ...Single sheet 45 g m2 to 90 g m2 12 lb to 24 lb L Multiple sheets 60 g m2 to 80 g m2 16 lb to 21 lb Note L Remove clips staples or other fasteners L Do not send the following types of documents Make a copy of the document and send the copy Chemically treated paper such as carbon or carbonless duplicating paper Electrostatically charged paper Badly curled creased or torn paper Paper with a coated su...

Page 57: ...urning ON the connecting tone feature feature 76 on page 79 4 4 Broadcast transmission By storing the base unit s phone book items page 39 into the broadcast memory you can send the same document to multiple parties up to 20 Your programmed items will remain in the broadcast memory allowing frequent re use L Keep the front cover page open for button locations 4 4 1 Programming items into the broad...

Page 58: ...he unit will automatically print a report Broadcast sending report Note L If you select FINE SUPER FINE or PHOTO resolution the number of pages that the unit can send will decrease L If the document exceeds the memory capacity transmission will be cancelled L If a party is busy or does not answer it will be skipped and redialed later To send the same document to a one time group of items You can a...

Page 59: ... feature 77 page 80 How to receive phone calls and faxes with the handset 1 Lift the handset and press TALK or SP PHONE to answer the call 2 When document reception is required a fax calling tone slow beep is heard or no sound is heard press 9 default fax activation code firmly L You can also press FAX START on the base unit Note L To receive fax documents using the handset make sure remote fax ac...

Page 60: ...atedly to display the following TAM FAX MODE 3 RINGS L The unit announces Answer set and the current day and time L The unit will announce the remaining recording time if it is less than 3 minutes L The display will show the ring setting in TAM FAX mode If you wish to change it press A or B repeatedly to display the desired setting and press SET L The AUTO ANSWER indicator turns ON L If GREETING O...

Page 61: ...g message 3 The caller presses 9 L The unit will activate the fax function 4 The caller presses the start button to send a fax Changing the ring setting in TAM FAX mode You can select from 2 3 default 4 5 6 7 or TOLL SAVER This setting can be changed by feature 06 on page 75 or page 84 TOLL SAVER The unit answers after 2 rings when new messages have been recorded and after 4 rings when there are n...

Page 62: ...n for button locations 1 Press MENU repeatedly to display JUNK FAX PROH 2 Press repeatedly to display JUNK LIST SET 3 Press SET 4 Press A or B repeatedly to display the item you wish to prevent the fax reception from 5 Press SET L To program other items repeat steps 4 to 5 6 Press STOP to exit the program Note L If there is no space to store new items LIST FULL is displayed in step 3 or step 5 Era...

Page 63: ... to select ON 4 Press SET 5 Press MENU How phone calls and faxes are received If the incoming call is for the fax number the fax machine will ring with the assigned ring pattern and automatically start fax reception If the incoming call is for the phone number the fax machine will keep on ringing in TEL mode the fax machine will record a voice message in TAM FAX mode fax communication will be atte...

Page 64: ...ring pattern assigned for fax A Standard ring one long ring B Double ring two short rings C Triple ring short long short rings D Other triple ring short short long rings B D default The fax will respond to calls with any of ring tone patterns B C and D 5 Press SET 6 Press MENU Triple ring short long short rings C 1st ring 2nd ring Other triple ring short short long rings D 1st ring 2nd ring Ring p...

Page 65: ...can feature This feature is helpful when you want to copy the document then remove it for other uses To use this feature activate feature 34 page 77 beforehand The default setting is OFF L The document will be fed into the unit and scanned into memory The unit will then print the data If the document exceeds the memory capacity copying of the exceeded document will be cancelled and this feature wi...

Page 66: ... of copies up to 30 3 Press 2 times to display COLLATE OFF 4 Press A or B repeatedly to display COLLATE ON 5 Press START Example Making 2 copies of a 4 page original document Note L The unit will store the documents into memory while collating the copies If memory becomes full while storing the unit will only print out the stored pages L After copying the collating feature will turn OFF automatica...

Page 67: ...3 Set the unit to TAM FAX mode page 58 7 1 2 When a caller calls 1 Call your unit from a remote touch tone telephone L The TAM FAX greeting message will be played 2 To record a message in mailbox 1 press 1 To record a message in mailbox 2 press 2 To record a message in mailbox 3 press 3 L If the caller does not enter a mailbox number the message will be recorded in mailbox 1 3 After your unit anno...

Page 68: ...ge recording time to 60 seconds feature 54 on page 79 If you change the setting to 60 seconds we recommend that you tell the caller in your TAM FAX greeting message to press 9 before starting fax transmission If you change the setting from 60 seconds to 16 seconds your current greeting message will be deleted The pre recorded greeting message will be played when a call is received To check the gre...

Page 69: ...ith new messages in the mailbox only new messages will be played back L When the mailbox has no new messages the unit will announce Mailbox no no new messages All message playback and will play back all messages in the mailbox L If you press another MAILBOX button during play back new messages in the selected mailbox will be played back When mailbox 2 or 3 has the password 1 Press MAILBOX 2 or MAI...

Page 70: ...erase a specific message Press ERASE while listening to the message you want to erase To erase all messages All of the recorded messages in the desired mailbox can be erased at one time 1 Press ERASE L The unit will announce To erase all messages please select mailbox 2 Within 5 seconds press the desired MAILBOX button MAILBOX 1 MAILBOX 2 or MAILBOX 3 L If mailbox 2 or 3 has a password enter it fe...

Page 71: ... of the last message of the mailbox the unit announces End of final message The unit will announce the remaining recording time if it is less than 3 minutes L If a call is received the unit will ring and playback will stop To answer the call press TALK or SP PHONE For playback start again from the beginning after hanging up L If the unit announces Memory full after playback erase unnecessary messa...

Page 72: ...s 4 while listening to the message you want to erase L A short beep will sound and the next message will be played To erase all messages Press 5 while listening to a message L A long beep will sound and the unit will announce Mailbox no no messages Memo Message 7 5 Leaving a message for others or yourself You can record a voice memo to leave a private message for yourself or someone else L Keep th...

Page 73: ... messages 4 After 3 seconds the voice menu will start page 72 Follow the menu or enter a remote command page 72 5 To end remote operation hang up OR To listen to messages in another mailbox press 1 mailbox 1 2 mailbox 2 or 3 mailbox 3 L If the unit announces Enter mailbox password mailbox 2 or 3 has a password feature 51 on page 78 feature 52 on page 78 or page 85 Enter the password Note L The uni...

Page 74: ...ds Press 9 to end The new greeting message will be played back 9 Stop L Operation is stopped temporarily L To resume operation enter a remote command within 15 seconds or the voice menu will start page 72 4 To erase a specific message During playback L The current message is erased L A short beep will sound and the next message will be played 5 To erase all messages L All recorded messages in the ...

Page 75: ...n If you mistakenly answer the call while a user is accessing a mailbox from a remote location 1 Press HOLD INTERCOM on the handset or TRANSFER on the base unit 2 Press 9 L The user can then access a mailbox by entering the remote code or the mailbox password ...

Page 76: ...ET 4 Select the feature you wish to program Press or repeatedly to display the desired feature L The current setting of the feature will be displayed 5 Press A or B repeatedly to display the desired setting L This step may be slightly different depending on the feature 6 Press SET L The setting you selected is set and the next feature will be displayed 7 To exit programming press MENU Note L To ex...

Page 77: ...L SAVER See page 59 for details Note L You can also program this feature with the handset page 84 Code 10 Changing the maximum recording time for incoming messages RECORDING TIME 3 MIN 1 MIN 2 MIN or 3 MIN default 1 minute to 3 minutes GREETING ONLY Only plays your greeting message Note L If you select GREETING ONLY the unit will answer a call with the greeting message and then hang up The unit wi...

Page 78: ...sions and receptions Code 23 Sending documents overseas OVERSEAS MODE ERROR If you cannot send a fax overseas even if the number is correct and the line is connected activate this feature before sending the fax This feature improves the reliability by reducing the transmission speed NEXT FAX This setting is effective only for the next attempted fax transmission After transmission the unit will ret...

Page 79: ...ful when you want to remove the document for other uses because the unit will release the document before sending or copying ON The unit will scan the document and store it into memory first then the unit will start sending or copying OFF default Deactivates this feature Note L If the document exceeds the memory capacity sending of the whole document or copying of the exceeded document will be can...

Page 80: ... feature with the handset page 87 Code 51 Setting the mailbox 2 password BOX2 PASSWORD ID To prevent other users from retrieving your messages program a password for mailbox 2 1 Press MENU 2 Press then 5 1 L If the password has already been assigned to the mailbox it is displayed 3 Enter a 2 digit number 00 99 L If you entered a wrong number press STOP and enter the password again 4 Press SET 5 Pr...

Page 81: ... our customer call centre or service personnel change the line mode to A Note L You can also program this feature with the handset page 87 Code 67 Setting the incoming message monitor ICM MONITOR ON To hear an incoming message ICM from the speaker when the answering machine is recording the message ON default You can monitor the incoming message OFF Deactivates this feature Code 72 Setting flash t...

Page 82: ... Press MENU L The language setting feature 48 on page 78 and the voice prompt feature 50 on page 78 will not be reset 8 4 Direct commands for base unit programming features You can also select the desired setting by directly entering the program code and a 2 digit number and direct command For more details on the features see page 75 to page 80 1 Press MENU 2 Press and the 2 digit code number 3 Pr...

Page 83: ...keypad see feature 25 on page 76 for details 2 6 Automatic callers list 1 ON 2 OFF default 3 1 Distinctive Ring 1 ON 2 OFF default 3 2 Fax ring pattern 1 A 2 B 3 C 4 D 5 B D default 3 4 Quick scan 1 ON 2 OFF default 3 6 Receiving reduction 1 72 2 86 3 92 default 4 100 3 9 Display contrast 1 NORMAL default 2 DARKER 4 1 Fax activation code 1 ON 2 OFF default L If you select ON next enter your code f...

Page 84: ...es then press MENU to exit programming Features Handset 8 5 Handset programming Important information L Make sure the handset and base unit are not being used The handset must be operated near the base unit and while OFF the charger Note L To exit programming press OFF at any time 8 5 1 Function menu table After pressing MENU the main menu is displayed Most items in the main menu have a sub menu S...

Page 85: ...g 1 to 7 6 Press the soft key SAVE 7 Press OFF Note L To set the base unit ringer tone using the base unit see feature 17 on page 75 Setting incoming call tone During an intercom call page 48 or while using the room monitor feature page 51 you can be informed of incoming calls by 2 tones 2 default The incoming call tone will sound 2 times On The incoming call tone will be heard for as long as the ...

Page 86: ...sired setting 6 Press the soft key SAVE 7 Press OFF Note L You can also set this feature with the base unit feature 57 on page 79 Setting the Talking Call Display feature See page 43 for details on the Talking Call Display feature Handset Talking Call Display 1 Press MENU 2 Scroll to Talk Caller ID by pressing v or e then press the soft key SELECT 3 Press v or e repeatedly to select the desired se...

Page 87: ...rogram this feature with the base unit feature 11 on page 75 Setting the mailbox 2 or 3 password To prevent other users from retrieving your messages program a password for mailbox 2 or 3 1 Press MENU 2 Scroll to Initial setting by pressing v or e then press the soft key SELECT 3 Press the soft key SELECT at Set answering 4 Scroll to Set mailbox2 3 by pressing v or e then press the soft key SELECT...

Page 88: ... soft key SELECT 4 Press v or e repeatedly to select the desired setting 5 Press the soft key SAVE 6 Press OFF Note L To change the base unit display contrast see feature 39 on page 77 Setting the key tone You can select whether or not key tones are heard when keys are pressed Includes confirmation tones and error tones The default setting is ON 1 Press MENU 2 Scroll to Initial setting by pressing...

Page 89: ...y pressing v or e then press the soft key SELECT 4 Scroll to Set line mode by pressing v or e then press the soft key SELECT 5 Press v or e repeatedly to select the desired setting 6 Press the soft key SAVE 7 Press OFF Note L You can also program this feature with the base unit feature 62 on page 79 Setting the room monitor feature See page 51 for details To turn ON the base unit room monitor feat...

Page 90: ... the desired setting by directly entering the program code 0 to 9 and and direct command For more details on the features see page 83 to page 87 1 Press MENU 2 Press the code number 0 to 9 and 3 Press the desired direct command to display the desired setting L This step may be slightly different depending on the feature 4 Press the soft key SAVE 8 6 1 Program code and direct command button 1 1 Rin...

Page 91: ...ording time 1 1min 2 2min 3 3min default 0 Greeting only 0 6 3 Remote code L Enter a 2 digit number 00 99 See page 85 for details 0 6 4 Recording mode 1 Standard recording 14min default 2 Enhanced recording 6min 0 6 5 Mailbox 2 Mailbox 3 password L Select the desired mail box by pressing e Mailbox2 or v Mailbox3 See page 85 for details 0 8 1 Display language 1 English default 2 Français 0 9 Room m...

Page 92: ...8 Programmable Features 90 0 4 Talking Call Display base unit 1 On default 0 Off ...

Page 93: ...d on the base unit only Note L After cancelling registration the handset cannot be used If you want to use it again re register the handset to the base unit 9 2 Re registering the handset If you want to re register the handset to the base unit or a different base unit of the same model you need to register it to that base unit The handset will be given a new extension number of that base unit Only...

Page 94: ... have not cancelled the handset s registration at the previous base unit page 91 the handset number still remains in that base unit s memory To erase the handset number from the previous base unit see the base unit s operating instructions For this base unit 1 Press and hold LOCATOR INTERCOM until a beep sounds 2 Enter the handset number that you do not want 1 to 4 3 Press SET ...

Page 95: ...other party s fax machine is busy or has run out of recording paper Try again L The other party s fax machine rang too many times Send the fax manually page 53 L The other party s machine is not a fax machine Check with the other party L The number you dialed is not in service PRESSED THE STOP KEY L STOP was pressed and fax transmission or reception was cancelled OK L Fax transmission or reception...

Page 96: ...age instructions to print out the document FAX MEMORY FULL L The memory is full of received documents due to a lack of recording paper or a recording paper jam Install paper page 17 or clear the jammed paper page 103 L When performing memory transmission the document being stored exceeded the memory capacity of the unit Send the entire document manually FILM EMPTY b COVER OPEN L The ink film is em...

Page 97: ...he ink film Wait for a moment while the check is completed RECORDING ERROR L The greeting message or voice memo you recorded was under 1 second long Record a longer message REDIAL TIME OUT L The other party s fax machine is busy or has run out of recording paper Try again REMOVE DOCUMENT L The document is jammed Remove the jammed document page 106 L Press STOP to eject the jammed paper SERIAL ERRO...

Page 98: ...ge 41 L 4 handsets have already been registered to the base unit To cancel a handset s registration see page 91 L You may have registered one of your handsets to another base unit without deleting its registration to this base unit Erase the handset s registration from the base unit as follows 1 Press and hold LOCATOR INTERCOM until a beep sounds 2 Enter the handset number that you do not want 1 t...

Page 99: ... your phone book is empty L A handset button was pressed while the handset was on the charger Lift the handset and press the button again L The battery needs to be charged Recharge the battery page 22 L The handset has lost communication with the base unit Move closer to the base unit and try again L More than one unit is in use such as conducting an outside intercom call Try again later L Another...

Page 100: ...FAX mode page 58 L If you use a Distinctive Ring service turn AUTO ANSWER OFF so that the fax machine is in TEL mode L If you use a Distinctive Ring service make sure you have set the same ring pattern assigned by the telephone company page 61 The REDIAL PAUSE button does not function properly L If this button is pressed during dialing a pause will be inserted If pressed immediately after a dial t...

Page 101: ...r s name has more than 15 letters the name will not be announced correctly The display exits the callers list while viewing caller information L Do not pause for over 1 minute on the handset or 3 minutes on the base unit while searching 10 3 3 Cordless handset The handset does not work L Make sure that the battery is installed correctly page 18 L Fully charge the battery page 22 L Clean the charge...

Page 102: ...ndset and or base unit you may not be able to make a call Try again later L The handset is in the remote operation mode Exit by pressing OFF page 69 I cannot have a conversation using the headset L Make sure that an optional headset is connected properly page 19 L If SP phone or SP is displayed on the handset press TALK to switch to the headset I cannot program items L Programming is not possible ...

Page 103: ...ted after the received document is printed out the size of the document sent by the other party is as large as or larger than the recording paper or the receiving reduction rate is not programmed correctly Program the proper rate in feature 36 page 77 L The other party placed the document in their fax machine facing the wrong way Check with the other party The printing quality is poor Please do no...

Page 104: ... in the mailbox do not play back L The mailbox password is wrong Enter the correct password For mailbox 2 see feature 51 on page 78 or page 85 For mailbox 3 see feature 52 on page 78 or page 85 The other party complains that they cannot leave a voice message L The recording time is set to GREETING ONLY Select 1 MIN 2 MIN or 3 MIN feature 10 on page 75 or page 85 L The memory is full Erase unnecess...

Page 105: ...med and a power failure prevents the document from being sent at the set time the document will be sent after power is restored L If any fax documents are stored in the memory they will be lost When power is restored a power down report will be printed stating which documents in memory have been erased Jams 10 4 Recording paper jams 10 4 1 When the recording paper has jammed in the unit The displa...

Page 106: ...Remove the jammed recording paper 1 5 Turn the gear of the blue core 1 in the direction of the arrow until the ink film is tight 2 L Make sure that the ink film is wrapped around the blue core 3 at least once 1 Correct 1 2 Tight 1 turn 3 ...

Page 107: ...rt the paper Then push the tension plate back 10 4 2 When the recording paper was not fed into the unit properly The display will show the following CHECK PAPER Remove the recording paper and straighten Pull the tension plate forward 1 and insert the paper Push the tension plate back then press START to clear the message Incorrect The ink film is not wrapped around the blue core Slack Crease Rever...

Page 108: ... out the jammed paper forcibly before opening the front cover Cleaning 10 6 Document feeder scanner glass cleaning Clean the document feeder scanner glass when Documents frequently misfeed Smudges or black white lines appear on the original document when sending or copying 1 Disconnect the power cord and the telephone line cord 2 Open the front cover by pulling up the centre part 1 ...

Page 109: ...r products such as paper towels or tissues 4 Close the front cover securely 5 Connect the power cord and the telephone line cord 10 7 Thermal head cleaning If smudges or black white lines appear on a copied received document check whether there is dust on the thermal head Clean the thermal head to remove the dust 1 Disconnect the power cord and the telephone line cord 2 Open the front cover by pul...

Page 110: ... film 1 6 Clean the thermal head 1 with a cloth moistened with isopropyl rubbing alcohol and let it dry thoroughly Caution L To prevent a malfunction due to static electricity do not use a dry cloth and do not touch the thermal head directly 7 Reinstall the ink film and close the covers see steps 4 to 7 on page 14 8 Connect the power cord and the telephone line cord 2 1 1 1 ...

Page 111: ...y after every 30 fax communications feature 22 on page 76 Printer test Allows you to check the print quality of your unit If the test print has a smudge or blurred points or lines clean the thermal head page 107 Broadcast programming list Provides you with names and numbers which are stored in the broadcast memory page 55 Callers list Keeps a record of the last 30 different callers of the base uni...

Page 112: ... 123 4 917 32 Mass Weight Approx 3 1 kg 6 8 lb Power consumption Standby Approx 4 5 W Transmission Approx 12 W Reception Approx 50 W When receiving a 20 black document Copy Approx 50 W When copying a 20 black document Maximum Approx 135 W When copying a 100 black document Power supply 120 V AC 60 Hz Fax memory capacity 3 Transmission Approx 25 pages Reception Approx 28 pages Voice memory capacity ...

Page 113: ...t quality we recommend using long grained paper L Do not use paper of different types or thickness at the same time This may cause a paper jam L Avoid double sided printing L Do not use paper printed from this unit for double sided printing with other copiers or printers This may cause a paper jam L To avoid curling do not open paper packs until you are ready to use the paper Store unused paper in...

Page 114: ...LIED INCLUDING ANY IMPLIED WARRANTIES OF MERCHANTABILITY AND FITNESS FOR A PARTICULAR PURPOSE IN NO EVENT WILL PANASONIC CANADA INC BE LIABLE FOR ANY SPECIAL INDIRECT OR CONSEQUENTIAL DAMAGES In certain instances some jurisdictions do not allow the exclusion or limitation of incidental or consequential damages or the exclusion of implied warranties so the above limitations and exclusions may not b...

Page 115: ...of devices subject only to the requirement that the sum of the Ringer Equivalence Numbers of all the devices does not exceed 5 The Ringer Equivalence Number of This Unit found on the rear of the unit This equipment meets the applicable Industry Canada Terminal Equipment Technical Specifications This is confirmed by the registration number The abbreviation IC before the registration number signifie...

Page 116: ...ne 79 74 Room monitor 51 76 Connecting tone 79 77 AUTO ANSWER 80 80 Set default 80 A Accessories 9 Belt clip 19 Paper tray 16 Advanced features 76 AUTO ANSWER setting 80 Auto talk feature 37 86 B Basic features 75 Battery Charge 22 Installation 18 Replacement 18 Broadcast transmission 55 Button description Base unit 10 Handset 11 C Call Display Calling back 44 Storing 47 Talking 43 76 Callers list...

Page 117: ...ally 57 Receiving reduction 77 Recording Greeting message 66 Memo message 70 Recording paper 17 111 Recording sound quality 79 85 Recording time Incoming message 75 85 TAM FAX greeting 79 Redialing Base unit 36 53 55 Handset 36 Redial list 36 Registration 91 Remote operation 71 Remote operation ID 75 85 Reports Broadcast programming 109 Broadcast sending 56 Call Display 77 109 Journal 54 109 Power...

Page 118: ...12 Index 116 W Wall mounting 21 ...

Page 119: ...117 ...

Page 120: ...118 ...

Page 121: ...119 ...

Page 122: ...PFQX1855YB CM0503MK2073 PFQX2077ZB CM0804DH01094 Panasonic Canada Inc 5770 Ambler Drive Mississauga Ontario L4W 2T3 www panasonic ca 1 2 ...

Reviews: