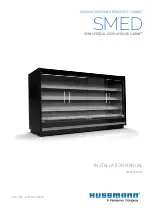
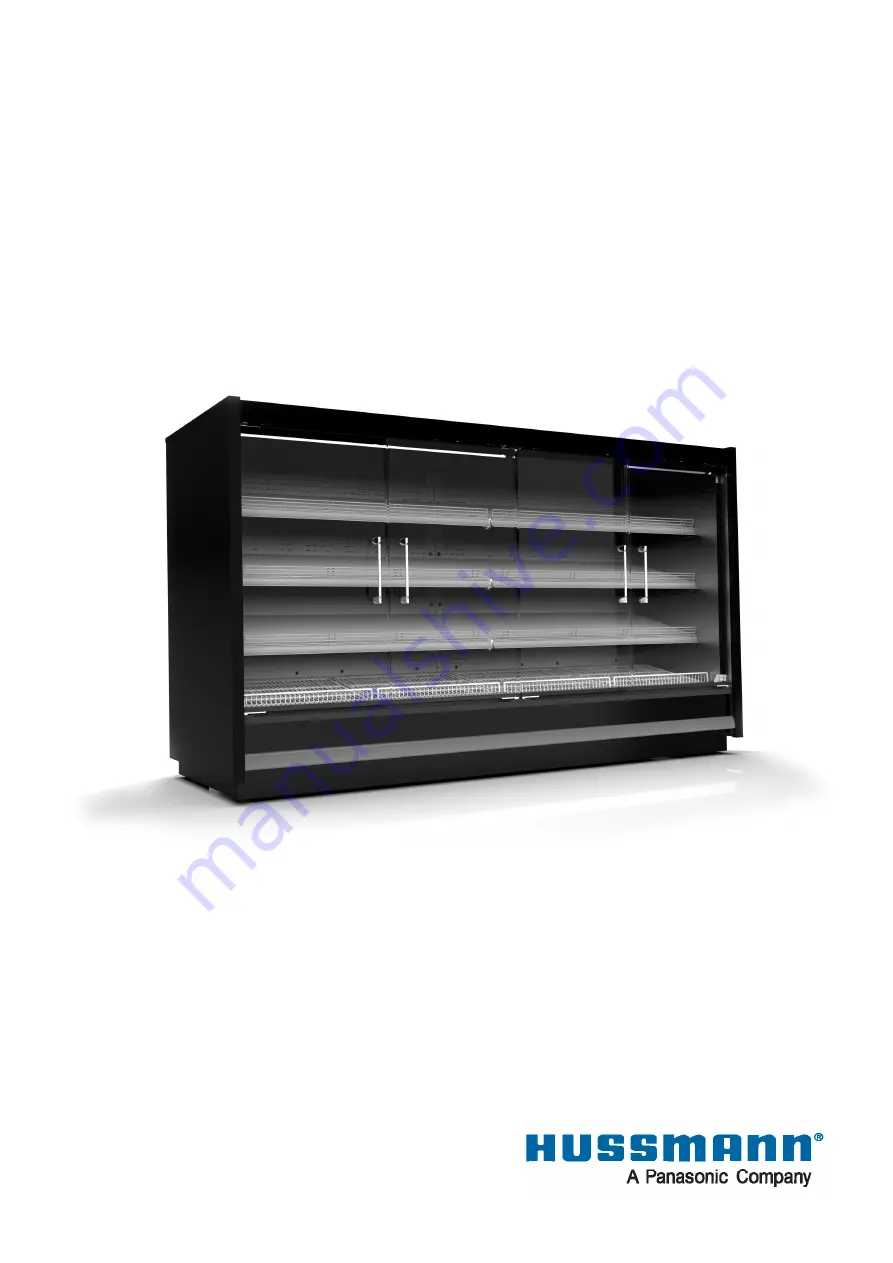
background image

JUN 2021 - AJHH9A20002A


INSTALLATION MANUAL 

SMED153/163

SMED

SEMI VERTICAL DISPLAY DOOR CABINET

MEDIUM TEMPERATURE REMOTE CABINET 

Summary of Contents for HUSSMANN SMED153

Page 1: ...JUN 2021 AJHH9A20002A INSTALLATION MANUAL SMED153 163 SMED SEMI VERTICAL DISPLAY DOOR CABINET MEDIUM TEMPERATURE REMOTE CABINET ...

Page 2: ...r Adjustment 3 4 Lighting 3 5 Fitting Shelves 3 6 Sealing Case Joins 3 7 Joining The Cases 3 8 Attaching Kickplates 3 9 Connecting Refrigerant Lines 3 10 Installing the Waste Drain 3 11 Installing Sensor Probes 03 13 16 17 19 20 21 21 22 24 25 26 CLEANING MAINTENANCE 4 1 Commissioning 4 2 Care Cleaning 4 3 Daily Checks 4 4 Six Monthly Maintenance 4 5 Replacing Fan and Motor Blades 04 27 28 30 31 3...

Page 3: ...azardous situation which if not avoided will result in moderate or serious injury CAUTION Indicate s hazardous situation which if not avoided will result in serious injury or death NO CLIMB Do not climb on top or on any parts of the case This may cause damage to the case or personal injury NO CHEMICALS Do not use chemcial substances to clean the case This may cause discoloration or could damage th...

Page 4: ...d flows around the case there can be risk for fire NO FLAMMABLE Do not keep any volatile or flammable materials inside the case It may risk explosion or fire NO A C Do not install case where air blows directly at the case This will disrupt the case airflow and affect performance TECHNICIANS ONLY Installation should only be performed by qualified technicians NO OBJECTS ON CASE Do not place objects ...

Page 5: ...d to use the case correctly The case should always be kept in good working order to ensure installer and user safety Injury to personnel and damage to the case and its components may occur if instructions in the manual are not correctly followed If information would like to be added to this manual or if suggestions would like to me made contact Hussmann directly at any time Check that the power su...

Page 6: ...pture Use water spray not jet or fog to extinguish R449a Solstice N40 is a non flammable HFO blend used in low and medium temperature refrigeration applications It provides a combination of lower Global Warming Potential GWP and higher energy efficiency R449a has a GWP of 1273 It is non ozone depleting which can be used in existing installations or for new installations EVENT OF DAMAGE Vapours of ...

Page 7: ...ir flow can flow through the underside and rear This will minimise the risk of condensation on the back and or underside Leave 100mm gap between the rear of the case and the back wall STOCKING SHELVES When stocking the shelves be sure to leave a 25mm gap in between the stock and shelf to ensure even and consistant airflow Not doing this correctly may result in a blockage of airflow which could fre...

Page 8: ... This information is a reference only Always refer to the latest Product Engineering Data sheet PED SMED153 163 Case Dimensions found at back of the manual 2 1 CASE DIMENSIONS SERVICES EXAMPLE SMED153 FIGURE 2A EXAMPLE ONLY PRE INSTALLATION ...

Page 9: ...t Product Engineering Data PED availablefromHussmannCustomerService Always ensure that the moving device is of a suitable type and has sufficient lifting capacity for the case weight and dimension Always lift cases from the underside It is the responsibility of the transport company to insure adequate loading strategies are implemented to insure the safe transportation of the Hussmann cases Cases ...

Page 10: ...amage to drainage outlets and electrical equipment mounted under or at the rear of cases INSPECT UNDERSIDE BEFORE LIFTING WITH FORKLIFT CAUTION When moving cases confirm that the equipment used is approved for such works Do not lift or drag the case by the Patch End as this may damage both the case and or on ends Refer to your companies safe working procedure SWP when handling cases such as forkli...

Page 11: ...n identification number As well as on the packaging the case identification number appears as a serial number on the rating plate most commonly located on the ceiling panel left hand end of the case and left side rear panel and is printed on a decal on the rear of the case The case sequence number is also written on a ticket on the front panel 2 5 RATING PLATES PACKAGING TAG RATING PLATE LOCATIONS...

Page 12: ...ovement of electrically charged particles measured in Amps A Asset Code Optional identification number for supermarket stores Anti Sweat Current The heater thats installed in the frames and doors of refrigerated cases to reduce condensation and prevention fogging this is measured in Amps A Defrost and Drain Current The current from heaters that are installed in freezer cases to stop the case from ...

Page 13: ...halk line on the floor to use as a guide for positioning the front of the cases in the line up Determine the position of the case and choose a part of the case that will relate to the chalk line 3 Adjust the case height using the adjustable feet to ensure the case is level to within 1 5mm from front to back and side to side and chassis of case is NOT twisted Maximum 30mm adjustment Refer to and fo...

Page 14: ...all cases are lined up NOTE All feet need to be loaded evenly on the ground If this is not undertaken this could cause the chassis to twist NOTE Use string line to align with datum point when lining up multiple cases The bumper support and front ticket strip must be removed before lining up the cases Laser Lines or Spirit Levels are also good instruments to use while lining a case up USE THE CHASS...

Page 15: ...500mm case The amount of legs will defer on a each size case Exaggerated Twist PAGE 15 SMED SEMI VERTICAL HUSSMANN NOTE If feet are not adjusted and levelled correctly The case chassis could twist causing saw toothing of the doors and other misalignments Front support feet help with the added weight of the door assembly ensure these are adjusted correctly FIGURE 3E FIGURE 3F INSTALLATION ...

Page 16: ...images below show the misalignment saw toothing This should be completely horizontal and flush with each other The door system on this case only has a minor adjustment If doors cannot be aligned as per the following examples then the case chassis has not been leveled to tolerance and needs to be readjusted Case needs to be re checked for level once fully stocked If door saw toothing is apparent an...

Page 17: ...Make small adjustments each time Both doors may need to be adjusted to achieve the most even result To resolve the doors misalignment as shown in below image adjustment should be done through the hinge mechanism at the top of door assembly The hinge mechanism by default is set in the middle of the rebate Shifting the hinge left or right can be done by untightening of two screws as shown in Figure ...

Page 18: ...differencethathinge mechanism is at the bottom of the door assembly Adjust the door by using of the two screws of door hinge plate at the bottom of door assembly By moving the hinge to the right and left the two door legs will be levelled Only minor misalignment that can be rectified by this mechanism 3 3 DOOR ADJUSTMENT BENTCAM DOOR FIGURE 3N FIGURE 3O FIGURE 3P INSTALLATION ...

Page 19: ...is important that proper cable management is followed and cables are clipped in correctly There is a plastic clip that clips into the bracket that holds the cable Ensureallcablesareretainedintothebackpanel Replacement LED driver The LED drivers can be found on the top left of the case in the electric box If lights appear faulty or not functioning contact your nearest service provider for replaceme...

Page 20: ...ving may affect cabinet performance Refer to PED sheet and or your refrigeration service provider Although the shelf sizes may vary the installation and fitting will remain the same Using the hook bracket shown down below Lift the shelf up to the back vertical bracket The height is independently adjustable by which holes you put the bracket on Make sure you level the shelf by inserted the bracket ...

Page 21: ... or windows direct sunlight electric fans or ovens etc 2 Cases joints must be air tight to prevent formation of ice or condensation Foam tape has already been fitted to the end of the case Check to ensure sealing integrity can be achieved remedy if foam tape has been damaged before final joining of both cases together To join the cases 1 Align the canopy by inserting the multiplexing rods into the...

Page 22: ...ransportation of the case Check handles and tighten if necessary This should be done after final Installation of Refrigeration and Drainage connections Use hex screws 6 3 x 19mm to fix the kickplate support to the base These parts are in the accessories box Do NOT fix the kickplate support to the base too tightly It should be able to slip up and down through the oblong hole This will enable the ki...

Page 23: ...ket by hooking the slot onto top of the bracket This will allow the kickplate to slide vertically to allow for a slight variation in height On patch or crown end kickplates cut the profile seal in a 450 angle in order to attach it to the bottom of the front kickplate panel Attach the profile seal to the bottom of the front kickplate panel 3 8 ATTACHING KICK PLATES FIGURE 3W FIGURE 3X FIGURE 3Y FIG...

Page 24: ...arge of dry nitrogen will be stated on a tag on each evaporator coil Pleasecheckandverifypressureiswithin 20 kPa 3 psi of tag stated pressure before installation For all pipe sizes refer to latest Product Engineering Data Sheet PED To connect refrigeration lines 1 Use free flowing dry nitrogen when brazing piping to ensure internal cleanliness of piping and eliminate copper oxide debris 2 Insulate...

Page 25: ...d cement per manufacturer s recommendation 2 Installed drain piping may require additional support depending on the number and location of the hub floor drains The installer should always provide adequate support to all drain piping arrangements to prevent excess stress on all drain piping components 3AC 3 Ensure the drain trap is assembled correctly as per figure 3AB below 4 Test for leakage and ...

Page 26: ...cal components Electric shock or fire may occur if not correctly processed To install the probe 1 Unscrew the plate from the ceiling panel to get accesstotheconduitfortheprobewire Acoloured piece of wire acting as a draw string is located behind the plate in the conduit 2 Secure the end of the sensor wire to the draw string wire 3 On the roof of the case pull draw wire and sensor wire all the way ...

Page 27: ...remove foreign residue or objects directly from the glass Do not use abrasive cleaners or materials on the glass like Ajax Scotch Brite or Steel Wool Do not use cleaners or materials on the glass that hinder the anti fog performance if applicable by leaving a residue or damaging the surface Examples of these cleaners include Armor All TIlex Bleach Windex No Drip Windex Wipes Pledge or any product ...

Page 28: ...ing pads as these will mar the finish Coarse paper towels on coated glass Ammoniaorsovent basedcleanersonacrylicparts Solvent oil or acetic based cleaners on any interior surfaces Theinteriorsurfacesmaybecleanedwithmilddomestic detergents The exterior surfaces should be cleaned with a mild detergent and warm water to protect and maintain their attractive finish Never use abrasive or solvent based ...

Page 29: ...Food grade stainless steel cleaning solution may be used periodically to minimize scratching and remove stains Rinse and wipe dry immediately after cleaning Never use hydrochloric acid muriatic acid on stainless steel Remove splashguards not sealed to floor Use a vacuum with a long wand attachment to remove accumulated dust and debris from under the merchandiser Ensure this is undertaken by qualif...

Page 30: ...n the floor creating a slip hazard If the cabinet is turned off during non trading hours ensure the cabinet is cleaned thoroughly to avoid bacterial growth during off time A thorough cleaning and service of the case should be carried out by qualified refrigeration and electrical engineers on a six monthly basis Please contact Hussmann Pty Ltd or your service provider Cases should also be cleaned b...

Page 31: ...warm water and drain out Ensure the drain is free flowing and check it for damage A thorough cleaning and maintenance check should be carried out on a six monthly basis by qualified and approved refrigeration and electrical engineers The following procedures should be undertaken as a minimum 12 Carefully flush the waste drain with a bucket of water and allow the base to drain Ensure the drain is f...

Page 32: ...llproductstockandstoreappropriately 3 Remove bottom display pans 4 Remove fan guard and fan blade 5 Remove screws holding fan motor bracket assembly to plenum and remove assembly 6 Disconnect and remove the fan assembly 7 In reverse order replace fan motor bracket and harness assembly ensuring it is retained in original location 8 Safely switch power to the case back on With case power turned on 9...

Page 33: ...le the cabinet in accordance with the local laws on waste disposal and in respect of the environment in which we live The case must be disposed of in accordance with local authority guidelines 75 of the materials in this case are able to be recycled the materials in this case are as follows Sheet Metal and other various metals Copper Aliminum Tempered Glass Wood PVC Polystyrene Polycarbonate Remai...

Page 34: ...if required adjust as per case specification Insufficient or no air flow appears at the case air curtain Check if evaporator coil is iced If ice is present then check defrost settings as per the manufacturers guideline or set to suite the store operating condition A colder store may require longer defrost duration A humid store may need more frequent defrost Check if case fans are turned on or ope...

Page 35: ... sweating Store humidity is high Check store climate control is operating correctly Insufficient ventilation Check case ventilation under and at rear of the case A fan kit may be needed please see your refrigeration service provider for details Icon Controller settings if fitted Check settings Case SST SST set too low Door Alignment is out Case is not Level Refer to page 14 for levelling informati...

Page 36: ... fittings and components Electrically isolate cases before work is carried out Staff training RCD Keep electrical connections dry at all times Falling Climbing on shelves Staff must be trained in OH S procedures MUST not climb on shelves or cases Crushing Hands or fingers may become pinched or crushed during the positioning of base trays shelves stock Staff must be trained in the correct procedure...

Page 37: ...ll arrest systems as appropriate in ac cordance with State Territory Legislation Safe working at heights Cuts and stabbing Cleaning cold glass surfaces with hot water Electrically isolate cases before work is carried out Staff training Crushing fingers hands or body between doors Electrically isolate cases before work is carried out Staff train ing RCD Keep electrical connections dry at all times ...

Page 38: ...criptions and intructions provided in the manual In order to obtain the latest manual please contact your nearest Hussmann representative The manufacturer is not liable for Defects in the electrical power supply Failure to comply with instructions Interventions carried out by unqualified untrained personnel Improper incorrect and unreasonable use of the cabinet Non compliance of maintenance and cl...

Page 39: ...PAGE 39 SMED SEMI VERTICAL HUSSMANN 7 6 APPENDIX 6 CASE SERVICES DIMENSIONS SMED153 APPENDIX ...

Page 40: ...PAGE 40 SMED SEMI VERTICAL HUSSMANN SMED163 7 6 APPENDIX 6 CASE SERVICES DIMENSIONS APPENDIX ...

Page 41: ......

Reviews: