background image

 1 SCHEMATIC DIAGRAM 

2

 2 WIRING CONNECTION DIAGRAM 

2

 3 DISASSEMBLY/ASSEMBLY INSTRUCTIONS 

3

©

2004 Matsushita Electric Works Ltd. All rights

reserved. Unauthorized copying and distribution is a
violation of law.

EY6105-X8

 4 TROUBLESHOOTING GUIDE 

7

 5 EXPLODED VIEW 

8

 6 REPLACEMENT PARTS LIST 

9

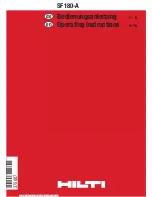
Cordless Drill & Driver

SPECIFICATIONS

CONTENTS

 Page 

Page

ORDER NO.PTD0411X48C8

Summary of Contents for EY6105-U1

Page 1: ...CTIONS 3 2004 Matsushita Electric Works Ltd All rights reserved Unauthorized copying and distribution is a violation of law EY6105 X8 4 TROUBLESHOOTING GUIDE 7 5 EXPLODED VIEW 8 6 REPLACEMENT PARTS LIST 9 Cordless Drill Driver SPECIFICATIONS CONTENTS Page Page ORDER NO PTD0411X48C8 ...

Page 2: ...1 SCHEMATIC DIAGRAM 2 WIRING CONNECTION DIAGRAM 2 EY6105 X8 ...

Page 3: ...o turn the chuck fastening screw inside the chuck clockwise direction of the arrow and remove the screw See Fig 1 NOTE If the chuck fastening screw will not come loose insert the allen wrench into the chuck and lightly tap in the clockwise direction with a hammer to tighten the chuck and then loosen the chuck fastening screw See Fig 2 4 Insert the allen wrench into the chuck and turn counterclockw...

Page 4: ... Ref No 2B Procedure 2A 2B Removal or attachment of the Motor Fig 5 Removal 1 Take out the motor with the gear box block from housing 2 Separate the motor from the gear box block by twisting the motor to unlock tabs Attachment 3 Motor mounting base and the positioning rib of gear case should be set See Fig 5 4 EY6105 X8 ...

Page 5: ...t 1 Start from inserting 6 pins into the driving block as shown in the Fig 7 2 Assemble the other parts in reverse order as shown in the Fig 6 NOTE Carrier Ring Gear and Ring Gear A have their own correct directions for proper reassembly 3 Insert 2 pieces of steel ball into each 6 holes of gear case 4 Set clutch plate and clutch spring NOTE Clutch plate has its own correct direction for proper rea...

Page 6: ...rew into the driving block about one rotation for clockwise direction 3 Align the hollow A of adjusting screw with the projection A of driving block 4 Set the clutch handle with position 1 on top Aligh the position 1 of clutch handle with the projection A of driving block 5 Insert the clutch handle with adjusting the tabs of adjusting screw to the groove of inside clutch handle 6 EY6105 X8 ...

Page 7: ...ee WIRING CONNECTION DIAGRAM are defective Check continuity between following terminals Replace switch FET Inspection of the forward reverse selection switch block When switch handle is depressed all the way There should be 0Ω between A D and between B C when switch lever is set to forward side There should be 0Ω between A D and between B C when switch lever is set to foward side Inspection of the...

Page 8: ...5 EXPLODED VIEW 8 EY6105 X8 ...

Page 9: ...EAR A 1 17 WEYT107L1357 PLANET GEAR B 3pcs PK 3 18 WEYT104L1107 CARRIER A 1 19 WEY6101L1477 RING GEAR B 1 20 WEY6105L1378 PLANET GEAR A B 3pcs PK 3 21 WEY6481L0887 THRUST PLATE 1 22 WEY6230L6027 SCREW C K3 6 2 23 WEYT104L0027 MOTOR MOUNTING PLATE 1 24 WEY6105L1008 DC MOTOR 1 25 WEYT107Y3237 H L CHANGE HANDLE 1 26 WEYT107Y2007 SWITCH 1 27 WEY6230L6037 SCREW C K3 5 2 28 WEY6481L0207 DUST PREVENTIVE ...

Reviews: