Panasonic EH-HE94, Operating Instructions Manual
The Panasonic EH-HE94 is a state-of-the-art hair dryer designed to deliver salon-quality results at home. Achieve sleek, smooth hair with its powerful yet gentle airflow. To make the most of its innovative features, simply download the free Operating Instructions Manual from our website manualshive.com.
Share
Download


Reviews:
No comments
Related manuals for EH-HE94
4
Brand: Venen Engel Pages: 22
700
Brand: Katana Pages: 38
iJoy-1ST
Brand: Interactive Health Pages: 8
EP-MA70
Brand: Panasonic Pages: 13
EP1080
Brand: Panasonic Pages: 18
EP1273 - MASSAGE LOUNGER
Brand: Panasonic Pages: 26
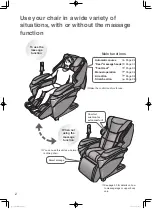
Real Pro Ultra EP30004
Brand: Panasonic Pages: 49
EP-MA73
Brand: Panasonic Pages: 58
EP30006KU - Real Pro Ultra Massage Chair
Brand: Panasonic Pages: 50

Pro
Brand: U-gym Pages: 8
X Rocker
Brand: Ace Bayou Pages: 6
AC-2000
Brand: Daga Pages: 32
RM-500
Brand: Daga Pages: 20
evero V4
Brand: HABYS Pages: 20
PRESTIGE-REH
Brand: HABYS Pages: 12
6036
Brand: OBH Nordica Pages: 14
Foot Spa
Brand: Lanaform Pages: 36
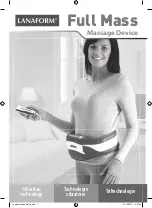
Full Mass
Brand: Lanaform Pages: 27


