background image

VQT3C14

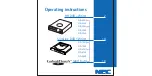
Operating Instructions

Dear customer

Thank you for purchasing this product. For optimum performance and safety, please read these instructions carefully.
Before connecting, operating or adjusting this product, please read the instructions completely.
Please keep this manual for future reference.

This Blu-ray Disc Recorder is for viewing and recording free to view channels only. It does not receive pay TV or 
encrypted channels.

DVB and the DVB logos are trademarks of the DVB Project.

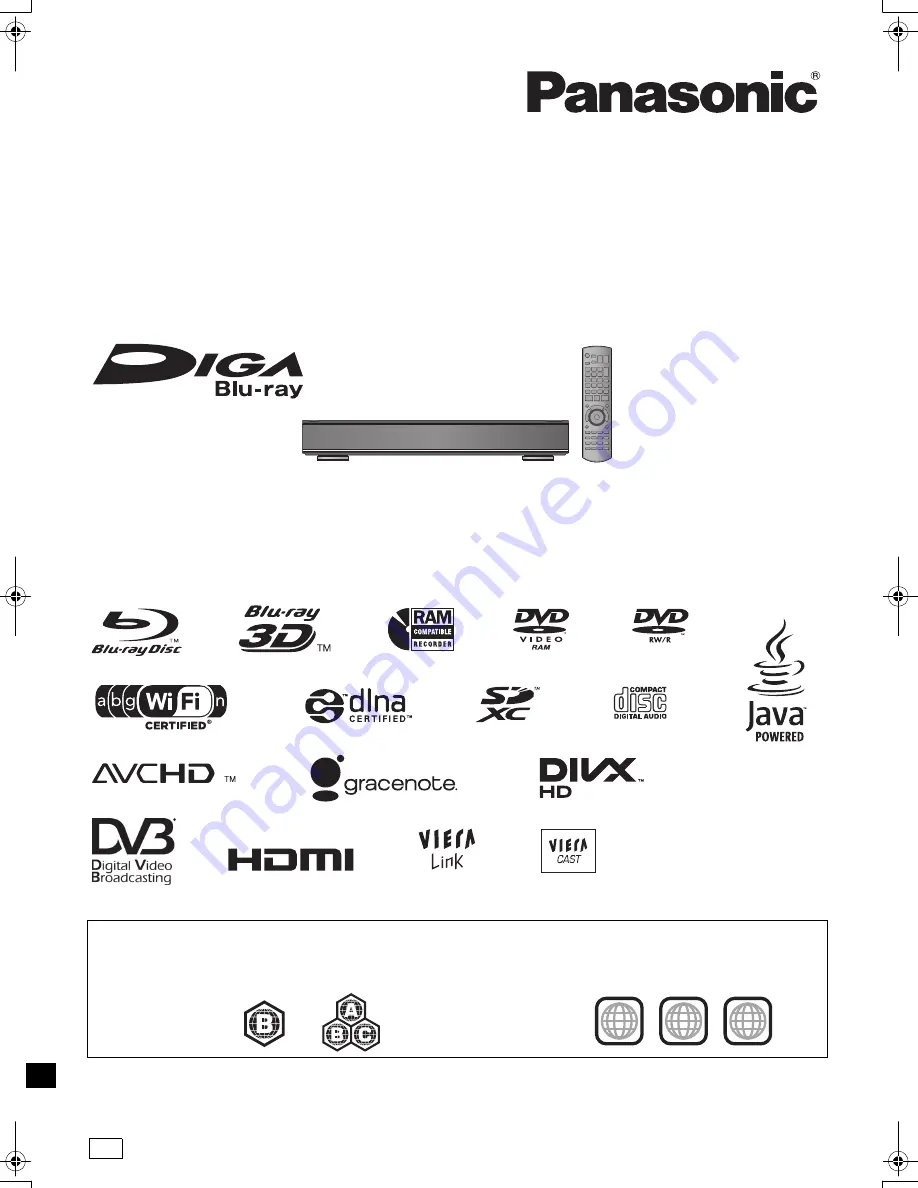
Blu-ray Disc™ Recorder

Model No. 

DMR-BWT800

DMR-BWT700

Region management information

BD-Video:

This unit plays BD-Video marked with labels 
containing the region code 

“B”

.

DVD-Video:

This unit plays DVD-Video marked with labels 
containing the region number 

“4”

 or 

“ALL”

.

Example:

Example:


4


ALL 


4


until 
2011/03/21

GL

DMRBWT800&700GL_eng.book  1 ページ  2011年2月14日 月曜日 午後3時50分

Summary of Contents for DMR-BWT700

Page 1: ...e reference This Blu ray Disc Recorder is for viewing and recording free to view channels only It does not receive pay TV or encrypted channels DVB and the DVB logos are trademarks of the DVB Project Blu ray Disc Recorder Model No DMR BWT800 DMR BWT700 Region management information BD Video This unit plays BD Video marked with labels containing the region code B DVD Video This unit plays DVD Video...

Page 2: ...y receive radio interference caused by mobile telephones during use If such interference occurs please increase separation between this unit and the mobile telephone This unit is intended for use in moderate climates Placement Place this unit on an even surface To reduce the risk of fire electric shock or product damage Do not install or place this unit in a bookcase built in cabinet or in another...

Page 3: ...identify the supplied accessories Product numbers correct as of February 2011 These may be subject to change 1 Remote control N2QAYB000610 2 Batteries for remote control 1 AC mains lead Do not use AC mains lead with other equipment 1 RF coaxial cable 1 Audio Video cable Insert so the poles i and j match those in the remote control Use alkaline or manganese batteries Point it at remote control sign...

Page 4: ...ATOR VIDEO 38 Playback from Chapter View 40 Operation during play 41 Enjoying 3D video 43 Editing video Deleting recorded titles 44 Editing recorded titles 45 Copying video Copying titles 49 Copying to HDD with DIRECT NAVIGATOR 50 Copying titles with copying list 51 Notes for copying 53 Copying Title Playing 54 Copying HD Video AVCHD format from HDD 55 Copying a finalised disc 55 Photo Playing pho...

Page 5: ...04 Operations that can be performed while recording or copying a title 104 Starting the timer recording while executing other operation 105 Specifications 106 Audio information 108 About JPEG MPO MP3 DivX MKV MPEG2 AVCHD files 108 Recording modes and approximate recording times 110 Maximum number of titles that can be recorded 111 Licenses 112 Limited Warranty 114 Glossary 115 Index 117 About desc...

Page 6: ...disk drive HDD HDD Video Including AVCHD Photo JPEG MPO Music Copied from music CD MP3 BD RE DL BD RE 50 GB 25 GB BD RE Video Including AVCHD Photo JPEG MPO BD R DL BD R 50 GB 25 GB BD R Video Including AVCHD LTH type is also supported DVD RAM RAM Video Not including AVCHD Photo JPEG MPO Take the disc out from the cartridge to use the DVD RAM with a cartridge TYPE1 cannot be used DVD R R Video Inc...

Page 7: ...type Standard symbol Playable contents BD Video BD V High Definition HD movie and music discs Information for High Bit Rate Audio 108 3D videos can be played back when this unit is connected to a 3D compatible TV using an HDMI cable BD R DL BD R 50 GB 25 GB BD R Video DivX and MKV DVD Video DVD V Movie and music DVD RW DVD Video Recording format RW VR DVD RW video recorded on another DVD recorder ...

Page 8: ...t record or edit the 8 cm disc Only playback or copy to the HDD is possible Discs that cannot be played Discs recorded on equipment other than this unit may not be used for recording on this unit Recording mode Recording Mode DR HG HX HE HL HM XP SP LP EP FR below Feature Quality Programmes can be recorded in a nearly perfect broadcasted state Recording can be done with reduced recording volume in...

Page 9: ...ered USB device Despite meeting the conditions mentioned above there may be USB memories that cannot be used for this unit This unit supports connecting a USB memory digital camera and video camera produced by Panasonic etc It is not warranted that all USB devices will meet this unit USB memories support DivX and MKV files less than 4 GB USB port at the rear of this unit is dedicated for optional ...

Page 10: ...screen Recording functions 28 Show Teletext 25 Show subtitles 25 Create chapter 40 Skip the specified time 42 Transmit the remote control signal A TV operation area 93 B Channel select 24 Change pages in the DIRECT NAVIGATOR screen etc 38 C Show VIERA CAST 71 D Input select 24 28 66 E Start up a video communication 71 F Exit the menu screen G Show the TV Guide screen 26 H Show FUNCTION MENU screen...

Page 11: ...wn 30 left and right Distance Within approx 7 m in front of the unit 7 Open close disc tray 18 8 USB port 18 9 SD card slot 18 BWT800 HDMI SUB V OFF LED Video off LED It is possible to set the LED to turn on off 85 Channel select 24 Start recording 28 Stop Start play Display 1 SD card slot indicator 2 Copying indicator 47 3 Disc indicator 4 Drive HDD BD or SD indicator 5 Remote control signal indi...

Page 12: ...ons 15 Basic connections 10BASE T 100BASE TX AC IN AV OUT AV IN R AUDIO L VIDEO S VIDEO COAXIAL OPTICAL DIGITAL AUDIO OUT PCM BITSTREAM COMMUNICATION CAMERA RF IN RF IN RF OUT RF OUT MAIN MAIN SUB SUB HDMI IN VHF UHF RF IN 10BASE T 100BASE TX COMMUNIC CAMERA RF OUT RF OUT To the aerial TV Aerial cable This unit s rear panel To household mains socket AC 220 to 240 V 50 Hz Cooling fan AC mains lead ...

Page 13: ...V that is only compatible with 2 channel audio output audio with 3 channels or more will be down mixed 115 and output as 2 channels even if connecting with an HDMI cable Some discs cannot be down mixed Connect to terminals of the same colour If the unit is connected to the TV with the supplied Audio Video cable 15 the optional one is required When the unit is not to be used for a long time To save...

Page 14: ... LAN connection The following limits are in place regarding the usage of this unit You must be aware of these limits before using this unit Panasonic will in no way be responsible for any incidental damage which may arise due to a failure to obey these limits or to any condition of use or disuse of this unit Data transmitted and received over radio waves may be intercepted and monitored This unit ...

Page 15: ...UDIO L VIDEO S VIDEO COAXIAL OPTICAL DIGITAL AUDIO OUT PCM BITSTREAM COMMUNICATION CAMERA AUDIO IN R L S VIDEO IN Audio Video cable supplied TV This unit s rear panel S Video cable Connect the unit directly to the TV If you connect the unit through an AV selector or VCR to the TV video signal will be affected by copy protection systems and the picture may not be shown correctly When connecting to ...

Page 16: ...SE T 100BASE TX COAXIAL OPTICAL DIGITAL AUDIO OUT PCM BITSTREAM COMMUNICATION CAMERA RF IN RF IN RF OUT RF OUT MAIN MAIN SUB SUB HDMI IN HDMI IN HDMI OUT This unit s rear panel HDMI cable Amplifier TV HDMI cable ARC compatible ARC compatible 3D programmes can be played back when this unit is connected to a 3D compatible amplifier and a 3D compatible TV using an HDMI cable You will not be able to v...

Page 17: ...10BASE T 100BASE TX COAXIAL OPTICAL DIGITAL AUDIO OUT PCM BITSTREAM COMMUNICATION CAMERA RF IN RF IN RF OUT RF OUT MAIN MAIN SUB SUB HDMI IN HDMI IN This unit s rear panel HDMI cable Amplifier TV HDMI cable 3D programmes can be played back when this unit is connected to a 3D compatible TV using an HDMI cable Connect the TV and the amplifier with the following cables to enjoy the audio from the TV ...

Page 18: ...to the instructions for the connected equipment To select a drive Press DRIVE SELECT to select the media drive that you operate Release disc protection BD RE BD R RAM If the disc is protected when writing to the disc release the protection 68 Setting the protection The HOLD function deactivates all buttons on the unit and remote control To cancel the HOLD function Press and hold OK and RETURN simu...

Page 19: ...drive select is set to HDD Selectable items will change depending on the type and status of the media Basic operation To return to the previous screen Press To exit the screen Press Display navigation Menu screen OK OK Select Enter RETURN EXIT Page Copy Select OPTION 05 01 08 01 10 01 03 02 PLAY RETURN PHOTO MUSIC KD2A 01 01 01 01 02 01 Delete Page Up Page Down USB OK RETURN USB device is inserted...

Page 20: ...TURN To restart set up 1 Press SETUP 2 Select Auto Setup in Digital TV Tuning then press OK If the TV aspect setting screen appears 85 TV Aspect To confirm that channels have been tuned correctly 24 Using Channel List Easy Setting TIMESLIP DISPLAY STATUS SETUP AUDIO 10s 60s RECMODE PROG CHECK REC TEXT STTL CHAPTER F U N C T I O N M E N U D I R E C T N A V I G A T O R GUIDE RETURN PLAY x1 3 PAUSE P...

Page 21: ...ut the encryption key of your network WPS PUSH button If your Wireless router supports WPS PUSH button you can easily perform the settings by pressing WPS button on it WPS Wi Fi Protected Setup is a standard that facilitates settings relating to the connection and security of wireless LAN devices 1 Press WPS button or corresponding button of Wireless router until the lamp starts flashing For detai...

Page 22: ...mptom contact your dealer OK Wireless Settings Complete Network name SSID Wireless type Authentication type Encryption type Reception Press OK to check network connection For better performance of Home Network DLNA it is recommended using a wireless access point compatible with 802 11n 5GHz Display Check the following 1 LAN cable connection or Wireless setting Fail Connection of the LAN cables 14 ...

Page 23: ... these settings individually using Network Settings 87 Do not use this unit to connect to any wireless network for which you do not have usage rights During automatic searches in a wireless network environment wireless networks SSID for which you do not have usage rights may be displayed however using these networks may be regarded as illegal access After performing network settings on this unit t...

Page 24: ...nge the channel channel information appears automatically Unit s display You can also select the channel with the number buttons TIMESLIP DISPLAY STATUS SETUP AUDIO 10s 60s RECMODE PROG CHECK REC TEXT STTL CHAPTER F U N C T I O N M E N U D I R E C T N A V I G A T O R GUIDE RETURN PLAY x1 3 PAUSE PAUSE LIVE TV STOP SLOW SEARCH SKIP CH PAGE SELECT INPUT CH AV TV DRIVE SELECT DEL B Y G R EXIT OK OPTI...

Page 25: ...amme every time it is pressed When appears in channel information left Press TEXT To select the page or access to certain topic areas and navigation Use 3 4 2 1 number buttons or colour buttons etc according to on screen instructions Some functions of Teletext are deactivated during recording You can switch the screen mode 93 3D programmes can be played back when this unit is connected to a 3D com...

Page 26: ...TURN Portrait Landscape 8 00 AM 8 45 AM 8 00 AM 8 30 AM 9 00 AM 9 30 AM 10 00 AM Selection Screen SAT 01 01 2011 8 05 AM Timer Rec Set Timer Rec Edit Timer Rec Cancel View OK RETURN SAT 01 01 2011 8 00 AM 8 45 AM To see programme information Programmes with the symbol Switch the appearance Landscape SAT 01 01 SAT 01 01 2011 08 05 AM All Digital Channels All Types OPTION Page Down 24 hours Prog Typ...

Page 27: ...ng of the watching programme is started When 2 programmes simultaneous recording is started When performing PAUSE LIVE TV or REWIND LIVE TV for more than 8 hours This may vary depending on the HDD free space These functions do not work in the following cases When the clock is not set While recording 2 programmes simultaneously While copying While watching a programme being recorded When a radio pr...

Page 28: ...e and then automatically convert to the selected recording mode while this unit is in standby 8 Recording mode The recorded title will be kept in DR mode without any conversion when Off DR is selected The conversion mode set here is inherited as an initial value for the next recording or timer recording If the confirmation message appears Press OK Press REC Recording starts Select the Automatic St...

Page 29: ...ording programme onto the TV screen to perform operations such as pause Press CH W X or INPUT SELECT to select the recording channel Recording Time You can set the length of recording time from 30 minutes to 4 hours Select the recording time You can also set the time with REC Continuous recording The recording is continued until you press STOP The title before conversion the title recorded in DR m...

Page 30: ... programme While recording Record another programme with steps on page 28 REC1 and REC2 will light Either of programmes is necessary to be recorded from this unit s tuner 2 programme simultaneous recording is not possible in the following conditions While executing Flexible Recording via AV input While high speed copying Channel or input cannot be switched except to the recording programmes Simult...

Page 31: ... OK When the programme currently broadcasting is selected following screen is displayed Select Timer Rec Set then press OK TIMESLIP DISPLAY STATUS SETUP AUDIO 10s 60s RECMODE PROG CHECK REC TEXT STTL CHAPTER F U N C T I O N M E N U D I R E C T N A V I G A T O R GUIDE RETURN PLAY x1 3 PAUSE PAUSE LIVE TV STOP SLOW SEARCH SKIP CH PAGE SELECT INPUT CH AV TV DRIVE SELECT DEL B Y G R EXIT OK OPTION MAN...

Page 32: ...programme is counted as one programme When recording from the external equipment recording mode is XP SP LP EP or FR To search the programmes Landscape view The unit displays programmes in grey that do not belong to the selected programme type Portrait view Only the selected programme types are displayed Manually programming timer recording Channel Name Schedule Mode Space OK RETURN Page Up Page D...

Page 33: ...to Renewal Recording The unit will record the new programme over the old one Only when Weekly is selected Press the Yellow button Renew On is displayed Start Stop Press 3 4 Press and hold 3 4 to alter in 15 minute increments Mode Conv Press 3 4 Subtitles Only when item other than Off is selected in Conv Press 3 4 Title Name Select Title Name then press OK 70 Entering text Timer Recording SAT 01 01...

Page 34: ...convert to the selected mode automatically during standby 28 Depending on the state of the unit playback may stop when recording begins Even if you turn the unit off during the timer recording the recording is continued When you programme successive timer recordings to start about last 1 minute of earlier programme will not be recorded Starting the timer recording while executing other operation 1...

Page 35: ...er Off Total 4 32 Timer Recording 30 30 DR HDD SAT 01 01 2011 08 05 AM Delete Info New Timer Programme SAT 08 01 SAT 08 01 10 00 AM 11 50 AM 11 00 AM 11 45 AM 11 30 AM 1 00 PM 8 00 AM 10 45 AM SAT 08 01 SAT 01 01 DR HG DR DR OK OK Icons Recording mode 8 Screen icons F Red Timer recording standby is activated Grey Timer recording standby is deactivated Currently recording programme Part or all of t...

Page 36: ...e content Follow the screen display or instruction manual of the disc for information on acquiring an account BD Live may need to be changed for certain discs 81 BD Live When discs supporting BD Live are played back the player or disc IDs may be sent to the content provider via the Internet During search slow motion or frame by frame only the primary video is displayed When BD Video Secondary Audi...

Page 37: ...item in the menu screen then press OK It will go to step automatically depending on the disc TIMESLIP DISPLAY STATUS SETUP AUDIO 10s 60s RECMODE PROG CHECK REC TEXT STTL CHAPTER F U N C T I O N M E N U D I R E C T N A V I G A T O R GUIDE RETURN PLAY x1 3 PAUSE PAUSE LIVE TV STOP SLOW SEARCH SKIP CH PAGE SELECT INPUT CH AV TV DRIVE SELECT DEL B Y G R EXIT OK OPTION MANUALSKIP VOL 0 2abc 5jkl 8tuv 1...

Page 38: ...vie Not Viewed DIRECT NAVIGATOR Channel Date Title Name Titles All Delete Page Up Page Down Movie 9 00 AM 0 01 DR Label Selected title Icons right Programme type HDD only Thumbnail HDD only Time Remaining 45 54 DR HDD Grouped Titles Start Time Prog Type Rec time Drama Sport Not Viewed DIRECT NAVIGATOR Channel Date Title Name All Movie 9 00 AM 0 01 DR Movie Screen icons Currently recording programm...

Page 39: ...you perform Remove select the title in the group 2 Press OPTION 3 Select the item then press OK HDD 1 Select the group then press OPTION 2 Select Edit then press OK 3 Select Enter Title Name then press OK 70 Entering text Even if the group name is changed the title names in the group will not be changed These functions for Group are only available for video and not available for photos and music S...

Page 40: ...e title has the maximum number of chapters you cannot perform the Resume play function 37 or the Change Thumbnail 46 with the title Playback from Chapter View Time Remaining 45 54 DR HDD Page Select Copy Grouped Titles VIDEO OPTION Start Time Prog Type Rec time PLAY RETURN PHOTO MUSIC Drama Sport Video AVCHD Movie Not Viewed DIRECT NAVIGATOR Channel Date Title Name Titles All Delete Page Up Page D...

Page 41: ...mary video is played while performing this operation Skip forward 1 minute Press MANUAL SKIP 60s Skip backward 10 seconds Press MANUAL SKIP 10s Each time you press play skips forward or backward DivX and MKV This function is not effective Press and hold PLAY a1 3 1 Play speed is quicker than normal Press again to return to normal speed RW VR DivX and MKV This function is not effective RW V This fu...

Page 42: ...titles during the Playback grouped titles 39 will be skipped 1Press TIME SLIP 2Select the time with 3 4 then press OK Play skips the specified time Press and hold 3 4 to change the time by 10 minute BD V DVD V DivX MKV and AVCHD This function is not effective Press AUDIO It will switch depending on the contents recorded every time it is pressed HDD BD RE BD R DR mode only Press STTL BD V DVD V and...

Page 43: ...Side by Side 2 screen structure when playback of the 3D video is started Depending on the operation the setting of the Signal Format may return to Original and the setting of the 3D Picture Mode may return to Normal when the content is switched or some other operation is performed while viewing 3D settings 3D BD Video Playback BD V It is also possible to play back 3D discs in 2D conventional video...

Page 44: ...AUSE LIVE TV STOP SLOW SEARCH SKIP CH PAGE SELECT INPUT CH AV TV DRIVE SELECT DEL B Y G R EXIT OK OPTION MANUALSKIP VOL 0 2abc 5jkl 8tuv 1 4ghi 7qrs p 3def 6mno 9xyz w INPUT REWINDLIVETV Time Remaining 45 54 DR HDD Page Select Copy Grouped Titles VIDEO OPTION Start Time Prog Type Rec time PLAY RETURN PHOTO MUSIC Drama Sport Video AVCHD Movie Not Viewed DIRECT NAVIGATOR Channel Date Title Name Titl...

Page 45: ... to delete Press PLAY a1 3 1 to start the playback when the title is paused 3 Select Continue then press OK Select Next then press OK to delete other sections Up to 20 sections can be set go to step 2 4 Select Delete then press OK Chapter Mark is generated in the scene that was partially deleted 5 Press RETURN You can find the desired point by using search or Time slip function etc You cannot set ...

Page 46: ... 3Press OK at the point to use as a thumbnail To change the point Restart play and select Change then press OK at the point to change 4Select Finish then press OK R R DL RW V R R DL RW It is possible to change the image displayed on the Top Menu after finalising or creating Top Menu You can find the desired point by using search or Time slip function etc HDD Programme type information in the title...

Page 47: ...tal Broadcast 84 Audio for HG HX HE HL HM Recording 84 When converted 3D information may not be retained In titles with the Auto Renewal Recording function 33 set a programme may be unintentionally converted while in During standby File Conversion Automatic Subtitles will be recorded for titles with subtitles You cannot switch the subtitle on or off during the playback Off Subtitle will not be rec...

Page 48: ...n A check mark is displayed Repeat this step until you select the chapters to be deleted Press the Yellow button again to cancel 2Select Delete then press OK To combine chapters Delete chapter mark 1Select the chapter then press OPTION 2Select Combine Chapters then press OK 3Select Combine then press OK The selected chapter is combined to the next chapter Playback from Chapter View 40 Editing chap...

Page 49: ...LAY RETURN PHOTO MUSIC Drama Sport Video AVCHD Movie Not Viewed DIRECT NAVIGATOR Channel Date Title Name Titles All Delete Page Up Page Down Movie 9 00 AM 0 01 DR OPTION To start copying the selected title Select Yes then press OK To change the selection below Set other settings then press OK e g 50 Setting the copying options Select Yes then press OK to start copying The order of copying Remainin...

Page 50: ...Subtitles Only when titles are recorded in DR mode and the recording mode other than high speed is selected Select Automatic or Off Finalise HDD R R DL RW V R R DL only Create Top Menu HDD RW only Select On or Off If On is selected in Finalise the discs become play only and you can also play them on other DVD equipment However you can no longer record or edit If Off is selected it is possible to p...

Page 51: ...es then press OK To display the menu screen 19 Titles in the grouped titles and other titles cannot be registered simultaneously Copying titles with copying list HDD BD RE BD R RAM R R DL RW V R R DL RW BD RE BD R RAM RW VR RW HDD BD RE OK RETURN BD RE is inserted Copy Copy New Photos Play Video View Photos e g BD RE Copy HDD BD DVD 1 2 3 Source Destination Cancel All Copy Direction Copy Mode Crea...

Page 52: ...aying these marks cannot be selected Title is restricted by Child Lock Parental Rating 80 Data size of each registered item Size Data size recorded to the copy destination When copying at normal speed the total data size will change according to the recording mode The total data size shown may be larger than the sum of the data sizes for each registered item because of data management information ...

Page 53: ...inal Picture Quality High Definition Standard Definition Normal speed 1 HG HX HE HL HM BD RE BD R Original Picture Quality High speed High Definition Normal speed Standard Definition Normal speed RAM R R DL RW V R R DL RW Original Picture Quality High Definition Standard Definition Normal speed XP SP LP EP FR BD RE BD R Original Picture Quality Normal speed High Definition Standard Definition Norm...

Page 54: ...e 3D Settings during the playback of the title 43 Convenient functions while viewing the 3D video 3D information may not be copied 1 Playback the title to copy Multiple audio and subtitle displayed during playback will be copied Select the multiple audio with Audio Selection in the Disc menu 76 2 Press OPTION 3 Select Copy Title Playing then press OK 4 Select Start then press OK Copying will start...

Page 55: ... on the disc has finished playing the Top Menu is recorded until the set time is reached To stop copying Press STOP You can also press and hold RETURN for 3 seconds If stopped partway copying will be up to that point Operations and on screen displays during copy are also recorded Almost all DVD Video on sale have been treated to prevent illegal copying and cannot be copied The content is recorded ...

Page 56: ...el Press 2 1 Start Slideshow 1 Select a date or folder then press the Green button 2 Select Start Slideshow then press OK Switching the Calendar screen HDD Press PAUSE Select the photo then press OK Press 2 1 to display the previous or next photo HDD Page Select Slideshow Calendar PHOTO OPTION 03 01 2010 29 10 2010 25 02 2011 05 01 2010 0001 0001 Copy OK RETURN VIDEO MUSIC 8 12 18 4 DIRECT NAVIGAT...

Page 57: ...show then press OK You can start a slideshow You can setup the time until the next photo is to display Effect for the next photo to display can be set There is no effect when playing back in 3D You can setup to playback repeatedly You can select background music on either from HDD or USB or off There is no effect when playing back in 3D You can select background music from HDD My Favourites or Pla...

Page 58: ...the photos to edit then press OPTION Multiple editing Select the item then press the Yellow button Repeat this step A check mark appears Press the Yellow button again to cancel SD Card OK RETURN SD card is inserted Play Video AVCHD View Photos Copy Video AVCHD Copy New Photos Copy Video MPEG2 e g SD e g HDD HDD Page Select Slideshow Calendar PHOTO OPTION 03 01 2010 29 10 2010 25 02 2011 05 01 2010...

Page 59: ...en press OK HDD While selecting album label Select Enter Album Name in Edit then press OK 70 Entering text Select Enter Event Name in Edit then press OK 70 Entering text BD RE RAM SD While selecting photo Select Set up Protection or Cancel Protection then press OK appears when the protection is set Even if the protection is set the photo may be deleted by another unit 1 While selecting All label S...

Page 60: ...onds The name of the copied photos will be changed If the number of files folders to be copied exceeds the maximum 108 copying will stop partway through Selecting and copying the photos HDD BD RE RAM SD USB BD RE RAM R R DL CD HDD SD SD USB HDD BD RE RAM 1 HDD 1Press FUNCTION MENU 2Select Photo in Playback Contents then press OK BD RE RAM R R DL CD SD USB 1Insert a disc the SD card or USB memory e...

Page 61: ...To stop copying Press and hold RETURN for 3 seconds Photos without shooting date will be categorised using the creation date If the space on the destination drive runs out or the number of files folders to be copied exceeds the maximum 111 copying will stop partway through The name of the copied photos will be changed Copying automatically SD Card OK RETURN SD card is inserted Play Video AVCHD Vie...

Page 62: ...mpleted 1While the Track List is displayed Press OPTION 2Select Select Folder then press OK 3Select the folder then press OK R R DL CD USB Music CD All tracks in the CD will be recorded MP3 All tracks in the folder will be recorded Cannot record track by track It will be recorded as 1 album to the HDD in 1 recording While stopped Music CD Insert a disc The unit starts accessing the Gracenote Datab...

Page 63: ...t the track then press OK You cannot play music tracks on HDD while copying 1 While the DIRECT NAVIGATOR Music Menu screen is displayed Press the Red button 2 Select VIDEO or PHOTO then press OK Playing music recorded on HDD DIRECT NAVIGATOR Music Menu MUSIC OK RETURN Please select to access music Artists Frequently Played Albums Total Tracks 53 HDD Random Play My Favourites OPTION Playlists VIDEO...

Page 64: ...t Select Photo Album then press OK 3 Select the album then press OK e g To end the slideshow Press RETURN How to create the photo album 59 Add to Album To play music continuously even if the Power off link works 72 Operations during music play Stop Press STOP Pause Press PAUSE Press PAUSE again or PLAY a1 3 1 to restart play Search Press SLOW SEARCH 6 or SLOW SEARCH 5 Press PLAY a1 3 1 to restart ...

Page 65: ...racks themselves are not deleted from the HDD While displaying the Playlists screen 1 Select Remove All Tracks then press OK 2 Select Remove then press OK While displaying the Music Menu screen 1 Select Clear My Favourites or Clear Frequently Played then press OK 2 Select Clear then press OK While displaying the My Favourites Track List of Playlists or Frequently Played screen 1 Select Remove then...

Page 66: ...tart recording To stop recording Press STOP It will be recorded in Standard Definition quality even if the programme is in High Definition quality 1While stopped Press INPUT SELECT and select AV then press OK 2Press FUNCTION MENU 3Select Flexible Recording via AV input in Others then press OK 4Select Hour and Min and set the recording time 5Start play on the other equipment 6Select Start then pres...

Page 67: ...the SD video MPEG2 format recorded on the Panasonic video camera etc to the HDD or disc SD Panasonic video camera HDD RAM 2 Select Copy Video MPEG2 then press OK 3 Select Start Copying then press OK 4 Select Yes then press OK to start copying To stop copying Press and hold RETURN for 3 seconds You cannot playback SD Video on an SD card or in the HDD of the Panasonic video camera etc with this unit...

Page 68: ...nly SD Formatting deletes all contents including computer data and they cannot be restored Check carefully before proceeding The contents are deleted when you format a disc or card even if you have set protection 1Select Format Disc or Format Card then press OK 2Select Yes then press OK 3Select Start then press OK 4Press OK RAM To stop formatting Press RETURN You can cancel formatting if it takes ...

Page 69: ...e confirmation screen approximately four times longer You cannot finalise discs recorded on other manufacturer s equipment R R DL RW V R R DL If you finalise discs recorded on Panasonic equipment other than this unit the background selected as Top Menu may not be displayed Discs finalised on this unit may not be playable on other players due to the condition of the recording RW You can create Top ...

Page 70: ...yed in the Top Menu after finalisation is previewed The maximum number of characters depends on the media If a name is long parts of it may not be shown in some screens 1 Press 7 to move to the 7th row 2 Press 7 twice to highlight R 3 Press OK _ Enter Title Name 1 2 3 4 5 A B C a D E F d G H I N O g J K L j M m 6 7 8 9 0 b c e f h i k l n _ o SPACE Set Delete P Q R S p T U V t W X Y Z w q r s u v ...

Page 71: ...he following cases settings are possible using Internet Content Settings 87 When restricting the use of VIERA CAST When the audio is distorted If using slow Internet connection the video may not be displayed correctly A high speed Internet service with a speed of at least 6 Mbps is recommended Be sure to update the software firmware when a software firmware update notice is displayed on the screen...

Page 72: ...link function does not work when recording copying etc The following operations make it possible to keep the power of the unit on and to play music continuously When the unit is directly connected to an amplifier receiver 1While playing music Press OPTION 2Select TV Power Off then press OK Sound may be discontinued for several seconds when the power to the TV is turned off You can operate this uni...

Page 73: ...anuals for other manufacturers equipment supporting VIERA Link function VIERA Link HDAVI Control based on the control functions provided by HDMI which is an industry standard known as HDMI CEC Consumer Electronics Control is a unique function that we have developed and added As such its operation with other manufacturers equipment that supports HDMI CEC cannot be guaranteed These functions may not...

Page 74: ...e DLNA compatible device that is to be connected to the unit should be connected to the same hub or broadband router as the unit Files not on the HDD cannot be played back Playing back 3D video recorded on this unit may not work properly Editing is not possible Following titles can not be played back A title with remote access restriction A title currently being recorded on DIGA A title with audio...

Page 75: ...an be updated by pressing the Red button 3 Select the equipment to playback the contents then press OK 4 Select the item to playback folder then press OK Menu structure will be different depending on the equipment connected to this unit Select the contents by repeating the operation Convenient functions can be used by pressing OPTION or DISPLAY depending on the contents Depending on the contents a...

Page 76: ...nding on the media Audio Selection Switch in the case of multiple audio Disc Play Picture Sound Other Angle 1 Soundtrack 1 2 0 ch Subtitles Off Menu Item Setting Subtitle Style Select the subtitle style recorded on the disc Angle Change the number to select an angle Audio Channel Change audio LR L R during playback Signal type k kHz Sampling frequency b bit Number of bits ch channel Number of chan...

Page 77: ...ve Select the method of conversion for progressive output to suit the type of title being played 116 Auto Automatically detects the film and video content and appropriately converts it Video Select when using Auto and the content is distorted Film Select this if the edges of the film content appear jagged or rough when Auto is selected However if the video content is distorted as shown in the illu...

Page 78: ...anged About the PIN PIN is required to change the following settings Enter the 4 digit PIN following the on screen instructions The PIN is common for the following items Child Lock Parental Rating BD Video Parental Control DVD Video Parental Control Lock Internet Content Settings PIN can be changed via the PIN Entry in Others 90 1 Select the number then press 1 You can also use the number buttons ...

Page 79: ...p unwanted channels 1 Select the channel 2 Press OK The check mark is removed Yellow Clear the all skip setting To change the channel number assignment 1 Select the channel then press the Green button 2 Enter the channel number to reassign with the number buttons 3 Press OK If another channel is already assigned to the channel number the two channels will be switched To set the channel manually Pr...

Page 80: ...th When the signal is too strong red bar reduce the signal amplification at your aerial New Channel Message Set whether to obtain the information automatically when a new digital channel is added After performing Update Channel List or Manual Tuning if the channel number has already been assigned channel number for the newly tuned channel will be assigned from 800ch onward Digital TV Manual Tuning...

Page 81: ...this unit BD Live You can restrict Internet access when BD Live functions are used If On Limit is selected internet access is permitted only for BD Live contents which have content owner certificates BD Video Parental Control Set an age limit of BD Video play Follow the on screen instructions PIN is required to change 78 DVD Video Parental Control Set a rating level to limit DVD Video play Follow ...

Page 82: ...ing a programme This setting is valid for the following cases Recording from external equipment Copying from a finalised DVD Video disc If On is selected the following restrictions are applied to recorded titles The settings in Aspect for Recording 82 and in Bilingual Audio Selection 83 are applied to titles You cannot switch the audio when watching a programme via AV input BD DVD Speed for High S...

Page 83: ...effect on Bitstream via HDMI AV OUT and DIGITAL AUDIO OUT terminal The audio will be output in Stereo in the following cases AVCHD playback BD V Playback of clicking sound on the menu and audio with secondary video in picture in picture mode Bilingual Audio Selection Select whether to record the audio type M1 or M2 when File Conversion 47 Copying to a DVD R DVD RW DVD Video format R and RW Rec for...

Page 84: ...h secondary audio Turn on off the clicking sound on the menu and audio with secondary video If Off is selected the primary audio only is output Audio Delay Mis sync between the video and audio is corrected by delaying the audio output Audio Type for Digital Broadcast If the programme has more than one track Dolby Digital MPEG etc you can set priorities This setting will give effect in the followin...

Page 85: ...t This will light when HDMI SUB Output Mode 86 is set to V OFF Video Off and the power of the connected equipment to the HDMI AV OUT SUB is on 3D Settings 3D Type If 3D video cannot be played back in 3D change the settings as required by the connected TV format Change the settings for 3D on the TV also when Side by side is selected 3D Playback Message Set to display or hide the 3D viewing warning ...

Page 86: ...is setting is for selecting whether to use Deep Colour output when a TV that supports Deep Colour is connected HDMI Audio Output Select Off when connected to a TV with an HDMI cable and connected to an amplifier not compatible with HDMI with a DIGITAL AUDIO OUT terminal 7 1ch Audio Reformatting BD V Surround sound with 6 1 ch or less is automatically expanded and played back at 7 1 ch If Off is se...

Page 87: ...ss OK to show the respective setting Proxy Server Settings Check and set the connection to the Proxy server Press OK to show the respective setting Internet Content Settings Lock You can restrict using VIERA CAST Follow the on screen instructions PIN is required to change 78 Automatic Volume Control Volume that is different depending on the contents is adjusted automatically to the standard volume...

Page 88: ...e list This function cannot be enabled when Manual is selected in Registration type for remote devices left To register equipment manually 1 Select the device name or the MAC Address for the device you want to register then press OK 2 Select Yes then press OK To deregister equipment 1 Select the registered equipment then press OK 2 Select Yes then press OK Automatic All connected devices on the sa...

Page 89: ... selected the aerial signal is output from this unit Remote Control Change the remote control code on the main unit and the remote control if you place other Panasonic products close together Use BD 1 the factory set code under normal circumstances 1 Select the code then press OK 2 While pressing OK press and hold the number button 1 to 6 for more than 5 seconds 3 Press and hold OK for more than 5...

Page 90: ...f this unit will be updated from broadcasts if update information is detected 92 Software Update Now Internet Software of this unit will be updated from Internet if update information is detected 92 Software Licence Information about the software licence is displayed System Information Display software firmware HDAVI Control version and Wireless Module version When using wireless connection only o...

Page 91: ... 7384 Japanese 7465 Javanese 7487 Kannada 7578 Kashmiri 7583 Kazakh 7575 Kirghiz 7589 Korean 7579 Kurdish 7585 Laotian 7679 Latin 7665 Latvian Lettish 7686 Lingala 7678 Lithuanian 7684 Macedonian 7775 Malagasy 7771 Malay 7783 Malayalam 7776 Maltese 7784 Maori 7773 Marathi 7782 Moldavian 7779 Mongolian 7778 Nauru 7865 Nepali 7869 Norwegian 7879 Oriya 7982 Pashto Pushto 8083 Persian 7065 Polish 8076...

Page 92: ... display during the update e g When FINISH is displayed update of the software firmware has completed The time it takes to update depends on the connection From broadcast About 2 hours From Internet About 1 hour The download time depends on the network or broadcast environment If the timer recording is scheduled within the following time at the start of the download the download will not be execut...

Page 93: ...re than one code listed select the one that allows correct operation Manufacturer and Code No Switching the aspect ratio of the screen Normal Normal output Side cut The black bars on the right and left sides of the 16 9 image disappear and the image is enlarged Zoom The black bars on the top and bottom sides of the 4 3 image disappear and the image is enlarged TV operation CH PAGE CH AV TV DRIVE S...

Page 94: ... may be damaged Use a new disc PLEASE WAIT Displayed when the unit is started and turned off There was a power failure or the AC plug was disconnected while the unit was on The unit is carrying out its recovery process This process restores the unit to normal operation The unit is not broken Wait until the message disappears PROG FULL There are already 32 timer programmes Delete unnecessary timer ...

Page 95: ...ecording playback or copy This is displayed when the unit is in the recovery process to return to normal operation Once the display clears you can use the unit again If it remains displayed consult the dealer where the unit was purchased U99 The unit fails to operate properly Press Í I on the main unit to switch the unit to standby mode Now press Í I on the main unit again to turn the unit on H or...

Page 96: ...D R DL and R DL this happens after about 60 times While searching the elapsed time may not display correctly Available disc space display may be different from actual Varying may be large especially when recorded in DR mode The clock does not display on the unit when switched to standby The clock does not display when Power Save in Standby is activated Ensure Power Save in Standby is set to Off 89...

Page 97: ...D are played back in accordance with the settings of the TV When HDMI Audio Output is set to Off 3D video may not be output correctly 86 TV reception is not displayed Broadcast signals are output from this unit s RF OUT terminal Select On in RF OUT Aerial Signal 89 No sound Distorted sound Check the connections or amplifier s settings 12 16 Press AUDIO to select the audio 25 42 To output audio fro...

Page 98: ...ly select Normal Silent in BD DVD Speed for High Speed Copy 82 Cannot playback The disc is dirty scratched or marked 103 You tried to play a RW that needs to have a Top Menu on the equipment used for recording You cannot playback while executing the Flexible Recording via AV input BD R BD RE Set Play Video AVCHD on BD RE BD R to On and the playback may be possible 81 The disc that is recorded by u...

Page 99: ...ad Remove the card from the slot and then insert again If this does not solve the problem turn off and turn on the unit again Copying deleting and setting protection takes a long time When there are a lot of folders and files it may sometimes take a few hours Photos JPEG MPO do not playback normally The images that were edited on the PC such as Progressive JPEG etc may not play back 108 Tracks cou...

Page 100: ...with HDMI was changed or if there was a power failure or the plug was removed from the household mains socket HDAVI Control may not work In this case change TV VIERA setting for HDAVI Control again You cannot access this unit from DLNA compatible equipment on the network Check the network connection and the network settings 14 21 74 75 87 It may not be possible to connect depending on the types of...

Page 101: ...ed and initially playable number of times is displayed The remaining number of plays decreases each time a programme is played However when playing from the point where play was previously stopped the remaining number of plays does not decrease due to the resume play function ABOUT DIVX VIDEO DivX is a digital video format created by DivX Inc This is an official DivX Certified device that plays Di...

Page 102: ...2 3 hours until condensation is gone Cigarette smoke etc causes malfunction or breakdown The unit may breakdown if cigarette smoke or bug spray vapour etc gets inside the unit Before moving the unit ensure the disc tray is empty 1 Turn the unit off Wait until BYE disappears from the display 2 Remove the AC mains lead from the household mains socket 3 Move only after the unit has come to a complete...

Page 103: ... noise etc may result Using the HDD in this condition may worsen the problem and in the worst case the HDD may no longer be usable As soon as you notice this type of problem copy all content to disc and request service Recorded content data on a HDD that has become unusable is unrecoverable How to hold a disc or SD card Do not touch the recorded surface or the terminal surface If there is dirt or ...

Page 104: ...cuting the Flexible Recording via AV input Operations that can be performed while recording or copying a title Playback of HDD Playback of discs Playback of SD Card Playback of photo Playback of music recorded on HDD While recording programme 1 1 2 1 While recording from external equipment 1 1 2 3 4 1 3 While copying in normal speed mode While copying in high speed mode With finalising or creating...

Page 105: ...uting other operation Executing operation Starting of the timer recording Executing operation Starting of the timer recording Recording the title 1 Executing Flexible Recording via AV input 4 Playing the title 2 3 Executing PAUSE LIVE TV REWIND LIVE TV 1 Editing the title Editing photo or music Copying a title in high speed mode without finalising or creating Top Menu Copying photos Copying a titl...

Page 106: ...tem Dolby Digital 2ch XP SP LP EP mode Dolby Digital Max 5 1ch DR HG HX HE HL HM mode HE AAC 2ch DR mode MPEG 2ch DR mode Audio in 1 Audio input pin jack Input level Standard 0 5 Vrms Full scale 2 0 Vrms at 1 kHz Input impedance More than 10 k Audio out 1 Audio output pin jack Output level Standard 0 5 Vrms Full scale 2 0 Vrms at 1 kHz Output impedance Less than 1 k Digital audio out Optical termi...

Page 107: ...O DVD R DVD Video format 1 DVD Video Recording format 1 AVCHD format 1 JPEG 2 MPO 2 MP3 2 DivX 2 3 MKV 2 3 DVD R DL DVD Video format 1 DVD Video Recording format 1 AVCHD format 1 JPEG 2 MPO 2 MP3 2 DivX 2 3 MKV 2 3 DVD RW DVD Videoformat 1 DVD Video Recording format 1 AVCHD format 1 R Video 1 AVCHD format 1 R DL Video 1 AVCHD format 1 RW Video 1 AVCHD format 1 DVD Video DVD Video format CD Audio C...

Page 108: ...stem MPO conforming MPF Multi Picture Format Maximum number of folders and files MP3 Playable media HDD DVD R DVD R DL CD R CD RW USB device Compression rate 32 kbps to 320 kbps Sampling rate 16 kHz 22 05 kHz 24 kHz 32 kHz 44 1 kHz 48 kHz Maximum number of folders and files Audio information Terminal Digital Audio Output Bitstream PCM HDMI AV OUT Output using original audio 1 BD Video 7 1ch PCM 1 ...

Page 109: ... Video Recording conversion and transfer is possible from USB device to HDD or DVD RAM disc After Video Recording conversion and transfer to HDD or DVD RAM disc is completed the playback becomes possible 3 SD Video Entertainment Video Profile HD Video High Definition Playable media SD Card USB device Codec MPEG 4 AVC H 264 File Format AVCHD format conforming Video Recording conversion and transfer...

Page 110: ... is 8 Mbps Regarding recording time remaining Remaining time in the DR mode is calculated with a bit rate of approx 15 Mbps But the bit rate differs depending on the broadcast so the displayed remaining time might be different from the actual remaining time Recording modes and approximate recording times Recording Mode HDD BD RE BD R BWT800 1 TB BWT700 500 GB Single Layer 25 GB Dual Layer 50 GB DR...

Page 111: ... 176 hours 9 hours 18 hours HL 472 hours 235 hours 12 hours 24 hours HM 684 hours 341 hours 17 hours 30 min 35 hours XP 215 hours 107 hours 5 hours 15 min 10 hours 30 min 1 hour 2 hours 1 hour 1 hour 45 min SP 431 hours 215 hours 10 hours 30 min 21 hours 2 hours 4 hours 2 hours 3 hours 35 min LP 862 hours 430 hours 21 hours 42 hours 4 hours 8 hours 4 hours 7 hours 10 min EP 6 hours 1293 hours 645 ...

Page 112: ...t you will use Gracenote Data the Gracenote Software and Gracenote Servers for your own personal non commercial use only You agree not to assign copy transfer or transmit the Gracenote Software or any Gracenote Data to any third party YOU AGREE NOT TO USE OR EXPLOIT GRACENOTE DATA THE GRACENOTE SOFTWARE OR GRACENOTE SERVERS EXCEPT AS EXPRESSLY PERMITTED HEREIN You agree that your non exclusive lic...

Page 113: ...ic Corporation the software licensed under the GNU General Public License Version 2 GPL v2 the software licensed under the GNU LESSER General Public License Version 2 1 LGPL v2 1 and or open sourced software other than the software licensed under the GPL v2 and or LGPL v2 1 1 2 3 4 5 This product includes software developed by the OpenSSL Project for use in the OpenSSL Toolkit http www openssl org...

Page 114: ...and use the Service Centre Locator for the name address of the nearest Authorised Service Centre Send or take the product to a Panasonic Authorised Service Centre together with your proof of purchase receipt as a proof of purchase date Please note that freight and insurance to and or from your nearest Authorised Service Centre must be arranged by you Note that home or pick up delivery service is a...

Page 115: ...e DTS HD DTS HD is a high quality sophisticated audio format used in movie theatres Previous DTS Digital Surround compatible equipment can play DTS HD as DTS Digital Surround audio BD Video supports up to 7 1 channel output Dynamic range Dynamic range is the difference between the lowest level of sound that can be heard above the noise of the equipment and the highest level of sound before distort...

Page 116: ... accidental deletion by setting writing protection or deletion protection Sampling frequency Sampling is the process of converting the heights of sound wave analog signal samples taken at set periods into digits digital encoding Sampling frequency is the number of samples taken per second so larger numbers mean more faithful reproduction of the original sound Signal Quality This is the guide for c...

Page 117: ...py Video 49 Copy title playing 54 Finalised disc 55 HD Video AVCHD 55 67 SD Video MPEG2 67 Create Top Menu 69 D Delete Delete BD Video data 69 Music 65 Photo 59 Video 44 Delete all photos HDD 82 Delete all titles Disc 68 HDD 82 Delete BD Video data 69 DIRECT NAVIGATOR Music 63 Photo 56 Video 38 Disc Create Top Menu 69 Delete all titles 68 Finalise 69 Format 68 Media information 6 Playback menu 76 ...

Page 118: ...e 62 Setting 87 Software Firmware Update 92 VIERA CAST 71 Network easy setting 21 87 P Partial Delete 45 PAUSE LIVE TV 27 Photo Copy 60 Delete 59 DIRECT NAVIGATOR 56 Edit 58 Playback 56 Protection 59 Slideshow 56 64 Picture Playback menu 77 Picture in picture 36 PIN 78 Play Playback menu 76 Playback menu Disc 76 Other 77 Picture 77 Play 76 Sound 77 Playback Music Audio CD 62 MP3 62 Recorded on HDD...

Page 119: ... Setup menu 78 Setup menu 78 Connection 85 Display 85 HDD Disc 81 Network 87 Others 89 Picture 83 Sound 83 Tuning 79 Signal condition 80 SkypeTM 71 Slideshow 56 64 Software Firmware Update 92 Sound Playback menu 77 Specifications 106 Subtitles Broadcasts 25 Playback 42 T Teletext 25 85 Timer recording 31 Auto Renewal Recording 33 Confirm and edit 35 Manually programming timer recording 32 Top menu...

Page 120: ...ries outside the European Union This symbol is only valid in the European Union If you wish to discard this product please contact your local authorities or dealer and ask for the correct method of disposal Panasonic Corporation Web Site http panasonic net Panasonic Corporation 2011 p VQT3C14 F0211MD0 ...

Reviews: