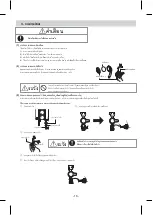
background image

DH940A3PL1T0

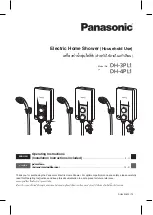
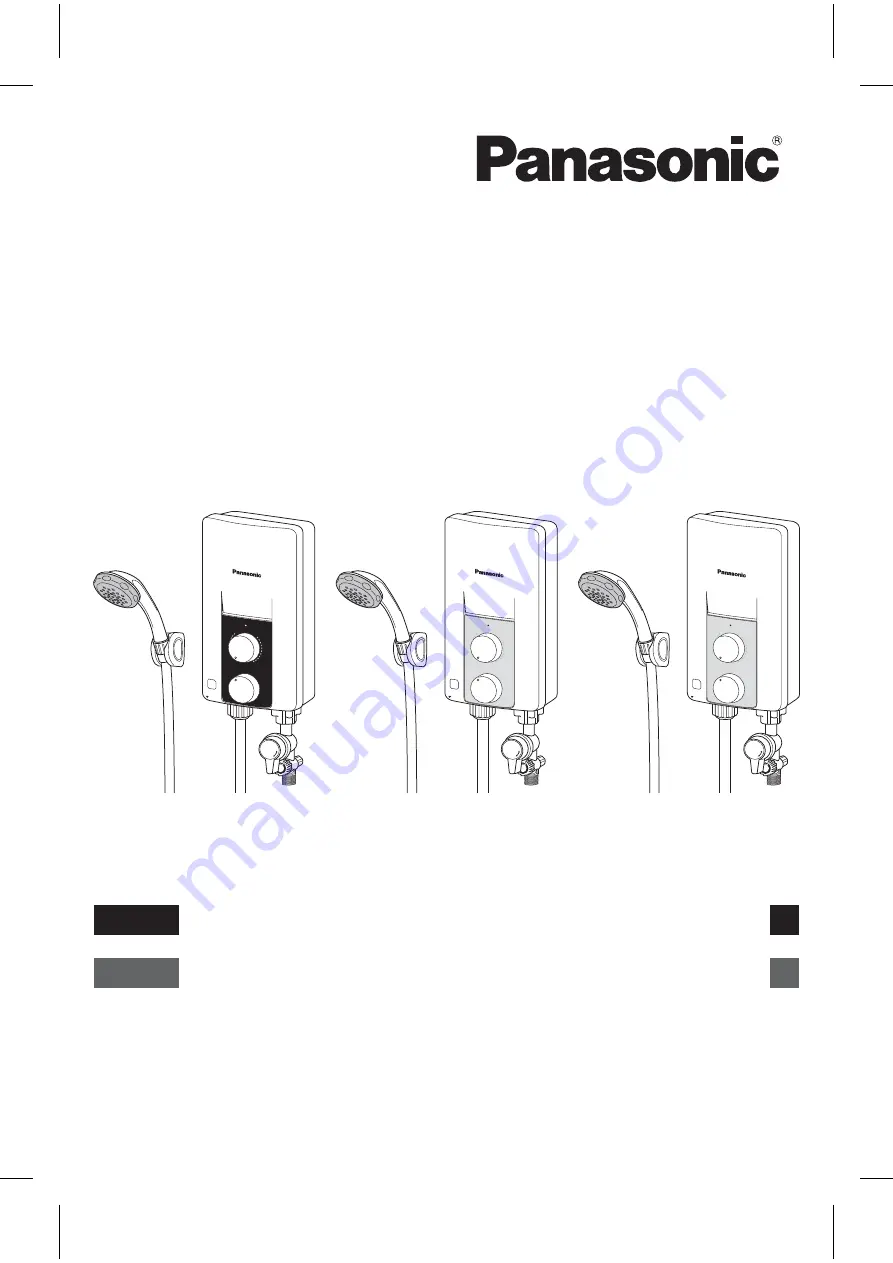
Electric Home Shower 

(Household Use)

Thank you for purchasing the Panasonic Electric Home Shower. For optimum performance and safety, please carefully 

read this Operating Instructions and keep this documentation in a safe place for future reference.

ขอขอบคุณที่เลือกซื้อเครื่องทำน้ำอุ่นพานาโซนิค

เพื่อการทำงานอย่างมีประสิทธิภาพสูงสุดและปลอดภัย โปรดอ่านคู่มือฉบับนี้อย่างละเอียด และเก็บรักษาไว้ในที่ปลอดภัยเพื่อใช้อ้างอิงในอนาคต

.......................................................................... 2 - 11

............................................................................................................... 12 - 21

DH-3PL1

DH-4PL1

Operating Instructions

(Installation Instructions included)

Model No.

รุ่น

ENGLISH

คู่มือการใช้งาน
(มีคำแนะนำการติดตั้งให้มาด้วย)

ภาษาไทย

OP

EN

CL

OS

E

FILTER

CLEANING

ELB Test

DH-3PL1

ELB Reset

Push Up

OFF

MAX

เครื่องทำน้ำอุนไฟฟา 

(สำหรับใชภายในครัวเรือน)

Pow

er Contro

l

Main Switch

ELB

Off

Off

High

On

OP

EN

CL

OS

E

FILTER

CLEANING

ELB Test

DH-3PL1

ELB Reset

Push Up

OFF

MAX

OP

EN

CL

OS

E

FILTER

CLEANING

ELB Test

DH-4PL1

ELB Reset

Push Up

OFF

MAX

Pow

er Contro

l

Main Switch

ELB

Off

Off

High

On

Pow

er Contro

l

Main Switch

ELB

Off

Off

High

On

Summary of Contents for DH-3PL1

Page 1: ...ี ปลอดภัยเพื อใช อ างอิงในอนาคต 2 11 12 21 DH 3PL1 DH 4PL1 Operating Instructions Installation Instructions included Model No รุ น ENGLISH คู มือการใช งาน มีคำแนะนำการติดตั งให มาด วย ภาษาไทย O P E N C L O S E FILTER CLEANING ELB Test DH 3PL1 ELB Reset Push Up OFF MAX เครื องทำน ำอุ นไฟฟ า สำหรับใช ภายในครัวเรือน Power Control Main Switch ELB Off Off High On O P E N C L O S E FILTER CLEANING ELB T...

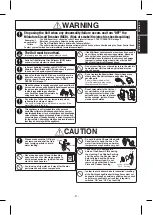
Page 2: ... prevent personal injury injury to others and property damage the following instructions must be followed Incorrect operation caused by failure to follow instructions will cause harm or damage the seriousness of which is classified as follow SAFETY INSTRUCTIONS To be followed absolutely CONTENTS Page No BEFORE USING ELECTRIC HOME SHOWER 1 SAFETY INSTRUCTIONS 2 PARTS IDENTIFICATION 3 ACCESSORIES HO...

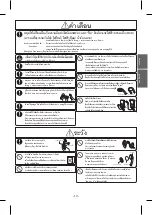
Page 3: ...ic shock Do not insert finger or other objects into the electric home shower Unit to avoid physical and electric shock hazards If the ELB Reset Lever cannot be reset even if you push it up or if it soon slides down during operation please do not use the Unit and contact the authorized dealer immediately to avoid a hazard to users such as damage to property serious injury or death Never fix the ELB...

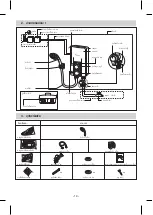
Page 4: ...sembly 1 set Rubber Packing A 1 pc Filter Body Assembly Caution Sheet 1 pc Filter Body Packing OPEN C L O S E FILTE R CLEANIN G OFF MA X O P EN C L O S E FIL TE R CLE AN ING O F F M A X O P E N C L O S E FILTER CLEANING OFF MAX O P E N C L O S E FILTER CLEANING OFF MAX ELB Lamp Filter Body Assembly Installation การติดตั งชิ นส วนประกอบตัวเครื องกรอง Place Rubber Packing between Filter Body Assembl...

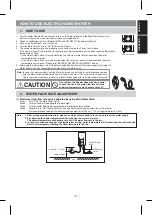
Page 5: ...alve Step 1 Turn OFF the Main Water Valve Step 2 Turn the Shower Head upward at waist height Step 3 Turn the Water Volume Knob clockwise to maximum volume position Step 4 Gradually turn ON the Main Water Valve and adjust the splashing height H of the shower It is recommended to adjust the water splashing height H at 100 cm 110 cm approximately 3 L min Note 1 After setting maximum flow rate please ...

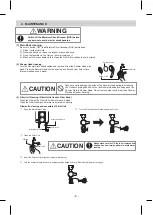
Page 6: ...ean it with moist cloth 2 Never use benzene thinner detergent bleach and such 3 Do not spray water to the Unit nor put wet towels on it 4 Make sure to use suitable cloth to clean the Front Plate surface to avoid scratch 2 Shower Head cleaning Turn the Shower Plate anticlockwise and remove it from the Shower Head with hand Clean the Shower Head s holes by using a soft brush from time to time Recomm...

Page 7: ...own Push up the ELB Reset Lever to reset the ELB refer to TEST OPERATION at page 11 3 Make sure to switch on the ON OFF DP double pole Switch 4 Make sure to switch on the Miniature Circuit Breaker MCB 1 Check the Water Volume Knob Turn the Water Volume Knob clockwise if it is closed 2 Check the Main Water Valve Turn ON the Main Water Valve if it is closed refer to HOW TO USE at page 5 1 Check the ...

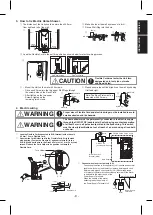
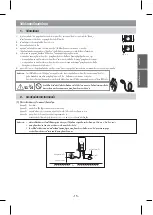
Page 8: ...nnot be filtered and allows foreign particles to enter the Unit It will cause Heater Unit and Shower Head to clog up Do not install remove and reinstall the Unit by yourself Improper installation will cause leakage electric shock or fire Installation and wiring must be done by competent personnel Do not share the inlet and outlet pipe of the Home Shower Unit with other outlets The pressure may dro...

Page 9: ...e life wire L and neutral wire N to the ELB L N and earth wire to the Ground Point with 1 N m 10 kgf cm torque Fix back the Cord Holder to its position to clamp the Flexible Cord 3 Connect wires in correct polarity L N Connecting the wires in wrong polarity L N causes an abnormal condition which may lead to electric leaking burning and such Before wiring please check polarity L N with voltage rang...

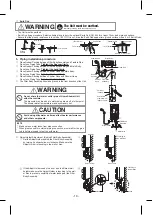
Page 10: ...all or tiles If the Adjust Holder needs to be cut due to different wall height make sure the Adjust Holder is touching to the wall or tiles to prevent possibility of water leakage at the Filter Body Assembly Touching to the wall tiles wall tiles Touching to the wall tiles tiles tiles Cut Adjust Holder About 5 mm i The Unit must be earthed Earth Rod fixing procedure Select suitable place to bury th...

Page 11: ...illustrated 4 Push in the Main Switch Knob and Power Control Knob until it is fully inserted Main Switch Knob and Power Control Knob can not be inserted if Step 1 and Step 2 is not done accordingly 5 Fix the screw at the bottom of the Unit Note 1 Do not push the ELB Test Button during fixing the Front Plate 2 Do not apply extreme force to insert the Main Switch Knob and Power Control Knob during f...

Page 12: ...ารกระทำที ถูกห าม สัญลักษณ นี พื นสีดำ แสดงการกระทำที ต อง ทำ คำเตือน ระวัง 1 ก อนเริ มทำงาน โปรดอ าน ข อควรระวังเพื อความปลอดภัย อย างระมัดระวัง เพื อป องกันมิให เป นอันตรายแก ตัวเอง ตัวผ ูอื นและก อ ความเสียหายแก ทรัพย สิน จงปฏิบัติตามคำแนะนำ การทำงานอย างไม ถูกต องเพราะไม ปฏิบัติตามคำส ัง จะก ออันตรายหรือเสียหายข ึนได ความร ายแรงได ถูก จัดไว เป นประเภทดังนี ข อควรระวังเพื อความปลอดภัย ควรทำตามอ...

Page 13: ...ฟฟ าช อต น ำร อนลวก แกนสวิตช นิรภัย ELB ไม สามารถรีเซ ตได โปรดดู 3 การตรวจสอบการทำงาน ที หน า 21 มีการตรวจจับกลิ นไหม หรือควันไฟได ในระหว างการทำงาน แผ นฝาครอบ แผ นหลังบิดเบี ยวผิดรูปหรือร อนผิดปกติ อุณหภูมิของน ำที ไหลออกมาจะร อนมากเป นพิเศษ และไม สามารถควบคุมปุ มบิดควบคุมอุณหภูมิได ติดต อผู แทนจำหน ายอย างเป นทางการของท านทันทีเพื อการดูแลรักษา ซ อมแซม ตัวอย างของความผิดปกติ ข อบกพร อง คำเตือน ร...

Page 14: ...าก แผ นหลัง ชุดกรองน ำ สายฝ กบัว ปุ มบิดสวิตช หลัก ป ุมปรับอุณหภูมิ ป ุมเครื องกรองน ำ วาล วน ำ ป ุมปรับปริมาณน ำ ท อจ ายน ำเข า อุปกรณ แยกซื อต างหาก สวิตช นิรภัยELB ห องน ำ สายท ออ อน ไม รวม ด ามจับปรับได สัญญาณไฟELB Filter Body Assembly Installation การติดตั งชิ นส วนประกอบตัวเครื องกรอง Place Rubber Packing between Filter Body Assembly and Main Body Tighten the Nut by hand firmly Make sure the...

Page 15: ...บิดสวิตช หลักหมายเลข ไปยังตำแหน ง เป ด ไฟสีเขียวที แสดงการทำงานของ ELB จะติด ใช ปุ มบิดสวิตช หลักก อนและหลังการใช งานฝ กบัว ปุ มนี เป นตัวควบคุมอุปกรณ จ ายไฟฟ าไปยังเครื องทำน ำอุ น 5 จะสามารถควบคุมอุณหภูมิของฝ กบัวได ทีละน อย โดยหมุนปุ มปรับอุณหภูมิหมายเลข หากหมุนปุ มปรับอุณหภูมิตามเข มนา ิกา อุณหภูมิของฝ กบัวจะเพิ มขึ น จนถึงอุณหภูมิสูงที สุดที ตำแหน ง สูง หากหมุนปุ มบิดควบคุมปริมาณน ำทวนเข มนา ...

Page 16: ...วามสะอาด 3 อย าฉีดน ำใส เครื องทำน ำอ ุน หรือวางผ าเป ยกๆ บนตัวเครื อง 4 ให แน ใจว าจะใช ผ าที เหมาะสมในการทำความสะอาดพื นผิวด านหน าเพื อหลีกเลี ยงรอยขีดข วน 2 การทำความสะอาดหัวฝ กบัว หมุนและถอดฝาครอบหัวฝ กบัวออก ทำความสะอาดตามรูของฝาครอบด วยแปรง ทำความสะอาดตะแกรงฝ กบัว ด วยขนแปรงอ อน อย างน อยสัปดาห ละ 1 ครั ง คำเตือน ในขณะทำความสะอาด ระมัดระวังอย าทำให รูของฝาครอบเสียรูป และใส ปะเก นยาง ที ฝ กบ...

Page 17: ... ง ดูรายละเอียดในหัวข อ การตรวจสอบการทำงาน ในหน า 21 3 ตรวจสอบให แน ใจว า สวิตช เป ด ป ดแบบ DP ขั วคู เป ดอยู 4 ตรวจสอบให แน ใจว า เบรคเกอร ตัดวงจรขนาดเล ก MCB เป ดอยู 1 ตรวจสอบปุ มบิดควบคุมปริมาณน ำ หากปุ มบิดป ดอยู ให หมุนปุ มบิดควบคุมปริมาณน ำโดยตามเข มนา ิกา 2 ตรวจดูวาล วน ำ ถ าป ดอย ู ให เป ดวาล ว ดูหน า 15 1 ตรวจสอบวิธีปรับน ำร อนตามหน า 15 น ำไหลออกน อย ไม มีน ำร อนไหลออกจากช องน ำออก ไม มี...

Page 18: ...ารรั วไหล ไฟฟ าช อต หรือไฟไหม การติดตั งและการวางระบบสายไฟต องผ านการดำเนินการโดยบุคลากรที มีความชำนาญเพียงพอ อย าใช ท อน ำเข าของเครื องทำน ำอ ุนร วมกับท อน ำออกอื นๆ แรงดันน ำอาจลดลงเนื องจากมีน ำไหลออกจากจุดอื นซึ งอาจทำให น ำจากฝ กบัวมีอุณหภูมิที ร อนมาก สายไฟที มีความยืดหยุ นจะต องใส หน วยผ านจุดที กำหนดเท านั น ไม ได ทำหลุมเพิ มเติม วาล วน ำ ทางออก ป ุมปรับปริมาณน ำ L N WARNING MUST BE TIGHT...

Page 19: ...มิลลิเมตร 3 แกน 2 คลายสกรูเคร ืองยึดสายไฟฟ าและตรึงสายเคเบิล ปลอกปลายสายไฟ เปลือก ออกแล วพันกับ ELB L N ให บิดเป นเกลียวแน น 1 N m 10 kgf cm มม 3 ต อสายไฟฟ าให ถูกต อง L คือสายไฟ N คือสายที เป นกลาง การต อสายไฟฟ าที ไม ถูกต อง L คือสายไฟ N คือสายที เป นกลาง จะเป นสาเหตุทำให เกิดไฟฟ ารั ว ไฟไหม ได โปรดตรวจสอบการเข าสายไฟฟ าให ถูกต อง L คือสายไฟ N คือสายที เป นกลาง ตรวจสอบโดยไขควงเช คไฟ หรือเครื องม...

Page 20: ... างป ุมปรับปริมาณน ำและท อน ำ ห ามใช ผ าเทปพันท อน ำ ควรขันให แน นด วยประแจเลื อน 2 วางปะเก นยางระหว างป ุมปรับปริมาณน ำและตัว เครื อง ห ามใช ผ าเทปพันท อน ำ ควรขันให แน นด วยมือ 3 วางปะเก นยางระหว างสายฝ กบัวและตัวเครื อง ห ามใช ผ าเทปพันท อน ำ ควรขันให แน นด วยมือ 4 วางปะเก นยางระหว างสายฝ กบัวและหัวฝ กบัว ห ามใช ผ าเทปพันท อน ำ ควรขันให แน นด วยมือ 5 ควรปรับป ุมปริมาณน ำเฉพาะท ีป ุมปรับบริเวณด ...

Page 21: ...มบิดสวิตช หลักและปุ มปรับอุณหภูมิเข าไปจนกระทั งปุ มดังกล าวได แทรกเข าไปด านในทั งหมด ไม สามารถทำการแทรกปุ มบิดสวิตช หลักและปุ มปรับอุณหภูมิเข าไปด านในได หากไม ได ปฏิบัติตามขั นที 1 และขั นที 2 ให สอดคล องต อเนื องกัน 5 ยึดสกรูที ด านล างของเครื อง 6 จะยึดแผ นฝาครอบให แน นได อย างไร หมายเหตุ 1 ห ามกดปุ มทดสอบ ELB ในระหว างที ยึดแผ นฝาครอบ 2 ห ามดันปุ มบิดสวิตช หลัก และ ปุ มปรับอุณหภูมิรุนแรงเกิน...

Page 22: ... 22 MEMO ...

Page 23: ... 23 MEMO ...

Page 24: ... 24 MEMO ...

Page 25: ......

Page 26: ...Printed in Malaysia http panasonic co th Panasonic A P Sales Thailand Co Ltd Panasonic Manufacturing Malaysia Berhad F0817 0 ...

Page 27: ......

Page 28: ......
Reviews: