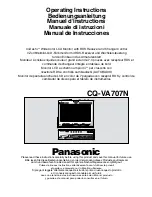
background image

CQ-VA707N

Operating Instructions

Bedienungsanleitung

Manuel d’instructions

Manuale di istruzioni

Manual de Instrucciones

In-Dash 7" Wide Color LCD Monitor with RDS Receiver and Changer Control

7-Zoll Breitbild-LCD-Farbmonitor mit RDS-Receiver und Wechslersteuerung

für den Einbau in das Armaturenbrett

Moniteur à cristaux liquides couleur grand écran de 7,0 pouces avec récepteur RDS et

commande de changeur Iintégré en tableau de bord

Monitor LCD a schermo ampio di 7" per cruscotto con

ricevitore RDS e controllo cambiadischi (AUTORADIO)

Monitor de pantalla ancha de LCD en color de 7 pulgadas con receptor RDS y control de

cambiador de discos para el tablero de instrumentos

Panasonic

Please read these instructions carefully before using this product and save this manual for future use.

Bitte lesen Sie diese Bedienungsanleitung vor der Verwendung dieses Produktes aufmerksam 

durch und bewahren Sie sie danach für spätere Nachschlagezwecke sorgfältig auf.

Prière de lire ces instructions attentivement avant d’utiliser le produit

et garder ce manuel pour l’utilisation ultérieure.

Si prega di leggere attentamente queste istruzioni prima di usare questo prodotto

e di conservare questo manuale per usi futuri.

Lea con atención estas instrucciones antes de utilizar el producto

y guarde este manual para poderlo consultar en el futuro.

TV707W

TV707W

VIDEO

VIDEO

VOLU

ME

VOLUME

PWR

PWR

OPEN/CLOSE

OPEN/CLOSE

AV IN

AV IN

AUDIO

AUDIO

IN-DASH 7.0 WIDE COLOR LCD TV

IN-DASH 7.0 WIDE COLOR LCD TV

MODE

MODE

TILT

TILT

MUTE

MUTE

TV707W

VIDEO

VOLU

ME

PWR

OPEN/CLOSE

AV IN

AUDIO

IN-DASH 7.0 WIDE COLOR LCD TV

MODE

TILT

MUTE

ASPECT

ASPECT

REMOTE

REMOTE

7.0'' WIDE COLOR LCD MONITOR WITH RECEIVER

7.0'' WIDE COLOR LCD MONITOR WITH RECEIVER

NAVIGATION

NAVIGATION

MENU

MENU

ENTER

ENTER

NAVI

NAVI

A

DISC/BAND

DISC/BAND

TRACK

TRACK

ASPECT

REMOTE

 7.0'' WIDE COLOR LCD MONITOR WITH RECEIVER

NAVIGATION

MENU

ENTER

NAVI

A

DISC/BAND

TRACK

CQ-VA707N

CQ-VA707N

CQ-VA707N

AM/FM

VTR1

VTR2

CH·C

TV

VOLU

ME

VOLUME

PWR

PWR

OPEN/CLOSE

OPEN/CLOSE

MODE

MODE

TILT

TILT

MUTE

MUTE

CQ-VA707N

CQ-VA707N

CQ-VA707N

VOLU

ME

PWR

OPEN/CLOSE

 7.0'' WIDE COLOR LCD MONITOR WITH RECEIVER

 7.0'' WIDE COLOR LCD MONITOR WITH RECEIVER

7.0'' WIDE COLOR LCD MONITOR WITH RECEIVER

MODE

TILT

MUTE

LOUD

EON

*

PTY

*

CT

Summary of Contents for CQ-VA707N

Page 1: ...le produit et garder ce manuel pour l utilisation ultérieure Si prega di leggere attentamente queste istruzioni prima di usare questo prodotto e di conservare questo manuale per usi futuri Lea con atención estas instrucciones antes de utilizar el producto y guarde este manual para poderlo consultar en el futuro TV707W TV707W VIDEO VIDEO VOLUME VOLUME PWR PWR OPEN CLOSE OPEN CLOSE AV IN AV IN AUDIO...

Page 2: ...ames of Controls 7 Before Use 11 User Settings 16 Sound Settings 28 Screen Adjustment 30 Operation General 32 Radio Basics 34 Radio Data System RDS 36 CD Changer Basics 44 Auxiliary 48 Installation 50 Electrical Connections 55 Troubleshooting 62 Maintenance 66 Specifications 67 Page Page ...

Page 3: ...igures 1 to 6 can be used The speaker for the car navigation system is integrated in the display unit We designed a small speaker which is built in the display unit This speaker is used only for Panasonic car navigation system CN DV2000EN for example Rear view camera automatic selection Rear view camera is optional When you put a car in reverse a picture taken by the rear view camera is displayed ...

Page 4: ...itor in a position that does not obstruct the driver s vision Do not install the control unit in the following types of location A location which is exposed to water a location where it could be stepped on or a location which is exposed to hot air such as near a heater duct Do not install the unit in an area where it would obstruct the operation of an air bag Ask a trained technician to install th...

Page 5: ...with a click Do not disassemble or short the batteries Do not throw the batteries into a fire To avoid the risk of an accident keep the batteries away from children To store batteries insulate them with tape or the like Contact with metallic objects or other batteries can cause ignition or rupture If the batteries are used in the wrong way there is the danger of liquid leakage rupture injuries and...

Page 6: ... TILT button Note If the display unit is in the retracted position the MENU NAVI NAVIGATION and A ASPECT but tons cannot be used 1 2 3 4 5 6 TA AF PTY A LOC MODE NAVI MENU PWR ENTER MUTE VOLUME TRACK DISC BAND NAVIGATION CHz CHx RANDOM SCAN REPEAT TITLE ASPECT OPEN CLOSE Car AV Infrared Transmitter Direct it at REMOTE Remote Control Sensor on the display unit Numeric button Remote control unit onl...

Page 7: ... TILT MUTE ASPECT CQ VA707N REMOTE 7 0 WIDE COLOR LCD MONITOR WITH RECEIVER NAVIGATION MENU ENTER NAVI A DISC BAND TRACK ASPECT REMOTE 7 0 WIDE COLOR LCD MONITOR WITH RECEIVER NAVIGATION MENU ENTER NAVI A DISC BAND TRACK CQ VA707N Display Unit Operate the controls on the display unit in the same way as you operate the remote control buttons Notes When the display unit is in the retracted position ...

Page 8: ...down for more than 2 seconds to turn the power off VOLUME button TILT button OPEN CLOSE button See pages 55 to 61 about electrical connections Connect the display unit control unit connecting cord a page 55 MUTE LOUD button Hold down for more than 2 seconds to turn the LOUD on off Connect the subconnector parking brake con nection lead reverse lead antenna control lead and illumination lead a page...

Page 9: ...r R Red L White Changer control connector Changer right audio input R Red Changer left audio input L White VIDEO Out Yellow For external video monitor REAR VTR2 right audio input R Red VTR2 left audio input L White VTR2 video input Yellow VTR2 In Pre Out RGB Connector Terminal for con necting to Panasonic car navigation system REMOTE Remote terminal for TV tuner CY TN1500PEN Rear See pages 55 to 6...

Page 10: ...e and in the position adjusted before a pages 12 and 16 Note When the display unit is opened or closed a loud beep sounds three times Cautions Mount the unit in a position where it will be free from contact with any obstacle If the unit stops halfway press OPEN CLOSE again and draw it all the way in Do not forcibly move it by hand Do not enter your finger or hand into moving parts and disc slot Ot...

Page 11: ...ngle TILT and forward backward position data are saved in the memory so when the display unit is drawn out next it is auto matically set at the angle and in the position adjusted before The display position can also be set on the menu screen a page 16 MODE MODE TILT VA707W VIDEO AV IN AUDIO VOL UM E PWR OPEN CLOSE IN DASH 7 0 WIDE COLOR LCD TV RECEIVER MODE TILT MUTE Display Unit Lateral Angle Adj...

Page 12: ... upper portion with non slip finish on the back and return it to the neutral position w Press OPEN CLOSE to retract the display unit Notes When the display unit is opened or closed a loud beep sounds three times The display unit cannot be retract ed if it is not returned to the neutral position If it is not retracted by pressing the OPEN CLOSE button check again that the unit is back in the latera...

Page 13: ...s 19 21 ACC ACC Selection page 27 INPUT SELECT Input Selection page 22 26 TA VOLUME RDS Traffic Announcement Volume Settings page 40 REGION RDS Region Settings page 38 PTY LANGUAGE RDS Program Type Display Language page 43 TONE Tone Bass and Treble Settings page 28 BAL FAD Balance and Fader Settings page 28 LOUD Loudness page 29 BEEP Operation Beep Sound page 29 DIMMER Dimmer Setting page 30 CONTR...

Page 14: ...consists of a menu and submenus Refer to the operation guide shown on the screen Main Menu Setting Adjusting Menu Operation guide TV707W VIDEO VIDEO VOLUME PWR PWR OPE OPEN CLOSE AV IN AV IN AUDIO IN DASH 7 0 WIDE COLOR LC IN DASH 7 0 WIDE COLOR LCD TV MODE MODE TILT TILT MUTE MUTE VIDEO PWR OPE AV IN IN DASH 7 0 WIDE COLOR LC MODE TILT MUTE ASPECT CQ VA707N REMOTE 7 0 WIDE COLOR LCD MONITOR WITH ...

Page 15: ...than 1 second a page 12 Monitor Position TILT SLIDE Notes Press MODE to close the main menu and the setting adjusting menu Press MENU in the setting adjusting menu to return to the main menu mode The setting adjusting menu is automatically closed if no operation is performed for about 10 seconds e TILT Press or to increase or decrease the tilt angle of the display unit TV707W VIDEO VIDEO VOLUME PW...

Page 16: ...U to display the main menu Press or to select USER Press or to select CLOCK w Press ENTER to set CLOCK Enable or disable clock the display Adjust the time 24 hour system Default DISPLAY OFF CLOCK MODE RDS ADJUST 0 00 e Press or to move the cursor Press ENTER to set after each setting Clock Display Select DISPLAY ON Clock display is on OFF Clock display is off Clock Mode Select CLOCK MODE RDS The c...

Page 17: ... of the unit remains normal even when the voice guide of the car navigation system is on The volume can be adjusted with the VOLUME and buttons 1 The volume of the unit is lowered to about 1 3 of the full level when the navigation voice guide is on 2 The volume of the unit is lowered to about 1 10 of the full level when the navigation voice guide is on 3 The volume of the unit is lowered to zero n...

Page 18: ... to use four digits for ID code ID code can not be set with two or three digits Once the ID code has been set the unit cannot be operated if the main power supply is disconnected then re connected It is electronically locked up so that the thief could not use the stolen unit unless that person knows the code you have set The ID code operation must be performed only by the person whom the unit belo...

Page 19: ...MENU ENTER Numeric button Notes Press MODE to close the main menu and the setting adjusting menu Press MENU in the setting adjusting menu to return to the main menu mode The setting adjusting menu is automatically closed if no operation is performed for about 10 seconds TV707W VIDEO VIDEO VOLUME PWR PWR OPE OPEN CLOSE AV IN AV IN AUDIO IN DASH 7 0 WIDE COLOR LC IN DASH 7 0 WIDE COLOR LCD TV MODE M...

Page 20: ...se the main menu and the setting adjusting menu Press MENU in the setting adjusting menu to return to the main menu mode The setting adjusting menu is automatically closed if no operation is performed for about 10 seconds 1 2 3 4 5 6 TA AF PTY A LOC MODE NAVI MENU PWR ENTER MUTE VOLUME TRACK DISC BAND NAVIGATION CHz CHx RANDOM SCAN REPEAT TITLE ASPECT OPEN CLOSE Car AV MODE PWR PWR Power MODE OPEN...

Page 21: ...iew camera is con nected If no rear view camera is connected select OFF TV TUNER Set the terminal to which a TV tuner CY TN1500PEN for example is connected If no TV tuner is connect ed select OFF r If needed set PAL or NTSC for VTR1 and VTR2 Note If the terminal is set as a TV tuner the TV mode is automati cally set to PAL and NTSC is not available VTR1 VTR2 Control Unit front 1 2 3 4 5 6 TA AF PT...

Page 22: ...ystem is connected to another than the RGB terminal VTR1 or VTR2 set the navigation screen to NTSC To watch a DVD video of the PAL system with the car navigation system change the setting to PAL on this menu RCA cord It is recommended that the VTR output RCA cord of a car navigation system be connected to VTR1 If a DVD video disc is inserted in this case the VTR1 DVD video mode is automati cally s...

Page 23: ...R2 TV TUNER OFF VTR1 VTR2 VTR1 PAL NTSC VTR2 PAL NTSC Use the same signal as the rear view camera ordinary PAL Set the connector that connect ed to a rear view camera VTR1 NAVI RGB VTR1 VTR2 CAMERA OFF VTR1 VTR2 TV TUNER OFF VTR1 VTR2 VTR1 PAL NTSC VTR2 PAL NTSC If the terminal is set as a TV tuner the TV mode is automati cally set to PAL and NTSC is not available Set the connector that is con nec...

Page 24: ...Navigation System CN DV2000EN and TV Tuner CY TN1500 PEN Car Navigation CN DV2000EN RGB DVD Player CN DV2000EN VTR1 TV Tuner CY TN1500PEN VTR2 NAVI RGB VTR1 VTR2 CAMERA OFF VTR1 VTR2 TV TUNER OFF VTR1 VTR2 VTR1 PAL NTSC VTR2 PAL NTSC Connect car navigation to RGB No rear view camera Connect TV tuner to VTR2 Set PAL used in DVD to VTR1 Set PAL used in TV tuner to VTR2 NAVI RGB VTR1 VTR2 CAMERA OFF ...

Page 25: ...in menu mode The setting adjusting menu is automatically closed if no operation is performed for about 10 seconds User Settings Continued NAVI RGB VTR1 VTR2 CAMERA OFF VTR1 VTR2 TV TUNER OFF VTR1 VTR2 VTR1 PAL NTSC VTR2 PAL NTSC Connect car navigation system to VTR1 Rear view camera is not con nected Connect TV tuner to VTR2 Use the same signal as the car navigation system in VTR1 ordinary NTSC Se...

Page 26: ...unit before stopping the engine Otherwise the unit keeps consuming the power Consequently the battery goes dead Default ACC OFF ACC Selection ACC ACC ON ACC provided ACC OFF ACC not provided TV707W VIDEO VIDEO VOLUME PWR PWR OPE OPEN CLOSE AV IN AV IN AUDIO IN DASH 7 0 WIDE COLOR LC IN DASH 7 0 WIDE COLOR LCD TV MODE MODE TILT TILT MUTE MUTE VIDEO PWR OPE AV IN IN DASH 7 0 WIDE COLOR LC MODE TILT ...

Page 27: ...justment range 12 dB to 12 dB TV707W VIDEO VIDEO VOLUME PWR PWR OPE OPEN CLOSE AV IN AV IN AUDIO IN DASH 7 0 WIDE COLOR LC IN DASH 7 0 WIDE COLOR LCD TV MODE MODE TILT TILT MUTE MUTE VIDEO PWR OPE AV IN IN DASH 7 0 WIDE COLOR LC MODE TILT MUTE ASPECT CQ VA707N REMOTE 7 0 WIDE COLOR LCD MONITOR WITH RECEIVER ON NAVIGATION MENU MENU ENTER ENTER NAVI A DISC BAND DISC BAND TRACK TRACK ON MENU ENTER DI...

Page 28: ... MODE TILT TILT MUTE MUTE VIDEO PWR OPE AV IN IN DASH 7 0 WIDE COLOR LC MODE TILT MUTE ASPECT CQ VA707N REMOTE 7 0 WIDE COLOR LCD MONITOR WITH RECEIVER ON NAVIGATION MENU MENU ENTER ENTER NAVI A DISC BAND DISC BAND TRACK TRACK ON MENU ENTER DISC BAND TRACK TILT TILT TILT MENU ENTER MENU ENTER q Press MENU to display the main menu Press or to select SOUND Press to select BEEP Beep w Press ENTER to ...

Page 29: ...MENU in the setting adjusting menu to return to the main menu mode The setting adjusting menu is automatically closed if no operation is performed for about 10 seconds Screen Adjustment TV707W VIDEO VIDEO VOLUME PWR PWR OPE OPEN CLOSE AV IN AV IN AUDIO IN DASH 7 0 WIDE COLOR LC IN DASH 7 0 WIDE COLOR LCD TV MODE MODE TILT TILT MUTE MUTE VIDEO PWR OPE AV IN IN DASH 7 0 WIDE COLOR LC MODE TILT MUTE ...

Page 30: ...DASH 7 0 WIDE COLOR LCD TV MODE MODE TILT TILT MUTE MUTE VIDEO PWR OPE AV IN IN DASH 7 0 WIDE COLOR LC MODE TILT MUTE ASPECT CQ VA707N REMOTE 7 0 WIDE COLOR LCD MONITOR WITH RECEIVER ON NAVIGATION MENU MENU ENTER ENTER NAVI A DISC BAND DISC BAND TRACK TRACK ON MENU ENTER DISC BAND TRACK TILT TILT TILT MENU ENTER MENU ENTER q Press MENU to display the main menu Press or to select SCREEN Press or to...

Page 31: ...me func tion Note Adjust the volume while the volume indicator appears on the display Volume Level 0 to 40 Mute Press MUTE to mute the sound completely Operation General AM FM VTR1 VOLUME VOLUME PWR OPEN CLOSE MODE TILT MUTE CQ VA707N CQ VA707N CQ VA707N VOLUME 7 0 WIDE COLOR LCD MONITOR WITH RECEIVER MUTE LOUD MUTE Volume MUTE MODE TR1 VTR2 CH C TV UME PWR PWR OPEN OPEN CLOSE MODE MODE TILT TILT ...

Page 32: ...audio signal is switched while the video signal remains as it is The volume of the voice guidance from the car navigation system and the volume of the main unit radio CD changer VTR1 VTR2 can be set a page 18 Displaying the Car Navigation Screen A Panasonic car navigation system must be connected This function allows a parallel operation While you follow the Navigation Screen you can listen to rad...

Page 33: ...oise when receiving a stereo broadcast Press ENTER to switch the MONO mode on or off ENTER LOC Local TV707W VIDEO VIDEO VOLUME PWR PWR OPEN CLOSE AV IN AV IN AUDIO IN DASH 7 0 WIDE COLO IN DASH 7 0 WIDE COLOR LCD TV MODE MODE TILT TILT MUTE MUTE VIDEO PWR AV IN IN DASH 7 0 WIDE COLO MODE TILT MUTE ASPECT CQ VA707N REMOTE 7 0 WIDE COLOR LCD MONITOR WITH RECEIVER ON NAVIGATION MENU MENU ENTER ENTER ...

Page 34: ... Station Preset Press any of the buttons 1 to 6 to tune in to the preset station Only for remote control Auto Station Preset Activate the automatic search for the strongest available stations on the presently received band starting from the lowest frequency Then store the stations offering the best reception to preset buttons 1 to 6 Up to six stations can be memorized per band Only for remote cont...

Page 35: ...rogram TP Broadcasting of traffic information Traffic Announcements TA Radio announcements on traffic conditions Program Type Display Program Type PTY RDS FM stations provide a program type identi fication signal Example news rock classical music etc Enhanced Other Networks EON When EON data is received the EON indicator lights and the TA and AF functions are expanded as follows TA Traffic informa...

Page 36: ...uency AF Press AF to change AF mode as follows Only for remote control Auto Preset Memory Auto preset memory works only for RDS stations when the AF mode is on a page 35 about auto preset memory Best Station Search Best Station Search is automatically activated to store the station with the best reception for each preset button Region Mode Changes the selection range of AF and Best Station Search ...

Page 37: ...E ASPECT OPEN CLOSE Car AV MENU ENTER MENU ENTER Changes the selection range of AF and Best Station Search Default REGION OFF Region Setting REGION ON REGION OFF The frequency is changed only for programs within the region The frequency is changed also for programs out side the region TV707W VIDEO VIDEO VOLUME PWR PWR OPE OPEN CLOSE AV IN AV IN AUDIO IN DASH 7 0 WIDE COLOR LC IN DASH 7 0 WIDE COLO...

Page 38: ...TA mode is on TA Volume The TA volume can be adjusted to a level different from the regular volume a page 40 Muting in TA Mode To listen only to traffic announcement while muting qAdjust the TA volume a page 40 wSet the regular volume level to 0 a page 32 TA Stand By Even when the CD changer the VTR1 or VTR2 mode is selected FM traffic announcements will interrupt them If TA is pressed in the CD c...

Page 39: ...ain menu mode The setting adjusting menu is automatically closed if no operation is performed for about 10 seconds VOLUME VOLUME PWR PWR OPEN CLOSE MODE MODE TILT MUTE CQ VA707N VOLUME PWR 7 0 7 0 WIDE COLOR LCD MONITOR WITH RECEIVER 7 0 MODE MUTE LOUD Volume BAND MODE MODE MODE BAND Volume W TV707W VIDEO VIDEO VOLUME PWR PWR OPEN CLOSE OPEN CLOSE AV IN AV IN AUDIO AUDIO IN DASH 7 0 WIDE COLOR LCD...

Page 40: ...PTY Selection q Press to change the program type as follows opposite direction SPEECH MUSIC News Current Affairs Information Sport Education Drama Cultures Science Varied Speech Pop Music Rock Music Easy Listening Light Classics M Serious Classics Other Music Weather Metr Finance Children s Progs Social Affairs Religion Phone In Travel Touring Leisure Hobby Jazz Music Country Music National Music ...

Page 41: ...olk M News Sport Pop M Classics PTY Preset Program types are stored in memory under the preset buttons 1 to 6 shown in the table below To tune in to the desired program type press any of the preset buttons 1 to 6 PTY Search If a preset call has failed search the program type station as follows q Select a program type by pressing the preset button The preset program type appears on the display for ...

Page 42: ... certain channels Notes Press MODE to close the main menu and the setting adjusting menu Press MENU in the setting adjusting menu to return to the main menu mode The setting adjusting menu is automatically closed if no operation is performed for about 10 seconds TV707W VIDEO VIDEO VOLUME PWR PWR OPE OPEN CLOSE AV IN AV IN AUDIO IN DASH 7 0 WIDE COLOR LC IN DASH 7 0 WIDE COLOR LCD TV MODE MODE TILT...

Page 43: ...laying If the navigation mode is ON only the audio signal is switched while the video signal remains as it is The mode can be changed even when the display unit is in the retracted position FM AM LW MW VTR2 CH C VTR1 Changer Control 3 TITLE Title Display Track title or disc title appears on the display only when the unit is connected to a CD changer that can recognize CD text CX DP9061EN for examp...

Page 44: ...tracks on all discs in the magazine will be played in a random sequence Press 4 RANDOM again to cancel Disc Random Only for remote control Play the tracks of the disc you are currently listening to in random order Press and hold 4 RANDOM for more than 2 seconds All the available tracks on the current disc will be played in a random sequence Press and hold 4 RANDOM for more than 2 seconds again to ...

Page 45: ...conds of the first track on all discs in the changer in sequential order starting from the disc following the one you are cur rently listening to Press and hold 5 SCAN for more than 2 seconds The 1st track of all the discs in the magazine is played for 10 seconds each When all discs are scanned resume normal play from the start of the original disc Press and hold 5 SCAN for more than 2 seconds aga...

Page 46: ...te This function is not available when there is no disc in the con nected CD changer or when the magazine is not in the changer 1 2 1 CHz 2 CHx CD changer indicator This function lets you control two CD changers through the optional dual CD Changer control unit CA CD55EN Change over between two connected CD changers Default CH 1 Press 1 CHz or 2 CHx to select CD changer 1 or CD changer 2 a page 60...

Page 47: ...R1 mode the video and audio from the external device connected to VTR1 IN are selected In VTR2 mode the video and audio from the external device connected to VTR2 IN are selected If the navigation mode is ON only the audio signal is switched while the video signal remains as it is a page 33 The mode can be changed even when the display unit is in the retracted position Control Unit Front Notes If ...

Page 48: ...ct ratio of 16 to 9 The extension ratio increas es toward the right and left ends of the screen Full The screen is extended horizontally as a whole to the aspect ratio of 16 to 9 The extension ratio is the same at any point of the screen Zoom The screen is fully extended at the normal aspect ratio of 4 to 3 The top and bottom of the screen are slightly cut Aspect Ratio for VTR Mode Press A ASPECT ...

Page 49: ...n a horizontal posi tion with the front end up at a convenient angle but not more than 30 Caution Do not disconnect the battery terminals of a car with trip or navigational computer since all user settings stored in memory will be lost Instead take extra care with installing the unit to prevent shorts 30 or less Dashboard Installation Installation Opening The unit can be installed in any dashboard...

Page 50: ... Failure to do so may result in damage to the unit 3 Connect the power lead after all other connections are made 4 Be sure to connect the battery lead yellow to the positive terminal of the battery or fuse block BAT terminal 5 Insulate all exposed wires to prevent short circuiting 6 Secure all loose wires after installing the unit 7 Please carefully read the operating and installation instructions...

Page 51: ...oard and bend the mounting tabs out with a screwdriver 1 e Mounting Spring i Screw Mounting Tabs r Mounting Bolt 6 Ground Lead Secure the rear of the unit Fix the rear of the unit to the car body by either method a or b shown at right after fixing Ground Lead 6 Subconnector 7 and Display Unit Control Unit Connecting Cord 8 3 Insert Trim Plate q 4 After installation reconnect the negative battery t...

Page 52: ...d 1 4 Clip Connector 1 5 Wiping Cloth 1 6 Ground Lead 2 7 1 1 9 Radio Antenna Extension Cord 1 u Rear Support Strap 1 a Using the Rear Support Strap u Display Unit 3 mmφ y Tapping Screw 5 mmφ x 16 mm Fire wall of car t Hex Nut 5 mmφ Display Unit b Using the Rubber Cushion Option Rubber Cushion option r Mounting Bolt 5 mmφ Display Unit w Mounting Collar Dashboard Fastening the Mounting Collar The t...

Page 53: ...r radio antenna cord to the control unit using radio antenna exten sion cord 9 between them Notes Never mount the control unit in any of the following locations to avoid damage due to overheating 1 Near the heater port 2 Places like the dashboard or rear deck where it may be exposed to direct sunlight Do not mount the control unit near the door where it could be exposed to rain Control Unit o Velc...

Page 54: ...metallic part of the car chassis TV Control Lead To the power control lead of the Panasonic TV tuner Battery Lead To the car battery continuous 12V DC Navi Mute Lead To the Navi Mute lead of the Panasonic car navigation system for example CN DV2000EN Video Control Lead To the Video Control lead of the Panasonic car navigation system for example CN DV2000EN Blue w yellow stripe SIDE BRAKE Reverse L...

Page 55: ...Car Navigation CY TN1500PEN TV Tuner Front Rear Yellow Yellow White White Red Red Yellow White Red Black Black Blue w white stripe Blue w white stripe RCA Cord RGB Cord supplied to CN DV2000EN White L RCA Cord Red R R L Video R L Video R L Video L L Video R R L Video R Remote DIN Cord Extension Cord DIN BATT RCA GND R L Remote Video R L Remote Video PWR CONT Remote RGB RGB RCA Cord supplied to CY ...

Page 56: ...ing conditions are met The RCA cord of the car navigation system is connected to VTR1 NAVI is set to RGB using INPUT SELECT The car navigation system is connected to VA707 with both the RGB cord and RCA cord Display Unit Rear 7 Subconnector 6 Ground Lead 2 Power Connector Orange NAVI MUTE NAVI MUTE VIDEO CONT Navi Mute Lead The volume of the unit is lowered when the navigation voice guide is on Po...

Page 57: ...Cord External Amplifier Control Power Cord Blue w white stripe Amplifier Control Power Cord Blue w white stripe Connect to AMP CONT Center Speaker EAB CF2 Left Speaker Rear Right Speaker Rear Left Speaker Front Right Speaker Front Amplifier Control Power Lead Blue w white stripe RCA Cord option RCA Cord option RCA Cord option RCA Cord option When a two way cord is used Resistor 220Ω Fuse 5A Black ...

Page 58: ...it etc Optical Fiber Cable CA LRD60 option Rear Front 8 Display Unit Control Unit Connecting Cord 2 Power Connector 77 Subconnector Yellow White CQ VA707N Control Unit Do not connect to the Video Control Lead of CX DV1500 L ACC or IGN Power Lead Panasonic Red Resistor 1kΩ ACC When connected to the external amplifier control power lead AMP CONT of CY AC300 instead of connecting to the ACC power sou...

Page 59: ...5EN RCA Cord Supplied to CA CD55 CA CD55EN CQ VA707N Control Unit Front Rear CD C 1 TWIN CD C CONT CX DP9061EN DIN Cord RCA Cord R Red R Red L White L White White Red Yellow Black Battery Lead To the car battery continuous 12V DC Ground Lead To a clean bare metallic part of the car chassis CD C 2 TWIN CD C CONT L R Dual CD Changer Control Lead Brown w white stripe Electrical Connections Continued ...

Page 60: ...rake lever Comes up to this point Parking Brake Connection Lead Blue w yellow stripe Power Source Side Lead Caution For safety be sure to ask your nearest professional installer to do this connection Connecting the Reverse Cord In case using an optional rear view camera the reverse lead must be connected Connect the reverse lead violet w white stripe to the positive lead of the reverse lamp the la...

Page 61: ...arest authorized Panasonic Service center The unit should be serviced only by a qualified technician Fuse Use fuses of the same specified rating 10 A Using different substitutes or fuses with higher ratings or connecting the unit directly without a fuse could cause fire or damage to the unit If the replacement fuse fails contact your nearest authorized Panasonic Service Center Caution If you press...

Page 62: ...ables to terminals that are always live Connect accessory power cord with ACC power supply of the car Bad ground lead connection Connect ground lead to a metallic part of your car A connecting cord between the display unit and the con trol unit is not connected correctly Check the connecting cord between the display unit and the control unit Error Display Message CD Changer Note Display contents a...

Page 63: ...connections Leave for some time before use Volume is too low Raise volume Volume is too low Raise navigation volume Obstacle is in the way Be careful not to let the cord be caught and use the display unit in a position free of contact with obstacles Display unit is not in the neutral position of its lateral angle Navigation volume set to 0 No image Screen too dark Screen whitish Tone not good colo...

Page 64: ...une in to a station emitting strong signals Station is too far or signals are too weak Display brightness and col ors are not correctly adjust ed VTR or video camera is not correctly connected Correct mode is not selected Colors are not correctly reproduced Adjust display brightness and colors Setting PAL NTSC is not correct Rough screen Set PAL NTSC correctly Rear view camera is not correctly con...

Page 65: ...rt by wiping lightly with a soft cloth When the unit is dirty wipe the surface of the display using Wiping Cloth 5 an accessory to the unit Without a Wiping Cloth When the unit is dirty wipe with a well wrung cloth dipped in a liquid dishwashing detergent neutral diluted with water and then go over the same surface with a dry cloth Since there is the possibility of water drops getting inside of th...

Page 66: ...ensions 156 W x 87 H x 178 D mm Number of Pixels 336 960 pixels 234 vertical x 480 horizontal x 3 Valid Pixel Ratio over 99 99 Display Method Transparent color filter format Drive Method TFT Thin Film Transistor active matrix format Light Source Internal light built in small fluorescent lamp Speaker 36 mm round speaker one Sound Output 0 7 W FM Stereo Radio Frequency Range 87 5 108 MHz Usable Sens...

Page 67: ...YEFM283609 B0900 0 Printed in Japan Matsushita Electric Industrial Co Ltd Central P O Box 288 Osaka 530 91 Japan ...

Reviews: