background image

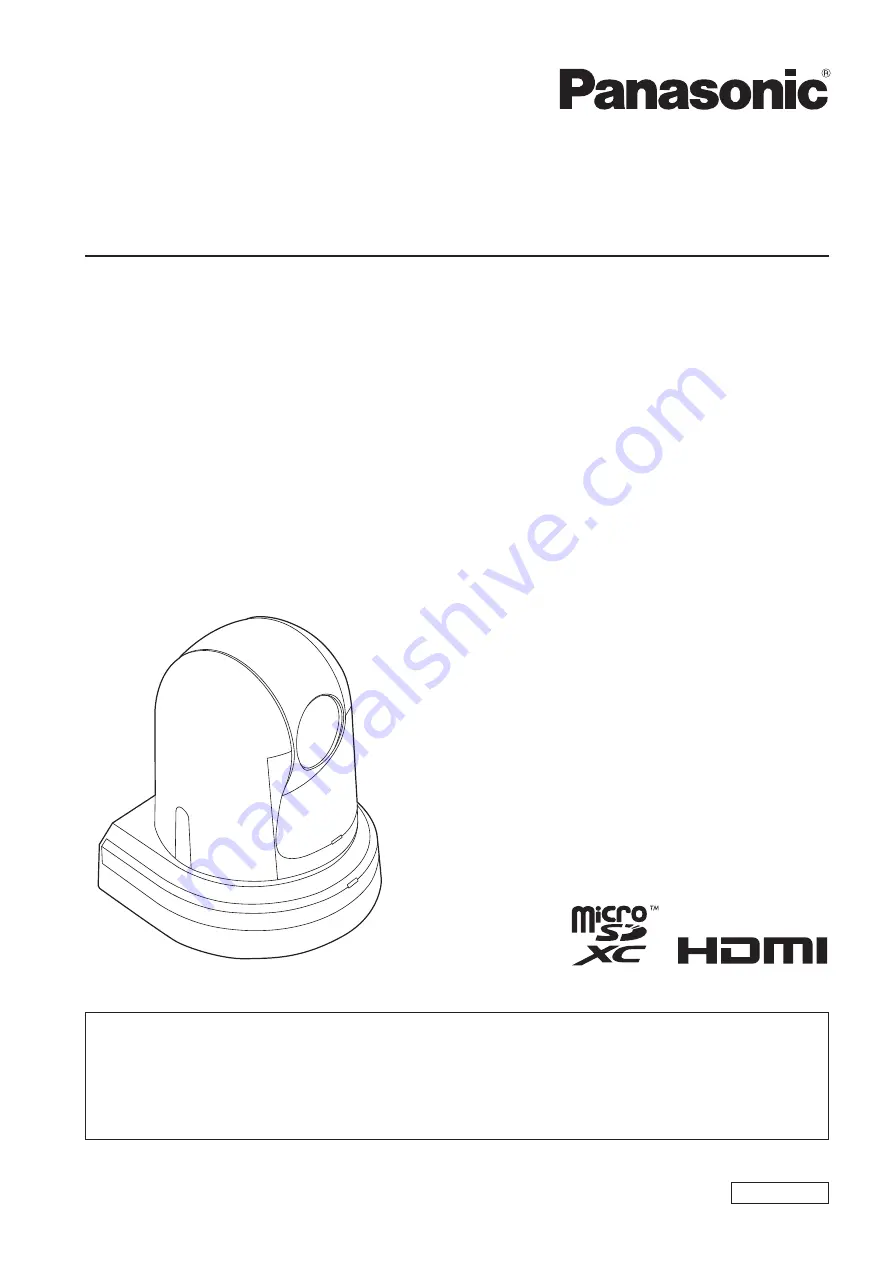
Operating Instructions

<Operations and Settings>

HD Integrated Camera

  How the Operating Instructions are configured

 <Basics>:

     The <Basics> describes the procedure for basic operation and installation. Before installing this unit, be 

sure to take the time to read through <Basics> to ensure that the unit will be installed correctly.

  <Operations and Settings> 

(this manual):

    This <Operations and Settings> describes how to operate the unit and how to establish its settings.


Model No. 

AW‑HE40HWP


Model No. 

AW‑HE40HKP


Model No. 

AW‑HE40HWE


Model No. 

AW‑HE40HKE


Model No. 

AW‑HE40SWP


Model No. 

AW‑HE40SKP


Model No. 

AW‑HE40SWE


Model No. 

AW‑HE40SKE

ENGLISH

SQW0456

F0715TY0

Summary of Contents for aw-he40 series

Page 1: ...t be sure to take the time to read through Basics to ensure that the unit will be installed correctly Operations and Settings this manual This Operations and Settings describes how to operate the unit...

Page 2: ...expressly prohibited Abbreviations The following abbreviations are used in this manual Microsoft Windows 7 Professional SP1 32 64 bit is abbreviated to Windows 7 Microsoft Windows 8 Pro 32 64 bit is...

Page 3: ...reen 35 Camera screen when Full Auto is selected 36 Camera screen when Manual1 to 3 is selected 36 Contrast 1 2 screen 37 Contrast 2 2 screen 38 Picture 1 3 screen 39 Picture 2 3 screen 40 Picture 3 3...

Page 4: ...ack to suit your intended application and environment Equipped with a newly developed codec engine the unit can output Full HD images at up to 60 fps via a network Changing the Priority Mode enables o...

Page 5: ...ed content and does not guarantee any content if recording or editing does not work properly Likewise the above also applies in a case where any type of repair is made to this unit Network security As...

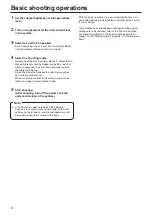
Page 6: ...eferences When continuing to shoot in the same circumstances there is no need to select another mode 5 Start shooting After shooting turn off the power of all the units and devices in the system If Fu...

Page 7: ...ed The pan tilt unit is moved to the position which was stored in the memory when the transition to the STANDBY mode was made POWER ON preset The pan tilt unit is moved to the setting which was establ...

Page 8: ...e played back on the Web screen downloaded to a personal computer and transferred to an FTP server USB Enables the unit to be used as a Web camera The camera can also be controlled from a personal com...

Page 9: ...ng conditions and suits your preferences The settings can be changed by menu operations The results of the white balance and other adjustments are stored in the memory separately by shooting mode Be a...

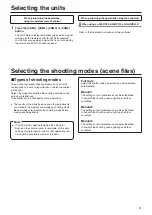
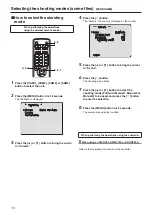
Page 10: ...ress the button The Camera sub menu is displayed on the monitor Camera Scene Full Auto Contrast Level 0 Day Night Day Night Day Level Return 5 Press the or button to bring the cursor to Scene 6 Press...

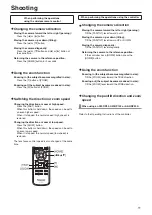
Page 11: ...direction or zoom at low speed Press the SLOW button When this button is held down the speed can be set to an even lower speed When it is tapped the normal speed low speed is restored The lens focus...

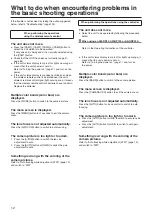
Page 12: ...US button to switch to auto focusing The camera picture is too light or too dark 1 Press the A IRIS button to switch the lens iris adjustment to auto 2 Press the AUTO button of GAIN to switch the gain...

Page 13: ...that is used for operation White balance adjustment pages 17 to 20 This adjustment is performed to express the white accurately Its setting also has an effect on the color tones of the entire screen I...

Page 14: ...manual the subject may go out of focus during panning tilting and zooming Therefore the unit comes with a function which compensates for this Focus compensation during zooming function Focus ADJ With...

Page 15: ...gain There are two ways to adjust the gain One way involves using the buttons on the wireless remote control or controller the other way involves using the Camera menu or Web setting The gain can be...

Page 16: ...while the recalling of a preset is in progress However the preset actions will be canceled If a preset is recalled while the recalling of another preset is in progress the current preset actions are c...

Page 17: ...essing the buttons on the controller provided that they are going to be used under the same conditions as the ones established when the values were set There is no need to set it again Once a new sett...

Page 18: ...Press the MODE button to switch to the camera picture When the adjustment has failed an error message such as OUT RANGE NG HIGH LIGHT NG LOW LIGHT NG ATW NG 3200K NG 5600K NG or VAR NG is displayed Ho...

Page 19: ...such as sunlight or fluorescent lighting applies When switching from Night mode to Day mode the white balance may shift out of adjustment Notes 3200K and 5600K presets When 3200K or 5600K is selected...

Page 20: ...e or button to bring the cursor to Picture 3 Press the button The Picture 1 3 sub menu is displayed Picture 1 3 Chroma Level 0 White Balance Mode VAR Color Temperature 3200K R Gain 0 B Gain 0 Pedestal...

Page 21: ...re in How to select the shooting mode page 10 under Selecting the shooting modes scene files 4 Press the or button to bring the cursor to Picture 5 Press the button The Picture 1 3 sub menu is display...

Page 22: ...oller AW RP50 AW RP120 AK HRP200 Selecting the unit to be operated Press the CAM1 CAM2 CAM3 or CAM4 button Press one of the CAMERA STATUS SELECTION buttons 1 Press and hold the SELECT button for about...

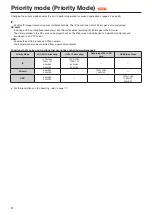
Page 23: ...er Not supported Not supported Day Night Supported with some restrictions 4 Supported with some restrictions 4 White Balance Mode Supported 1 AWB A AWB B ATW only Supported AWB A AWB B ATW only AWB AB...

Page 24: ...ayed Some sub menu items have a sub menu of their own 5 Press the or button to bring the cursor to the item to be set Each time the or button is pressed the cursor moves The cursor can be moved in the...

Page 25: ...TATUS SELECTION button to select the unit you want to operate 2 Press and hold the CAMERA OSD button on the AW RP50 for about 2 seconds The AW HE40 camera menu appears on the monitor 3 Turn the F1 dia...

Page 26: ...ghts and the GROUP menu appears on the LCD panel 5 Turn the F1 dial to select COLOR TEMP then press the F1 dial The color temperature appears on the bottom right F2 area of the LCD panel 6 Turn the F2...

Page 27: ...hen press the F2 dial Off Do not freeze the current preset playback images On Freeze the current preset playback images Digital image stabilization function setting 1 Press the MENU button on the AW R...

Page 28: ...P and DIGITAL EXTENDER to the USER buttons You can assign the on off functions for freezing images during preset playback FREEZE DURING color temperature settings COLOR TEMP and digital extender funct...

Page 29: ...RP120 for about 2 seconds The AW HE40 camera menu appears on the monitor 3 Turn the F1 dial to select an AW HE40 camera menu item or to change a setting value Turn the F1 dial to move the cursor up an...

Page 30: ...1 dial Slow or Fast appears on the bottom right F2 area of the LCD panel 4 Turn the F2 dial to select Slow or Fast then press the F2 dial Freezing images during preset playback FREEZE DURING 1 Press t...

Page 31: ...e USER buttons You can assign the on off functions for freezing images during preset playback FREEZE DURING color temperature settings COLOR TEMP and digital extender function DIGITAL EXTENDER to the...

Page 32: ...umber 3 Press the SELECT button Control of the selected camera is enabled For operating the camera menus When the CHARA MENU button is pressed for 2 seconds the selected camera menu is displayed overl...

Page 33: ...nsition from SYNC See No 36 13 Scene user file selection switch SCENE USER FILE SHIFT 14 Scene user file 1 switch SCENE USER FILE1 Equivalent to Manual1 15 Scene user file 2 switch SCENE USER FILE2 Eq...

Page 34: ...ssible using the UP and DOWN buttons 43 Red green tally display call switch TALLY CALL CALL is disabled 44 Alarm display ALARM 45 Optical alarm display OPT 46 Iris master pedestal lock IRIS M PED LOCK...

Page 35: ...Top Menu indicates the first hierarchical level whereas Camera and Maintenance indicate that the second hierarchical level is now displayed Menu items accompanied by a mark indicate data which is stor...

Page 36: ...de concerned is displayed Contrast Level 10 to 10 Set here is the contrast level when the image brightness is adjusted Day Night Day Night Auto This is used to select normal shooting or low light shoo...

Page 37: ...When 59 94 Hz has been set as the unit s frequency When Step is selected as the Shutter Mode When Synchro is selected as the Shutter Mode 1 100 1 250 1 500 1 1000 1 2000 1 4000 1 10000 59 94 Hz to ma...

Page 38: ...either adjust the focus or set the focus to auto Even when Auto is selected shooting may not switch between day and Night mode as expected depending on the subject In such cases perform the following...

Page 39: ...scent lighting is used as the light source VAR Specify a color temperature from 2400K to 9900K Color Temperature 2400K to 9900K Specify a color temperature from 2400K to 9900K in increments of about 1...

Page 40: ...stop for about 30 seconds When Low or High is selected it will take longer for the brightness of the image to converge When Low or High is selected brightness cannot be adjusted When Low or High is se...

Page 41: ...to shoot images in shade or shadow more brightly The function takes effect when Auto has been selected as the Contrast Mode Gain or Frame Mix item setting DNR Off Low High Set here is the level of th...

Page 42: ...Normal EBU NTSC User The preset color matrix data is loaded and the saturation and phase are compensated accordingly When User is selected the saturation and phase can be finely adjusted using the 16...

Page 43: ...Output This displays the Output screen on which to select the camera s output image settings Others This displays the Others screen on which to select the settings for the installation status of the c...

Page 44: ...it will restart automatically Operation will not be possible while the unit is restarting Some peripheral devices may not recognize that the unit has restarted If you change the frequency be sure to r...

Page 45: ...s and confirm the format is set to the post change format and the display returns to the Output screen If you move the cursor to No and confirm the format is set to the pre change format and the displ...

Page 46: ...egenerated Mode A Pan Tilt Zoom including digital zoom Focus Iris Gain White BAL Mode B Pan Tilt Zoom including digital zoom Focus Iris Mode C Pan Tilt Zoom including digital zoom Focus Freeze During...

Page 47: ...ection Depending on the shooting conditions the function may not be able to differentiate between movement of the subject and movement of the unit resulting in correction errors Notes Tally Disable En...

Page 48: ...according to the Audio setting in the camera menu Note Bars Type Type1 Type2 Change the type of color bar to display Type1 Type2 OSD Off With Tally Off On This is used to enable or disable the functio...

Page 49: ...the volume set to high Line Middle Use the line input with the volume set to medium Line Low Use the line input with the volume set to low Plugin Power Off On Turn the plugin power for the audio off o...

Page 50: ...hich the user can check the IP Address Subnet Mask and Default Gateway settings which have been established in the unit Initialize This is selected to display the Initialize screen on which the user c...

Page 51: ...en the Initialize screen appears Initialize screen Initialize Do you want to initialize Menu settings CANCEL O K Return When the cursor is moved to O K on the Initialize screen and the setting is ente...

Page 52: ...dB increments AGC Max Gain 24dB 6dB to 48dB 6dB increments Contrast 2 2 Day Night Day Day Day Night Auto Night Day Level Mid Mid Low Mid High Picture Picture 1 3 Chroma Level 2 3 to 3 White Balance Mo...

Page 53: ...1080 50p 1080 50i 1080 25PsF 1080 25p 720 50p AW HE40S 59 94Hz 1080 59 94i 1080 59 94i 1080 29 97PsF 1080 29 97p 720 59 94p 50Hz 1080 50i 1080 50i 1080 25PsF 1080 25p 720 50p Frequency AW HE40HWP AW...

Page 54: ...Low Plugin Power Off Off On ALC On Off On Equalizer Off Off Low Cut Speech Enhancement Protocol Model Select SEVIHD1 SEVIHD1 SBRC300 SBRCZ330 Reserved1 Reserved2 Reserved3 Reserved4 Reserved5 Reserved...

Page 55: ...r software must have already been installed in order to display the unit s IP videos using a personal computer which is running Windows This is not required for a personal computer which is running OS...

Page 56: ...ificantly restrictions imposed by the graphics processing GDI of the operating system installed may give rise to a phenomenon called screen tearing where parts of the picture are not displayed in sync...

Page 57: ...ive screen Live Single display mode You can display images from the camera on a personal computer and perform camera operations such as pan tilt zoom and focus control The items displayed on the scree...

Page 58: ...other screen When the screen is updated Note 4 Stream buttons Stream When H 264 is selected These buttons appear only when H 264 images are displayed 1 When selected the text on the button turns green...

Page 59: ...ing and the new setting to be entered If OSD menu display is set to On by Web screen operation the OSD menu is also displayed for the monitor video Note 7 Power ON button Power ON Standby button Stand...

Page 60: ...and its buttons To adjust the image in the horizontal or vertical direction panning or tilting left click the pad and the buttons The more the outside of the pad is clicked the faster the camera opera...

Page 61: ...n area When the image is displayed at the correct resolution the image is displayed in full screen mode To return to the Live screen press the Esc key on the personal computer while the image is displ...

Page 62: ...creens Multi screen consisting of 16 sub screens 1 1 Multi Screen list box Multi screen The live screen Live display method is selected here Single The IP videos of the connected camera are displayed...

Page 63: ...5 4 Click the OK button Click OK again when the following screen appears While the initial settings remain used for the user name and password a message prompting the user to change the user name and...

Page 64: ...ti screen setup page 86 4 User mng button User mng When the User mng button is pressed the User mng screen is displayed in the main area User management screen User mng page 87 5 Network button Networ...

Page 65: ...is changed the operation of the mode before the change is forcefully stopped Note Clock settings tab Date Time Configure the settings for the clock Set the clock using any of the three methods PC sync...

Page 66: ...page tab Live page Configure the setting for the camera title Camera title Input the name of the camera here When the Set button is clicked the input name appears in the camera title display area The...

Page 67: ...Mbps 1280x720 50p 15Mbps 1280x720 25p 8Mbps 1280x720 25p 4Mbps 1280x720 25p 2Mbps Record tally Turn the function for the tally lamp to light when recording to an SD card on off Factory settings Off Re...

Page 68: ...ed on this screen z zInitial display settings for Live page Stream Select the images to display when the Live screen Live is opened Setting value H 264 1 Display videos H 264 1 H 264 2 Display videos...

Page 69: ...y 2 types for each resolution Setting value Fine Normal Factory settings Fine z zH 264 1 H 264 2 H 264 3 H 264 4 Configure the settings for H 264 images H 264 transmission Whether to transmit the H 26...

Page 70: ...imum bit rate Setting value 512kbps 768kbps 1024kbps 1536kbps 2048kbps 3072kbps 4096kbps 6144kbps 8192kbps 10240kbps 12288kbps 14336kbps 16384kbps 20480kbps 24576kbps Factory settings H 264 1 14336kbp...

Page 71: ...port Audio Usable port number range 1024 to 50000 Only even numbers can be specified The port number cannot be set to 10670 Factory settings H 264 1 33004 H 264 2 33014 H 264 3 33024 H 264 4 33034 Th...

Page 72: ...below configuration and transmission may not be possible If configuration of JPEG 1 to 3 and H 264 1 to 4 settings is not possible check the bit rate total and then configure the settings again Bit r...

Page 73: ...m Use this when audio is input to the camera via line input Line Low Set the volume to low Use this when audio is input to the camera via line input Factory settings Line Middle Plugin Power Turn plug...

Page 74: ...ts for the shooting conditions at hand are automatically established When Full Auto has been selected the detailed setting and adjustment menus are not displayed Manual1 to 3 In these modes the detail...

Page 75: ...is performed it will appear as if the images are missing some frames Setting value Auto Off 6dB 12dB 18dB 24dB Factory settings Auto Auto F Mix Max Gain When Auto for the Contrast Mode or Auto for the...

Page 76: ...200K halogen light is used as the light source 5600K This white balance mode is ideal when 5600K sunlight or fluorescent lighting is used as the light source VAR Specify a color temperature from 2400K...

Page 77: ...ted When Low or High is selected video will be delayed by 4 frames When Low or High is selected the following settings cannot be changed Day Night Night Day Level Pedestal DRS Gamma Type Back Light CO...

Page 78: ...Setting value Low Mid High Factory settings Mid Back Light COMP Off or On is set here for the backlight compensation function Under backlight conditions the function prevents darkening as a result of...

Page 79: ...splayed when User is selected as the Color Matrix setting on the Image adjust screen and the Setup button is clicked B to Cy_B_B Saturation The saturation of B to Cy_B_B can be finely adjusted Setting...

Page 80: ...camera direction moves to the home position if Home has been selected on the pull down menu This is used to delete the preset position setting which is currently being selected It does not function if...

Page 81: ...required after zooming or set the focus to the auto mode This item can be selected only when Manual has been selected as the Focus Mode setting Preset Setting Preset Speed Table Set the preset speed t...

Page 82: ...59 94p 1080 59 94i 1080 29 97PsF 1080 29 97p 720 59 94p For 50Hz Auto 1080 50p 1080 50i 1080 25PsF 1080 25p 720 50p Frequency This item is selected to switch the frame frequency Setting value 59 94Hz...

Page 83: ...Mode B Pan Tilt Zoom including digital zoom Focus Iris Mode C Pan Tilt Zoom including digital zoom Focus Factory settings Mode A Freeze During Preset Turn the function for freezing images during pres...

Page 84: ...y when Manual has been selected as the Focus Mode setting Factory settings Off Tally Enable or Disable is set here for the function which turns on or turns off the tally lamp using the tally control s...

Page 85: ...display to Off On for when the color bar is displayed Factory settings Off z zOSD Mix OSD Off With Tally This is used to enable or disable the function for clearing the OSD menu displays when the tal...

Page 86: ...e characters Factory settings Cam 1 to Cam 16 Not registered When connecting via HTTPS install the security certificate for the camera to be displayed page 102 When configuring a host name the DNS set...

Page 87: ...led When User auth is set to On while Authentication is set to Digest network connection with the AW RP50 AW RP120 and AK HRP200 will be disabled Notes User name 1 to 32 half size characters The user...

Page 88: ...ol This access level allows you to display images and control the unit The unit cannot be set Factory settings 2 Camera control Host check You can view registered host IP addresses by clicking for Hos...

Page 89: ...function or by other network cameras For details on the server settings consult your network administrator Factory settings Off IP address IPv4 Input the unit s IP address here when the DHCP function...

Page 90: ...for the router Note Default gateway When Manual is set to On for IPv6 network enter the default gateway for the unit s IPv6 network Factory settings blank DHCPv6 Enable or disable use of the IPv6 DHCP...

Page 91: ...settings 20min Recommended network setting for internet Perform the recommended settings to connect the camera to the Internet Clicking the Set button displays a dialog box telling the user that item...

Page 92: ...the name of the directory to save the video data to be sent Maximum number of characters 0 to 256 half size characters Characters that can be entered Half size alphanumeric characters half size symbol...

Page 93: ...of the network setup screen Network to On Note NTP server address When Manual is selected in the NTP server address setting input the IP address or host name of the NTP server Maximum number of charac...

Page 94: ...n the HTTPS setup method CRT key generate A CRT key SSL encryption key is generated by HTTPS To generate a CRT key click the Execute button to display the CRT key generate dialog For more details refe...

Page 95: ...ction This sets the method to connect to the unit Setting value HTTP Only HTTP connection is possible HTTPS Only HTTPS connection is possible Factory settings HTTP For more details refer to Setting th...

Page 96: ...ate Signing Request CSR page 99 4 Installing a Server Certificate page 100 Request to Certificate Authority CA Generate Server Certificate When using self signed certificates When using server certifi...

Page 97: ...the RSA key size must be in accordance with the demands of the Certificate Authority CA which will be applied to Note 3 Click the Execute button CRT key generation starts When CRT key generation is c...

Page 98: ...wing half size symbols _ When connecting the camera to the Internet set the address or host name to be accessed from the Internet in Common Name In this case when accessing the camera locally a securi...

Page 99: ...ame of the state 128 half size characters Locality Inputs the name of the city 128 half size characters Organization Inputs the name of the organization 64 half size characters Organizational Unit Inp...

Page 100: ...ve period of the server certificate has expired When the Confirm button is clicked the content of the installed server certificate security certificate is displayed in the CA Certificate Confirm dialo...

Page 101: ...CA procedures to acquire and install root certificates and intermediate certificates When accessing the camera by HTTPS the image display speed and frame rate of the moving image may reduce When acce...

Page 102: ...ternet in Common Name In this case when accessing the camera locally a security warning screen is displayed every time the camera is accessed even when a security certificate is installed When the sec...

Page 103: ...6 Select Place all certificates in the following store and click Browse 7 Select Trusted Root Certification Authorities and click OK 8 Click Next 9 Click Finish 10 Click Yes When importing is finished...

Page 104: ...ogs Setting value Event log Displays the event logs Error log Displays the error logs Event log No Displays the log sequence numbers 1 indicates the latest information and up to 100 logs can be saved...

Page 105: ...of characters to be used for the name of the directory in which the software will be stored and for the name of the software which has been downloaded to less than 250 characters Note 2 Click the Brow...

Page 106: ...his screen Reset to the default Except the network settings When the Execute button is clicked the unit s settings are returned to their defaults The following settings are not initialized All the set...

Page 107: ...HE40_ NSetting dat Settings of the Web screen Clock settings Network settings After the Execute button is clicked the amount of time it takes for the destination dialog box to appear is about 10 seco...

Page 108: ...Activate You can perform activation register an unlock key code to add available functions For details refer to Activation page 122 Download Obtain the serial number and other information for the rem...

Page 109: ...n MP4 format 1 1920 1080 59 94p Frequency 59 94Hz 2 1920 1080 29 97p Frequency 59 94Hz 3 1280 720 59 94p Frequency 59 94Hz 4 1280 720 29 97p Frequency 59 94Hz 5 1920 1080 50p Frequency 50Hz 6 1920 108...

Page 110: ...d to one SD card is approximately 89100 Also the maximum number of folders is approximately 900 Setting the format for the video to be recorded Set the size frame rate and bit rate of the video to be...

Page 111: ...corded content Play List screen Select content individually Acquires the latest information Deletes the selected content Close the Play List screen Displays the recording duration of the content Displ...

Page 112: ...aying back to the connected personal computer Specify the save destination on the personal computer If downloading does not start and no operation is performed for a while downloading may not be possi...

Page 113: ...lent to Chroma Level of the camera menus and Web settings Setting range 0 to 6 Equivalent to 3 to 3 of Chroma Level If the shooting mode scene is set to Full Auto even if this setting is changed the c...

Page 114: ...re Iris Aperture Iris The lens iris can be adjusted manually Setting range 1 minimum to 2731 open If this item is set to auto mode the lens iris is set to automatic adjustment and Contrast Mode of the...

Page 115: ...80 Mic High 1279 to 1024 Mic Middle 1023 to 768 Mic Low 767 to 512 Line High 511 to 256 Line Middle 255 to 0 Line Low The volume may be adjusted automatically depending on the communication software u...

Page 116: ...name and password The default settings for the user name and password are as follows User name admin Password 12345 If the mobile terminal does not support the character code UTF 8 the characters cann...

Page 117: ...ion switching When this button is pressed the buttons for selecting the resolution are displayed on the screen The characters are displayed in green for the resolution button which is currently select...

Page 118: ...s When this button is pressed the buttons for performing the focusing operations are displayed on the screen Use this to switch between auto and manual focusing At the auto setting focusing is perform...

Page 119: ...s port number When the authentication dialog box appears enter the user name and password of an administrator or general user Depending on the mobile terminal password entry may be required when tran...

Page 120: ...roller or web setting screen Whatever was set or released last takes precedence For the controller operations refer to the Operating Instructions of the controller The settings of the limiters using t...

Page 121: ...t Next perform the steps in Basic limiter operations Press the MENU button quickly and then press the button for 2 seconds while holding down the PRESET button Releasing the limiters The limiter posit...

Page 122: ...formed Obtaining the activation code The activation code can be obtained by accessing the activation code generation site and then having the serial number information of the unit and key code include...

Page 123: ...ad item 3 Click the OK button After uploading completes the unit restarts automatically 4 Click the OK button The web screen appears 5 Close the Web browser once Checking that activation is complete 1...

Page 124: ...hat the unit s power is not being supplied P 7 Have the limiter functions been set P 120 to 121 Has the correct unit to be operated been selected P 9 Cannot operate using the wireless remote control H...

Page 125: ...ong IP address been accessed Check the connections by following the steps below When using Windows Using the Windows command prompt execute ping IP address which has been set in the camera A reply ret...

Page 126: ...same subnet If a proxy server has been set using the proxy setting of the web browser it is recommended that a Don t use proxy address be selected as the unit s IP address setting Has the wrong defaul...

Page 127: ...etting established for the monitor white lines appear in front of the black shadows of the camera menus Depending on the edge enhancement setting established for the monitor the background colors may...

Page 128: ...P 75 The auto white balance adjustment AWB does not work Is Night mode established The auto white balance adjustment AWB cannot be used in Night mode P 17 to 19 P 36 P 38 P 75 Is the scene mode set t...

Page 129: ...ause the pixels are arranged systematically on each image sensor It is noticeable when the spatial frequency of a subject and the pixel pitch are brought into proximity so change the camera angle or t...

Page 130: ...webpage D Click the OK button The images are not refreshed The images may not be refreshed or other trouble may occur with some web browsers or their version which is being used Image display may be s...

Page 131: ...pages in the Temporary Internet Files settings the web setting screen may not be displayed properly Follow the steps below A In Internet Explorer select Tools Internet Options B Click the General tab...

Page 132: ...cur and the refresh speed of the IP videos may drop Is the H 264 image format set to 1920 1080 60fps or 50fps Depending on the performance of the personal computer the screen display images will be di...

Page 133: ...click OK An unnecessary status bar or scroll bar is displayed on the pop up window Open the security settings screen for Internet Explorer and select Internet Click the Custom level button set Allow...

Page 134: ...g add on Web from Panasonic System Networks Co Ltd Select Allow For Internet Explorer 8 0 The following message appears in the information bar Pop up blocked To see this pop up or additional options c...

Page 135: ...45 Chroma Level 39 76 Color Enable 113 Color Matrix 78 Color Temperature 39 76 Common 90 Compression 58 Concerning initialization 51 Config data type 107 Connection 95 101 Contrast 36 74 113 Contrast...

Page 136: ...0 Manual Date Time 65 Manual End time date 66 Manual Start time date 66 Manual Summer time daylight saving 66 Manual Time zone 65 Matrix 36 Matrix Type 42 Max bit rate per client 70 Max Digital Zoom 4...

Page 137: ...02 Self signed Certificate Generate 94 98 Information 94 Serial no 105 Setup 56 63 64 Sharpness 113 Shutter Mode 37 75 Shutter speed 15 37 75 Single display mode 57 Smoother live video display on the...

Page 138: ...Web Site http www panasonic com Panasonic Corporation 2015...

Reviews: