


●
This is to explain the procedure for allowing AW-HE40 series cameras to be used via
AW-RP50 controller.
For detailed explanations, please see each Operating Instructions.
【
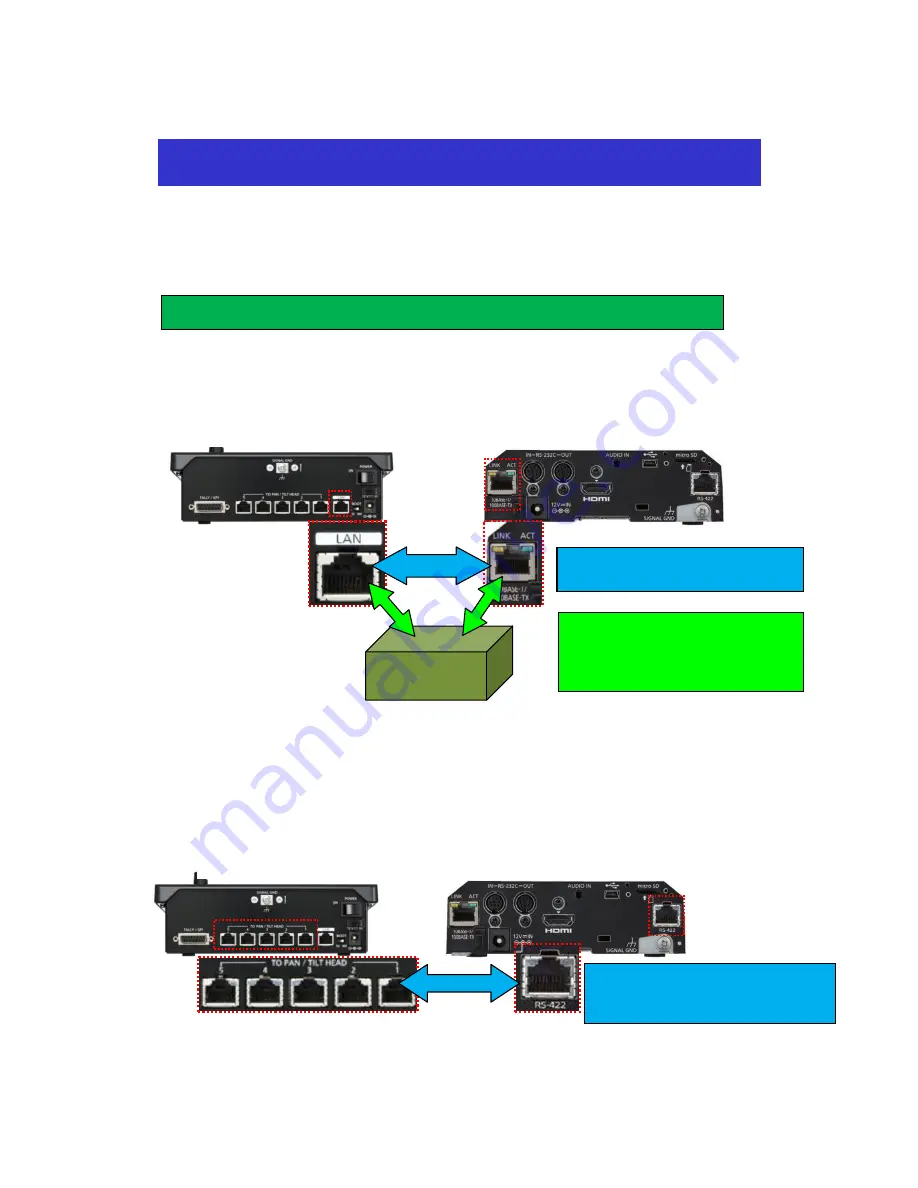
IP Connection
】
(Point)
Through a hub, AW-RP50 controller can control up to 100 remote cameras.
Connect [LAN] on AW-RP50 rear panel and [LAN ACT/LINK] on AW-HE40 rear panel using a LAN cable.
【
Serial Connection
】
(Point)
The cable can be extended up to 1,000m.
AW-RP50 controller can control up to five AW-HE40 cameras via serial connection.
Connect TO PAN/TILT HEAD [1]
– [5] on AW-RP50 rear panel and [RS-422] on AW-HE40 rear panel using
a LAN cable.
※
TO PAN/TILT HEAD ports [1]
– [5] correspond to AW-RP50 connection settings “CAM1” – “CAM5”,
respectively.
If you want to use AW-
RP50 “CAM3” for serial controlling of the camera, please connect a LAN cable
with TO PAN/TILT HEAD port [3].
Remote Camera Installation & Setup Guide
1
.
Connecting the LAN Cable
(AW-RP50 Rear Panel)
(AW-HE40 Rear Panel)
HUB
(LAN Cable)
Category 5 or higher, Up to 100m
(LAN Cable)
Category 5 or higher, Up to 100m
<
For PoE+ Hub >
Category 5e or higher, Up to 100m
(AW-RP50 Rear Panel)
(AW-HE40 Rear Panel)
(LAN Cable)
Category 5 or higher, Up to 1,000m
Straight cable
Direct Connection
(Through a hub)


