background image

English

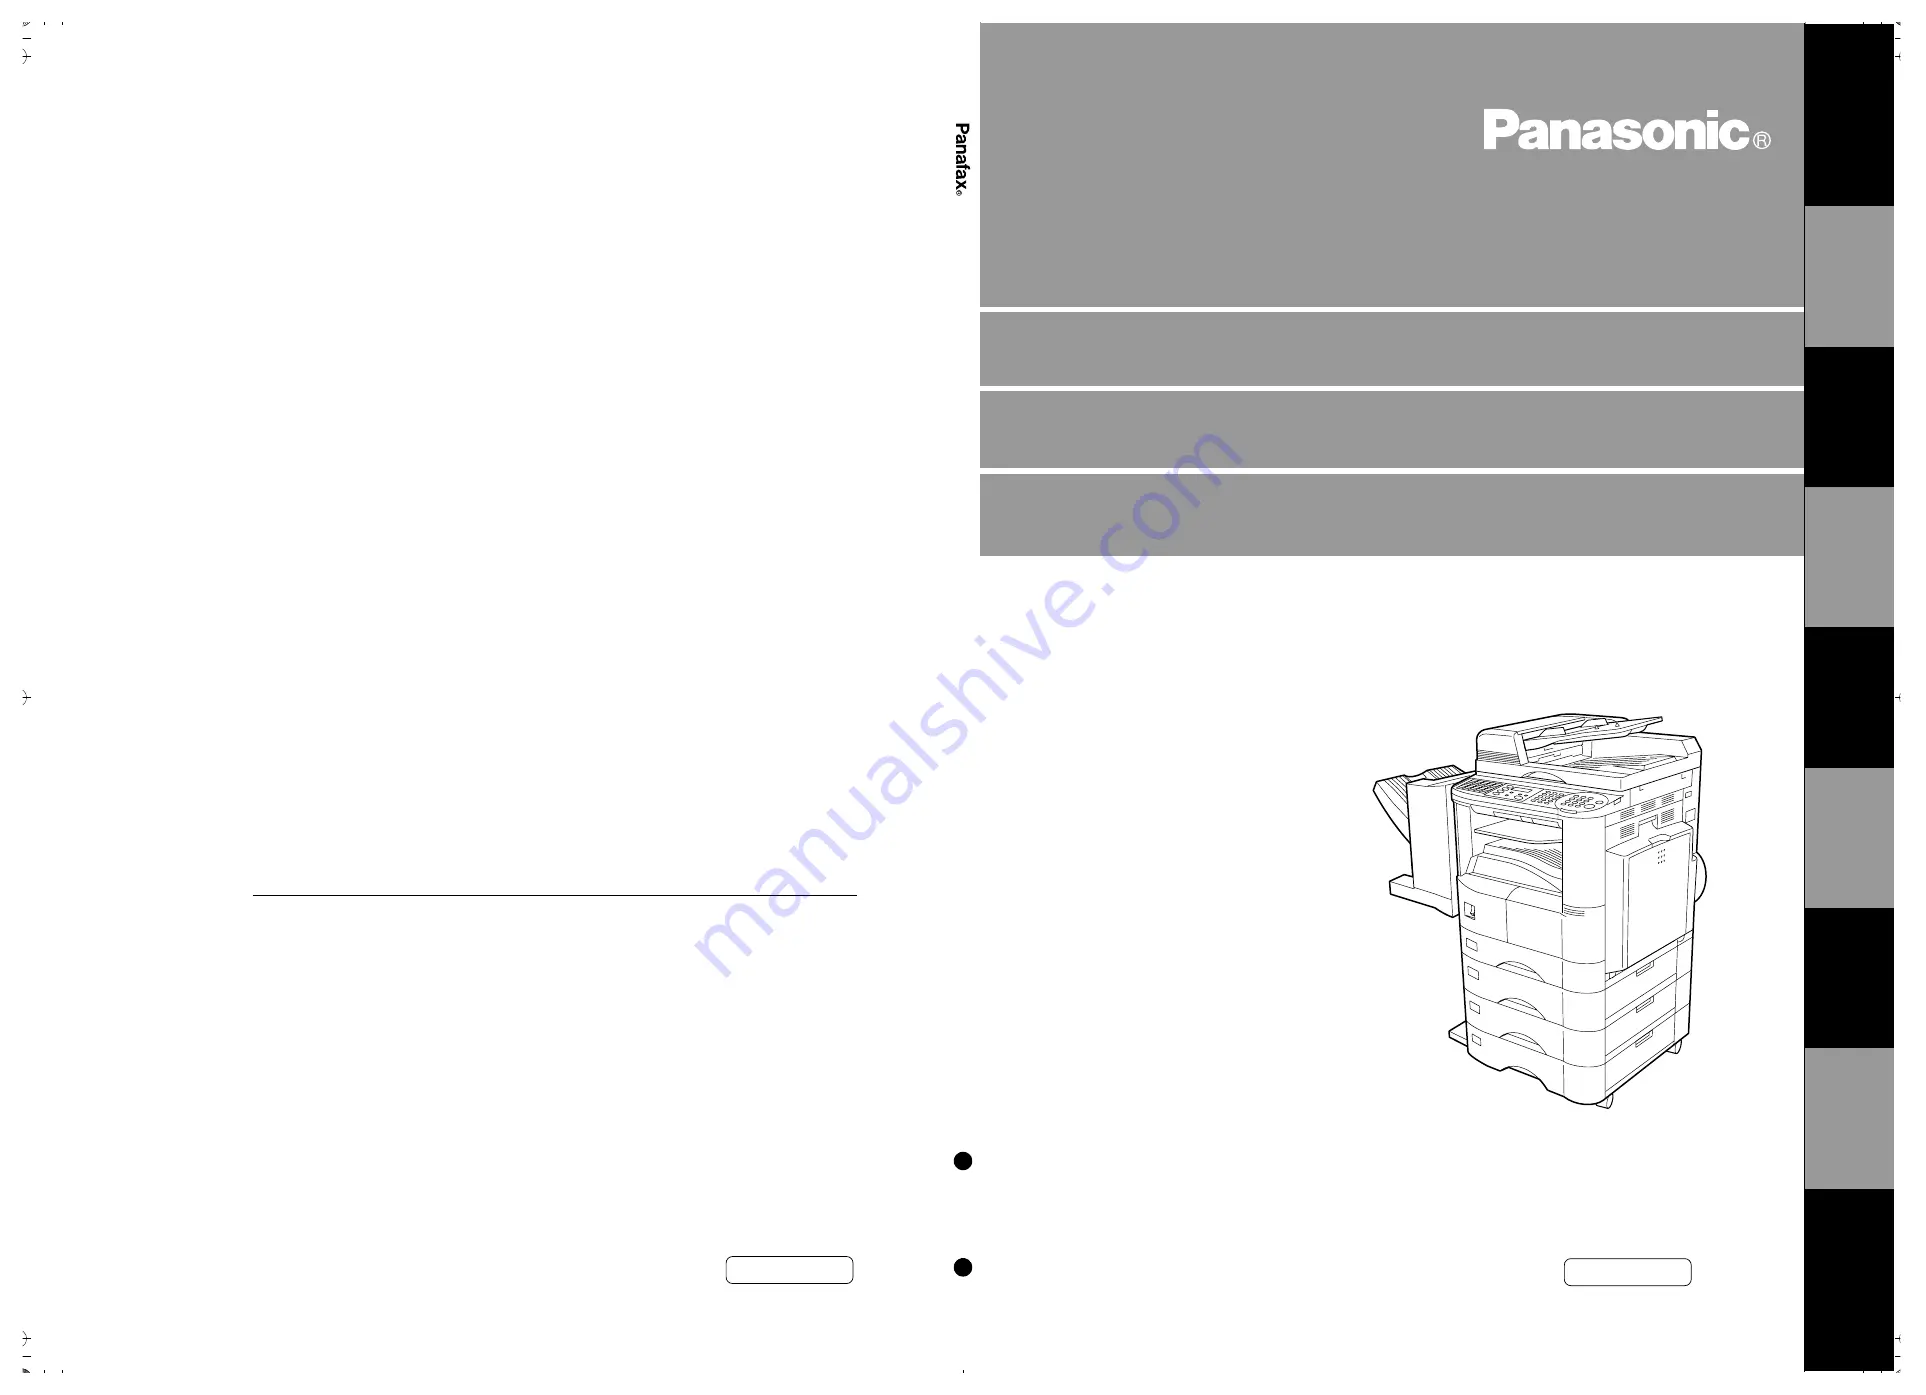
Operating Instructions (For Facsimile)

Digital Copier

Before operating this equipment, please read 
these instructions completely and keep these 
operating instructions for future reference.

DP-20

00 

Ope

rating

 Instructi

ons 

(fo
r Facsim

ile)

Engli

s

h

DP-2000

Options
DA-AR250/AS200/DS200/DS210/FG230/FG231/FK200/FK210/FS200/MD200
DA-NE200/PC200/PC210/SM08B/SM16B/SM28B/UC200/XN200/XT200; UE-410047/410048/403171

G

E

TTING T

O


KNO

W

 Y

O

UR 

MA

CHI

NE

IN

S

T

ALLING 

Y

O

UR M

A

CHINE

P

R

O

G

RAM

MING 

Y

O

UR

 MA

CH

INE

BA

S

IC

OPE

R

A

T

IO

N

S

AD

V

ANCE

D

FE

A

T

UR

E

S

NE

TW

ORK

FE

A

T

URE

S

PR

IN

T

O

U

T

JOURNALS

 AND

LIS

T

S

PR

OB

LE

M

SO

L

V

IN

G

AP

P

E

ND

IX

Matsushita Electric Industrial Co., Ltd.
Osaka 542-8588, Japan

DZSD001199-1 T1100-1041
April 2001
Printed in Japan

U.S.A. Only

For Service Call:

English

Summary of Contents for 403171

Page 1: ...250 AS200 DS200 DS210 FG230 FG231 FK200 FK210 FS200 MD200 DA NE200 PC200 PC210 SM08B SM16B SM28B UC200 XN200 XT200 UE 410047 410048 403171 GETTING TO KNOW YOUR MACHINE INSTALLING YOUR MACHINE PROGRAMMING YOUR MACHINE BASIC OPERATIONS ADVANCED FEATURES NETWORK FEATURES PRINTOUT JOURNALS AND LISTS PROBLEM SOLVING APPENDIX Matsushita Electric Industrial Co Ltd Osaka 542 8588 Japan DZSD001199 1 T1100 ...

Page 2: ...ed below to record information you may need in the future Model No Serial No Date of Purchase Dealer Address Telephone Number Supplies Telephone Number Service Telephone Number Copyright 2000 by Matsushita Graphic Communication Systems Inc All rights reserved Unauthorized copying and distribution is a violation of law Printed in Japan The contents of these Operating Instructions are subject to cha...

Page 3: ... Standard Size Originals 33 Flatbed Scanning 33 Basic Transmission Settings 34 Contrast 34 Resolution 34 Original Text Photo 35 Verification Stamp 35 Communication Journal COMM JOURNAL 36 Sending Documents 37 Memory Transmission 37 Manual Number Dialling 39 One Touch Dialling 41 Abbreviated Dialling 42 Directory Search Dialling 43 Multi Station Transmission Broadcasting 45 Direct Transmission 47 M...

Page 4: ...er Controlled Communications 70 Deferred Transmission 70 Deferred Polling 71 Polling 73 Setting the Polling Password 73 Preparing to be Polled 74 To Poll Documents from Another Station 75 Program Keys 76 Setting for Group Dialling 76 Setting for Deferred Transmission 77 Setting for Deferred Polling 79 Setting for Normal Polling 81 Setting for One Touch Key 83 Changing or Erasing the Program Key Se...

Page 5: ...m a Remote Station s Mailbox 118 Receiving a Confidential Document to Your Machine s Mailbox 119 Storing a Confidential Document in Your Machine s Mailbox 120 Printing a Confidential Document from Your Machine s Mailbox 121 Deleting a Confidential Document Stored in Your Machine s Mailbox 122 Sub Addressing 124 General Description 124 To set the Sub Address into a One Touch ABBR dialling Numbers 1...

Page 6: ...4 This page is intentionally left blank ...

Page 7: ...MACHINE IS INSTALLED IN A SPACIOUS OR WELL VENTILATED ROOM SO AS NOT TO INCREASE THE AMOUNT OF OZONE IN THE AIR SINCE OZONE IS HEAVIER THAN AIR IT IS RECOMMENDED THAT AIR AT FLOOR LEVEL BE VENTILATED PLUG POWER SUPPLY CORD INTO ORDINARY AC OUTLET BEFORE CONNECTING TELEPHONE LINE CORD DISCONNECT TELEPHONE LINE CORD BEFORE UNPLUGGING POWER SUPPLY CORD FROM AC OUTLET DISCONNECT THE EQUIPMENT IMMEDIAT...

Page 8: ...NO 26 AWG OR LARGER TELEPHONE LINE CABLE DISCONNECT ALL POWER TO THE MACHINE BEFORE COVER S ARE REMOVED REPLACE THE COVER S BEFORE THE UNIT IS RE ENERGIZED IMPORTANT SAFETY INSTRUCTIONS When using your telephone equipment basic safety precautions should always be followed to reduce the risk of fire electric shock and injury to persons including the following DO NOT USE THIS PRODUCT NEAR WATER FOR ...

Page 9: ...ne CAUTION Do not install the machine near heating or an air conditioning unit Avoid exposure to direct sunlight Install the machine on a flat surface leave at least 10 cm of space between the machine and other objects Do not block the ventilation openings Do not place heavy objects or spill liquids on the machine Safety Information ...

Page 10: ...ing 2 Polled Printout 1 Journal Print View 2 One Touch Abbreviated Directory Search List 3 Program List 4 Fax Parameter List 5 Not used 6 Individual XMT Journal 7 Directory Sheet Deferred Communication 1 XMT 2 Polling 3 Advanced Communication Set Mode 1 User Parameters Date Time Logo Character ID ID Number Fax Telephone Number 2 One Touch Abbreviated Numbers 3 Program Keys 4 Fax Parameters Select ...

Page 11: ...er switch After connecting all cables and the Power Cord turn the power switch ON Telephone Line Jack Plug one end of the telephone line cable into the telephone jack supplied by the telephone company and the other end into the LINE jack on the back of the machine Telephone Jack ...

Page 12: ...tion name Use or to select the symbols Used to switch between upper and lower character set Used to set Standard Fine Super Fine See page 34 One Touch Keys 01 20 Used for One Touch Dialling See page 41 and 48 Program Keys P1 P5 Used to record long dialling procedures or Group Dialling Number keys See page 76 to 84 Character key One Touch Keys and Program Keys also serve as character and symbol inp...

Page 13: ...eviated Dialling See page 42 and 49 Used to start On Hook Dialling See page 57 Used to set operations Used to switch the machine into energy saving mode For more details see page 24 of the Operating Instructions For Copier Used to start or select the function and sub functions These functions are explained in detail on page 8 Use this button when resetting all the previously set functions Use this...

Page 14: ...This page is intentionally left blank GETTING TO KNOW YOUR MACHINE 12 ...

Page 15: ...chine receives a call Setting the Monitor Volume see Note 1 Make sure that the FAX lamp is ON If not press to select the FAX MODE 1 You will hear the dial tone through the speaker 2 repeatedly to raise the volume or repeatedly to lower the volume 3 NOTE 1 You can also adjust the volume of the key touch tone and the volume of the buzzer in the Fax Parameter No 010 KEY BUZZER VOLUME See page 28 MONI...

Page 16: ...the Ringer Volume Make sure that the FAX lamp is ON If not press to select the FAX MODE 1 Standby 2 repeatedly to raise the volume or repeatedly to lower the volume 3 12 NOV 2000 15 00 00 RINGER VOLUME RINGER VOLUME Adjusting the Volume ...

Page 17: ...ing the Date and Time At standby the display will show the date and time Once the standby display is set it will automatically be updated Make sure that the FAX lamp is ON If not press to select the FAX MODE 1 2 3 4 Enter the new date and time Ex Date 12th Month November Year 2000 Time 3 00 PM If you make a mistake use or to move the cursor over the incorrect number then overwrite it with a correc...

Page 18: ...he FAX MODE 1 2 3 repeatedly until display shows 4 Enter your LOGO max 25 characters and digits by using the Character keys See page 10 Ex If you make a mistake use or to move the cursor beyond the incorrect character press then re enter the new character If more than 19 characters are entered the left side characters will scroll off the display 5 SET MODE 1 4 ENTER NO OR 1 USER PARAMETERS PRESS S...

Page 19: ...ON If not press to select the FAX MODE 1 2 3 repeatedly until display shows 4 Enter your Character ID max 16 characters and digits by using the Character keys See page 10 Ex If you make a mistake use or to move the cursor beyond the incorrect character press then re enter the new character 5 NOTE 1 The special characters of Å å Ä ä Ö ö Ü ü È è É é Æ æ and Ñ cannot be used for Character ID SET MODE...

Page 20: ...N If not press to select the FAX MODE 1 2 3 repeatedly until display shows 4 Enter your ID max 20 digits by using the key pad and Ex If you make a mistake use or to move the cursor beyond the incorrect number press then re enter the new number 5 NOTE 1 You may use to enter a character at the beginning of the ID number to indicate the following digit s for your country code Ex 1 201 555 1212 1 for ...

Page 21: ...ion name using character keys up to 15 characters Ex If your machine does not have the 2nd G3 Fax Communication Port Kit installed proceed to Step 10 8 If your machine has the 2nd G3 Fax Communication Port Kit installed you can pre select which telephone line should be used for this station by pressing or If AUTO default is selected the machine will automatically select the available telephone lin...

Page 22: ...2 Second Telephone line 10 To record another number repeat step 4 to 10 To return to standby press NOTE 1 This field AUTO Line 1 or Line 2 appears only when the 2nd G3 Fax Communication Port Kit is installed 2 LINE SELECTION L 2 1 L 1 2 L 2 3 AUTO STOP ONE TOUCH PRESS ONE TCH OR One Touch Abbreviated Dialling Numbers ...

Page 23: ...lled you can pre select which telephone line should be used for this station by pressing or If AUTO default is selected the machine will automatically select the available telephone line 9 Select the telephone line to be used for the communication Ex for L 2 Line 2 Second Telephone line Continued on the next page SET MODE 1 4 ENTER NO OR 1 ONE TOUCH 2 ABBR NO ABBR ENTER NO OR 0 2 2 022 ENTER TEL N...

Page 24: ...line enter it first and then press A hyphen is displayed for pause 2 Use or to enter a space between the numbers to make it easier to read 3 You can search for an unused One Touch key or ABBR number by pressing or in step 3 or 4 4 This field AUTO Line 1 or Line 2 appears only when the 2nd G3 Fax Communication Port Kit is installed STOP ABBR ENTER NO OR PAUSE SPACE MONITOR One Touch Abbreviated Dia...

Page 25: ...you can pre select which telephone line should be used for this station by pressing or If AUTO default is selected the machine will automatically select the available telephone line 8 Select the telephone line to be used for the communication Ex for L 2 Line 2 Second Telephone line Continued on the next page 1 ONE TOUCH 2 ABBR NO 1 2 1 ONE TOUCH PRESS ONE TCH OR 01 SALES DEPT 9 555 1234 9 PAUSE 5 ...

Page 26: ...mber 2 If the One Touch Abbreviated dialling number has been used for a communication reservation the settings cannot be changed or erased until the communication has finished To change or erase the settings cancel the communication first by Edit File Mode See page 85 3 This field AUTO Line 1 or Line 2 appears only when the 2nd G3 Fax Communication Port Kit is installed STOP ONE TOUCH PRESS ONE TC...

Page 27: ...andby press NOTE 1 If the One Touch Abbreviated dialling number has been used for a communication reservation the settings cannot be changed or erased until the communication has finished To change or erase the settings cancel the communication first by Edit File Mode See page 89 1 ONE TOUCH 2 ABBR NO 1 2 1 ONE TOUCH PRESS ONE TCH OR 01 SALES DEPT 9 555 1234 01 SALES DEPT ENTER TEL NO STOP ONE TOU...

Page 28: ...ch key under the Directory Sheet Cover To print out a directory sheet follow the steps below 1 2 Your machine prints out the directory sheet DIRECTORY SHEET DATE 12 NOV 2000 TIME 15 00 01 02 03 04 05 SALES DEPT ENG DEPT ACCT DEPT EXPORT DEPT 06 07 08 09 10 11 12 13 14 15 16 17 18 19 20 P1 P2 P3 P4 P5 PANASONIC HEAD OFFICE 201 555 1212 PRINT OUT 1 7 ENTER NO OR PRINTING DIRECTORY SHEET dotted line ...

Page 29: ...ameters return to their preset values Home position Other parameters can only be changed by the procedure described below Setting the Fax Parameters see Note 1 see Note 2 Make sure that the FAX lamp is ON If not press to select the FAX MODE 1 2 3 Enter Fax Parameter number from the Parameter Table See page 28 to 31 Ex for STAMP 4 5 Enter the new setting value Ex for ON 6 To set another parameter p...

Page 30: ... No Print 008 HEADER FORMAT 1 Logo ID No Selecting the header format 2 From To 009 RCV D TIME PRINT 1 Invalid Selecting whether the machine prints the received date time remote ID percentage of reduction and page number on the bottom of each received page 2 Valid 010 KEY BUZZER VOLUME 1 Off Selecting the volume of the Key Buzzer tone 2 Soft 3 Medium 4 Loud 012 COMM JOURNAL 1 Off Selecting the home...

Page 31: ...ting whether the machine retains the document in memory if it is not successfully transmitted 2 Valid 033 XMT REDUCTION 1 Invalid Selecting whether the machine performs reduction when the transmitting original is wider than the recording paper used at the receiving machine 2 Valid 037 RCV TO MEMORY Enter a 4 digit password for printing the received document s in memory by using F8 5 RCV TO MEMORY ...

Page 32: ...mediately after storing the first page 2 Valid 085 FAX OUTPUT TRAY 1 Inner 1 Selecting the Output Tray home position for received document s Inner 1 Received document s exit to the Bottom Output Tray Inner 2 Received document s exit to the Upper Output Tray Blue 2 Inner 2 3 Outer 088 LINE SELECTION See Note 3 1 Auto Setting the home position for the Telephone Line selection Auto Selects the availa...

Page 33: ...ttings are printed on the Fax Parameter List To print out Fax Parameter List See page 141 2 This parameter is available only when the Parallel Port Interface Option is installed 3 This parameter is available only when the G3 Communication Port Option is installed 4 The contents of Fax Parameter may differ depending on the each country s regulation or specification No Parameter Setting Number Setti...

Page 34: ...This page is intentionally left blank PROGRAMMING YOUR MACHINE 32 ...

Page 35: ...Face Up on the ADF until the leading edge placed into the machine stops Place a book or an original Face Down on the Platen Glass aligning it with the arrow mark on the original size guides NOTE 1 When an oversized original is sent to another machine sometimes it is reduced in accordance with the other party s recording paper size EX Original Size Guide Face Up Original Size Guide Face Down P When...

Page 36: ... which is suitable for most originals If you want to send it with more detail change the setting to Fine or Super Fine Press to see Note 3 Contrast Communication Journal Resolution Duplex Scan Original Text Photo Cover Sheet Stamp Password XMT NOTE 1 To change the preset Contrast position change the setting of Fax Parameter No 001 See page 28 2 To change the preset Resolution position change the s...

Page 37: ... you machine will automatically select Fine Resolution 2 When you store document s into memory the Verification Stamp will stamp on the original if it is successfully stored into memory In this case the Verification Stamp is not a confirmation that the document was successfully transmitted If you wish to disable the use of the Verification Stamp when storing document s into memory change the setti...

Page 38: ...er every communication When you set COMM JOURNAL INC a Communication Journal is printed out automatically only if the communication has failed Make sure that the FAX lamp is ON If not press to select the FAX MODE 1 2 3 for OFF or for ON Always print out or for INCOMPLETE only or or 4 NOTE 1 To change the preset Comm Jornal condition change the setting of Fax Parameter No 012 See page 28 SELECT MOD...

Page 39: ...f The memory is full You want to send the document immediately Use Voice Mode Transmit if You want to send the document after talking with the other party You want to send the document after listening to a voice prompting Memory Transmission Your machine quickly stores the document into the machine s memory Then starts to dial the telephone number If the transmission fails your machine will re tra...

Page 40: ... the Specifications on page See page 150 for the image memory capacity If no action is taken within 10 seconds the machine will start transmitting the stored documents The percentage varies and its dependent on the type of documents you are storing machine settings or whether an optional memory card is installed 3 An Information Code will be displayed if the transmission has failed or no answer at...

Page 41: ...RY lamp is on If not press to set On 3 Enter a telephone number from the keypad Ex If your machine does have the 2nd G3 Fax Communication Port Kit installed the machine will automatically select the available telephone line for transmission indicated by AUTO on the LCD display If you wish you can change which telephone line the machine should use by selecting Line 1 or Line 2 with the key on the C...

Page 42: ...o memory first before transmitting change the Fax Parameter No 082 QUICK MEMORY XMT to Invalid See page 30 3 This field AUTO Line 1 or Line 2 appears only when the 2nd G3 Fax Communication Port Kit is installed 4 The document s begin to store into memory with a file number Then starts dialling the telephone number immediately after storing the first page See Note 3 The remaining page s continue to...

Page 43: ...n If not press to set On 3 Press a One Touch key Ex 4 The document s begin to store into memory with a file number Then starts dialling the telephone number immediately after storing the first page See Note 1 The remaining page s continue to store into memory NOTE 1 This feature is called Quick Memory Transmission If you wish to store All the document s into memory first before transmitting change...

Page 44: ...s 2 Make sure that the MEMORY lamp is on If not press to set On 3 Press then enter a 3 digit code Ex 4 The document s begin to store into memory with a file number Then starts dialling the telephone number immediately after storing the first page See Note 1 The remaining page s continue to store into memory NOTE 1 This feature is called Quick Memory Transmission If you wish to store All the docume...

Page 45: ...nal s face up on the ADF or 1b Place a book or an original face down on the Platen Glass 2 Make sure that the MEMORY lamp is on If not press to set On 3 4 Enter the full station name or part of a station name by using the Character keys See page 10 Ex for searching PANASONIC 5 or repeatedly until the display shows the station name you want to send to Continued on the next page ENTER STATION S THEN...

Page 46: ...oring the first page See Note 1 The remaining page s continue to store into memory NOTE 1 This feature is called Quick Memory Transmission If you wish to store All the document s into memory first before transmitting change the Fax Parameter No 082 QUICK MEMORY XMT to Invalid See page 30 STORE NO 002 PAGES 001 05 DIALLING NO 002 PANASONIC Sending Documents ...

Page 47: ...Place a book or an original face down on the Platen Glass 2 Make sure that the MEMORY lamp is on If not press to set On 3 Dial by any combination of the following methods One Touch Dialling Abbreviated Dialling Manual Number Dialling press after each station is entered Up to 70 stations Directory Search Dialling press after each station is entered For details see page 39 to 43 Ex If you want to co...

Page 48: ...ntered station or group shown on the display if needed 4 All document s are stored into memory with a file number See Note 2 Then starts dialling the telephone numbers in sequence 1 The Quick Memory Transmission is disabled if multiple stations are set CLEAR STORE NO 001 PAGES 001 01 STORE COMPLETED TOTAL PAGE 005 25 DIALLING NO 002 Station name Sending Documents ...

Page 49: ...from the keypad Ex 4 Your machine starts to dial the telephone number NOTE 1 If you need a special access number to get an outside line dial it first then press to enter a pause represented by a before dialling the full number Ex 9 PAUSE 5551234 2 To stop the transmission press The display shows Press to stop the transmission The Communication Journal will not print out regardless of the printout ...

Page 50: ...ss to select the FAX MODE 1a Place original s face up on the ADF or 1b Place a book or an original face down on the Platen Glass 2 Make sure that the lamp goes off 3 Press a One Touch key Ex The display will show the One Touch number and station name The full number e g 5551234 will then be dialed ENTER STATION S THEN PRESS START 00 ENTER STATION THEN PRESS START 00 01 Station name 5551234 DIALLIN...

Page 51: ...ber see page 21 Make sure that the FAX lamp is ON If not press to select the FAX MODE 1a Place original s face up on the ADF or 1b Place a book or an original face down on the Platen Glass 2 Make sure that the lamp goes off 3 Press then enter a 3 digit code The display will show the ABBR number and station name The full number e g 5553456 will then be dialed ENTER STATION S THEN PRESS START 00 ENT...

Page 52: ...n the ADF or 1b Place a book or an original face down on the Platen Glass 2 Make sure that the lamp goes off 3 4 Enter the full station name or part of a station name by using the Character keys See page 10 Ex for searching PANASONIC 5 or repeatedly until display shows the station name you want to send to 6 The full number e g 5553456 will be dialed ENTER STATION S THEN PRESS START 00 ENTER STATIO...

Page 53: ...smission Receiving This machine has duplex SCAN PRINT capabilities see Note 1 see Note 2 Duplex Scan Select Mode set to Duplex Scan ON Duplex Print Fax Parameter set to Duplex Print Valid NOTE 1 Rotation XMT requires the use of Memory Transmission 2 Verification Stamp is disabled during Duplex Scan Letter or A4 Original Receiving Station Letter or A4 Paper Sends with 70 reduction Letter or A4 Orig...

Page 54: ...tting Rotation Transmission Make sure that the FAX lamp is ON If not press to select the FAX MODE 1 2 3 4 5 SET MODE 1 4 ENTER NO OR FAX PARAMETER 1 99 NO 078 ROTATION XMT 1 INVALID 078 ROTATION XMT 2 VALID Sending Documents ...

Page 55: ... down on the Platen Glass 2 3 4 5 Dial by any combination of the following methods One Touch Dialling Abbreviated Dialling Manual Number Dialling press after each station is entered Up to 70 stations Directory Search Dialling press after each station is entered For details see page 39 to 43 Continued on the next page SELECT MODE 1 5 ENTER NO OR DUPLEX SCAN OFF 1 OFF 2 ON ENTER STATION S THEN PRESS...

Page 56: ...PERATIONS 54 see Note 1 see Note 2 6 NOTE 1 The Duplex Scan function will reset back to OFF after the communication is completed 2 Duplex Scan is only available with the inverting ADF option Sending Documents ...

Page 57: ...RATIONS 55 Setting Duplex Print Make sure that the FAX lamp is ON If not press to select the FAX MODE 1 2 3 4 5 SET MODE 1 4 ENTER NO OR FAX PARAMETER 1 99 NO 095 DUPLEX PRINT 1 INVALID 095 DUPLEX PRINT 2 VALID Sending Documents ...

Page 58: ...laten Glass 2 Lift the external telephone and dial the telephone number from the keypad Ex 3 When you hear the voice of the other party tell the other party to prepare to receive a document Then when you hear a beep and hang up the handset NOTE 1 To stop the transmission press The display shows Press to stop the transmission The Communication Journal will not print out regardless of the printout m...

Page 59: ...ass 2 You will hear dial tone through the monitor speaker 3 Dial the telephone number from the keypad Ex 4 When you hear a beep NOTE 1 If you need a special access number to get an outside line dial it first then press to enter a pause represented by a before dialling the full number Ex 9 PAUSE 5551234 2 The second Telephone Line L 2 is not available for On Hook Dialling ENTER STATION S THEN PRESS...

Page 60: ...eiving or printing received documents you can reserve a transmission by the following procedure 1 Your machine is on line the ON LINE lamp is blinking or printing received documents 2a Place original s face up on the ADF or 2b Place a book or an original face down on the Platen Glass 3 Make sure that the MEMORY lamp is on If not press to set On Continued on the next page ON LINE MEM XMT ID Identif...

Page 61: ...alling press after each station is entered For details see page 39 to 43 Ex 5 Your machine will store the document s into memory NOTE 1 To cancel the memory transmission reservation see page 89 2 If the same station has been reserved with different files the files will be executed in a single transmission Batch Transmission See page 69 SET SET 01 Station name 5551234 STORE NO 005 PAGES 001 01 STOR...

Page 62: ...ou cannot send documents to multiple stations To reserve your machine for sending urgent documents 1 Your machine is on line the ON LINE lamp is blinking or printing received documents 2a Place original s face up on the ADF or 2b Place a book or an original face down on the Platen Glass 3 Make sure that the lamp goes off Continued on the next page ON LINE MEM XMT ID Identification ON LINE RCV ID I...

Page 63: ...rch Dialling and press For details see pages 39 to 43 Ex You can reserve sending an urgent document to a single station only A message DIRECT XMT RESERVED will be shown on the display 1 Make sure the document is on the ADF 2 3 and then remove the document from ADF START START 01 Station name 5551234 DIRECT XMT RESERVED 01 Station name DIRECT XMT RESERVED 01 Station name CANCEL XMT RESERVE 1 YES 2 ...

Page 64: ... shown to the right A file number is shown in the upper right hand corner of the display if it is a memory transmission file Make sure that the FAX lamp is ON If not press to select the FAX MODE 1 Set document s face down Make sure that the MEMORY lamp is on 2 3 The document is stored into memory with a file number Then dials the last dialed number NOTE 1 While the unit is displaying WAIT TO DIAL ...

Page 65: ...ce down 2 Make sure that the lamp goes off 3 Your machine starts to dial the last dialed number NOTE 1 While the unit is displaying WAIT TO DIAL you can press to start redialling immediately ENTER STATION S THEN PRESS START 00 ENTER STATION THEN PRESS START 00 TEL NO 5551234 DIALLING 5551234 REDIAL Sending Documents ...

Page 66: ... manually change the Fax Parameter No 017 RECEIVE MODE to Manual See page 29 and the following message will be shown on the display To receive documents manually see Note 1 see Note 2 1 When the telephone rings lift the handset See Note 1 If you hear a beep the sound tells you that someone wants to send a document 2 Remove any documents from the ADF 3 Your machine starts receiving the document 4 H...

Page 67: ... document on a single page If the received document is extremely long over 39 longer than the recording paper the document will be divided into separate pages and print without reduction 2 Fixed Reduction You can pre determine the reduction ratio from 70 to 100 in 1 steps The document s you receive will be reduced to the fixed ratio regardless of size Selecting the Print Reduction Mode Set Fax Par...

Page 68: ...ed on top of the next page see Note 1 NOTE 1 If the reduction method is set to the Automatic Reduction mode the document is printed out with no reduction when printing out separate pages If the reduction method is set to Fixed Reduction mode the document is printed by the ratio you set in Fax Parameter No 025 Transmitted Document Received Document The receiving document is divided into two sheets ...

Page 69: ...mory reception and there is no recording paper or toner an Information Code appears on the display 2 Install the recording paper or replace the toner cartridge The machine will automatically start printing the document stored in the memory NOTE 1 If the memory overflows the machine will stop receiving and release the communication line The document s stored in memory up to that moment will be prin...

Page 70: ...This page is intentionally left blank BASIC OPERATIONS 68 ...

Page 71: ...o the same destination automatically batching and transmitting them in a single phone call The following is an example of Real time Batch Transmission See Note 1 Delayed Batch Transmission Assign a time for batch transmission to a Program Key in advance All transmission s using the Program Key are batched and transmitted at the reserved time The following is an example of Delayed Batch Transmissio...

Page 72: ...ed Transmission see Note 1 see Note 2 see Note 3 Make sure that the FAX lamp is ON If not press to select the FAX MODE 1a Place original s face up on the ADF or 1b Place a book or an original face down on the Platen Glass 2 3 4 Enter the start time from the keypad Use a 4 digit 24 hour clock Ex 11 30 p m and ENTER STATION S THEN PRESS START 00 DEFERRED COMM 1 3 ENTER NO OR DEFERRED XMT START TIME ...

Page 73: ...of the following methods One Touch Dialling Abbreviated Dialling Manual Number Dialling press after each station is entered Up to 70 stations Directory Search Dialling press after each station is entered For details see page 39 to 43 Ex 6 to store documents into the memory Make sure that the FAX lamp is ON If not press to select the FAX MODE 1 2 Continued on the next page CLEAR START DEF DIRECT XM...

Page 74: ...ing press after each station is entered Up to 70 stations Directory Search Dialling press after each station is entered For details see page 39 to 43 Ex 6 NOTE 1 If you enter a wrong number in Step 3 press then re enter the right number 2 To change or cancel the Deferred Communication settings see page 87 and 89 0 3 3 0 SET DEFERRED POLLING PASSWORD 9 8 7 6 SET ENTER STATION S THEN PRESS START SET...

Page 75: ...tion your polling request will be refused automatically To set the polling password follow the steps below see Note 1 see Note 2 Make sure that the FAX lamp is ON If not press to select the FAX MODE 1 2 3 4 Enter a 4 digit polling password Ex 5 NOTE 1 Polling might not function with all fax machines We suggest you attempt a trial polling before you actually poll important documents 2 If a password...

Page 76: ...lace original s face up on the ADF or 1b Place a book or an original face down on the Platen Glass 2 3 4 Enter a 4 digit polling password See Note 3 Ex 5 The document s will be stored into memory NOTE 1 You can still send or receive documents even when set to be polled 2 Only 1 polled file can be stored in memory If you need to add document s into the same polled file see page 91 3 If you have set...

Page 77: ... each station is entered Up to 70 stations Directory Search Dialling press after each station is entered For details see page 39 to 43 Ex 6 NOTE 1 You can review the entered stations in step 5 by pressing or key press to erase the displayed station or group as needed 2 If you have set the polling password in Fax Parameter No 026 the password will appear on the display You can still change the pass...

Page 78: ...he FAX MODE 1 2 3 Ex 4 Enter the station name up to 15 characters by using the Character keys See page 10 Ex PROG A and 5 Enter the station numbers by using One Touch Key or and 3 digit code Ex and You may use the or keys to review the entered station s before going to next step If you find an error press to erase the displayed station 6 You can now set other Program Keys by repeating the procedur...

Page 79: ... 1 2 3 Ex 4 Enter the station name up to 15 characters by using the Character keys See page 10 Ex PROG A and 5 6 Enter the starting time using 4 digits Ex 11 30 p m and Continued on the next page PROGRAM 1 4 ENTER NO OR PROGRAM P PRESS PROGRAM KEY PROGRAM P1 NAME ENTER NAME SET PROGRAM P1 PRESS FUNCTION KEY DEFERRED XMT START TIME 2 3 3 0 SET ENTER STATION S THEN PRESS START Program Keys ...

Page 80: ...ing Abbreviated Dialling Directory Search Dialling press after each station is entered For details see page 39 to 43 Ex 8 You can now set other Program Keys by repeating the procedures from Step 3 or return to standby by pressing SET 01 Station name 5551234 STOP PROGRAM P PRESS PROGRAM KEY Program Keys ...

Page 81: ...haracter keys See page 10 Ex PROG A and 5 6 Enter the starting time Ex 10 00 p m and 7 Enter a 4 digit polling password Ex and The polling password appears if it has been previously set Continued on the next page PROGRAM 1 4 ENTER NO OR PROGRAM P PRESS PROGRAM KEY PROGRAM P1 NAME ENTER NAME SET PROGRAM P1 PRESS FUNCTION KEY DEFERRED POLLING START TIME 2 2 0 0 SET DEFERRED POLLING PASSWORD 1 1 1 1 ...

Page 82: ...ing Abbreviated Dialling Directory Search Dialling press after each station is entered For details see page 39 to 43 Ex 9 You can now set other Program Keys by repeating the procedures from Step 3 or return to standby by pressing SET 01 Station name 5551234 STOP PROGRAM P PRESS PROGRAM KEY Program Keys ...

Page 83: ...tion name up to 15 characters by using the Character keys See page 10 Ex PROG A and 5 6 Enter a 4 digit polling password Ex and The polling password appears if it has been previously set Continued on the next page PROGRAM 1 4 ENTER NO OR PROGRAM P PRESS PROGRAM KEY PROGRAM P1 NAME ENTER NAME SET PROGRAM P1 PRESS FUNCTION KEY POLLING PASSWORD 1 1 1 1 SET ENTER STATION S THEN PRESS START Program Key...

Page 84: ...ing Abbreviated Dialling Directory Search Dialling press after each station is entered For details see page 39 to 43 Ex 8 You can now set other Program Keys by repeating the procedures from Step 3 or return to standby by pressing SET 01 Station name 5551234 STOP PROGRAM P PRESS PROGRAM KEY Program Keys ...

Page 85: ...sing the Character keys See page 10 Ex PROG A and 5 Enter a telephone number up to 36 digits including pauses and spaces Ex 6 You can now set other Program Keys by repeating the procedures from Step 3 or return to standby by pressing PROGRAM 1 4 ENTER NO OR PROGRAM P PRESS PROGRAM KEY PROGRAM P1 NAME ENTER NAME SET P1 PROG A ENTER TEL NO 9 PAUSE 5 5 5 SPACE 1 2 3 4 P1 PROG A 9 555 1234 STOP PROGRA...

Page 86: ...r station s for deferred polling Station s for group dialling Telephone number and station name for One Touch key To erase the settings in a program key 1 2 3 Press the Program key you want to erase Ex 4 5 You can now erase other Program Keys by repeating the procedures from Step 3 or return to standby by pressing PROGRAM 1 4 ENTER NO OR PROGRAM P PRESS PROGRAM KEY PROGRAM P1 DELETE 1 YES 2 NO DEL...

Page 87: ...s ON If not press to select the FAX MODE 1 2 3 4 FILE LIST DATE 12 NOV 2000 TIME 15 00 1 2 3 4 5 6 FILE COMM TYPE CREATED TIME START TIME PAGES DESTINATION S No 001 DEFERRED XMT 12 NOV 13 20 20 30 001 002 MEM DEF XMT 12 NOV 13 20 22 30 003 011 012 013 016 017 PANASONIC HEAD OFFICE 201 555 1212 1 File number If the file is now being executed a is indicated on the left of the file number 2 Communica...

Page 88: ...SS SET TO SELECT FILE LIST 1 PRINT 2 VIEW USE THE KEYS TO SCROLL EACH FILE Sample display Type of File XMT Transmission POLL Polling POLLED Polled RCV TO MEM Receive to Memory CONF MAIL Conf RCV Conf Polled PC JOB PC Interface Job Option FILE XMT File Transmission JOURNAL Journal Report Status nn nn Start time IN PRG In progress REDIAL Waiting to redial INCOMP Incomplete file File Number Entered s...

Page 89: ...he file number or use or to select the file that you want to change Ex 4 See Note 2 5 Enter a new start time Ex 6 00 a m If you do not have to change the time skip to step 6 6 Continued on the next page EDIT FILE MODE 1 6 ENTER NO OR ENTER FILE NO OR FILE NO 0 0 1 ENTER FILE NO OR FILE NO 001 DEFERRED XMT START TIME 22 30 0 6 0 0 DEFERRED XMT START TIME 06 00 TEL NO 5551234 Edit File Mode ...

Page 90: ...e file is not a Deferred Communication File the following message is shown on the display Press to change the type of the file for deferred communication file 3 If you edit the file that is saved as an incomplete file after pressing in step 8 your machine will prompt you whether to execute the file immediately The display shows Press to execute the file immediately CLEAR ENTER STATION S THEN PRESS...

Page 91: ...next file number you want to delete or press to return to standby NOTE 1 Your machine cannot delete the file while it is being sent 2 Enter as the file number and press to delete all files except the file in progress The following message is shown on the display Press to delete all files EDIT FILE MODE 1 6 ENTER NO OR ENTER FILE NO OR FILE NO 0 0 1 ENTER FILE NO OR FILE NO 001 DELETE FILE NO 001 1...

Page 92: ... 1 2 3 Enter the file number or use or to select the file that you want to change Ex See Note 2 4 Your machine will print the file The document s will remain in memory even after printing the file NOTE 1 Your machine cannot print the file while it is being sent EDIT FILE MODE 1 6 ENTER NO OR ENTER FILE NO OR FILE NO 0 0 1 ENTER FILE NO OR FILE NO 001 PRINTING PAGE 001 003 Edit File Mode ...

Page 93: ...book or an original face down on the Platen Glass 2 3 Enter the file number or use or to select the file that you want to add Ex 4 Your machine will start storing the document s into a file NOTE 1 Your machine cannot add the document into the file while it is being sent or waiting to redial ENTER STATION S THEN PRESS START 00 EDIT FILE MODE 1 6 ENTER NO OR 0 0 1 ENTER FILE NO OR FILE NO ENTER FILE...

Page 94: ...the FAX lamp is ON If not press to select the FAX MODE 1 2 3 Enter the file number or use or to select the file that you want to change Ex 4 Your machine will retry the file and start dialling immediately NOTE 1 To confirm or change the entered telephone number for the file see page 85 and 87 2 If you set Fax Parameter No 031 to Valid all incomplete files will remain in the memory To avoid memory ...

Page 95: ...y To print the documents from memory the authorized operator must enter the correct password Setting the RCV To Memory Password Make sure that the FAX lamp is ON If not press to select the FAX MODE 1 2 3 4 Enter a 4 digit RCV to Memory Password Ex 5 SET MODE 1 4 ENTER NO OR FAX PARAMETER 1 99 NO 37 RCV TO MEMORY 1 2 3 4 37 RCV TO MEMORY 1234 ...

Page 96: ...eiving and release the line The machine will not answer the next incoming call until there is space available in the memory 2 We recommend that optional flash memory card is installed when this function is used See the Operating Instructions For Copier SELECT MODE 1 5 ENTER NO OR RCV TO MEMORY OFF 1 OFF 2 ON 3 PRINT RCV TO MEMORY ON 1 OFF 2 ON 3 PRINT 12 NOV 2000 15 00 RCV TO MEMORY Receive To Mem...

Page 97: ...If the password has not been set your machine will not prompt you to enter the password The documents will be printed immediately after pressing in step 4 2 Once the RCV TO MEMORY feature is set to On the password cannot be changed Fax Parameter No 037 will not be shown on the LCD display If you wish to change the password set RCV TO MEMORY feature to Off first Then change the password See page 94...

Page 98: ...o attach a Fax Cover Sheet to a transmission follow the procedure below Make sure that the FAX lamp is ON If not press to select the FAX MODE 1a Place original s face up on the ADF or 1b Place a book or an original face down on the Platen Glass 2 3 Page 1 Page 2 Page 1 Header P 01 Header P 02 Total P 02 Page 2 Fax Cover Sheet Received as Transmitted as ENTER STATION S THEN PRESS START 00 SELECT MO...

Page 99: ...press after each station is entered For details see page 39 to 43 Ex 7 NOTE 1 To change the preset Fax Cover Sheet Setting change the setting of Fax Parameter No 056 see page 30 2 This function is available for memory or direct transmission modes 3 The Fax Cover Sheet is not counted in the number of pages column of the journals 4 When the Fax Cover Sheet setting is set to On the Quick Memory XMT f...

Page 100: ...m PANASONIC 201 555 1212 4 02 Page s Following This Cover Page 1 Starting time of communication 2 Recorded name in the One Touch ABBR No or dialed telephone number 3 Your LOGO up to 25 characters and ID Number Up to 20 digits 4 The number of pages to follow This information is not shown when transmitting by Direct Transmission Mode Fax Cover Sheet ...

Page 101: ...action Journal will be sorted by the Department Code number 01 50 when it is printed If you wish to prevent unauthorized persons from setting changing or erasing the Department Code settings you should set the Access Code to restrict these settings Setting the Department Code Make sure that the FAX lamp is ON If not press to select the FAX MODE 1 2 3 4 5 6 Enter Department Code number Ex 01 to 50 ...

Page 102: ...ress NOTE 1 Use to copy the default LOGO which is set in the User Parameters You can add the department name following the default LOGO 2 When enabling the Dept Code feature for the first time it is important to Print the Journal by pressing and in order to erase the previous journal contents P A N A S O N I C SPACE S A L E S INPUT DEPT NAME 12 PANASONIC SALES INPUT DEPT CODE 1 2 3 4 INPUT DEPT CO...

Page 103: ... the steps below Make sure that the FAX lamp is ON If not press to select the FAX MODE 1 2 3 4 5 Enter the Department Code number you wish to change or erase Ex 01 to 50 Continued on the next page SET MODE 1 4 ENTER NO OR FAX PARAMETER 1 99 NO 77 DEPT CODE 2 VALID DEPT CODE 01 50 ENTER NO OR 1 2 INPUT DEPT NAME 12 PANASONIC SALES Department Code ...

Page 104: ... 8 Then enter a new Department Code Ex 9 To change or erase another Department Code repeat steps 6 to 10 To return to standby press P A N A F A X SPACE S A L E S INPUT DEPT NAME 12 INPUT DEPT NAME 12 PANAFAX SALES INPUT DEPT CODE 1234 5 6 7 8 INPUT DEPT CODE INPUT DEPT CODE 5678 STOP INPUT DEPT NAME 13 Department Code ...

Page 105: ...ated Dialling Manual Number Dialling press after each station is entered Up to 70 stations Directory Search Dialling press after each station is entered For details see page 39 to 43 Ex 3 4 Enter a 4 digit Department Code Ex 5 The document is sent with the header of the selected Department Name The selected Department Name is printed on the COMM Journal Individual Transmission Journal and Cover Sh...

Page 106: ...er a 4 digit Department Code Ex 4 5 Dial the telephone number from the keypad Ex 6 When you hear a beep The document is sent with the header of the selected Department Name The selected Department Name is printed on the COMM Journal Individual Transmission Journal and Cover Sheet ENTER STATION S THEN PRESS START 00 MONITOR MONITOR INPUT DEPT CODE 1 2 3 4 INPUT DEPT CODE 1234 MONITOR 5 5 5 1 2 3 4 ...

Page 107: ...ontents 1 2 FAX PARAMETER LIST DATE 12 NOV 2000 TIME 15 00 P 02 DEPARTMENT CODE LIST 1 2 3 NUMBER DEPARTMENT NAME DEPARTMENT CODE 01 Panafax Sales 0001 02 Panafax Service 0002 03 Panafax Accounting 0003 50 Panafax Engineering 0050 PANASONIC HEAD OFFICE 201 555 1212 1 Department Code Number 01 50 2 Department Name Up to 25 characters 3 Department Code 4 digits PRINT OUT 1 7 ENTER NO OR PRINTING FAX...

Page 108: ...00 23 56 4 5 01 Panafax Sales NO COMM PAGES FILE DURATION X R IDENTIFICATION DATE TIME DIAGNOSTIC 01 OK 005 00 05 13 XMT 5551234 10 NOV 15 10 C0044903C0000 21 OK 021 021 019 00 10 15 FWD FAX FORWARD 10 NOV 18 10 C0044903C0000 6 7 TOTAL PAGES 000026 TOTAL TIME 00 15 28 02 Panafax Service NO COMM PAGES FILE DURATION X R IDENTIFICATION DATE TIME DIAGNOSTIC 19 OK 001 001 017 00 00 13 XMT 5551234 11 NO...

Page 109: ...678 10 NOV 12 10 C0044903C0000 56 OK 005 005 020 00 08 15 PLD 111 222 333 10 NOV 19 15 C0044903C0000 70 OK 001 017 00 00 13 RCV 44567345 11 NOV 10 10 C0044903C0000 PANASONIC HEAD OFFICE 201 555 1212 1 Period date of this journal 2 Number of total pages transmitted received for this machine 3 Total transmitted received time for this machine 4 Department Code Number 01 50 5 Department Name 6 Number ...

Page 110: ...This page is intentionally left blank ADVANCED FEATURES 108 ...

Page 111: ...ll start receiving the document If a match is not found your machine will cancel the reception and an Information Code 406 will be recorded on the Journal Setting the Selective Reception see Note 1 see Note 2 Make sure that the FAX lamp is ON If not press to select the FAX MODE 1 2 3 4 5 NOTE 1 When the Selective Reception is set your machine can receive only from those stations which are programm...

Page 112: ...ASSWORD XMT to ON when you send a document To use Password Reception you must set a 4 digit receiving password in advance The password must be shared with the other compatible Panafax machine s If the password in your machine does not match the receiving password in the other compatible Panafax machine s the reception will fail Once you set password reception and set the parameter to ON it stays u...

Page 113: ... press 5 for OFF password is not checked or for ON password is checked or 6 NOTE 1 You can change the setting temporarily by using FUNCTION 8 4 PASSWORD XMT for each transmission See page 113 for details 2 To change the password press in step 4 Then re enter a new one SET MODE 1 4 ENTER NO OR FAX PARAMETER 1 99 NO 43 PASSWORD XMT 1 2 3 4 SET SET 43 PASSWORD XMT 1 OFF 1234 43 PASSWORD XMT 1 OFF 123...

Page 114: ...rd is not checked or for ON password is checked or 6 NOTE 1 Once you set the parameter you cannot select the parameter OFF or ON for each reception It is always OFF or ON until you change the setting 2 To change the password press in step 4 Then re enter a new one SET MODE 1 4 ENTER NO OR FAX PARAMETER 1 99 NO 44 PASSWORD RCV 1 2 3 4 SET SET 44 PASSWORD RCV 1 OFF 1234 44 PASSWORD RCV 1 OFF 1234 44...

Page 115: ... is ON If not press to select the FAX MODE 1a Place original s face up on the ADF or 1b Place a book or an original face down on the Platen Glass 2 3 4 for OFF password is not checked or for ON password is checked or 5 ENTER STATION S THEN PRESS START 00 SELECT MODE 1 5 ENTER NO OR PASSWD XMT OFF 1 OFF 2 ON PASSWD XMT OFF 1 OFF 2 ON PASSWD XMT ON 1 OFF 2 ON ENTER STATION S THEN PRESS START Passwor...

Page 116: ...of the following methods One Touch Dialling Abbreviated Dialling Manual Number Dialling press after each station is entered Up to 70 stations Directory Search Dialling press after each station is entered For details see page 39 to 43 Ex 7 If your machine s Transmission Password coincides with the other station s Transmission Password your machine starts sending the document When transmission is co...

Page 117: ...ves two confidential faxes with same confidential code both documents are stored together in the same confidential mailbox 2 Up to 20 Mailbox files can be stored in memory So you can receive the confidential fax using 20 different confidential codes 3 If the memory overflows the machine will stop receiving and release the line 4 We recommend that optional flash memory card be installed when this f...

Page 118: ...wn on the Platen Glass 2 3 4 Enter a 4 digit Confidential Code Ex 5 6 Dial by any one of the following methods One Touch Dialling Abbreviated Dialling Manual Number Dialling Directory Search Dialling Ex Continued on the next page ENTER STATION S THEN PRESS START 00 CONF COMM 1 5 ENTER NO OR CONFIDENTIAL XMT CONF CODE 2 2 3 3 CONFIDENTIAL XMT CONF CODE 2233 ENTER STATION THEN PRESS START 01 Station...

Page 119: ...NETWORK FEATURES NETWORK FEATURES 117 7 If necessary inform the receiving person and tell them the Confidential Code Confidential Mailbox ...

Page 120: ...e that the FAX lamp is ON If not press to select the FAX MODE 1 2 3 Enter a 4 digit Confidential Code Ex 4 5 Dial by any one of the following methods One Touch Dialling Abbreviated Dialling Manual Number Dialling Directory Search Dialling Ex 6 NOTE 1 The confidential file will be erased automatically at the center station after being polled CONF COMM 1 5 ENTER NO OR CONFIDENTIAL POLL CONF CODE 2 2...

Page 121: ...CUMENT HELD 1 2 3 4 FILE NO RECEIVED FROM PAGES TIME RECEIVED 040 PANAFAX 001 12 NOV 15 00 PANASONIC HEAD OFFICE 201 555 1212 1 File number 001 to 999 2 Received remote station s ID Character ID or Numeric ID 3 Number of pages received 4 Received date and time NOTE 1 If your machine receives two confidential faxes with same confidential code both documents are stored together in the same confident...

Page 122: ... Platen Glass 2 3 4 Enter a 4 digit Confidential Code Ex 5 The document s will be stored into memory If necessary inform the receiving party of the confidential document and tell them the confidential code needed to poll the document NOTE 1 The confidential file will be erased automatically after being polled If you wish to retain the confidential file even after being polled change the setting of...

Page 123: ...ure that the FAX lamp is ON If not press to select the FAX MODE 1 2 3 Enter the Confidential Code of the document you want to print Ex 4 The machine will print the confidential documents NOTE 1 The confidential file will be erased automatically after being printed out even if the setting of Fax Parameter No 042 CONF POLLED FILE SAVE is changed to Valid CONF COMM 1 5 ENTER NO OR PRINT CONF FILE CON...

Page 124: ...ure There are two types of confidential file deletions one is to delete the file individually by its Confidential Code and the other is to delete All confidential files in memory To delete a file using confidential code Make sure that the FAX lamp is ON If not press to select the FAX MODE 1 2 3 Enter a 4 digit Confidential Code Ex 4 CONF COMM 1 5 ENTER NO OR DELETE CONF FILE CONF CODE 2 2 3 3 DELE...

Page 125: ...ete all confidential files in memory Make sure that the FAX lamp is ON If not press to select the FAX MODE 1 2 3 4 CONF COMM 1 5 ENTER NO OR DELETE CONF FILE CONF CODE DELETE ALL CONF FILES 1 YES 2 NO DELETING ALL CONF FILES Confidential Mailbox ...

Page 126: ...nformation to the desired recipient by the following methods By registering the Sub Address information into the Phone Book Numbers By specifying the Sub Address information in the Manual Number Dialling Mode Setting of Routing Forwarding or Relaying You can customize the Automatic Routing to any combination of LAN Local Area Network PSTN Public Switched Telephone Network or PBX Extension with Las...

Page 127: ... enter the Sub Address Up to 20 digits Up to 36 digits including telephone number pauses spaces FLASH and Sub Address Ex Telephone number 5551234 Sub Address 2762 Enter as 5 Enter the station name See page 19 6 NOTE 1 separates the Sub Address from the Telephone number and is indicated by an s in the display 1 ONE TOUCH 2 ABBR NO 1 ONE TOUCH PRESS ONE TCH OR 01 ENTER TEL NO FLASH 5 5 5 1 2 3 4 FLA...

Page 128: ...s to select the FAX MODE 1a Place original s face up on the ADF or 1b Place a book or an original face down on the Platen Glass 2 Ex 3 The document is stored into memory and your machine starts to dial the number of the station and sends the document s with Sub Addressing information ENTER STATION S THEN PRESS START 00 01 Station name 5551234s2762 STORE NO 001 PAGES 001 01 Sub Addressing ...

Page 129: ... number pauses spaces FLASH and Sub Address Ex Telephone number 5551234 Sub Address 2762 Enter as 3 The document is stored into memory and your machine starts to dial the number of the station and sends the document s with Sub Addressing information NOTE 1 separates the Sub Address from the Telephone number and is indicated by an s in the display 2 Manual Off Hook or On Hook Dialling cannot be use...

Page 130: ...This page is intentionally left blank NETWORK FEATURES 128 ...

Page 131: ...f the last 100 transactions a transaction is recorded each time you send or receive a document It is printed automatically after every 100 transactions See Note 1 or you can print or view it manually by using the following procedure Make sure that the FAX lamp is ON If not press to select the FAX MODE 1 2 3a for print a Journal 3b for view a Journal 4 Select the view mode to view transmission tran...

Page 132: ... or thedialed telephone number Number of pages successfully transmitted or received 01 12 10 00 OK P01 XMT 5551234 Scroll Marker Latest transaction Oldest transaction Only 1 transaction CommunicationResult OK Communication was successful B OK Batch Transmission was successful P OK Reserved transmission was successful under memory full condition R OK Relayed transmission was successful BUSY Line bu...

Page 133: ...OURNAL An Individual Transmission Journal contains the information on the latest transmission Make sure that the FAX lamp is ON If not press to select the FAX MODE 1 2 3 Continued on the next page PRINT OUT 1 7 ENTER NO OR 6 IND XMT JOURNAL PRESS SET TO PRINT PRINTING IND XMT JOURNAL Journals and Lists ...

Page 134: ...03C0000 03 OK 001 004 00 00 31 XMT ACCOUNTING DEPT 11 NOV 17 50 C0044903C0000 04 630 000 005 005 00 00 00 XMT 342345676 11 NOV 17 57 0800420000000 05 STOP 000 006 00 00 34 XMT 12324567 11 NOV 18 35 0210260200000 06 OK 001 001 007 00 00 20 XMT 44567345 11 NOV 18 44 C8044B03C0000 07 408 003 008 00 02 14 XMT 2345678 11 NOV 18 55 0040440A30080 48 OK 002 002 049 00 00 31 XMT 0245674533 12 NOV 08 35 C80...

Page 135: ...ge 1 2 IND XMT JOURNAL DATE 12 NOV 2000 TIME 15 00 10 11 DATE TIME 12 NOV 2000 09 00 3 JOURNAL No 21 4 COMM RESULT OK 5 PAGE S 001 7 DURATION 00 00 16 6 FILE No 010 16 MODE MEMORY TRANSMISSION 17 DESTINATION 001 555 1234 ABCDEFG 18 RECEIVED ID 19 RESOLUTION STD 20 LINE NUMBER 2 13 PANASONIC HEAD OFFICE 201 555 1212 15 14 Journals and Lists ...

Page 136: ...l number of pages that were attempted to be transmitted Asterisk indicates that the quality of some received copies was poor 6 File number 001 to 999 If the communication is stored into memory a file number is assigned for each communication 7 Duration of communication 8 Type of communication XMT means Transmission RCV means Reception POL means Polling PLD means Polled FWD means Fax Forward 9 Remo...

Page 137: ... 1 or Fax Parameter No 12 Sample COMM JOUR COMM JOURNAL DATE 12 NOV 2000 TIME 15 00 1 2 3 MODE MEMORY TRANSMISSION START 12 NOV 14 50 END 12 NOV 15 00 FILE NO 050 4 5 6 7 8 9 10 STN NO COMM ABBR NO STATION NAME TEL NO PAGES DURATION 001 OK 01 SERVICE DEPT 001 001 00 01 30 002 OK 02 SALES DEPT 001 001 00 01 25 003 407 03 ACCOUNTING DEPT 000 001 00 01 45 004 BUSY 021 111 1234 000 001 00 00 00 PANASO...

Page 138: ... storing the documents into memory for transmission but successfully stored document s was sent R OK indicates that the Relayed XMT or Confidential Communication was successful 3 digit Info Code See page 145 indicates that the communication has failed In this case the machine will print the attached report with first page of your document as shown on the previous page 7 Abbreviated number or mark ...

Page 139: ... of the telephone numbers you have stored Make sure that the FAX lamp is ON If not press to select the FAX MODE 1 2 3 4 for One Touch ABBR Number List for Directory Search List Continued on the next page PRINT OUT 1 7 ENTER NO OR 2 ONE TCH ABBR LIST PRESS SET TO PRINT 1 ONE TOUCH ABBR NO 2 DIR SEARCH PRINTING ONE TOUCH ABBR LIST PRINTING DIR SEARCH LIST Journals and Lists ...

Page 140: ...1234 AUTO 02 SALES DEPT 222 666 2345 L 1 03 ACCOUNTING DEPT 313 333 3456 L 2 NO OF STATIONS 03 4 PANASONIC HEAD OFFICE 201 555 1212 ABBR NO LIST DATE 12 NOV 2000 TIME 15 00 1 2 3 5 ABBR NO STATION NAME TELEPHONE NO LINE 001 ENG DEPT 888 555 1234 AUTO 002 PURCHASE DEPT 999 666 2345 L 1 003 REGULATION DEPT 777 333 3456 L 2 NO OF STATIONS 003 PANASONIC HEAD OFFICE 201 555 1212 Journals and Lists ...

Page 141: ...T 003 777 333 3456 AUTO S SALES DEPT 01 121 555 1234 L 1 SERVICE DEPT 02 222 666 2345 AUTO NO OF STATIONS 006 4 PANASONIC HEAD OFFICE 201 555 1212 1 One Touch number or Abbreviated number nn One Touch number nnn Abbreviated number 2 Station name recorded in the machine Up to 15 characters 3 Telephone number recorded in the machine Up to 36 digits 4 Number of recorded One Touch and ABBR numbers 5 T...

Page 142: ... 002 P3 PROG A POLL 001 002 P8 PROG B ABBR GRP 001 002 003 PANASONIC HEAD OFFICE 201 555 1212 1 Program key 2 Program name Up to 15 characters 3 Type of communication XMT indicates transmission POLL indicates polling ABBR GRP indicates that the Program key is programmed as a group key ONE TOUCH indicates that the Program key is programmed as a One Touch key 4 Timer Indicates the starting time indi...

Page 143: ...SOLUTION HOME 1 Standard 2 Fine 3 S Fine 2 1 003 ORIGINAL HOME 1 Text 2 T P 3 Photo 1 1 099 MEMORY SIZE FLASH 2MB 4MB 6 PANASONIC HEAD OFFICE 201 555 1212 1 Parameter number 5 Standard setting Factory preset standard setting 2 Description HOME means home position setting 6 Memory size Base memory option memory 3 Selection 7 Changed setting indicates that the Factory preset setting was changed 4 Cu...

Page 144: ...This page is intentionally left blank PRINTOUT JOURNALS AND LISTS 142 ...

Page 145: ...ission Copy Quality Vertical lines on the transmitted document Check own copy quality If copy is OK your machine has no problem report to the receiving party that they have a problem If copy is NG clean the Scanning Area Transmitted document is blank During Reception Add Paper Replenish the recording paper Recording paper misfeed Remove the misfed paper See Operating Instructions for Copier P 58 R...

Page 146: ...he machine is printing the received document s from memory which also happens to be the 100th transaction the machine will not auto answer until the Transaction Journal completes printing 148 64 Cannot transmit or receive An information code will be shown on the display Refer to the information code table to find out the trouble 145 No Unit Operation No unit operation To reset the machine turn off...

Page 147: ...revious page is illegible Wait a few minutes and send again 410 Communication aborted on the transmitting side Check with the other party 411 Polling password does not match Check the polling password 73 412 No data from the transmitting side Check with the other party 414 Polling password does not match Check the polling password 73 415 Polling transmission error Check the polling password 73 416...

Page 148: ...ring dialling STOP was pressed Reload the document s and send again 634 Redial was not successful due to no response from the called station or wrong number dialed Note If busy tone was not detected the machine will only redial once Check the telephone number and send again 638 Power failure occurred during the communication Check the power cord and plug 870 Memory overflow occurred while storing ...

Page 149: ...o remove the stamp see Note 1 1 Open the ADF Input Tray 2 Open the ADF Exit Cover 3 1 Remove by pulling the Stamp Assembly upward 2 Remove the Stamp Replace the stamp with a new one 4 Reinstall the Stamp Assembly NOTE 1 Please contact your local Authorized Panasonic Dealer to purchase a new stamp See the Operating Instructions For Copier for order number Troubleshooting ...

Page 150: ...ine Cable from the telephone jack that was supplied by the telephone company 2 Plug a different regular telephone into the same telephone jack 3 Check for dial tone through the handset If there is still no dial tone report it to your local telephone company or Call from another telephone to this number If the telephone does not ring report it to your local telephone company MONITOR Troubleshooting...

Page 151: ...acity Automatic Document Feeder Up to 50 sheets A4 A5 64g m2 Up to 30 sheets A3 FLS B4 64 g m2 Scanning Method Sheet Feeding or Flatbed with CCD type image sensor Effective Scanning Width 292 mm Scanner Resolution Horizontal 8 pels mm Standard and Fine Resolution 16 pels mm Super Fine Resolution Vertical 3 85 lines mm Standard Resolution 7 7 lines mm Fine Resolution 15 4 lines mm Super Fine Resolu...

Page 152: ...number including pauses and spaces and up to 15 characters for each station name Image Memory Capacity Based on ITU T Image No 1 chart using Standard Resolution Power Consumption Normal Operation Mode 165 Wh Energy Saver Mode 70 Wh Sleep Mode 3 5 Wh Maximum 1 5 kW Base Memory 120 pages with 4 MB Flash Memory Card 440 pages with 8 MB Flash Memory Card 760 pages Specifications ...

Page 153: ... photocopier which can produce images with great clarity Furthermore its copying functionality can also be greatly enhanced by the addition of specially selected options and supplies For a list of available options and supplies see the Operating Instructions For Copier ...

Page 154: ...e that allows up to 16 alphanumeric characters identifying your facsimile machine Coding Scheme The data compression method used by facsimile machines Your machine utilizes Modified Huffman MH Modified Read MR Modified Modified Read MMR and Joint Bi level Experts Group JBIG coding schemes Comm Journal Refers to either the Communication Journal Relay Transmission Report or the Confidential XMT Repo...

Page 155: ...ransmission capabilities of the current generation of facsimile machines Group Dialling The ability to program many telephone numbers into a single station so that many locations can be dialed in sequence utilizing a single keystroke Handshaking The exchange of a group of control signals that communicate between the transmitter and receiver These signals determine the condition at which communicat...

Page 156: ...y pressing one key Overlap Printing Documents too long to be reduced are automatically printed on two pages with approximately 13 mm overlap Panasonic Super Smoothing An electronic image enhancement Panasonic Super Smoothing that will create a particular pattern for the improvement of copy quality Photo A scanning technique to distinguish levels of gray from black and white Your machine can detect...

Page 157: ...ncoming document into its memory when it runs out of recording paper or toner Transmission Reservation The ability to preset a telephone number so that you may reserve a transmission while your unit is performing another function Transmission Password A 4 digit password that is checked when a document is transmitted User Parameter Programmed parameters that provide information to other stations Ex...

Page 158: ...ct Transmission Reservation 60 Double Sided Transmission Receiving 51 Duplex Print 30 Duplex Scan 53 E Edit File Mode 85 F Fax Cover Sheet 96 Fax Output Tray 30 FAX Parameter List 141 Fax Parameter Table 28 FILE Acceptance Report 28 File List 85 Fixed Reduction 65 Flatbed Scanning 33 Function Key 8 G General Description 99 110 124 H Header Format 28 Header Print 28 How To Load Originals 33 I ID Nu...

Page 159: ...int Reduction Mode 65 Selective Reception 109 Sending a Confidential Document to a Remote Station s Mailbox 116 Sending a Document with Department Code 103 Sending Document with Department Code Voice Mode Transmission 104 Sending Document s Using Duplex Scan 53 Sending Documents 37 Setting Duplex Print 55 Setting for Group Dialling 76 Setting Password Transmission 111 Setting RCV To Memory 94 Sett...

Page 160: ...Facsimile Telephone Number Directory Name Telephone Number ...

Page 161: ...250 AS200 DS200 DS210 FG230 FG231 FK200 FK210 FS200 MD200 DA NE200 PC200 PC210 SM08B SM16B SM28B UC200 XN200 XT200 UE 410047 410048 403171 GETTING TO KNOW YOUR MACHINE INSTALLING YOUR MACHINE PROGRAMMING YOUR MACHINE BASIC OPERATIONS ADVANCED FEATURES NETWORK FEATURES PRINTOUT JOURNALS AND LISTS PROBLEM SOLVING APPENDIX Matsushita Electric Industrial Co Ltd Osaka 542 8588 Japan DZSD001199 1 T1100 ...

Reviews: