background image

1

Image Converter

User Manual

Model “Oszi” 400 Series 

Summary of Contents for Image Converter

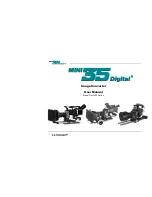
Page 1: ...1 Image Converter User Manual Model Oszi 400 Series ...

Page 2: ...2 ...

Page 3: ...large rear optical elements such as Cooke S4 Primes Zeiss Ultra Primes and Zeiss Super Speeds Zeiss Distagons with focal lengths over 40mm will also work Improved features of the Oszi 400 series Improved image screen Finer grain pattern for better imaging New oscillating movement The elliptical motion of the PRO35 has been incorporated no more center spot Adjustable speed control Allows greater co...

Page 4: ...4 World Wide Technical Support P S Technik GmbH Email info pstechnik de Phone 49 89 45 09 82 30 North America ZGC Inc Email sales zgc com Phone 1 973 335 4460 printed January 04 ...

Page 5: ...ing Kits 7 Preparation 8 General Description 9 With CANON XL1 XL1S 13 With SONY DSR PD150 DCR VX1000 DCR VX2000 21 With PANASONIC AG DVX100 29 Maintenance 37 Optional Accessories Mounts 37 Frequently Asked Questions 38 Dealers 44 Technical Data 45 Technical Support 46 ...

Page 6: ... 1 Support Interface with Integrated Shoulder Set and 15mm LWS systems The support interface provides 1 4 and 3 8 attachment points allowing the use of all industry standard tripods bridge plates and other support systems e g Steadicam The 15mm LWS system accepts all film style accessories including follow focus and matte boxes An ordered connecting kit is already mounted ...

Page 7: ...set and screws 1 Color Viewfinder Holder Canon Connecting Kit A Connecting Kit ordered with the basic module is already mounted when delivered Camera connecting kits must be purchased separately for each brand and are available for the following Mini Digital Video Cameras Canon XL1 XL1S Sony DSR PD150 DCR VX1000 DCR VX2000 Panasonic AG DVX100 ...

Page 8: ...second nature as your productions progress USAGE NOTE The Mini35Digital creates a lively cine like image with an artificial film grain pattern How much the film grain pattern is adequate for you depends on your preference To adjust the visibility of the pattern use the 8 step speed control wheel J and the T stops To optimize the effect the taking lens should be as wide open as possible Use the iri...

Page 9: ...scription Comment A Hook For Tape Measure B LWS System Light Weight Support System Prepared for 15mm rods C Wheel Clamping screw for LWS D Intermediate Flange Takes the Interchangeable Mount Interchangeable Mount connects to Lens ...

Page 10: ...nector Pin 1 Bat Pin 2 Bat G Rose Wheel H RUN GREEN button Manual RUN STOP I Control LED RUN LOW BAT GREEN Æ RED low power Æ Blinking light Æ Runs with chosen speed Acceptable speed Prepare new battery Below minimum speed change bat J Speed Control Wheel 8 steps Controls oscillating movement K Focal Plane White Engravure ...

Page 11: ...C Pin 3 VTR M INPUT for LANC cable 7 Pin Fischer female socket Pin 1 not connected Pin 2 VTR trigger Pin 3 Bat Pin 4 U Bat ex Pin 5 not connected Pin 6 Bat Pin 7 RET N Control LED RUN LOW BAT GREEN Æ RED low power Æ Blinking light Æ Good speed control Acceptable speed Below minimum speed ...

Page 12: ...ra Then connect the Mini35 via the REMOTE connection L with the remote control unit 7 pin LANC Cable Red connector Canon Sony Black connector Panasonic Canon XL1 XL1S Sony DSR PD150 DCR VX1000 DCR VX2000 The Mini35 can now be controlled Independent manually by the Mini35 RUN button or Both manually via the camera START button or Together via a Remote Control System Panasonic AG DVX100 The camera h...

Page 13: ...rly attach the Mini35Digital image converter to your Canon XL1 XL1S with lightweight support a Viewfinder Holder b Top Cover c Lock Ring d Relay Lens e Spring loaded pad f Support release Lever g Camera Screw h Battery Holder k Bottom Screws C a n o n ...

Page 14: ...elay is attached to the rear of the Mini35 via a bayonet type mount The lock ring c is the ring located in the front of the relay lens nearest to the body of the Mini35 photo page 11 3 Attach the relay lens onto the camera The relay lens attaches like any other XL mounted lens Æ a Line up the red dots b Engage the lens in the mount c Rotate the lens until the lock clicks in place C a n o n ...

Page 15: ...time a camera has to be installed you will find it easier to start by sliding the camera support out of the way The camera support platform has a spring loaded pad in the center that adjusts for the height of the camera The knob with a lever f at the back of the camera platform locks the spring loaded pad in place By releasing that knob the spring will push the pad to its highest position making t...

Page 16: ...t of the Mini35 and secure it in place with the lock ring c Æ a Open the lock ring c b Line up the relay lens into the port holding the camera by its top handle Make sure the locating pin is fully engaged c Close the lock ring c clockwise to secure the relay lens Note Be sure the camera does not accidently disengage C a n o n ...

Page 17: ...he camera support a The big knurled knob g through the camera platform has to line up with the threaded hole on the camera bottom b Start engaging the thread of the knob in the thread of the camera but do not tighten it yet c Release the lever f at the back of the platform to allow the spring loaded pad e to come in contact with the base of the camera Finish tightening the knob g at the bottom of ...

Page 18: ...ject The image should be sharp in the viewfinder and on the field monitor The Canon XL1 and XL1S will electronically recognize only lenses made by Canon to work with these cameras Accordingly you will see a lens warning light in the viewfinder when using the Mini35Digital Image converter This is normal and will have no effect on the footage you shoot With the XL1 camera you cannot eliminate the le...

Page 19: ... sharp than the one recorded by the unfiltered original lens Test if the back focus is properly adjusted Place the camera with the Mini35Digital image converter mounted with a 35mm lens in front of a high quality test definition chart such as the Putora 7A9 chart The iris on the relay should be fully opened The film lens should be focused by eye to the point of best resolution highest number of ci...

Page 20: ... you have achieved the sharpest image 3 Check that the film lens is at the best focus before you check the back focus a second time You will need a good quality monitor to accurately judge the sharpness 4 Once satisfied with the image lock the hex screw to secure this adjustment and double check the image By using a Putora 7A9 chart you will be able to see the moiré effect of the test circles visi...

Page 21: ...ow to properly attach the Mini35Digital Image converter to your Sony DSR PD150 DCR VX1000 DCR VX2000 with lightweight support a Top Cover b Lock Ring c Relay Lens d Spring loaded Pad e Support release Lever f Camera Screw g Battery Holder h Bottom Screws S O N Y ...

Page 22: ...ring b counter clockwise The relay is attached to the rear of the Mini35 via a bayonet type mount The lock ring b is the ring located in the front of the relay lens nearest to the body of the Mini35 3 Attach the relay lens onto the camera Remove all filters sunshades adapter rings etc before attaching the relay lens directly onto the camera front lens S O N Y ...

Page 23: ...time a camera has to be installed you will find it easier to start by sliding the camera support out of the way The camera support platform has a spring loaded pad in the center that adjusts for the height of the camera The knob with a lever e at the back of the camera platform locks the spring loaded pad in place By releasing that knob the spring will push the pad to its highest position making t...

Page 24: ...ws s in front of the relay lens The bayonet ring r must be moveable c Line up the relay lens into the port holding the camera by its top handle Make sure the locating pin is fully engaged Close lock ring d Bring the camera carefully into a standard vertical position Then remove camera without losing this position e Lock the 4 screws in the relay front and re connect relay lens to the adapter port ...

Page 25: ...he camera support a The big knurled knob f through the camera platform has to line up with the threaded hole on the camera bottom b Start engaging the thread of the knob in the thread of the camera but do not tighten it yet c Release the lever e at the back of the platform to allow the spring loaded pad d to come in contact with the base of the camera d Finish tightening the knob f at the bottom o...

Page 26: ... 2 Turn on the camera in the fully manual position a Turn off the AutoFocus and Zoom function b Focus camera lens on the ground glass inside the converter If the image is too dark c Open the iris on the film lens d Open the iris on the camera lens 3 Focus the 35mm film lens on an object The image should be sharp in the viewfinder and on the field monitor S O N Y ...

Page 27: ... glance the image may appear less sharp than the one recorded by the unfiltered original lens Test if the back focus is properly adjusted Place the camera with the Mini35Digital image converter mounted with a 35mm lens in front of a high quality test definition chart such as the Putora 7A9 chart The iris on the relay should be fully open The film lens should be focused by eye to the point of best ...

Page 28: ... sharpest image 2 Check that the film lens is at the best focus before you check the back focus a second time You will need a good quality monitor to accurately judge the sharpness of the image By using a Putora 7A9 chart you will be able to see the moiré effect of the test circles visible through the relatively low definition of the viewfinder 3 Lock the back focus and double check the image S O ...

Page 29: ...erly attach the Mini35Digital image converter to your Panasonic AG DVX100 camera with lightweight support a Top Cover b Lock Ring c Relay Lens d Spring loaded Pad e Support release Lever f Camera Screw g Battery Holder h Bottom Screws P A N A S O N I C ...

Page 30: ...he rear of the Mini35 via a bayonet type mount The lock ring b is the ring located in the front of the relay lens nearest to the body of the Mini35 3 Attach the relay lens onto the camera a Remove all filters sunshades adapter rings etc before attaching the relay lens directly onto the camera front lens b Eventually you need a rubber pad to grip the protective cap recessed deeply in the hood P A N...

Page 31: ...a camera has to be installed you will find it easier to start by sliding the camera support out of the way The camera support platform has a spring loaded pad in the center that adjusts for the height of the camera The knob with a lever e at the back of the camera platform locks the spring loaded pad in place By releasing that knob the spring will push the pad to its highest position making the mo...

Page 32: ...in front of the relay lens The bayonet ring r must be moveable c Line up the relay lens into the port holding the camera by its top handle Make sure the locating pin is fully engaged Close lock ring d Bring the camera carefully into a standard vertical position Then remove camera without losing this position e Lock the 4 screws in the relay front and re connect relay lens to the adapter port f Clo...

Page 33: ...mera support a The big knurled knob f through the camera platform has to line up with the threaded hole on the camera bottom b Start engaging the thread of the knob in the thread of the camera but do not tighten it yet c Release the lever knob e at the back of the platform to allow the spring loaded pad d to come in contact with the base of the camera d Finish tightening the knob f at the bottom o...

Page 34: ...Turn on the camera in the fully manual position Turn off the AutoFocus and Zoom function Focus camera lens on the ground glass inside the converter If the image is too dark a Open the iris on the film lens b Open the iris on the camera lens 3 Focus the 35mm film lens on an object The image should be sharp in the viewfinder and on the field monitor P A N A S O N I C ...

Page 35: ... the image may appear less sharp than the one recorded by the unfiltered original lens Test if the back focus is properly adjusted Place the camera with the Mini35Digital image converter mounted with a 35mm lens in front of a high quality test definition chart such as the Putora 7A9 chart The iris on the relay should be fully opened The film lens should be focused by eye to the point of best resol...

Page 36: ...pest image 2 Check that the film lens is at the best focus before you check the back focus a second time You will need a good quality monitor to accurately judge the sharpness of the image By using a Putora 7A9 chart you will be able to see the moiré effect of the test circles visible through the relatively low definition of the viewfinder 3 Lock the back focus and double check the image P A N A S...

Page 37: ...essories for the Mini35Digital Adapter kit for Canon B W viewfinder Additional side handgrips Additional camera connecting kits Custom lens mounts and support interfaces Top handle for use with EasyRig or Marzpak Available Lens Mounts PL Mount Pana Mount Nikon Canon EF Zeiss Contax Leica R M Contact you local P S Technik dealer for prices and availability ...

Page 38: ... sure that your matte box and any equipment in front of the lens does not cause the vignetting Some old lens designs with small rear lenses do not work properly with the Mini35 because the diameter of the last lens is to small This is concerning the Cooke Series II III and Zeiss Distagons below 40mm The 25 250mm zooms by Angenieux as well as Cooke are both tight but work properly We did not test a...

Page 39: ...professional 35mm motion picture film look is sharp but less starkly so Capturing the image in 35mm format with a 35mm lens also allows you to capture gradations of focus depth of field like the human eye sees images on a image plane Tip For the best effect when composing a shot aim for out of focus objects in both the foreground and background Q How can I avoid having the grain of the projection ...

Page 40: ... with other users of the adapter A General information is available from www pstechnik de Questions can be forwarded to info pstechnik de DVInfo net www dvinfo net hosts a P S Technik forum http www dvinfo net conf forumdisplay php s forumid 58 where many users post questions insight into and experiences with the device Mizell Wilson of ZGC Inc is the offical monitor of this forum and is happy to ...

Page 41: ...t A Our tip Check out www customflix com for the latest in independent distribution of your film Q I am using an XL1 S and want a progressive look but I don t like Frame mode are there any options A While we have not tested it ourselves we have heard very good things about DVFilmMaker from www dvfilm com Q I am using a PAL XL1 S for the increased resolution and color but plan to distribute in NTSC...

Page 42: ...ving images the focus and zoom movements may not be as smooth as the movement on a cine lens In addition older zoom lenses will not hold their focus while zooming in and out and functionally become variable primes We do have reports that the newest SLR zooms will hold focus throughout the range Make sure to test the individual lens before production Q Can I use 16mm lenses A No this is not possibl...

Page 43: ...rphic adapters with the Mini35 A No The Mini35 connects directly to the cameras and does not allow for the use of any of the prosumer anamorphic attachments There are two methods for shooting 16x9 The first is to shoot 4 3 composing for 16x9 and then masking in post The XL1S provides on screen guides to assist in this process The second is to use the in camera 16x9 feature To achieve a 2 4 1 scope...

Page 44: ...m Video Equipment Tel 61 2 94 38 44 88 Email jbowring ozemail com au Korea SAMA Electronics Corp Tel 82 2 34 72 05 65 Email inn samakorea com Holland Holland Equipment B V Tel 31 20 694 35 75 Email sales hollandequipment nl GUS Dedo Weigert Film GmbH Tel 49 89 35 61 61 11 Email mwarnck dedoweigertfilm de Singapore Thailand Malaysia Philipines Indonesia Transmarco H Warta Pte Ltd Email thwarta gene...

Page 45: ...Tuning for Shooting Sensor Back Focus Relay Lens Back Focus Camera Lens Length of Mini35Digital unit 345 mm 345 mm 345 mm Weight 2 85 kg 6 27 lbs 3 0 kg 6 6 lbs 3 0 kg 6 6 lbs Frame position Upright Emulsion Side Up Pro35Digital s Iris Diaphragm behind lens Built in for Light Reduction No effect on depth of focus Current consumption 300mA 7 2 V Power supply Adapter Battery connected via 2 pin cabl...

Page 46: ...46 World Wide Technical Support P S Technik GmbH Email info pstechnik de Phone 49 89 45 09 82 30 North America ZGC Inc Email sales zgc com Phone 1 973 335 4460 printed January 04 ...

Reviews: