background image

Summary of Contents for D3300

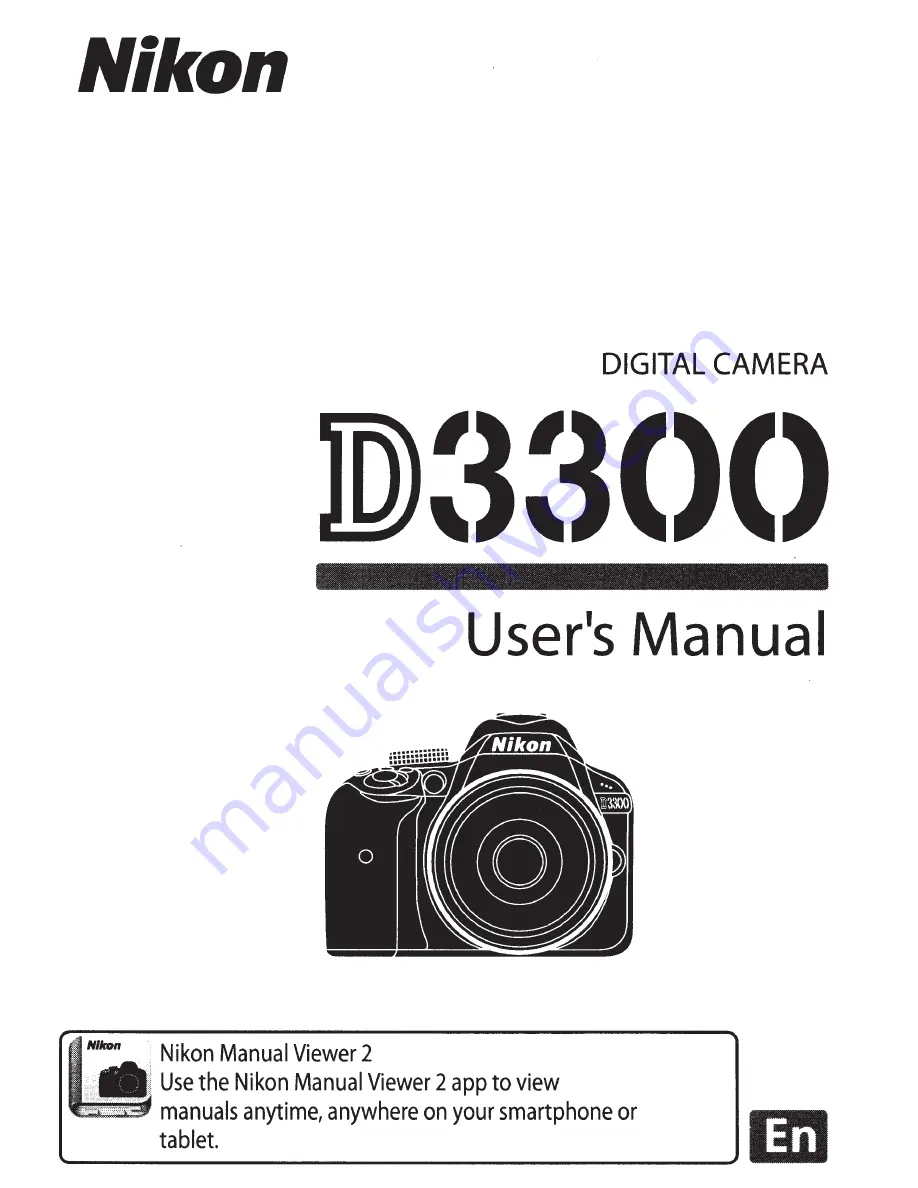
Page 1: ...Nikon Nllron DIGITAL CAMERA User s Manual Nikon Manual Viewer 2 Use the Nikon Manual Viewer 2app to view manuals anytime anywhere on your smartphone or tablet ...

Page 2: ...are shown in bold Camera Settings The explanations in this manual assume that default settings are used Nlkon Nikon Manual Viewer 2 Install the Nikon Manual Viewer 2 app on your smartphone or tablet to view Nikon digital camera manuals anytime anywhere Nikon Manual Viewer 2 can be downloaded free of charge from the App Store and Google Play Download of the app and any product manuals requires an I...

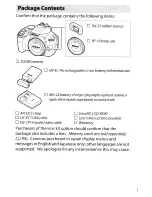
Page 3: ...ed shape depends on country ofsale 0 AN DC3 strap 0 ViewNX 2 CD ROM D UC E7 7 USB cable D User s Manual this booklet D EG CP74 audio video cable D Warranty Purchasers of the lens kit option should confirm that the package also includes a lens Memory cards are sold separately OJ 95 Cameras purchased in Japan display menus and messages in English and Japanese only other languages are not supported W...

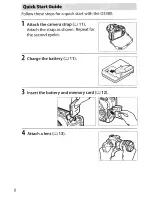
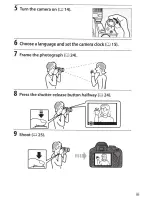
Page 4: ...steps for a quick start with the 03300 1 Attach the camera strap OJ 11 Attach the strap as shown Repeat for the second eyelet 2 Charge the battery OJ 11 3 Insert the battery and memory card OJ 12 4 Attach a lens OJ 13 ...

Page 5: ...S Turn the camera on Il 14 6 Choose a language and set the camera clock IJ 15 7 Frame the photograph CD 24 8 Press the shutter release button halfway Il 24 9 Shoot OJ 25 iii ...

Page 6: ...e Manual from the website listed below The ReferenceManual can be viewed using Adobe Reader or Adobe Acrobat Reader 5 0 or later 1 On your computer launch a web browser and open the following site http nikonimglib com manual 2 Choose a language and download the Reference Manual 3 Double click the downloaded file ...

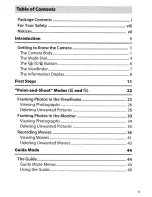
Page 7: ...The Information Display 8 First Steps 11 Point and Shoot Modes 0 and 22 Framing Photos in the Viewfinder 23 Viewing Photographs 26 Deleting Unwanted Pictures 28 Framing Photos in the Monitor 30 Viewing Photographs 34 Deleting Unwanted Pictures 35 Recording Movies 36 Viewing Movies 41 Deleting Unwanted Movies 43 Guide Mode 44 The Guide 44 Guide Mode Menus 45 Using the Guide 48 v ...

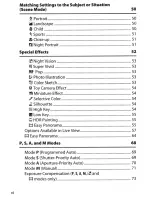
Page 8: ...era Effect Miniature Effect Selective Color _ s lh 1 ouette IOOID High Key Low Key Q HDR Painting t l Easy Panorama Options Available in Live View t l Easy Panorama P S A and MModes 50 50 50 50 51 51 51 52 53 53 53 53 53 54 54 54 54 54 55 55 55 57 64 68 Mode P Programmed Auto 69 Mode S Shutter Priority Auto 69 Mode A Aperture Priority Auto 70 Mode M Manual 71 Exposure Compensation P S A M and t l ...

Page 9: ...the Computer 85 View Pictures 87 Technical Notes 89 Compatible Lenses 89 Other Accessories 91 Approved Memory Cards 95 Caring for the Camera 96 Storage 96 Cleaning 96 Caring for the Camera and Battery Cautions 97 Caring for the Camera 97 Caring for the Battery 100 Error Messages 102 S f pec1 1cat1ons 106 Battery Life 119 VII ...

Page 10: ...could cause permanent visual impairment Usingtheviewfinder diopteradjustment control When operating the viewfinder diopter adjustment control with your eye to the viewfinder care should be taken not to put your finger in your eye accidentally Lt Tum offimmediately in the event of malfunction Should you notice smoke or an unusual smell coming from the equipment or AC adapter available separately un...

Page 11: ...vethe productwhere it will be exposed toextremelyhigh temperatures suchasinan enclosed automobileorin directsunlight Failure to observe this precaution could cause damage or fire Do notaim aflash atthe operatorofa motorvehide Failure to observe this precaution could result in accidents 6 Observecautionwhen usingtheflash Using the camera with the flash in close contact with the skin or other object...

Page 12: ...use or when the product has been used on battery power for an extended period Before removing the battery turn the camera offand allowthe battery to cool Discontinue use immediately should you notice any changes in the battery such as discoloration or deformation Observe properprecautions when handlingthe charger Keep dry Failure to observe this precaution could result in injury or product malfunc...

Page 13: ...O ROMs on an audio CD player could cause hearing loss or damage the equipment itFollowthe directionsofairlineand hospital personnel This camera transmits radio frequencies that could interfere with medical equipment or aircraft navigation Disable the wireless networkfeature and remove all wireless accessories from the camera before boarding an aircraft and turn the camera offduring take offand lan...

Page 14: ... REPLACED BY AN INCORRECT TYPE DISPOSE OF USED BATIERIES ACCORDING TO THE INSTRUCTIONS This symbol indicates that electrical and electronic equipment is to be collected separately The following apply only to users in European countries This product is designated for separate collection at an appropriate collection point Do not dispose of as household waste Separate collection and recycling helps c...

Page 15: ...stallation Ifthis equipment does cause harmful interference to radio or television reception which can be determined by turning the equipment offand on the user is encouraged to try to correct the interference by one or more ofthefollowing measures Reorient or relocate the receiving antenna Increasethe separation between the equipment and receiver Connect the equipment into an outlet on a circuit ...

Page 16: ...The copying or reproduction of stamps issued by the government and of certified documents stipulated by law is prohibited Cautions on certain copies and reproductions The government has issued cautions on copies or reproductions of securitiesissued by private companies shares bills checks gift certificates etc commuter passes or coupon tickets except when a minimum ofnecessary copies are to be pro...

Page 17: ...E WITH THE AVC STANDARD AVC VIDEO AND OR ii DECODE AVC VIDEO THAT WAS ENCODED BY ACONSUMER ENGAGED IN APERSONAL AND NON COMMERCIAL ACTIVITY AND OR WAS OBTAINED FROM AVIDEO PROVIDER LICENSED TO PROVIDE AVC VIDEO NO LICENSE IS GRANTED OR SHALL BE IMPLIED FOR ANY OTHER USE ADDITIONAL INFORMATION MAY BE OBTAINED FROM MPEG LA l L C SEE http www mpegla com Use Only Nikon Brand Electronic Accessories Nik...

Page 18: ...damages or lost profits that may result from product malfunction B Life Long Learning As part of Nikon s Life Long Learning commitment to ongoing product support and education continually updated information is available on line at the following sites Forusers in the U S A http www nikonusa com Forusers in Europe and Africa http www europe nikon com support Forusers in Asia Oceania andthe Middle E...

Page 19: ... dial IJPower switch 14IJMode dial 4 IJShutter release button 24 25 IJ o n button 77 IJ121 button 71 73 Accessory shoe for optional flash IJm information button 8 units E 1 f Infrared receiver for ML L3 remote ye ets or camera strap 11 IJspeaker control rear 93 Focal plane mark e The Speaker Do not place the speaker in close proximity to magnetic devices Failure to observe this precaution could af...

Page 20: ...Lens mount 13 m Built in flash 29 m Body cap ICI Bit button 6B Accessory terminal 94 m Microphone 39 Connector for external IJConnector cover microphone 94 m Fn button IJUSB and AN connector 85 m Mounting mark 13 EiJHOMI mini pin connector Lens release button 21 Infrared receiver for ML L3 remote control front 93 ...

Page 21: ...hamber cover latch ftl button 26 12 19 liiil IJMENU button 75 Battery chamber cover 12 19 m f button 26 mQJ g button 6 m button 26 79 IJTripod socket IJi button 10 IJMonitor 8 26 30 button 30 36 IJBattery latch 12 19 IJ OK button 79 Power connector cover for m optional power connector Mult1 selector 79 m Memory card slot cover 12 20 3 ...

Page 22: ...trol over camera settings P Programmed auto CD 68 69 S Shutter priority auto CD 68 69 A Aperture priority auto CD 68 70 M Manual CD 68 71 GUIDE Mode CD 44 Take view and edit pictures and adjust settings with the help of an on screen guide Auto Modes Select these modes for simple point and shoot photography Auto CD 22 Auto flash off CD 22 ...

Page 23: ...n OJ 53 57 Low key OJ 55 Color sketch CD 53 58 0 HDR painting I 55 Q Toy camera effect m 54 59 r l Easy panorama I 55 64 Miniature effect I 54 60 Scene Modes The camera automatically optimizes settings to suit the scene selected with the mode dial Match your selection to the scene being photographed Portrait m 50 Iii Landscape CD 50 2 Child CD SO 1 Sports m 51 Close up CD 51 Night portrait I 51 5 ...

Page 24: ...utterrelease As for single frame except that camera noise i is reduced Self timer Take pictures using the self timer The timer starts when the shutter release button is pressed all the way down and the shutter is released after about 10 seconds t 2 Delayed remote ML L3 Shutter is released 2 safter shutter release Iii 5 button on optional ML L3 remote control is pressed Quick response remote ML L3 ...

Page 25: ...icator 29 Flexible program indicator Exposure indicator 72 Exposure compensation display 73 Number of exposures remaining Electronic rangefinder 16 mFiash compensation indicator Number ofshots remaining before E d xposure compensation m JCator memory buffer f1lls 24 White balance recording indicator 73 Exposure compensation value Auto ISO sensitivity indicator 73 Warning indicator 102 Flash compen...

Page 26: ...e IJPrint date indicator 77 auto Flash control indicator auto flash off 22 Flash compensation indicator for Scene modes 50 optional flash units Special effects mode 52 _ A 0 L ht 76 ct1ve 1g mg P S A and Mmodes 68 m Picture Control 76 Eye Fi connection indicator IJ IJRelease mode 6 Satellite signal indicator IJ Beep md1cator 77 ...

Page 27: ...cording indicator k appears when memory remains for over 1000 exposures 16 Exposure indicator 72 Exposure compensation indicator 73 Help icon 102 Note Display shown with all indicators lit for illustrative purposes B Turning the Monitor Off To clear shooting information from the monitor press the 111m button or press the shutter release button halfway The monitor will turn off automatically if no ...

Page 28: ...e size Choose a size for new photos Image quality Choose a file format and compression ratio Flash mode Choose the flash mode ISO sensitivity Control the camera s sensitivity to light Nikon Exposure compensation Adjust exposure from the value metered by the camera making the entire frame brighter or darker Flash compensation Metering AF area mode Focus mode Adjust flash level Choose how the camera...

Page 29: ...eat for the second eyelet 2 Charge the battery Ifa plug adapter is supplied raise the wall plug and connect the plug adapter as shown below at left making sure the plug is fully inserted Insert the battery and plug the charger in An exhausted battery will fully charge in about an hour and 50 minutes k p 1 Batterycharging Charging complete 11 ...

Page 30: ...t the battery in the orientation shown using the battery to keep the orange battery latch pressed to one side The latch locks the battery in place when the battery is fully inserted Batterylatch Slide the memory card in until it clicks into place ...

Page 31: ...dust from entering the camera when the lens or body cap is removed Remove the camera bodycap Remove the rear lens cap Align the mounting marks Be sure to remove the lens cap before taking pictures Mounting mark cameraJ Mounting mark lens 13 ...

Page 32: ...etractable Lens Barrel Buttons Before using the camera unlock and extend the zoom ring Keeping the retractable lens barrel button pressed G rotate the zoom ring as shown Retractablelens barrelbutton Pictures can not be taken when the lens is retracted if an error message is displayed as a result ofthe camera having been turned on with the lens retracted rotate the zoom ring until the message is no...

Page 33: ...ton to select a language and set the camera clock __ button select highlighteditem Selecthighlighted item ordisplay sub j Select language Select daylight saving time option menu Move cursor down Select time zone Set time anddate note that the camera uses a 24 hourc ock Select date format 15 ...

Page 34: ... remaining Press the lmm button and check the battery level and number of exposures remaining In the case of exposures remaining values over 1000 are shown in thousands indicated by the letter k ID button Battery level OJ 18 Number ofexposures remaining ...

Page 35: ... put your fingers or fingernails in your eye t l r l Focus points t Viewfinder not in focus Viewfinder in focus During Charging Do not move the chargerortouch the battery during charging Failure to observe this precaution could in very rare instances result in the charger showing that charging is complete when the battery is only partially charged Remove and reinsert the battery to begin charging ...

Page 36: ...ring charging confirm that the temperature is in the correct range and then unplug the charger and remove and reinsert the battery If the problem persists cease use immediately and take battery and charger to your retailer or a Nikon authorized service representative Use the charger with compatible batteries only Unplug when not in use B Battery Level Battery level is shown in the information disp...

Page 37: ...uter before proceeding MemoryCards Memory cards may be hot after use Observe due caution when removing memory cards from the camera Turn the power off before inserting or removing memory cards Do not remove memory cards from the camera turn the camera off or remove or disconnect the power source during formatting or while data are being recorded deleted or copied to a computer Failure to observe t...

Page 38: ...d and photos can not _____ LOC K J Write protect switch be deleted or recorded a beep will sound ifyou attempt to release the shutter To unlock the memory card slide the switch to the write position BA M M A M A M M and Vibration Reduction VR Switches When using autofocus with a lens equipped with an A M mode switch slide the switch to A if the lens has an M A M or A M M switch select MIA or AIM F...

Page 39: ...m the camera and be careful not to press the retractable lens barrel button when attaching or removing the lens B The CameraClock The camera clock is less accurate than most watches and household clocks Check the clock regularly against more accurate time pieces and reset as necessary B The Clock Battery The camera clock is powered by an independent rechargeable power source which is charged as ne...

Page 40: ...ns Before proceeding turn the Mode dial camera on and rotate the mode dial to or the only difference between the two is that the flash will not fire in mode Viewfinder photography Taking photographs m 23 Live view Viewing photographs CD 26 Deleting photographs CD 28 Taking photographs CD 30 Viewing photographs CD 34 Deleting photographs CD 35 cr 11 ElQ Q Jt E Shooting movies QIJ Viewing movies Del...

Page 41: ...om ring to zoom in on the subject so that it fills a larger area of the frame or zoom out to increase the area visible in the final photograph select longerfocallengths on the lens focal length scale to zoom in shorterfocal lengthsto zoom out lfthe lens is equipped with a retractable lens barrel button Cil 14 press and hold the button while rotating the zoom ring until the lens is released and the...

Page 42: ... focus if the subject is poorly lit the flash may pop up and the AF assist illuminator may light When the focus operation is complete a Focus point In focus Buffer indicator capacity beep will sound a beep may not sound ifthe subject is moving and the in focus indicator e will appear in the viewfinder In focus indicator flashes Description Subject in focus Camera unable to focus using autofocus Se...

Page 43: ...ct the power source until the lamp has gone out and recording is complete B The Shutter Release Button The camera has a two stage shutter release button The camera focuses when the shutter release button is pressed halfway To take the photograph press the shutter release button the rest ofthe way down Focus press halfway Shoot press all the way down Pressing the shutter release button halfway also...

Page 44: ...pictures II ThumbnailPlayback To display images in contact sheets of four nine or 72 images thumbnail playback press the button Use the multi selector or command dial to highlight images and press to display the highlighted image full frame Press le l 0 to reduce the number of images f button displayed Nikon ...

Page 45: ... displayed Press the E button to toggle between the date list and the list of thumbnails for the selected date Use the multi selector to highlight dates in the date list or to highlight pictures in the thumbnail list Press when the cursor is in the date list to return to 72 frame playback Date list Thumbnail list 27 ...

Page 46: ...28 Deleting Unwanted Pictures Display the photograph you wish to delete E button Press iiD a confirmation dialog will be displayed ___ I nu button Press the iiD button again to delete the picture ...

Page 47: ...ff rl The Built in Flash y If additional lighting is required for correct exposure in mode the built in flash will pop up automatically when the shutter release button is pressed halfway If the flash is raised photographs can only be taken when the flash ready indicator is displayed If the flash ready indicator is not displayed the flash is charging remove your finger briefly from the shutter rele...

Page 48: ...s will be displayed in the camera monitor live view 2 Ready the camera button Hold the handgrip in your right hand and cradle the camera body or lens with your left When framing photographs in portrait tall orientation hold the camera as shown at right ...

Page 49: ...us point will flash red 4 Take the picture Press the shutter release button the rest of the way down The monitor turns off and the memory card access lamp lights during recording Do not eject the memory card or remove or disconnect the power source until the lamp has gone out and recording is complete When recording is complete the photograph will be displayed in the monitor for a few seconds Pres...

Page 50: ...subject and select the appropriate shooting mode when autofocus is enabled The selected mode is shown in the monitor _ T______ _ 2 1 Portrait Human portrait subjects til Landscape Closeup N Night portrait Auto w Auto flash off Landscapes and cityscapes Subjects close to the camera Portrait subjects framed against adark background ...

Page 51: ...E to another setting Live view may end automatically to prevent damage to the camera s internal circuits exit live view when the camera is not in use Note that the temperature of the camera s internal circuits may rise and noise bright spots randomly spaced bright pixels or fog may be displayed in the following instances the camera may also become noticeably warm but this does not indicate a malfu...

Page 52: ...Viewing Photographs Pressing lE displays a picture in the monitor B button Press or to view additional pictures 34 ...

Page 53: ...Deleting Unwanted Pictures Display the photograph you wish to delete IB button Press 1ID a confirmation dialog will be displayed Ui1 button Press the 1ID button again to delete the picture 35 ...

Page 54: ...layed in the monitor TheIllleon l __A_Jii_ic_o_n_in_d ic a te_s_t_h at_m_o_v_ie_s_c_a_n_n_o_t____ _be recorded _ _ button 2 Ready the camera Hold the handgrip in your right hand and cradle the camera body or lens with your left 3 Focus Press the shutter release button halfway to focus Focus point ...

Page 55: ...are displayed in the monitor S End recording Press the movie record button again to end recording Recording will end automatically when the maximum length is reached the memory card is full or another mode is selected Press the hi button to exit live view Movie record button Recording indicator Time remaining 37 ...

Page 56: ...ighmovie quality I pixels Frame rate 1 normal movie quality 4 J i iiifra 60p2 10 min 20 min ii 11 i Em 50p3 m a rm 1920 X 1080 30p2 1 1 25p3 Bm B 24p 20 min 29 min 59 s m tii 1280x 720 6Qp2 ii liiD1 50p3 m t m rm 640x 424 30p2 29 min 59 sf mmtm 25p3 29 min 59 s 1 listed value Actual frame rates for 60p SOp 30p 25p and 24p are 59 94 50 29 97 25 and 23 976fps respectively 2 Available when NTSC is se...

Page 57: ...try The camera can record both video and sound do not cover the microphone during recording Note that the built in microphone may record lens noise during autofocus and vibration reduction Flash lighting can not be used during movie recording Live view may end automatically to prevent damage to the camera s internal circuits exit live view when the camera is not in use Note that the temperature of...

Page 58: ...ally Depending on shooting conditions the timer may appear immediately when movie recording begins Note that regardless of the amount of recording time available live view will still end automatically when the timer expires Wait for the internal circuits to cool before resuming movie recording ...

Page 59: ...nd then scroll through pictures until a movie indicated by a icon is displayed B button Press to start playback your current position is indicated by the movie progress bar icon Length Current position toto length i Movie progress bar Volume 41 ...

Page 60: ...ring rewind advance Speed increases with each press from 2x to 4x to Bx to 16x keep pressed to skip to beginning or end of movie first frame is indicated by in top right corner of monitor last frame by If playback is paused movie rewinds or advances one frame at a time hold for continuous rewind or advance Rotate the command dial to skip ahead or back 10 s ...

Page 61: ...ng Unwanted Movies Display the movie you wish to delete movies are indicated by icons IE button Press mi a confirmation dialog will be displayed y I ID1 button Press the mi button again to delete the movie 43 ...

Page 62: ... displayed when the mode dial is rotated to GUIDE Battery indicator UJ 18 Number of exposures remaining UJ 16 _shooting mode A guide mode indicator appears on the shooting mode icon Choose from the following items Shoot View delete Take pictures View and or delete pictures Retouch Retouch pictures Change camera settings ...

Page 63: ...st aperture I Freeze motion people h i Select a s utter Im ez Otl n vehlcl_ es speed iGUo Bring more into focus L Show waterflowing I AdJ st h ite baIanee j Capture reds in sunsets to vividly capture the I colors in sunsets 1 ak_ br gh _Ph Adjust exposure compensation to take I I Take dark low key bright high key or 1 photos dark low key photos Adjust auto ISO sensitivity control for Reduce blur I...

Page 64: ...with the shooting option selected Flash settings Flash mode Flash settings Flash compensation Release mode ISO sensitivity settings ISO sensitivity ISO sensitivity settings Auto ISO sensitivity control Set Picture Control Exposure compensation White balance II View Delete View single photos View aslide show View multiple photos Delete photos Choose adate II Guide Mode Guide mode is reset to Easy o...

Page 65: ...Selectivecolor Playbackfolder Playbackdisplayoptions DPOF printorder Clockand language Time zone and date Language Formatmemorycard Output settings IHDMI Wireless mobile adapter Eye Fi upload Slot empty release lock Only available when compatible Eye Fi memory card isinserted Changes to Image quality Image size Auto offtimers Print date Playbackfolder Playback display options all Display and sound...

Page 66: ...tor on or return to the top level of the guide eNub ttonL ____ IPress A f 0111 or to highlight a menu _ _ _ _ ___ _ _ __ Highlight options Select highlighted menu or option Press_ or T to highlight options in the menus Press_ T or to highlight options in displays like that shown below Single frame Take one photo eachtime you press the shutter button Press to select the highlighted menu or option ...

Page 67: ...corner ofthe monitor help can be displayed by pressing the Qi l button A description ofthe currently selected option will be displayed while the button is pressed Press A or to scroll through the display 8 help icon Choosefrom single frame continuous quiet shutter release setf timerand remote controlmodes Thefollowing remote controlmodesareavailable Delayed remote Ml L3 picture is taken aftertwo s...

Page 68: ...22 The following scenes can be Mode dial selected with the mode dial Use for portraits with soft natural looking skin tones If the subject is far from the background or a telephoto lens is used background details will be softened to lend the composition a sense of depth Use for vivid landscape shots in daylight Note The built in flash and AF assist illuminator turn off Use for snapshots of childre...

Page 69: ... close up shots offlowers insects and other small objects a macro lens can be used to focus at very close ranges E i jl tsb l eextttfl t i f i it i Af i t i i i ti t h i 7 Use for a natural balance between the main subject and the background in portraits taken under low light B Preventing Blur Use a tripod to prevent blur caused by camera shake at slow shutter speeds 51 ...

Page 70: ... g High Key l f Photo Illustration Low Key _______ _ _ __ _ _ _ _ Color Sketch Q HDR Painting Q Toy Camera Effect t 1 Easy Panorama Miniature Effect The following effects can be selected by rotating the mode dial to EFFECTS and rotating the command dial until the desired option appears in the monitor Mode dial Command dial Monitor ...

Page 71: ...nt image Overall saturation is increased for a more lively image f Q2 flA tf KI t S lf2 j r Sharpen outlines and simplify coloring for a poster effect that can be adjusted in live view OJ 57 Note The flash turns off automatically to use the flash choose a flash mode aJ 10 of AUTO auto or AUTO auto red eye reduction Movies shot in this mode play back like a slide show made up of a series of stills ...

Page 72: ...into a movie that plays back in about three minutes The effect can be adjusted in live view QJ 60 Note Sound is not recorded with movies The built in flash and AF assist illuminator turn off S e lective Co Qr All colors other than the selected colors are recorded in black and white The effect can be adjusted in live view aJ 62 Note The built in flash turns off ilht uett e Silhouette subjects again...

Page 73: ...reviewed in live view Note that the desired results may not be achieved if the camera or subject moves during shooting During recording a message is displayed and no further photos can be taken The built in flash turns off continuous shooting is disabled and movies are recorded in mode Shoot panoramas as described on page 64 Start live view before beginning recording panoramas can not be shot duri...

Page 74: ...F RAW or NEF RAW JPEG fine option is selected in these modes will be recorded as JPEG images JPEG images created at these settings will be recorded as fine quality images B tf and Modes Autofocus is not available during movie recording The live view refresh rate will drop together with the frame rate for continuous release mode using autofocus during live view photography will disrupt the preview ...

Page 75: ...ed in the monitor 2 Adjust outline thickness Press to display the options shown at right Press or to make outlines thicker or thinner 3 Press lh 1 button Press to exit when settings are complete To exit live view press the button The selected settings will continue in effect and will apply to photographs taken using the viewfinder 57 ...

Page 76: ... or to change Vividness can be increased to make colors more saturated or decreased for a washed out button monochromatic effect while outlines can be made thicker or thinner Increasing the thickness of the lines also makes colors more saturated 3 Press Press to exit when settings are complete To exit live view press the button The selected settings will continue in effect and will apply to photog...

Page 77: ... Press or Y to highlight Vividness or Vignetting and press 0111111 or to change Adjust vividness to make colors more or less saturated vignetting to control the amount of vignetting 3 Press button Press to exit when settings are complete To exit live view press the button The selected settings will continue in effect and will apply to photographs taken using the viewfinder 59 ...

Page 78: ...ctor to position the focus point in the area that will be in focus and then press the shutter release button halfway to focus To temporarily clear bi button miniature effect options from the display and enlarge the view in the monitor for precise focus press Press to restore the miniature effect display 3 Display options Press to display miniature effect options ...

Page 79: ... the area that will be in focus and press or T to adjust its width S Press Press to exit when settings are complete To exit live view press the button The selected settings will continue in effect and will apply to photographs taken using the viewfinder 61 ...

Page 80: ... 3 Select a color Frame an object in the white square in the center of the display and press A to choose the color of the object as one that will remain in the final image the camera may have button Selected color difficulty detecting unsaturated colors choose a saturated color To zoom in on the center of the display for more precise color selection press Press f to zoom out ...

Page 81: ...p of the display and repeat Steps 3 and 4 to select Color range another color Repeat for a third color if desired To deselect the highlighted color press ffi1 To remove all colors press and hold A confirmation dialog will be displayed select Yes 6 Press Press to exit when settings are complete During shooting only objects of the selected hues will be recorded in color all others will be recorded i...

Page 82: ...tor 2 Focus Frame the start of the panorama and press the shutter release button halfway 3 Start shooting Press the shutter release button the rest of the way down and then lift your finger from the button The display will briefly go dark and then turn on with 6 v J and I icons indicating the button _J vw v v w L _v J I possible pan directions focus and exposure will lock ...

Page 83: ...n the end of the panorama is reached Progress indicator I o An example of how to pan the camera is shown below Without changing your position pan the camera in a steady curve either horizontally or vertically Time the pan according to the option selected for Image size in the shooting menu about 15 seconds are needed to complete the pan when Normal panorama is selected about 30 seconds when Wide p...

Page 84: ...olor or brightness subjects that are too close to the camera poorly lit subjects and subjects such as the sky or sea that are a solid color or contain simple repeating patterns Exposure compensation CD 73 can be used to adjust exposure by up to 3 EV in steps of V3 EV Adjust exposure compensation after starting live view in Step 1 The completed panorama will be slightly smaller than the area visibl...

Page 85: ... window Navigation window Guide The following operations can be performed yo 4 Use___ _l D e scr _i __ p tio _n ___ _ _ __ I i Pause l oK IPause playback I I l PI I IResume playback when the panorama ay i 1 is paused or during rewind advance 1 Press _ to rewind to advance If Iplayback is paused the panorama Advance rewind 1rewinds or advances a segment at a itime keep the button pressed for contin...

Page 86: ...sure Shutter priorityauto Use to freeze or blur motion User chooses s shutter speed camera selects aperture for CD 69 best results Aperture priority Use to blur background or bring both foreground and background into focus User A auto chooses aperture camera selects shutter CD 70 speed for best results User controls both shutter speed and M Manual CD 71 aperture Set shutter speed to Bulb or Time f...

Page 87: ...s shutter speed and aperture for optimal exposure in most situations ModeS Shutter Priority Auto In shutter priority auto you choose the shutter speed while the camera automatically selects the aperture that will produce the optimal exposure Rotate the command dial to choose the desired shutter speed rotate right for faster speeds left for slower speeds Command dial F5 6 69 ...

Page 88: ...y auto you choose the F r aperture while the camera automatically selects the shutter speed that will produce the optimal exposure Rotate the command dial left for larger apertures lower f numbers right for smaller apertures higher f numbers Command dial ...

Page 89: ...ture Shutter speed is selected by rotating the command dial right for faster speeds left for slower To adjust aperture keep the IB button pressed while rotating the command dial left for larger apertures lower f numbers and right for smaller apertures higher f numbers Shutter speed Command dial F5 5 Y t Aperture button Command dial J y t 71 ...

Page 90: ...le freeze motion Large apertures such as f 5 6 remember the lower the f number the larger the aperture blurdetails in front ofand behind the main subject II The Exposure Indicator Slow shutter speeds here 7s blur motion Small apertures f 22 in this case bring both background and foreground into focus Optimal exposure Underexposed by V3 EV Overexposed byover2EV 0 I 0 0 lnini ...

Page 91: ...re Compensation P S A M and t l modes only Exposure compensation is used to alter exposure from the value suggested by the camera making pictures brighter or darker CII 109 lEV No exposure compensation lEV 73 ...

Page 92: ...ue is selected in the viewfinder or information display Normal exposure can be restored by setting exposure compensation to 0 Exposure compensation is not reset when the camera is turned off lit button 1 1 IT 0 3 EV B The Information Display Exposure compensation options can also be accessed from the information display m 10 ...

Page 93: ...ra menus To view the menus press the MENU button MENU button TabS Choose from the following menus B Playback CIJ 76 d Retouch CIJ 78 0 Shooting CIJ 76 Recent settings CIJ 78 V Setup CIJ 77 r 1 Current settings are shown by icons Menu options Options in current menu Help icon CIJ 79 75 ...

Page 94: ...send to smart device Rotate tall II 0 ShootingMenu Shooting Options Reset shooting menu Noise redudion Image quality ISO sensitivity settings Image size AF area mode White balance Built in AF assist illuminator Set Picture Control Metering Auto distortion control Flash cntrl for built in flash Color space Movie settings Active D Lighting 76 ...

Page 95: ...hoto Flicker reduction Time zone and date Language Auto image rotation Image comment Auto offtimers Self timer Remote on duration ML L3 Beep Rangefinder File number sequence Buttons Slot empty release lock Print date Storage folder Accessory terminal Video mode HOMI Wireless mobile adapter Eye Fi upload Firmware version Only available when compatible Eye Fi memory card is inserted 77 ...

Page 96: ...ce Perspective control Image overlay Miniature effect NEF RAW processing Selective color Resize Edit movie Quick retouch Side by side comparison Straighten Available only ifretouch menu is displayed by pressing i and selecting Retouch in full frame playback when aretouched image or original is displayed II RecentSettings The recent settings menu lists the twenty most recently used settings ...

Page 97: ...own Follow the steps below to navigate the menus 1 Display the menus Press the MENU button to display the menus B The 0 Help Icon MENU button If a 0 icon is displayed at the bottom left corner of the monitor help can be displayed by pressing the 8 button A description of the currently selected option or menu will be displayed while the button is pressed Press 6 or T to scroll through the display 9...

Page 98: ... to highlight the icon for the current menu 3 Select a menu Press or T to select the desired menu 4 Position the cursor in the selected menu Press _ to position the cursor in the selected menu S Highlight a menu item Press or T to highlight a menu item ...

Page 99: ...highlighted item To exit without making a selection press the MENU button Note the following Menu items that are displayed in gray are not currently available While pressing generally has the same effect as pressing there are some cases in which selection can only be made by pressing To exit the menus and return to shooting mode press the shutter release button halfway CD 25 81 ...

Page 100: ...i as earlier versions that do not support the 03300 may fail to transfer NEF RAW images correctly 1 Launch the installer Start the computer insert the installer CD and launch the installer A language selection dialog will be displayed Ifthe desired language is not available click Region Selection to choose a different region region selection is not available in the European release CD Select regio...

Page 101: ...s 3 Exit the installer Windows Click Yes IJi e Y X 1 whlt h e ll y XI to 1 OOit v w ttlr J fJ et phQtt lt V I l ot r r irto llv re w nsta Click Install Mac ThR lnstaft l tlon is com Is it OK to exit fn s taH Cen l Click OK 4 Remove the installer CD from the CD ROM drive 83 ...

Page 102: ... IOS X 10 9 10 8 or 10 7 1 Windows 8 1 Windows 7 1 OS IWindows Vista and 1 Windows XP note that 64 bit 1 J r version sofWindo ws XP are not I supported 1 ii bitWindows 8 11 Windows 71 or 2GB or more 4GB or more I Windows Vista 1 GB or more Irecommended I 2 GB or more recommended Memory I 64 bit Windows 8 1I Windows 7I or RAM I Windows Vista 2GB or more i 4GB or more recommended I WindowsXP S12 MB ...

Page 103: ...le as shown and then turn the camera on D 2 Start Nikon Transfer 2 component of ViewNX 2 If a message is displayed prompting you to choose a program select Nikon Transfer 2 B Windows7 If the following dialog is displayed select Nikon Transfer 2 as described below 1 Under Import pictures and videos click Change program A program selection dialog will be displayed select Import File using Nikon Tran...

Page 104: ... memory card will be copied to the computer Start Transfer B During Transfer Do not turn the camera off or disconnect the USB cable while transfer is in progress 4 Terminate the connection When transfer is complete turn the camera off and disconnect the USB cable ...

Page 105: ...esktop Mac Click the ViewNX 2 icon in the Dock II Retouching Photographs To crop pictures and perform such tasks as adjusting sharpness and tone levels click the Edit button in the ViewNX 2 toolbar II EditingMovies To perform such tasks as trimming unwanted footage from movies shot with the camera click the Movie Editor button in the ViewNX 2 toolbar 87 ...

Page 106: ... to print pictures on a printer connected to the computer B For More Information Consult online help for more information on using ViewNX 2 B Viewing the Nikon Website To visit the Nikon website after installing ViewNX 2 select All Programs Link to Nikon from the Windows start menu Internet connection required ...

Page 107: ...inder photography Ca neril s tting Foe Mode M eri g r M F w it hF r Ot h_ Lens a cessory AF I M F M er e ertrontc rangefinder modes 3D Color C J AF S AF 1 NIKKOR Other type Gor DAF NIKKOR PC E NIKKORseries 2 3 11 4 II II II II 11 1 PC Micro Bsmmf 2 80 5 _ ___ 74 _ II v _ 1 r 1 ____ _ AF S AF Iteleconverter6 11 7 11 7 II II II II 11 1 Other AF NIKKOR except lenses II 8 II 1 II II _ II II 1 for F3AF...

Page 108: ... f 3 5 4 5 New or AF 28 85mm f 3 5 4 5 lenses are zoomed all the way in at the minimum focus distance the in focus indicator may be displayed when the image on the matte screen in the viewfinder is not in focus Focus manually until image in viewfinder is in focus 9 With maximum aperture off 5 6 or faster Noise in the form of lines may appear during autofocus when movies are recorded at high ISO se...

Page 109: ... 5A is required to connect the camera to the EH 5b EH 5a or EH 5 Filters intended for special effects photography may interfere with autofocus or the electronic rangefinder The 03300 can not be used with linear polarizing filters Use C PL or C PL II circular polarizing filters instead NC filters are recommended for protecting the lens To prevent ghosting use of a filter is not recommended Filters ...

Page 110: ...G 2 magnifies the scene displayed in the center of the viewfinder for greater precision during focusing Eyepiece adapter required available separately Eyepiece Adapter DK 22 The DK 22 is used when attaching the DG 2 magnifier Right Angle Viewing Attachment DR 6 The DR 6 attaches at a right angle to the viewfinder eyepiece allowing the image in the viewfinder to be viewed at right angles to the len...

Page 111: ...r latch to the right D insert a fingernail into the gap and open the battery chamber Ensure that the battery is inserted in the correct orientation Wireless Remote ControllerWR R10 WR T10 When a WR Rl 0 wireless remote controller is attached the camera can be controlled wirelessly using a WR Tl 0 wireless remote controller Wireless Remote Controller WR 1 WR 1 units are used in groups of two or mor...

Page 112: ...the next to the accessory terminal close the connector cover when the terminal is not in use UC E17 and UC E6 USB cables OJ 85 The supplied UC E17 cable is not available for separate purchase purchase UC E6 cables instead EG CP14 audio video cables Wireless Mobile Adapter WU 1a Supports two way communication between the camera and smart devices running the Wireless Mobile Utility II Optional Acces...

Page 113: ... 6GB 8GB 12GB 16GB 24GB 48 GB 64 GB 32GB 4GB 8GB 16GB 32GB 64GB Professional I 64GB 128GB F u I 1 H _D_V id eo ___ _ _ ____ ____ _ _ 1 Check that any card readers or other devices with which the card will be used support 2GB cards 2 Check that any card readers or other devices with which the card will be used are SDHC compliant The camera supports UHS 1 3 Check that any card readers or otherdevice...

Page 114: ...y cloth After using the camera at the beach or seaside wipe off sand or salt with a cloth lightly dampened in distilled water and dry thoroughly Important Dust or other foreign matter inside the camera may cause damage not covered under warranty Lens mirror and viewfinder Monitor These glass elements are easily damaged Remove dust and lint with a blower If using an aerosol blower keep the can vert...

Page 115: ...netic radiation or magnetic fields Strong static charges or the magnetic fields produced by equipment such as radio transmitters could interfere with the monitor damage data stored on the memory card or affect the product s internal circuitry Do not leave the lens pointed at the sun Do not leave the lens pointed at the sun or other strong light source for an extended period Intense light may cause...

Page 116: ...circumstances should you exert pressure on the curtain poke it with cleaning tools or subject it to powerful air currents from a blower These actions could scratch deform or tear the curtain Storage To prevent mold or mildew store the camera in a dry well ventilated area If you are using an AC adapter unplug the adapter to prevent fire If the product will not be used for an extended period remove ...

Page 117: ... or entering the eyes and mouth Moire Moire is an interference pattern created by the interaction of an image containing a regular repeating grid such as the pattern of weave in cloth or windows in a building with the camera image sensor grid If you notice moire in your photographs try changing the distance to the subject zooming in and out or changing the angle between the subject and the camera ...

Page 118: ...ome time insert it in the camera and run it flat before removing it and storing it in a location with an ambient temperature of 15 octo 25 oc 59 oF to 77 oF avoid hot or extremely cold locations Repeat this process at least once every six months Turning the camera on and off repeatedly when the battery is fully discharged will shorten battery life Batteries that have been fully discharged must be ...

Page 119: ...eep it fully charged Depending on your location it may be difficult to purchase replacement batteries on short notice Note that on cold days the capacity of batteries tends to decrease Be sure the battery is fully charged before taking photographs outside in cold weather Keep a spare battery in a warm place and exchange the two as necessary Once warmed a cold battery may recover some of its charge...

Page 120: ...ghest f number largest f number _ F II Attach non IX NIKKOR lens Lens not attached If non CPU lens is attached select flashes modeM A lens with a retractable lens barrel Before taking photos button is attached with the lens barrel rotate the zoom ring to F retracted Press the retractable lens flashes extend the lens barrel button and rotate the zoom ring to extend the lens Shutter release c JI 17 ...

Page 121: ...ed write protected Slide lock to 11 Write Slide card write protect switch to write flashes position position Use approved card This memory card Format card If problem persists card may be damaged Contact Nikon cannot be used Card d f r r l authorized service representative may be damaged flashes Error creating new folder Delete files Insert another card or insert new memory card Insert new memory ...

Page 122: ...erture lower f number buLb flashes 1 Change shutter speed or select modeM No 11 Time in Smode flashes Press the live view EFFECTS button when you are flashes Press the hiJ b utton to start live view ready to start a tPR n 0 before recording a panorama panorama r t h t Use a lens with a focal length of 55 mm anno s oo th 1 f or less to shoot panoramas If you are panorama WI ens o th II th us1ng azo...

Page 123: ...e representative Metering error u Unable to start live view Please waitfor camera to cool Folder contains no images Wait for the internal circuits to cool before resuming live view or movie recording Folder selected for playback contains no images note that this message will be displayed if memory card is inserted after Current is selected for Playback folder in playback menu and playback started ...

Page 124: ... Off reference I Fileformat data optional Capture NX 2 software required t J easy panorama mode Normal horizontal pan 4800 x 1080 Normal vertical pan 1632 x 4800 Wide horizontal pan 9600 x 1080 Wide vertical pan 1632 x 9600 Other modes 6000 x 4000 Large 4496 x 3000 Medium 2992 x 2000 Small NEF RAW 12 bit compressed JPEG JPEG Baseline compliant with fine approx 1 4 normal approx 1 8 or basic approx...

Page 125: ...8 mm 1 0 m 1 from center surface viewfinder eyepiece lens 1 7 0 5 m 1 Type B BriteView Clear Matte Mark VII screen Quick return Instant return electronically controlled Autofocus is available with AF S and AF llenses Autofocus is not available with other type Gand D lenses AF lenses IX NIKKOR and lenses for the F3AF are not supported and Al P lenses Non CPU lenses can be used in mode M but the cam...

Page 126: ...emote ML L3 Up to 5 fps Note Frame rates assume manual focus manual or shutter priority auto exposure a shutter speed of V2so s or faster and other settings at default values 2 s 5 s 10 s 20 s 1 9 exposures TIL exposure metering using 420 pixel RGB sensor Matrix metering 3D color matrix metering II type G E and D lenses color matrix metering II other CPU lenses Center weighted metering Weight of 7...

Page 127: ...t l easy panorama Exposure compensation ca n be adjusted b y 5 s EV in increments of Exposure lock ISO sensitivity Recommended tXJIOSUire Index Detection range V3 EV in P S A and Mmodes Luminosity locked at detected value with o n button ISO 100 12800 in steps 1 EV Can also be set to approx 1 EV ISO 25600 equivalent above ISO 12800 auto ISO sensitivity control available On off Nikon Multi CAM 1000...

Page 128: ...ton halfway single servo AF or by pressing t o n button auto pop up P S A M Manual pop up with button release Approx 12 39 12 39 with manual flash m ft ISO 100 20 68 F TTL i TTL flash control using 420 pixel RGB sensor is available with built in flash and SB 91 0 SB 900 SB 800 SB 700 SB 600 SB 400 or SB 300 i TTL balanced fill flash for digital SLR is used with matrix and center weighted metering ...

Page 129: ...h SB 91 0 SB 900 SB 800 or SB 700 as a master flash or SU 800 as commander Flash Color Information Communication supported with all CLS compatible flash units AS 15 sync terminal adapter available separately Autofocus AF Single servo AF AF S servo AF AF F Manual focus MF Face priority AF wide area AF normal area AF subject tracking AF Contrast detect AF anywhere in frame camera selects focus point...

Page 130: ...ected for video mode Actual frame rate when 24p is selected is 23 976 fps MOV Video compression H 264 MPEG 4 Advanced Video Coding i Audio recording format Linear PCM Audio recording device Bui in monaural or externa stereo microphone sensitivity adjustable i ISO sensitivity ISO 100 12800 can also be set to approx 1 EV ISO 25600 equivalent above ISO 12800 Playback Full frame and thumbnail 4 9 or 7...

Page 131: ...optional ME 1 stereo microphones Arabic Bengali Bulgarian Chinese Simplified and Traditional Czech Danish Dutch English Finnish French German Greek Hindi Hungarian Indonesian Italian Japanese Korean Marathi Norwegian Persian Polish Portuguese Portugal and Brazil Romanian Russian Serbian Spanish Swedish Tamil Telugu Thai Turkish Ukrainian Vietnamese One rechargeable Li ion EN EL14a battery EH Sb AC...

Page 132: ...ndensation Unless otherwise stated all figures are for acamera with afully charged battery operating at the temperature specified by the Camera and Imaging Products Association CIPA 23 3 oc 73 4 5 4 F Nikon reserves the right to change the specifications ofthe hardware and software described in this manual atany time and without prior notice Nikon will not be held liablefor damages that may result...

Page 133: ...ratingtemperature o0 40 oc 32 F 1 04 F Dimensions W x Hx D Approx 70 x 26 x 97 mm 2 8 x 1 0 x 3 8 in excluding plug adapter Weight Approx 96 g 3 4oz excluding plug adapter II EN EL14aRechargeable Li ion Battery Type Rect1ar9ealJie TitflTUm Tonbatt e ry _ __ Rated capacity 7 2 V 1230 mAh Operating temperature 0 40 oc 32 F 1 04 F Dimensions W x Hx D Approx 38 x 53 x 14 mm 1 5 x 2 1 x 0 6 in weight A...

Page 134: ...ance AF o 28 mT6 92 ft fro mfocaTPfane a i aiTzoom positions MF 0 25 m 0 82 ft from focal plane at all zoom positions Diaphragm blades 7 ro llnded cHa phra im open fn 9 Diaphragm Fully automatic Aperture range 18 mm focal length f 3 5 22 55 mm focal length f 5 6 36 The minimum aperture displayed may vary depending on the size of the exposure increment selected with the camera Metering Full apertur...

Page 135: ...s manual for illustrative purposes is the AF S OX NIKKOR 18 SSmm f 3 5 5 6G VR II Lens cap Focal length mark Lens mounting mark OJ 73 Focus ring Vibration reduction ON OFF switch Zoom ring OJ 23 The AF S OX NIKKOR 18 SSmm f 3 5 5 6G VR II features a retractable lens barrel 117 ...

Page 136: ...SD SDHC and SDXC logos are trademarks of the SD 3C LLC HDMI the HDMIIogo and High Definition Multimedia Interface are trademarks or registered trademarks of HDMI Licensing LLC HLJml All other trade names mentioned in this manual or the other documentation provided with your Nikon product are trademarks or registered trademarks of their respective holders B FreeType License FreeType2 Portions of th...

Page 137: ...after monitor is turned off flash fired at full power once every other shot Live view not used 2 Measured at 20 C 68 oF with an AF S DX NIKKOR 18 SSmm f 3 5 5 6G VR Illens under the following test conditions vibration reduction off continuous release mode focus mode set to AF C image quality setto JPEG basic image size setto M medium white balance setto AUTO ISO sensitivity set to ISO 100 shutter ...

Page 138: ...ds Using a GP 1 or GP 1 A GPS unit Using an Eye Fi card Using a WU 1 a wireless mobile adapter Using VR vibration reduction mode with VR lenses To ensure that you get the most from rechargeable Nikon EN EL14a batteries Keep the battery contacts clean Soiled contacts can reduce battery performance Use batteries immediately after charging Batteries will lose their charge if left unused ...

Page 139: ... this manual in whole or in part except for brief quotation in critical articles or reviews may be made without written authorization from NIKON CORPORATION NIKON CORPORATION Printed in Thailand 2014 Nikon Corporation CE 6MB20211 01 ...

Page 140: ...DIGITAL CAMERA Reference Manual En ...

Page 141: ... Camera Settings The explanations in this manual assume that default settings are used Help Use the camera s on board help feature for help on menu items and other topics See page 11 for details D This icon marks cautions information that should be read before use to prevent damage to the camera A This icon marks notes information that should be read before using the camera 0 This icon marks refer...

Page 142: ...w 10 First Steps 14 Point and Shoot Modes i and j 25 Framing Photos in the Viewfinder 26 Viewing Photographs 29 Deleting Unwanted Pictures 30 Framing Photos in the Monitor 32 Viewing Photographs 35 Deleting Unwanted Pictures 36 Recording Movies 37 Viewing Movies 39 Deleting Unwanted Movies 40 Guide Mode 41 The Guide 41 Guide Mode Menus 42 Using the Guide 45 Table of Contents ...

Page 143: ...e up 48 o Night Portrait 49 Special Effects 50 Night Vision 51 S Super Vivid 51 T Pop 51 U Photo Illustration 52 g Color Sketch 52 Toy Camera Effect 52 Miniature Effect 53 3 Selective Color 53 1 Silhouette 54 2 High Key 54 3 Low Key 54 HDR Painting 55 I Easy Panorama 55 Options Available in Live View 56 I Easy Panorama 63 ...

Page 144: ...ng How the Camera Focuses Focus Mode 74 Choosing How the Focus Point Is Selected AF Area Mode 78 Focus Point Selection 80 Focus Lock 81 Manual Focus 83 Image Quality and Size 85 Image Quality 85 Image Size 87 Using the Built in Flash 89 Auto Pop up Modes 89 Manual Pop up Modes 91 ISO Sensitivity 95 Remote Control Photography 97 Using an Optional ML L3 Remote Control 97 ...

Page 145: ... 114 Metering 114 Autoexposure Lock 116 Exposure Compensation 118 Flash Compensation 120 Preserving Detail in Highlights and Shadows 122 Active D Lighting 122 White Balance 124 Fine Tuning White Balance 127 Preset Manual 129 Picture Controls 135 Selecting a Picture Control 135 Modifying Picture Controls 137 Live View 142 Framing Photographs in the Monitor 142 Focusing in Live View 144 The Live Vie...

Page 146: ...yback 180 Calendar Playback 181 Taking a Closer Look Playback Zoom 182 Protecting Photographs from Deletion 184 Rating Pictures 186 Rating Individual Pictures 186 Rating Multiple Pictures 187 Selecting Pictures for Upload 189 Selecting Individual Pictures for Upload 189 Selecting Multiple Pictures for Upload 190 Deleting Photographs 192 Full Frame Thumbnail and Calendar Playback 192 The Playback M...

Page 147: ...rint Set 213 Viewing Pictures on TV 215 Standard Definition Devices 215 High Definition Devices 217 Camera Menus 219 D The Playback Menu ManagingImages 219 Playback Folder 220 Playback Display Options 220 Image Review 221 Rotate Tall 221 C The Shooting Menu ShootingOptions 222 Reset Shooting Menu 224 Auto Distortion Control 225 Color Space 225 Noise Reduction 226 ISO Sensitivity Settings 226 Built...

Page 148: ...ker Reduction 241 Time Zone and Date 242 Language 243 Auto Image Rotation 243 Image Comment 244 Auto off Timers 245 Self Timer 246 Remote on Duration ML L3 247 Beep 247 Rangefinder 248 File Number Sequence 249 Buttons 251 Slot Empty Release Lock 253 Print Date 254 Storage Folder 257 Accessory Terminal 258 Video Mode 260 Wireless Mobile Adapter 260 Eye Fi Upload 261 Firmware Version 262 ...

Page 149: ...ome 269 Filter Effects 270 Color Balance 271 Image Overlay 272 NEF RAW Processing 275 Resize 277 Quick Retouch 279 Straighten 279 Distortion Control 280 Fisheye 280 Color Outline 281 Photo Illustration 281 Color Sketch 282 Perspective Control 282 Miniature Effect 283 Selective Color 284 Side by side Comparison 286 m Recent Settings 288 ...

Page 150: ...ctor and AC Adapter 311 Caring for the Camera 313 Storage 313 Cleaning 313 Image Sensor Cleaning 314 Caring for the Camera and Battery Cautions 321 Caring for the Camera 321 Caring for the Battery 324 Available Settings 326 Troubleshooting 329 Battery Display 329 Shooting All Modes 330 Shooting P S A M 333 Playback 334 Miscellaneous 335 Error Messages 336 Specifications 342 The AF S DX NIKKOR 18 5...

Page 151: ...iopter adjustment control with your eye to the viewfinder care should be taken not to put your finger in your eye accidentally ATurn off immediately in the event of malfunction Should you notice smoke or an unusual smell coming from the equipment or AC adapter available separately unplug the AC adapter and remove the battery immediately taking care to avoid burns Continued operation could result i...

Page 152: ...leave the product where it will be exposed to extremely high temperatures such as in an enclosed automobile or in direct sunlight Failure to observe this precaution could cause damage or fire ADo not aim a flash at the operator of a motor vehicle Failure to observe this precaution could result in accidents AObserve caution when using the flash Using the camera with the flash in close contact with ...

Page 153: ...er use or when the product has been used on battery power for an extended period Before removing the battery turn thecameraoffandallowthebattery to cool Discontinue use immediately should you notice any changes in the battery such as discoloration or deformation AObserve proper precautions when handling the charger Keep dry Failure to observe this precaution could result in injury or product malfu...

Page 154: ... ROMs on an audio CD player could cause hearing loss or damage the equipment AFollow the directions of airline and hospital personnel This camera transmits radio frequencies that could interfere with medical equipment or aircraft navigation Disable the wireless network feature and remove all wireless accessories from the camera before boarding an aircraft and turn the camera off during take off an...

Page 155: ...nd electronic equipment is to be collected separately The following apply only to users in European countries This product is designated for separate collection at an appropriatecollection point Do not dispose of as household waste Separate collection and recycling helps conserve natural resources and prevent negative consequences for human health and the environment that might result from incorre...

Page 156: ...different from that to which the receiver is connected Consult the dealer oranexperienced radio television technician for help CAUTIONS Modifications The FCC requires the user be notified that any changes or modifications made to this device that are not expressly approved by Nikon Corporation may void the user s authority to operate the equipment InterfaceCables Use the interface cables sold or p...

Page 157: ...ed The copying or reproduction of stamps issued by the government and of certified documents stipulated by law is prohibited Cautions on certain copies and reproductions The government has issued cautions on copies or reproductions of securities issued by private companies shares bills checks gift certificates etc commuterpasses or coupon tickets except when a minimum of necessary copies are to be...

Page 158: ...COMPLIANCE WITH THE AVC STANDARD AVC VIDEO AND OR ii DECODE AVC VIDEO THAT WAS ENCODED BY A CONSUMER ENGAGED IN A PERSONAL AND NON COMMERCIAL ACTIVITY AND OR WAS OBTAINED FROM A VIDEO PROVIDER LICENSED TO PROVIDE AVC VIDEO NO LICENSE IS GRANTED OR SHALL BE IMPLIED FOR ANY OTHER USE ADDITIONAL INFORMATION MAY BE OBTAINED FROM MPEG LA L L C SEE http www mpegla com Use Only Nikon Brand Electronic Acc...

Page 159: ...damages or lost profits that may result from product malfunction A Life Long Learning As part of Nikon s Life Long Learning commitment to ongoing product support and education continually updated information is available on line at the following sites For users in the U S A http www nikonusa com For users in Europe and Africa http www europe nikon com support For users in Asia Oceania and the Midd...

Page 160: ...Power switch 17 3 Shutter release button 27 28 4 E N button 109 118 120 5 R information button 7 150 6 Eyelets for camera strap 14 7 Speaker 8 Command dial 9 Mode dial 4 10 A L button 81 184 252 11 Accessory shoe for optional flash units 299 12 Infrared receiver for ML L3 remote control rear 98 13 Focal plane mark E 84 D The Speaker Do not place the speaker in close proximity to magnetic devices F...

Page 161: ...crophone 158 18 Connector cover 19 Fn button 251 20 Mounting mark 16 21 Lens release button 24 22 Infrared receiver for ML L3 remote control front 98 23 CPU contacts 24 Mirror 318 25 Lens mount 16 84 26 Body cap 27 Accessory terminal 309 28 Connector for external microphone 161 29 USB and A V connector 204 208 215 30 HDMI mini pin connector 217 ...

Page 162: ...button 9 171 39 a button 32 37 142 155 40 J OK button 11 41 Multi selector 11 42 Memory card slot cover 15 23 43 O button 30 192 44 Memory card access lamp 28 143 45 Battery chamber cover latch 15 22 46 Battery chamber cover 15 22 47 I E button 67 68 70 71 97 48 Tripod socket 49 Monitor 7 29 32 142 170 50 Battery latch 15 22 51 Power connector cover for optional power connector 311 ...

Page 163: ... for full control over camera settings P Programmed auto 0 102 S Shutter priority auto 0 104 A Aperture priority auto 0 106 M Manual 0 108 g Mode 0 41 Take view and edit pictures and adjust settings with the help of an on screen guide Auto Modes Select these modes for simple point and shoot photography i Auto 0 25 j Auto flash off 0 25 ...

Page 164: ...58 Miniature effect 0 53 59 3 Selective color 0 53 61 1 Silhouette 0 54 2 High key 0 54 3 Low key 0 54 HDR painting 0 55 I Easy panorama 0 55 63 Scene Modes The camera automatically optimizes settings to suit the scene selected with the mode dial Match your selection to the scene being photographed k Portrait 0 47 l Landscape 0 47 p Child 0 48 m Sports 0 48 n Close up 0 48 o Night portrait 0 49 ...

Page 165: ... Number of shots remaining before memory buffer fills 69 White balance recording indicator 129 Exposure compensation value 118 Flash compensation value 120 ISO sensitivity 95 226 9 k appears when memory remains for over 1000 exposures 19 10 Flash ready indicator 31 11 Flexible program indicator 103 12 Exposure indicator 109 Exposure compensation display 118 Electronic rangefinder 248 13 Flash comp...

Page 166: ...uto flash off 25 Scene modes 47 Special effects mode 50 P S A and M modes 100 2 Eye Fi connection indicator 261 3 Satellite signal indicator 260 4 Print date indicator 254 5 Flash control indicator 229 Flash compensation indicator for optional flash units 304 6 Active D Lighting 122 7 Picture Control 135 8 Release mode 67 9 Beep indicator 247 ...

Page 167: ...uto ISO sensitivity indicator 227 16 Number of exposures remaining 19 White balance recording indicator 129 17 k appears when memory remains for over 1000 exposures 19 18 Exposure indicator 109 Exposure compensation indicator 118 19 Help icon 336 A Turning the Monitor Off To clear shooting information from the monitor press the R button or press the shutter release button halfway The monitor will ...

Page 168: ... highlight items using the multi selector and press J to view options for the highlighted item P button 1 White balance 124 2 Image size 87 3 Image quality 85 4 Flash mode 90 92 5 ISO sensitivity 95 6 Exposure compensation 118 7 Flash compensation 120 8 Metering 114 9 AF area mode 78 145 10 Focus mode 74 144 ...

Page 169: ... menus To view the menus press the G button Camera Menus An Overview Tabs Choose from the following menus D Playback 0 219 N Retouch 0 263 C Shooting 0 222 m Recent settings 0 288 B Setup 0 231 G button Current settings are shown by icons Menu options Options in current menu Help icon 0 11 ...

Page 170: ...on If a d icon is displayed at the bottom left corner of the monitor help can be displayed by pressing the W Q button A description of the currently selected option or menu will be displayed while the button is pressed Press 1 or 3 to scroll through the display Select highlighted item or display sub menu Move cursor up Move cursor down J button select highlighted item Cancel and return to previous...

Page 171: ...ess 4 to highlight the icon for the current menu 3 Select a menu Press 1 or 3 to select the desired menu 4 Position the cursor in the selected menu Press 2 to position the cursor in the selected menu 5 Highlight a menu item Press 1 or 3 to highlight a menu item ...

Page 172: ...elect the highlighted item To exit without making a selection press the G button Note the following Menu items that are displayed in gray are not currently available While pressing 2 generally has the same effect as pressing J there are some cases in which selection can only be made by pressing J To exit the menus and return to shooting mode press the shutter release button halfway 0 28 ...

Page 173: ...eat for the second eyelet 2 Charge the battery If a plug adapter is supplied raise the wall plug and connect the plug adapter as shown below at left making sure the plug is fully inserted Insert the battery and plug the charger in An exhausted battery will fully charge in about an hour and 50 minutes First Steps Battery charging Charging complete ...

Page 174: ... Insert the battery in the orientation shown using the battery to keep the orange battery latch pressed to one side The latch locks the battery in place when the battery is fully inserted Slide the memory card in until it clicks into place Battery latch ...

Page 175: ...g the camera when the lens or body cap is removed Be sure to remove the lens cap before taking pictures Remove the camera body cap Remove the rear lens cap Mounting mark lens Mounting mark camera Align the mounting marks Rotate the lens as shown until it clicks into place ...

Page 176: ...th Retractable Lens Barrel Buttons Before using the camera unlock and extend the zoom ring Keeping the retractable lens barrel button pressed q rotate the zoom ring as shown w Pictures can not be taken when the lens is retracted if an error message is displayed as a result of the camera having been turned on with the lens retracted rotate the zoom ring until the message is no longer displayed Retr...

Page 177: ...ect a language and set the camera clock q w e Select language Select time zone Select date format r t Select daylight saving time option Set time and date note that the camera uses a 24 hour clock Move cursor up J button select highlighted item Select highlighted item or display sub menu Move cursor down ...

Page 178: ...xposures remaining Press the R button and check the battery level and number of exposures remaining In the case of exposures remaining values over 1000 are shown in thousands indicated by the letter k R button Battery level 0 21 Number of exposures remaining ...

Page 179: ...areful not to put your fingers or fingernails in your eye Focus points Viewfinder not in focus Viewfinder in focus D During Charging Do not move the charger or touch the battery during charging Failure to observe this precaution could in very rare instances result in the charger showing that charging is complete when the battery is only partially charged Remove and reinsert the battery to begin ch...

Page 180: ...mes a second during charging confirm that the temperature is in the correct range and then unplug the charger and remove and reinsert the battery If the problem persists cease use immediately and take battery and charger to your retailer or a Nikon authorized service representative Use the charger with compatible batteries only Unplug when not in use A Battery Level Battery level is shown in the i...

Page 181: ...o a computer before proceeding D Memory Cards Memory cards may be hot after use Observe due caution when removing memory cards from the camera Turn the power off before inserting or removing memory cards Do not remove memory cards from the camera turn the camera off or remove or disconnect the power source during formatting or while data are being recorded deleted or copied to a computer Failure t...

Page 182: ...card can not be formatted and photos can not be deleted or recorded a beep will sound if you attempt to release the shutter To unlock the memory card slide the switch to the write position A A M M A M A M M and Vibration Reduction VR Switches When using autofocus with a lens equipped with an A M mode switch slide the switch to A if the lens has an M A M or A M M switch select M A or A M For inform...

Page 183: ...t from the camera and be careful not to press the retractable lens barrel button when attaching or removing the lens A The Camera Clock The camera clock is less accurate than most watches and household clocks Check the clock regularly against more accurate time pieces and reset as necessary A The Clock Battery The camera clock is powered by an independent rechargeable power source which is charged...

Page 184: ... response to shooting conditions Before proceeding turn the camera on and rotate the mode dial to i or j the only difference between the two is that the flash will not fire in j mode Viewfinder photography Taking photographs Viewing photographs Deleting photographs 0 26 0 29 0 30 Live view Taking photographs Viewing photographs Deleting photographs 0 32 0 35 0 36 Shooting movies Viewing movies Del...

Page 185: ...se the zoom ring to zoom in on the subject so that it fills a larger area of the frame or zoom out to increase the area visible in the final photograph select longerfocal lengths on the lens focal length scale to zoom in shorter focal lengths to zoom out If the lens is equipped with a retractable lens barrel button 0 17 press and hold the button while rotating the zoom ring until the lens is relea...

Page 186: ...ton halfway to focus if the subject is poorly lit the flash may pop up and the AF assist illuminator may light When the focus operation is complete a beep will sound a beep may not sound if the subject is moving and the in focus indicator I will appear in the viewfinder In focus indicator Description I Subject in focus I flashes Camera unable to focus using autofocus See page 76 Focus point In foc...

Page 187: ...sconnect the power source until the lamp has gone out and recording is complete A The Shutter Release Button The camera has a two stage shutter release button The camera focuses when the shutter release button is pressed halfway To take the photograph press the shutter release button the rest of the way down Focus press halfway Shoot press all the way down Pressing the shutter release button halfw...

Page 188: ...29 Point and Shoot Modes i and j Viewing Photographs Pressing K displays a picture in the monitor Press 4 or 2 to view additional pictures K button ...

Page 189: ...nt and Shoot Modes i and j Deleting Unwanted Pictures Display the photograph you wish to delete Press O a confirmation dialog will be displayed Press the O button again to delete the picture K button O button ...

Page 190: ... 245 Exposure meters off Exposure meters on A The Built in Flash If additional lighting is required for correct exposure in i mode the built in flash will pop up automatically when the shutter release button is pressed halfway 0 89 If the flash is raised photographs can only be taken when the flash ready indicator M is displayed If the flash ready indicator is not displayed the flash is charging r...

Page 191: ...will be displayed in the camera monitor live view 2 Ready the camera Hold the handgrip in your right hand and cradle the camera body or lens with your left When framing photographs in portrait tall orientation hold the camera as shown at right Framing Photos in the Monitor a button ...

Page 192: ...nt will flash red 4 Take the picture Press the shutter release button the rest of the way down The monitor turns off and the memory card access lamp lights during recording Do not eject the memory card or remove or disconnect the power source until the lamp has gone out and recording is complete When recording is complete the photograph will be displayed in the monitor for a few seconds Press the ...

Page 193: ... is enabled The selected mode is shown in the monitor c Portrait Human portrait subjects d Landscape Landscapes and cityscapes e Close up Subjects close to the camera f Night portrait Portrait subjects framed against a dark background Z Auto Subjects suited to i or j mode or that do not fall into the categories listed above b Auto flash off A Live View For more information on taking photographs in...

Page 194: ...35 Point and Shoot Modes i and j Viewing Photographs Pressing K displays a picture in the monitor Press 4 or 2 to view additional pictures K button ...

Page 195: ...nt and Shoot Modes i and j Deleting Unwanted Pictures Display the photograph you wish to delete Press O a confirmation dialog will be displayed Press the O button again to delete the picture K button O button ...

Page 196: ...1 Press the a button The view through the lens is displayed in the monitor 2 Ready the camera Hold the handgrip in your right hand and cradle the camera body or lens with your left 3 Focus Press the shutter release button halfway to focus Recording Movies a button Focus point ...

Page 197: ...cording indicator and the time available are displayed in the monitor 5 End recording Press the movie record button again to end recording Press the a button to exit live view A Recording Movies See page 155 for more information on recording movies Movie record button Recording indicator Time remaining ...

Page 198: ...nd j Viewing Movies Press K to start playback and then scroll through pictures until a movie indicated by a 1 icon is displayed Press J to start playback and press 1 or K to end playback For more information see page 162 K button ...

Page 199: ... Modes i and j Deleting Unwanted Movies Display the movie you wish to delete movies are indicated by 1 icons Press O a confirmation dialog will be displayed Press the O button again to delete the movie K button O button ...

Page 200: ...s displayed when the mode dial is rotated to g The Guide Choose from the following items Shoot View delete Take pictures View and or delete pictures Retouch Set up Retouch pictures Change camera settings Battery indicator 0 21 Shooting mode A guide mode indicator appears on the shooting mode icon Number of exposures remaining 0 19 ...

Page 201: ...o focus 9 Distant subjects Freeze motion people Select a shutter speed Close ups Freezemotion vehicles 8 Sleeping faces Show water flowing 9 Moving subjects H Capture reds in sunsets Adjust white balance to vividly capture the colors in sunsets 7 Landscapes 6 Portraits Night portrait Take bright photos Adjust exposure compensationtotake bright high key or dark low key photos 5 Photograph night lan...

Page 202: ...the shooting option selected Flash settings Flash mode Flash settings Flash compensation Release mode ISO sensitivity settings ISO sensitivity ISO sensitivity settings Auto ISO sensitivity control Set Picture Control Exposure compensation White balance View single photos View multiple photos Choose a date View a slide show Delete photos A Guide Mode Guide mode is reset to Easy operation Auto when ...

Page 203: ... Trim Filter effects cross screen Filter effects soft Photo illustration Miniature effect Selective color Image quality Image size Auto off timers Print date Display and sound settings Monitor brightness Info background color Auto info display Beep Movie settings Frame size frame rate Movie quality Microphone Wind noise reduction Flicker reduction Playback folder Playback display options DPOF prin...

Page 204: ...Press G to turn the monitor on or return to the top level of the guide Turn monitor on Highlight a menu Press 1 3 4 or 2 to highlight a menu Highlight options Press 1 or 3 to highlight options in the menus Press 1 3 4 or 2 to highlight options in displays like that shown below Select highlighted menu or option Press J to select the highlighted menu or option ...

Page 205: ...ke that shown below highlight and press J View help W Q button If a d icon is displayed at the bottom left corner of the monitor help can be displayed by pressing the W Q button A description of the currently selected option will be displayed while the button is pressed Press 1 or 3 to scroll through the display To Use Description d help icon ...

Page 206: ...simple as selecting a mode framing a picture and shooting as described on page 25 The following scenes can be selected with the mode dial kPortrait Use for portraits with soft natural looking skin tones If the subject is far from the background or a telephoto lens is used background details will be softened to lend the composition a sense of depth lLandscape Use for vivid landscape shots in daylig...

Page 207: ...red while skin tones remain soft and natural mSports Fast shutter speeds freeze motion for dynamic sports shots in which the main subject stands out clearly A Note The built in flash and AF assist illuminator turn off nCloseup Use for close up shots of flowers insects and other small objects a macro lens can be used to focus at very close ranges ...

Page 208: ... or Situation Scene Mode oNightPortrait Use for a natural balance between the main subject and the background in portraits taken under low light A Preventing Blur Use a tripod to prevent blur caused by camera shake at slow shutter speeds ...

Page 209: ...by rotating the mode dial to q and rotating the command dial until the desired option appears in the monitor Night Vision 3 Selective Color S Super Vivid 1 Silhouette T Pop 2 High Key U Photo Illustration 3 Low Key g Color Sketch HDR Painting Toy Camera Effect I Easy Panorama Miniature Effect Mode dial Command dial Monitor ...

Page 210: ...se in the form of randomly spaced bright pixels fog or lines Autofocus is available in live view only manual focus can be used if the camera is unable to focus The built in flash and AF assist illuminator turn off SSuperVivid Overall saturation and contrast are increased for a more vibrant image T Pop Overall saturation is increased for a more lively image ...

Page 211: ...d eye reduction Movies shot in this mode play back like a slide show made up of a series of stills gColorSketch The camera detects and colors outlines for a color sketch effect The effect can be adjusted in live view 0 57 A Note Movies shot in this mode play back like a slide show made up of a series of stills ToyCameraEffect Create photos and movies that appear to have been shot with a toy camera...

Page 212: ...45 minutes of footage shot at 1920 1080 30p into a movie that plays back in about three minutes The effect can be adjusted in live view 0 59 A Note Sound is not recorded with movies The built in flash and AF assist illuminator turn off 3SelectiveColor All colors other than the selected colors are recorded in black and white The effect can be adjusted in live view 0 61 A Note The built in flash tur...

Page 213: ...Use with bright scenes to create bright images that seem filled with light A Note The built in flash turns off 3LowKey Use with dark scenes to create dark low key images with prominent highlights A Note The built in flash turns off A Preventing Blur Use a tripod to prevent blur caused by camera shake at slow shutter speeds ...

Page 214: ...Panorama Shoot panoramas as described on page 63 Start live view before beginning recording panoramas can not be shot during viewfinder photography A Note The built in flash turns off and movies can not be recorded A NEF RAW NEF RAW recording is not available in S T U g 3 and I modes Pictures taken when an NEF RAW or NEF RAW JPEG fine option is selected in these modes will be recorded as JPEG imag...

Page 215: ...played in the monitor 2 Adjust outline thickness Press J to display the options shown at right Press 2 or 4 to make outlines thicker or thinner 3 Press J Press J to exit when settings are complete To exit live view press the a button The selected settings will continue in effect and will apply to photographs taken using the viewfinder a button ...

Page 216: ...ss 4 or 2 to change Vividness can be increased to make colors more saturated or decreased for a washed out monochromatic effect while outlines can be made thicker or thinner Increasing the thickness of the lines also makes colors more saturated 3 Press J Press J to exit when settings are complete To exit live view press the a button The selected settings will continue in effect and will apply to p...

Page 217: ... at right Press 1 or 3 to highlight Vividness or Vignetting andpress4or2tochange Adjust vividness to make colors more or less saturated vignetting to control the amount of vignetting 3 Press J Press J to exit when settings are complete To exit live view press the a button The selected settings will continue in effect and will apply to photographs taken using the viewfinder a button ...

Page 218: ...lector to position the focus point in the area that will be in focus and then press the shutter release button halfway to focus To temporarily clear miniature effect options from the display and enlarge the view in the monitor for precise focus press X Press W Q to restore the miniature effect display 3 Display options Press J to display miniature effect options a button ...

Page 219: ...tation of the area that will be in focus and press 1 or 3 to adjust its width 5 Press J Press J to exit when settings are complete To exit live view press the a button The selected settings will continue in effect and will apply to photographs taken using the viewfinder ...

Page 220: ...ions 3 Select a color Frame an object in the white square in the center of the display and press 1 to choose the color of the object as one that will remain in the final image the camera may have difficulty detecting unsaturated colors choose a saturated color To zoom in on the center of the display for more precise color selection press X Press W Q to zoom out a button Selected color ...

Page 221: ...at the top of the display and repeat Steps 3 and 4 to select another color Repeat for a third color if desired To deselect the highlighted color press O To remove all colors press and hold O A confirmation dialog will be displayed select Yes 6 Press J Press J to exit when settings are complete During shooting only objects of the selected hues will be recorded in color all others will be recorded i...

Page 222: ...played in the monitor 2 Focus Frame the start of the panorama and press the shutter release button halfway 3 Start shooting Press the shutter release button the rest of the way down and then lift your finger from the button The display will briefly go dark and then turn on with 4 6 7 and 5 icons indicating the possible pan directions focus and exposure will lock a button ...

Page 223: ...atically when the end of the panorama is reached An example of how to pan the camera is shown below Without changing your position pan the camera in a steady curve either horizontally or vertically Time the pan according to the option selected for Image size in the shooting menu about 15 seconds are needed to complete the pan when Normal panorama is selected about 30 seconds when Wide panorama is ...

Page 224: ...n color or brightness subjects that are too close to the camera poorly lit subjects and subjects such as the sky or sea that are a solid color or contain simple repeating patterns Exposure compensation 0 118 can be used to adjust exposure by up to 3 EV in steps of 1 3 EV Adjust exposure compensation after starting live view in Step 1 The completed panorama will be slightly smaller than the area vi...

Page 225: ...urrent position is indicated by the navigation window The following operations can be performed Navigation window Guide To Use Description Pause Pause playback Play J Resume playback when the panorama is paused or during rewind advance Advance rewind Press 4 to rewind 2 to advance If playback is paused the panorama rewinds or advances a segment at a time keep the button pressed for continuous rewi...

Page 226: ...ed I Continuous The camera takes photographs while the shutter release button is pressed 0 68 J Quietshutterrelease As for single frame except that camera noise is reduced 0 70 E Self timer Take pictures with the self timer 0 71 Delayedremote ML L3 Shutter is released 2 s after shutter release button on optional ML L3 remote control is pressed 0 97 Quick response remote ML L3 Shutter is released w...

Page 227: ...lease button is pressed all the way down 1 Press the I E button 2 Choose I Continuous Highlight I Continuous and press J 3 Focus Frame the shot and focus 4 Take photographs The camera will take photographs while the shutter release button is pressed all the way down Continuous Shooting Burst Mode I E button ...

Page 228: ...buffer the shutter release will be disabled and the images transferred to the memory card A Frame Rate For information on the number of photographs that can be taken in continuous release mode see page 344 Frame rates may drop when the memory buffer is full or the battery is low A The Built in Flash Continuous release mode can not be used with the built in flash rotate the mode dial to j 0 25 or t...

Page 229: ...oes not sound when the camera focuses 1 Press the I E button 2 Select J Quiet shutter release Highlight J Quiet shutter release and press J 3 Press the shutter release button all the way down Press the shutter release button all the way down to shoot Quiet Shutter Release I E button ...

Page 230: ...ts or group shots that include the photographer Before proceeding mount the camera on a tripod or place it on a stable level surface 1 Press the I E button 2 Select E Self timer mode Highlight E Self timer and press J 3 Frame the photograph Self Timer Mode I E button ...

Page 231: ... to sound Two seconds before the photo is taken the lamp will stop flashing and the beeping will become more rapid The shutter will be released ten seconds after the timer starts Note that the timer may not start or a photograph may not be taken if the camera is unable to focus or in other situations in which the shutter can not be released To stop the timer without taking a photograph turn the ca...

Page 232: ...er eyecup q and insert the cap as shown w A Using the Built in Flash Before taking a photograph with the flash in modes that require the flash to be raised manually press the M Y button to raise the flash and wait for the M indicator to be displayed in the viewfinder 0 31 Shooting will be interrupted if the flash is raised after the self timer has started A The Setup Menu Self Timer Option For inf...

Page 233: ...nd AF C are available only in modes P S A and M Focus Viewfinder Photography Option Description AF A Auto servo AF Camera automatically selects single servo autofocus if subject is stationary continuous servo autofocus if subject is moving Shutter can only be released if camera is able to focus AF S Single servo AF For stationary subjects Focus locks when shutter release button is pressed halfway ...

Page 234: ...nitiate predictive focus tracking if the subject moves toward the camera while the shutter release button is pressed halfway This allows the camera to track focus while attempting to predict where the subject will be when the shutter is released D Continuous Servo Autofocus In AF C mode or when continuous servo autofocus is selected in AF A mode the camera gives higher priority to focus response h...

Page 235: ... recompose the photograph Thereislittleornocontrastbetween the subject and the background The focus point contains areas of sharply contrasting brightness Example Subject is the same color as the background Example Subject is half in the shade The focus point contains objects at different distances from the camera Background objects appear larger than the subject Example Subject is inside a cage E...

Page 236: ...he autofocus operation when the shutter release button is pressed halfway some restrictions apply 0 331 Note that the illuminator may become hot when used multiple times in quick succession and will turn off automatically to protect the lamp after a period of continuous use Normal function will resume after a brief pause AF assist illuminator ...

Page 237: ...only d Dynamic area AF For non stationary subjects In AF A and AF C focus modes user selects focus point using multi selector 0 80 but camera will focus based on information from surrounding focus points if subject briefly leaves selected point f 3D tracking 11 points InAF AandAF Cfocusmodes user selects focus point using multi selector 0 80 If subject moves after camera has focused camera uses 3D...

Page 238: ... are reset when another shooting mode is selected A 3D Tracking 11 Points If subject leaves the viewfinder remove your finger from the shutter release button and recompose the photograph with the subject in the selected focus point Note that when the shutter release button is pressed halfway the colors in the area surrounding the focus point are stored in the camera Consequently 3D tracking may no...

Page 239: ...se photographs with the main subject almost anywhere in the frame 1 Choose an AF area mode other than e Auto area AF 0 78 2 Return to the shooting display Press P to return to the shooting display 3 Select the focus point Use the multi selector to select the focus point in the viewfinder or information display while the exposure meters are on Press J to select the center focus point P button Focus...

Page 240: ...ce as your original subject Focus lock is most effective when an option other than e Auto area AF is selected for AF area mode 0 78 1 Focus Position the subject in the selected focus point and press the shutter release button halfway to initiate focus Check that the in focus indicator I appears in the viewfinder 2 Lock focus AF A and AF C focus modes With the shutter release button pressed halfway...

Page 241: ...he photograph and shoot Focus will remain locked between shots if you keep the shutter release button pressed halfway AF S or keep the A L button pressed allowing several photographs in succession to be taken at the same focus setting Do not change the distance between the camera and the subject while focus lock is in effect If the subject moves focus again at the new distance A Autoexposure Lock ...

Page 242: ... lens focus mode switch If the lens is equipped with an A M M A M or A M M mode switch slide the switch to M 2 Focus To focus manually adjust the lens focus ring until the image displayed on the clear matte field in the viewfinder is in focus Photographs can be taken at any time even when the image is not in focus A M mode switch M A M mode switch ...

Page 243: ...sted on page 76 the in focus indicator may sometimes be displayed when the subject is not in focus confirm focus in the viewfinder before shooting A Selecting Manual Focus with the Camera If the lens supports M A autofocus with manual override or A M autofocus with manual override AF priority manual focus can also be selected by setting the camera focus mode to MF manual focus 0 74 Focus can then ...

Page 244: ...Quality and Size Option File type Description NEF RAW JPEG fine NEF JPEG Two images are recorded one NEF RAW image and one fine quality JPEG image NEF RAW NEF Raw 12 bit data from the image sensor are saved directly to the memory card Settings such as white balance and contrast can be adjusted after shooting JPEG fine JPEG Record JPEG images at a compression ratio of roughly 1 4 fine quality JPEG ...

Page 245: ...e 0 254 is not available at image quality settings of NEF RAW or NEF RAW JPEG NEF RAW images can be viewed on the camera or using software such as Capture NX 2 available separately 0 307 or ViewNX 2 supplied JPEG copies of NEF RAW images can be created using the NEF RAW processing option in the retouch menu 0 275 A NEF RAW JPEG When photographs taken at NEF RAW JPEG fine are viewed on the camera o...

Page 246: ...press J 2 Choose an image size Highlight an option and press J Image size Size pixels Print size cm in Large 6000 4000 50 8 33 9 20 13 3 Medium 4496 3000 38 1 25 4 15 0 10 Small 2992 2000 25 3 16 9 10 6 7 Approximate size when printed at 300 dpi Print size in inches equals image size in pixels divided by printer resolution in dots per inch dpi 1 inch approximately 2 54 cm P button ...

Page 247: ...tically 1632 4800 13 8 40 6 5 4 16 0 Wide panorama Camera panned horizontally 9600 1080 81 3 9 1 32 0 3 6 Camera panned vertically 1632 9600 13 8 81 3 5 4 32 0 Figures for horizontal and vertical panorama are reversed if camera is rotated 90 degrees Approximate size when printed at 300 dpi Print size in inches equals image size in pixels divided by printer resolution in dots per inch dpi 1 inch ap...

Page 248: ...ing the M Y button pressed rotate the command dial until the desired flash mode appears in the information display 2 Take pictures The flash will pop up as required when the shutter release button is pressed halfway and fire when a photograph is taken If the flash does not pop up automatically DO NOT attempt to raise it by hand Failure to observe this precaution could damage the flash Using the Bu...

Page 249: ...it fires the red eye reduction lamp lights to help reduce red eye Not available in o mode j flash off The flash does not fire Njr auto slow sync red eye As for auto with red eye reduction except that slow shutter speeds are used to capture background lighting Use for portraits taken at night or under low light Available in o mode Nr auto slow sync Slow shutter speeds are used to capture background...

Page 250: ...not raised 1 Raise the flash Press the M Y button to raise the flash 2 Choose a flash mode Keeping the M Y button pressed rotate the command dial until the desired flash mode appears in the information display 3 Take pictures The flash will fire whenever a picture is taken M Y button Command dial Information display M Y button ...

Page 251: ...odes S and M Np slow sync As for fill flash above except that shutter speed slows automatically to capture background lighting at night or under low light Use when you want to capture both subject and background Not available in modes S and M Nt rear curtain slow sync As for rear curtain sync below except that shutter speed slows automatically to capture background lighting at night or under low l...

Page 252: ... may be briefly disabled to protect the flash after it has been used for several consecutive shots The flash can be used again after a short pause A Shutter Speeds Available with the Built in Flash Shutter speed is restricted to the following ranges when the built in flash is used Mode Shutter speed Mode Shutter speed i k p n S T U g P A 1 200 1 60 s S 1 200 30 s o 1 200 1 s M 1 200 30 s Bulb Time...

Page 253: ...200 400 800 1600 3200 6400 12800 m ft 1 4 2 2 8 4 5 6 8 11 16 1 0 8 5 3 ft 3in 27 ft 11 in 2 2 8 4 5 6 8 11 16 22 0 7 6 0 2 ft 4in 19 ft 8 in 2 8 4 5 6 8 11 16 22 32 0 6 4 2 2 ft 13 ft 9 in 4 5 6 8 11 16 22 32 0 6 3 0 2 ft 9 ft 10 in 5 6 8 11 16 22 32 0 6 2 1 2 ft 6 ft 11 in 8 11 16 22 32 0 6 1 5 2 ft 4 ft 11 in 11 16 22 32 0 6 1 1 2 ft 3 ft 7 in 16 22 32 0 6 0 7 2 ft 2 ft 4 in ...

Page 254: ...ivalent to ISO 25600 Choosing Auto allows the camera to set ISO sensitivity automatically in response to lighting conditions to use auto in P S A and M modes select Auto ISO sensitivity control for the ISO sensitivity settings item in the shooting menu 0 227 1 Display ISO sensitivity options Press the P button then highlight the current ISO sensitivity in the information display and press J ISO Se...

Page 255: ...96 More on Photography 2 Choose an ISO sensitivity Highlight an option and press J ISOsens1t1v1 ty lmLIE I 400 800 16003200640011800 Ht1 OBack JOK ...

Page 256: ...n be used to reduce camera shake or for self portraits Before proceeding mount the camera on a tripod or place it on a stable level surface 1 Press the I E button 2 Select a remote control mode Highlight Delayed remote ML L3 or Quick response remote ML L3 and press J Remote Control Photography I E button ...

Page 257: ...p will flash after the shutter has been released Note that the timer may not start or a photograph may not be taken if the camera is unable to focus or in other situations in which the shutter can not be released A Before Using the ML L3 Remote Control Before using the ML L3 for the first time remove the clear plastic battery insulator sheet A Cover the Viewfinder To prevent light entering via the...

Page 258: ...sh Before taking a photograph with the flash in manual pop up modes 0 91 press the M Y button to raise the flash and wait for the M indicator to be displayed in the viewfinder 0 31 Shooting will be interrupted if the flash is raised after the shutter release button on the ML L3 is pressed If the flash is required the camera will only respond to the ML L3 shutter release button once the flash has c...

Page 259: ...era settings Camera sets shutter speed and aperture for optimal exposure S Shutter priorityauto 0 104 Use to freeze or blur motion User chooses shutter speed camera selects aperture for best results A Aperture priority auto 0 106 Use to blur background or bring both foreground andbackgroundintofocus User chooses aperture camera selects shutter speed for best results M Manual 0 108 User controls bo...

Page 260: ...utter speed Aperture Fast shutter speeds 1 1600 s in this example freeze motion Slow shutter speeds here 1 s blur motion Large apertures such as f 5 6 remember thelowerthef number thelargertheaperture blurdetails in front of and behind the main subject Small apertures f 22 in this case bring both background and foreground into focus ...

Page 261: ...for snapshots or whenever you want to leave the camera in charge of shutter speed and aperture The camera automatically adjusts shutter speed and aperture for optimal exposure in most situations To take pictures in programmed auto mode rotate the mode dial to P Mode dial ...

Page 262: ...high f numbers and slow shutter speeds All combinations produce the same exposure Rotate right to blur background details or freeze motion Command dial Rotate left to increase depth of field or blur motion While flexible program is in effect a U R indicator appears in the viewfinder and information display To restore default shutter speed and aperture settings rotate the command dial until the ind...

Page 263: ...utter speeds to freeze motion slow shutter speeds to suggest motion by blurring moving objects The camera automatically adjusts aperture for optimal exposure To choose a shutter speed 1 Rotate the mode dial to S Fast shutter speeds e g 1 1600 s freeze motion Slow shutter speeds e g 1 s blur motion Mode dial ...

Page 264: ...105 P S A and M Modes 2 Choose a shutter speed Rotate the command dial to choose the desired shutter speed rotate right for faster speeds left for slower speeds Command dial ...

Page 265: ... the main subject that appears to be in focus The camera automatically adjusts shutter speed for optimal exposure To choose an aperture 1 Rotate the mode dial to A Large apertures low f numbers e g f 5 6 blur details in front of and behind the main subject Smallapertures highf numbers e g f 22 bring the foreground and background into focus Mode dial ...

Page 266: ...107 P S A and M Modes 2 Choose an aperture Rotate the command dial left for larger apertures lower f numbers right for smaller apertures higher f numbers Command dial ...

Page 267: ...anual In manual mode you control both shutter speed and aperture Shutter speeds of Bulb and Time are available for long time exposures of moving lights the stars night scenery or fireworks 0 110 1 Rotate the mode dial to M Mode dial ...

Page 268: ... the command dial left for larger apertures lower f numbers and right for smaller apertures higher f numbers Shutter speed Command dial Aperture E N button Command dial A The Exposure Indicator If a CPU lens is attached 0 289 and a shutter speed other than Bulb or Time is selected the exposure indicator in the viewfinder and information display shows whether the photograph would be under or over e...

Page 269: ...n for thirty minutes or until the button is pressed a second time Before proceeding mount the camera on a tripod or place it on a stable level surface To prevent light entering via the viewfinder from appearing in the photograph or interfering with exposure we recommend that you cover the viewfinder with your hand or other objects such as an optional eyepiece cap 0 307 before taking pictures witho...

Page 270: ...and dial to choose a shutter speed of Bulb A 3 Take the photograph After focusing press the shutter release button on the camera optional wireless remote controller or remote cord all the way down Take your finger from the shutter release button when the exposure is complete Mode dial Command dial ...

Page 271: ...e shutter speed Rotate the command dial left to choose a shutter speed of Time 3 Open the shutter After focusing press the shutter release button on the camera or optional remote control remote cord or wireless remote controller all the way down Mode dial Command dial ...

Page 272: ...fter 30 minutes A ML L3 Remote Controls If you will be using an ML L3 remote control select one of the following remote control modes as described on page 97 Delayed remote ML L3 or Quick response remote ML L3 Note that if you are using an ML L3 remote control pictures will be taken in Time mode even when Bulb A is selected for shutter speed ...

Page 273: ...stribution color composition and distance M Center weighted metering Classic meter for portraits Camera meters entire frame but assigns greatest weight to center area Recommended when using filters with an exposure factor filter factor over 1 N Spot metering Choose this mode to ensure that subject will be correctly exposed even when background is much brighter or darker Camera meters current focus...

Page 274: ...ght the current metering method in the information display and press J 2 Choose a metering method Highlight an option and press J A Spot Metering If e Auto area AF is selected for AF area mode during viewfinder photography 0 78 the camera will meter the center focus point P button ...

Page 275: ... autoexposure lock is not available in i or j mode 1 Meter exposure Press the shutter release button halfway 2 Lock exposure With the shutter release button pressed halfway q and the subject positioned in the focus point press the A L button w to lock exposure While exposure lock is in effect an AE L indicator will appear in the viewfinder Shutter release button A L button ...

Page 276: ...ture While exposure lock is in effect the following settings can be adjusted without altering the metered value for exposure Mode Setting Programmed auto Shutter speed and aperture flexible program 0 103 Shutter priority auto Shutter speed Aperture priority auto Aperture The metering method itself can not be changed while exposure lock is in effect ...

Page 277: ...posure compensation is used to alter exposure from the value suggested by the camera making pictures brighter or darker 0 345 It is most effective when used with M Center weighted metering or N Spot metering 0 114 1 EV No exposure compensation 1 EV ...

Page 278: ...ure compensation in and I modes will be reset when another mode is selected Exposure compensation is not reset when the camera is turned off E N button Command dial Information display 0 3 EV 2 EV A The Information Display Exposure compensation options can also be accessed from the information display 0 9 A Mode M In mode M exposure compensation affects only the exposure indicator A Using a Flash ...

Page 279: ...ent unwanted highlights or reflections 0 347 Keep the M Y and E N buttons pressed and rotate the command dial until the desired value is selected in the viewfinder or information display In general positive values make the main subject seem brighter while negative values make it seem darker Normal flash output can be restored by setting flash compensation to 0 Flash compensation is not reset when ...

Page 280: ...m the information display 0 9 A Optional Flash Units Flash compensation is also available with optional flash units that support the Nikon Creative Lighting System CLS see page 300 The flash compensation selected with the optional flash unit is added to the flash compensation selected with the camera ...

Page 281: ...y through a door or window or taking pictures of shaded subjects on a sunny day Active D Lighting is not recommended in mode M in other modes it is most effective when used with L Matrix metering 0 114 1 Display Active D Lighting options Press the G button to display the menus Highlight Active D Lighting in the shooting menu and press 2 Preserving Detail in Highlights and Shadows Active D Lighting...

Page 282: ...tographs taken with Active D Lighting Uneven shading may be visible with some subjects Active D Lighting can not be used at an ISO sensitivity of Hi 1 A Active D Lighting Versus D Lighting Active D Lighting adjusts exposure before shooting to optimize the dynamic range while the D Lighting option in the retouch menu 0 266 brightens shadows in images after shooting ...

Page 283: ...escription v Auto Automatic white balance adjustment Recommended in most situations J Incandescent Use under incandescent lighting I Fluorescent Use with the light sources listed on page 126 H Direct sunlight Use with subjects lit by direct sunlight N Flash Use with the flash G Cloudy Use in daylight under overcast skies M Shade Use in daylight with subjects in the shade L Preset manual Measure wh...

Page 284: ...Modes 1 Display white balance options Press the P button then highlight the current white balance setting in the information display and press J 2 Choose a white balance option Highlight an option and press J P button ...

Page 285: ...mperature to which an object would have to be heated to radiate light in the same wavelengths While light sources with a color temperature in the neighborhood of5000 5500 K appear white light sources with alower color temperature such as incandescent light bulbs appear slightly yellow or red Light sources with a higher color temperature appear tinged with blue The camera white balance options are ...

Page 286: ...hite balance is fine tuned using the White balance option in the shooting menu 1 Select a white balance option Press G to display the menus then highlight White balance in the shooting menu and press 2 Highlight the desired white balance option and press 2 if Fluorescent is selected highlight the desired lighting type and press 2 note that fine tuning is not available with Preset manual G button ...

Page 287: ...inates Increase green Increase blue Increase amber Increase magenta Adjustment A White Balance Fine Tuning The colors on the fine tuning axes are relative not absolute For example moving the cursor to B blue when a warm setting such as J incandescent is selected will make photographs slightly colder but will not actually make them blue ...

Page 288: ...ace a neutral gray or white object under the lighting that will be used in the final photograph 2 Display white balance options To display the menus press the G button Highlight White balance in the shooting menu and press 2 to display white balance options Highlight Preset manual and press 2 Method Description Measure Neutral gray or white object is placed under lighting that will be used in fina...

Page 289: ...e and press 2 4 Select Yes The menu shown at right will be displayed highlight Yes and press J The camera will enter preset measurement mode When the camera is ready to measure whitebalance aflashingD L will appear in the viewfinder and information display ...

Page 290: ...amera was able to measure a value for white balance the message shown at right will be displayed and a will flash in the viewfinder for about eight seconds before the camera returns to shooting mode To returntoshootingmodeimmediately press the shutter release button halfway If lighting is too dark or too bright the camera may be unable to measure white balance A message will appear in the informat...

Page 291: ...ically increased by 1 EV when measuring white balance when shooting in mode M adjust exposure so that the exposure indicator shows 0 0 109 A Other Methods for Measuring Preset White Balance To enter preset measurement mode see above after selecting preset white balance in the information display 0 125 press J for a few seconds If white balance has been assigned to the Fn button 0 251 white balance...

Page 292: ... display the menus press the G button Highlight White balance in the shooting menu and press 2 to display white balance options Highlight Preset manual and press 2 2 Select Use photo Highlight Use photo and press 2 3 Choose Select image Highlight Selectimage and press 2 to skip the remainingstepsandusethe image last selected for preset white balance select This image G button ...

Page 293: ...lder containing the source image and press 2 5 Highlight the source image To view the highlighted image full frame press and hold the X button 6 Copy white balance Press J to set preset white balance to the white balance value for the highlighted photograph ...

Page 294: ...Standard Recommended for most situations this option uses standard processing for balanced results R Neutral A good choice for photographs that will later be extensively processed orretouched this option uses minimal processing for natural results S Vivid Choose this option for photographs that emphasize primary colors Pictures are enhanced for a vivid photoprint effect T Monochrome Take monochrom...

Page 295: ...Modes 1 Display Picture Control options Press the G button to display the menus Highlight Set Picture Control in the shooting menu and press 2 2 Select a Picture Control Highlight a Picture Control and press J G button ...

Page 296: ...icture Control Press G to display the menus then highlight Set Picture Control in the shooting menu and press 2 Highlight the desired Picture Control and press 2 2 Adjust settings Press 1 or 3 to highlight the desired setting and press 4 or 2 to choose a value 0 139 Repeat this step until all settings have been adjusted or select Quick adjust to choose a preset combination of settings Default sett...

Page 297: ...138 P S A and M Modes 3 Save changes and exit Press J Picture Controls that have been modified from default settings are indicated by an asterisk ...

Page 298: ...y according to the type of scene Contrast Adjust contrast manually or select A to let the camera adjust contrast automatically Brightness Raise or lower brightness without loss of detail in highlights or shadows Manual adjustments non monochrome only Saturation Control the vividness of colors Select A to adjust saturation automatically according to the type of scene Hue Adjust hue Manual adjustmen...

Page 299: ...n monochrome controls only and contrast for the Picture Control selected in Step 2 press and hold the X button The icons for Picture Controls that use auto contrast and saturation are displayed in green in the Picture Control grid and lines appear parallel to the axes of the grid A Previous Settings The line under the value display in the Picture Control setting menu indicates the previous value f...

Page 300: ... yellow red more contrast than orange O Orange R Red G Green Softens skin tones Can be used for portraits Note that the effects achieved with Filter effects are more pronounced than those produced by physical glass filters A Toning Monochrome Only Choose from B W black and white Sepia Cyanotype blue tintedmonochrome Red Yellow Green Blue Green Blue Purple Blue Red Purple Pressing 3 when Toning is ...

Page 301: ...he shutter release button halfway The focus point will flash green while the camera focuses If the camera is able to focus the focus point will be displayed in green if the camera is unable to focus the focus point will flash red note that pictures can be taken even when the focus point flashes red check focus in the monitor before shooting Except in i and j modes exposure can be locked by pressin...

Page 302: ...f and the memory card access lamp lights during recording Do not remove the battery or memory card until recording is complete When shooting is complete the photograph will be displayed in the monitor for a few seconds before the camera returns to live view mode To exit press the a button Memory card access lamp ...

Page 303: ...nd modes 1 Display focus options Press the P button then highlight the current focus mode in the information display and press J Option Description AF S Single servo AF For stationary subjects Focus locks when shutter release button is pressed halfway AF F Full time servo AF For moving subjects Camera focuses continuously until shutter release button is pressed Focus locks when shutter release but...

Page 304: ...le in U g and 3 modes Option Description 6 Face priority AF Use for portraits The camera automatically detects and focuses on portrait subjects 7 Wide area AF Use for hand held shots of landscapes and other non portrait subjects Use the multi selector to select the focus point 8 Normal area AF Use for pin point focus on a selected spot in the frame A tripod is recommended 9 Subject tracking AF Use...

Page 305: ...146 Live View 1 Display AF area modes Press the P button then highlight the current AF area mode in the information display and press J 2 Choose an AF area mode Highlight an option and press J P button ...

Page 306: ...etect the subject because for example the subject has turned to face away from the camera the border will no longer be displayed 7 8 wide and normal area AF Use the multi selector to move the focus point anywhere in the frame or press J to position the focus point in the center of the frame 9 subject tracking AF Position the focus point over your subject and press J The focus point will track the ...

Page 307: ...Displayed if shooting will end in 30 s or less 152 161 r Microphone sensitivity Microphone sensitivity for movie recording 158 t Sound level Sound level for audio recording Displayed in red if level is too high adjust microphone sensitivity accordingly Left L and right R channel indicators appear when optional ME 1 or other stereo microphone is used 158 y Wind noise reduction Displayed when On is ...

Page 308: ...ocus mode 144 o AF area mode The current AF area mode 145 0 Movie frame size The frame size of movies recorded in movie mode 158 1 Time remaining movie mode The recording time remaining in movie mode 156 2 Focus point The current focus point The display varies with the option selected for AF area mode 0 145 147 3 Exposure indicator Indicates whether the photograph would be under or over exposed at...

Page 309: ...ndicate edges of movie frame crop Show photo indicators Show movie indicators 0 155 Framing grid Hide indicators A crop showing the area recorded is displayed during movie recording when frame sizes other than 640 424 are selected for Movie settings Frame size frame rate in the shooting menu 0 158 the area outside the movie frame crop is grayed out when movie indicators are displayed R button ...

Page 310: ...ed to suit the live view display producing photographs with exposure close to what is seen in the monitor note that exposure compensation can only be previewed in the monitor at values between 3 EV and 3 EV To prevent light entering via the viewfinder from appearing in the photograph or interfering with exposure we recommend that you cover the viewfinder with your hand or other objects such as an ...

Page 311: ...g to another setting Live view may end automatically to prevent damage to the camera s internal circuits exit live view when the camera is not in use Note that the temperature of the camera s internal circuits may rise and noise bright spots randomly spaced bright pixels or fog may be displayed in the following instances the camera may also become noticeably warm but this does not indicate a malfu...

Page 312: ...ct is lit by spot lighting or by a neon sign or other light source that changes in brightness Flicker or banding appears under fluorescent mercury vapor sodium vapor or similar lighting A cross star filter or other special filter is used The subject appears smaller than the focus point The subject is dominated by regular geometric patterns e g blinds or a row of windows in a skyscraper The subject...

Page 313: ...cise focus press the X button While the view through the lens is zoomed in a navigation window will appear in a gray frame at the bottom right corner of the display Use the multi selector to scroll to areas of the frame not visible in the monitor available only if 7 Wide area AF or 8 Normal area AF is selected for AF area mode or press W Q to zoom out X button Navigation window ...

Page 314: ... shot and focus as described in Steps 2 and 3 of Framing Photographs in the Monitor 0 142 see also Focusing in Live View on pages 144 147 Note that the number of subjects that can be detected in face priority AF drops during movie recording Recording Movies D The 0 Icon A 0 icon 0 148 indicates that movies can not be recorded A Before Recording Set aperture before recording in mode A or M 0 106 10...

Page 315: ...fect 4 End recording Press the movie record button again to end recording Recording will end automatically when the maximum length is reached the memory card is full or another mode is selected A Taking Photographs During Movie Recording To end movie recording take a photograph and exit to live view press the shutter release button all the way down and hold it in this position until the shutter is...

Page 316: ...rding Note that the built in microphone may record lens noise during autofocus and vibration reduction Flash lighting can not be used during movie recording Live view may end automatically to prevent damage to the camera s internal circuits exit live view when the camera is not in use Note that the temperature of the camera s internal circuits may rise and noise bright spots randomly spaced bright...

Page 317: ...recording off to select microphone sensitivity manually select Manual sensitivity and choose a sensitivity Frame size frame rate Maximum length high movie quality normal movie quality 4 Frame size pixels Frame rate1 L t 1920 1080 60p2 10 min 20 min M u 50p3 N r 30p2 20 min 29 min 59 s O s 25p3 P k 24p Q l 1280 720 60p2 R o 50p3 S n 640 424 30p2 29 min 59 s 29 min 59 s T p 25p3 1 Listed value Actua...

Page 318: ... when the camera is in mode M Shutter speed can be set to values as fast as 1 4000 s the slowest speed available varies with the frame rate 1 30 s for frame rates of 24p 25p and 30p 1 50 s for 50p and 1 60 s for 60p ISO sensitivity can be set to values between ISO 100 and Hi 1 0 95 If shutter speed and ISO sensitivity are not in these ranges when live view starts they will automatically be set to ...

Page 319: ...ght the desired item and press 2 then highlight an option and press J A HDMI and Other Video Devices When the camera is attached to an HDMI video device the camera monitor will remain on and the video device will display the view through the lens If the device supports HDMI CEC select Off for the HDMI Device control option in the setup menu 0 218 before shooting in live view G button ...

Page 320: ...anual movie settings 0 159 in mode M ISO sensitivity 0 95 can be adjusted in place of exposure compensation A Using an External Microphone The optional ME 1 stereo microphone can be used to record sound in stereo or to reduce noise caused by lens vibration being recorded during autofocus D The Count Down Display A count down will be displayed 30 s before live view ends automatically 0 148 Dependin...

Page 321: ...vies are indicated by a 1 icon in full frame playback 0 170 Press J to start playback your current position is indicated by the movie progress bar Viewing Movies 1 icon Length Current position total length Movie progress bar Guide Volume ...

Page 322: ... 8 to 16 keep pressed to skip to beginning or end of movie first frame is indicated by h in top right corner of monitor last frame by i If playback is paused movie rewinds or advances one frame at a time hold for continuous rewind or advance Skip 10 s Rotate the command dial to skip ahead or back 10 s Adjust volume X W Q Press X to increase volume W Q to decrease Return to full frame playback K Pr...

Page 323: ...ovie on the new opening or closing frame Play the movie back as described on page 162 pressing J to start and resume playback and 3 to pause Pause playback when you reach the new opening or closing frame Editing Movies Option Description f Choose start end point Create a copy from which the opening or closing footage has been removed g Save selected frame Save a selected frame as a JPEG still Movi...

Page 324: ... new start or end point To create a copy that begins from the current frame highlight Start point and press J The frames before the current frame will be removed when you save the copy To create a copy that ends at the current frame highlight End point and press J The frames after the current frame will be removed when you save the copy Start point End point P button ...

Page 325: ...played press 1 7 Preview the movie To preview the copy highlight Preview and press J to interrupt the preview and return to the save options menu press 1 To abandon the current copy and return to Step 5 highlight Cancel and press J to save the copy proceed to Step 8 8 Save the copy Highlight Save as new file and press J to save the copy to a new file To replace the original movie file with the edi...

Page 326: ... be saved if there is insufficient space available on the memory card Copies have the same time and date of creation as the original A Choosing the Role of the Current Frame To make the frame displayed in Step 5 the new end point x instead of the new start point w or vice versa press the A L button A L button ...

Page 327: ...EG still 1 Pause the movie on the desired frame Play the movie back as described on page 162 pressing J to start and resume playback and 3 to pause Pause the movie at the frame you intend to copy 2 Choose Save selected frame Press the P button then highlight Save selected frame and press 2 P button ...

Page 328: ...he current frame 4 Save the copy Highlight Yes and press J to create a fine quality 0 85 JPEG copy of the selected frame A Save Selected Frame JPEG movie stills created with the Save selected frame option can not be retouched JPEG movie stills lack some categories of photo information 0 172 ...

Page 329: ...l photographs Press 2 to view photographs in order recorded 4 to view photographs in reverse order View additional photo info Change photo info displayed 0 172 View thumbnails W Q See page 180 for more information on the thumbnail display Zoom in on photograph X See page 182 for more information on playback zoom Delete images O Confirmation dialog will be displayed Press O again to delete photo K ...

Page 330: ...J starts movie playback 0 162 If the current picture is a panorama pressing J starts panorama playback 0 66 A The P Button Pressing the P button in full frame thumbnail or calendar playback displays the dialog shown at right where you can rate pictures 0 186 retouch photos and edit movies 0 164 263 and select pictures for transfer to a smart device when an optional wireless mobile adapter is conne...

Page 331: ...ow Note that image only shooting data RGB histograms highlights and overview data are only displayed if corresponding option is selected for Playback display options 0 220 Location data are only displayed if an optional GP 1 or GP 1A GPS unit 0 309 was used when the photo was taken 0 259 File information None image only Overview Highlights Location data RGB histogram Shooting data ...

Page 332: ...h indicator 265 3 Upload marking 189 4 Frame number total number of images 5 File name 250 6 Image quality 85 7 Image size 87 8 Time of recording 18 242 9 Date of recording 18 242 10 Folder name 257 11 Rating 186 1 Protect status 184 2 Retouch indicator 265 3 Upload marking 189 4 Frame number total number of images 5 Image highlights 6 Rating 186 ...

Page 333: ...togram blue channel 6 Upload marking 189 7 Retouch indicator 265 8 White balance 124 White balance fine tuning 127 Preset manual 129 9 Protect status 184 10 Rating 186 A Playback Zoom To zoom in on the photograph when the histogram is displayed press X Use the X and W Q buttons to zoom in and out and scroll the image with the multi selector The histogram will be updated to show only the data for t...

Page 334: ...on of tones will be relatively even If the image is dark tone distribution will be shifted to the left If the image is bright tone distribution will be shifted to the right Increasing exposure compensation shifts the distribution of tones to the right while decreasing exposure compensation shifts the distribution to the left Histograms can provide a rough idea of overall exposure when bright ambie...

Page 335: ...es 5 Metering 114 Shutter speed 101 Aperture 101 6 Shooting mode 25 47 50 100 ISO sensitivity1 95 7 Exposure compensation 118 8 Focal length 298 9 Lens data 10 Focus mode 74 144 Lens VR vibration reduction 2 355 11 Flash type 229 299 Commander mode2 12 Flash mode 90 92 13 Flash control 229 Flash compensation 120 14 Camera name 15 Rating 186 ...

Page 336: ... 4 AUTO is displayed if photo was taken with Active D Lighting on 16 White balance 124 White balance fine tuning 127 Preset manual 129 17 Color space 225 18 Picture Control 135 19 Quick adjust3 139 Original Picture Control3 135 20 Sharpening 139 21 Contrast 139 22 Brightness 139 23 Saturation3 139 Filter effects3 139 24 Hue3 139 Toning3 139 25 Noise reduction 226 26 Active D Lighting4 122 27 Retou...

Page 337: ... distribution of tones in the image 0 175 7 Image quality 85 8 Image size 87 9 File name 250 10 Time of recording 18 242 11 Date of recording 18 242 12 Folder name 257 13 Rating 186 14 Metering 114 15 Shooting mode 25 47 50 100 16 Shutter speed 101 17 Aperture 101 18 ISO sensitivity1 95 19 Image comment indicator 244 20 Focal length 298 21 Location data indicator 259 22 Active D Lighting 2 122 23 ...

Page 338: ... used when the photo was taken 0 259 In the case of movies the data give the location at the start of recording 1 Protect status 184 2 Retouch indicator 265 3 Upload marking 189 4 Frame number total number of images 5 Latitude 6 Longitude 7 Altitude 8 Coordinated Universal Time UTC 9 Rating 186 10 Camera name ...

Page 339: ... number of images displayed Display fewer images X Press X button to reduce the number of images displayed When four images are displayed pressto view highlighted image full frame Highlight images Use multi selector or command dial to highlight pictures Viewhighlightedimage Press J to display the highlighted image full frame Delete highlighted photo O See page 192 for more information Change prote...

Page 340: ...n in date list to place cursor in thumbnail list Press W Q again to return to date list J Exit to thumbnail playback Zoom in on highlighted photo X Date list Exit to 72 frame playback Thumbnail list Press and hold X button to zoom in on highlighted picture Highlight dates Highlight images Date list Highlight date Thumbnail list Highlight picture Toggle full frame playback Thumbnail list View highl...

Page 341: ...oom To Use Description Zoom in or out X W Q Press X to zoom in to maximum of approximately 38 large images 28 medium images or 19 small images Press W Q to zoom out While photo is zoomed in use multi selector to view areas of image not visible in monitor Keep multi selector pressed to scroll rapidly to other areas of frame Navigation window is displayed when zoom ratio is altered area currently vi...

Page 342: ... P and 1 or 3 to zoom in or out press P and 4 or 2 to view other faces View other images Rotate command dial to view same location in other images at current zoom ratio Playback zoom is cancelled when a movie is displayed Cancel zoom Cancel zoom and return to full frame playback Change protect status A L See page 184 for more information To Use Description ...

Page 343: ...in the playback menu Note that protected images will be deleted when the memory card is formatted 0 234 To protect a photograph 1 Select an image Display the image in full frame playback or playback zoom or highlight it in the thumbnail list in thumbnail or calendar playback 2 Press the A L button The photograph will be marked with a P icon Protecting Photographs from Deletion Full frame playback ...

Page 344: ...ey can be deleted display pictures full frame or highlight them in the thumbnail list and then press the A L button To remove protection from all images in the folder or folders currently selected in the Playback folder menu 0 220 press the A L and O buttons together for about two seconds during playback ...

Page 345: ... images Rating Individual Pictures 1 Select an image Display the image in full frame playback or playback zoom or highlight it in the thumbnail list in thumbnail or calendar playback 2 Display playback options Press the P button to display playback options 3 Select Rating Highlight Rating and press J Rating Pictures P button ...

Page 346: ... mark the picture as a candidate for later deletion 5 Press J Press J to complete the operation Rating Multiple Pictures Use the Rating option in the playback menu to rate multiple pictures 1 Select Rating Press the G button to display the camera menus then highlight Rating in the playback menu and press 2 G button ...

Page 347: ... view the currently highlighted picture full frame press and hold the X button and keeping the W Q button pressed press 1 or 3 to choose a rating of from zero to five stars or select to mark the picture as a candidate for later deletion 3 Press J Press J to complete the operation W Q button ...

Page 348: ...electing Individual Pictures for Upload 1 Select an image Display the image or highlight it in the thumbnail list in thumbnail or calendar playback 2 Display playback options Press the P button 3 Choose Select to send to smart device deselect Highlight Select to send to smart device deselect and press J Pictures selected foruploadareindicatedbya icon todeselect display or highlight the image and r...

Page 349: ...nd to smart device option in the playback menu when an optional wireless mobile adapter is connected 1 Choose Select to send to smart device To display the menus press the G button Highlight Select to send to smart device in the playback menu and press 2 A The Icon The icon will no longer be displayed when upload is complete G button ...

Page 350: ...Use the multi selector to highlight pictures and press W Q to select or deselect to view the highlighted picture full screen press and hold the X button Selected pictures are marked by a icon 3 Press J Press J to complete the operation W Q button ...

Page 351: ... 1 Select an image Display the image or highlight it in the thumbnail list in thumbnail or calendar playback 2 Press the O button A confirmation dialog will be displayed 3 Press the O button again To delete the photograph press the O buttonagain To exit without deleting the photograph press the K button Deleting Photographs Full frame playback Thumbnail playback O button ...

Page 352: ...lay the menus press the G button Highlight Delete in the playback menu and press 2 Option Description Q Selected Delete selected pictures n Select date Delete all pictures taken on a selected date R All Delete all pictures in the folder currently selected for playback 0 220 A Calendar Playback During calendar playback you can delete all photographs taken on a selected date by highlighting the date...

Page 353: ...ghlight a picture to view the highlighted picture full screen press andhold theX button 4 Select the highlighted picture Press the W Q button to select the highlighted picture Selectedpictures are marked by a O icon Repeat steps 3 and 4 to select additional pictures to deselect a picture highlight it and press W Q W Q button ...

Page 354: ...195 Playback and Deletion 5 Press J to complete the operation A confirmation dialog will be displayed highlight Yes and press J ...

Page 355: ...menu highlight Select date and press 2 2 Highlight a date Press 1 or 3 to highlight a date To view the pictures taken on the highlighted date press W Q Use the multi selector to scroll through the pictures or press and hold X to view the current picture full screen Press W Q to return to the date list W Q button ...

Page 356: ...l pictures taken on the highlighted date Selected dates are indicated by check marks Repeat steps 2 and 3 to select additional dates to deselect a date highlight it and press 2 4 Press J to complete the operation A confirmation dialog will be displayed highlight Yes and press J ...

Page 357: ...tion in the playback menu is used to display a slide show of the pictures in the current playback folder 0 220 1 Select Slide show To display the slide show menu press the G button and select Slide show in the playback menu Slide Shows G button ...

Page 358: ...s Select Restart to restart or Exit to return to the playback menu To Use Description Skip back skip ahead Press 4 to return to previous frame 2 to skip to next frame View additional photo info Change photo info displayed 0 172 Pause resume slide show Pause show Press again to resume Raise lower volume X W Q Press X during movie playback to increase volume W Q to decrease Exit to playback mode K E...

Page 359: ...only pictures with selected ratings highlight By rating and press 2 A list of ratings will be displayed highlight ratings and press 2 to select or deselect pictures with the highlighted rating for inclusion in the slide show Selected ratings are indicated by a check mark Press J to exit when the desired ratings are selected Frame interval Choose how long still images are displayed Transition effec...

Page 360: ...wnload from the websites listed on page xviii as earlier versions that do not support the D3300 may fail to transfer NEF RAW images correctly 1 Launch the installer Start the computer insert the installer CD and launch the installer A language selection dialog will be displayed If the desired language is not available click Region Selection to choose a different region region selection is not avai...

Page 361: ...02 Connections 2 Start the installer Click Install and follow the on screen instructions 3 Exit the installer 4 Remove the installer CD from the CD ROM drive Windows Mac Click Yes Click OK Click Install ...

Page 362: ...er OS Pre installed versions of Windows 8 1 Windows 7 Windows Vista and Windows XP note that 64 bit versions of Windows XP are not supported OS X 10 9 10 8 or 10 7 Memory RAM 32 bit Windows 8 1 Windows 7 or Windows Vista 1 GB or more 2 GB or more recommended 64 bit Windows 8 1 Windows 7 or Windows Vista 2 GB or more 4 GB or more recommended Windows XP 512 MB or more 2 GB or more recommended 2 GB o...

Page 363: ...cable as shown and then turn the camera on 2 Start Nikon Transfer 2 component of ViewNX 2 If a message is displayed prompting you to choose a program select Nikon Transfer 2 Using ViewNX 2 A Windows 7 If the following dialog is displayed select Nikon Transfer 2 as described below 1 Under Import pictures and videos click Change program A program selection dialog will be displayed select Import File...

Page 364: ...ble while transfer is in progress A Use a Reliable Power Source To ensure that data transfer is not interrupted be sure the camera battery is fully charged A Connecting Cables Be sure the camera is off when connecting or disconnecting interface cables Do not use force or attempt to insert the connectors at an angle Close the connector cover when the connector is not in use A USB Hubs Transfer may ...

Page 365: ...djusting sharpness and tone levels click the Edit button in the ViewNX 2 toolbar EditingMovies To perform such tasks as trimming unwanted footage from movies shot with the camera click the Movie Editor button in the ViewNX 2 toolbar A Starting ViewNX 2 Manually Windows Double click the ViewNX 2 shortcut on the desktop Mac Click the ViewNX 2 icon in the Dock ...

Page 366: ...g you to print pictures on a printer connected to the computer A For More Information Consult online help for more information on using ViewNX 2 A Viewing the Nikon Website To visit the Nikon website after installing ViewNX 2 select All Programs Link to Nikon from the Windows start menu Internet connection required ...

Page 367: ...selected pictures or all pictures proceed to page 211 Printing Photographs D Selecting Photographs for Printing NEF RAW photographs 0 85 can not be selected for printing JPEG copies of NEF RAW images can be created using the NEF RAW processing option in the retouch menu 0 275 D Date Imprint If you select Print time stamp in the PictBridge menu when printing photographs containing date information ...

Page 368: ...er selecting an option press J to return to the printer settings menu Option Description Page size Choose a page size No of copies This option is listed only when pictures are printed one at a time Press 1 or 3 to choose number of copies maximum 99 Border Choose whether to frame photos in white borders Time stamp Choose whether to print the times and dates of recordings on photos Cropping This opt...

Page 369: ...210 Connections 3 Start printing Select Start printing and press J to start printing To cancel before all copies have been printed press J ...

Page 370: ...d dates Press 1 or 3 to highlight dates and press 2 to select or deselect To view the pictures taken on the selected date press W Q Use the multi selector to scroll through the pictures or press and hold X to view the current picture full screen Press W Q again to return to the date selection dialog Print DPOF Print the current DPOF print order 0 213 The order can be viewed and modified before pri...

Page 371: ...ions 3 Adjust printer settings Adjust printer settings as described in Step 2 on page 209 4 Start printing Select Start printing and press J to start printing To cancel before all copies have been printed press J ...

Page 372: ...t DPOF print order in the playback menu Highlight Select set and press 2 to remove all photographs from the print order select Deselect all 2 Select pictures Use the multi selector to highlight pictures to view the highlighted picture full screen press and hold the X button and keeping the W Q button pressed press 1 or 3 to choose the number of prints To deselect a picture set the number of prints...

Page 373: ...steps in Printing Multiple Pictures to modify and print the current order 0 211 DPOF print date and shooting data options are not supported when printing via direct USB connection to print the date of recording on photographs in the current print order use the PictBridge Time stamp option The DPOF print order option can not be used if there is not enough space on the memory card to store the print...

Page 374: ... connector Type C can be used to connect the camera to high definition video devices Standard Definition Devices Before connecting the camera to a standard television confirm that the camera video standard 0 260 matches that used in the TV 1 Turn the camera off Always turn the camera off before connecting or disconnecting the A V cable 2 Connect the A V cable as shown Viewing Pictures on TV Connec...

Page 375: ...n the television screen Note that the edges of images may not be displayed A Video Mode If no image is displayed check that camera is correctly connected and that the option selected for Video mode 0 260 matches the video standard used in the TV A Television Playback Use of an AC adapter available separately is recommended for extended playback ...

Page 376: ...nect the HDMI cable as shown 3 Tune the device to the HDMI channel 4 Turn the camera on and press the K button During playback images will be displayed on the high definition television or monitor screen Note that the edges of images may not be displayed A Playback Volume Volume can be adjusted using television controls the camera controls can not be used Connect to high definition device choose c...

Page 377: ... be used to shoot photographs and movies in live view A HDMI CEC Devices HDMI CEC High Definition Multimedia Interface Consumer Electronics Control is a standard that allows HDMI devices to be used to control peripherals to which they are connected When the camera is connected to an HDMI CEC device will appear in the viewfinder in place of the number of exposures remaining A 1920 1080 60p 50p Sele...

Page 378: ...ns D The Playback Menu ManagingImages G button Option Default 0 Delete 193 Playback folder Current 220 Playback display options Additional photo info 220 Transition effects On Image review On 221 Rotate tall On 221 Slide show Image type Still images and movies 198 Frame interval 2 s Transition effects On DPOF print order 213 Rating 187 Select to send to smart device 190 ...

Page 379: ...ack menu press J Transition effects Choose from On each frame is pushed out of the display by the following frame and Off no transition between frames Playback Folder G button D playback menu Option Description Current Only photos in the folder currently selected for Storage folder in the setup menu 0 257 are displayed during playback This option is selected automatically when a photo is taken sel...

Page 380: ...l be automatically rotated for display in the monitor pictures taken with Off selected for Auto image rotation will still be displayed in landscape orientation 0 243 Note that because the camera itself is already in the appropriate orientation during shooting images are not rotated automatically during image review Image Review G button D playback menu Rotate Tall G button D playback menu ...

Page 381: ...ault 0 Reset shooting menu 224 Image quality JPEG normal 85 Image size I Normal panorama 88 Other modes Large 87 White balance Auto 124 Fluorescent Cool white fluorescent 126 Set Picture Control Standard 135 Auto distortion control Off 225 Color space sRGB 225 Active D Lighting On 122 Noise reduction On 226 ISO sensitivity settings ISO sensitivity P S A M 100 95 Other modes Auto Auto ISO sensitivi...

Page 382: ...t AF 78 m Dynamic area AF Other modes Auto area AF Live view movie k l p o Face priority AF 145 n Normal area AF Other modes Wide area AF Built in AF assist illuminator On 229 Metering Matrix metering 114 Flash cntrl for built in flash TTL 229 Movie settings Frame size frame rate 158 159 Movie quality Normal Microphone Auto sensitivity Wind noise reduction Off Manual movie settings Off Option Defa...

Page 383: ... settings to their default values 0 137 and resets the following Option Default 0 Release mode m Continuous 67 Other modes Single frame Focus point Center 80 Flexible program Off 103 A L button hold Off 252 Focus mode Viewfinder Auto servo AF 74 Live view movie Single servo AF 144 Flash mode i k p n S T g Auto 89 91 o Auto slow sync U Flash off P S A M Fill flash Exposure compensation Off 118 Flas...

Page 384: ... results are not guaranteed with other lenses The color space determines the gamut of colors available for color reproduction sRGB is recommended for movies and for general purpose printing and display Adobe RGB for professional publication and commercial printing Auto Distortion Control G button C shooting menu Color Space G button C shooting menu A Adobe RGB For accurate color reproduction Adobe...

Page 385: ...than about 1 s roughly doubles during processing l m will flash in the viewfinder and photographs can not be taken Noise reduction will not be performed if the camera is turned off before processing is complete If Off is selected noise reduction will only be performed as required the amount of noise reduction is less than that performed when On is selected Adjust ISO sensitivity 0 95 Noise Reducti...

Page 386: ...e user will be used instead the minimum value for auto ISO sensitivity is automatically set to ISO 100 In modes P and A sensitivity will only be adjusted if underexposure would result at the shutter speed selected for Minimum shutter speed 1 2000 1 s or Auto in modes S and M sensitivity will be adjusted for optimal exposure at the shutter speed selected by the user If Auto available only with CPU ...

Page 387: ...ion option in the shooting menu to reduce noise 0 226 Note that ISO sensitivity may be raised automatically when auto ISO sensitivity control is used in combination with slow sync flash modes available with the built in flash and the optional flash units listed on page 299 possibly preventing the camera from selecting slow shutter speeds Auto ISO sensitivity control is available only in i TTL flas...

Page 388: ...or lights when lighting is poor for more information see page 331 Off The AF assist illuminator does not light to assist the focus operation The camera may not be able to focus using autofocus when lighting is poor Flash Cntrl for Built in Flash G button C shooting menu Option Description 1 TTL Flash output is adjusted automatically in response to shooting conditions 2 Manual Choose a flash level ...

Page 389: ...The following types of flash control are supported when a CPU lens is used in combination with the built in flash 0 89 or optional flash units 0 299 i TTLBalancedFill FlashforDigitalSLR Information from the 420 pixel RGB sensor is used to adjust flash output for a natural balance between the main subject and the background Standard i TTL Fill Flash for Digital SLR Flash output is adjusted for the ...

Page 390: ... setup options 233 Format memory card 234 Monitor brightness 0 235 Info display format AUTO SCENE EFFECTS Graphic 236 P S A M Graphic Auto info display On 238 Clean image sensor Clean at startup shutdown Clean at startup shutdown 314 Lockmirrorupforcleaning1 317 Image Dust Off ref photo 239 Flicker reduction Auto 241 Time zone and date2 Daylight saving time Off 242 Language2 243 Auto image rotatio...

Page 391: ...sequence Off 249 Buttons Assign Fn button ISO sensitivity 251 Assign AE L AF L button AE AF lock 252 Shutter release button AE L Off 252 Slot empty release lock Release locked 253 Print date Off 254 Storage folder 257 Accessory terminal Remote control Remote shutter release Take photos 258 Assign Fn button Same as camera 4 button Location data Standby timer Enable 259 Set clock from satellite Yes ...

Page 392: ...mera settings some items may be grayed out and unavailable Select Yes to reset all setup menu settings except Time zone and date Language Storage folder and Video mode to the defaults listed above Video mode2 260 HDMI Output resolution Auto 218 Device control On Wireless mobile adapter Enable 260 Eye Fi upload3 Enable 261 Firmware version 262 Reset Setup Options G button B setup menu Option Defaul...

Page 393: ...ight No and press J 2 Press J A message will be displayed while the card is formatted Do not remove the memory card or remove or disconnect the power source until formatting is complete Format Memory Card G button B setup menu D Formatting Memory Cards Formatting memory cards permanently deletes any data they may contain Be sure to copy any photographs and other data you wish to keep to a computer...

Page 394: ...235 B The Setup Menu Camera Setup Press 1 or 3 to choose monitor brightness Choose higher values for increased brightness lower values for reduced brightness Monitor Brightness G button B setup menu ...

Page 395: ...n be chosen separately for auto scene and special effects modes and for P S A and M modes 1 Select a shooting mode option Highlight AUTO SCENE EFFECTS or P S A M and press 2 2 Select a design Highlightadesignandpress J Info Display Format G button B setup menu Classic 0 237 Graphic 0 7 ...

Page 396: ...sh compensation indicator for optional flash units 304 5 Active D Lighting 122 6 Picture Control 135 7 Release mode 67 8 Beep indicator 247 9 Battery indicator 21 10 Help icon 11 336 11 Image quality 85 12 Image size 87 13 White balance 124 14 Flash mode 90 92 15 ISO sensitivity 95 16 Exposure compensation 118 17 Flash compensation 120 18 Metering 114 19 AF area mode 78 145 20 Focus mode 74 144 ...

Page 397: ...ator 116 22 Shooting mode i auto j auto flash off 25 Scene modes 47 Special effects mode 50 P S A and M modes 100 23 Shutter speed 101 24 Aperture f number 101 25 Exposure indicator 109 Exposure compensation indicator 119 26 k appears when memory remains for over 1000 exposures 19 27 Number of exposures remaining 19 White balance recording indicator 130 28 ISO sensitivity 95 Auto ISO sensitivity i...

Page 398: ...age dust off data press G Start The message shown at right will be displayed and rEF will appear in the viewfinder Clean sensor and then start Select this option to clean the image sensor before starting The message shown at right will be displayed and rEF will appear in the viewfinder when cleaning is complete Image Dust Off Ref Photo G button B setup menu D Image Sensor Cleaning Image Dust Off r...

Page 399: ...ence data Press the shutter release button the rest of the way down to acquire Image Dust Off reference data If the reference object is too bright or too dark the camera may be unable to acquire Image Dust Off reference data and the message shown at right will be displayed Choose another reference object and repeat the process from step 1 D Image Dust Off Reference Data The same reference data can...

Page 400: ...tton B setup menu A Flicker Reduction If Auto fails to produce the desired results and you are unsure as to the frequency of the local power supply test both options and choose the one that produces the best results Flicker reduction may not produce the desired results if the subject is very bright in which case you should select mode A or M and choose a smaller aperture higher f number before sta...

Page 401: ...B setup menu Option Description Time zone Choose a time zone The camera clock is automatically set to the time in the new time zone Date and time Set the camera clock 0 18 Date format Choose the order in which the day month and year are displayed Daylight saving time Turn daylight saving time on or off The camera clock will automatically be advanced or set back one hour ...

Page 402: ...orientations are recorded Camera orientation is not recorded when Off is selected Choose this option when panning or taking photographs with the lens pointing up or down Language G button B setup menu Auto Image Rotation G button B setup menu Landscape wide orientation Camera rotated 90 clockwise Camera rotated 90 counterclockwise A Rotate Tall To automatically rotate tall portrait orientation pho...

Page 403: ...nd off by highlighting it and pressing 2 After choosing the desired setting press J to exit Image Comment G button B setup menu A Text Entry The dialog at right is displayed when text entry is required Use the multi selector to highlight the desired character in the keyboard area and press J to insert the highlighted character at the current cursor position note that if a character is entered when...

Page 404: ...ter auto off delays to reduce the drain on the battery Auto off Timers G button B setup menu Option Description all times are approximate C Short D Normal E Long Auto off timers are set to the following values Playback menus Image review Live view Standby timer Short 20 s 4 s 5 min 4 s Normal 1 min 4 s 10 min 8 s Long 5 min 20 s 20 min 1 min F Custom Choose separate delays for Playback menus Image...

Page 405: ... Self timer delay Choose the length of the shutter release delay Number of shots Press 1 and 3 to choose the number of shots taken each time the shutter release button is pressed from 1 to 9 if a value other than 1 is selected shots will be taken at intervals of about 4 seconds Self Timer G button B setup menu ...

Page 406: ...fe This setting applies only during viewfinder photography Choose the pitch High or Low of the beep that sounds when the camera focuses and in self timer and remote control modes Select Off to prevent the beep from sounding The current setting is shown in the information display 3 is displayed when the beep is on 2 when it is off Remote on Duration ML L3 G button B setup menu Beep G button B setup...

Page 407: ...icator Description Subject in focus Focus point is slightly in front of subject Focus point is well in front of subject Focus point is slightly behind subject Focus point is well behind subject Camera can not determine correct focus A Using the Electronic Rangefinder The electronic rangefinder requires a lens with a maximum aperture of f 5 6 or faster The desired results may not be achieved in sit...

Page 408: ...aph numbered 9999 a new folder will be created automatically and file numbering will begin again from 0001 Off File numbering is reset to 0001 when a new folder is created the memory card is formatted or a new memory card is inserted in the camera Note that a new folder is created automatically if a photograph is taken when the current folder contains 999 photographs Reset Resets the file numberin...

Page 409: ...s JPG for JPEG images or MOV for movies The NEF and JPEG files recorded at a setting of NEF RAW JPEG have the same file names but different extensions Copies created with image overlay 0 272 and movie edit options 0 164 have file names beginning with DSC_ copies created with the other options in the retouch menu have file names beginning with CSC e g CSC_0001 JPG Images recorded with the Color spa...

Page 410: ... dial to select image quality and size 0 85 w ISO sensitivity Keeping the Fn button pressed rotate the command dial to select ISO sensitivity 0 95 m White balance Keeping the Fn button pressed rotate the command dial to select white balance P S A and M modes only 0 124 Active D Lighting Keeping the Fn button pressed rotate the command dial to select Active D Lighting P S A and M modes only 0 122 F...

Page 411: ... lock Focus and exposure lock while the A L button is pressed C AE lock only Exposure locks while the A L button is pressed E AE lock Hold Exposure locks when the A L button is pressed and remains locked until the button is pressed a second time or the standby timer expires F AF lock only Focus locks while the A L button is pressed A AF ON The A L button initiates autofocus The shutter release but...

Page 412: ...s only enabled when a memory card is inserted in the camera Selecting Enable release allows the shutter to be released when no memory card is inserted although no pictures will be recorded they will however be displayed in the monitor in demo mode Slot Empty Release Lock G button B setup menu ...

Page 413: ...e The date or date and time are imprinted on photographs taken while this option is in effect b Date and time c Date counter New photos are imprinted with a time stamp showing the number of days between the date of shooting and a selected date see below A Print Date The date is recorded in the order selected for Time zone and date 0 242 The imprinted data may be cropped out or rendered illegible i...

Page 414: ...camera offers three slots for storing dates 1 Enter the first date ThefirsttimeyouselectDatecounter you will be prompted to enter a date for the first slot Enter a date using the multi selector and press J to exit to the date list 2 Enter additional dates or edit existing dates To change a date or enter additional dates highlight a slot press 2 and enter a date as described above Future date two d...

Page 415: ... Choose a date Highlight a slot in the date list and press J 4 Choose a date counter format Highlight Display options and press 2 then highlight a date format and press J 5 Exit the date counter menu Press J to exit the date counter menu ...

Page 416: ...in up to 999 photographs During shooting pictures are stored in the highest numbered folder with the selected name If a photograph is taken when the current folder is full or contains a photograph numbered 9999 the camera will create a new folder by adding 1 to the current folder number e g 101D3300 The camera treats folders with the same name but different folder numbers as the same folder For ex...

Page 417: ... B setup menu Option Description y Take photos The shutter release button on the optional accessory is used to take photographs z Record movies The shutter release button on the optional accessory is used for movie recording Press the button halfway to start live view or to focus in AF S and AF F modes Press the button all the way down to start or end recording Use the camera a button to end live ...

Page 418: ... if a GP 1 or GP 1A is connected when it displays the current latitude longitude altitude and Coordinated Universal Time UTC as reported by the unit Setclockfromsatellite Choose Yes to set the camera clock based on the time provided by the satellite navigation system Option Description Enable Exposure meters turn off automatically if no operations are performed for the time selected for Auto off t...

Page 419: ...GPS unit flashing The unit is searching for a signal Pictures taken while the icon is flashing do not include location data No icon No new location data have been received from the unit for at least two seconds Pictures taken when the icon is not displayed do not include location data Video Mode G button B setup menu Wireless Mobile Adapter G button B setup menu Option Description Enable Enable wi...

Page 420: ... upload f static Eye Fi upload enabled waiting to begin upload f animated Eye Fi upload enabled uploading data g Error Eye Fi Upload G button B setup menu D Eye Fi Cards Whether due to errors or other causes Eye Fi cards may emit wireless signals when Disable is selected If a warning is displayed in the monitor 0 337 turn the camera off and remove the card The camera can be used to turn Eye Fi car...

Page 421: ...irmware version A Using Eye Fi Cards in Ad Hoc Mode Additional time may be required when connecting using Eye Fi cards that support ad hoc mode Select longer values for Auto off timers Standby timer in the setup menu 0 245 Firmware Version G button B setup menu ...

Page 422: ...cting Retouch in full frame playback when a retouched image or original is displayed N The Retouch Menu CreatingRetouchedCopies G button Option 0 i D Lighting 266 j Red eye correction 267 k Trim 268 l Monochrome 269 m Filter effects 270 n Color balance 271 o Image overlay 272 0 NEF RAW processing 275 1 Resize 277 2 Quick retouch 279 e Straighten 279 Distortion control 280 Fisheye 280 q Color outli...

Page 423: ... and press J to view the highlighted picture full screen press and hold the X button 3 Select retouch options For more information see the section for the selected item To exit without creating a retouched copy press G A Retouch The camera may not be able to display or retouch images created with other devices If the image was recorded at image quality settings of NEF RAW JPEG 0 85 retouch options...

Page 424: ...ge overlay excluded A Retouching Copies Most options can be applied to copies created using other retouch options although with the exceptions of Image overlay and Edit movie Choose start end point each option can be applied only once note that multiple edits may result in loss of detail Options that can not be applied to the current image are grayed out and unavailable A Image Quality and Size Ex...

Page 425: ...estrict D Lighting to portrait subjects D Lighting G button N retouch menu Before D Lighting D Lighting portrait subject A Portrait Subjects The camera automatically selects up to three subjects for portrait D Lighting note that portrait D Lighting can not be applied to photos taken with Off selected for Auto image rotation in the setup menu 0 243 Depending on composition and how the subjects are ...

Page 426: ...or red eye correction can be previewed in the edit display Confirm the effects of red eye correction and press J to create a copy Note that red eye correction may not always produce the expected results and may in very rare circumstances be applied to portions of the image that are not affected by red eye check the preview thoroughly before proceeding Red Eye Correction G button N retouch menu ...

Page 427: ...crease the size of the crop Reduce size of crop W Q Press the W Q button to reduce the size of the crop Change crop aspect ratio Rotate the command dial to switch between aspect ratios of 3 2 4 3 5 4 1 1 and 16 9 Move crop Use multi selector to position the crop Create copy Save the current crop as a separate file A Image Size The size of the copy which varies with crop size and aspect ratio appea...

Page 428: ...hite Sepia or Cyanotype blue and white monochrome Selecting Sepia or Cyanotype displays a preview of the selected image press 1 to increase color saturation 3 to decrease Press J to create a monochrome copy Monochrome G button N retouch menu Increase saturation Decrease saturation ...

Page 429: ...s Red intensifier greens Green intensifier or blues Blue intensifier Press 1 to increase the effect 3 to decrease Green intensifier Blue intensifier Cross screen Add starburst effects to light sources Number of points Choose from four six or eight Filter amount Choose the brightness of the light sources affected Filter angle Choose the angle of the points Length of points Choose the length of poin...

Page 430: ...ayed in the monitor press the X button The histogram will be updated to show data only for the portion of the image displayed in the monitor While the image is zoomed in press the A L button to toggle back and forth between color balance and zoom When zoom is selected you can zoom in and out with the X and W Q buttons and scroll the image with the multi selector Increase amount of magenta Increase...

Page 431: ...maging application The new picture is saved at current image quality and size settings before creating an overlay set image quality and size 0 85 87 all options are available To create an NEF RAW copy choose an image quality of NEF RAW 1 Select Image overlay Highlight Image overlay in the retouch menu and press 2 The dialog shown at right will be displayed with Image 1 highlighted press J to displ...

Page 432: ...return to the preview display 3 Select the second image The selected image will appear as Image 1 Highlight Image 2 and press J then select the second photo as described in Step 2 4 Adjust gain HighlightImage1orImage 2 and optimize exposure for theoverlaybypressing1 or 3 to select gain from values between 0 1 and 2 0 Repeat for the second image The default value is 1 0 select 0 5 to halve gain or ...

Page 433: ...hown at right to save the overlay without displaying a preview select Save To return to Step 4 and select new photos or adjust gain press W Q 6 Save the overlay PressJ while the previewis displayed to save the overlay After an overlay is created the resulting image will be displayed full frame in the monitor D Image Overlay The overlay has the same photo info as the photograph selected for Image 1...

Page 434: ...nu and press 2 to display a picture selection dialog listing only NEF RAW images created with this camera 2 Select a photograph Use the multi selector to highlight a photograph to view the highlighted photograph full frame press and hold the X button Press J to select the highlighted photograph and proceed to the next step NEF RAW Processing G button N retouch menu ...

Page 435: ...ects of exposure compensation may differ from those that might have been expected when the photograph was taken 4 Copy the photograph Highlight EXE and press J to create a JPEG copy of the selected photograph To exit without copying the photograph press the G button Color space 0 225 Image quality 0 85 Image size 0 87 White balance 0 124 Exposure compensation 0 118 Picture Control 0 135 D Lighting...

Page 436: ...d Copies Create small copies of one or more selected photographs 1 Select Resize Highlight Resize in the retouch menu and press 2 2 Choose a size Highlight Choose size and press 2 Highlight an option and press J Resize G button N retouch menu ...

Page 437: ...deselect to view the highlighted picture full screen press and hold the X button Selected pictures are marked by a 1 icon Press J when the selection is complete 4 Save the resized copies A confirmation dialog will be displayed Highlight Yes and press J to save the resized copies A Viewing Resized Copies Playback zoom may not be available when resized copies are displayed W Q button ...

Page 438: ... enhancement Press J to copy the photograph Create a straightened copy of the selected image Press 2 to rotate the image clockwise by up to five degrees in increments of approximately 0 25 degrees 4 to rotate it counterclockwise note that edges of the image will be trimmed to create a rectangular copy Press J to save the retouched copy Quick Retouch G button N retouch menu Straighten G button N re...

Page 439: ...shion distortion note that greater amounts of distortion control result in more of the edges being cropped out Press J to save the retouched copy Create copies that appear to have been taken with a fisheye lens Press 2 to increase the effect this also increases the amount that will be cropped out at the edges of the image 4 to reduce it Press J to save the retouched copy Distortion Control G butto...

Page 440: ...base for painting Press J to save the retouched copy Sharpen outlines and simplify coloring for a poster effect Press 2 or 4 to make outlines thicker or thinner Press J to save the retouched copy Color Outline G button N retouch menu Before After Photo Illustration G button N retouch menu Before After ...

Page 441: ...romatic effect while outlines can be made thicker or thinner Thicker outlines make colors more saturated Press J to save the retouched copy Create copies that reduce the effects of perspective taken from the base of a tall object Use the multi selector to adjust perspective note that greater amounts of perspective control result in more of the edges being cropped out Press J to save the retouched ...

Page 442: ...ation W Q Press W Q to choose orientation of area that is in focus Choose area in focus If area of effect is in wide orientation press 1 or 3 to position frame showing area of copy that will be in focus If area of effect is in tall orientation press 4 or 2 to position frame showing area of copy that will be in focus Choose size If area of effect is in wide orientation press 4 or 2 to choose height...

Page 443: ...ghlightedphotographfull frame press and hold the X button 3 Select a color Use the multi selector to position the cursor over an object and press A L to select the color of the object as one that will remain in the final copy the camera may have difficulty detecting unsaturated colors choose a saturated color To zoom in on the picture for precise color selection press X Press W Q to zoom out Selec...

Page 444: ...otograph Choose from values between 1 and 7 note that higher values may include hues from other colors 6 Select additional colors To select additional colors rotate the command dial to highlight another of the three color boxes at the top of the display and repeat Steps 3 5 to select another color Repeat for a third color if desired To deselect the highlighted color press O To remove all colors pr...

Page 445: ...s only available if the retouch menu is displayed by pressing the P button and selecting Retouch when a copy or original is played back full frame 1 Select a picture Select a retouched copy shown by a N icon or a photograph that has been retouched in full frame playback Press P then highlight Retouch and press J Side by side Comparison G button N retouch menu P button ...

Page 446: ...retouched copy To view the highlighted picture full frame press and hold the X button If the copy was created from two images using Image overlay press 1 or 3 to view the other source image If multiple copies exist for the current source image press 1 or 3 to view the other copies Press J to return to playback with the highlighted image displayed D Side by side comparison The source image will not...

Page 447: ...s the 20 most recently used settings Press 1 or 3 to highlight an option and press 2 to select m Recent Settings G button A Removing Items from the Recent Settings Menu To remove an item from the recent settings menu highlight it and press the O button A confirmation dialog will be displayed press O again to delete the selected item ...

Page 448: ...ble with compatible lenses in viewfinder photography 1 Spot metering meters selected focus point 0 114 2 Observeduecaution when tilting or shifting PC ENIKKOR24mmf 3 5DEDlenses asthey may contact the camera body and cause damage or injury 3 Shifting and or tilting the lens interferes with exposure Compatible Lenses Camera setting Focus Mode Metering Lens accessory AF MF with electronic rangefinder...

Page 449: ...F 28 85mm f 3 5 4 5 New or AF 28 85mm f 3 5 4 5 lenses are zoomed all the way in at the minimum focus distance the in focus indicator may be displayed when the image on the matte screen in the viewfinder is not in focus Focus manually until image in viewfinder is in focus 9 With maximum aperture of f 5 6 or faster Noise in the form of lines may appear during autofocus when movies are recorded at h...

Page 450: ... Type G or E lens Type D lens When using a CPU lens equipped with an aperture ring lock the aperture ring at the minimum aperture highest f number A Matrix Metering For matrix metering the camera uses a 420 pixel RGB sensor to set exposure according to tone distribution color composition and with type G E or D lenses distance information 3D color matrix metering II with other CPU lenses the camera...

Page 451: ...cessory AF MF withelectronic rangefinder MF M Other modes AI AI modified NIKKOR or Nikon Series E lenses z1 z z2 Medical NIKKOR 120mm f 4 z z z2 3 Reflex NIKKOR z z2 PC NIKKOR z4 z z2 AI type Teleconverter z5 z z2 PB 6 Bellows Focusing Attachment6 z1 z z2 Autoextensionrings PK series 11A 12 or 13 PN 11 z1 z z2 1 With maximum aperture of f 5 6 or faster 2 Exposure indicator can not be used 3 Can be...

Page 452: ...8mm f 8 OP 10mm f 5 6 2 1cm f 4 Extension Ring K2 180 600mm f 8 ED serial numbers 174041 174180 360 1200mm f 11 ED serial numbers 174031 174127 200 600mm f 9 5 serial numbers 280001 300490 AF lenses for the F3AF AF 80mm f 2 8 AF 200mm f 3 5 ED AF Teleconverter TC 16 PC 28mm f 4 serial number 180900 or earlier PC 35mm f 2 8 serial numbers 851001 906200 PC 35mm f 3 5 old type Reflex 1000mm f 6 3 old...

Page 453: ...KOR 200 400mm f 4G ED VR II At ranges under 1 m 3 ft 3 in the following lenses may block the AF assist illuminator and interfere with autofocus when lighting is poor AF S DX NIKKOR 10 24mm f 3 5 4 5G ED AF S NIKKOR 16 35mm f 4G ED VR AF S Zoom Nikkor 17 35mm f 2 8D IF ED AF S DX Zoom Nikkor 17 55mm f 2 8G IF ED AF S NIKKOR 18 35mm f 3 5 4 5G ED AF S DX NIKKOR 18 105mm f 3 5 5 6G ED VR AF S DX VR Z...

Page 454: ...vent shadows Shadow Shadow The flash has a minimum range of 0 6 m and can not be used in the macro range of macro zoom lenses The flash may be unable to light the entire subject with the following lenses at ranges less than those given below Lens Zoom position Minimum distance without vignetting AF S DX NIKKOR 10 24mm f 3 5 4 5G ED 24 mm 1 5 m 4 ft 11 in AF S DX Zoom Nikkor 12 24mm f 4G IF ED 24 m...

Page 455: ...5 5 6G ED VR 18 mm 2 5 m 8 ft 2 in 24 mm 1 0 m 3 ft 3 in 35 105 mm No vignetting AF S DX Zoom Nikkor 18 135mm f 3 5 5 6G IF ED 18 mm 2 0 m 6 ft 7 in 24 135 mm No vignetting AF S DX NIKKOR 18 140mm f 3 5 5 6G ED VR 24 mm 1 0 m 3 ft 3 in 35 140 mm No vignetting AF S DX VR Zoom Nikkor 18 200mm f 3 5 5 6G IF ED AF S DX NIKKOR 18 200mm f 3 5 5 6G ED VR II 24 mm 1 0 m 3 ft 3 in 35 200 mm No vignetting A...

Page 456: ...m 1 5 m 4 ft 11 in 50 70 mm No vignetting AF S NIKKOR 28 300mm f 3 5 5 6G ED VR 28 mm 1 5 m 4 ft 11 in 35 mm 1 0 m 3 ft 3 in 50 300 mm No vignetting AF S VR Zoom Nikkor 200 400mm f 4G IF ED AF S NIKKOR 200 400mm f 4G ED VR II 200 mm 4 0 m 13 ft 2 in 250 mm 3 0 m 9 ft 10 in 300 mm 2 5 m 8 ft 2 in PC E NIKKOR 24mm f 3 5D ED 24 mm 3 0 m 9 ft 10 in When not shifted or tilted When used with the AF S NI...

Page 457: ... mm meaning that the angle of view of a 35mm camera is approximately 1 5 times that of the D3300 The approximate focal length of lenses for the D3300 in 35mm format can be calculated by multiplying the focal length of the lens by about 1 5 Picture size 35mm format Lens 36 24 mm Picture diagonal Picture size D3300 23 5 15 6 mm Angle of view 35mm format Angle of view D3300 ...

Page 458: ...is not equipped with a flash Optional Flash Units Speedlights Flash unit SB 9101 SB 9001 SB 800 SB 7001 SB 600 SB 4002 SB 3002 SB R2003 Feature Guide No 4 ISO 100 34 111 34 111 38 125 28 92 30 98 21 69 18 59 10 33 ISO 200 48 157 48 157 53 174 39 128 42 138 30 98 25 82 14 46 1 If a color filteris attachedto theSB 910 SB 900 orSB 700when AUTO or N flash isselected for white balance the camera will a...

Page 459: ...ed with the flash unit for details A Guide Number To calculate the range of the flash at full power divide the Guide Number by the aperture If for example the flash unit has a Guide Number of 34 m or 111 ft ISO 100 20 C 68 F its range at an aperture of f 5 6 is 34 5 6 or about 6 1 meters or in feet 111 5 6 approximately 19 ft 10 in For each twofold increase in ISO sensitivity multiply the Guide Nu...

Page 460: ...i TTL balanced fill flash for digital SLR1 z z z z z z Standard i TTL flash for digital SLR z2 z2 z z2 z z AA Auto aperture z3 z3 A Non TTL auto z3 z3 GN Distance priority manual z z z M Manual z z z z z4 z4 RPT Repeating flash z z Advanced Wireless Lighting Master Remote flash control z z z z z i TTL i TTL z z z A B Quickwireless flash control z z AA Auto aperture z5 z5 A Non TTL auto z z M Manua...

Page 461: ... with flash unit Advanced Wireless Lighting Remote i TTL i TTL z z z z z A B Quickwireless flash control z z z z z AA Auto aperture z5 z5 A Non TTL auto z z M Manual z z z z z RPT Repeating flash z z z z Flash Color Information Communication z z z z z z AF assist for multi area AF z z z z z Red eye reduction z z z z z Camera flash mode selection z z Camera flash unit firmware update z z z CLS comp...

Page 462: ...elease isdisabled Set flashunit to A non TTL auto flash 3 Autofocus is available with AF S VR Micro Nikkor 105mm f 2 8G IF ED and AF S Micro NIKKOR 60mm f 2 8G ED lenses only 4 Available when camera is used to select flash mode A The AS 15 Sync Terminal Adapter When the AS 15 sync terminal adapter available separately is mounted on the camera accessory shoe flash accessories can be connected via a...

Page 463: ...aperture settings If the flash ready indicator flashes for about three seconds after a photograph is taken the flash has fired at full power and the photograph may be underexposed CLS compatible flash units only for information on the exposure and flash charge indicators on other units see the manual provided with the flash When an SC series 17 28 or 29 sync cable is used for off camera flash phot...

Page 464: ... is available with 17 135 mm AF lenses however autofocusisavailable only with the focus points shown at right SB 800 SB 600 and SU 800 AF assist illumination is available with 24 105 mm AF lenses however autofocusisavailable only with the focus points shown at right SB 700 AF assist illumination is available with 24 135 mm AF lenses however autofocus is available only with the focus points shown a...

Page 465: ...r connector EP 5A is required to connect the camera to the EH 5b EH 5a or EH 5 see page 311 for details Filters Filters intended for special effects photography may interfere with autofocus or the electronic rangefinder The D3300 can not be used with linear polarizing filters Use C PL or C PL II circular polarizing filters instead NC filters are recommended for protecting the lens To prevent ghost...

Page 466: ...DG 2 The DG 2 magnifies the scene displayed in the center of the viewfinder for greater precision during focusing Eyepiece adapter required available separately Eyepiece Adapter DK 22 The DK 22 is used when attaching the DG 2 magnifier Right Angle Viewing Attachment DR 6 The DR 6 attaches at a right angle to the viewfinder eyepiece allowing the image in the viewfinder to be viewed at right angles ...

Page 467: ...latch to the right q insert a fingernail into the gap and open the battery chamber w Ensure that the battery is inserted in the correct orientation r Wireless Remote Controller WR R10 WR T10 When a WR R10 wireless remote controller is attached the camera can be controlled wirelessly using a WR T10 wireless remote controller 0 99 258 Wireless Remote ControllerWR 1 0 99 258 WR 1 units are used in gr...

Page 468: ... accessory terminal close the connector cover when the terminal is not in use USB and A V connector accessories UC E17 and UC E6 USB cables 0 204 208 The supplied UC E17 cable is not available for separate purchase purchase UC E6 cables instead EG CP14 audio video cables Wireless Mobile Adapter WU 1a 0 260 Supports two way communication between the camera and smart devices running the Wireless Mob...

Page 469: ... SDHC memory cards2 SDXC memory cards3 SanDisk 2 GB1 4 GB 8 GB 16 GB 32 GB 64 GB Toshiba Panasonic 4 GB 6 GB 8 GB 12 GB 16 GB 24GB 32 GB 48 GB 64 GB Lexar Media 4 GB 8 GB 16 GB 32 GB Platinum II 64 GB Professional 64 GB 128 GB Full HD Video 4 GB 8 GB 16 GB 1 Check that any card readers or other devices with which the card will be used support 2 GB cards 2 Check that any card readers or other devic...

Page 470: ... q and power connector w covers 2 Insert the EP 5A power connector Be sure to insert the connector in the orientation shown using the connector to keep the orange battery latch pressed to one side Be sure the connector is fully inserted 3 Close the battery chamber cover Positionthepowerconnectorcableso that it passes through the power connector slot and close the battery chamber cover ...

Page 471: ... the AC adapter Connect the AC adapter power cable to the AC socket on AC adapter e and the EP 5A power cable to the DC socket r A P icon is displayed in the monitor when the camera is powered by the AC adapter and power connector ...

Page 472: ...body Use a blower to remove dust and lint then wipe gently with a soft dry cloth After using the camera at the beach or seaside wipe off sand or salt with a cloth lightly dampened in distilled water and dry thoroughly Important Dust or other foreign matter inside the camera may cause damage not covered under warranty Lens mirror and viewfinder These glass elements are easily damaged Remove dust an...

Page 473: ... cleaned at any time using the Clean now option or cleaning can be performed automatically when the camera is turned on or off CleanNow 1 Place the camera base down Image sensor cleaning is most effective when the camera is placed base down as shown at right 2 Select Clean image sensor in the setup menu Press the G button to display the menus Highlight Clean image sensor in the setup menu 0 231 an...

Page 474: ...ress J The camera will check the image sensor and then begin cleaning 1 flashes in the viewfinder and other operations can not be performed Do not remove or disconnect the power source until cleaning is complete and the message shown at right is no longer displayed ...

Page 475: ... Cleaning Using camera controls during startup interrupts image sensor cleaning Cleaning is performed by vibrating the image sensor If dust can not be fully removed using the options in the Clean image sensor menu clean the image sensor manually 0 317 or consult a Nikon authorized service representative If image sensor cleaning is performed several times in succession image sensor cleaning may be ...

Page 476: ... cleaned only by Nikon authorized service personnel 1 Charge the battery A reliable power source is required when inspecting or cleaning the image sensor Be sure the battery is fully charged before proceeding 2 Remove the lens Turn the camera off and remove the lens 3 Select Lock mirror up for cleaning Turn the camera on and press the G button to display the menus Highlight Lock mirror up for clea...

Page 477: ...ensor Holding the camera so that light falls on the image sensor examine the interior of the camera for dust or lint If no foreign objects are present proceed to Step 8 7 Clean the sensor Remove any dust and lint from the sensor with a blower Do not use a blower brush as the bristles could damage the sensor Dirt that can not be removed with a blower can only be removed by Nikon authorized service ...

Page 478: ... the mirror is raised the curtain will close automatically To prevent damage to the curtain observe the following precautions Do not turn the camera off or remove or disconnect the power source while the mirror is raised If the battery runs low while the mirror is raised a beep will sound and the self timer lamp will flash to warn that the shutter curtain will close and the mirror will be lowered ...

Page 479: ...foreign matter find its way onto the image sensor clean the sensor as described above or have the sensor cleaned by authorized Nikon service personnel Photographs affected by the presence of foreign matter on the sensor can be retouched using Capture NX 2 available separately 0 307 or the clean image options available in some third party imaging applications D Servicing the Camera and Accessories ...

Page 480: ...tion or magnetic fields Strong static charges or the magnetic fields produced by equipment such as radio transmitters could interfere with the monitor damage data stored on the memory card or affect the product s internal circuitry Do not leave the lens pointed at the sun Do not leave the lens pointed at the sun or other strong light source for an extended period Intense light may cause the image ...

Page 481: ...aged Under no circumstances should you exert pressure on the curtain poke it with cleaning tools or subject it to powerful air currents from a blower These actions could scratch deform or tear the curtain Storage To prevent mold or mildew store the camera in a dry well ventilated area If you are using an AC adapter unplug the adapter to prevent fire If the product will not be used for an extended ...

Page 482: ...damage or malfunction Dust or lint on the monitor can be removed with a blower Stains can be removed by wiping lightly with a soft cloth or chamois leather Should the monitor break care should be taken to avoid injury from broken glass and to prevent liquid crystal from the monitor touching the skin or entering the eyes and mouth Moiré Moiré is an interference pattern created by the interaction of...

Page 483: ...sed for some time insert it in the camera and run it flat before removing it and storing it in a location with an ambient temperature of 15 C to 25 C 59 F to 77 F avoid hot or extremely cold locations Repeat this process at least once every six months Turning the camera on and off repeatedly when the battery is fully discharged will shorten battery life Batteries that have been fully discharged mu...

Page 484: ...attery and keep it fully charged Depending on your location it may be difficult to purchase replacement batteries on short notice Note that on cold days the capacity of batteries tends to decrease Be sure the battery is fully charged before taking photographs outside in cold weather Keep a spare battery in a warm place and exchange the two as necessary Once warmed a cold battery may recover some o...

Page 485: ... k l p m n o S T U g 3 1 2 3 I Shooting menu 1 Image quality z z z z Image size z z z z White balance z Set Picture Control z Auto distortion control z z z z notavailable inI mode Color space z z z z Active D Lighting z Noise reduction z z z z not available in mode ISO sensitivity settings z z z not available in and I modes ...

Page 486: ...lein and I modes Live view movie z z2 z2 not available in mode Built in AF assist illuminator z z z not available in l and m modes z notavailablein and I modes Metering z Flash cntrl for built in flash Optional flash z Movie settings z z z z i j P S A M k l p m n o S T U g 3 1 2 3 I ...

Page 487: ...utton hold z z2 z2 Flexible program z availableonly in P mode Exposure compensation z z2 availableonlyin and I modes Flash mode z2 not available in j mode z z2 not available in l and m modes z2 availableonlyinS T U g and modes Flash compensation z 1 Reset with Reset shooting menu 0 224 2 Reset when mode dial is rotated to new setting i j P S A M k l p m n o S T U g 3 1 2 3 I ...

Page 488: ...problem select single servo autofocus AF S 0 74 single point AF c 0 78 and the center focus point and then frame a high contrast subject in the center focus point and press the shutter release button halfway to focus the camera With the camera in focus use the diopter adjustment control to bring the subject into clear focus in the viewfinder If necessary viewfinder focus can be further adjusted us...

Page 489: ...ilt in flash fires 0 69 89 Final photo is larger than area shown in viewfinder Viewfinder horizontal and vertical frame coverage is approximately 95 Photos are out of focus AF S or AF I lens is not attached use AF S or AF I lens or focus manually Camera unable to focus using autofocus use manual focus or focus lock 0 76 81 83 Camera is in manual focus mode focus manually 0 83 Focus does not lock w...

Page 490: ...t for it to cool down Image size can not be changed An NEF RAW option is selected for image quality 0 86 Camera is slow to record photos Depending on shooting conditions and memory card performance access lamp may light for up to about a minute after shooting ends in continuous release mode Turn noise reduction off 0 226 Noise bright spots randomly spaced bright pixels fog or lines appear in photo...

Page 491: ...s elements If problem persists perform image sensor cleaning 0 314 Date is not imprinted on photos An NEF RAW option is selected for image quality 0 86 254 Sound is not recorded with movies Microphone off is selected for Movie settings Microphone 0 158 Flicker or banding appears during live view or movie recording Choose an option for Flicker reduction that matches the frequency of the local AC po...

Page 492: ...th lens used Colors are unnatural Adjust white balance to match light source 0 124 Adjust Set Picture Control settings 0 135 Can not measure white balance Subject is too dark or too bright 0 131 Image can not be selected as source for preset white balance Image was not created with D3300 0 133 Effects of Picture Control differ from image to image A auto is selected for sharpening contrast or satur...

Page 493: ...selected for Auto image rotation 0 243 Photo is displayed in image review 0 221 Camera was pointed up or down when photo was taken 0 243 Can not delete picture Picture is protected remove protection 0 184 Memory card is locked 0 23 Can not retouch picture Photo can not be further edited with this camera 0 264 Can not change print order Memory card is full delete pictures 0 192 338 Memory card is l...

Page 494: ...Photos are not displayed in Capture NX 2 Update to latest version 0 307 Image Dust Off option in Capture NX 2 does not have desired effect Image sensor cleaning changes the position of dust on the image sensor Image Dust Off reference data recorded before image sensor cleaning is performed can not be used with photographs taken after image sensor cleaning is performed Image Dust Off reference data...

Page 495: ...re ring to minimum aperture highest f number 291 Lens not attached F s flashes Attach non IX NIKKOR lens 290 If non CPU lens is attached select mode M 108 Before taking photos rotatethezoomringto extend the lens F flashes A lens with a retractable lens barrel button is attached with the lens barrel retracted Press the retractable lens barrel button and rotate the zoom ring to extend the lens 17 Sh...

Page 496: ...d is locked Slide lock to write position flashes Memory card is locked write protected Slide card write protect switch to write position 23 This memory card cannot be used Card may be damaged Insert another card k flashes Use approved card 310 Format card If problem persists card may be damaged Contact Nikon authorized service representative 234 Error creating new folder Delete files or insert new...

Page 497: ...Delete photographs 192 Insert new memory card 15 flashes Camera can not focus using autofocus Change composition or focus manually 27 76 83 Subject is too bright s flashes Use a lower ISO sensitivity 95 Use commercial ND filter 306 In mode S Increase shutter speed 105 A Choose a smaller aperture higher f number 107 Choose another shooting mode 4 Subject is too dark Use a higher ISO sensitivity 95 ...

Page 498: ...ou are using a zoom lens choose a focal length of 55 mm or less 63 N flashes Flash has fired at full power Check photo in monitor if underexposed adjust settings and try again N s flashes Use the flash 89 Change distance to subject aperture flash range or ISO sensitivity 94 95 107 Lens focal length is less than 18 mm use a longer focal length Optional SB 400 or SB 300 flash unit attached flash is ...

Page 499: ...sultNikon authorizedservice representative Metering error Unable to start live view Pleasewaitforcamera to cool Wait for the internal circuits to cool before resuming live view or movie recording 152 157 Folder contains no images Folder selected for playback contains no images note that this message will be displayed if memory card is inserted after Current is selected for Playback folder in playb...

Page 500: ...RAW processing 275 Check printer Check printer To resume select Continue if available Check paper Paper is not selected size Insert paper of correct size and select Continue Paper jam Clear jam and select Continue Out of paper Insert paper of selected size and select Continue Check ink supply Check ink To resume select Continue Out of ink Replace ink and select Continue See printer manual for more...

Page 501: ...xels 24 78 million Dust reduction System Image sensor cleaning Image Dust Off reference data optional Capture NX 2 software required Storage Image size pixels I easy panorama mode Normal horizontal pan 4800 1080 Normal vertical pan 1632 4800 Wide horizontal pan 9600 1080 Wide vertical pan 1632 9600 Other modes 6000 4000 Large 4496 3000 Medium 2992 2000 Small File format NEF RAW 12 bit compressed J...

Page 502: ...Eyepoint 18 mm 1 0 m 1 from center surface of viewfinder eyepiece lens Diopter adjustment 1 7 0 5 m 1 Focusing screen Type B BriteView Clear Matte Mark VII screen Reflex mirror Quick return Lens aperture Instant return electronically controlled Lens Compatible lenses Autofocus is available with AF S and AF I lenses Autofocus is not available with other type G and D lenses AF lenses IX NIKKOR and l...

Page 503: ...tter priority auto exposure a shutter speed of 1 250 s or faster and other settings at default values Self timer 2 s 5 s 10 s 20 s 1 9 exposures Exposure Metering mode TTL exposure metering using 420 pixel RGB sensor Metering method Matrix metering 3D color matrix metering II type G E and D lenses color matrix metering II other CPU lenses Center weighted metering Weight of 75 given to 8 mm circle ...

Page 504: ... easy panorama Exposure compensation Can be adjusted by 5 5 EV in increments of 1 3 EV in P S A and M modes Exposure lock Luminosity locked at detected value with A L button ISO sensitivity Recommended Exposure Index ISO 100 12800 in steps of 1 EV Can also be set to approx 1 EV ISO 25600 equivalent above ISO 12800 auto ISO sensitivity control available Active D Lighting On off Focus Autofocus Niko...

Page 505: ...Built in flash i k p n o S T U g Auto flash with auto pop up P S A M Manual pop up with button release Guide Number Approx 12 39 12 39 with manual flash m ft ISO 100 20 C 68 F Flash control TTL i TTL flash control using 420 pixel RGB sensor is available with built in flash and SB 910 SB 900 SB 800 SB 700 SB 600 SB 400 or SB 300 i TTL balanced fill flash for digital SLR is used with matrix and cent...

Page 506: ...ommunication supported with all CLS compatible flash units Sync terminal AS 15 sync terminal adapter available separately White balance White balance Auto incandescent fluorescent 7 types direct sunlight flash cloudy shade preset manual all except preset manual with fine tuning Live view Lens servo Autofocus AF Single servo AF AF S full time servo AF AF F Manual focus MF AF area mode Face priority...

Page 507: ...6 fps File format MOV Video compression H 264 MPEG 4 Advanced Video Coding Audio recording format Linear PCM Audio recording device Built in monaural or external stereo microphone sensitivity adjustable ISO sensitivity ISO 100 12800 can also be set to approx 1 EV ISO 25600 equivalent above ISO 12800 Monitor Monitor 7 5 cm 3 in approx 921k dot VGA TFT LCD with 170 viewing angle approx 100 frame cov...

Page 508: ...microphones Supported languages Supported languages Arabic Bengali Bulgarian Chinese Simplified and Traditional Czech Danish Dutch English Finnish French German Greek Hindi Hungarian Indonesian Italian Japanese Korean Marathi Norwegian Persian Polish Portuguese Portugal and Brazil Romanian Russian Serbian Spanish Swedish Tamil Telugu Thai Turkish Ukrainian Vietnamese Power source Battery One recha...

Page 509: ...tionsofthehardwareandsoftwaredescribed in thismanualatanytimeandwithoutpriornotice Nikonwillnotbeheldliablefordamagesthat may result from any mistakes that this manual may contain Dimensions weight Dimensions W H D Approx 124 98 75 5 mm 4 9 3 9 3 in Weight Approx 460 g 1 lb 0 2 oz with battery and memory card but without body cap approx 410 g 14 5 oz camera body only Operating environment Temperat...

Page 510: ...0 minutes at an ambient temperature of 25 C 77 F when no charge remains Operating temperature 0 C 40 C 32 F 104 F Dimensions W H D Approx 70 26 97 mm 2 8 1 0 3 8 in excluding plug adapter Weight Approx 96 g 3 4 oz excluding plug adapter Type Rechargeable lithium ion battery Rated capacity 7 2 V 1230 mAh Operating temperature 0 C 40 C 32 F 104 F Dimensions W H D Approx 38 53 14 mm 1 5 2 1 0 6 in We...

Page 511: ...utput to camera Zoom Manual zoom using independent zoom ring Focusing Autofocus controlled by Silent Wave Motor and separate focus ring for manual focus Vibration reduction Lens shift using voice coil motors VCMs Minimum focus distance AF 0 28 m 0 92 ft from focal plane at all zoom positions MF 0 25 m 0 82 ft from focal plane at all zoom positions Diaphragm blades 7 rounded diaphragm opening Diaph...

Page 512: ...he AF S DX NIKKOR 18 55mm f 3 5 5 6G VR II is for use exclusively with Nikon DX format digital cameras and features a retractable lens barrel Focal length scale Focal length mark A M mode switch 0 23 83 Vibration reduction ON OFF switch 0 355 Lens mountingmark 0 16 Rear lens cap Lens cap Focus ring 0 83 154 CPU contacts 0 291 Zoom ring 0 26 Retractable lens barrel button 0 17 ...

Page 513: ...ns obscures the built in flash Shadow Shadow Camera Minimum distance without vignetting D7100 D7000 D5300 D5200 D5100 D5000 D3300 D3200 D3100 D3000 D300 series D200 D100 D90 D80 D70 series D60 D50 D40 series No vignetting at any focus distance Because the built in flash units for the D100 and D70 can only cover the angle of view of a lens with a focal of 20 mm or more vignetting will occur at a fo...

Page 514: ...tuations To use vibration reduction slide the vibration reduction switch to ON Vibrationreductionisactivated when the shutter release button is pressed halfway reducing the effects of camera shake on the image in the viewfinder and simplifying the process of framing the subject and focusing in both autofocus and manual focus modes When the camera is panned vibration reduction applies only to motio...

Page 515: ... reduction is disabled while the built in flash is charging When vibration reduction is active the image in the viewfinder may jiggle after the shutter is released This does not indicate a malfunction wait for the image in the viewfinder to stabilize before shooting A Supplied Accessories 52 mm Snap on Front Lens Cap LC 52 Rear Lens Cap ...

Page 516: ... mark with the lens hood alignment mark as shown in Figure q and then rotate the hood w until the mark is aligned with the lens hood lock mark When attaching or removing the hood hold it near the symbol on its base and avoid gripping it too tightly Vignetting may occur if the hood is not correctly attached The hood can be reversed and mounted on the lens when not in use ...

Page 517: ...r or benzene to clean the lens The lens hood or NC filters can be used to protect the front lens element Attach the front and rear caps before placing the lens in its flexible pouch When a lens hood is attached do not pick up or hold the lens or camera using only the hood If the lens will not be used for an extended period store it in a cool dry location to prevent mold and rust Do not store in di...

Page 518: ...us on the background and the subject may be out of focus Example A far off portrait subject at some distance from the background 2 The subject contains many fine details The camera may have difficulty focusing on subjects that lack contrast or appear smaller than objects in the background Example A field of flowers In these cases use manual focus or use focus lock to focus on another subject at th...

Page 519: ...for Digital Still Cameras version 2 3 a standard in which information stored with photographs is used for optimal color reproduction when the images are output on Exif compliant printers PictBridge A standard developed through cooperation with the digital camera and printer industries allowing photographs to be output directly to a printer without first transferring them to a computer HDMI High De...

Page 520: ...MI the HDMI logo and High Definition Multimedia Interface are trademarks or registered trademarks of HDMI Licensing LLC All other trade names mentioned in this manual or the other documentation provided with your Nikon product are trademarks or registered trademarks of their respective holders A FreeType License FreeType2 Portions of this software are copyright 2014 The FreeType Project http www f...

Page 521: ...1 MB 1000 100 Medium 7 4 MB 1700 100 Small 3 8 MB 3300 100 JPEG normal Large 6 3 MB 2000 100 Medium 3 8 MB 3300 100 Small 2 0 MB 6300 100 JPEG basic Large 2 9 MB 3900 100 Medium 1 9 MB 6500 100 Small 1 0 MB 12 100 100 1 All figures are approximate Results will vary with card type camera settings and scene recorded 2 Maximum number of exposures that can be stored in memory buffer at ISO 100 Drops w...

Page 522: ... standby timer toexpire after monitor is turnedoff flash fired at full power once every other shot Live view not used 2 Measured at 20 C 68 F with an AF S DX NIKKOR 18 55mm f 3 5 5 6G VR II lens under the following test conditions vibration reduction off continuous release mode focus mode set to AF C imagequalitysettoJPEGbasic imagesizesettoM medium whitebalancesettov ISOsensitivity settoISO 100 s...

Page 523: ...utter speeds Using a GP 1or GP 1A GPS unit Using an Eye Fi card Using a WU 1a wireless mobile adapter Using VR vibration reduction mode with VR lenses To ensure that you get the most from rechargeable Nikon EN EL14a batteries Keep the battery contacts clean Soiled contacts can reduce battery performance Use batteries immediately after charging Batteries will lose their charge if left unused ...

Page 524: ...L3 67 97 Quick response remote ML L3 67 97 J Quiet shutter release 67 70 c Single point AF 78 d Dynamic area AF 78 e Auto area AF 78 f 3D tracking 78 79 6 Face priority AF 145 147 7 Wide area AF 145 147 8 Normal area AF 145 147 9 Subject tracking AF 145 147 L Matrix metering 114 M Center weighted metering 114 N Spot metering 114 o auto flash 90 j red eye reduction 90 92 p slow sync 90 92 q rear cu...

Page 525: ... Filter effects 270 Body cap 2 308 Border PictBridge 209 Built in AF assist illuminator 77 229 294 Built in flash 89 295 Bulb 110 Burst 68 Buttons 251 C Calendar playback 181 Capture NX 2 307 CEC 218 Center weighted metering 114 Charger 14 306 351 Choose start end point 164 Clean image sensor 314 Clock 18 242 Clock battery 24 Cloudy White balance 124 CLS 299 300 Color balance 271 Color outline 281...

Page 526: ...9 Flash White balance 124 Flash cntrl for built in flash 229 Flash compensation 120 Flash control 230 Flash mode 90 92 Flash range 94 Flash ready indicator 6 31 304 Flash sync speed 93 344 Flexible program 103 Flicker reduction 157 241 Fluorescent White balance 124 126 Fn button 251 258 f number 101 106 Focal length 298 Focal length scale 353 Focal plane mark 84 Focus 74 84 144 147 154 Focus indic...

Page 527: ...ata 179 259 309 Lock mirror up for cleaning 317 M Manual 83 108 Manual focus 83 144 154 Manual movie settings 159 Matrix metering 114 Maximum aperture 84 343 Maximum sensitivity 227 Medium Image size 87 Memory buffer 69 Memory card 15 234 310 362 Memory card capacity 362 Metering 114 Microphone 158 161 Miniature effect 59 283 Minimum shutter speed 227 Mirror 2 317 Mode dial 4 Monitor 142 170 235 M...

Page 528: ...iet shutter release 67 70 R Rangefinder 84 248 Rating 186 200 Rear curtain sync 92 Recent settings 288 Red intensifier Filter effects 270 Red eye correction 267 Red eye reduction 90 92 Release mode 67 Remote control 97 258 308 Remote cord 110 258 309 Remote on duration ML L3 247 Remote shutter release 258 Reset 224 233 Reset setup options 233 Reset shooting menu 224 Resize 277 Retouch menu 263 Ret...

Page 529: ...traighten 279 Subject tracking AF 145 T Television 215 Thumbnail playback 180 Time 110 Time stamp PictBridge 209 Time zone 18 242 Time zone and date 242 Timer 71 Toning 139 141 Transition effects 200 220 Trim 268 Trimming movies 164 Type D lens 291 Type E lens 291 Type G lens 291 U USB cable 204 208 309 UTC 179 259 V Vibration reduction 23 355 Video mode 216 260 Viewfinder 6 20 343 Viewfinder eyep...

Page 530: ......

Page 531: ...reproduction in any form of this manual in whole or in part except for brief quotation in critical articles or reviews may be made without written authorization from NIKON CORPORATION NIKON CORPORATION 2014 Nikon Corporation CE ...

Page 532: ......

Page 533: ...NikonScttool Discover the photographer in you Learn to make incredible photos easily with expert instruction Nikon School seminars will help you make the pictures you want ...

Page 534: ...ELECTRIC SHOCK CAREFULLY FOLLOW THESE INSTRUCTIONS If the shape of the plug does not fit the power outlet use an attachment plug adaptor of the proper configuration for the power outlet This power unit is intended to be correctly orientated in avertical or floor mount position 14 100018 XX 01 ...

Page 535: ...koN 03300 tJdird iliti H iff i Nikon WARRANTY PROGRAMS CAMERA ACCESSORY USA Register your product online vvvvvv nikonusa com register Registration not required for warranty coverage Printed in Thailand 6YE10313 01 ...

Page 536: ...NY IMPLIED WARRANTIES ARISING BY OPERATION OF LAW SHALL BE LIMITED TO ONE 1 YEAR FROM THE DATE OF PURCHASE OR SUCH LONGER PERIOD AS MAY BE REQUIRED BY APPLICABLE LAW UNDER NO CIRCUMSTANCES SHALL NIKON INC BE LIABLE FOR ANY CONSEQUENTIAL INCIDENTAL SPECIAL DIRECT INDIRECT EXEMPLARY OR PUNITIVE DAMAGES RELATING TO OR ARISING OUT OF ANY BREACH OF THIS WARRANTY OR ANYOTHER CLAIM REGARDING THIS PRODUCT...

Page 537: ...R AF S DXNIKKOR18 55mmf 3 5 5 66 VR II Illi Jf J B ij8 I User s Manual IIManuel d utilisation IIManual del usuario EliiJflt taA 1 a Manual do usuario l3lA A I NIKON CORPORATION Printed in Thailand 7MA0027C 01_ G13 ...

Page 538: ... j l 1 Figure 1 Figure 1 Imagen 1 2 Figure 2 Figure 2 lmagen 2 ...

Page 539: ...n be previewed in the viewfinder Use the zoom ring to zoom in and out Photographs can be taken only when the focal length scaleis between 18 and 55 mm Figure 2 Aperture Aperture is adJUSted usmg camera controls Zoom andM aximum Aperture Changes to zoom can alter the maximum aperture by up to 1Ji EV The camera however automatically takes this into account when setting expo sure and no modifications...

Page 540: ...RANTY PROGRAMS PAGE 1 LENS ACCESSORY USA PAGE 2 LENS ACCESSORY INTERNATIONAL Register your product online 1IIIVIIVV nlkonusa lster Registration not required for warranty coverage Printed in Thailand 7YE10001 01 ...

Page 541: ...OF ANY IMPLIED WARRANTIES ARISING BY OPERATION OF LAW SHALL BE LIMITED TO ONE 1 YEAR FROM THE DATE OF PURCHASE OR SUCH LONGER PERIOD AS MAY BE REQUIRED BY APPLICABLE LAW UNDER NO CIRCUMSTANCES SHALL NIKON INC BE LIABLE FOR ANY CONSEQUENTIAL INCIDENTAL SPECIAL DIRECT INDIRECT EXEMPLARY OR PUNITIVE DAMAGES RELATING TO OR ARISING OUT OF ANY BREACH OF THIS WARRANTY OR ANY OTHER CLAIM REGARDING THIS PR...

Page 542: ...er only and is not assignable or transferable 2 This warranty shall not extend to any product which has been subject to misuse alteration abuse negligence accident or unauthorized repair or has had its serial number altered or removed f The above warranty is expressly in lieu of all other warranties expressed or implied including but not limited to any implied warranty of merchantability or fitnes...

Page 543: ... WARRANTY 4 YEARS NIKON INC USA EXTENDED SERVICE COVERAGE LENS EXTENDED SERVICE COVERAGE USA Register your ESC online www nlkonusa colllltagister Registration within ten days of purchase required for ESC coverage Nlkon Printed in Thailand 7YE20001 01 ...

Page 544: ...s identified below 7 ESC is valid only for the NIKKOR lens indicated on your bill of sale and only when that product is purchased by a retail consumer from an authorized Nikon dealer or reseller who purchased it from Nikon Inc or from an authorized Nikon U S distributor that purchased it from Nikon Inc Such NIKKOR lenses may be identified by the Nikon Inc Lens One Year USA Limited Warranty The ser...

Page 545: ...KOR AF S DXNIKKOR SS 200mmf 4 S 6G EDVR II lllilm a a IIUser s Manual IIManuel d utilisation IIManual del usuario Blf Jflijta D Manual do usuario l3lA A t NIKON CORPORATION Printed in Thailand 7MA0147C 07 A G13 ...

Page 546: ...CD 1 Figure 1 Figure 1 Imagen 1 l I I I 200 135 105 85 70 55 2 Figure 2 Figure 2 lmagen 2 ...

Page 547: ... in the presence of flammable gas could result in explosion or fire Donotlookatthesun through thelensorthecamera viewfinder Viewing the sun or other bright light source through the lens or viewfinder could cause permanent visual impairment Keep out ofreach ofchildren Failure to observe this precaution could result in injury Observe the following precautions when handling thelens andcamera Keep the...

Page 548: ...unt and then rotate the lens counter clockwise until it clicks into place with the lens mounting mark at the top Be careful not to press the retractable lens barrel button while attaching or removing the lens Removing the Lens DJ Turn the camera off Remove the lens To remove the lens press the lens release button while turning the lens clockwise Before Use The lens features a retractable barrel Be...

Page 549: ... and Depth of Field Before focusing rotate the zoom ring to adjust the focal length and frame the photograph If the camera offers depth of field preview stop down depth of field can be previewed in the viewfinder Use the zoom ring to zoom in and out Photographs can be taken only when the focal length scale is between 55 and 200 mm Figure 2 Note Focal length decreases as the focus distance shortens...

Page 550: ... blurred after the shutter is released This does not indicate a malfunction When the camera is panned vibration reduction applies only to motion that is not part of the pan if the camera is panned horizontally for ex ample vibration reduction will be applied only to vertical shake making it much easier to pan the camera smoothly in awide arc Do not turn the camera off or remove the lens while vibr...

Page 551: ... Cap Compatible Accessories 52 mm screw on filters Bayonet Hood HB 37 Flexible Lens P ouch CL 0915 Rear Lens Cap LF 4 Specifications Type Type GAF SDX lens with built in CPU and Fmount Focal length 55 200 mm f 4 5 6 113 elementsi grou ding1_ ensei Maximum aperture Lens construction Angle ofview j28 50 8 I Focallength scale Graduated in millimeters 55 70 85 1 05 135 200 Distance information Output ...

Page 552: ... IF THE DISCLAIMER OF IMPLIED WARRANTIES IS INEFFECTIVE UNDER APPLICABLE LAW THE DURATION OF ANY IMPLIED WARRANTIES ARISING BY OPERATION OF LAW SHALL BE LIMITED TO ONE 1 YEAR FROM THE DATE OF PURCHASE OR SUCH LONGER PERIOD AS MAY BE REQUIRED BY APPLICABLE LAW UNDER NO CIRCUMSTANCES SHALL NIKON INC BE LIABLE FOR ANY CONSEQUENTIAL INCIDENTAL SPECIAL DIRECT INDIRECT EXEMPLARY OR PUNITIVE DAMAGES RELA...

Page 553: ...rable 2 This warranty shall not extend to any product which has been subject to misuse alteration abuse negligence accident or unauthorized repair or has had its serial number altered or removed The above warranty is expressly in lieu of all other warranties expressed or implied including but not limited to any implied warranty of merchantability or fitness for particular purpose except to the ext...

Page 554: ... Nikon Inc Lens 1YEAR USA LIMITED WARRANTY Nikon Inc Lens 4 YEARS USA EXTENDED SERVICE COVERAGE ESC Register your product online VIAIVVV nikonusa collllregister Registration not required for warranty coverage Registration is required within 10 days of purchase for ESC coverage Printed in Thailand 7YU35107 01 ...

Page 555: ...Alaska Hawaii Puerto Rico and the US Virgin Islands 6 ESC can be performed only by Nikon Inc service facilities 7 ESC is valid only for the NIKKOR lens indicated on your bill of sale and only when that product is purchased by aretail consumer from an authorized Nikon dealer or reseller who purchased it from Nikon Inc or from an authorized Nikon U S distributor that purchased it from Nikon Inc Such...

Reviews: