background image

%N

5SERS-ANUAL

Summary of Contents for 25338

Page 1: ... N 5SER S ANUAL ...

Page 2: ... use of this product Licensed under one or more US Pats 7 016 549 6 836 572 6 728 421 6 865 300 7 031 547 and other patents pending 2006 NIKON CORPORATION 2006 Nik Software Inc All rights reserved Trademark Information U Point is a trademark of Nik Software Inc Macintosh and Mac OS are trademarks of Apple Computer Inc Microsoft and Windows are registered trademarks of Microsoft Corporation Pentium...

Page 3: ...st 43 Base Adjustments Step 44 Camera Adjustments 45 RAW Adjustments 50 Lens Adjustments 52 Light Color Adjustments 54 Detail Adjustments 57 Enhancement Steps 59 Show Hide Triangle 60 Apply Step Checkbox 60 Apply Enhancement Checkbox 60 Link Icon 60 Adjust Filter Pull Down Menu 61 Opacity Mixer 61 Selection Notification Area 64 Feather Control 64 Versions Menu 65 Automatically Generated Versions 6...

Page 4: ...in Browser 113 Open Recent 114 Save 114 Save As 115 Revert 116 Close 116 Print Setup 116 Print 117 Exit 122 Edit Menu 125 Undo 125 Redo 125 Cut 125 Copy 125 Paste 126 Duplicate 126 Delete 126 Select All 126 Flip 127 Rotate 127 Size Resolution 127 Change the Output Size DPI 127 Change the File Size Image Size 128 Fit Photo 128 Preferences 128 General 129 Color Management 130 Levels Grid 131 Cache S...

Page 5: ...Manage Settings Files 187 Batch Process 188 Watched Folder 190 View Menu 195 Show All Control Points 195 Show Selection 195 Show Grid 196 Show Lost Highlights 196 Show Lost Shadows 197 Show Focus Area 197 View at 100 198 Fit to Screen 198 Zoom In 198 Zoom Out 198 Full Screen 198 Hide Palettes 199 Compare 199 Compare in Browser 199 Compare in Editor 200 Compare With Original 200 Window Menu 203 Cas...

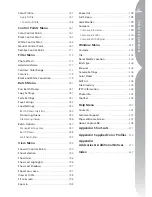
Page 6: ...iv C h ap ter 1 Ta ble o f Co nte nts iv ...

Page 7: ...ed directly on the image and its value is defined by the user Each Control Point operates together with the next affect ing the image progressively as more and more Control Points are applied Select a Control Point to adjust color or to control the White Black and Neutral points Because the enhancements you make are maintained separately from the original image data and without regard for the orig...

Page 8: ...a settings and RAW adjustments that can be applied within Capture NX Color Mode Page 45 White Balance Page 46 Tone Compensation Page 48 Saturation Page 49 Sharpening Page 49 Exposure Compensation Capture NX Page 50 Hue Adjustment Page 50 Color Moiré Reduction Page 51 Dust Off page 51 Auto Color Aberration page 52 Vignette Control page 52 Capture NX contains full support for Nikon RAW NEF images an...

Page 9: ...gs Palette To display the contents of the Camera Settings Palette click on the button within the Camera Settings Palette Settings that you can edit have a pull down Menu which gives you access to the various controls for each of these settings Within the Camera Settings Palette you are given access to a number of adjustments that are unique to RAW NEF files These adjustments can be located in the ...

Page 10: ...4 ...

Page 11: ...ll Capture NX place the Capture NX setup CD into your computer s CD or DVD drive Open the CD either through the My Computer icon on your desktop Windows or by double click ing on the CD icon that appears on your desktop Mac OS Double click on the Setup icon that appears within the window that is displayed to begin the setup wizard Please note On Windows machines Microsoft NET Framework version 1 1...

Page 12: ...ly convert the image from the embedded profile to the profile as defined in the Default RGB space You are also provided with the ability to select the profile to use as the Default RGB space Default RGB Space Use this option to set the RGB space that is used for your images This profile is used when the Always use the default RGB color space as the working color space option is selected or if the ...

Page 13: ...7 ...

Page 14: ...8 ...

Page 15: ...oints from affect ing that object While the Black White and Neutral Control Points were designed to control the entire image globally both the Red Eye and Color Control Points were designed to control elements locally The Color Control Points work by identifying an object based on a number of criteria When you place your first Color Control Point the U Point technology identifies the unique elemen...

Page 16: ...ints are added for skin tones and foliage A Control Point added to the model s face brightens and increases the vibrancy of the skin Another added to the foliage darkens the leaves and draws attention to the model Step 3 Selection Step 2 Next a Color Control Point is placed to identify the clouds in the image This new Control Point applies only to tones in the clouds not the sky and prevents the f...

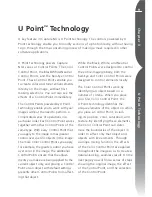
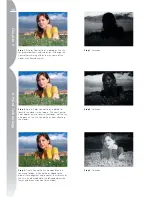
Page 17: ...11 C h ap ter 3 U Po in t Te ch nol og y Before After ...

Page 18: ...ditor Page 13 Menu Bar Page 113 208 Toolbar Page 71 94 Bird s Eye Page 97 Edit List Page 43 Photo Info Page 99 File Directory Page 37 Camera Settings Page 39 IPTC Page 41 Browser Page 29 Image Window Page 105 Color Picker Page 109 ...

Page 19: ...use these tools to perform various edits from zooming to rotating the image to applying enhancements selectively Please see pages 71 94 for more information on each of the individual Toolbars Bird s Eye The Bird s Eye Palette shows either a portion of the image that is visible in the active image window or the position of the area displayed within the Light Table mode of the Browser The portion of...

Page 20: ...n easy to access Palette which displays the contents of an entire folder in the Browser Please see page 37 for a complete description of the File Directory Palette Camera Settings By opening the Camera Settings Palette you can see all of the camera generated data for the current image from information regarding the camera that created the image to exposure information Additionally the Camera Setti...

Page 21: ...15 ...

Page 22: ...16 ...

Page 23: ...pture NX can be opened by selecting Capture NX from the Start Menu within Windows or by double clicking on the application icon in the Applications folder within the Mac OS Welcome Screen Open Recent Image Open Recent Browser New Drag an Image Here Mac Only Don t Show Again ...

Page 24: ... immediately within the Editor Open Recent Browser This section contains a list of the most recent folders viewed within the Browser with the most recent folder displayed at the top Other recently browsed folders are displayed beneath that folder in chronological order Double click on one of the displayed folders to open that folder immediately within the Browser New This section enables you to br...

Page 25: ... can then navigate within this folder by double clicking on any of the folders displayed within the Browser Once you have found the image you want to edit double click on that image If you would like to navigate to a differ ent window other than the My Pictures Windows or the Pictures folder Mac OS click on the button within the File Directory frame This will cause the File Directory Palette to be...

Page 26: ...ault location Grip Edge This edge provides you with an area to grab and reposition the window If the window is currently docked clicking and dragging the window with this edge will automatically undock the window and allow you to reposition the window anywhere on your screen To re dock the window to its normal location simply click on the button Resize Control This part of the window enables you t...

Page 27: ...system Capture NX can utilize cache file data to reduce the amount of data that needs to be processed thereby greatly increasing the speed of opening NEF images Please see page 133 for information on the cache system Please note Previous versions of Nikon Capture and PictureProject are not able to display enhancements that are unique to Capture NX within NEF files If you would like to share your N...

Page 28: ... the image as a 16 bit file is only provided if origi nal image was a RAW or 16 bit file Changing the image from 16 bit to 8 bit will make the image file smaller but doing so may also reduce the level of quality of the image It is recommended that you create an 8 bit copy of your image for situations in which only 8 bit files are compatible Please Note TIFF saved with CMYK data can only be saved w...

Page 29: ...utomatic appli cation of one or more enhancements to a series of images Typically a photogra pher will use a batch process to apply a predefined series of adjustments to several images at once Capture NX supports a number of batch processing methods You can run a traditional Batch Process select ing a folder of images and a Settings File to apply to those images you can copy and paste your enhance...

Page 30: ...nded that you leave the Settings File in the default folder location since this will make it easy to locate when you are ready to apply a batch process you are given the option to select a different location to place the Settings File For more information regarding the Save Settings command please see page 182 How to Apply a Batch Process With a Settings File Once you have created a Settings File ...

Page 31: ...atch Menu and select Copy Settings By default Capture NX will copy all of the enhancements that are applied to the representative image If you would like to copy only individual enhancements simply click on an enhancement within the Edit List to highlight it prior to selecting Copy Settings If you would like to highlight and select more than one enhance ment hold the Ctrl Windows or Command Mac OS...

Page 32: ...he Processing Queue window will appear enabling you to start the batch process at any point Once you select the Start button within the Processing Queue Capture NX will process each of the images that you selected to enhance using the default saving settings This saves the images using the NEF file format in the same folder location with the same file name If you would like to change these setting...

Page 33: ...27 ...

Page 34: ...28 ...

Page 35: ...of ways by double clicking on a folder icon within the Browser window by using the File Directory Palette or by using the Open command within the Folder Menu of the Browser The Browser Capture NX contains a very powerful browser that enables you to browse sort and organize your images as well as to rotate or apply batch processes to multiple images simultaneously The Browser Inverse Sort Button Pa...

Page 36: ...lder that you opened within the Browser This button is not accessible when viewing the first folder of that editing session Folder Open This button opens a list of previously viewed folders You can then select one of the folders that you previously viewed to quickly navigate to that folder Folder Forward This button navigates back to the last folder that you viewed before using the Folder Back but...

Page 37: ...lder Menu The Folder Menu within the Browser contains different controls for the view of the current folder Open Select this option to open a folder browser dialog that enables you to locate a folder to display within the Browser Open in Split Window Select this option to open a folder browser dialog that enables you to locate a folder to display in an additional browser window that becomes availa...

Page 38: ...s Eye Palette is accessible within this view to see your current location in relation to the images on the Light Table DETAILS This view places important informa tion about each image in a column and enables you to sort by each of the columns Label Menu The Label Menu within the Browser contains tools to assist you with label ing your images which is important when it comes time to sort and archiv...

Page 39: ...ay at any time rearrange the images manually by clicking and dragging an image to the desired location Alphabetical Choose this sort method to arrange the images alphabetically based on the file s name Date Choose this sort method to arrange the images chronologically based on the creation of the image By Labels This sub menu contains the current available labels and enables you to choose to displ...

Page 40: ...within the Browser contains a duplication of the contents of the Batch Menu from the Menu Bar and enables you to quickly access and apply batch processes to your images For more information regarding the Batch functionalities of Capture NX please see page 181 ...

Page 41: ...35 ...

Page 42: ...36 ...

Page 43: ...ctory displays the files on your hard disk in the same manner as the Operating System within the Capture NX window offering file copying and file moving functions Double clicking on any folder from within the File Directory will open that folder within the Browser ...

Page 44: ...38 ...

Page 45: ...thin the Camera Settings palette Camera Settings The Camera Settings Palette contains a list of all of the pertinent information regarding the current image Within this Palette you can see information regard ing the camera the time and date the image was shot the exposure data as well as the settings made within the camera that affected the current image Any editable settings are accessible with a...

Page 46: ...40 ...

Page 47: ...orking in the Browser you can also select multiple images and modify the contents of the IPTC fields of those images directly Once you are finished adding or editing the IPTC information simply click OK IPTC The IPTC Palette contains a standardized list of text fields that can be used to indicate the copyright and usage requirements of your images The contents of the IPTC Palette named after the c...

Page 48: ...42 ...

Page 49: ... all of the enhancements that have been applied to your image in chronological order The Edit List can be used as a history that allows you to go back and modify any of the adjustments that you have previously made to your images The Edit List Base Adjustments Page 44 Enhancement Steps Page 59 Versions Menu Page 65 Batch Menu Page 66 New Step Button Page 66 ...

Page 50: ...ttings that were applied By modify ing a previous step you will temporar ily disable all of the steps that occur after the current step you are modify ing Once you have completed any modification to that step click on the Apply Checkbox next to the last step that you want to reapply Capture NX will automatically apply all of the steps between the step you have just modified and the last step that ...

Page 51: ... Adjustments section will be presented automatically if the image is a RAW NEF image Tools that apply only to RAW images do not appear in the menus Tools specific to RAW images are available in the Base Adjustments Step Please note Any feature applied within the Camera Adjustments is applied to the entire image and cannot be adjusted using any of the Selective Tools COLOR MODE RAW ONLY The Color M...

Page 52: ...n the image was captured New White Balance This pull down Menu provides you with a number of controls for setting a new white balance value Recorded Value Selecting this value will set the white balance to the setting recorded by the camera Calculate Automatically When you select this value Capture NX will determine the best white balance setting to provide neutral colors throughout the image Inca...

Page 53: ...djustment Slider Fluorescent sub menu This sub menu enables you to choose between the most commonly available fluorescent light bulb temperatures Warm White 3 000K 3 700K Cool White 4 200K 5 000K Daylight 6 500K Fine Adjustment Slider This slider enables you to shift the selected color temperature by or 50 Mired Flash Select this option if your image was shot using a Nikon Speedlight as the light ...

Page 54: ... Select a section that was illuminated by the light source you want to set the white balance to To choose a section select Use Marquee Sample and click Start The cursor will change to an area selection eyedropper when moved over the active image drag to select an area White balance will be set to the average for the selected area You will notice that the Red and Blue sliders may have moved which m...

Page 55: ...RATION RAW ONLY The Saturation feature enables you to adjust the saturation that was set in the camera To change the saturation click on the button for Saturation and select one of the options from the pull down Menu Choose from the following list Unchanged This will revert to the saturation set in the camera Moderate Normal Enhanced SHARPENING RAW ONLY The Sharpening feature enables you to adjust...

Page 56: ... the slider This feature enables you to choose from 2 to 2EV Click OK to accept the Exposure Compensation effect or click Cancel to prevent the Exposure Compensation effect from changing your image If you would like to remove the Exposure Compensation effect at any time simply uncheck the Apply Checkbox next to Exposure Compensation Please note The Exposure Compensation feature is very useful for ...

Page 57: ...ts at consistent locations on the sensor the Dust Off feature can register their location on the sensor in a refer ence image The noise in subsequent images are compared to that profile and minimized Please note The position as well as amount of dust on the low pass filter may change It is recommended that you take reference images regularly and use a reference image that was taken within one day ...

Page 58: ...ge that was taken as close to the time of the current image as possible Alternatively you may select one of the last three locations that was selected within the Location pull down Menu Once you have located the correct Dust Off reference photo click OK to apply the Dust Off effect to your image If you would like to remove the Dust Off effect at any time simply uncheck the Apply Checkbox next to D...

Page 59: ...tion Recorded Distance Information Not Recorded D1X D1H firmware version 1 01 or earlier Distance Information Not Recorded Distance Information Not Recorded D1 Distance Information Not Recorded Distance Information Not Recorded To apply the Vignette Control feature to your image click on the button next to Vignette Control to display the Vignette Control dialog window Drag the Intensity slider to ...

Page 60: ...ts of the Light Color Adjustments section of the Base Adjustments step can be applied to any image either NEF JPEG or TIFF format Please note Any feature applied within the Light Color Adjustments is applied to the entire image and cannot be adjusted using any of the Selective Tools The features located within the Light Color Adjustments Section are also provided under the Menus as well as in the ...

Page 61: ...lor Booster feature from affecting your image If you would like to remove the Color Booster effect at any time simply uncheck the Apply Checkbox next to Color Booster D LIGHTING D Lighting reveals details in shadows and highlights correcting for underexpo sure backlighting or insufficient flash without harming the properly exposed areas or introducing unwanted artifacts D Lighting can also help re...

Page 62: ...he Apply Checkbox next to LCH LEVELS CURVES The Levels Curves feature combines two of the most often used tonal enhancing features into one easy to use editor The Levels Curves feature enables you to adjust contrast tone brightness levels and color balance to make maximum use of the tone range and color gamut offered by a particular output device such as a printer or monitor The Levels Curves feat...

Page 63: ...ou with the Photo Effects dialog For a complete explanation of the Photo Effects feature please see page 173 Once you are satisfied with the results of the Photo Effects feature click on the OK button If you want to cancel the Photo Effects feature click on the Cancel button If you would like to remove the changes from the Photo Effects at any time uncheck the Apply Checkbox next to Photo Effects ...

Page 64: ...ould like to remove the Noise Reduction effect at any time simply uncheck the Apply Checkbox next to Noise Reduction UNSHARP MASK The Unsharp Mask feature increases the apparent sharpness of your image by enhancing the edges of objects in your image Unsharp Mask works by increas ing the contrast of edges throughout your image This feature provides you with controls over Intensity Radius halo width...

Page 65: ...ictureProject If you would prefer to disable any straighten ing applied within previous versions of Capture or within PictureProject simply uncheck the Apply Checkbox for this item Enhancement Steps Apply Step Checkbox On Apply Step Checkbox Off Apply Enhancement Checkbox On Apply Enhancement Checkbox Off Show Hide Triangle Link Icon Enhancement Steps can either be automatically created by Capture...

Page 66: ... the following items Show Hide Triangle The Show Hide Triangle shows or hides the contents of that specific enhancement s dialog window Click on the button to toggle between these two Apply Step Checkbox The Apply Step Checkbox enables you to turn on and off a specific step thereby turning off all of the effects of that step This checkbox is automatically checked when a step is first created To tu...

Page 67: ...ion Opacity Mixer The Opacity Mixer provides you with the ability to blend either the current enhancement or all Control Points of the same type with the rest of the image The Opacity Mixer option becomes avail able as soon as you add any features from the Adjust Control Point or Filter Menus Click on the button next to the Opacity Mixer entry located directly beneath the feature that you wish to ...

Page 68: ...only to the color aspects of the image Opacity Chrominance Channel Use this slider to control the amount of the current effect on the Chrominance portion of the image Move this slider to the left to reduce the amount of the current effect on the chrominance aspect of the image Reduce this slider to 0 to apply the current enhance ment to the Luminance portions of the image so that no effect on the ...

Page 69: ...hose elements are lighter than the corre sponding area in the original image That is only areas that are brighter due to the enhancement will be applied to the image Screen The Screen blending mode is achieved by increasing the pixel values of the resulting image with the pixel values of original image The resulting image is always brighter than the original image prior to the enhancement Overlay ...

Page 70: ...w where the current step is being applied to the image by selecting the Show Selection option from the View Menu Feather Control The Feather Control option is presented whenever a selection has been made on the image This feature enables you to soften the edges of selections that have already been made using one of the selection tools By softening the edges of the selection you can reduce any visi...

Page 71: ...age is saved This version provides you with the ability to revert to the last saved step within the versions Please note Selecting this option from the Versions Palette will retain all of the changes made since the last save while selecting Revert from the File Menu will remove all changes made since the last save Please see page 116 for more information on the Revert feature CURRENT This version ...

Page 72: ...s found within the main Batch Menu Please refer to page 181 for a full description on how to use Batch functionality within Capture NX New Step Button Clicking on the New Step Button will create a new empty Enhancement step within the Edit List Click on this button if you want to manually generate a new step within the Edit List to start a new series of enhancements This is especially helpful if y...

Page 73: ...ete key on your keyboard Your image will then be updated to reflect this change Copying and Pasting Steps and Enhancements Entire Steps and Enhancements can be copied from one image and then pasted to another or they may even be pasted again within the same image You must first select and copy the desired step or enhancement to the clipboard To do this first click and highlight the step or enhance...

Page 74: ...paste Linking Enhancements Linking enhancements within the Edit List enables you to apply the selective controls that are used within one step to more than one enhancement By default each enhancement is applied to a separate step By linking two or more enhancements together in the same step each of those enhancements can benefit from the same selective controls that were applied to that step To li...

Page 75: ...ew enhance ment This is especially useful if you have made a selection applied an enhance ment to a step and then you want to see how a different enhancement will affect the image within the area identi fied by your selection For example after selecting the sky in an image and selecting the Levels Curves adjustment you may want to switch the Levels Curves adjustment for the Color Balance feature T...

Page 76: ...70 ...

Page 77: ...he following object types can be selected Control Points Images in the Browser Steps in the Edit List Please note Only one type of object can be selected at a time Shortcut A key Hand Tool The Hand Tool enables you to move within an image or Browser window Select this tool when viewing an image or Browser window that contains more information than is displayed within the current window Click and d...

Page 78: ...ge to zoom into the image Hold the Alt Windows or Option Mac OS key and click to zoom out Double click on the icon in order to zoom the current image to 100 Shortcut Z key Zoom in when any other tool is active Ctrl Spacebar keys Windows Command Spacebar keys Mac OS Zoom out when any other tool is active Ctrl Alt Spacebar keys Windows Command Option Spacebar keys Mac OS ...

Page 79: ...73 ...

Page 80: ...74 ...

Page 81: ...tating an image will cause a step to be created within the Edit List enabling you to remove the rotation at any point in the future When you save your image as a NEF file format you can remove the rotation after the image has been saved and closed Shortcut Rotate the image 90 degrees to the right Ctrl R Windows Command R Mac OS Rotate the image 90 degrees to the left Ctrl Shift R Windows Command S...

Page 82: ... to re adjust the trace Alternatively if you know how many degrees to rotate simply enter those numbers into the Straighten dialog Positive numbers will rotate the image clockwise while negative numbers will cause the image to rotate counter clockwise Within the Straighten dialog you can select whether or not to display the full image data By default Capture NX will automatically crop the image us...

Page 83: ...outside of the crop or click the Esc key Cropping an image will cause a step to be added to the Edit List enabling you to remove the cropping effect at any point in the future When saving as a NEF file format you can remove the cropping effect at any point even after the image has been saved and closed Shortcut C key Crop Options Dialog At any point in the editing process you can bring up the Crop...

Page 84: ...uperimpose this grid onto your image by holding down the Alt key Windows or the Option key Mac OS while you are in the crop mode Based on the photographic rule of thirds the Crop Grid helps guide your cropping so that the main points of interest lie close to the points where the four lines inter sect It also draws your attention to the natural horizontal or vertical lines in the image such as a ho...

Page 85: ...79 ...

Page 86: ...80 C h ap ter 1 3 80 ...

Page 87: ...togram section is designed specifically to help you locate the darkest and lightest sections of your image Please see page 100 for more information on how to use the Double Threshold function A Black Control Point is often used in conjunc tion with a White Control Point Black Point Handle For additional information regard ing the Black Control Point please see page 163 Toolbar F4 Black White and N...

Page 88: ... For additional information regarding White Control Points please see page 165 Neutral Control Point Neutral Control Points enable you to correct a color cast in your photograph by forcing the targeted color to become a defined color or to become neutral The Neutral Control Point is not acces sible while working within the Browser In its default operation the Neutral Control Point will change the ...

Page 89: ...P oi nts Please note In its default state the Neutral Control Point will not affect the luminosity of your image it will only affect the relationship of colors in your image For additional information regarding the functionality of a Neutral Control Point please see page 167 ...

Page 90: ...84 ...

Page 91: ...you to make adjustments to the color of that object With the use of the size slider you are able to increase the reach or scale of the current Control Point so that it affects similar colors of objects which are farther away from the Color Control Point Each new Control Point works together with the other Control Points to affect more and more specific objects Using additional Control Points ensur...

Page 92: ...es caused by flash photogra phy Simply select the Red Eye Control Point and place it on an eye that has red eye The Red Eye Control Point is not accessible while working within the Browser Control the Red Eye Control Point s effect by increasing or decreasing the Size slider The Hide option completely removes the effect of the Red Eye Control Point temporarily enabling you to see the before and af...

Page 93: ...87 ...

Page 94: ...88 ...

Page 95: ...ndicated within the Edit List s Selection Notification Area as All Selected selecting the Plus Brush and then painting will immediately remove the current step s effect from the image and apply it only to the area you are painting You can toggle to this tool with the key after select ing the Brush Tool from the Toolbar or you can temporarily toggle to this tool by holding down the Alt Windows or O...

Page 96: ...lable and you can paint in the Colorize enhance ment on your image By switching the Colorize enhancement to any other enhancement within the Edit List you can first paint in where you want to apply an enhancement Then using the Adjust Filter pull down Menu you can select the enhancement that you want to use instead of the Colorize enhancement for the area you had just indicated by painting For mor...

Page 97: ...ied Increase this value and the brush will either add more of the current step s enhancements to the image when using the Plus Brush or it will remove more of the current step s enhancements from the image when using the Minus Brush PRESSURE CONTROLS This pull down Menu enables you to control the different brush elements using a pressure sensitive input device such as a Pen Tablet Size This option...

Page 98: ...ections made will remove these anchor points The Rectangle Marquee Tool enables you to draw a square selection Hold down the Shift key after you begin drawing the selection to constrain the selection to a square Hold down the Alt Windows or Option Mac OS key while drawing the selec tion to draw the selection from the center instead of the corner The Oval Marquee Tool enables you to draw a round se...

Page 99: ...s while using a Minus Gradient will subtract from any previously applied selections To apply a gradient begin by clicking and dragging a line on your image The spot at which you first click will define the start of the gradient the spot at which you let go of the mouse will define the end of the gradient The distance between the two spots will define how quickly the gradient will transition and th...

Page 100: ...ove Tools are not accessible while working within the Browser To fill the current step s effect into the image or selection simply click on the icon To remove the current step s effect from the entire image or selec tion click on the icon Fill Remove Options Dialog The Fill Clear Options can be accessed by double clicking on the icon in the Toolbar OPACITY Changing the Opacity slider lets you cont...

Page 101: ...95 ...

Page 102: ...96 ...

Page 103: ... Bird s Eye Palette is also available when working in the Browser only while the Browser is set to the Light Table view mode While in the Light Table view mode you will see small rectangles that represent your images with a rectangle that displays the current position of the Browser on the Light Table You can also click and drag the rectangle to change the portion of the Light Table that is visibl...

Page 104: ...98 ...

Page 105: ...ndow Each histogram represents a bar graph of the total number of pixels that appear at different levels of luminosity The horizontal axis represents the luminosity level while the vertical axis represents the number of pixels at each luminosity level found within the current image The left side of the horizontal axis represents the darkest tones within the image while the right side represents th...

Page 106: ...d End text boxes Please note Values for the differ ent channels range from 0 to 255 with values for 12 and 16 bit images being scaled to fit in this range Double Threshold The Double Threshold checkbox enables you to determine the darkest and light est colors within the current image Check this box to turn on the Double Threshold effect This will add two sliders at the bottom of the Histogram wind...

Page 107: ...within the Watch Point section of the Photo Info Palette that corresponds to the Watch Point you wish to remove Color Model This pull down Menu enables you to select the color model used to describe the colors within the Watch Point section You can choose between the RGB and HSB color models Sample Size Use this option to change the number of pixels which are used in sampling for both the current ...

Page 108: ...102 C h ap ter 1 7 Ph oto In fo Please note Values for the different channels range from 0 to 255 with values for 12 and 16 bit images being scaled to fit into this range ...

Page 109: ...103 ...

Page 110: ...104 ...

Page 111: ...ta which can help you enhance the image Image Windows are displayed as long as Capture NX is not in Full Screen mode If you cannot see the Image Window around your image simply exit the Full Screen Mode by selecting Full Screen from the View Menu or by pressing the F key The Image Window Image Name Zoom Ratio File Size Color Profile Soft Proof ...

Page 112: ... Menu with the Color Profile feature described on page 157 Soft Proof The Soft Proof function enables you to preview the effect of an output profile on your image approximating the results you can expect from your printer The Soft Proof function provides you with controls to preview the use of different profiles It also allows you to set different parameters for the color management system to use ...

Page 113: ...that your printer can produce are shifted to the closest color possible This option preserves as many natural colors as possible and is often the best choice for printing photographs Absolute Colorimetric This rendering intent is similar to the Relative Colorimetric except that it does not map the white point of the image to the white point of the destination profile It is recommended that you use...

Page 114: ...108 ...

Page 115: ...or within the RGB HSB or LAB color spaces Additionally you are provided with swatches as well as memory colors to provide you with preselected colors The Color Picker Color Wheel Color Triangle LAB Selection Boxes HSB Selection Boxes RGB Selection Boxes Swatches Show Hide Triangle Memory Color Ranges Swatches Color Eyedropper Previous Picks Last Selected Current Color ...

Page 116: ...s with the middle of the bottom edge representing neutral gray RGB Selection Boxes The RGB Selection Boxes display the current color in Red Green and Blue You can change the targeted color by entering different values directly into the RGB Selection Boxes HSB Selection Boxes The HSB Selection Boxes display the current color in Hue Saturation and Brightness You can change the targeted color by ente...

Page 117: ...section provides you with a predetermined selection of swatches Simply select the swatch that contains the appropriate color for the current enhancement and then click OK within the Color Picker MEMORY COLOR RANGES The Memory Color Ranges represent four different ranges of color that contain memory colors Memory colors represent colors that you see on a regular basis such as the color of the sky t...

Page 118: ...112 ...

Page 119: ...mand O Mac OS Open With The Open With command enables you to open the current image with all of the current enhancements in a separate application You can select the alterna tive application that will open the image within the application preferences Open Folder in Browser Select this option to display a browser window to locate a folder to open the Capture NX Browser File Menu ...

Page 120: ...annels and is recommended for most images CMYK This color model saves your image infor mation with Cyan Magenta Yellow and Black color channels and is recom mended only if you will be saving your image for printing with a device that requires a CMYK image COMPRESSION Choose from two different compression options None This option does not compress the image information LZW This option employs a los...

Page 121: ... when saving the image in the JPEG format Shortcut Ctrl S Windows Command S Mac OS Save As The Save As feature enables you to save the current image into a different file with the ability to change the location the file name and file extension NEF COMPRESSION Choose whether or not you want to compress your NEF file Please note This option is only accessible if the NEF file created within your came...

Page 122: ...ality the larger the file size EMBED ICC PROFILE Check this box if you would like to embed the current profile in your image It is recommended that you leave this box checked unless your printer requests that you do not embed the color profile in the image ADVANCED The Advanced Show Hide Triangle provides with access to the Quality Slider Quality The Quality Slider provides you with more control o...

Page 123: ...Browser and selecting Print By selecting multiple images within the Browser and selecting print you can create Print Packages contact sheets or print multiple images in a batch After selecting Print from the File Menu the Print dialog will appear Within the Print dialog you will see a preview of the current image as well as options to alter the orientation and display of that image The following c...

Page 124: ...ath each image You can choose from three different sets of information Basic Information Basic contains the file name and capture date of the image Additional Information Checking the Additional Information checkbox will also add the camera name shutter speed aperture image size exposure mode and white balance for the image Detailed Information This option adds the metering mode exposure compensat...

Page 125: ...enables you to set up different Print Packages based on the desired size of the images Select this option and then choose from the desired print size from within the pop up Menu Please note The contents of the pop up Menu change based on the units of measurement set up within the Preferences ROTATE IMAGE S TO FIT Click on this checkbox to rotate the current image if the orientation of the image do...

Page 126: ...or drafts or proof sheets only Color Management Tab The Color Management tab enables you to set the Color Management options for the images when they are printed The settings within the Color Management tab default to the settings indicated within the Capture NX Preferences Please note If you assign color management within the print dialog it is very important that you turn off color management wi...

Page 127: ...uc ible by your printer All colors that are outside of the range that your printer can produce are shifted to the closest color possible This option preserves as many natural colors as possible and is often the best choice for printing photographs Absolute Colorimetric This rendering intent is very similar to the Relative Colorimetric except that it does not map the white point of the image to the...

Page 128: ...122 C h ap ter 2 0 File Me nu Exit Select this option to quit out of Capture NX Shortcut Ctrl Q Windows Command Q Mac OS Please note Within the Mac OS Exit can be found under the Capture NX Menu ...

Page 129: ...123 ...

Page 130: ...124 ...

Page 131: ... loss of image quality Shortcut Ctrl Z Windows Command Z Mac OS Redo The Redo feature becomes available after the undo command has been used and enables you to reapply anything that was undone with the undo command Shortcut Ctrl Shift Z Windows Command Shift Z Mac OS Cut The Cut command clears an object and places it within Capture NX s clipboard making that object accessible to paste The Cut comm...

Page 132: ... of the currently selected object The Duplicate command can make a copy of the following objects The current image Images within the Browser Selected Control Points Shortcut Ctrl D Windows Command D Mac OS Delete The Delete command removes the currently selected object The Delete command can be performed on the following objects Selected text Selected Control Points Images within the Browser Selec...

Page 133: ...n the Size Resolution dialog you can choose between one of two resize modes Change the Output Size DPI Within this mode you can adjust both the resolution as well as the final image size The first parameter that you change either the resolution or the final image size will simply redis tribute the currently available pixels If you then choose to alter the remaining parameter Capture NX will interp...

Page 134: ... sizes Resizing simply involves entering the largest allowable image dimensions width and height into the dialog windows It is recommended that you enter the same size into both windows based on the longest side of the image For instance if you want to resize a folder of images of varying dimensions to 4 x 6 enter 6 inches into both the height and width boxes This will ensure that both portrait an...

Page 135: ... Adjustments section of the base adjustments step for non RAW images Please note The two RAW sections Camera Adjustments and RAW Adjustments will still be displayed for RAW images D1X RAW DEFAULT Use this option to set the default size of NEF images taken with the D1X This option utilizes a unique resizing algorithm to resize D1X images to a 10 Megapixel equivalent image DEFAULT UNITS Use this opt...

Page 136: ...ration The Saturation rendering intent attempts to produce highly saturated colors but it may not produce accurate colors in a photograph Relative Colorimetric This rendering intent maps the white point of the image to the white point as defined by the printer profile and reproduces accurately all of the colors that are within the range of colors reproducible by your printer All colors that are ou...

Page 137: ...s defined in the Default RGB space PRINTER PROFILE This preference enables you to set the default profile to use for your printer as well as within the Soft Proof feature USE THIS PROFILE WHEN PRINTING Check this option to automatically change the color profile within the color manage ment section of the print dialog to the profile set with the Printer Profile option CMYK SEPARATION PROFILE This p...

Page 138: ...before displaying the result Since areas within a photo graph are generally made up of small variations of color selecting this option provides a more accurate rendition of the color of the targeted area 5x5 Average The 5 5 Average option samples a total of twenty five pixels in a grid of five pixels by five pixels and averages the colors of each pixel before display ing the result This option is ...

Page 139: ...ill open the fastest It is important to note that no unique information is stored within these cache files and if a cache file is replaced your image file will not lose any information or quality It will simply require additional processing in order to open which will take additional time You can alter the cache settings to change when cache files are created where the cache files are placed and h...

Page 140: ...ture NX will use for cache files You can then use the slider to change the amount of space available for the Capture NX cache system Next to the slider you will see the amount of space currently allocated to the Capture NX cache system along with an approxi mate number of images that can be stored within the space ...

Page 141: ...135 ...

Page 142: ...136 ...

Page 143: ... printer or monitor The Levels Curves feature provides you with controls to make tonal adjust ments to specific portions of the active image s tone range for either the entire image or to specific color channels making it possible to enhance the image while preserving detail Within the Levels Curves dialog you are provided with the option of first selecting which channel or portion of colors that ...

Page 144: ...he luminosity level while the vertical axis represents the number of pixels at each luminosity level found within the current image The left side of the horizontal axis represents the darkest tones in your image while the right side represents the lightest tones in the image based on the active channel selected When editing all channels simultane ously the histogram represents light ness from blac...

Page 145: ...lor when working on an individual color channel while redistributing all of the values to stretch the luminosity range to match the entire possible range of values It is recommended that you move the White Point Slider all the way to the left to match up with the right most informa tion from the displayed histogram This adjusts the current image so that the lightest values in the image match the l...

Page 146: ...t tone range while preserving details in shadows and highlights WHITE POINT DROPPER Clicking on this button will change the mouse cursor into a White Point Dropper cursor By then clicking on your image you will set the White Point Sliders for all three color channels to the value of the color selected by the White Point Dropper Use this tool along with the Double Threshold command from the Photo I...

Page 147: ... change the mouse cursor into a crosshair cursor By then clicking on your image you will add an anchor point to the curve at the location on the curve that represents the color that your mouse is hover ing over You can then use the newly created anchor point to enhance your image Ctrl Windows or Option Mac OS click to affect the current channel only RESET CURRENT CHANNEL Clicking on this button wi...

Page 148: ...our image or move the slider to the right to brighten the image Once you are satisfied with the results of the Contrast Brightness feature click on the OK button Simply click on the Cancel button to prevent this feature from affecting your image Auto Levels Use the Auto Levels feature to enable Capture NX to analyze your image in order to determine the correct adjust ments to spread the available ...

Page 149: ...e effect of the Contrast Brightness enhancement or click cancel to prevent this feature from affecting your image D Lighting D Lighting reveals details in shadows and highlights correcting for underexpo sure backlighting or insufficient flash without harming the properly exposed areas or introducing unwanted artifacts D Lighting can also help reveal detail in overexposed areas in brightly lit scen...

Page 150: ...mage Adjust Highlights Slider Move the Adjust Highlights slider to the right to reveal additional detail in the highlight areas of the active image Color Boost Slider Move the Color Boost slider to the right to increase saturation throughout the entire image Once you are satisfied with the results of the D Lighting feature click on the OK button If you want to cancel the D Lighting feature simply ...

Page 151: ...input luminos ity values to output luminosity values The Luminosity Histogram represents a bar graph of the total number of pixels that appear at different levels of luminosity The horizontal axis repre sents the luminosity level while the vertical axis represents the number of pixels at each luminosity level found within the current image The left side of the horizontal axis represents the darkes...

Page 152: ...ved by simply clicking and dragging the anchor point outside of the Luminosity Histogram The Master Lightness editor contains a number of additional controls Black and White output sliders The Black and White output sliders enable you to set the maximum and minimum brightness levels of the image By dragging the Black Output Slider up you lighten the darkest luminosity level in the image and by dra...

Page 153: ...above the Hue Map can be used to isolate and adjust the lightness of individual colors Clicking on the curve will create an anchor point Moving that anchor point upward makes colors in the affected portion of the color range brighter Taking that same anchor point and moving it downward makes the affected colors darker Using the Width slider increases or decreases the range of similar colors affect...

Page 154: ...kes the affected colors less saturated Anchor points can be removed by simply clicking and dragging the anchor point off the Hue Map Use the Width slider to increase or decrease the range of similar colors affected by the color identified with the anchor point The Output slider affects the satura tion of all of the colors throughout the image evenly Moving this slider up will increase the saturati...

Page 155: ...hin the Hue Map Rotation pull down Menu Superimposed above this Hue Map you are provided a Hue Curve that can be used to isolate and adjust the Hue of individual colors Clicking on the curve will create an anchor point Moving that anchor point will shift the colors in the affected portion of the color range to a differ ent color as represented within the Hue Map This change depends on the rotation...

Page 156: ...increase the brightness of the entire image CONTRAST Adjust this slider to the left to decrease the contrast of the entire image or to the right to increase the contrast of the entire image RED Adjust this slider to the left to remove red from the image which will cause the image to become more cyan Adjust this slider to the right to add red to the image which will also remove cyan from the image ...

Page 157: ... to prevent the Color Booster feature from affecting your image Please note The Auto button within the Color Booster is only available when selecting the Color Booster from the Color Light Adjustments sub step of the Base Adjustments step Saturation Warmth The Saturation Warmth feature was designed specifically to provide you with an efficient method of adjust ing both the saturation and warmth of...

Page 158: ...he Gaussian Blur enhancement RADIUS The Radius slider controls the intensity of the blur being applied to the image OPACITY The Opacity slider blends the Gaussian blur with the details in the image to provide you control over the balance of detail and the blur effect Combining a high radius with a low opacity creates a hazy soft focus effect while combin ing a low radius with a medium opacity prod...

Page 159: ...s recommended that you zoom your image to 100 while determining the amount of sharpening to apply to your image CHANNEL First select the channel that you wish to sharpen Additional channels may be selected later after you have modified the settings for the first channel By default the RGB option will be selected which enables you to sharpen all three channels Red Green and Blue of your image simul...

Page 160: ...effect on that channel by clicking on the button Once you are satisfied with the results of the Unsharp Mask feature click on the OK button If you want to cancel the feature click on the Cancel button Correct Color Aberration Control The Color Aberration Control feature can be used to adjust and control potential color fringes that can occur in photographs Color aberration is caused by the differe...

Page 161: ...n are more apparent at the edges of images To reduce pincushion distortion drag the Control Slider to the right To reduce barrel distortion drag the Control Slider to the left When correcting a significant amount of pincushion distortion the resulting image may become smaller than the original image If this occurs Capture NX will automatically fill the portion of the image frame that no longer con...

Page 162: ... Better Quality methods in the Method pull down Menu Select Faster for faster processing or Better Quality for a more precise noise reduction effect EDGE NOISE REDUCTION When you check the Edge Noise Reduction checkbox Capture NX will reduce noise artifacts around the edges of objects within the image resulting in more distinct outlines Once you are satisfied with the results of the Noise Reductio...

Page 163: ...log displays the current profile embedded within the image Choose between the two differ ent methods of altering the profile to color manage your image Apply Profile Choose Apply Profile to assign a profile to the current image This option is most often used when you would like to assign an input profile such as a profile you created for your camera to the image Please note When you apply a profil...

Page 164: ...t device s color profile To convert your image s profile to a different output profile first select the target profile from the Profile pull down Menu You are then provided with two additional controls to affect how the image is converted INTENT The Intent option lets you choose between four different rendering intents to apply to your image The different rendering intents control how colors from ...

Page 165: ...reproduce the results of the output device including the effect of a differ ent paper color USE BLACK POINT COMPENSATION Check this box to utilize Black Point Compensation This ensures that the black point from the image is mapped to the black point of your printer allowing the full color range of the printer to be used If your prints contain either gray shadows or too little detail try turning th...

Page 166: ...160 ...

Page 167: ...x Attached to the Color Control Point are four sliders representing Size Brightness Contrast and Saturation Moving any one of these sliders will change how that Control Point interacts with your image and that adjustment will update the values of that slider within the Color Control Point dialog Within the Color Control Point dialog are text boxes that repre sent the numerical values for each of t...

Page 168: ...or from the Color Picker The object targeted by the current Color Control Point is then changed to the color identified with the Color Picker Protect Details The Protect Details checkbox disables any changes currently being made by any Control Point on the targeted color Choosing this option enables you to prevent any adjustments from affecting the object identified by the Control Point The only c...

Page 169: ...rol Point Method pull down menu where you can choose from one of the available methods To utilize more than one Color Control Point Method on an image you must create a new step for each different method The different methods are Basic The Basic method is the fastest and most direct method to apply the handles from the current step to your image This method is recommended for web graphics and illu...

Page 170: ...Box Use the Reset button to return the settings of the Black Control Point to the default settings When you click on the Advanced button the advanced controls for the Black Control Point are displayed within the Black Point Dialog Box Within the Advanced area of the Black Point Dialog Box you have the option of changing the method of controlling the Black Control Point from controlling only the Lu...

Page 171: ...rgeted object not only to become white but also to neutralize the light tones of your image The White Control Point is not accessible while working within the Browser White points are normally set on what should be the lightest point of the image and are used to set one end of the dynamic range of the image The Double Threshold function within the Photo Info s Histogram section is designed specifi...

Page 172: ...ialog Box you can change between controlling the luminosity and controlling the individual red green and blue values of the White Control Point You can also choose to hide the White Control Point or to reset the White Control Point to the default settings Luminosity Mode The Luminosity Mode of the White Control Point always changes the color which is targeted by the White Control Point to a neutra...

Page 173: ...by right clicking Windows or control clicking Mac OS on the White Control Point and selecting Hide Each step may contain up to one Black and one White Control Point while allowing for an unlimited number of Neutral Control Points Neutral Control Point Neutral Control Points enable you to correct a color cast in your photograph by forcing the targeted color to become neutral or to become a defined ...

Page 174: ...values of your image It will affect only the relationship of colors in your image After placing a Neutral Control Point on your image you will be presented with a Control Point containing sliders for red green and blue values in addition to a Neutral Point dialog next to the Edit List By default all three sliders will remain equal relative to one another By chang ing these values you are in effect...

Page 175: ... the entire image correcting different objects and in the process removing multiple color casts Within the Neutral Point dialog you will find entry boxes to manually enter red green and blue values directly for that Neutral Control Point A Reset button is provided that enables you to return the settings of the Neutral Control Point to the default settings Additional controls for the Neutral Contro...

Page 176: ... for example place a Neutral Control Point on the sky click on the Color Picker color swatch open the swatches portion of the Color Picker and then select a color from the Sky memory color range This will remove any color cast from the image by removing the difference between the targeted color of the sky and the defined sky memory color from the entire image Show Selection The Show selection chec...

Page 177: ... Red Eye Control Point s effect by increasing or decreasing the Size slider Hide The Hide option completely removes the effect of the Red Eye Control Point temporarily This is helpful in comparing the before and after effect of the Red Eye Control Point on your image You can quickly access the Hide option by right clicking Windows or control clicking Mac OS on the Red Eye Control Point and selecti...

Page 178: ...172 ...

Page 179: ...fect your image Choose from Enhance Photo Black and White Sepia and Tinted Please note Only one of these modes can be applied to your image Enhance Photo Enhance Photo is the default method available to you when you open the Photo Effects feature This mode enables you to control the tonality in your image enhance dark tones and control the color balance of the entire image BRIGHTNESS The Brightnes...

Page 180: ... causes the Photo Effects feature to bring out additional detail in the shadows of the active image AUTO When you click on the Auto button Capture NX will analyze the image and determine a recommended setting for the Brightness slider It will also deter mine automatically if the Enhance Dark Tones option will be applied Black White The Black and White converts the current image to Black and White ...

Page 181: ...oto Effects feature to bring out additional detail in the shadows of the active image AUTO When you click on the Auto button Capture NX will analyze the image and determine a recommended setting for the Brightness slider It will also deter mine automatically if the Enhance Dark Tones option will be applied Sepia The Sepia mode emulates the darkroom effect of applying a sepia tone to a black and wh...

Page 182: ... left removes green from the filter causing the filter and the image to become more magenta Adjusting this slider to the right adds green to the filter and the image YELLOW BLUE The Yellow Blue Slider enables you to control the amount of yellow or blue in the filter being used Moving this slider to the left removes blue from the filter causing the filter and the image to become more yellow Adjusti...

Page 183: ...age Choose from Small Grain Medium Grain Large Grain and Noise Click OK to accept the Add Grain Noise effect or click Cancel to prevent the effect from being applied to your image Contrast Color Range The Contrast Color Range feature enables you to control the contrast between selected colors within an image without introducing a color cast to the entire image Using this tool isolates and identifi...

Page 184: ...to your image either selec tively or globally with one of the selec tive tools The Colorize enhancement is also the tool that is automatically applied when you select one of the selective tools in a step that has not already had an enhancement applied to it Within the Colorize enhancement you can select the color to be applied to the image either with an eye dropper which can sample any color of a...

Page 185: ...ion The higher the strength set in this slider the more intense the result of the filter will be BRIGHTNESS The Brightness Slider controls the overall luminosity of the image Move this slider to the left to darken the entire image or move this slider to the right to brighten the entire image CONTRAST Use the Contrast Slider to change the contrast of your image Moving this slider to the left will d...

Page 186: ...180 ...

Page 187: ...eries of settings from the current image simply select this option from one of the Batch Menu options To copy selected settings from the Edit List click to highlight a specific step or enhancement Hint You can copy more than one step at a time Hold the Control Windows or Command Mac OS and click to highlight multiple steps or enhancements You can also select a range of steps or enhancements by cli...

Page 188: ...Settings dialog opens you are presented with a representa tion of the current image s Edit List It is from this Edit List that you can select and identify which enhancements will be saved into a Settings File Within the Save Settings dialog you can select to save the IPTC data that was applied to the current image to save the various steps and enhance ments applied within those steps or to save th...

Page 189: ...es if you are in the Browser Alternatively you can apply the batch process to a specified folder by selecting Run Batch Process from the Batch Menu When applying batch processes to JPEG and TIFF files the Processing Queue will immediately become available Batch Process Alert Box When applying a batch process to NEF files Capture NX will identify any possi bilities for conflicts by presenting you w...

Page 190: ... of all of the enhance ments located within the Settings File You can choose to keep the original contents of the step to replace the contents of that step with any of the possibilities from within the Settings File or to delete that step entirely The Show Differences dialog always displays one additional step beyond the steps available within the target image You can use this additional step to a...

Page 191: ...shows a list of images that are currently waiting to be processed If you do not wish a particu lar image to be processed uncheck the box for that image LOG WINDOW The Log window contains a list of all of the images that have already been processed CLEAR FROM LIST The Clear From List button enables you to clear the highlighted image from the Queue window This is helpful if you do not want to proces...

Page 192: ...file format chosen EMBED ICC PROFILES The Embed ICC Profiles in images is only available when you have selected JPEG or TIFF as the file format to use Enable this setting to embed the current profile in the image while saving CLOSE WHEN DONE Check the Close When Done checkbox to cause the Processing Queue window to close when the batch process has completed NOTIFY WHEN COMPLETED This option will c...

Page 193: ...the new file name Batch Options The Batch Options dialog contains differ ent options that can be used to modify the contents of the Load Settings folder as well as batch processes that can be applied by Capture NX Manage Settings Files The Manage Settings Files enables you to determine which settings are displayed within the Load Settings Menu By default the Load Settings Menu displays all Setting...

Page 194: ...box if you would like to process the contents of the folder along with the contents of any folders within the targeted folder Delete Files From Folder After They Have Been Processed The Delete Files From Folder After They Have Been Processed option will delete the original files after the batch process has been completed APPLY SETTINGS Browse Click on the Browse button within the Apply Settings se...

Page 195: ...ir original folder FILE NAME The File Name section enables you to identify the naming convention to use when saving the images Rename By selecting Rename Capture NX will rename the images using the naming system found with the File Naming window Click on the Edit button to display the File Naming Dialog Please see page 186 for more infor mation on the File Naming Dialog Use Source File Name Select...

Page 196: ...utton to locate the folder that you would like Capture NX to monitor for new images to apply a batch process to Include Subfolders Check the Include Subfolders checkbox if you would like Capture NX to monitor the contents of any folders within the targeted folder as well as the contents of the targeted folder APPLY SETTING Browse Click on the browse button within the Apply Settings section to loca...

Page 197: ...ation section enables you to identify the location to use when saving the image Select Folder By choosing the Select Folder option you can manually identify the desti nation folder you wish to use for the images after the batch process Click on the browse button to identify the location to place the processed images Use Source Folder The Use Source Folder option will place the processed files in t...

Page 198: ... on the file format chosen EMBED ICC PROFILES The Embed ICC Profiles checkbox is only available when you have selected JPEG or TIFF as the file format to use Enable this setting to embed the current profile in the image while saving Once you have identified the parame ters to use for the Watched Folder click OK This will bring up the Processing Queue indicating that the current process is a Watche...

Page 199: ...193 ...

Page 200: ...194 ...

Page 201: ... of the image Show Selection The Show Selection option enables you to display the Selection for the current step The Selection displays where the current enhancements are being applied within the image due to changes made with the selective tools Additionally if you select a Control Point and then select the Show Selection feature that Control Point s Selection will be displayed The effect from th...

Page 202: ...ues will be displayed within the image window when this option is enabled That is only the pixels that contain a value of 255 will be displayed for each of the three channels The resulting image will contain white primary and secondary colors only The following table describes values these colors represent White This area contains values of 255 for the Red Green and Blue channels Yellow This area ...

Page 203: ...of 0 will be displayed for each of the three channels The resulting image will contain black primary and secondary colors only The following table describes values these colors represent Black This area contains values of 0 for the Red Green and Blue channels Blue This area contains values of 0 for the Red and Green channels Green This area contains values of 0 for the Red and Blue channels Red Th...

Page 204: ...n 0 Mac OS Fit to Screen Select this option to set the zoom ratio for the current image so that the entire image fits into the space available on your monitor Shortcut Ctrl 0 Windows Command 0 Mac OS Zoom In Select this option to zoom one step into the active image Shortcut Ctrl Windows Command Mac OS Zoom Out Select this option to zoom one step out of the active image Shortcut Ctrl Windows or Com...

Page 205: ...es you to compare the current state of the image with the original state of that same image Compare in Browser Use this option to compare between two three or four different images in the Browser Simply select the images in the Browser and select Compare in Browser from the View Menu This will display as many as four equally sized images within the Browser side by side While comparing the images y...

Page 206: ... With Original Use this option to compare the origi nal with the current state of the active image within the Edit mode Select this option from the View Menu when you are working on an image in the Editor and Capture NX will automatically open a duplicate window of the same image and resize it so that the two windows fit within the available space of your monitor The image either on the left or on...

Page 207: ...201 ...

Page 208: ...202 ...

Page 209: ...resizes and arranges all of the currently opened image windows over the top of one another so that each window is the same size and all of the windows appear within the space available on your monitor Tile The Tile option resizes and arranges all of Window Menu ...

Page 210: ...on from the Window Menu will make the Color Picker visible Edit List Selecting the Edit List option from the Window Menu will show the Edit List If the Edit List Palette is not visible it will make the Edit List Palette visible File Directory Selecting the File Directory option from the Window Menu will show the File Directory If the File Directory Palette is not visible it will make the File Dire...

Page 211: ...205 ...

Page 212: ...206 ...

Page 213: ...ill launch your Internet browser and provide you with links to the different Technical Support options available for Capture NX Follow one of those links to reach the online technical support options Please note Clicking on one of these options will require an Internet connection Show Welcome Screen Selecting the Show Welcome Screen option from the Help Menu will display the Welcome Screen This is...

Page 214: ...ut Capture NX The About Capture NX option shows you the version number of Capture NX which can be helpful when contacting technical support Please note Within the Mac OS the About Capture NX option can be found under the Capture window ...

Page 215: ...209 ...

Page 216: ...210 ...

Page 217: ...e zoom out tool Rotate 90 degrees Clockwise Ctrl R Command R Rotate 90 degrees Counter Clockwise Ctrl Shift R Command Shift R Crop C C Holding down the Alt Option key while in the middle of a crop shows the Crop Gridlines Color Control Point Ctrl Shift A Command Shift A Decrease Size of Brush Increase Size of Brush Softer Brush Shift Shift Harder Brush Shift Shift Plus Brush B B Holding down Alt W...

Page 218: ...s a Plus Lasso Select All Ctrl A Command A Show Lost Highlights Shift H Shift H Show Lost Shadows Shift S Shift S Full Screen F F Hide Palettes Tab Tab Levels Curves Ctrl L Ctrl M Command L Command M Open Ctrl O Command O Save Ctrl S Command S Save As Ctrl Shift S Command Shift S Print Ctrl P Command P Print Setup Ctrl Shift P Command Shift P Exit Ctrl Q Command Q Undo Ctrl Z Command Z Redo Ctrl S...

Page 219: ...Shift 1 Shift 1 Sort By Label Label 2 Shift 2 Shift 2 Sort By Label Label 3 Shift 3 Shift 3 Sort By Label Label 4 Shift 4 Shift 4 Sort By Label Label 5 Shift 5 Shift 5 Sort By Label Label 6 Shift 6 Shift 6 Sort By Label Label 7 Shift 7 Shift 7 Sort By Label Label 8 Shift 8 Shift 8 Sort By Label Label 9 Shift 9 Shift 9 Sort By Label Unlabeled Shift 0 Shift 0 Toggle Plus Minus Tool to Plus Toggle Pl...

Page 220: ...1 2 Profiles with a Gamma Value of 2 2 sRGB NKsRGB icm Windows Nikon sRGB 4 0 0 3001 Macintosh This RGB profile is used in the major ity of Windows monitors It closely resembles the RGB commonly used in color television and is also used in the digital television broadcasting system that is on its way to becoming the industry standard in the United States of America Software and hardware manufactur...

Page 221: ...s involved in desktop publishing The corresponding RGB setting in Adobe Photoshop 5 0 is SMPTE 240M the corresponding setting in Adobe Photoshop 5 5 or later Adobe RGB 1998 CIE RGB NKCIE icm Windows Nikon CIE RGB 4 0 0 3000 Macintosh A video color space profile established by the Commission Internationale de l Éclairage CIE While it boasts a fairly wide gamut it suffers from the drawback that the ...

Page 222: ... B Color temperature Value Apple RGB 6500 K D65 x 0 3127159 1 8 Trinitron x 0 625 0 28 0 155 y 0 3290015 y 0 34 0 595 0 07 Color Match RGB 5000 K D50 x 0 3457029 1 8 P22 EBU x 0 63 0 295 0 155 y 0 3585386 y 0 34 0 605 0 077 sRGB 6500 K D65 x 0 3127159 2 2 HDTV CCIR 709 x 0 64 0 3 0 15 y 0 3290015 y 0 33 0 6 0 06 NTSC 1953 Std Illuminant C x 0 3101 2 2 NTSC 1953 x 0 67 0 21 0 14 y 0 3162 y 0 33 0 7...

Page 223: ...et when Capture NX starts If an update is available the Nikon Message Center window will be displayed Click Available Messages to view the updates available for your Nikon digital products and software then click Install to download and install the desired updates To personalize your list of Nikon digital products or to view a list of the installed software supported under Nikon Message Center cli...

Page 224: ...anged for results identical to those obtained with the camera other settings may not produce the same results White Balance Mired Any given change in color temperature produces a greater difference in color at low color temperatures than it would at higher color temperatures For example at a color temperature of 6000 K a change of 1000 K produces almost no change in color while a change of the sam...

Page 225: ...rocessed or retouched Modes III and IIIa which are adapted to the sRGB color space are suited to nature or landscape shots that will be printed or used as is with little or no modification Exposure Compensation Highlights in images saved in Nikon Capture 4 4 or earlier with a negative value selected for exposure compen sation may display differently when opened in Capture NX Dust Off Cameras That ...

Page 226: ...ersion 1 10 or later and D100 Dust Off ref photos cannot be created with the D1 or with earlier versions of the camera firmware for the D1X and D1H Dust Off ref photos taken with the D100 D1X or D1H have the extension nef do not change this extension Camera Shake A slight amount of blurring caused by camera shake will not affect Dust Off ref photos Image Dust Off Image Dust Off only affects relati...

Page 227: ...F CMYK Images Images saved in TIFF format with CMYK image data cannot be reopened in Capture NX LZW Compression File size may sometimes increase when images are saved in TIFF 16 bit format using LZW compression JPEG Image quality may drop when images are saved in JPEG format No drop in image quality occurs when images are saved in NEF Lost Highlights and Shadows Before saving images in a format ot...

Page 228: ...ce the size of the image using the Size Resolution palette Size Resolution Please note The units for size and resolution are lost when settings are saved using the Save option Color Management Preferences Windows Multiple Displays In a multiple display environment choose a single profile suited to all displays Supported Color Profiles Capture NX supports only ICC International Color Consortium mon...

Page 229: ...esults that exceed the dynamic range of the RGB channels Auto Contrast Settings Auto contrast shadow and highlight settings can be adjusted in the Levels Grid tab of the Preferences dialog The Curve Edit Display Although values for input and output in the Curves palette range from zero to 255 eight bit precision familiar to users of other image editing software the results of any changes to curves...

Page 230: ...in which input and output values are the same Gamma can be set to any value between 0 05 and 6 00 Opening NEF Files Saved in Nikon Capture 3 5x or Earlier In Capture NX changes to color balance apply before changes to curves In Nikon Capture 3 5 and earlier changes to curves were applied before changes to color balance with the result that settings may change when the images saved in Nikon Capture...

Page 231: ...sharpening is to apply Color Aberration Control Lateral Chromatic Aberration The refractive index of the lens varies slightly with the wavelength color of light This results in changes in image magnification towards the edges of the image producing a phenom enon known as lateral or transverse chromatic aberration Batch Processing Before Using Batch Processing To ensure that desired results are ach...

Page 232: ...226 ...

Page 233: ... Paste Settings 181 Save Settings 182 Batch Process 188 Batch Process Alert Box 183 Batch Processing 23 225 Bird s Eye 13 97 204 Black White 174 Black and White Conversion 178 Black Control Point 81 163 Browser 14 29 204 Brush Options Dialog 91 C Camera Relationship 3 Camera Settings 14 39 204 Capture NX Interface 13 Cascade 203 Color 145 Color Aberration Control 154 225 Color Balance 54 150 Color...

Page 234: ...ance Photo 173 Enhancement Steps 59 66 Exiting Capture NX 20 122 Exposure Compensation 50 219 F Feather Control 64 File Directory 14 37 204 File Format Differences 21 File Menu 113 Fill Remove Tools 94 Filter Menu 173 Fisheye Lens 53 Fit Photo 128 Fit to Screen 198 Flip 127 Focus 152 Folder Menu 31 Full Screen 198 G Gaussian Blur 152 Gradient 93 Grip Edge 20 H Hand Tool 71 Help Menu 207 Hide Palet...

Page 235: ...nfo 14 99 204 Polygon Lasso tool 92 Preferences 128 Cache Settings 133 Color Management 130 General 129 Levels Grid 131 Print 23 117 222 Print Setup 116 Processing Queue 184 R RAW File Format Benefits 2 Rectangle Marquee tool 92 Red Eye Control Point 86 171 Reset Palette Location 204 Resize Control 20 Revert 116 Rotate 75 127 Rows 32 S Saturation 49 Saturation Warmth 151 Save 114 221 JPEG 115 221 ...

Page 236: ...ft Proof 106 Sort Menu 33 Straighten 75 Supplied Color Profiles 214 Supported cameras include 21 System Requirements 5 T Technical Support 207 TIFF 22 Tile 203 Tinted 176 Tone Compensation 48 Toolbar 13 71 75 81 85 89 204 U U Point Technology 1 9 Unsharp Mask 58 153 225 V Versions 221 Versions Menu 65 View at 100 198 View Menu 195 Vignette Control 52 220 W Watch Points 101 Watched Folder 190 Welco...

Page 237: ...231 ...

Page 238: ...232 ...

Page 239: ......

Page 240: ... O REPRODUCTION IN ANY FORM OF THIS MANUAL IN WHOLE OR IN PART EXCEPT FOR BRIEF QUOTATION IN CRITICAL ARTICLES OR REVIEWS MAY BE MADE WITHOUT WRITTEN AUTHORIZATION FROM 20 2 4 ...

Reviews: