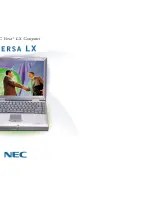
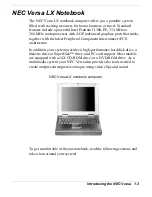
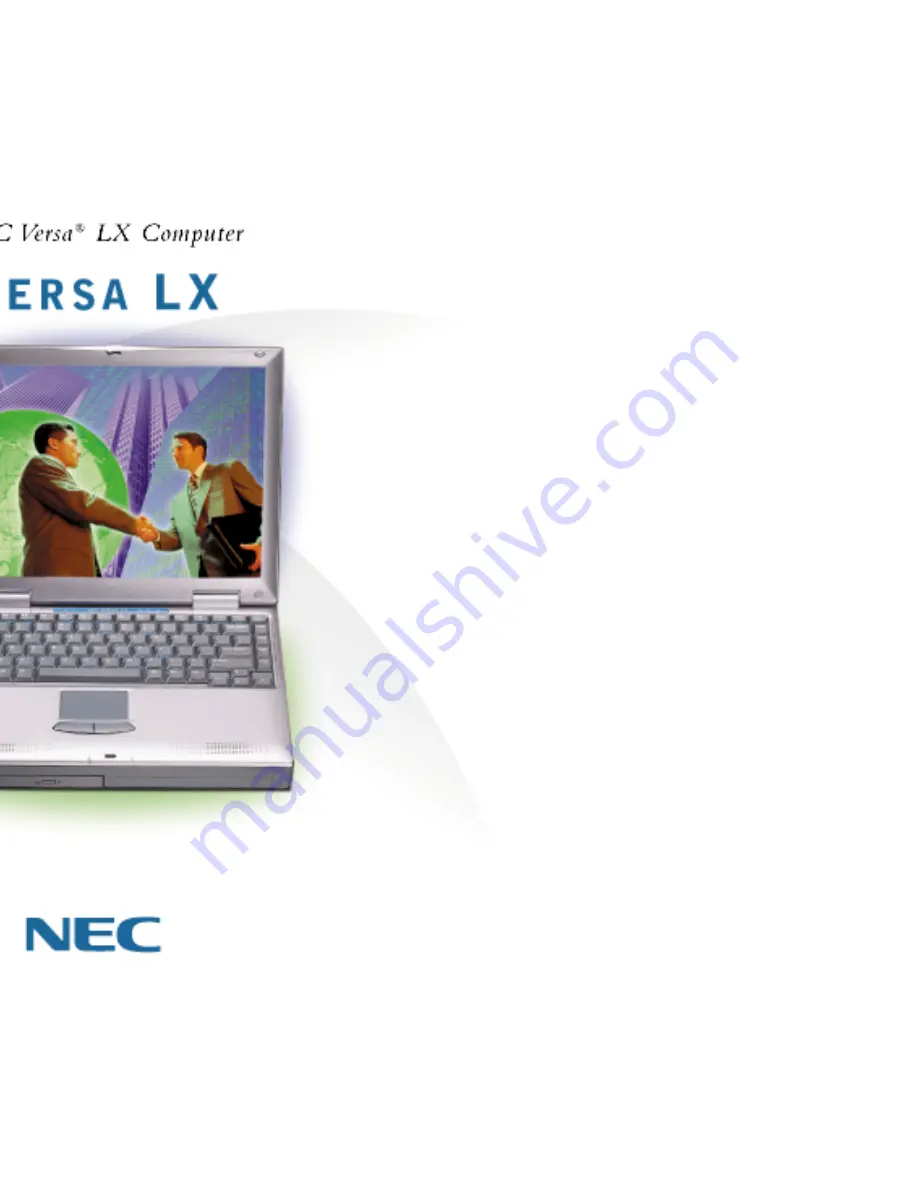
background image

Summary of Contents for Versa LX

Page 1: ......

Page 2: ...ctors such as system configuration customer data and operator control Since implementation by customers of each product may vary the suitability of specific product configurations and applications must be determined by the customer and is not warranted by NECC To allow for design and specification improvements the information in this document is subject to change at any time without notice Reprodu...

Page 3: ...ht Side of the System 1 13 Around the Bottom of the System 1 15 2 Getting Started Power Sources for Your NEC Versa 2 2 Using the AC Adapter 2 2 Powering On 2 4 Using the Main Battery Pack 2 5 Determining Battery Status 2 6 When to Change the Battery 2 8 Battery Handling 2 8 Replacing the Battery 2 9 Battery Precautions 2 11 Recharging Battery Precautions 2 12 Extending Battery Life 2 12 NEC VersaB...

Page 4: ...sing BIOS Setup to Set Power Management 3 15 Using the Save to File STF Feature 3 15 Updating the BIOS 3 17 Preparing the BIOS Update Diskette 3 17 Changing the Switch Settings 3 18 Performing the BIOS Update 3 18 Windows Introduction 3 19 Windows 98 3 20 Desktop Icons 3 20 Taskbar Icons 3 21 Windows 95 3 22 Windows NT 3 24 Service Pack 4 3 25 Adding Hardware 3 26 NEC Utilities 3 26 NEC Customize ...

Page 5: ... VersaGlide Tips 4 7 NEC Versa File Bay 4 7 SuperDisk Drive 4 8 Formatting Diskettes in the SuperDisk Drive 4 8 NEC VersaBay III 4 9 NEC VersaBay Swapping Utility 4 10 Installing the NEC VersaBay Swapping Utility 4 10 Using the NEC VersaBay Swapping Utility 4 10 Removing a Device from the VersaBay III 4 11 Installing a Device in the VersaBay III 4 13 Customizing Your System with the VersaBay III 4...

Page 6: ...s 4 37 Changing Switch Settings 4 38 5 Using External Devices External Monitor 5 2 Printer 5 3 Parallel Devices 5 3 Serial Devices 5 4 External Keyboard Mouse 5 5 External Bar Code Scanner 5 7 External Television Connections 5 7 External Audio Options 5 9 USB Devices 5 10 NEC Versa Dock 5 11 NEC Versa PortBar 5 11 PortBar Ports 5 11 6 Using Multimedia Audio 6 2 Recording 6 2 Optimizing the Sound Q...

Page 7: ...n Restore 7 12 Windows NT Recovery CDs 7 14 If You Need Assistance 7 15 8 Getting Services and Support Services and Support Contact Information 8 2 NECC Web Site 8 2 NECC FTP Site 8 3 NECC Support Services 8 4 Email Fax to Support Services 8 4 A Setting Up a Healthy Work Environment Making Your Computer Work for You A 2 Arrange Your Equipment A 3 Adjust Your Chair A 4 Adjust Your Input Devices A 4...

Page 8: ...viii Contents C Frequently Asked Questions External Mouse C 2 Display C 2 PC Cards C 3 Diskette Drive C 5 Booting C 7 Power Management C 7 Miscellaneous C 10 Glossary Index ...

Page 9: ...e full spectrum of the system Chapter 4 Using the Hardware for an understanding of NEC Versa features and functionality You ll learn how to swap VersaBay devices install PC cards and upgrade your system memory Chapter 5 Using External Devices to master procedures for connecting external devices like an external monitor headphones a printer or speakers Chapter 6 Using Multimedia for steps on integr...

Page 10: ...owing format Warnings alert you to situations that could result in serious personal injury or loss of life Cautions indicate situations that can damage the system hardware or software Note Notes give particularly important information about whatever is being described Names of keys are printed as they appear on the keyboard for example Ctrl Alt or Enter Text that you must type or keys that you mus...

Page 11: ...rd provides an easy to carry reference to LED meanings controls function key combinations and NECC help numbers The quick reference card does not ship with some systems purchased outside of the United States and Canada The NEC Help Center is a fully navigational HTML based document containing multimedia elements a full search capability and all of the information about your NEC Versa that you find...

Page 12: ... Versa Getting to Know Your NEC Versa NEC Versa LX Notebook Around the Front of the System Around the Back of the System Around the Left Side of the System Around the Right Side of the System Around the Bottom of the System ...

Page 13: ...mputer is ready to go To get started do the following Read Appendix A Setting Up a Healthy Work Environment for guidelines that help you use your computer productively and safely Information includes how to set up and use your computer to reduce your risk of developing nerve muscle or tendon disorders Take the online System Tour to get acquainted with the NEC Versa The System Tour is part of the N...

Page 14: ...th the latest Peripheral Component Interconnect PCI architecture In addition your system provides a high performance hard disk drive a diskette drive or SuperDisk drive and PC card support Most models are equipped with a 24X CD ROM drive or a DVD ROM drive As a multimedia system your NEC Versa also provides the tools needed to create and present impressive images using video clips and sound NEC Ve...

Page 15: ...EC Versa LX comes with a 1024x768 64K color LCD panel that you can adjust for a comfortable viewing position Depending on the model your system is equipped with a 13 3 inch color Thin Film Transistor TFT Extended Graphics Array XGA panel 14 1 inch Thin Film Transistor TFT Extended Graphics Array XGA panel To adjust the LCD panel brightness press the Fn F8 and Fn F9 functions keys For more details ...

Page 16: ...A Microphone B Operating Status LEDs Microphone A strategically positioned built in microphone allows you to record monophonic sound directly into your notebook computer See Chapter 6 Using Multimedia for details about recording Operating Status LEDs keeps you informed of your NEC Versa s current operating status See the following figure and list for each icon s meaning ...

Page 17: ...e NEC Versa writes data to or retrieves data from the internal hard disk drive a SuperDisk drive in the file bay or a device in the VersaBay III Caps Lock lights when Caps Lock is in effect Num Lock lights when Num Lock mode is active Scroll Lock lights when Scroll Lock is in effect Diskette Drive lights when the NEC Versa accesses the floppy diskette drive ...

Page 18: ... The built in sound system also supports 3D sound which simulates the latest surround sound technology NEC VersaGlide The NEC VersaGlide works like a standard computer mouse Simply move your fingertip over the VersaGlide to control the position of the cursor Use the selection buttons below the VersaGlide to select menu items VersaGlide settings and features are described in detail in Chapter 4 Key...

Page 19: ...hts green when the system is under AC power When the system is under battery power this LED lights to indicate the following Lights green when the system power is on Blinks green when the system is in Suspend mode Lights yellow blinks when in Suspend mode to indicate that battery power is at 8 capacity or less Lights amber blinks when in Suspend mode to indicate that battery power is at 3 capacity...

Page 20: ...or The primary battery is installed in the battery bay Lights green when the secondary battery is charging Blinks green to indicate an error The secondary optional battery is installed in the VersaBay III NEC VersaBay III A 24X CD ROM drive a SuperDisk drive or a DVD ROM drive comes installed in the NEC VersaBay III on the front of your system The VersaBay III lets you add options including an opt...

Page 21: ... D AC Power Port E External Monitor Port F Parallel Port G PS 2 Port PortBar Notch Use these notches to secure the PortBar to the back of the system Serial Port Use this port to connect an external modem or other serial device Expansion Port This port also called the Docking port provides a connection for NEC Versa LX options including the NEC Versa Dock and the NEC Versa PortBar Only dock the NEC...

Page 22: ...d Capabilities Port ECP The ECP standard provides you with a greater processing speed than the conventional parallel port It also supports Enhanced Parallel Port EPP bi directional and uni directional protocols PS 2 Port Use the standard PS 2 port to connect an external PS 2 style mouse or a PS 2 style keyboard to the system With an optional Y cable adapter you can connect both a mouse and a keybo...

Page 23: ...e Chapter 4 Using the Hardware PC card slots Provide two slots for inserting two Type II PC cards or one Type III PC card USB Port The Universal Serial Bus USB port allows you to connect up to 127 USB equipped peripheral devices printers monitors scanners etc to your NEC Versa TV Out RCA Port Lets you use a television set equipped with a standard RCA jack as an external monitor This port supports ...

Page 24: ...l headphones or speakers to your NEC Versa Plugging in headphones disables the built in system speakers Line In Lets you use another audio system like a home stereo as an input source Use a cable to connect to the Line Out port on the other audio system to record or play in stereo External Microphone MIC Allows you to connect an external microphone for monophonic recording or amplification through...

Page 25: ...ou cannot power off until you slide forward the Power Sleep button again to bring it out of Suspend mode In addition the Smart Power switch invokes an orderly shutdown in the Windows 98 and Windows 95 environments If you use the Power Sleep button to turn off your system while applications are running the Smart Power switch alerts the operating system The operating system prompts you to save all d...

Page 26: ...y Release Latch D VersaBay Release Lock E Battery Bay Height Adjustment Feet Allow you to modify the angle of the NEC Versa for easier viewing and typing Battery Bay Release Latch Allows you to release and remove the system s main battery NEC VersaBay III Release Lock and Latch Lets you unlock and remove the device currently installed in the bay Battery Bay Contains the system s main battery It is...

Page 27: ...2 Getting Started Power Sources for Your NEC Versa System Care Introducing the Software Traveling with your NEC Versa ...

Page 28: ...system Using the AC Adapter Use the AC adapter and power cable that came with your NEC Versa to run your computer on alternating current AC power or to recharge the battery pack Use the AC adapter whenever a wall outlet is nearby Keep the adapter connected whenever possible The AC adapter charges the battery when it is connected whether the NEC Versa is powered on or off Do not attempt to disassem...

Page 29: ...ce Connect the AC adapter as follows 1 Connect the AC adapter cable to the power port on the back of your NEC Versa 2 Plug one end of the AC power cable into the AC adapter and the other end into a properly grounded 120 or 240 volt wall outlet Note The AC power cable type that your system uses depends on the country where you are using it Contact the local dealer to purchase the correct power cabl...

Page 30: ...ith your Versa LX Although other adapters look similar using them can damage your system Powering On Power on the system as follows 1 Locate the latch on the front of the LCD panel slide it to the right and raise the panel 2 Locate the Power Sleep button and slide it toward the front of the system to turn on system power For additional information about Power control buttons and power LEDs refer t...

Page 31: ... in place for 4 or fewer seconds to put your system in Suspend mode Before using the Power Sleep button to put the system into Suspend mode set the System Switch BIOS parameter to Sleep button Remove the battery pack and replace it with a fully charged battery Leave the battery pack in the system and connect your NEC Versa to the AC adapter and a wall outlet If you connect the system to AC power a...

Page 32: ...attery Status You can determine battery status via the battery gauge LEDs on the front of the Lithium Ion battery that ships with your NEC Versa LX computer Lithium Ion battery A Battery Gauge LED B Alignment Groove C LED Status Button ...

Page 33: ...If the problem still persists contact NECC Technical Support In Windows 98 and 95 environments you can also use the power meter to determine battery status Just move the cursor over the power icon on the taskbar to display the remaining battery power In Windows NT environments in addition to the battery gauge LEDs use SystemSoft s PowerProfiler to determine battery status Click on the battery icon...

Page 34: ...loration warping Hot to the touch Strange odor Battery Handling Keep the following in mind when removing or replacing a battery Use only the battery designed for your system in the NEC Versa Mixing other manufacturers batteries or using a combination of very old and new batteries can deteriorate battery and equipment performance Turn off power to the system after use Keeping system power on can de...

Page 35: ...Also installing another manufacturer s battery or using a combination of very old and new batteries can deteriorate battery and equipment performance 1 Save your files exit Windows and put your system into Suspend mode or turn off system power 2 Close the LCD and turn the system over 3 Slide the battery release latch toward the back of the system and hold firmly A Battery Bay Release Latch ...

Page 36: ...battery 5 Insert the new battery as follows Locate the alignment groove on the edge of the battery Locate the alignment groove inside the battery bay Align the grooves on the battery with the grooves in the bay Slide the battery into the bay until securely locked into place Inserting the battery pack 6 Turn the system over ...

Page 37: ...over 140º F 60ºC may cause damage Do not drop or impact the battery Do not disassemble the battery Do not solder the battery Do not puncture the battery Do not use a battery that appears damaged or deformed has any rust on its casing is discolored overheats or emits a foul odor Keep the battery dry and away from water Keep metal objects away from battery connectors Metal objects in contact with th...

Page 38: ...While on the road it is important to be aware of the simple things you can do to extend the life of the system s main battery One way is to keep the brightness setting low Use the Fn F8 and Fn F9 function keys to control the brightness NEC VersaBay III The NEC VersaBay III Battery Pack provides a optional second Lithium Ion Li Ion battery to use in your NEC Versa LX computer Inserting a second ful...

Page 39: ...etely if the NEC Versa notebook remains unused for approximately two months Bridge Battery The bridge battery saves your system status in Suspend mode for up to five minutes This gives you time to install a fully charged battery or plug in AC power when your battery charge becomes low The bridge battery should be replaced only by an authorized NECC technician Connect your NEC Versa system to AC po...

Page 40: ...r and VersaBay III Avoid dropping or bumping the computer or the AC adapter Do not stack heavy objects on the computer the AC adapter or the battery packs Avoid moving the NEC Versa during system operation especially while the hard disk diskette drive or VersaBay III device is being accessed When using the AC adapter make sure the power source falls within the system s compatible range of 100 240 ...

Page 41: ...d wiping the display surface with abrasive material including rough fabric Do not use a cleaning solution this may damage the notebook s plastic If the AC adapter becomes extremely hot unplug the adapter and let it cool Keep the AC adapter away from the IR ports Storage Requirements Store the computer and AC adapter in an environment that meets the following conditions If the temperature of the NE...

Page 42: ... system as follows Never use harsh solutions household cleaners or spray cleaners that contain caustic materials on the NEC Versa computer These cleaners are usually high in alkalinity which is measured in pH Using these cleaners can cause the plastic surface to crack or discolor LCD screen Carefully wipe the LCD screen with a soft cloth or a screen wipe designed for that purpose Special screen wi...

Page 43: ... The NEC Versa LX computer makes a natural traveling companion Using a battery you can use the computer anywhere you go Here is some information you might find helpful when taking the NEC Versa on the road Carry an extra charged battery pack for additional battery power Check that you have everything you need before you leave on a trip Be sure you have all the necessary cables and accessories See ...

Page 44: ...s of Argentina Brazil India Madeira and South Africa To use your system overseas you need an adapter plug There are five different plugs available worldwide You can buy these at an electronics supply store Checklists The following checklists can help you prepare for your trip with your NEC Versa Look them over and use what fits your situation What to Take The following are what you should take wit...

Page 45: ...ged system Inspectors want to see the screen display a message The boot message is usually sufficient If your system is fully charged the inspection only takes a minute or so Otherwise be prepared to attach the AC adapter and power cable And if you don t have these the inspection might include a disassembly of the system Back up your NEC Versa s hard disk Insert a fully charged battery to make sur...

Page 46: ...3 Using the Software BIOS Setup Windows Introduction NEC Utilities NEC Help Center Software Applications and Drivers ...

Page 47: ...ss F2 when the following prompt appears Press F2 to enter Setup When you press F2 to enter BIOS Setup the system interrupts the Power On Self Test POST and displays the current CMOS RAM settings If the system detects an error during POST it prompts you with a double beep and a message Press F1 to resume If you press F1 the system enters BIOS Setup automatically If you want to fix the error careful...

Page 48: ... to the following BIOS Setup Main Menu Use the up and down arrow keys located on the lower right corner of the keyboard to toggle through the BIOS Setup menu items How to Use BIOS Setup The following sections describe how to use BIOS Setup including these topics Looking at screens Using keys Checking and setting system parameters ...

Page 49: ...rea lists parameters and their current settings Available Options and Help The right side of the screen This area lists alternate settings and Help text for each parameter Key Legend The bottom right corner of the screen These lines display the keys that move the cursor and select parameters Options that are grayed out are not available for the current selection ...

Page 50: ...rom hour to minute to second ESC Exits the current screen and returns to the Main Menu screen From the Main Menu screen displays the prompt Quit without saving F3 F4 Changes the screen color F10 Saves and exits the BIOS setup utility Checking Setting System Parameters See the following table for a list of parameters their factory default settings and alternate settings A description of each settin...

Page 51: ...Defined CDROM SuperDsk Not installed 32 Bit Mode On Off Boot Sector Virus Protection Disabled Enabled DS VersaBay 1 Auto User defined CDROM SuperDsk Not installed Docking Station IDE 1 Auto User defined CDROM SuperDsk Not installed Advanced CMOS Setup Video Out Type NTSC PAL LCD Panel View Expansion On Off PS 2 Port Warm Swap Enabled Disabled Internal Mouse Enabled Disabled Graphics Aperture Size ...

Page 52: ...n Off 1 2 6 8 10 15 min Auto Suspend Timeout 4 10 minutes Off 5 15 20 25 30 min LCD Suspend Disabled Enabled Suspend Option Suspend STF Auto Save to File Enabled Disabled Panel Brightness Auto User Defined Suspend Warning Tone Enabled Disabled Remote Power On Enabled Disabled Resume Signal PME RI Wake Up Alarm Disabled Enabled Resume Alarm Time 5 Off Set time in 5 min increments when Wake Up Alarm...

Page 53: ...ral Setup Internal Hard Drive Enabled Disabled USB Controller Disabled Enabled Serial Port Auto Disabled PnP OS Setup 7 COM1 IRQ4 COM2 IRQ3 COM3 IRQ4 COM4 IRQ3 Parallel Port Auto Disabled LPT1 LPT2 PnP OS Setup 7 Parallel Mode ECP Uni Directional Bi Directional EPP IR Serial Port Disabled Auto PnP OS Setup 7 COM2 IRQ3 COM3 IRQ4 COM4 IRQ3 1 These setup items are only visible when system is docked 2...

Page 54: ...d to field Use the PgUp or PgDn key to change the numbers within each field System Memory Displays the amount of system memory currently installed in your system Time Sets the time enter the current hour minute and second in hr min sec 24 hour format To set the time use the Tab or arrow keys to move from field to field Use the PgUp or PgDn key to change the numbers within each field Diskette Drive...

Page 55: ...assword Establishes password protection for entering the BIOS setup utility booting the system and resuming from suspend Change User Password Establishes a user password once a Supervisor password is set Boot Password Required Indicates whether or not a password is required during system boot Resume Password required Indicates whether or not a password is required during system resume Boot Passwor...

Page 56: ...rformance with only minimal power conservation Longest Life provides the maximum amount of power savings Off disables power management and all device timeouts Custom lets you define your own power management configuration by selecting values for specific device timeouts Custom lets you set the following timeouts CPU Speed Control Sets CPU performance at one of four levels Hard Disk Timeout Sets th...

Page 57: ...on The system reads the saved file and sets up your system accordingly If Auto Save to File is set to Off and the save to file area is present on your hard drive pressing the Fn Power Sleep key combination puts the system into Save to File mode Before using the Power Sleep button to put the system into Suspend mode set the System Switch BIOS parameter to Sleep button For details about creating the...

Page 58: ... devices and whether or not the system attempts to boot from a device other than those specified Other Boot Devices Allows you to specify IDE devices as bootable devices Peripheral Setup The Peripheral Setup menu displays the connection locations between the system and the Input Output I O ports This menu also lets you specify different port assignments as needed Note If you disable a device in Pe...

Page 59: ... battery is conditioned to recharge to its full capacity To recharge the battery connect your NEC Versa to AC power This process may take up to four hours to complete Auto Configuration with Defaults Loads default settings Save Settings and Exit Accepts changes made to current settings saves to CMOS and exits BIOS Setup Exit Without Saving Reverts to previously selected settings and exits Setup Pa...

Page 60: ...hile on the road or traveling short distances Custom Lets you decide Set power management levels according to your own needs and present environment Off Works well in an office environment while powering your NEC Versa with AC power Using the Save to File STF Feature STF protects the integrity of your working files For example if you are called away from your NEC Versa and Suspend mode is selected...

Page 61: ...utomatic and two manual After 30 minutes of inactivity your NEC Versa automatically invokes STF provided you have configured STF in the BIOS Setup utility You can manually invoke STF by Pressing Fn Power Sleep simultaneously before you leave your NEC Versa Before using the Power Sleep button to put the system into Suspend mode set the System Switch BIOS parameter to Sleep button Selecting Start Su...

Page 62: ... If you are informed that the default BIOS needs an update contact the NECC Support Services at 800 632 4525 Fax 801 981 3133 or access the web site www nec computers com to obtain a copy of the BIOS update Note If you purchased and are using this computer outside the U S or Canada please contact a local NECC or dealer in your country Only use the BIOS upgrade diskette for your specific model and ...

Page 63: ...witch 5 to ON before performing the BIOS update For details about setting the switches see the section Switch Settings in Chapter 4 Performing the BIOS Update Use the following procedure to perform the actual BIOS update 1 Make sure that the computer is operating under AC power is undocked and that the power is off Insert the BIOS Update diskette into the file bay drive 2 Power on the computer wit...

Page 64: ...utility updates the BIOS Power off your computer The next time you power on your computer you will have the latest NEC Versa LX computer BIOS revision level 8 Enter Setup to restore the default parameter settings 9 Be sure to modify any custom settings that you may have configured 10 Be sure to change switch 5 back to OFF after completing the BIOS update For details about setting the switches see ...

Page 65: ...Set Up the Microsoft Network Provides a setup program that allows you to sign up for the Microsoft Network If you already have an account use this interface to sign on to the Microsoft Network Network Neighborhood Appears when your computer is connected to a network Use the network neighborhood to browse through the computers in your workgroup and the computers in the entire network My Briefcase P...

Page 66: ...NEC Customize Gives you the option to launch the Application and Driver CD access the IR setup utility or install the NEC VersaBay Swapping utility Taskbar Icons With Windows 98 a number of icons appear on the taskbar Use the cursor to hover over the icon and display its function right click the icon to display its menu options or double click the icon to launch it The following icons normally app...

Page 67: ...ttings Control Panel Mouse Volume Control Adjusts the volume and speaker balance when you play audio files Also access Volume Control under Start Programs Accessories Entertainment Volume Control ATI Allows you to modify display and icon settings as well as desktop schemes Lets you launch any installed ATI programs Time Clock Allows you to adjust the time and date rearrange active windows on your ...

Page 68: ...s available today For a fee online services give you access to the Internet email the world wide web travel information news reports and more Note Before choosing and registering for an online service you must connect an optional modem to your system and to a working phone line The phone line must be analog If you are unsure what type of line you have call your local phone company If you are using...

Page 69: ...desktop to maneuver a taskbar for quick navigation between open windows and more The following icons appear on the desktop My Computer Provides access to drives printers the Control Panel and network features Network Neighborhood Shows you the network integrated LANs and WANs Inbox Lets you access the Microsoft mail software and services Internet Explorer Allows you to browse the internet or view ...

Page 70: ... important to reinstall Service Pack 4 after introducing new hardware or software To reinstall Service Pack 4 double click the sp4i386 exe file located in the C SP4 directory on your hard disk drive and follow the on screen instructions When running sp4i386 exe DO NOT replace the file pcmcia sys and DO NOT overwrite newer files installed by some applications When running sp4i386 exe be sure to sel...

Page 71: ...the Using the Product Recovery CD in Chapter 7 NEC Utilities NECC provides several programs and routines designed to make your NEC Versa run more efficiently The NEC utilities include NEC Customize Utility HDPREPEZ Utility NEC Customize Utility In Windows 98 systems Windows 95 systems and Windows NT systems the NEC Customize utility gives you the option to install or launch NEC custom wallpaper Wi...

Page 72: ...n of each option when the option is highlighted The Launch button initiates a selected option when clicked The More Info button provides an overview of the NEC Customize utility The Exit button closes the NEC Customize utility Using the NEC Customize Utility Follow these steps to use the NEC Customize utility 1 Double click the NEC Customize icon 2 From the display window select the desired option...

Page 73: ...yond the factory installed base memory Follow these steps to run the HDPREPEZ utility 1 Power off and restart your NEC Versa 2 At the statement Starting Windows 98 or 95 press F8 3 From the Startup menu select the Safe Mode Command Prompt Only option 4 Enter MS DOS At the c prompt type cd necutils hdprep and press Enter to change to the necutils hdprep directory 5 Type HDPREPEZ and press Enter The...

Page 74: ...ing Multimedia Solving System Problems Setting Up a Healthy Work Environment System Specifications Service and Support includes Chapter 8 Getting Services and Support from the printed user s guide FAQs Frequently Asked Questions provides answers to the questions that NEC Versa users most frequently ask Software Applications and Drivers A variety of software applications and drivers are provided on...

Page 75: ...ed here is current at the time of printing and subject to change without notice Using the Application and Driver CD Use the Application and Driver CD to install applications drivers utilities Internet browsers and the online NEC Help Center Launching the Application and Driver CD Follow these procedures to launch the Application and Driver CD using NEC Customize Windows 98 and Windows 95 Environme...

Page 76: ...e Documentation Description Located in the bottom portion of the dialog box the text describes the selected or highlighted software category or application driver etc Install Clicking the Install button installs the selected software Exit Clicking the Exit button closes the Application and Driver CD dialog box Once the Application and Driver CD dialog box appears follow these steps to install the ...

Page 77: ... click OK and close the Control Panel window Partition Magic Dividing a hard disk drive into several partitions lets you efficiently organize operating systems programs and data PowerQuest s Partition Magic allows you to optimize hard disk drive space with an easy click of the mouse Visually create format shrink expand and move hard disk partitions in minutes Using Partition Magic Your NEC Versa W...

Page 78: ... Product Recovery CD for Windows 98 or 95 The partition restore process reinstalls the operating system and related drivers to drive C For details on using the Product Recovery CD see Chapter 7 Solving System Problems Intel LANDesk Client Manager Intel LANDesk Client Manager provides the capability for managing a variety of components within a PC system These components include network interface c...

Page 79: ...out more about Intel LANDesk Client Manager capabilities and uses refer to the online help that is available when you open Client Manager Note During the setup and installation of LANDesk Client Manager you may be prompted to install Microsoft s Internet Explorer Be sure to install Internet Explorer before installing LANDesk Client Manager After Internet Explorer is installed you must run the LAND...

Page 80: ...on solution that enhances your productivity by letting you synchronize all your key data With Intellisync for Windows you can Synchronize files drives and directories on two computers or in different partitions on a single computer Synchronize data between two Personal Information Managers PIMs Copy and move files on a remote system using an infrared device or a parallel or serial cable Control ac...

Page 81: ...ting conferencing broadcasting and web authoring capabilities Netscape Navigator Netscape Navigator is one of the most popular software packages for browsing information on intranets or the Internet Information tools simplify access to favorite sites and provide one click access to Internet searches Navigator s features include technology that allows you to manipulate and move images and Java appl...

Page 82: ...sing the Hardware LCD Panel Keyboard NEC VersaGlide NEC Versa File Bay SuperDisk Drive NEC VersaBay III 24X CD ROM Drive DVD ROM Drive PC Cards IR Port Increasing System Storage and Memory Switch Settings ...

Page 83: ...n To adjust the panel s brightness use the Fn F8 and Fn F9 function keys If the LCD panel backlight turns off when you attempt to close the panel toggle the Fn F3 function key or close and open the panel to turn on the backlight Keyboard The NEC Versa keyboard is equipped with many features These include Function keys Numeric keypad Cursor control keys Windows keys Control keys Typewriter keys ...

Page 84: ...l functions seven of which are printed in blue on the key Function keys are application driven See the specific application s user guide for information about how each function key works within the application you are using The following function key combinations are preprogrammed for the NEC Versa LX computer Fn F3 toggles between four video modes LCD CRT both LCD and CRT or TV out Fn F4 sets sta...

Page 85: ...ssing the right control key for support of IBM 327x connections Numeric keypad Pressing NumLock on the keyboard activates the numeric keypad numbers and functions printed in blue on the keys The keypad lets you type numbers and mathematical operands as you would on a calculator The keypad is ideal for entering long lists of numbers When you press NumLock again the keys revert to their normal funct...

Page 86: ... used to enter text and characters Keys with blue printing on them behave differently when combined with control keys or the Fn key NEC VersaGlide The NEC VersaGlide is an easy way to control the cursor with your finger Lightly glide your finger across the NEC VersaGlide and the cursor follows The NEC VersaGlide provides standard mouse functionality plus more VersaGlide features include the Single...

Page 87: ...mouse driver The NEC supplied mouse driver provides the VersaGlide functionality described in this section Making VersaGlide Adjustments The NEC VersaGlide offers a number of options that let you customize how it functions The options let you control the cursor speed select button orientation enable or disable tapping define auto jumps enable easy scrolling and configure gestures to initiate selec...

Page 88: ...aGlide keep your shoulders and arms as relaxed as possible Take regular breaks from the computer to rest your eyes Perform stretching exercises to relax your fingers hands wrists forearms and shoulders See Appendix A Setting Up a Healthy Work Environment for more information NEC Versa File Bay The NEC Versa File Bay is the bay located at the rear of the system s right side Your NEC Versa ships wit...

Page 89: ...k drive A Emergency Eject Hole B Release Button C Status LED Formatting Diskettes in the SuperDisk Drive When formatting a diskette in the SuperDisk drive while in DOS mode you may encounter the following error messages For 720 KB and 1 44 MB diskettes the error message states Invalid media or Track 0 bad disk unusable Extended Error 1g format terminated For a 120 MB SuperDisk the error message st...

Page 90: ...ows you to remove and replace a device while your NEC Versa is in a suspend state For details about using the warm swap utility refer to the section NEC VersaBay Swapping Utility later in this chapter Locating the VersaBay III A VersaBay III In addition to the CD ROM drive SuperDisk drive or DVD ROM drive the VersaBay III accepts the following options a second battery pack a second hard disk drive...

Page 91: ...this chapter Once the swapping utility is installed on your system a small icon appears in the lower right hand corner of the Windows taskbar Moving your cursor over the icon displays information about the VersaBay III The balloon message that appears indicates if the bay is empty or if a device is installed Because warm swapping is only supported for the CD ROM drive SuperDisk drive DVD ROM drive...

Page 92: ...ice and asks you if you want to continue Press Yes to put your system into a suspended state 5 Once your system is in a suspended state remove the device from your computer Insert the new device while your system is still in a suspended state 6 To resume your system after removing and or installing a device slide the Power Sleep button toward the front of the system References to the drive letter ...

Page 93: ...Close the LCD panel and turn the system upside down 3 Locate the VersaBay III release lock and release latch on the bottom of the unit VersaBay III release latches A VersaBay Release Lock B VersaBay Release Latch 4 Slide the lock to the unlocked position before releasing the latch 5 Slide the latch toward the battery bay and hold it ...

Page 94: ...ice Installing a Device in the VersaBay III Use the following steps to install a device in the VersaBay III Your system must be in a suspended state to use the utility or powered off before removing or inserting devices in the VersaBay III 1 Use the NEC VersaBay Swapping Utility to put your system into a suspended state or power off the system 2 Close the LCD panel and turn the system upside down ...

Page 95: ...unlocked position if necessary 5 Slide the latch toward the battery bay and hold it 6 Align the device in the VersaBay III and push it in until it locks into place 7 Slide the lock back to the locked position Inserting the CD ROM drive 8 Turn the system over and open the LCD panel 9 Press the Power Sleep button to resume operation ...

Page 96: ... 8 in Installing a Device in the VersaBay III 4 Once you power on the system automatically recognizes the newly installed hard drive 24X CD ROM Drive Your NEC Versa may ship with a 24X CD ROM drive that features the latest in CD ROM technology The CD ROM drive is assigned an available drive letter Use the CD ROM drive to load and start programs from a compact disc CD You can also use the CD ROM dr...

Page 97: ... Release Button ejects the CD tray Press this button when power is on to insert a CD into or remove a CD from the drive Status LED lights during data read operations Do not eject the CD or turn off the NEC Versa when the indicator is lit CD Loading To insert a CD into the CD ROM drive follow these steps 1 Press the Release button The CD tray emerges a short way out of the drive door 2 Gently pull ...

Page 98: ... brush the cloth from the center of the disc toward the edge Avoid using benzene paint thinner record cleaner static repellent or any other chemical on the disc Chemicals and cleaners can damage the disc Changing the Auto Play Setting Your system may not be configured to allow a CD to automatically play upon insertion Although this feature makes using your CDs very convenient it may interfere with...

Page 99: ...ification 8 Select OK twice to accept the settings in the Settings tab and exit the Properties window 9 To activate the new setting reboot the system when prompted DVD ROM Drive The DVD ROM drive offers many improvements over the standard CD ROM technology including superior video and audio playback faster data access and greater storage capacities The drive uses the latest DVD technology which re...

Page 100: ...ional physical component that protrudes beyond the traditional card size The extension can be as large as 40 mm deep by 9 65 mm high This extension provides room for additional electronics as well as a location for external connectors Type III Cards Type III cards are thicker 10 5 mm than Type II cards and allow no connections Type III card uses include advanced function I O cards with additional ...

Page 101: ...quipment Always insert the fax modem card before using your fax modem software application If you start the application before inserting the fax modem card the application typically does not find the card PC Card Modems You can use a PC card modem with your NEC Versa to communicate with others via fax email or connect to an online service or bulletin board Follow these steps to connect your system...

Page 102: ...l Positioning System GPS enables the tracking of remote units for example delivery trucks Serial adds an extra serial communications port Multimedia combines animation and sound Audio enables the use of sound for example in voice mail PC Card Slots Your NEC Versa LX notebook integrates two CardBus slots for inserting two Type II PC cards or one Type III PC card The 32 bit CardBus also has zoomed v...

Page 103: ...ou turn off the sound through the function keys or volume control no sound is emitted Other tone sequences such as high then low tones indicate that the card is inserted but the card type is unknown Inserting a card 3 Use the software preinstalled on your system to check PC card slot availability In Windows 98 or 95 look for the PC Card icon in the control panel or on the right side of the taskbar...

Page 104: ...ve the card 4 Press the button on the side of the PC card in the slot IR Port The IR port on the left side of your system lets your NEC Versa LX computer communicate with other devices that also use infrared technology The IR port is Infrared Data Association IrDA compatible You can easily transfer files between your NEC Versa and an IR equipped desktop or print to an IR equipped printer without u...

Page 105: ... IR Port For optimal performance when using the IR infrared port for file transfer printing and other infrared communication install the required drivers and applications Check that the IR port is enabled via the BIOS Setup utility Windows NT or the Customize icon Windows 95 Use the NEC Versa LX Application and Driver CD that ships with your NEC Versa LX system to install the following IR drivers ...

Page 106: ...etup utility windows displays 4 Select Enable and click OK A message displays indicating that you must reboot your system TWICE to fully enable the IR port 5 Click OK to reboot your system Be sure to reboot your system a second time before attempting to use the IR port for infrared communication 6 Click Exit to close the NEC Customize utility window Windows NT Systems In Windows NT enable the IR p...

Page 107: ... change you may need to add an optional hard disk drive with a greater capacity or additional memory Read the following sections to learn how to install an optional hard disk drive or a memory module Hard Disk You can increase the system s storage capacity by replacing the standard hard disk drive or adding a second hard disk drive in the VersaBay III Adding a second hard disk drive is described i...

Page 108: ...e 4 27 3 Slide the battery release latch toward the back of the system and hold firmly A Battery Release Latch 4 Continue to hold the battery release latch as you slide the battery out of the system Removing the battery ...

Page 109: ...our finger in the center notch of the hard drive lever and pull up the lever Be sure that both sides of the lever are raised If you encounter any resistance when lifting the lever carefully loosen both sides of the lever before lifting Hard Disk Drive in the drive bay A Screw B Hard Disk Drive Lever C Hard Disk Drive ...

Page 110: ...of the center notch Pull the drive toward the open side of the battery bay Do not apply pressure to the drive surface as you pull Disconnecting the drive Once the drive is disconnected use the lever to lift the drive out of the system Once removed only handle the drive by its sides Lifting the drive out of the bay ...

Page 111: ...er the new drive into the drive bay Lowering the drive into the bay Align the drive connector with the connector in the drive bay Pressing against the outer edge of the lever slide the drive toward the connectors and push firmly to secure the connection Do not apply pressure to the drive surface as you push Connecting the drive A Drive Connectors ...

Page 112: ...ing the Hardware 4 31 Press down on both sides of the drive lever to lock it into place Replace the screw to secure the hard disk drive Securing the drive A Screw B Hard disk drive lever C Hard Disk drive ...

Page 113: ...battery bay until securely locked into place Inserting the battery pack Memory Module Installation Your NEC Versa LX computer comes standard with 64 megabytes MB of random access memory RAM depending on your model You can increase system memory to a maximum of 256 MB depending on your model The RAM combinations vary depending on which two of the listed single bank SO DIMMs are used 32 MB memory mo...

Page 114: ...ry module involves the following procedures removing the keyboard retainers lifting and moving the keyboard out of the way installing the SO DIMM reassembling the unit Before handling any internal components discharge static electricity from yourself and your clothing by touching a nearby metal surface Use the following steps to install a memory module 1 Make sure that the system is powered off an...

Page 115: ... the system and remove Removing the keyboard retainers 4 Gently lift up the edge of the keyboard nearest the LCD and slide the keyboard toward the LCD screen to release the tabs that secure it Be careful not to disconnect the keyboard or keyboard cable entirely from the system Positioning the keyboard ...

Page 116: ... the SO DIMM SO DIMM features A Connectors B Alignment Key 7 Locate the SO DIMM expansion port and proceed as follows Hold the SO DIMM at a 45 degree angle and align the SO DIMM contacts with the socket in the system Push the connector into the socket Press down on the edge of the SO DIMM opposite the contacts until the lock tabs on the sides snap into place securing the module Installing the SO D...

Page 117: ...ng on the edge of the SO DIMM When the edge of the SO DIMM pops up and is at approximately a 60 degree angle pull the SO DIMM from the socket Removing an installed SO DIMM Note The system switches are also located underneath the keyboard Therefore if you need to set any system switches you might want to do so while the system is already disassembled The system switches are defined in the following...

Page 118: ...witch A six or four position dip switch is located underneath the keyboard The following list identifies each switch setting and its function Switch 1 Password Override Switch The default setting is OFF If you forget your password and cannot access the data on your NEC Versa change the setting to ON and your current password is erased Switch 2 Keyboard select Default is ON for U S 85 key keyboard ...

Page 119: ...ating your BIOS change the setting to ON Switch 6 Logo select Default is OFF for U S Default Switch Settings Changing Switch Settings Use the following steps to change switch settings 1 Make sure the system is powered off and that no peripheral devices are attached 2 Open the LCD panel ...

Page 120: ...ently lift up the edge of the keyboard nearest the LCD and slide the keyboard toward the LCD screen to release the tabs that secure it Be careful not to disconnect the keyboard or keyboard cable entirely from the system 5 Gently rest the keyboard on top of the base unit to view and access the dip switch block Be careful not to twist or disconnect the keyboard cable ...

Page 121: ...g a fine tipped object change the appropriate switch to the required setting See Switch Settings for dip switch functions and settings Never use a pencil to change switch settings Residue from the pencil can damage the system Password Override Switch set to On ...

Page 122: ...ll replace SO DIMM modules you might want to do so while the system is already disassembled 7 Reassemble the system as follows Lift up the keyboard and align the tabs on the front of it with the grooves in the system Reseat the keyboard in its original position Slide the keyboard retainers back onto the system Reassembling the system ...

Page 123: ...assword and cannot access the data on your NEC Versa change the setting to ON and your current password dissolves Switch 2 Keyboard select Default is ON for U S 85 key keyboard Switch 3 Reserved for factory use Default is OFF Switch 4 Reserved for factory use Default is OFF Default Switch Settings Changing Switch Settings Use the following steps to change switch settings 1 Make sure the system is ...

Page 124: ...y lift up the edge of the keyboard nearest the LCD and slide the keyboard toward the LCD screen to release the tabs that secure it WARNING Be careful not to disconnect the keyboard or keyboard cable entirely from the system 5 Gently rest the keyboard on top of the base unit to view and access the dip switch block Be careful not to twist or disconnect the keyboard cable ...

Page 125: ...switch functions and settings CAUTION Never use a pencil to change switch settings Residue from the pencil can damage the system Password Override Switch set to On Note The system memory expansion slots are also located underneath the keyboard Therefore if you need to install replace SO DIMM modules you might want to do so while the system is already disassembled ...

Page 126: ...ble the system as follows Lift up the keyboard and align the tabs on the front of it with the grooves in the system Reseat the keyboard in its original position Slide the keyboard retainers back onto the system Reassembling the system ...

Page 127: ...5 Using External Devices External Monitor Printer External Keyboard Mouse External Bar Code Scanner External Television Connections External Audio Options USB Devices NEC Versa Dock NEC Versa PortBar ...

Page 128: ...hat the NEC Versa is powered off and the monitor power switch is turned off 2 Open the left most port cover on the back of the system 3 Attach the 15 pin cable connector to the monitor port on the system Secure the cable connection with the screws provided Connecting a monitor 4 Connect the monitor power cable and plug it into a properly grounded wall outlet 5 Follow any setup instructions in the ...

Page 129: ...ics compatible 36 pin connector Note When you connect a printer be sure to install the appropriate printer driver through the Windows control panel Connect a parallel device to your NEC Versa as follows 1 Check that power to both the NEC Versa and the device is off 2 Open the left most port cover on the back of the system and locate the parallel port 3 Align and connect the 25 pin parallel cable c...

Page 130: ...evice for more information Serial Devices To install a serial device such as a printer or an external modem you need a cable with a female 9 pin connector Note When you connect a printer or modem be sure to install the appropriate driver through the Windows Control Panel Follow these steps to connect a serial device to your NEC Versa 1 Check that power to both the NEC Versa and the device is off 2...

Page 131: ...grounded wall outlet 6 Turn on power to the system and the device Note Make sure your device is online before trying to print See the device specific guide for instructions External Keyboard Mouse You can add a full size PS 2 style keyboard or PS 2 style mouse to your NEC Versa using the Plug and Play feature The PS 2 style keyboard and the PS 2 style mouse are warm insertable allowing you to conn...

Page 132: ...eyboard and a external mouse at the same time use the optional NEC Y adapter For ordering information contact your NECC dealer Note If you purchased this product outside the U S or Canada contact the local NECC office or their dealers for ordering information To connect an external keyboard or mouse simply put the system into a suspended state connect the device to the keyboard mouse port then res...

Page 133: ...settings refer to Chapter 3 Using the Software External Television Connections Your NEC Versa LX is equipped with two TV out ports that allow you to use a television as an external display device in the Windows 95 environment The RCA TV out port requires an RCA to RCA cable and a television equipped with a standard RCA input jack The S video TV out port requires an S video cable and a television e...

Page 134: ...cable into the TV Out RCA yellow colored port on your NEC Versa and the other end of the cable into the standard RCA jack on your television or VCR Connect one end of the S Video cable into the TV Out S video port on your NEC Versa and the other end of the cable into the S video input jack on your television 2 Go to Settings Control Panel Display Properties Settings and place a check in the TV box...

Page 135: ...the setting The NEC Versa does not support the SECAM signals used in some countries External Audio Options The NEC Versa comes equipped with built in audio ports that let you record and play sound Connect audio jacks like a microphone headphones or external speakers to the audio ports as follows 1 Locate the audio port that you want to use 2 Plug the jack into the appropriate port on the right sid...

Page 136: ... systems only These peripherals may include digital cameras scanners printers CD ROM drives modems keyboards telephones and game devices USB devices called USB hubs can serve as connection ports for other USB peripherals Only one device needs to be plugged into your NEC Versa Additional peripherals can be connected in a daisy chain configuration where one device is connected to another in a series...

Page 137: ...puter on an NEC Versa Dock The cover is specially designed to allow for proper cooling during system operation NEC Versa PortBar The NEC Versa PortBar duplicates the ports found on the back of your NEC Versa LX system Plus the PortBar adds a 15 pin MIDI game port connector Keep the NEC Versa PortBar in your office connected to peripherals while you take your NEC Versa notebook on the road PortBar ...

Page 138: ... External FDD Connector Port Connects the external FDD floppy disk drive cable that attaches to the external FDD Not for use on the NEC Versa LX MIDI game Port Connects a joystick or MIDI device to your notebook computer AC Adapter Port Connects to the AC Adapter for AC power operation and battery charging Note For details on attaching and disconnecting the PortBar reference the information sheet ...

Page 139: ...6 Using Multimedia Audio Video Multimedia Applications ...

Page 140: ... from electronic sources such as tape cassettes VCRs and CD players through the Line In port Microphone level inputs come through the microphone port Note When using the built in microphone make sure the speaker volume is turned down before using the microphone or feedback may occur The following procedure describes how to use the Microsoft Sound Recorder to record sound into a file on the NEC Ver...

Page 141: ...Select File Save As from the Sound Recorder menu bar 8 Name and save your file You can play your recording in Sound Recorder or in Media Player See the section Playing Back later in this chapter Optimizing the Sound Quality To ensure optimal sound quality when using the record and playback features on your NEC Versa be sure to configure the microphone volume control as follows 1 Right click the so...

Page 142: ... effects create a sense of place or environment and include sounds such as rain heavy traffic chirping birds Specific sound effects accent or illustrate an action Examples of specific sound effects include footsteps a crash a clock chime There are many sources of prerecorded sound effects available on the market or you can record your own sounds Line In accepts analog signals from external devices...

Page 143: ...sounds to accompany a voice over or another more prominent sound Mixing lets you blend digital and MIDI audio files to get the final high quality soundtrack you want See the online help that is available with the Sound Recorder for more information Playing Back You can play back your recorded soundtrack through stereo headphones the internal NEC Versa stereo speakers or external stereo speakers Yo...

Page 144: ... side of the NEC Versa Adjust the volume with the volume control knob on the right side of the system or through the software using the sound horn on the taskbar Using the Built In Speakers The NEC Versa has built in stereo speakers that are always available Adjust the volume through the software using the taskbar icon sound horn or with the volume control knob located on the right side of the NEC...

Page 145: ... of digital audio files Be sure to disable power management if you are using a MIDI device See Chapter 3 for details about disabling power management Video The NEC Versa LX computer features a dazzling TFT 16 million color high resolution display for sharp effective visuals on the NEC Versa or on an external CRT monitor The NEC Versa XGA TFT display has high resolution of 1024 x 768 pixels In addi...

Page 146: ...record motion graphics to your hard drive Use a video frame grabber and store a stream of grabbed stills on your hard disk Using Animation Files You can create a dynamic presentation using an animation application Animation can illustrate a concept drive home an important point or command attention Graphics animation can add punch to a presentation with an animated illustration a flashing arrow or...

Page 147: ...7 Solving System Problems Problem Checklist Start Up Problems Using the Product Recovery CD If You Need Assistance ...

Page 148: ... the computer The electrical outlet to which your AC adapter is connected is working Test the outlet by plugging in a lamp or other electrical device All cables are tightly connected The display setting is configured correctly The display brightness control is adjusted properly If using battery power check that the battery pack is properly inserted and fully charged ...

Page 149: ...e battery several times to recondition it Replace the battery Information on the LCD is difficult to see Adjust the brightness control Use the slide switch at the bottom of the LCD SVGA panels only or the Fn F8 and Fn F9 functions keys An optional component does not work Make sure the component is securely installed or connected Verify that the system parameter for the I O port configuration is se...

Page 150: ...ssage appears before the operating system starts look up the error message in the following table Follow the instructions If you see other error messages the hardware might need repair Note When the NEC Versa detects an error related to display devices it cannot display on either the LCD or a CRT The system warns you by beeping Post Error Messages The NEC Versa LX computer has a built in checking ...

Page 151: ...ow Connect the system to AC power to charge the CMOS battery If the battery does not charge contact your NECC service representative to replace the CMOS battery CMOS Checksum Failure After CMOS RAM values are saved a checksum value is generated for error checking The previous value is different from the current value Run Setup to reset the value CMOS System Options Not Set The values stored in CMO...

Page 152: ...lock It The keyboard lock on the computer is engaged The computer must be unlocked to continue Keyboard Error There is a timing problem with the keyboard Set the Keyboard option in Setup to Not Installed to skip the keyboard POST routines KB interface Error There is an error in the keyboard connector Contact your NECC representative for service Off Board Parity Error Parity error installed in an e...

Page 153: ... Failure Memory failure in the first 64 KB 4 Timer Not Operational Memory failure in the first 64 KB of memory or Timer 1 on the motherboard is not functioning 5 Processor Failure The CPU on the motherboard generated an error 6 Gate A20 Failure The keyboard controller may be bad The BIOS cannot switch to protected mode 7 Processor Exception Interrupt Error The CPU generated an exception interrupt ...

Page 154: ...he RDISK utility For details about using the repair emergency disk look in the online help under the NT Commands RDISK and WINNT32 Note Only use the Product Recovery CD as a last resort Check the problem checklist at the beginning of this chapter for information about solving problems before using the CD The Product Recovery CD provides a variety of options that either remove or replace existing f...

Page 155: ...rtition structure and format only the primary partition without affecting the extended partition s Partition restore formats drive C of a multiple partitioned drive and restores drive C to its initial installation state Additional partitions e g drives D E etc remain intact Note Use Partition Restore if your hard disk is partitioned into two or more partitions drives Express A full restore option ...

Page 156: ...erform a full express restore as follows 1 Check the Product Recovery CD title and make sure that it is the correct CD for your NEC Versa computer and operating system 2 Put the CD into the CD ROM drive tray close the drive door and reboot your computer 3 Read the License Agreement screen that appears Use the VersaGlide touchpad to position the cursor on the Accept button Left click to accept the ...

Page 157: ...6 If you chose Full read the Confirm Your Choice screen A warning displays indicating that your hard disk is about to be erased 7 Select Continue to proceed to perform a Full restore If you select Go Back the restore program returns to the prior screen which has an exit option If you select Continue a screen with progress bars displays and lets you know the progress of the recovery Do not turn off...

Page 158: ...r data and applications to other partitions drives or the Partition Restore process will erase them completely A Partition restore deletes all files on drive C and replaces them with the original factory installed files Only use a Partition Restore if the preinstalled software on drive C is unusable Use the Product Recovery CD to perform a partition restore as follows 1 Check the Product Recovery ...

Page 159: ...nfirm Your Choice screen A warning displays indicating that drive C the primary drive partition is about to be erased and formatted It may be necessary to reinstall software to the other drives partitions to reestablish Start Menu links and other configuration requirements stored on drive C 7 Select Continue to proceed if you wish to perform a Partition Restore If you select Go Back the restore pr...

Page 160: ...is CD as a last resort as it removes or replaces existing files which results in data loss The 2nd CD labeled Product Recovery CD 2 of 2 contains a subset of the Microsoft Windows NT 4 0 Workstation software Whenever you install an additional Windows NT component the following Windows NT Setup screen appears Setup needs to copy some Windows NT files Setup will look for the files in the location sp...

Page 161: ...hooting table at the beginning of this chapter If you still have a problem see Chapter 8 Getting Services and Support for details about contacting NECC Note If you purchased and are using this product outside the U S or Canada please contact the local NECC office or their dealers for the support and service available in your country ...

Page 162: ...8 Getting Services and Support Services and Support Contact Information NECC Web Site NECC FTP Site NECC Support Services Email Fax to Support Services ...

Page 163: ...support and service If you have access to a telephone modem and or fax machine you can use these services to obtain information about your system at any time day or night seven days a week Not only do these services provide information about your NEC system they can also be used to answer your questions and help solve any problems you may have with your system should that ever be necessary NECC We...

Page 164: ...t questions a Reseller s area password accessible To access NECC s Home Page enter the following Internet Uniform Resource Locator URL in your browser http www nec computers com NECC FTP Site Use the Internet to access the NECC FTP file transfer protocol site to download various files video drivers printer drivers BIOS updates and Setup Disk files The files are essentially the same files as on the...

Page 165: ...hardware support for a fee Preinstalled software toll free phone support for 90 days from the time of your first call to the NECC Support Services After the initial 90 days get preinstalled software support for a fee Please have available your system s name model number serial number and as much information as possible about your system s problem before calling For outside the U S or Canada please...

Page 166: ...se from the appropriate technical person Desktop Monitor Notebook You should provide as much specific information about your questions as possible Also if you are sending a fax please include your voice telephone number fax number model number and system serial number with the question You will receive a response to your questions within one business day ...

Page 167: ...lthy Work Environment Making Your Computer Work for You Arrange Your Equipment Adjust Your Chair Adjust Your Input Devices Adjust Your Screen or Monitor Vary Your Workday Pre Existing Conditions and Psychosocial Factors ...

Page 168: ...r nerve tendon and muscle disorders Prolonged or improper use of a computer workstation may pose a risk of serious injury To reduce your risk of injury set up and use your computer in the manner described in this appendix Although some studies have shown an association between increasing hours of keyboard use and the development of some musculoskeletal disorders it is still unclear whether working...

Page 169: ...ations use a separate external keyboard attached to your notebook computer use a separate external monitor attached to your notebook computer Arrange Your Equipment Arrange your equipment so that you can work in a natural and relaxed position Place items that you use frequently within easy reach Adjust your workstation setup to the proper height as described in this appendix by lowering the table ...

Page 170: ...your thighs and the underside of your workstation Use armrests or forearm supports to support your forearms If adjustable the armrests or forearm supports should initially be lowered while all the other adjustments discussed in this appendix are made Once all these adjustments are completed raise the armrests or adjust the forearm supports until they touch the forearms and allow the shoulder muscl...

Page 171: ...o press hard to reach keys move your whole arm Keep from bending your wrists hands or fingers sideways Press the keys gently do not bang them Keep your shoulders arms hands and fingers relaxed Adjust Your Screen or Monitor Correct placement and adjustment of the screen or external monitor can reduce eye shoulder and neck fatigue Check the following when you position the screen or external monitor ...

Page 172: ...st controls to enhance readability Use a document holder placed close to the screen or external monitor Position whatever you are looking at most of the time the screen or reference material directly in front of you to minimize turning your head while you are typing Get regular eye check ups Vary Your Workday If you use your computer for prolonged periods follow these instructions Vary your tasks ...

Page 173: ...l imbalances connective tissue disorders e g arthritis prior trauma to the hands wrists arms shoulders neck back or legs prior musculoskeletal disorders aging fluid retention due to pregnancy poor physical conditioning and dietary habits and other conditions Psychosocial factors associated with these disorders include workplace stress poor job satisfaction lack of support by management and or lack...

Page 174: ...B Specifications System Components Memory Map Interrupt Controllers ...

Page 175: ...d Graphics Port Architecture 64 bit Peripheral Component Interconnect PCI Random Access Memory Standard Main Memory 64 MB SDRAM SO DIMM Optional Expansion 1 slot Expandable in 32 MB 64 MB or 128 MB increments Maximum 256 MB Video Ram 8 MB SDRAM L2 Cache RAM 256 KB Read Only Memory 512 KB x 8 bit Flash ROM Calendar Clock Year month day hour minute second maintained by internal back up battery ...

Page 176: ...ble adapter Expansion 1 port 240 pin for optional NEC Versa Dock and optional NEC Versa PortBar Microphone 1 port 3 pin Mini Pin Jack Stereo Headphones 1 port 3 pin Mini Pin Jack 5 watts per channel Stereo Line In 1 port 3 pin Mini Pin Jack TV Out 1 port 2 pin RCA Jack 1 port 7 pin S Video Jack DC In 1 port for AC adapter cable USB port 1 port 6 pin Speakers Two built in 1 4 watts W each with a ma...

Page 177: ... 14 1 inch high resolution active matrix Thin Film Transistor TFT Extended Graphics Array XGA color display Resolution 1024 x 768 Colors 16 Million max Keyboard Membrane 85 keys both U S and International with standard QWERTY key layout International keyboards are country specific Function keys 12 keys Cursor Control keys 8 keys arrow keys arranged in inverted T layout Numeric keypad embedded Fn k...

Page 178: ...ansfer Rate 120 MB 680 KB S max 1 44 MB 150 KB S max 720 KB 75 KB S max Track to track seek rate 120 MB 20ms typ 1 44 MB 720 KB 25ms typ Hard Disk Drive Specifications vary depending upon model Ultra DMA 33 support Capacity Internal 4 x GB 6 x or 10 GB Drive height 9 5 mm 12 5 mm or 12 7 mm Read write track to track seek rate 3 ms 4 5 ms Average seek time 12 ms 14 ms Revolutions per minute 4000 42...

Page 179: ...Rates 2550 KB second mode 1 2907 KB second mode2 Read Rate 3600 KB sec max 2550 KB sec avg Burst Transfer Rate 16 7 MB sec PIO mode4 DMA mode Average Access Time 120 ms Random 250 ms Fullstroke Memory Buffer 128 KB Interface IDE ATAPI Photo CD Compatibility Multisession Photo CD Video CD CD 1 CD I Ready CD G CD Plus CD DA CD EXTRN and CD ROM XA Power AC Adapter Input Voltage 100 to 240 volts V AC ...

Page 180: ... the system is on or off Bridge Battery When fully charged backs up memory contents and system status for up to 5 minutes under Suspend mode Dimensions System Width 12 1 in 309 mm Depth 10 0 in 254 mm Height 1 85 in 47 mm Battery Pack Width 4 47 in 114 mm Depth 6 19 in 158 mm Height 0 72 in 18 5 mm Weight NEC Versa 5 65 lb 2 57 kg to 5 83 lb 2 65 kg without primary battery or VersaBay III device i...

Page 181: ...ttery Pack 1 12 lb 51 kg Recommended Environment Operation Temperature 41 F to 95 F 5 C to 35 C Relative Humidity 20 to 80 Noncondensing Storage Temperature 4 F to 104 F 20 C to 40 C Relative Humidity 20 to 80 Noncondensing ...

Page 182: ...cations Memory used by the OS device drivers TSRs and all DOS applications 0A0000 0AFFFFh 64 KB Video Buffer EGA and VGA 0B0000 0B7FFFh 32 KB Video Buffer monochrome CGA color VGA monochrome 0B8000 0BFFFFh 32 KB Video Buffer CGA EGA color and VGA color 0C0000 0CBFFFh 64 KB Video ROM EGA and VGA 0D0000 0DFFFFh 64 KB Used by Adapter ROMs i e network controllers hard disk controllers SCSI host adapte...

Page 183: ...tem Interrupt Controllers Controller Master Slave Priority Name Device Master 0 IRQ00 SystemTimer 1 Master 1 IRQ01 Keyboard Master 2 IRQ02 Programmable Controller Slave 3 IRQ08 Real time Clock Slave 4 IRQ09 USB Port Slave 5 IRQ10 PC CardBus Controller Video Slave 6 IRQ11 VersaBay in Versa Dock Slave 7 IRQ12 PS 2 Mouse NEC VersaGlide Slave 8 IRQ13 Math Coprocessor built into CPU Slave 9 IRQ14 Hard ...

Page 184: ...C Frequently Asked Questions External Mouse Display PC Cards Diskette Drive Booting Power Management Miscellaneous ...

Page 185: ...e ports Contact your NECC dealer for ordering information Why won t a serial mouse work when connected to the PS 2 port with the appropriate adapter The NEC Versa LX computer is designed to find a mouse connected to the PS 2 port only The system does not recognize a serial mouse with an adapter Display What is the maximum resolution I can run in simultaneous mode The maximum resolution in simultan...

Page 186: ...d the video driver you need or insert a diskette or CD into the appropriate drive Click on Have Disk PC Cards In which slots do my PC cards go Your PC cards can go into either slot if they are NEC approved cards Other software may not support the use of both slots Type III cards only fit in the bottom slot slot 0 Is there any instance when a modem or network card is only supported in one slot This...

Page 187: ...ng the Modem icon Install Modem Wizard in the Control Panel Why do certain PC cards cause my battery life to drop noticeably Certain hard disk cards and wireless radio cards consume more power than others and can impact battery life When not using any PC card close all applications using the card and pop it part of the way out of the slot to save power If my NEC Versa LX system is docked in the NE...

Page 188: ...e drive be sure that you have a diskette in drive A containing operating system files Be sure to check the Boot Device Setup parameters in the BIOS Setup Utility to determine the designated sequence of boot devices See Chapter 3 Using BIOS Setup See your operating system documentation for information about creating system diskettes What happens if I leave a diskette in my diskette drive Shutting d...

Page 189: ...What type of diskette do I use in my diskette drive Some systems ship with a 1 44 megabyte MB diskette drive that uses 3 5 inch high density HD diskettes These diskettes are also called double sided high density DSHD diskettes You can store 1 44 MB of information on these diskettes Your diskette drive can also use 3 5 inch double sided double density DSDD diskettes These diskettes only hold 720 ki...

Page 190: ...ld boot is a system start with power off A cold boot also resets the hardware It checks the hardware and reloads the operating system Press the system unit power button to perform a cold boot or go to Start Shut Down Shut down the computer If power is on turn the power off using the system unit power button wait at least five seconds and then turn the power on Power Management Does my system come ...

Page 191: ...t the System Switch BIOS parameter to Sleep button Putting your system into Suspend initiates the Suspend power saving mode and is a convenient way of conserving energy when you are going to be away from your system for short period of time What is the function of Suspend to File Suspend to File provides the greatest power savings by putting the system in a maximum power shutdown When the system g...

Page 192: ... Can I disable my system s power management features Yes Simply press the Power Management switch Fn F7 on the system keyboard until you hear a single beep Other Power Management settings include Custom 2 beeps Highest Performance 3 beeps Longest Life 4 beeps In Windows 98 or 95 click on Start Settings Control Panel In Control Panel double click on the Power icon In the Power Properties screen unc...

Page 193: ...up If your application still runs slow you might consider installing additional memory see Memory Module Installation in Chapter 4 Also refer to your operating system s documentation for tips on optimizing system performance Why do I get a message Insufficient memory when I run some games I have 64 MB of memory The Insufficient memory refers to the 640 kilobytes of base memory Since there are driv...

Page 194: ...98 Windows 95 and Windows NT you can use up to 255 characters to name a file I m having a problem using the IR port What can I do Verify that the IR port is enabled Enter the BIOS Setup Utility access the Peripheral Setup menu and be sure that the IR serial port setting contains an available COM port and IRQ setting Check that both the sending and receiving system and device are using the same tra...

Page 195: ...point channel allowing the graphics controller direct access to main memory increases bandwidth to 266 MBps and supports throughputs of 533 MBps and 1 07 GBps animation The art of making things appear to move in two dimensional 2 D or three dimensional 3 D space and making events happen over time applications programs Software designed to perform specific functions like solving business or mathema...

Page 196: ...ithin a computer used for transmitting data or electrical power from one device to another byte Group of eight contiguous bits C CardBus A 32 bit high performance bus defined by the new PC Card Standard and released by the PCMCIA standards body and trade associations CardBus offers wider and faster 32 bit bus and bus mastering operation for improved adapter performance and can operate at speeds up...

Page 197: ... data and system configuration parameters stored in CMOS cold boot Process of starting up the computer by turning on the power If power is already on the process means to turn off the computer and turn it on again A cold boot reinitializes all devices crt Cathode Ray Tube A type of display screen used in desktop monitors It forms the screen image using tiny dots called pixels See also LCD cursor A...

Page 198: ...technology used in some NEC Versa LCD screen displays DVD A denser faster CD that can hold video as well as audio and computer data Short for digital versatile disk or digital video disk this new type of CD ROM holds a minimum of 4 7 GB gigabytes enough for a full length movie E enhanced VGA A video interface that offers more colors or higher resolution than VGA extended RAM The area of RAM above ...

Page 199: ...cal parts from which a computer is made hertz Hz A unit of frequency equal to one cycle per second hot key Combination of two or three keys that you press simultaneously for a particular function I input output I O The process of transferring data between the computer and external devices IDE Intelligent Drive Electronics A hard disk drive type that has controller electronics built into the drive ...

Page 200: ...lay An LCD consists of a thin sandwich of two glass plates with sealed edges containing nematic liquid crystal material that forms the screen image Versa displays are LCD type load To copy a program into the computer s memory from a storage device M megabyte MB 1 048 576 bytes memory Electronic storage area in a computer that retains information and programs A computer has two types of memory read...

Page 201: ...MMX enabled microprocessors can handle many common multimedia operations such as digital signal processing DSP that are normally handled by a separate sound or video card However only software especially written to call MMX instructions MMX enabled software can take advantage of the MMX instruction set mode A method of operation for example the Versa operates in either normal or power saving modes...

Page 202: ...ory O operating system Set of programs that manage the overall operation of the computer overwrite Storing information at a location where information is already stored thus destroying the original information P page A type of message transmission in which a message is sent or received via modem to a paging device from a computer with paging communications software or telephone parallel interface ...

Page 203: ...d sized peripheral interface standard for portable devices Types of PC cards also known as PCMCIA cards currently offered by major vendors include fax modems LAN storage cards and wireless communications devices peripheral Input or output device not under direct computer control A printer is a peripheral device pixels Picture elements Tiny dots that make up a screen image port Provides the means f...

Page 204: ...y in which stored data cannot be modified by the user except under special conditions reset The process of returning a device to zero or to an initial or arbitrarily selected condition resolution The degree of screen image clarity Video display resolution is determined by the number of pixels on the screen Resolution is usually specified in pixels by scan lines for example 640 by 480 See pixels RS...

Page 205: ...eadsheets SuperDisk A high capacity diskette drive that uses the laser servo technology to read from and write to specially designed 120 MB diskettes The SuperDisk is backward compatible and reads 1 44 MB and 720 MB diskettes Suspend mode A state of power management that puts the system to sleep Suspend mode shuts down all devices in the system while retaining data and system status SVGA Super Vid...

Page 206: ...ection of up to 127 peripheral devices such as mice modems and keyboards USB supports plug and play installation on some systems V VersaGlide A small touch sensitive pad used as a pointing device on your NEC Versa notebook computer With the VersaGlide you can move your finger along the pad to move the cursor or simulate a mouse click by tapping the pad VGA Video Graphics Array Graphics technology ...

Page 207: ...device waveform A graphic representation of a sound wave as displayed on an oscilloscope which converts sound waves into electronic signals write To record or store information to a storage device X XGA Extended Graphics Array This high resolution graphics standard supports 640 x 480 1024 x 768 pixel and 16 million simultaneous colors XGA also supports non interlaced monitors Z zoomed video Zoomed...

Page 208: ...ecautions 2 11 using 2 5 Battery refresh 3 14 Battery status 2 5 8 4 Beep codes 7 7 BIOS language setting 3 14 BIOS setup 3 2 BIOS setup utility advanced CMOS setup 3 10 checking system parameters 3 5 looking at screens 3 4 main menu 3 3 other options 3 14 save to file 3 15 standard CMOS setup 3 9 using keys 3 5 BIOS update 3 17 enabling the switch 3 18 performing 3 18 preparing the diskette 3 17 ...

Page 209: ...stem storage memory 4 32 Installing external devices bar code scanner 5 7 external monitor 5 2 keyboard 5 5 mouse 5 5 parallel device 5 3 printer 5 3 serial device 5 4 television 5 8 USB port 5 10 Installing SO DIMMs 4 32 Installing the hard disk drive 4 26 Intel LANDesk Client Manager 3 33 Intellisync for Notebooks 3 35 Internal hard disk drive 3 9 4 26 Internal mouse 3 10 Internal speakers 6 6 I...

Page 210: ... 8 3 8 4 8 5 FTP site 8 3 web site 8 2 NEC Customize 3 26 NEC customize utility using 3 27 NEC Help Center 3 29 uninstalling 3 32 8 2 NEC utilities 3 26 NEC Versa Dock 5 11 NEC Versa file bay 4 7 NEC Versa PortBar 5 11 NEC VersaBay 1 9 NEC VersaBay Swapping Utility 4 10 installing 4 10 using 4 10 NEC VersaGlide 1 7 Netscape Navigator 3 36 Numeric keypad 4 4 O Online help NEC Help Center 3 29 Opera...

Page 211: ...ttery pack 2 9 S Save to file feature 3 15 Serial port 1 10 3 14 Service Pack 4 reinstalling 3 25 3 26 Service Pack 4 3 25 Services and Support contact information 8 2 Setting boot devices 3 13 Setting system parameters 3 5 peripherals 3 13 power savings 3 10 Setting up a healthy work environment A 2 Smart switch 1 14 Software applications 3 29 Specifications battery pack B 7 bridge battery B 7 ca...

Page 212: ...10 User password 3 10 Using the AC adapter 2 2 Using the battery pack 2 5 Using the NEC VersaGlide 4 5 Using the TV out port 5 8 V VersaBay III 4 9 customizing your system 4 15 installing devices 4 13 removing a device 1 15 removing devices 4 11 VersaGlide adjustments 4 6 features 4 5 tips 4 6 Video 6 7 Video out type 3 10 Volume control 1 13 W Wake up suspend alarm 3 12 Weight battery pack B 8 sy...

Page 213: ...one or more of the following measures Reorient or relocate the receiving antenna Increase the separation between the equipment and receiver Connect the equipment to an outlet on a circuit different from the one to which the receiver is connected To meet FCC standards shielded cables and power cords are required to connect this device to a personal computer or other Class B certified device Canadia...

Page 214: ...batteries according to the manufacturer s instructions Il y a danger d explosion s il y a replacement incorrect de la batterie Remplacer uniquement avec une batterie du même type ou d un type recommandé par le constructeur Mettre au rébut les batteries usagées conformément aux instructions du fabricant Battery Disposal The main battery is made of Lithium Ion Li Ion and the CMOS clock battery is ma...

Page 215: ...c DECLARATION OF CONFORMITY We the Responsible Party NEC Computers Inc 15 Business Park Way Sacramento CA 95828 declare that the product NEC Versa LX is in compliance with FCC CFR47 part 15 for Class B digital devices ...

Reviews: