background image


NEC Display Solutions of America, Inc.


OL-V323-2 Installation Guide 

10 Point Touch Overlay for the V323-2


Rev.1.2 


www.necdisplay.com


OL-V323-2              


1.0 

Contents 

Guide Purpose 


Page 1 

Notes and Warnings   


Page 1 

Equipment 


Page 2 

Dimensional Drawings 


Page 2 

Integration Procedures 


        Page 3-4 


2.0 

Purpose 

2.1 

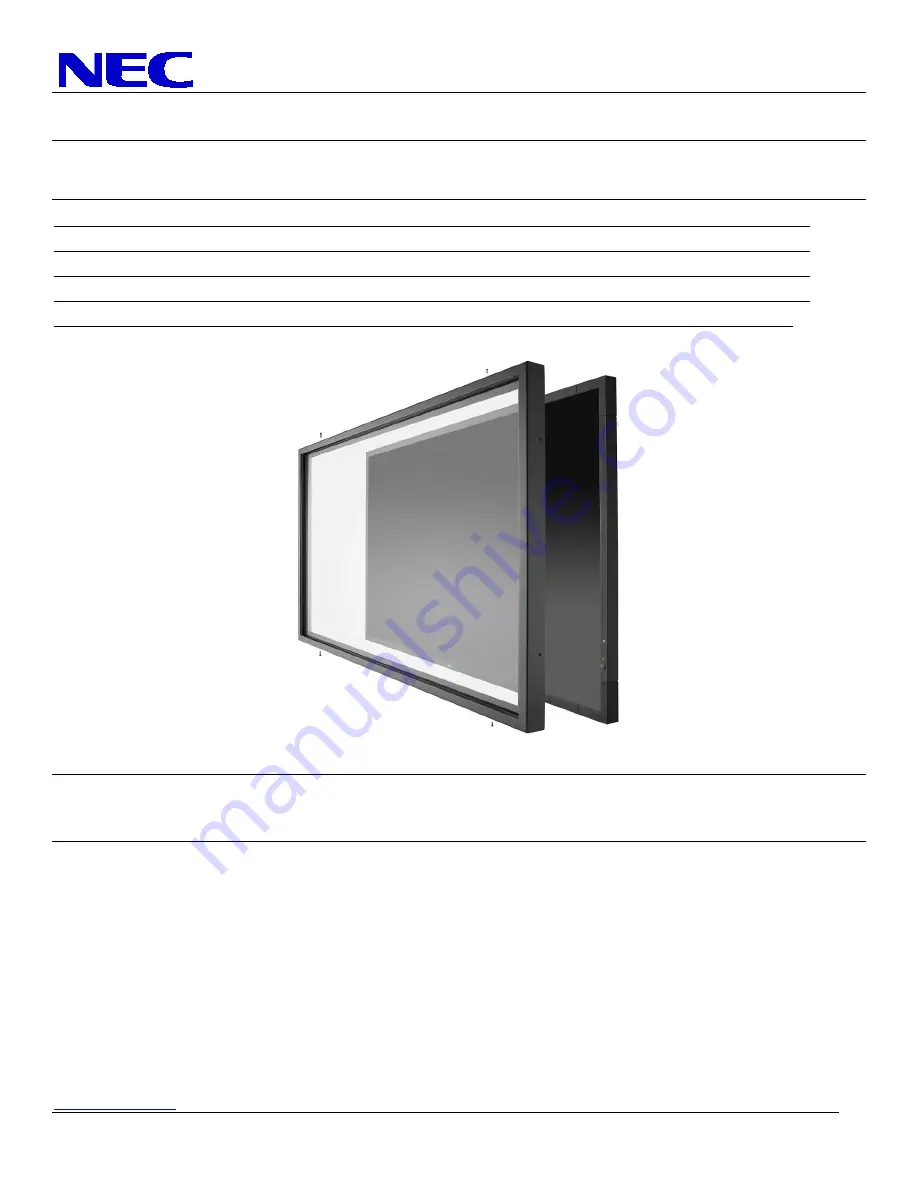
This procedure describes the steps to install the OL-V323-2 IR Touch Overlay onto the V323-2 display. 

3.0 

Notes and Warnings 

3.1 

The overlay contains tempered glass.  Use caution when handling. 

3.2 

The overlay has an integrated USB cable located in the bottom right corner.  Ensure the cable is not 
pinched, crushed, or damaged during installation.  

3.3 

Ensure the touch screen frame does not bend or torque during installation. 

3.4 

Once the touch screen is installed, do not lift the monitor by grasping or holding only the touch screen 
overlay. Grasp both the monitor and overlay to support the unit weight. 

3.5 

Contact NEC Display Solutions support if you have any questions or require additional installation 
guidance support. 

500 Park Boulevard, Suite 1100 
Itasca, IL 60143 
Phone:  (800) 632-4662 

Summary of Contents for OL-V323-2

Page 1: ...ontains tempered glass Use caution when handling 3 2 The overlay has an integrated USB cable located in the bottom right corner Ensure the cable is not pinched crushed or damaged during installation 3 3 Ensure the touch screen frame does not bend or torque during installation 3 4 Once the touch screen is installed do not lift the monitor by grasping or holding only the touch screen overlay Grasp b...

Page 2: ...2 www necdisplay com OL V323 2 2 4 0 Equipment 4 1 1 OL V323 2 IR touch screen overlay 4 Bezel retention brackets for OL V323 2 Note Brackets attached to the overlay 1 6 32 x 3 8 Undercut Phillips Machine Screws Note Quantity 1 Machine Screw Provided as Spare 1 10ft USB Extension Cable 5 0 Dimensional Drawings ...

Page 3: ... THE BRACKET ORIENTATION BY TAKING NOTE OF THE SPECIFIC LOCATION OF EACH BRACKET AS THEY ARE NOT ALL THE SAME 6 3 1 Retain screws for reuse 6 4 Clean inside surface of the glass 6 4 1 Use a glass cleaner or mild cleaning solution to clean glass 6 4 2 Spray solution onto clean soft cloth then wipe the surface Spraying cleaning solution directly onto the monitor may damage the unit 6 4 3 Use circula...

Page 4: ...EMOVED FROM TO SECURELY MOUNT THE OVERLAY 6 6 1 Slide the bezel retention bracket from the rear of the monitor between the bottom of the monitor and the touch frame bezel 6 6 2 Align the bracket screw hole with the bezel Attach the bezel retention bracket to the bezel with the 6 32 x 3 8 undercut screws previously removed in Step 6 3 6 6 3 Repeat for remaining three 3 brackets 6 7 Connect the touc...

Reviews: