background image


本取扱説明書を熟読し、大切に保管してください 

Read this document carefully, and keep at hand so that it is available whenever necessary.


1

N8403-012 

1000BASE-T

接続ボード

(2ch) 

1000BASE-T Adapter (2ch) 

取扱説明書


User’s Guide


構成部品一覧表 

Packing list


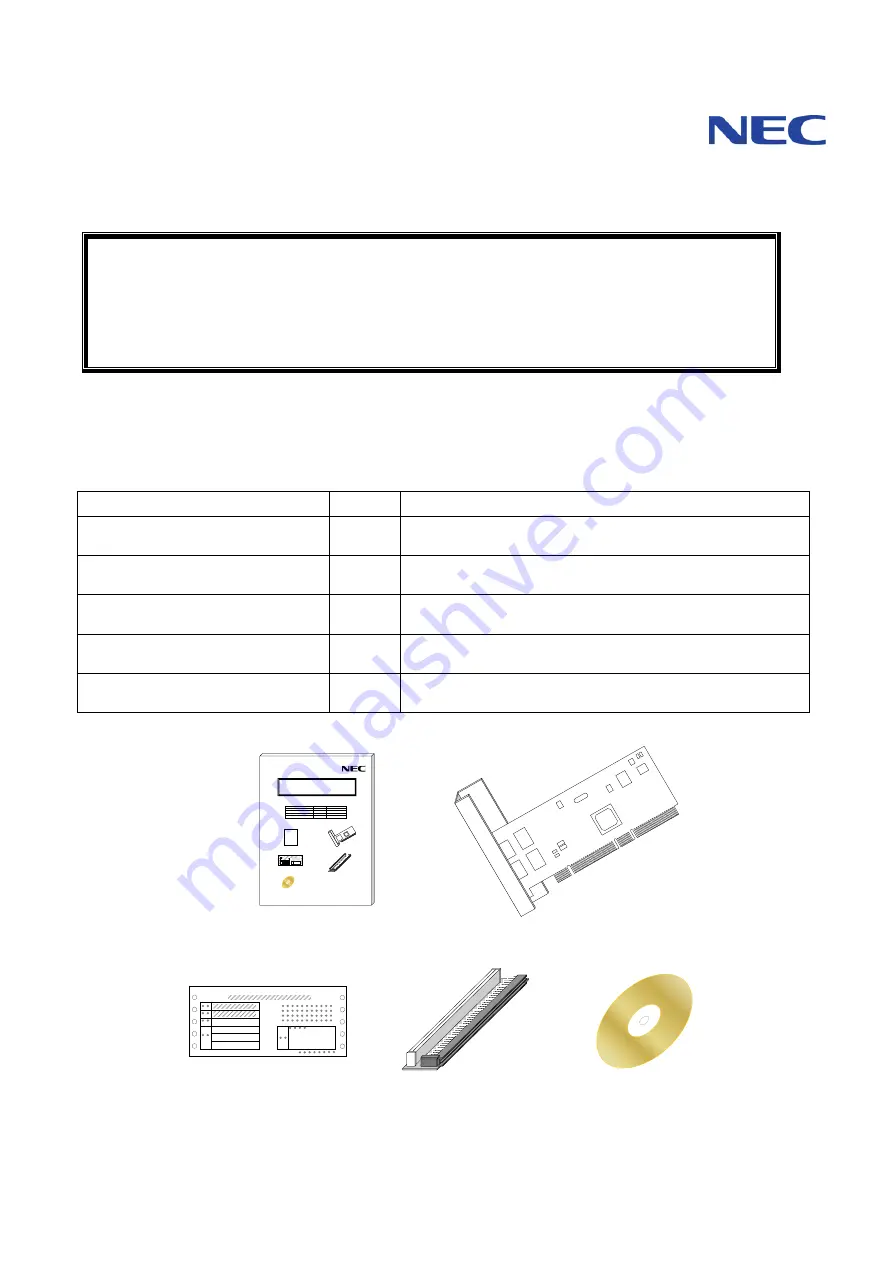
本製品には以下のものが添付されております。確認してください。 

Confirm that your package contains the followings;


品名


数量


備考


1000BASE-T

接続ボード

(2ch) 

1000BASE-T adapter (2ch) 


PCI

ライザカード


PCI riser card 


ドライバ

CD 

Driver CD 

1


・コンパクトディスク

  1

(

Compact disc: 1 piece)


・ソフトウェアのご使用条件

(

Software License Agreement

)


保証書


Warranty card 

Valid only in Japan 

取扱説明書


User’s Guide 

本書


This document 


N8403-012

1000BASE-T

接続ボード

(2ch)

取扱説明書

取扱説明書

User’sGuide

保証書

Warranty card

ドライバ

CD

Driver CD

PCI

ライザカード

PCI riser card

1000BASE-T

接続ボード

(2ch)

1000BASE-T Adapter(2ch)

取扱説明書

保証書

ドライバ

CD

ライザカード

N8403-012 1000BASE-T

接続ボード

(2ch)

Summary of Contents for 1000BASE-T

Page 1: ...followings 品名 数量 備考 1000BASE T 接続ボード 2ch 1000BASE T adapter 2ch 1 PCI ライザカード PCI riser card 1 ドライバ CD Driver CD 1 式 コンパクトディスク 1 枚 Compact disc 1 piece ソフトウェアのご使用条件 Software License Agreement 保証書 Warranty card 1 Valid only in Japan 取扱説明書 User s Guide 1 本書 This document N8403 012 1000BASE T接続ボード 2ch 取扱説明書 取扱説明書 User sGuide 保証書 Warranty card ドライバCD Driver CD PCIライザカード PCI riser card 1000BASE T接続ボード 2...

Page 2: ......

Page 3: ...4 4 Windows 2000 をご使用の場合 10 4 5 WindowsServer 2003 をご使用の場合 21 5 アダプタ フォルト トレランス AFT 機能およびアダプティブ ロード バランシン グ ALB のセットアップ 32 5 1 Windows 2000 をご使用の場合の設定方法 34 5 2 Windows Server 2003 をご使用の場合の設定方法 34 6 トラブルシューティング 36 6 1 アダプタがネットワークに接続できない場合 36 6 2 アダプタのテスト 37 6 3 一般的な障害とその対処方法 38 7 技術情報 39 7 1 PCIインストレーションのヒント 39 Microsoft Windows 2000 Windows Server 2003 は米国 Microsoft 社の登録商標です LinuxはLinus Torvaldsの商...

Page 4: ...s Server 2003 59 5 How to set up Adapter Fault Tolerance AFT function and Adaptive Load Balancing ALB 69 5 1 How to set up on Windows 2000 71 5 2 How to set up on Windows Server 2003 71 6 Troubleshooting 73 6 1 If you cannot connect your adapter to the network 73 6 2 Test the adapter 74 6 3 Common problems and solutions 75 7 Technical information 76 7 1 Tips on PCI installation 76 Microsoft Window...

Page 5: ... ご了承ください 5 本書は 本体装置の操作に熟知した管理者 または保守員向けに記載されており ます 本体装置の取り扱いや 各種 OS の操作 その他一般的かつ 基本的な事 柄につきましては記載を省いておりますのであらかじめご了承ください NEC Corporation 2004 日本電気株式会社の許可無く 本書の複製 改変などを行うことはできません 輸出する際の注意事項 本製品 ソフトウェアを含む は日本国内仕様であり 外国の規格等 には準拠しておりません 本製品は日本国外で使用された場合は 当 社は一切の責任を負いかねます また 当社 海外 NEC 含む は本製品に関し 海外での保守 修理 サービスおよび技術サポート等は行っておりません 情報処理装置等電波障害自主規制協議会 VCCI 表示 この装置は 情報処理装置等電波障害自主規制協議会 VCCI の基 準に基づくクラス A 情報技術...

Page 6: ...otwithstanding the above three items NEC is not liable for the results of operation 5 This document assumes that readers are server administrators or maintenance service personnel who have good understanding of server operations Please be forewarned that general or basic matters on how to use servers and operating system are not described in this document NEC Corporation 2004 No part of this manua...

Page 7: ...ように説明しています 表示内容を無視して誤った使い方をした時に生じる危害や損害の程度を 次の表 示で区分し説明しています 警告 この表示の欄は 死亡または重傷などを負う可能 性が想定される 内容です 注意 この表示の欄は 障害を負う可能性または物的損 害が発生する可能性が想定される 内容です 情報 この表示の欄は 運用上障害が発生する可能性が想 定される 内容や その他 機器を正しくご使用い ただくための指示 情報 です お守りいただく内容の種類を 次の絵表示で区分し 説明しています 発火の可能性が想定されることを注意喚起した内容です 感電の可能性が想定されることを注意喚起した内容です 特定しない一般的な行為の禁止を示します 必ず 電源コードをコンセントから抜くように指示した内容 です iii ...

Page 8: ...igence of observation of this document or improper use of this product Warning Indicates a danger that could lead to a death or serious injury Caution Indicates a danger that could lead to an unrecoverable serious injury or property damage Information Indicates information that could cause a failure of operation or an instruction to use this product properly Symbols of precautions and restrictions...

Page 9: ...れらの設備や機器 制御システムなどに本ボード を使用した結果 人身事故 財産損害などが生じても当社はいかなる責 任も負いかねます 保守員以外の方は N8403 012 アダプタの分解 修理 改造などを行 わないでください 怪我や感電をするおそれがあります 本ボードのお手入れの際は 水などで洗わないでください 感電するお それがあります 故障した場合は 販売店または保守員に連絡してくだ さい 本体装置の電源コードの接続が不完全なまま使用しないでください 電源コードを正しくコンセントに接続してお使いください ショートや 発熱により感電や火災をおこすおそれがあります 故障または異常な状態で使用 放置しないでください 感電や火災をおこすおそれがあります 万一 煙 異音 異臭などが生じた場合 直ちに本体装置の POWER スイッチを OFF にして 電源プラグをコンセントから抜いて 販売店 または保...

Page 10: ...ified maintenance engineer Otherwise there is a risk of fire injury or electric shock Avoid exposure to water when you clean up this product Otherwise there is a risk of electric shock If anything goes wrong with this product contact your sales agent Do not use this product if the power cord of server is insecurely plugged Plug the power cord properly Otherwise there is a risk of a fire or electri...

Page 11: ...を 本体装置への取り付け 取り外しをするとき には 必ず アダプタを実装する CPU ブレードを抜いてから行ってく ださい 感電するおそれがあります 本体装置の電源は 本体装置で指定された規格の電源を使用してくださ い 感電や火災をおこすおそれがあります CPU ブレードへの N8403 012 アダプタの取り付け 取り外しを行うと き および ブレード収納ユニットへ CPU ブレードを取り付けるとき に 指をはさんだり ぶつけたりしないように注意してください 本製品は 各自治体の条例に従って廃棄してください 詳しくは 各自 治体へお問い合わせください 本製品を 他人に譲渡する場合は本書および添付品すべてを必ず一緒に 渡してください vii ...

Page 12: ...k Use a conforming power source for the server to its specifications Otherwise there is a risk of a fire or current leakage Be careful not to catch or hurt your finger when attaching detaching N8403 012 adapter to from CPU blade and when attaching CPU blade to Blade Server Assemble Unit When you dispose this product be certain to observe your local disposal regulations For details consult your mun...

Page 13: ...で塗 装されていない金属部分には 決して触れないでください 汚れや腐蝕等によ り 接触不良が発生するおそれがあります また 濡れた手や汚れた手で触れ ないでください z N8403 012 アダプタをスムーズに挿入できない本体装置があるかもしれませ ん その場合 挿入の際に N8403 012 アダプタ および本体装置を傷つけない ように注意してください z N8403 012 アダプタを拡張スロットに挿入する際 ブラケットの先端が本体装 置の他の部位 他の部品 ボードなど に触れないようにご注意ください 破 損するおそれがあります 故障した場合は 販売店または保守員に連絡してください 注意 必ずお守りください z ケーブルは本ボードのインタフェイスに適合するものを使用し 接続先をよく 確認した上で接続してください 障害が発生するおそれがあります z ケーブル接続時は カチッという音がする...

Page 14: ...loose connection Do not touch this product with wet or dirty hands z On some servers you may not be able to smoothly insert N8403 012 adapter If so be careful not to damage the server and or the adapter itself by inserting N8403 012 adapter z When you insert N8403 012 adapter into expansion slot be careful not to touch the tip of bracket to other parts of server such as other components or board O...

Page 15: ...インストールしてくだ さい NEC が提供する ご使用になる OS に添付された媒体およびマニュアル NEC の Web サイトで提供される修正モジュール 3 N8403 012 をCPUブレードに取り付ける前に以下の作業が必要です Intel PROSetの削除 オンボードLANのドライバ更新 本書の 4 ドライバのインストールとアダプタの設定 5 ページ に示す手順に従って Intel PROSetの削除およびオンボードLANのドライバを更新してください なお 本作業は ターミナルサービス TS または Deployment Manager DPM からは できません CPUブレード本体上で作業を実施してください 4 N8403 012 を CPU ブレードに取り付けた後に BIOS の設定を一部変更して頂く必要があ ります 4 2 アダプタ取り付け後の BIOS 設定変更について 6...

Page 16: ... provided by NEC Update module available at NEC s Web site 3 Before you attach N8403 012 adapter to CPU blade you should Remove Intel PROSet and Update the onboard LAN driver Follow the steps in Chapter 4 Installing driver and setting up adapter on page 44 in this document for removing Intel PROSet and updating the onboard LAN driver You cannot do this from Terminal Service TS or Deployment Manage...

Page 17: ... 012 号機 xxxxxx PORT B ACT LINK LED z LAN ポート ネットワークに接続するためのコネクタです コネクタ形状は RJ 45 です 接続できるケーブルの種類および接続方法については 3 ネットワークケーブルの接 続 4 ページ を参照してください z PCI バスコネクタ PCI バスコネクタを 本体装置の PCI 拡張スロットへ実装します なお 本アダプタ は 64bit PCI Rev2 2 および PCI X 133MHz 以下 に対応し 5V 3 3V ユニバー サル仕様となっています z PCI ライザカード CPU ブレードと N8403 012 を接続するためのライザカードです PCI または PCI X スロットに N8403 012 アダプタを取り付けてから CPU ブレー ドインタフェイスを CPU ブレードのインタフェイスに接続します...

Page 18: ... LED LED 状態 意味 点灯 リンク相手と正常に接続しています Link 確立 点滅または 点灯 データの送受信があることを示していま す 点滅周期はトラフィック量に応じて変 化します ACT LNK 消灯 リンク相手との正常に接続できていません Link 未確立 緑色に点灯 1000Mbps で動作しています 橙色に点灯 100Mbps で動作しています ACT LNK SPEED ACT LNK SPEED P o rt A P o rt B SPEED 消灯 10Mbps で動作しています 2 ...

Page 19: ...付ける CPU ブレードをシャットダウンして電源を OFF にします 2 ブレード収納ユニットから CPU ブレードを取り外します 警告 高温に注意してください 本体装置の電源をOFFにした直後は 内部の部品が高温になって います カバーは 十分時間をおいて内部が冷めたことを確認し てから取り外してください 3 CPU ブレードに他の PCI ボードが既に装着されている場合 他の PCI ボードを CPU ブレー ドから取り外し PCI ライザカードも取り外します 4 CPU ブレードを ほこりが少ない静電気防止処理が施されたシートの上に置きます 5 本製品に添付されている PCI ライザカードを CPU ブレードに取り付けます 取り付けの際はコネクタをしっかりと奥まで差し込んで装着してください 6 アダプタ本体を CPU ブレードに取り付けた PCI ライザカードの PCI コネクタ部分...

Page 20: ...さい 8 CPU ブレードをブレード収納ユニットに差し込み 4 ドライバのインストールとアダプタの 設定 6 ページ の手順にしたがって BIOS 設定値変更およびドライバのセットアップを実 施してください 3 ネットワークケーブルの接続 本 N8403 012 アダプタの LAN ポートにネットワークケーブル ツイストペアケーブル のコ ネクタを接続します 各通信規格に使用可能なツイストペアケーブルの種類は以下の通りです 通信規格 ツイストペアケーブル規格 10Base T カテゴリ 3 以上 100Base TX カテゴリ 5 以上 1000Base T カテゴリ 5e 以上 ツイストペアケーブルは 8 芯 4 ペアのケーブルをお使いください また ツイストペアケーブルの長さは最大 100 メートルのものが使用できます 4 ...

Page 21: ... ご使用のOSを確認して以下の項目の手順に従って作業 してください Windows2000 の場合 4 4 Windows 2000 をご使用の場合 10ページ WindowsServer2003 の場合 4 5 WindowsServer 2003 をご使用の場合 21ペー ジ Windows2000 で N8403 012 をお使いになる場合 N8403 012 は サービスパック 4 以降に対応していますので サービスパック 4 以 降が適用されていない場合は 適用してください Linuxで使用される場合は 以下のいずれかを使用し 手順に従ってインストールして ください NECが提供する ご使用になるOSに添付された媒体およびマニュアル NECのWebサイトで提供される修正モジュール アダプタ取り付け後に CPU ブレードを起動して BIOS の設定値 を一部変更する必要があります ...

Page 22: ...ub Menu F1 Setup Defaults F10 Save and Exit Item Specific Help System time 13 58 43 System Date 06 08 2004 Processor Settings 3 矢印キー により Advanced メニューを選択します PhoenixBIOS Setup Utility Main Advanced Security Server Boot Exit F1 Help Esc Exit Select Item Select Menu Change Values Enter Select Sub Menu F1 Setup Defaults F10 Save and Exit Item Specific Help Memory Configuration PCI Configuration Periph...

Page 23: ...bit Embedded Video Controller PCI Slot 1 Option ROM Initializes device expansion ROM PCI Configuration Enabled 5 矢印キー により PCI Slot 1 Option ROM 欄の Enabled を選択し Enter キーを押します PhoenixBIOS Setup Utility Main Advanced Security Server Boot Exit F1 Help Esc Exit Select Item Select Menu Change Values Enter Select Sub Menu F1 Setup Defaults F10 Save and Exit Item Specific Help Embedded SCSI Embedded NIC D...

Page 24: ...d SCSI Embedded NIC Dual Gbit Embedded Video Controller PCI Slot 1 Option ROM Initializes device expansion ROM PCI Configuration Disabled 7 F10 キーを押して 変更した設定情報を保存します PhoenixBIOS Setup Utility Main Advanced Security Server Boot Exit Space Select Enter Accept Item Specific Help Embedded SCSI Embedded NIC Dual Gbit Embedded Video Controller PCI Slot 1 Option ROM Initializes device expansion ROM PCI C...

Page 25: ...電源をOFFにして CPUブレードをブレード収納ユニットから抜き取ってから作業してください 警告 高温に注意してください 本体装置の電源をOFFにした直後は 内部の部品が高温になって います カバーは 十分時間をおいて内部が冷めたことを確認し てから取り外してください アダプタを取り付ける際にはCPUブレードをブレード収納ユ ニットより抜いてください 本アダプタをCPUブレードに取り付けるときは 必ずCPUブレー ドをブレード収納ユニットから引き抜いてください 感電やアダプタまたは本体装置の損傷のおそれがあります アダプタ取付後に CPU ブレードを起動して BIOS の設定値を一 部変更する必要があります 4 2 アダプタ取り付け後の BIOS 設定 変更について 6 ページ の手順に従って作業してください 9 ...

Page 26: ...CPU ブレードからインストールする場合 4 4 2 CPU ブレードからインストールする場合 13 ページ をご覧ください z TS クライアントからインストールする場合 4 4 3 TS クライアントからインストールする場合 14 ページ をご覧ください z デバイスマネージャを利用して手動でインストールする場合 4 4 4 デバイスマネージャを利用して手動でインストールする場合 15 ページ をご覧 ください z DPM Ver 2 1 3 0 からインストールする場合 4 4 5 DPM Ver 2 1 3 0 からインストールする場合 18 ページ をご覧ください アダプタを交換する場合は 一旦ドライバを削除してからド ライバを再インストールしてください なお ドライバを削除してしまうと プロトコルの情報が消 えてしまいますので 削除の前にネットワーク情報を控えて おき ドライバ...

Page 27: ...ボタンをクリックします 4 ドライバ タブを選択し バージョンを確認します 以下のバージョンと同じ もしくは新しいバージョンの場合はドライバを更新する 必要はありませんので Intel PROSetの削除手順 に進んでください Express5800 420Laの場合 バージョン 7 0 26 0 Express5800 420Maの場合 バージョン 7 2 17 0 オンボードLANドライバの更新手順 1 CPUブレードに接続されているCD ROMドライブ装置に本製品添付のドライバCD をセットします 2 CPUブレードの画面において コマンドプロンプトを起動します 3 コマンドプロンプトにおいて カレントディレクトリをCD ROMドライブ装置に移 動し 以下のコマンドを入力してEnterキーを押します 下記コマンドラインの は半角スペースの入力を示します 対象装置がExpress580...

Page 28: ...ールパネル を選択します 2 アプリケーションの追加と削除 アイコンをダブルクリックします 3 Intel PROSet ボタンを選択し 削除 ボタンをクリックします 4 ダイアログボックスが表示されるので はい をクリックします Intel PROSet が削除されます 5 アプリケーションの追加と削除 のダイアログが表示されるので 閉じる ボタンを クリックします 6 すべてのウィンドウを閉じます 7 システムを再起動してください 続いてN8403 012のドライバをセットアップしますので N8403 012アダプタをCPUブレ ードに取り付けてください 取り付け作業は 2 本体装置へのアダプタの取り付け 3ページ の手順を参照して実施してく ださい 12 ...

Page 29: ...ースの入力を示します install bat 012 しばらくして Finish と表示されれば完了です 続いてIntel PROSetをインストールします 4 スタートメニューから プログラム アクセサリ の順にポイントし エクスプロー ラ をクリックします 5 以下のフォルダに格納されている PROSet exe をダブルクリックします CD ROMのドライブレター APPS PROSet WIN2K 6 Intel PROSet for Wired Connection InstallShield ウィザード が表示されるので 次へ ボタンをクリックします 7 使用許諾契約を読んで 同意するならば 使用許諾契約の条項に同意します を選択 し 次へ ボタンをクリックします 8 標準 を選択し 次へ ボタンをクリックします 9 インストール ボタンをクリックします 10 InstallS...

Page 30: ...terキーを押します 下記コマンドラインの は半角スペースの入力を示します install bat TS しばらくして Driver Installed と表示されれば完了です 続いてIntel PROSetをインストールします 4 スタートメニューから プログラム アクセサリ の順にポイントし エクスプロー ラ をクリックします 5 以下のフォルダに格納されている PROSet exe をダブルクリックします CD ROMのドライブレター APPS PROSet WIN2K 6 Intel PROSet for Wired Connection InstallShield ウィザード が表示されるので 次へ ボタンをクリックします 7 使用許諾契約を読んで 同意するならば 使用許諾契約の条項に同意します を選択 し 次へ ボタンをクリックします 8 標準 を選択し 次へ ボタンをクリック...

Page 31: ...3 ドライバ タブの ドライバの再インストール ボタンをクリックします 4 デバイスドライバのアップグレードウィザード ダイアログボックスが表示されます ので 次へ ボタンをクリックしてください 5 ハードウェアデバイスドライバのインストール 画面が表示されますので デバイ スに最適なドライバを検索する 推奨 を選択し 次へ ボタンをクリックしてくださ い 6 ドライバファイルの特定 画面が表示されますので 本製品添付のドライバCDを CD ROMドライブ装置にセットし 検索場所のオプション の 場所を指定 を選択し その他は選択しないでください 次へ ボタンをクリックしてください 7 デバイスドライバのアップグレードウィザード ダイアログで CD ROMのドライブレター PRO1000 WIN2K と指定し OK ボタンをクリックしてください 8 ドライバファイルの検索 画面が表示されま...

Page 32: ...次へ ボタンをクリックしてください 15 ハードウェアデバイスドライバのインストール 画面が表示されますので デバイ スに最適なドライバを検索する 推奨 を選択し 次へ ボタンをクリックしてくださ い 16 ドライバファイルの特定 画面が表示されますので 本製品添付のドライバCDを CD ROMドライブ装置にセットし 検索場所のオプション の 場所を指定 を選択し その他は選択しないでください 次へ ボタンをクリックしてください 17 デバイスドライバのアップグレードウィザード ダイアログで CD ROMのドライブレター PRO1000 WIN2K と指定し OK ボタンをクリックしてください 18 ドライバファイルの検索 画面が表示されますので 次へ ボタンをクリックしてく ださい 19 ファイルのコピーが開始されます 20 デバイスドライバのアップグレードウィザードの完了 画面が表示さ...

Page 33: ...el PROSet for Wired Connection InstallShield ウィザード が表示されるので 次へ ボタンをクリックします 24 使用許諾契約を読んで 同意するならば 使用許諾契約の条項に同意します を選択 し 次へ ボタンをクリックします 25 標準 を選択し 次へ ボタンをクリックします 26 インストール ボタンをクリックします 27 InstallShieldウィザードを完了しました ウィンドウが表示されたら 完了 ボタン をクリックします 28 システムを再起動してください 17 ...

Page 34: ...D ROMドライブ名 例 D 3 セットアップ の セットアップコマンド名 に ドライバインストール用バッチファ イル名を以下の様に指定します CD ROMドライブ名 install bat 例 D install bat 4 コマンドオプション は何も指定しないでください 5 DPM Ver 2 1 3 0 の取扱説明書に従い インストールしてください 続いてIntel PROSetをインストールします DPMを使用される環境ではCPUブレードからインストールしてください 以下はCPUブレードからインストールする場合の手順です 6 スタートメニューから プログラム アクセサリ の順にポイントし エクスプロー ラ をクリックします 7 以下のフォルダに格納されている PROSet exe をダブルクリックします CD ROMのドライブレター APPS PROSet WIN2K 8 Inte...

Page 35: ...N8403 012 1000BASE T 接続ボード 2ch 日本語版 Japanese Edition 10 標準 を選択し 次へ ボタンをクリックします 11 インストール ボタンをクリックします 12 InstallShieldウィザードを完了しました ウィンドウが表示されたら 完了 ボタン をクリックします 13 システムを再起動してください 19 ...

Page 36: ...の間にケーブルが接続されている ことを確認してください ケーブルが接続されていなかっ たり リンクパートナーの電源がOFFであったりした場合 に テスト結果が失敗となります 1 コントロールパネル ウィンドウで Intel PROSet アイコンをダブルクリックしてくださ い Intel PROSet ダイアログボックスが表示されます 2 診断 タブをクリックします 3 テストの実行 ボタンをクリックします 4 ここでメッセージが表示されますので はい Y をクリックしてください 診断テストが実行されます 5 テスト項目右側の 合格 失敗 が 1 0 と表示されれば正常です 合格 失敗 が 0 1 と表示された場合は 6 トラブルシューティング 36 ペー ジ に従って 再確認してください 再確認後も 合格 失敗 が 0 1 と表示された場合は 保守員または販売店にお問 い合わせください ...

Page 37: ...態に応じてインストール作業を実施し てください z CPU ブレードからインストールする場合 4 5 2 オンボード LAN ドライバの更新と Intel PROSet の削除 24 ページ をご覧く ださい z TS クライアントからインストールする場合 4 5 3 TS クライアントからインストールする場合 25 ページ をご覧ください z デバイスマネージャを利用して手動でインストールする場合 4 5 4 デバイスマネージャを利用して手動でインストールする場合 26 ページ をご覧 ください z DPM Ver 2 1 3 0 からインストールする場合 4 5 5 DPM Ver 2 1 3 0 からインストールする場合 29 ページ をご覧ください アダプタを交換する場合は 一旦ドライバを削除してからド ライバを再インストールしてください なお ドライバを削除してしまうと プロトコ...

Page 38: ...すので ネットワーク接続 をクリックして ローカルエリア接続 をクリックします クラシック スタート メニューの場合 スタートメニューから 設定 ネットワーク接続 の順にクリックします そして ローカルエリア接続 アイコンを右クリックし ショートカットメニュー から プロパティ を選択します 2 構成 ボタンをクリックします ネットワークアダプタのプロパティ が開きます 3 プロパティ を選択します ローカルエリア接続のプロパティ ダイアログが開きま す 4 ドライバ タブを選択し バージョンを確認します 以下のバージョンと同じ もしくは新しいバージョンの場合はドライバを更新する 必要はありませんので Intel PROSetの削除手順 に進んでください Express5800 420Laの場合 バージョン 7 0 26 0 Express5800 420Maの場合 バージョン 7 2 1...

Page 39: ...nstall bat OBMA しばらくして Finish と表示されれば完了です 4 システムを再起動してください Intel PROSet の削除手順 Intel PROSetがインストールされていない場合は 削除の必要はありません 1 スタートメニューから 設定 コントロールパネル を選択します 2 プログラムの追加と削除 アイコンをダブルクリックします 3 Intel PROSet ボタンを選択し 削除 ボタンをクリックします 4 ダイアログボックスが表示されるので はい をクリックします Intel PROSet が削除されます 5 すべてのウィンドウを閉じます 6 システムを再起動してください 続いてN8403 012のドライバをセットアップしますので N8403 012アダプタをCPUブレ ードに取り付けてください 取り付け作業は 2 本体装置へのアダプタの取り付け 3ページ...

Page 40: ...されれば完了です 続いてIntel PROSetをインストールします 4 エクスプローラを表示させます 標準の スタート メニューの場合 スタートメニューから すべてのプログラム アクセサリ の順にポイントし エクスプローラ をクリックします クラシック スタート メニューの場合 スタートメニューから プログラム アクセサリ の順にポイントし エクスプローラ をクリックします 5 以下のフォルダに格納されている PROSet exe をダブルクリックします CD ROMのドライブレター APPS PROSet WS03XP32 6 Intel PROSet for Wired Connection InstallShield ウィザード が表示されるので 次へ ボタンをクリックします 7 使用許諾契約を読んで 同意するならば 使用許諾契約の条項に同意します を選択し 次へ ボタンをクリック...

Page 41: ...動し 以下のコマンドを入力してEnterキーを押します 下記コマンドラインの は半角スペースの入力を示します install bat TS しばらくして Driver Installed と表示されれば完了です 続いてIntel PROSetをインストールします 4 エクスプローラを表示させます 標準の スタート メニューの場合 スタートメニューから すべてのプログラム アクセサリ の順にポイントし エクスプローラ をクリックします クラシック スタート メニューの場合 スタートメニューから プログラム アクセサリ の順にポイントし エクスプローラ をクリックします 5 以下のフォルダに格納されている PROSet exe をダブルクリックします CD ROMのドライブレター APPS PROSet WS03XP32 6 Intel PROSet for Wired Connection ...

Page 42: ... MT Dual Port Server Adapter もしくは Intel PRO 1000 MT Dual Port Network Connection を右クリックして プロパティ を選択します ここで 全般 タブの 場所 欄にPCI Slot1と表示されているノードの一つを選択し てください 3 ドライバ タブの ドライバの再インストール ボタンをクリックします 4 ハードウェアの更新ウィザード ダイアログボックスが表示されますので 一覧ま たは特定の場所からインストール 詳細 を選択し 次へ ボタンをクリックしてくだ さい 5 次の場所で最適のドライバを検索する を選択し 次の場所を含める にチェックを 入れ その他は選択しないでください CD ROMのドライブレター PRO1000 WS03XP32 と指定し ドライバCDをセットしてから 次へ ボタンをクリックしてください...

Page 43: ...ドウェアの更新ウィザード ダイアログボックスが表示されますので 一覧ま たは特定の場所からインストール 詳細 を選択し 次へ ボタンをクリックしてくだ さい 12 次の場所で最適のドライバを検索する を選択し 次の場所を含める にチェックを 入れ その他は選択しないでください CD ROMのドライブレター PRO1000 WS03XP32 と指定し ドライバCDをセットしてから 次へ ボタンをクリックしてください 13 ファイルのコピーが開始されます 14 ハードウェア更新ウィザードの完了 画面が表示されますので 完了 ボタンをクリ ックしてください 続いてIntel PROSetをインストールします 15 エクスプローラを表示します 標準の スタート メニューの場合 スタートメニューから すべてのプログラム アクセサリ の順にポイントし エクスプローラ をクリックします クラシック スタ...

Page 44: ...el PROSet for Wired Connection InstallShield ウィザード が表示されるので 次へ ボタンをクリックします 18 使用許諾契約を読んで 同意するならば 使用許諾契約の条項に同意します を選択 し 次へ ボタンをクリックします 19 標準 を選択し 次へ ボタンをクリックします 20 インストール ボタンをクリックします 21 InstallShieldウィザードを完了しました ウィンドウが表示されたら 完了 ボタン をクリックします 22 システムを再起動してください 28 ...

Page 45: ...して 追加 をクリックします CD ROMドライブ名 例 D 3 セットアップ の セットアップコマンド名 に ドライバインストール用バッチファ イル名を以下の様に指定します CD ROMドライブ名 install bat 例 D install bat 4 コマンドオプション は何も指定しないでください 5 DPM Ver 2 1 3 0 の取扱説明書に従い インストールしてください 続いてIntel PROSetをインストールします DPMを使用される環境ではCPUブレードからインストールしてください 以下はCPUブレードからインストールする場合の手順です 6 エクスプローラを表示させます 標準の スタート メニューの場合 スタートメニューから すべてのプログラム アクセサリ の順にポイントし エクスプローラ をクリックします クラシック スタート メニューの場合 スタートメニューから...

Page 46: ...el PROSet for Wired Connection InstallShield ウィザード が表示されるので 次へ ボタンをクリックします 9 使用許諾契約を読んで 同意するならば 使用許諾契約の条項に同意します を選択 し 次へ ボタンをクリックします 10 標準 を選択し 次へ ボタンをクリックします 11 インストール ボタンをクリックします 12 InstallShieldウィザードを完了しました ウィンドウが表示されたら 完了 ボタン をクリックします 13 システムを再起動してください 30 ...

Page 47: ...の間にケーブルが接続されている ことを確認してください ケーブルが接続されていなかっ たり リンクパートナーの電源がOFFであったりした場合 に テスト結果が失敗となります 1 コントロールパネル ウィンドウで Intel PROSet アイコンをダブルクリックしてくださ い Intel PROSet ダイアログボックスが表示されます 2 診断 タブをクリックします 3 テストの実行 ボタンをクリックします 4 ここでメッセージが表示されますので はい Y をクリックしてください 診断テストが実行されます 5 テスト項目右側の 合格 失敗 が 1 0 と表示されれば正常です 合格 失敗 が 0 1 と表示された場合は 6 トラブルシューティング 36 ペー ジ に従って 再確認してください 再確認後も 合格 失敗 が 0 1 と表示された場合は 保守員または販売店にお問 い合わせください ...

Page 48: ...をグループの全 アダプタから行うことにより スループットを向上させます この機能は AFT 機能を含みます 設定の詳細は 下記の WWW サイト掲載の 周辺機器使用 LAN ボード を参照してくださ い http soreike wsd mt nec co jp docs www_home exp teci tecbook htm AFT のグループとして指定するアダプタは 同一ネットワーク機器 ハブ スイッチ等 異なるネットワーク機器 のどちらの接続でも使 用可能ですが すべて同一 LAN 同一セグメント 上に存在する必 要があります ALB のグループとして指定するアダプタは 同一ネットワーク機器 ハブ スイッチ等 の同じ LAN 上に存在する必要があります 別々のネットワーク機器に接続した場合 正常に動作しません ドライバインストール後 システムを再起動した後に AFT ALB をセ...

Page 49: ...bnet Operational Stand by AdapterTeaming の構成 プライマリ Intel PRO 1000 MT Dual Port Server Adapter N8403 012 PortA セカンダリ Intel PRO 1000 MT Dual Port Server Adapter 2 N8403 012 PortB ALB による負荷分散 Express5800 BladeServer Express5800 BladeServer Port A Port B Switching Hub Switching Hub ALB N8403 N8403 012 012 AdapterTeaming の構成 プライマリ Intel PRO 1000 MT Dual Port Server Adapter N8403 012 PortA セカンダリ Intel P...

Page 50: ... トレランス または アダプティブ ロード バランシング を選択 して 次へ をクリックします 6 チームにするアダプタにチェックをいれて 次へ をクリックします 7 完了 ボタンをクリックします 8 有線ネットワーク用 Intel PROSet ダイアログボックスに戻るので 適用 ボタンをクリ ックし OK ボタンをクリックします 9 システムを再起動させます 5 2 Windows Server 2003 をご使用の場合の設定方法 1 有線ネットワーク用Intel PROSet を開きます 標準の スタート メニューの場合 スタートメニューから コントロールパネル 有線用Intel PROSet の順に クリックします クラシック スタート メニューの場合 スタートメニューから 設定 コントロールパネル の順にクリックします すると コントロールパネル ウィンドウが開きますので 有線用...

Page 51: ...ボード 2ch 日本語版 Japanese Edition 4 アダプタ フォルト トレランス または アダプティブ ロード バランシング を選択 して 次へ をクリックします 5 チームにするアダプタにチェックをいれて 次へ をクリックします 6 完了 ボタンをクリックします 7 有線ネットワーク用Intel PROSet ダイアログボックスに戻るので 適用 ボタンをクリ ックし OK ボタンをクリックします 8 システムを再起動させます 35 ...

Page 52: ...自動認識 にも かかわらず アダプタのポートを全二重モードに固定設定した場合は スイッチングハブ側 が半二重モードになります この時 リンクは確立しますがネットワークパフォーマンスは 著しく低下しますのでご注意ください ケーブルが正しく接続されていることを確認してください ネットワークケーブルは両方 アダプタおよびリンクパートナー ハブ スイッチ等 の LAN ポートにしっかりと取り付けられていなければなりません ケーブルを確認してください ご使用のツイストペアケーブルのカテゴリが基準以下であったり 3 ネットワークケーブ ルの接続 4 ページ 参照 ケーブルに損傷があったり 極度に折れ曲がって設置されてい る場合 重いものの下敷きになっている場合通信できないことがあります また ケーブル長が 100 メートルを超えている場合にも通信できないことがあります この場合 別のケーブルを使用して...

Page 53: ...s で動作しています ACT LNK SPEED ACT LNK SPEED P o rt A P o rt B SPEED 消灯 10Mbps で動作しています 6 2 アダプタのテスト 本アダプタのドライバおよび Intel PROSet をインストールすることによって アダプタ の自己診断テストが実行できるようになります Intel PROSet のインストール手順については 4 ドライバのインストールとアダプ タの設定 5 ページ を参照してください Windows 2000 Windows Server 2003 の場合 Windows 2000 Windows Server 2003 搭載の本体装置では コントロールパネル で Intel PROSet アイコンをダブルクリックして Intel PROSet を実行します 診断の実行方 法その他の情報については Intel PR...

Page 54: ...を使用してください 特に 1000Mbps でお 使いになる場合はカテゴリ 5e 以上のツイストペアケーブルを使用してください また ケーブルがしっかりと固定されていることを確認してください z アダプタとリンクパートナーの通信モード 全二重 半二重 が一致していることを確認し てください リンクLEDが点灯しない z ネットワークドライバが読み込まれていることを確認してください z アダプタおよびリンクパートナー上の接続状態をすべて確認してください z リンクパートナー上 ハブ スイッチ等 の別のポートを使用してみてください z アダプタとリンクパートナーの通信速度が一致していることを確認してください z アダプタとリンクパートナー間のケーブルのタイプが正しいことを確認してください 本アダプタを 1000Mbps 設定でお使いになる場合は カテゴリ 5e 以上のケーブルを使 用してくださ...

Page 55: ...アダプタの I O アドレスと IRQ レベルを設定します これらの値は アダプタソフトウェアでは変更できません 本体装置の起動時に障害が発生す る場合は さらに設定が必要な場合もあります このような本体装置では 本体装置の PCI BIOS 設定ユーティリティを使ってマニュアル 設定が可能です 本体装置のマニュアルをご覧ください BIOS 設定の一部の検証または変更 が必要なことがあります PCI に関する一般的な対処方法を次に示します z PCI BIOS のアップデート 最新の PCI システム BIOS を使用すると PCI 設定の問題を是正できることがありま す 本体装置の製造元に連絡し 最新の BIOS バージョンがあるかどうかを問い合わ せてください 39 ...

Page 56: ...connector for accessing the network The connector type is RJ 45 For the types of connectable cables and how to connect see Chapter 3 Network cable connection on page 43 z PCI bus connector Attach PCI bus connector to PCI expansion slot in the server This adapter supports 64 bit PCI Rev2 2 and PCI X 133MHz or slower and is compliant with 5V 3 3V universal specifications z PCI riser card A riser car...

Page 57: ...ed Blinking or lit Indicates that data is being sent received Blinking interval varies depending on the traffic intensity ACT LNK Off Not properly accessing the link partner Link not established Lit green Working at 1000 Mbps Lit orange Working at 100 Mbps ACT LNK SPEED ACT LNK SPEED P o rt A P o rt B SPEED Off Working at 10 Mbps 41 ...

Page 58: ...u are going to insert the card 2 Remove the CPU blade from Blade Server Assemble Unit Warning Caution Hot Components in the server are hot to the touch when and after you turn off the server Use care until it becomes cool before you remove the cover 3 If any other PCI boards are attached to the CPU blade remove them all from CPU blade and PCI riser card 4 Place the CPU blade on an anti static clea...

Page 59: ...Unit See Chapter 4 Installing driver and setting up adapter on page 44 for changing BIOS settings and setting up the driver 3 Network cable connection Connect a network cable twisted pair cable connector to N8403 012 adapter s LAN port Twisted pair cable types that you can use for this product are listed by communication grades Communication grade Twisted pair cable specifications 10Base T CAT 3 o...

Page 60: ...o install on Windows 2000 on page 49 WindowsServer2003 Section 4 5 How to install on Windows Server 2003 on page 59 N8403 012 supports Windows2000 where Service Pack 4 or newer is applied To use N8403 012 on Windows2000 make sure that Service Pack 4 or newer is applied on the operating system To use this product on Linux install the driver either by Media and manual that and come with the operatin...

Page 61: ...ect Item Select Menu Change Values Enter Select Sub Menu F1 Setup Defaults F10 Save and Exit Item Specific Help System time 13 58 43 System Date 06 08 2004 Processor Settings 3 Press arrow keys to select Advanced on the menu PhoenixBIOS Setup Utility Main Advanced Security Server Boot Exit F1 Help Esc Exit Select Item Select Menu Change Values Enter Select Sub Menu F1 Setup Defaults F10 Save and E...

Page 62: ...nter key PhoenixBIOS Setup Utility Main Advanced Security Server Boot Exit F1 Help Esc Exit Select Item Select Menu Change Values Enter Select Sub Menu F1 Setup Defaults F10 Save and Exit Item Specific Help Embedded SCSI Embedded NIC Dual Gbit Embedded Video Controller PCI Slot 1 Option ROM Initializes device expansion ROM PCI Configuration Enabled Enabled Disabled PhoenixBIOS Setup Utility Main A...

Page 63: ...CSI Embedded NIC Dual Gbit Embedded Video Controller PCI Slot 1 Option ROM Initializes device expansion ROM PCI Configuration Disabled 7 Press F10 key to save the changes PhoenixBIOS Setup Utility Main Advanced Security Server Boot Exit Space Select Enter Accept Item Specific Help Embedded SCSI Embedded NIC Dual Gbit Embedded Video Controller PCI Slot 1 Option ROM Initializes device expansion ROM ...

Page 64: ...are hot to the touch when and after you turn off the server Use care until it becomes cool before you remove the cover When you attach the adapter remove CPU blade from Blade Server Assemble Unit Before you attach this adapter to CPU blade make sure to remove CPU blade from Blade Server Assemble Unit Otherwise you may get electric shock or the server may be damaged When you have attached the adapt...

Page 65: ... from CPU blade on page 52 z To install from TS client see Section 4 4 3 How to install from TS client on page 53 z To install manually by using Device Manager see Section 4 4 4 How to install manually by using Device Manager on page 54 z To install from DPM Ver 2 1 3 0 see Section 4 4 5 How to install from DPM Ver 2 1 3 0 on page 56 To replace the adapter first you have to remove the driver then ...

Page 66: ...he followings or newer you do not need to update the driver Go to How to remove Intel PROSet For NEC Express5800 420La Version 7 0 26 0 For NEC Express5800 420Ma Version 7 2 17 0 How to update the onboard LAN driver 1 Insert the driver CD that comes with this product into the CD ROM drive which the CPU blade is connected with 2 Start the command prompt on the CPU blade screen 3 On the command prom...

Page 67: ...ove Programs icon 3 Select Intel PROSet button Click Remove button 4 You will see a dialog box Click Yes Then Intel PROSet is removed 5 You will see the Add Remove Programs dialog box Click Close button 6 Close all windows 7 Restart the system Next you set up the N8403 012 adapter driver Attach the N8403 012 adapter to CPU blade See Chapter 2 How to attach the adapter on your server on page 42 for...

Page 68: ...ace install bat 012 If you see a returned message Finish you have updated the driver successfully Next you install Intel PROSet 4 Select Programs Accessories from Start menu Click Windows Explorer 5 Double click PROSet exe which you can find in the following folder CD ROM s drive letter APPS PROSet WIN2K 6 Intel PROSet for Wired Connection InstallShield Wizard is displayed Click Next 7 Read the li...

Page 69: ...in the following command line samples represents a space install bat TS If you see a returned message Driver Installed you have installed the driver successfully Next you install Intel PROSet 4 Select Programs Accessories from Start menu Click Windows Explorer 5 Double click PROSet exe which you can find in the following folder CD ROM s drive letter APPS PROSet WIN2K 6 Intel PROSet for Wired Conne...

Page 70: ...pecify Device Driver window is displayed Insert the driver CD that comes with this product into the CD ROM drive Select Specify Location do not select others in Search Option Click Next 7 In Update Device Driver Wizard dialog enter CD ROM s drive letter PRO1000 WIN2K Click OK 8 Searching Device Driver window is displayed Click Next 9 File copy starts 10 Update Device Driver Wizard Complete window ...

Page 71: ...lick OK 18 Searching Device Driver window is displayed Click Next 19 File copy starts 20 Update Device Driver Wizard Complete window is displayed Click Finish Next you install Intel PROSet 21 Select Programs Accessories from Start menu Click Windows Explorer 22 Double click PROSet exe which you can find in the following folder CD ROM s drive letter APPS PROSet WIN2K 23 Intel PROSet for Wired Conne...

Page 72: ... batch file name in Setup command name on Setup as follows CD ROM drive letter install bat Sample D install bat 4 Specify nothing in Command options 5 See DPM Ver 2 1 3 0 User s Guide for installation procedures Next you install Intel PROSet If you use DPM in your environment install this from CPU blade The followings describe how to install from CPU blade 6 Select Programs Accessories from Start ...

Page 73: ...N8403 012 1000BASE T Adapter 2ch English Edition 英語版 10 Select Typical Click Next 11 Click Install 12 InstallShield Wizard Completed window is displayed Click Finish 13 Restart the system 57 ...

Page 74: ...ner such as switching hub are connected with a cable If not or if the link partner is powered off test result will be failed 1 Double click Intel PROSet icon in Control Panel window Intel PROSet dialog box is displayed 2 Click Diagnostics tab 3 Click Run Tests 4 You see a message Click Yes The diagnostics test will start 5 If Pass Fail field is 1 0 on the right of the test items the adapter is nor...

Page 75: ...ect one z To install from CPU blade see Section 4 5 2 How to install from CPU blade on page62 z To install from TS client see Section 4 5 3 How to install from TS client on page63 z To install manually by using Device Manager see Section 4 5 4 How to install manually by using Device Manager on page 64 z To install from DPM Ver 2 1 3 0 see Section 4 5 5 How to install from DPM Ver 2 1 3 0 on page66...

Page 76: ...ettings Network Connections from Start menu Right click Local Area Connection icon Select Properties from the shortcut menu 2 Click Configure button Network Adapter s Properties is displayed 3 Select Properties Local Area Connection Properties dialog box is displayed 4 Select Driver tab and confirm the version If the version is the same as the followings or newer you do not need to update the driv...

Page 77: ...e Finish you have updated the driver successfully 4 Restart the system How to remove Intel PROSet If Intel PROSet is not installed you can skip this step 1 Select Settings Control Panel from the Start menu 2 Double click Add Remove Programs icon 3 Select Intel PROSet button Click Remove button 4 You will see a dialog box Click Yes Then Intel PROSet is removed 5 Close all windows 6 Restart the syst...

Page 78: ...pdated the driver successfully Next you install Intel PROSet 4 Open Windows Explorer Standard Start menu Select All Programs Accessories from Start menu Click Windows Explorer Classic Start menu Select Programs Accessories from Start menu Click Windows Explorer 5 Double click PROSet exe which you can find in the following folder CD ROM s drive letter APPS PROSet WS03XP32 6 Intel PROSet for Wired C...

Page 79: ...g command line samples represents a space install bat TS If you see a returned message Driver Installed you have installed the driver successfully Next you install Intel PROSet 4 Open Windows Explorer Standard Start menu Select All Programs Accessories from Start menu Click Windows Explorer Classic Start menu Select Programs Accessories from Start menu Click Windows Explorer 5 Double click PROSet ...

Page 80: ...e Wizard dialog box is displayed Select install from a list or specific location Advanced Click Next 5 Select Search for the best driver in these location then Include this location in the search deselect all others Enter CD ROM s drive letter PRO1000 WS03XP32 Insert the driver CD Click Next 6 File copy starts 7 Completing the Hardware Update Wizard window is displayed Click Finish 8 Open Device M...

Page 81: ...you install Intel PROSet 15 Open Windows Explorer Standard Start menu Select All Programs Accessories from Start menu Click Windows Explorer Classic Start menu Select Programs Accessories from Start menu Click Windows Explorer 16 Double click PROSet exe which you can find in the following folder CD ROM s drive letter APPS PROSet WS03XP32 17 Intel PROSet for Wired Connection InstallShield Wizard is...

Page 82: ...r the driver installation batch file name in Setup command name on Setup as follows CD ROM drive letter install bat Sample D install bat 4 Specify nothing in Command options 5 See DPM Ver 2 1 3 0 User s Guide for installation procedures Next you install Intel PROSet If you use DPM in your environment install this from CPU blade The followings describe how to install from CPU blade 6 Open Windows E...

Page 83: ...n InstallShield Wizard is displayed Click Next 9 Read the license agreement If you agree select I accept the terms in the license agreement Click Next 10 Select Typical Click Next 11 Click Install 12 InstallShield Wizard Completed window is displayed Click Finish 13 Restart the system 67 ...

Page 84: ...ner such as switching hub are connected with a cable If not or if the link partner is powered off test result will be failed 1 Double click Intel PROSet icon in Control Panel window Intel PROSet dialog box is displayed 2 Click Diagnostics tab 3 Click Run Tests 4 You see a message Click Yes The diagnostics test will start 5 If Pass Fail field is 1 0 on the right of the test items the adapter is nor...

Page 85: ...s frames from the server to increase throughput This function includes the AFT function Adapters that will be grouped for AFT can be connected with the same network device such as hub or switch or with different ones however they should exist on the same LAN the same segment Adapters that will be grouped for ALB should exist on the same LAN of the network device such as hub or switch If they are c...

Page 86: ...rational Stand by AdapterTeaming configuration Primary Intel PRO 1000 MT Dual Port Server Adapter N8403 012 PortA Secondary Intel PRO 1000 MT Dual Port Server Adapter 2 N8403 012 PortB Load balancing by ALB Express5800 BladeServer Express5800 BladeServer Port A Port B Switching Hub Switching Hub ALB N8403 N8403 012 012 AdapterTeaming configuration Primary Intel PRO 1000 MT Dual Port Server Adapter...

Page 87: ...6 Select adapters that you want to make a team Click Next 7 Click Finish 8 You go back to Intel PROSet for Wired Connections dialog box Click Apply then OK 9 Restart the system 5 2 How to set up on Windows Server 2003 1 Open Intel PROSet for Wired Connections Standard Start menu Select Control Panel Intel PROSet Wired from Start menu Classic Start menu Select Settings Control Panel from Start menu...

Page 88: ... 英語版 N8403 012 1000BASE T Adapter 2ch 5 Select adapters that you want to make a team Click Next 6 Click Finish 7 You go back to Intel PROSet for Wired Connection dialog box Click Apply then OK 8 Restart the system 72 ...

Page 89: ...witching hub s port becomes half duplex mode Here the link is established between them however the network performance will extremely be low Verify your cable is connected properly The network cable should securely be attached on both LAN ports of adapter and link partner such as hub switch Verify your cable type If your twisted pair cable is below the category s specifications see Chapter 3 Netwo...

Page 90: ...K SPEED ACT LNK SPEED P o rt A P o rt B SPEED Off Working in 10 Mbps 6 2 Test the adapter By installing this adapter s driver and Intel PROSet you can run the adapter self diagnostic test For how to install Intel PROSet see Chapter 4 Installing driver and setting up adapter on page 44 To run on Windows 2000 Windows Server 2003 On servers where Windows 2000 Windows Server 2003 is installed double c...

Page 91: ...of CAT 5e or better Also make sure that the cable is securely attached z Make sure that the communication mode full duplex half duplex on the adapter matches that on link partner Link LED stays off z Make sure you loaded the network driver z Check all connections at the adapter and link partner z Try another port on the link partner such as hub switch z Make sure the communication rate on the adap...

Page 92: ...oftware can change these settings If an error occurs at the server startup a further setting may be required For such a server you can manually make settings by the server s PCI BIOS Setup utility See the server s User s Guide You may need to check or change a part of BIOS settings General countermeasures on PCI are z To update PCI BIOS By using the latest PCI system BIOS sometimes PCI setting pro...

Page 93: ...N8403 012 1000BASE T Adapter 2ch English Edition 英語版 Memo 77 ...

Page 94: ......

Page 95: ...0BASE T Adapter 2ch User s Guide 2004 年 7 月初版 First Printing July 2004 日本電気株式会社 東京都 港区 芝 5 丁目 7 番 1 号 TEL 03 3454 1111 大代表 NEC Corporation 7 1 Shiba 5 chome Minato ku Tokyo 108 8001 Japan この取扱説明書は再生紙を使用しています 856 124304 012 A 856 124304 012 AK ...

Reviews: