


Welcome -
1
Welcome
Welcome to the world of Motorola digital wireless communications! We are
pleased that you have chosen the Motorola C300 wireless phone.
Note:
In this guide,
press and hold
means “pressing and holding a key for
about 3 seconds,” while
press
means “pressing and releasing a key
immediately.”
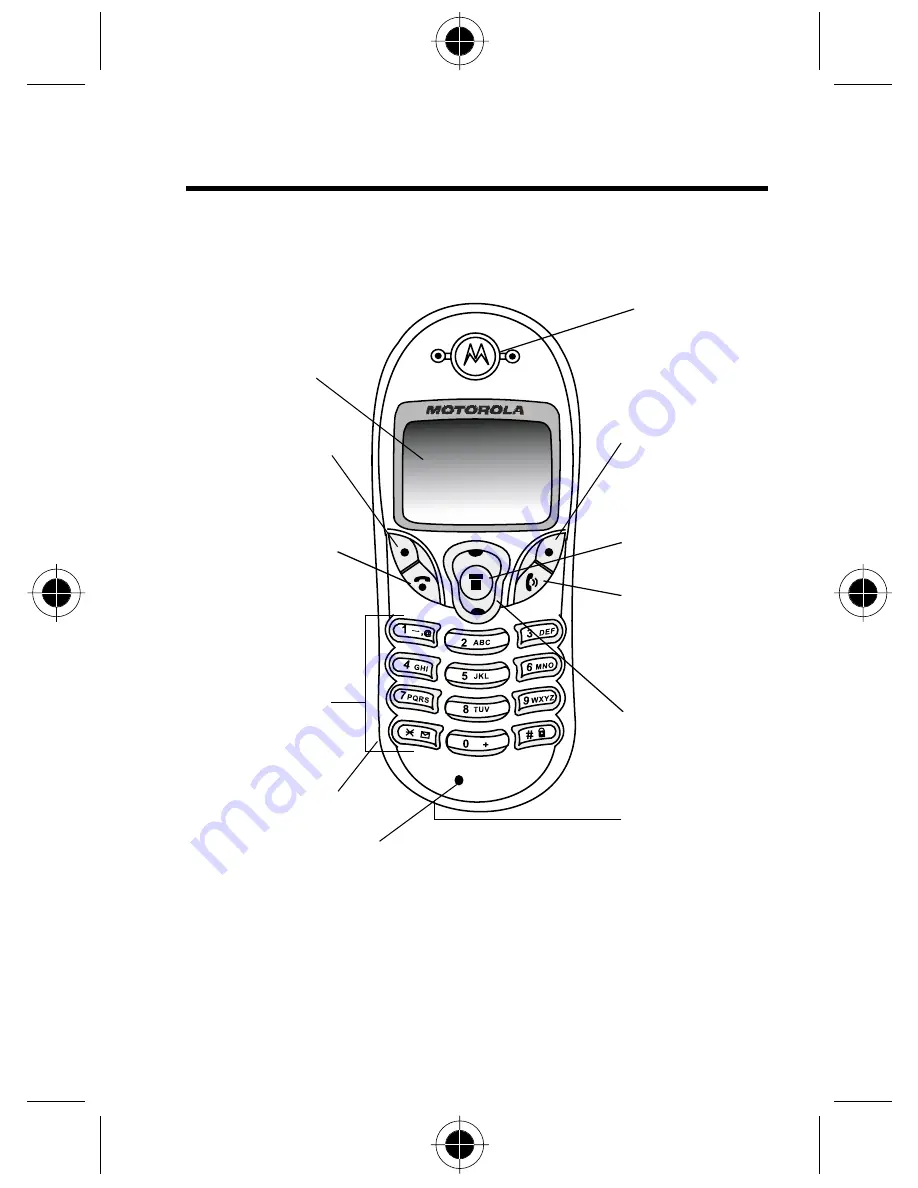
Earpiece
LCD Display
Right Soft Key
Perform functions
identified by right
display prompt
Left Soft Key
Perform functions
identified by left
display prompt
Power On/Off
Key
Press and hold to
switch phone on/
off, or to end or
cancel
a call
Make Key
Make and answer
calls, view recent
dialled calls list
Scroll Key
Move through
menus and lists
Alphanumeric
Keys
Menu Key
Accessory
Connector Port
Insert charger and
phone accessories
Microphone
Headset Jack
For connection to
optional hands-free
headset


