background image

FLOOR TYPE AIR CONDITIONERS

MFZ-KJ25VE MFZ-KJ35VE  MFZ-KJ50VE

English

InstallatIon Manual 

For INSTALLER

•  When installing multi units, refer to the installation manual of the multi unit for 

outdoor unit installation.

JG79A867H01_en.indd   1

2014/02/07   15:44:57

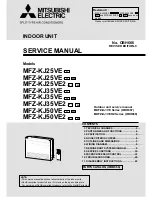
Summary of Contents for MFZ-KJ25VE

Page 1: ... TYPE AIR CONDITIONERS MFZ KJ25VE MFZ KJ35VE MFZ KJ50VE English InstallatIon Manual For INSTALLER When installing multi units refer to the installation manual of the multi unit for outdoor unit installation ...

Page 2: ...ls and piping materials for installation The pressure of R410A is 1 6 times more than R22 Not using appropriate tools or materials and incom plete installation could cause the pipes to burst or injury n When pumping down the refrigerant stop the compressor before disconnecting the refriger ant pipes If the refrigerant pipes are disconnected while the compressor is running and the stop valve is ope...

Page 3: ...ess than 7 m Additional refrigerant A pipe length m 7 8 Insulation material Heat resisting foam plastic 0 045 specific gravity 9 Be sure to use the insulation of specified thickness Ex cessive thickness may cause incorrect installation of the indoor unit and insufficient thickness may cause dew drip page Model Power supply 1 Wire specifications 2 Pipe size thickness 3 4 Indoor unit Outdoor unit Ra...

Page 4: ...WARD PIPING The following figure is a view of the bottom of the indoor unit from above FOR REAR OR LEFT REAR PIPING The following figure is a front view of the indoor unit installation location FOR LEFT PIPING FOR RIGHT PIPING HolE PosItIons ø65 mm KJ25 35 ø75 mm KJ50 5 7 mm 2 3 InDooR unIt PREPaRatIon Remove the front panel of the indoor unit 1 Push down the tab on the both sides of the unit to o...

Page 5: ...door unit and process the end of the wire 3 Loosen terminal screw and connect first the earth wire then indoor outdoor unit connecting wire A to the terminal block Be careful not to make mis wiring Fix the wire to the terminal block securely so that no part of its core is appeared and no external force is conveyed to the connecting section of the terminal block 4 Firmly tighten the terminal screws...

Page 6: ...tape 11 Cut and use the lower side panels on the left and right sides of the indoor unit as shown below Smooth the cut edges of the side panels so that they will not damage the insulation coating For left or right piping Installing flush against a wall with molding Molding Cut the lower side panels to match the height of the molding Fig 5 Projection Make sure to hook the catch Drain hose Pull the ...

Page 7: ...me manner applied for indoor unit For tightening use a torque wrench or spanner and use the same tightening torque applied for indoor unit 3 4 INSULATION AND TAPING 1 Cover piping joints with pipe cover 2 For outdoor unit side surely insulate every piping including valves 3 Using piping tape G apply taping starting from the entry of outdoor unit Stop the end of piping tape G with tape with adhesiv...

Page 8: ...et temperature 24ºC will start 2 To stop operation press the E O SW several times until all LED lamps turn off Refer to operating instructions for details Checking the remote infrared signal reception Press the ON OFF button on the remote controller 12 and check that an electronic sound is heard from the indoor unit Press the ON OFF button again to turn the air conditioner off Once the compressor ...

Page 9: ......

Page 10: ......

Page 11: ......

Page 12: ...HEAD OFFICE TOKYO BLDG 2 7 3 MARUNOUCHI CHIYODA KU TOKYO 100 8310 JAPAN JG79A867H01 ...

Reviews: