background image


BNP-B3977A (ENG) 

 MDS-B Series


Linear Servo System 


Specifications and Instruction Manual


Summary of Contents for MELDAS MDS-B Series

Page 1: ...BNP B3977A ENG MDS B Series Linear Servo System Specifications and Instruction Manual ...

Page 2: ...ing is mistaken leading to medium or minor injuries or physical damage Note that some items described as CAUTION may lead to major results depending on the situation In any case important information that must be observed is described The signs indicating prohibited and mandatory items are described below This sign indicates that the item is prohibited must not be carried out For example is used t...

Page 3: ...rve this could lead to electric shocks Do not operate the machine with the front cover removed The high voltage terminals and charged sections will be exposed and may pose a risk of electric shocks Do not remove the surface cover even when the power is OFF unless carrying out wiring work or periodic inspections The inside of the servo amplifier is charged and may pose a risk of electric shocks Wai...

Page 4: ...overheat and fires to occur due to faults in the regenerative transistor etc 4 Injury prevention CAUTION Do not apply a voltage other than that specified in Instruction Manual on each terminal Failure to observe this item could lead to ruptures or damage etc Do not mistake the terminal connections Failure to observe this item could lead to ruptures or damage etc Do not mistake the polarity Failure...

Page 5: ...ervo amplifier and control panel or between the servo amplifier and other devices Do not install or run a servo amplifier or linear servomotor that is damaged or missing parts Do not let conductive objects such as screws or metal chips etc or combustible materials such as oil enter the servo amplifier or linear servomotor The servo amplifier and linear servomotor are precision devices so do not dr...

Page 6: ...erminals U V W Failure to do so could lead to abnormal operation of the servomotor Do not directly connect a commercial power supply to the linear servomotor Doing so could lead to faults Make sure not to mistake the orientation of the surge absorbing diode installed on the DC relay for the control output signal Failure to do so could cause a trouble preventing the signal from being output or coul...

Page 7: ...es such as the magnetic brakes installed Thus when using this for an axis onto which an unbalance force is applied such as a gravity axis install a stopping device on the machine side to secure safety Always carry out trial operation after changing the program or parameters and after maintenance and inspection Do not enter the machine s movable range during automatic operation For an unbalanced ax...

Page 8: ...e battery 7 Disposal CAUTION Treat this unit as general industrial waste Note that the MDS Series units with a heat radiating fin protruding from the back use alternate Freon and thus cannot be treated as general industrial waste Always return this part to the Service Center or Service Station A permanent magnet is used on the secondary side of the linear servomotor This also must be returned to t...

Page 9: ...d torque characteristics drawing At input voltage 200VAC 4 4 4 4 Dynamic brake characteristics 4 5 4 5 Outline dimensions 4 6 4 6 Explanation of connectors 4 9 Chapter 5 Servo Drive Specifications 5 1 Type configuration 5 2 5 2 List of specifications 5 3 5 3 Overload protection specifications 5 4 5 4 Outline dimensions 5 6 5 5 Explanation of connectors and terminal blocks 5 8 5 6 Dynamic brake uni...

Page 10: ...or and Cable Specifications 8 1 Cable connection system 8 2 8 1 1 Cable option list 8 3 8 2 Cable connectors 8 5 8 2 1 Servo amplifier CN1A CN1B and CN9 cable connector 8 5 8 2 2 Servo amplifier CN2 and CN3 cable connector 8 5 8 2 3 Servo amplifier CN20 connector for mechanical brakes 8 5 8 2 4 MDS B HR MDS B MD cable connector 8 6 8 2 5 Power supply section power wire connector 8 7 8 2 6 Flexible...

Page 11: ...tput data 10 2 10 1 3 Setting the output scale 10 2 10 2 Gain adjustment 10 3 10 2 1 Current loop gain 10 3 10 2 2 Speed loop gain 10 3 10 2 3 Position loop gain 10 5 10 3 Characteristics improvement 10 7 10 3 1 Optimal adjustment of cycle time 10 7 10 3 2 Vibration suppression method 10 10 10 3 3 Improving the cutting surface precision 10 11 10 3 4 Improvement of protrusion at quadrant changeover...

Page 12: ...1 1 Chapter 1 Outline 1 1 Outline 1 2 1 2 Features 1 2 ...

Page 13: ...as a standard 1 2 Features 1 Ample lineup Seven models Machines can be handled flexiblely Thus thrust can be increased by using several motors for one axis 2 High speed and high acceleration The max speed is 2m s as a standard An acceleration of 98m s2 is possible with the motor unit 3 Absolute position detection system As the absolute position detection system the Mitsutoyo linear scale AT342 and...

Page 14: ...m Configuration 2 1 Basic system configuration 2 3 2 2 List of units and corresponding linear motors 2 4 2 3 Linear motor drive system 2 5 2 3 1 Standard linear servo system 2 5 2 3 2 Configuration of parallel drive system 2 8 ...

Page 15: ...ries Make sure not to mistake the connection terminals Failure to observe this could lead to ruptures or trouble Make sure not to mistake the polarity Failure to observe this could lead to ruptures or trouble Make sure not to mistake the orientation of the surge absorbing diode installed on the DC relay for the control output signal Failure to do so could cause a trouble preventing the signal from...

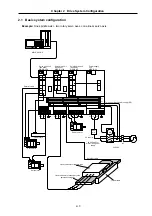
Page 16: ... main circuit power supply 8 8 8 8 8 8 8 8 Servo drive unit two axes MDS B V24 Servo drive unit two axes MDS B V14L Spindle drive unit one axis MDS B SP Power supply unit MDS B CV AC reactor Linear servomotor primary side Linear servomotor secondary side permanent magnet Servomotor MELDAS CNC L L L11 L21 U V W U V W L1 L2 L3 Linear scale Spindle motor U V W Detector cable Servomotor Linear scale D...

Page 17: ...y switch is fixed to 0 Always install a contactor 5 Always install an AC reactor shipped from Mitsubishi Note that this is not required for the A CR Wire the AC reactor to the front NF side of the contactor 2 2 List of units and corresponding linear motors Linear servo amplifier Corresponding servo amplifier LM Type NP2S 05 M NP2M 1 0M NP2L 15 M NP4S 10 M NP4M 2 0M NP4L 30 M NP4G 4 0M Type MDS B C...

Page 18: ...urally This is hazardous as the dropping distance and dropping speed are large 2 3 1 Standard linear servo system The standard drive system configuration of the linear servo system is shown below For the linear servo system the corresponding servo drive unit is the MDS B V14L Detection system Resolution Max speed Servo driver Linear scale Scale I F Pole detection unit Remarks 0 04µm 120m min LS186...

Page 19: ...unit scale I F unit use the motor thermal signal for the CNC unit s general purpose input port and detect the motor overheating CN1A CN2 MDS B V14L Servo driver To NC general purpose input port LC191M Heidenhain Absolute position linear scale To next axis terminator or battery unit To power supply if final axis To NC or previous axis Linear motor primary side Linear motor secondary side permanent ...

Page 20: ...urpose input port AT342 Mitsutoyo Absolute position linear scale 4 Absolute system 3 System using linear scale AT342 special MDS B HR 21 By using the scale I F unit MDS B HR the resolution of the position and speed used for servo control can be improved thereby improving the servo s controllability MDS B V14L Servo driver CN1A CN2 Empty CON3 CON4 Empty CON1 CON2 CN1A CN2 CN4 CN3 CN1B Scale I F MDS...

Page 21: ...le I F Incremental scale MDS B HR 11M AT342 scale MDS B HR 21M To next axis terminator or battery unit To power supply if final axis To NC or previous axis Linear motor primary side Slave Motor thermal signal Linear motor primary side Master Scale I F Incremental scale MDS B HR 12M AT342 scale MDS B HR 22M Pole detector MDS B MD 600 Not required for the AT342 scale Motor thermal signal Incremental...

Page 22: ... CN3 CN1A CN3 L L Single phase 200VAC U V W CON3 CON4 CON1 CON2 Linear scale CN2 CN1A CN2 U V W Master axis MDS B V14L Slave axis To next axis terminator or battery unit To power supply if final axis To NC or previous axis Linear motor primary side Slave Motor thermal signal Linear motor primary side Master Analog voltage output type incremental scale or AT342 Mitsutoyo absolute position scale Pol...

Page 23: ...Selecting the linear servomotor 3 2 3 1 1 Max feedrate 3 2 3 1 2 Max thrust 3 2 3 1 3 Continuous thrust 3 4 3 2 Selecting the power supply unit 3 6 3 3 Selecting the power supply capacity wire size AC reactor contactor and NFB 3 6 ...

Page 24: ...an be approximated using the machine specifications and expression 3 1 Fmax M a Ff 1 2 3 1 Fmax Max motor thrust N M Movable mass including motor s moving sections kg a Acceleration during acceleration deceleration m s2 Ff Load force including cutting force wear and unbalance force N Note that there is a servo response delay as shown on the right in respect to the acceleration in the acceleration ...

Page 25: ...mmand 19 6m s2 Command 9 8m s2 0 20 40 60 80 100 120 0 5 10 15 20 25 30 35 40 Velocity m min Acceleration m s2 During decceleration Command 29 4m s2 Command 19 6m s2 Command 9 8m s2 Max speed 120m min PGN1 100 SHG Max speed 120m min PGN1 100 SHG 0 20 40 60 80 100 120 0 5 10 15 20 25 30 35 40 Velocity m min Acceleration m s2 During acceleration Command 29 4m s2 Command 19 6m s2 Command 9 8m s2 0 20...

Page 26: ...od Load thrust calculation method Explanation 1 Amount of acceleration thrust Kinetic friction force Normally the acceleration deceleration time constant is calculated so this thrust is 80 of the maximum thrust of the motor 2 Kinetic friction force Cutting force 3 Amount of deceleration thrust Kinetic friction force The signs for the amount of acceleration thrust and amount of deceleration thrust ...

Page 27: ...e may be in the reverse of the movement direction depending on the size of the unbalance force 7 Amount of deceleration thrust Kinetic friction force Unbalance force 8 Static friction force Unbalance force The holding force becomes smaller than the upward stop Downward stop POINT During a stop the static friction force may constantly be applied The static friction force and unbalance force may par...

Page 28: ...with the rotation motor Select a power supply unit capacity having the minimum lineup capacity that satisfies expression 3 5 Caution With the linear servo axis this is used for an axis with a high acceleration deceleration frequency compared to that multiplied by 0 7 when using two or more axes with the rotation motor so the value does not need to be multiplied by 0 7 POINT Refer to the MELDAS AC ...

Page 29: ...cifications 4 1 Type configuration 4 2 4 2 List of specifications 4 3 4 3 Speed torque characteristics drawing At input voltage 200VAC 4 4 4 4 Dynamic brake characteristics 4 5 4 5 Outline dimensions 4 6 4 6 Explanation of connectors 4 9 ...

Page 30: ...The Mitsubishi control No is indicated with two alphanumeric digits 3 Rated thrust The rated thrust is indicated with the two digits for the 1000th place and 100th place Example 500 N 05 3 000 N 30 1 Width dimensions nominal dimensions 2 130 mm 4 210 mm 1 Length dimensions nominal dimensions S 290 mm M 530 mm L 770 mm G 1 010 mm 4 Max speed M 120 m s 5 Mitsubishi control No The Mitsubishi control ...

Page 31: ...00 6000 9000 12000 Conti nu ous A 5 11 7 15 11 23 7 15 11 5 24 18 38 25 52 Current Max A 40 55 83 55 84 138 188 Output continuous kW 0 5 1 0 1 0 2 0 1 5 3 0 1 0 2 0 2 0 4 0 3 0 6 0 4 0 8 0 Power voltage V 200 Max speed m min 120 Magnet attraction force N 3750 7500 11250 7500 15000 22500 30000 Coil resistance 1 phase at 20 C Ω 1 43 1 40 0 92 1 15 0 77 0 44 0 32 Primary side coil kg 8 5 15 22 14 5 2...

Page 32: ... m min Thrust Short time usage range Speed N 6000 2000 0 0 60 120 m min Thrust Short time usage range Speed N 9000 3000 0 0 60 120 m min Thrust Short time usage range Speed N 12000 4000 0 0 60 120 m min Thrust Short time usage range Speed N Continuous usage Oil cooling Continuous usage Oil cooling Continuous usage Oil cooling LM NP2S 05M Continuous usage Oil cooling LM NP2M 10M LM NP2L 15M Continu...

Page 33: ...ng amount m F0 Speed during brake operation m min M Total weight of moving section kg A Coefficient according to following table B Coefficient according to following table Note Lmax has a 10 variation due to the motor s inductive voltage constant Motor type Coefficient A Coefficient B LM NP2S 05M 2 13 10 3 4 5 10 8 LM NP2M 10M 1 04 10 3 2 26 10 8 LM NP2L 15M 8 22 10 4 1 3 10 8 LM NP4S 10M 9 03 10 ...

Page 34: ...0M 530 85 85 5 2 4 LM NP2L 15M 770 70 70 8 2 7 Secondary side dimensions Changed dimensions Type L d n LM NS20 360 360 4 2 3 LM NS20 540 540 6 2 5 L 50 12 23 130 105 Cannon connector MS3102A22 23P 85 14 C M8 screw depth 12 Cooling oil inlet outlet 2 PT1 4 screw Key position Nameplate A B n 90 90 27 L 100 120 19 5 82 9 n 90 45 45 90 Nameplate d ø9 Installation hole ...

Page 35: ...3 4 LM NP4L 30M 770 70 70 8 3 7 Secondary side dimensions Changed dimensions Type L d n LM NS40 360 360 4 2 3 LM NS40 540 540 6 2 5 L A 90 B 50 15 23 20 75 75 210 178 40 30 Cannon connector MS3102A24 10P C M8 screw depth 12 Cooling oil inlet outlet 2 PT3 8 screw Key position Nameplate n 90 L 45 200 162 9 19 5 Nameplate 180 90 n 90 45 d ø9 Installation hole ...

Page 36: ...s Type L A B C LM NP4G 40M 1010 55 55 11 3 L A 90 B 50 15 23 20 75 75 210 178 40 C M8 screw depth 12 Cooling oil inlet outlet 2 PT3 8 screw Nameplate 10 90 Key position Power supply cannon connector MS3101A32 17P Cable length 700mm Thermal cannon connector MS3101A10SL 4P Cable length 700mm ...

Page 37: ... Lead wire side A B C U V For motor W A B C U V For motor W D E Grounding D E Grounding E F G1 G2 E F G1 G2 G H Blank G Blank MS3102A22 23P MS3102A24 10P Thermal protector Thermal protector U V W E B C D E F G H G2 Thermal protector G1 Key position For motor Grounding A U V W E B C D E F G G2 Thermal protector G1 Key position For motor Grounding A ...

Page 38: ...or lead wire parallel to the emergency stop circuit on the CNC control unit or connect it to the scale I F unit MDS B HR CAUTION If oil proofing is required use the oil proof specification part for the cannon connector on the cable side POINT Use an MS type cannon connector compatible with the Mitsubishi rotation type HA type HC type AC servomotor U V W E B C D Key position For motor Grounding A B...

Page 39: ...pecifications 5 4 5 4 Outline dimensions 5 6 5 5 Explanation of connectors and terminal blocks 5 8 5 6 Dynamic brake unit 5 9 5 6 1 Connection of dynamic brake unit 5 9 5 6 2 Outline dimensions of dynamic brake unit 5 10 5 7 Battery unit 5 10 5 7 1 Connection of battery unit 5 10 5 7 2 Outline dimensions of battery unit 5 10 ...

Page 40: ...Servo Drive Specifications 5 2 5 1 Type configuration MDS B V14L Capacity class symbol 01 03 05 10 20 35 45 70 90 110 150 Capacity kW 0 1 kW 0 3 kW 0 5 kW 1 0 kW 2 0 kW 3 5 kW 4 5 kW 7 0 kW 9 0 kW 11 0 kW 15 0 kW ...

Page 41: ...Tolerable vibration 4 9m s2 Tolerable impact Acceleration 49m s2 when packaged Max heating amount W 26 32 45 65 104 150 208 318 370 400 550 Weight kg 3 5 3 5 3 5 4 5 4 5 4 5 6 0 7 0 7 0 10 0 10 0 Capacity kW 0 1 0 3 0 5 1 0 2 0 3 5 4 5 7 0 9 0 11 0 15 0 Torque limit range 0 to 100 Noise dB A Within 55dB Note 1 The heating amount is the value for the rated output Note 2 When installed in a sealed s...

Page 42: ...wn below If overload operation exceeding the electronic thermal protection curve shown below the overload 1 alarm 50 will occur If a current exceeding 95 of the max current continuously flows for one second or more due to a machine collision etc overload 2 alarm 51 will occur Motor LM NP2S NP2M NP4S Servo amplifier MDS B V14L 20 35 Motor LM NP2L NP4M Servo amplifier MDS B V14L 45 When operating Wh...

Page 43: ...Chapter 5 Servo Drive Specifications 5 5 Motor LM NP4L Servo amplifier MDS B V14L 90 Motor LM NP4G Servo amplifier MDS B V14L 110 When operating When stopped When operating When stopped Time s Time s ...

Page 44: ... Rectan gular hole 340 120 180 250 350 380 400 Side Inside panel Outside panel Servo drive unit Fin fan Maintenance area Servo drive unit Capacity to 3 5kW 4 5kW 7 to 9kW 11 to 15kW W 60 90 120 150 b 360 360 360 360 c 52 82 112 142 d 342 342 342 342 Note The outline dimension type A0 unit indicated in 2 2 List of units and corresponding linear motors does not have the fin fan section ...

Page 45: ...Chapter 5 Servo Drive Specifications 5 7 Note The front view drawing shows the state with the terminal cover removed MDS B 14L 01 MDS B 14L 45 MDS B 14L 70 03 90 05 10 20 35 MDS B 14L 110 150 ...

Page 46: ...tenance normally not used Connection with power supply Connection with motor end detector Connection with machine end detector Connector CN20 External brake output contact Also used for V14L 110 150 dynamic brake contact output TE2 L L Converter voltage input Converter voltage input TE3 L11 L21 200VAC single phase input Terminal block TE1 U V W Motor drive U phase output Motor drive V phase output...

Page 47: ...brake unit The MDS B V14L 110 and MDS B V14L 150 do not have built in dynamic brakes An external dynamic brake unit must be provided 5 6 1 Connection of dynamic brake unit 1 For only dynamic brake unit 2 For dynamic brake unit magnetic brakes combined use ...

Page 48: ... a battery less linear scale AT342 LC191M is used for the absolute position detector used in the absolute position system Thus basically the battery unit is not required However in a system using a rotation motor for the other axes a battery unit is required for the CNC system 5 7 1 Connection of battery unit Refer to 7 2 11 Connection of battery unit 5 7 2 Outline dimensions of battery unit Commo...

Page 49: ... configuration 6 3 6 2 3 List of specifications 6 4 6 2 4 Outline dimensions 6 5 6 2 5 Explanation of connectors 6 6 6 3 Pole detection unit 6 7 6 3 1 Outline 6 7 6 3 2 Type configuration 6 7 6 3 3 List of specifications 6 7 6 3 4 Outline dimensions 6 8 6 3 5 Explanation of connectors 6 8 6 3 6 Installation 6 9 ...

Page 50: ...n speed 110m min resolution 0 5µm Heidenhain LC191M Max operation speed 120m min resolution 0 1µm 2 Linear scales usable as combination with MDS B HR scale I F unit For incremental incremental value system Maker Scale type Scale specifications excerpt Mitsutoyo AT342 Special Max operation speed 110m min resolution 0 04µm LS186 Max operation speed 120m min resolution 0 04µm LIDA181 Max operation sp...

Page 51: ...he source waves output by the MDS B MD pole detection unit 3 1 scale 2 driver operation is possible with the signal branching function with type class 6 2 2 Type configuration MDS B HR type configuration MDS B HR Protection format class No symbol IP65 P IP67 Pole detection unit compatibility class No symbol Not MD compatible M MD compatible Signal branching function class 1 No of outputs 1 2 No of...

Page 52: ... p A phase B phase Z phase 2 5V standard Amplitude 2Vp p A phase B phase Z phase 2 5V standard Amplitude 1Vp p A phase B phase Z phase 2 5V standard Amplitude 2Vp p Corresponding frequency Analog source waveform 200kHz max Scale resolution Analog source waveform 512 division Input output communication type High speed serial communication I F MDS B V 4 specifications equivalent to RS485 Pole detect...

Page 53: ...Chapter 6 Detector Specifications 6 5 6 2 4 Outline dimensions 152 46 RM15WTR 10S 4 ø5 hole 6 5 RM15WTR 8P 2 165 CON4 70 6 5 RM15WTR 12S CON3 CON2 CON1 5 5 ...

Page 54: ...l 5 P5 6 P5 7 GND 8 GND Connector RM15WTR 8P Hirose CON1 CON2 RM15WTR 12S Hirose CON3 RM15WTR 10S Hirose CON4 CON1 Pin No Function 1 A phase signal 2 REF signal 3 B phase signal 4 REF signal 5 P24 6 MOH signal 7 P5 8 P5 9 TH signal 10 GND CON3 Pin No Function 1 A phase signal 2 A phase signal 3 B phase signal 4 B phase signal 5 Z phase signal 6 Z phase signal 7 RQ signal 8 RQ signal 9 SD signal 10...

Page 55: ...ection format class No symbol IP65 P IP67 Outline shape class 1 0 Current part Pole pitch class 60 60mm pole pitch 1 This is a class reserved for future use Currently there is only one type 6 3 3 List of specifications Pole detection unit type Unit MDS B MD 600 MDS B MD 600P Tolerable ambient temperature C 0 to 55 C Tolerable ambient relative humidity RH 90 RH or less with no dew condensation Atmo...

Page 56: ...Connector name Application Remarks CON1 Connection with scale I F unit MDS B HR Connector pin layout CON1 Pin No Function 1 A phase signal 2 REF signal 3 B phase signal 4 REF signal 5 TH signal 6 P5 7 P5 8 GND Connector RM15WTR 8P Hirose CON1 33 1 9 10 5 5 5 35 5 10 15 5 29 5 5 5 2 1 3 4 5 6 7 8 ...

Page 57: ...ation 1 For LM NP2 type linear motor 35 5 3 50 13 0 44 00 29 5 2 50 12 5 5 5 12 0 1 0 51 0 7 0 2 For LM NP4 type linear motor 35 5 23 5 51 0 29 5 12 5 12 0 18 0 16 0 1 5 1 0 15 0 2 50 44 00 9 0 10 50 33 10 View from side Same for both linear motor types ...

Page 58: ...on wiring system diagram 7 6 7 2 3 Installing the unit 7 7 7 2 4 Layout of each unit 7 8 7 2 5 Main circuit connection 7 9 7 2 6 Connection of feedback cable 7 11 7 2 7 Link bar specifications 7 12 7 2 8 Separated layout of units 7 13 7 2 9 Installing multiple power supply units 7 14 7 2 10 Installation for 2ch communication specifications with CNC and installation of only one power supply unit 7 ...

Page 59: ...plete fixing could cause the servomotor to come off during operation and lead to injuries 2 The motor must be replaced when damaged The connectors cooling ports etc cannot be repaired or replaced 3 Use nonmagnetic tools during installation 4 An attraction force is generated in the magnetic body by the secondary side permanent magnet Take care not to catch hands Take special care when installing th...

Page 60: ... 0 5 mm 2 Example of the installation procedures An example of the installation procedures is shown below 3 Moving over secondary side where primary side is installed 1 Installing secondary side part 1 Installing primary side where there is no secondary side 4 Installing remaining secondary side CAUTION 1 Installing the primary side where there is no secondary side as shown above is recommended to...

Page 61: ...etic tools when installing the secondary side 2 When placing the secondary side onto the installation surface use the screws on the product and suspend with eye bolts etc 3 If the secondary side is already installed and another secondary side is being added place the secondary side away from the side already installed and then slide the additional secondary side to the specific position 7 1 3 Cool...

Page 62: ...subject to direct sunlight With no corrosive gas combustible gas oil mist or dust Altitude 1000m or less above sea level Vibration 5 9m s2 or less CAUTION 1 The ambient temperature condition for the servo amplifier is 55 C or less Because heat can easily accumulate in the upper portion of the amplifier give sufficient consideration to heat dissipation when designing the power distribution panel If...

Page 63: ...re Note 1 Each unit is provided with an earth bar Do not tighten the grounding bar together with the other wires Instead wires as shown on the right Note 2 If there are noise generating devices contactor magnetic brakes relay near the power supply or drive unit and the drive unit could malfunction reduce the generated noise by installing a surge killer on the noise generating device ...

Page 64: ...t Refer to the following installation example for installing the servo amplifier P ow er distribution panel F ront B ack 4 0 4 0 4 0 P ow er distribution p anel 4 0 4 0 F ilter Intak e section Example 1 Example 2 Secure an air ventilation area when When the outside air cooling section is the machine surface is behind protruding outside the power distribution the power distribution panel panel make...

Page 65: ...will easily accumulate in each unit Thus install a fan in the power distribution panel to agitate the heat at the top of the unit 7 2 4 Layout of each unit Principally the following layout is used as the standard 1 When total of spindle motor output and servomotor output is 38kW or less Servo drive unit 2 When total of spindle motor output and servomotor output is 38kW or more Note As a principle ...

Page 66: ... operation 3 Do not apply a non designated voltage on each terminal Failure to observe this could lead to ruptures or trouble MC NF For control circuit power supply RS 8 8 8 8 8 8 Servo drive unit one axis MDS B V14L Spindle drive unit one axis MDS B SP Power supply unit MDS B CV Linear servomotor primary side Linear scale Detector cable L L L11 L21 U V W L1 L2 L3 Spindle motor U V W MC 3ø 200VAC ...

Page 67: ...f the servo drive terminals U V W and the linear motor terminals U V W If the phase order is mistaken the motor could vibrate or move suddenly 6 Never connect wires that could apply power to the servo drive output terminals U V W The servo drive unit could be damaged 7 The cannon plug used differs according to the motor Confirm that the specified power is connected to the servo drive s power termi...

Page 68: ...14L MDS B MD Scale I F unit Incremental linear scale Absolute position linear scale AT342 special Absolute position linear scale CON2 CON3 CON4 CN1A CN1B CN4 CN2 CN3 CN1A CN1B CN4 CN2 CN3 Required Peel the clamp sheath at a point near the servo amplifier and ground with a cable clamp Required Peel the cable sheath at a point near the I F unit and ground with a cable clamp Required depending on con...

Page 69: ...m the power supply unit to each drive unit L1 L1 Possible M4 screw Connection wire for supplying control power 200VAC to 230V to each unit Remarks Connection outline diagram L L L1 L1 A SP B SP A V1 V2 B V1 V2 B V14 V24 B V14L A CV B CV Note Mount the terminal cover after completing the wiring shown on the left The terminal cover is provided for each unit width Refer to Chapter 3 Selection when se...

Page 70: ... standard drive unit MDS B V1 V14L are being used lay out the units and power supply unit with the following priority V1 V14L 150 V1 V14L 110 SP 300 SP 260 SP 220 SP 185 SP 150 As shown in the following example the 9kW or less standard servo drive unit MDS B V1 V2 V14 V24 V14L can be installed vertically However the length of the relay link bar must be 50cm or less and two bars must be bundled B V...

Page 71: ...t and contactor operation sequence from the other power supply units A B CV so the contactor must be installed independently The unit could be damaged if the contactor is omitted or if the contactor is shared with other power supply units 1 Connection of CNC communication cable Connect with the 1 to 4 line shown above 2 Connection of communication cable between drive unit and power supply unit As ...

Page 72: ...H2 CN1A CN1B CN4 CN1A CN1B CN4 CN4 CN9 L L L1 L1 MC1 AC reactor A B AL Contactor NFB1 200VAC 1 B V14L B V14 V24 B V14L B V14 V24 A SP B SP A CV NO 2 B CV 2 3 4 6 5 CN4 CN9 L L L1 L1 MC1 A CV NO 1 B CV MC MC AC reactor A B AL Contactor 1 Connection of contactor and AC reactor As shown above control is possible by using one contactor in a batch for the power supply unit No 1 and power supply unit No...

Page 73: ...CN4 CN9 L L L1 L1 MC1 MC AC reactor A B AL Contactor NFB1 200VAC 1 B V14L B V14 V24 B V14L B V14 V24 A SP B SP A CV B CV 2 3 4 6 5 1 Connection of CNC communication cable 1 CH1 Connect with the 1 to 2 line shown above 2 CH2 Connect with the 3 to 4 line shown above 2 Communication cable between drive unit and power supply unit 1 CH1 Connect to the 5 line from the CH1 final axis B V14 V24 V14L in dr...

Page 74: ...hain or AT342 Mitsutoyo with the normal linear servo system the battery unit is not required 1 Without battery unit 2 With battery unit The battery unit type is as shown below according to the battery capacity No of connected units Select so that the No of absolute rotary encoders OSA104 OSA105 is less than the battery unit capacity MDS A BT 2 4 6 8 The last number of the type indicates the batter...

Page 75: ... 5A 30V Max tolerable contact power resistance load 2000VA 150WA Max tolerable contact voltage current AC 380V 8A 2 Example of brake contact connection 1 For AC OFF 2 For DC OFF VAR Surge absorber 220V CAUTION While the DC OFF is valid when the braking delay time is a problem the contact s DC shut off capacity and the occurrence of error signals for CNC must be confirmed Observe the following poin...

Page 76: ...ower supply section power wire connector 8 7 8 2 6 Flexible conduits 8 10 1 Method for connecting to a connector with back shell 8 10 2 Method for connecting to the connector main body 8 10 8 3 Cable clamp fitting 8 11 8 4 Cable wire and assembly 8 12 8 5 Cable connection diagram 8 13 8 5 1 CNC unit bus cable 8 13 8 5 2 Absolute value scale coupling cable 8 14 8 5 3 Cable for amplifier scale I F u...

Page 77: ...es can be ordered If cables with a special length are required the user should purchase the connector set etc and manufacture the cables 1 2 NC MDS B V14L MDS B V14L MDS B CVE MDS B MD MDS B HR 1 1 CON2 CON3 CON4 CN1A CN1B CN4 CN2 CN3 CN1A CN1B CN4 CN2 CN3 CN4 to CN1A to CN2 to CN1A to CN2 to CN1B to CN1B to CN4 to CN4 CNLH4MD S CNLH3S S CNL2H2 S CNL2S S Incremental linear scale Absolute position ...

Page 78: ...0 20 30m CNL2H2 No One touch type S Screw type lock Length 2 5 10 20 30m Servo amplifier side connector Sumitomo 3M or equivalent Connector 10120 3000VE Shell kit 10320 52F0 008 One touch type 10320 52A0 008 Screw type Interface unit side connector Hirose Connector RM15WTP 8S Clamp RM15WTP CP 10 For CN2 CN3 4 Cable for amplifier I F unit 5 Cable for I F unit scale CNLH3S Length 2 5 10 20 30m Inter...

Page 79: ...e FCUA CN806 Servomotor side power supply connector DDK Connector CE05 6A24 10SD B BSS Clamp CE3057 16A 2 D265 Straight PWCE24 10S Compliant cable range ø13 to ø15 5 Servomotor side power supply connector DDK Connector CE05 8A24 10SD B BAS Clamp CE3057 16A 2 D265 IP67 and EN standard compati ble Angle PWCE24 10L Compliant cable range ø13 to ø15 5 Servomotor side power supply connector DDK Connecto...

Page 80: ...ith this connector This is a part integrally formed with the cable Unit mm 20 9 29 7 33 0 42 0 11 5 8 2 2 Servo amplifier CN2 and CN3 cable connector Maker Sumitomo 3M Type Connector 10120 3000VE Shell kit 10320 52F0 008 One touch type 10320 52A0 008 Screw type Unit mm 22 0 33 3 12 7 14 0 12 0 39 0 23 8 10 0 8 2 3 Servo amplifier CN20 connector for mechanical brakes Maker Sumitomo 3M Type Connecto...

Page 81: ... 8 5 20 øA I F unit connector Product name øA Applicable cable diameter RM15WTP CP 5 6 5 5 RM15WTP CP 6 6 5 6 RM15WTP CP 7 8 7 RM15WTP CP 8 10 5 8 RM15WTP CP 9 10 5 9 RM15WTP CP 10 10 5 10 I F unit connector RM15WTP 8S CON1 CON2 RM15WTP CP RM15WTP 12P CON3 RM15WTP CP RM15WTP 10P CON4 RM15WTP CP Pole detector connector RM15WTP 8S CNM1 RM15WTP CP Note The cable diameter is indicated in ...

Page 82: ...05 8A24 10SD B BAS 1 1 2 18UNEF 2B 43 63 86 3 1 7 16 18UNEF 2A 18 2 36 5 54 7 7 5 Cable clamp Maker DDK Ltd Unit mm Total length Outside dia Effective screw length Type Shell size A B C D E F G H Installation screws V Bushing Compliant cable CE3057 12A 2 D265 13 CE3420 12 2 ø9 5 to ø13 CE3057 12A 3 D265 20 22 23 8 35 10 3 41 3 19 10 37 3 4 13 16 18UNEF 2B CE3420 12 3 ø6 8 to ø10 CE3057 16A 2 D265 ...

Page 83: ...m Cable clamp Maker Daiwa Ltd Unit mm Length before tightening Side to side Corner to corner Type Accommodating outside diameter American standard screw thread Aø L L1 L2 D D1 D2 YSO10 5 to 8 YLO10 5 to 8 ø5 to 8 3 9 16 24UNEF 2B 43 39 42 5 24 26 26 0 25 0 05 øG J 0 12 E 0 3 C 0 5 Gasket D H or less A 0 38 0 øB 13 16 18UNEF 2A screw ø17 8 ø36 5 35 10 9 11 4 18UNEF 2B screw O ring 7 85 or more Effe...

Page 84: ...EF 9 53 50 MS3106B24 10S 1 1 2 18UNEF 18 26 58 72 43 63 1 7 16 18UNEF 9 53 53 Angle plug Maker DDK Ltd Unit mm Coupling screw Length of coupling section Total length Connec ti on nut outside diameter Cable clamp installation screw Effective screw length Type A J 0 12 L or less øQ 0 0 38 R 0 5 U 0 5 V W or more MS3108B22 23S 1 3 8 18UNEF 18 26 76 98 40 48 24 1 33 3 1 3 16 18UNEF 9 53 MS3108B24 10S ...

Page 85: ...in inside dia 14 For LM NP2S LM NP2M LM NP2L CE05 6A22 23S D B BSS CE05 8A22 23S D B BAS RCC 106CA2022 VF 06 Min inside dia 19 RCC 106CA2428 VF 06 Min inside dia 19 For power supply For LM NP4S LM NP4M LM NP4L CE05 6A24 10S D B BSS CE05 8A24 10S D B BAS RCC 108CA2428 VF 08 Min inside dia 24 4 Note None of the parts in this table can be ordered from Mitsubishi Electric Corp 2 Method for connecting ...

Page 86: ...unding plate with a cable clamp fitting If the cable is thin clamp several together Clamp section drawing The grounding plate D and cable clamp fittings A and B can be purchased from Mitsubishi Outline drawing of grounding plate D Outline drawing of cable clamp fitting Screw hole for wiring through cabinet to grounding plate Always wire the grounding wire from the grounding plate to the cabinet s ...

Page 87: ...t to mistake the connection Core size mm 2 pair Core insulation sheath type Note d mm Recommended wire type 0 08 10 UL20276 AWG28 10pair BLACK 0 2 8 UL20276 AWG24 8pair BLACK 0 3 8 0 9 to 1 27 UL20276 AWG22 7pair BLACK Note d is as shown below d Securely connect the cable shield wire to the connector s ground plate as shown below Ground plate Sheath Shield external conductor Core wire Sheath Shiel...

Page 88: ...ector cable Failure to observe this could lead to faults runaway or fires 8 5 1 CNC unit bus cable SH21 cable connection diagram This is an actual connection diagram for the SH21 cable supplied by Mitsubishi Manufacture the cable as shown below 1 11 2 12 3 13 4 14 5 15 6 16 7 17 8 18 9 19 10 20 PE 1 11 2 12 3 13 4 14 5 15 6 16 7 17 8 18 9 19 10 20 PE Plate ...

Page 89: ... LC191M Heidenhain Reference example 2 AT342 Mitsutoyo 6 16 7 17 19 10 20 1 11 PE SD SD RQ RQ P5 5V LG Plate Amplifier side CN2 3 Scale side 10120 3000VE 20m or less 20 to 30m 6 16 7 17 19 10 20 1 11 PE SD SD RQ RQ P5 5V LG Plate Amplifier side CN2 3 Scale side 10120 3000VE 6 16 7 17 19 10 20 1 11 PE SD SD RQ RQ P5 5V LG Plate Amplifier side Scale relay section 14 17 8 9 7 11 4 10 PE 6 16 7 17 19 ...

Page 90: ... Mitsubishi The connection differs according to the cable length 15 to 30m 6 16 7 17 19 10 20 1 11 PE SD SD RQ RQ P5 5V P5 5V LG LG Case grounding Amplifier side CN2 3 Scale I F unit side CON1 2 3 4 1 2 5 6 7 8 FG 10120 3000VE RM15WTP 8S 15m or less 6 16 7 17 19 10 20 1 11 PE SD SD RQ RQ P5 5V P5 5V LG LG Case grounding Amplifier side CN2 3 Scale I F unit side CON1 2 3 4 1 2 5 6 7 8 FG 10120 3000V...

Page 91: ...mple 1 AT342 Mitsutoyo connection example 15m or less Scale side Scale I F unit side CON3 9 10 7 8 1 2 3 4 5 6 11 12 PE SD SD RQ RQ A A B B R R P5 5V LG Case grounding RM15WTP 12S 15 to 30m Scale side Scale I F unit side CON3 9 10 7 8 1 2 3 4 5 6 11 12 PE SD SD RQ RQ A A B B R R P5 5V LG Case grouding RM15WTP 12S 9 10 7 8 1 2 3 4 5 6 11 12 PE SD SD RQ RQ A A B B R R P5 5V LG Case grounding Scale s...

Page 92: ... I F unit motor thermal CAUTION 1 Do not connect anything to pins unless particularly described when manufacturing cable Leave OPEN 2 Contact Mitsubishi before manufacturing cable over 30m long 1 2 3 4 9 7 8 10 PE MA MA MB MB TH P5 5V P5 5V LG Case grounding Pole detector side Scale I F unit side CON4 1 2 3 4 5 6 7 8 PE RM15WTP 8S RM15WTP 10P 24V MOH 5 6 Motor side Scale I F unit side CON4 G1 G2 2...

Page 93: ...nd Cable Specifications 8 18 8 5 7 Mechanical brake cable 1 9kW or less mechanical brakes 2 11 15kW mechanical brakes and dynamic brakes 1 2 3 CN20 RA1 Amplifier side Common Dynamic brakes Mechanical brakes CN20 RA1 1 2 3 Amplifier side ...

Page 94: ...ector resolution SV019 RNG1 SV020 RNG2 9 4 5 Motor type SV025 MTYP 9 5 6 Detector type SV025 MTYP 9 6 7 Power supply type SV036 PTYP 9 7 9 2 2 Parameters set according to feedrate 9 8 9 2 3 Parameters set according to machine movable mass 9 8 9 2 4 List of standard parameters for each motor 9 9 9 3 Initial setup of the linear servo system 9 10 9 3 1 Installation of linear motor and linear scale 9 ...

Page 95: ...rned ON the servo driver will automatically execute self diagnosis and initial settings for operation etc The LEDs on the front of the servo driver will change as shown below according to the progression of these processes If an alarm occurs the alarm No will appear on the LEDs Refer to Chapter 11 Troubleshooting for details on the alarm displays Rotary switch setting Set axis No 0 1st axis 1 2nd ...

Page 96: ... lost motion compensation is applied will be as shown below according to the command polarity CW CCW A X SV041 X SV016 B Y SV016 Y SV041 C X SV016 X SV041 D Y SV041 Y SV016 Feedback polarity Name Abbrev Details Setting range unit SV017 SPEC Servo specifications fdir must be set according to the motor power line and linear scale installation state Refer to 9 3 Initial setup of the linear servo syst...

Page 97: ...ear motor having a magnetic pole pitch of 60mm F E D C B A 9 8 7 6 5 4 3 2 1 0 spm drvall drvup mpt3 mp abs vmh vdir fdir seqh dfbx vdir2 bit Name Meaning when 0 is set Meaning when 1 is set 0 vdir2 Sub side CN3 connector feedback forward polarity Sub side CN3 connector feedback reverse polarity 1 dfbx Set to 0 2 seqh READY servo ON time normal mode READY servo ON time time reduction mode 3 Set to...

Page 98: ...yed on the CNC screen For oil cooling the following type NP Mc excluding the hyphen with a c added to the end is displayed Cooling method Self cooling Oil cooling Motor series Standard Standard No 0x 1x 2x 3x 4x 5x 6x 7x 8x 9x Ax Bx Cx Dx Ex Fx x0 NP2S 05M NP2S 05M x1 NP2M 15M NP2M 15M x2 NP2L 15M NP2L 15M x3 x4 NP4S 10M NP4S 10M x5 NP4M 20M NP4M 20M x6 NP4L 30M NP4L 30M x7 NP4G 40M NP4G 40M x8 NP...

Page 99: ...tor system system using SUB side feedback Note 2 ABS SCALE absolute scale corresponds to the following absolute position detection scales Mitsutoyo AT342 Heidenhain LC191M Detection system and MTYP Refer to the following table and set SV025 MTYP according to the detection system Linear motor system AT342 LC191M HR AT342 special HR MD HR MD AT342 special MTYP Detection system MTYP Detection system ...

Page 100: ...d set SV036 PTYP port For MDS A CR unit No Regenerative resistor type Resistance value Ω Wattage W 0 1 GZG200W260HMJ 26 80 2 GZG300W130HMJ 2 26 150 3 MR RB30 13 300 4 MR RB50 13 500 5 GZG200W200HMJ 3 6 7 350 6 GZG300W200HMJ 3 6 7 500 7 R UNIT 1 30 700 8 R UNIT 2 15 700 9 R UNIT 3 15 2100 A B C D E F F E D C B A 9 8 7 6 5 4 3 2 1 0 amp rtyp ptyp bit Name Details 0 1 2 3 4 5 6 7 ptyp Set the power s...

Page 101: ...me Explanation SV005 VGN1 Speed loop gain Refer to the comparison graph with the total movable mass including motor mass for the standard setting value SV008 VIA Speed loop leading compensation Set 1364 as a standard Set 1900 as a standard for the SHG control If the total movable mass is large and the VGN1 value is smaller than the standard value a lower value can be set regardless of whether norm...

Page 102: ... 20 20 20 20 20 SV024 50 50 50 50 50 50 50 50 50 50 50 50 50 50 50 SV025 xx00 xx01 xx02 xx04 xx05 xx06 xx07 xx10 xx11 xx12 xx14 xx15 xx16x xx17 xx18 SV026 20 20 20 20 20 20 20 20 20 20 20 20 20 20 20 SV027 4000 4000 4000 4000 4000 4000 4000 4000 4000 4000 4000 4000 4000 4000 4000 SV028 SV029 0 0 0 0 0 0 0 0 0 0 0 0 0 0 0 SV030 0 0 0 0 0 0 0 0 0 0 0 0 0 0 0 SV031 0 0 0 0 0 0 0 0 0 0 0 0 0 0 0 SV032...

Page 103: ...o the pole must be adjusted according to the linear motor and linear scale relation If this pole is not adjusted the motor may not operate or may not operate correctly The magnetic pole adjustment method is explained in this section 9 3 1 Installation of linear motor and linear scale The installation direction of the linear motor and linear scale is explained in this section 1 Linear motor s magne...

Page 104: ...ownward and the AT342 display facing forward the feedback moves in the plus direction When moved in the opposite direction the position moves in the minus direction The plus minus directions of the Heidenhain scale are the opposite of the AT342 scale AT342 Mitutoyo AT342 scale unit Plus direction Minus direction Detection head Signal cable HEIDENHAIN Scale unit body Heidenhain scale unit Minus dir...

Page 105: ...arameter Set this as follows according to the servo specification Table of feedback polarities according to linear motor and linear scale installation directions Connected scale AT342 scale Heidenhain scale Item Polarity SPEC fdir Polarity SPEC fdir Fig 9 3 1 1 Forward polarity 0 Reverse polarity 1 Fig 9 3 1 2 Reverse polarity 1 Forward polarity 0 Fig 9 3 1 3 Reverse polarity 1 Forward polarity 0 ...

Page 106: ... phase passed The following parameters are used for DC excitation No Abbrev Parameter name Explanation SV034 SSF3 Special servo function selection 3 This is a HEX setting parameter Set this as follows according to the servo specification No Abbrev Parameter name Explanation Setting range SV061 DA1NO D A output channel 1 data No Set the initial excitation level for DC excitation Set a minus value S...

Page 107: ...en the MAX CURRENT 2 value is 100 or more the cable connection may be incorrect so confirm the connection 2 Confirm the MAIN side feedback polarity SPEC fdir achieved with DC excitation The MAIN side feedback polarity can be confirmed with the direction that the linear motor moves during U phase excitation and the increment decrement of the cycle counter displayed on the CNC Servo Monitor screen J...

Page 108: ...s validated after the CNC power is rebooted 1 For system to which MDS B MD is not connected If the pole shift amount is set it will be validated after the CNC power is rebooted 2 For system to which MDS B MD is connected Normally the motor is driven with the pole created by MDS B MD However if this pole shift amount is set it will be validated when the Z phase has been passed once after the CNC po...

Page 109: ...062 setting values Confirm that the motor s primary side moves to the end Confirm Rn on the NC Absolute Position Motor Set the Rn display value in SV028 and SV034 dcd to 0 Reboot the NC power and carry out normal operation Is the polarity correct SV061 SV062 Has a time exceeding SV063 setting value passed Cycle counter 0 Change SV017 fdir Change the polarity Move the motor s primary side Y N N Y Y...

Page 110: ...r Set this as follows according to the servo specification SV025 MTYP Motor detector type This is a HEX setting parameter Set this as follows according to the detector type No Abbrev Parameter name Explanation Setting range Unit SV028 MSFT Pole shift amount Set the pole shift amount 30000 to 30000 µm 15 14 13 12 11 10 9 8 7 6 5 4 3 2 1 0 spm drvall drvup mpt3 mp abs vmh vdir fdir seqh dfbx vdir2 b...

Page 111: ... for the master axis If the pole directions are reversed set the opposite setting as SV017 fdir for the master axis SV017 vdir2 Set 0 Set 0 SV025 pen ent Set AAxx Set AAxx SV028 Normally set the setting value for control Set the pole shift amount when DC excitation is carried out with the connected detector CAUTION When carrying out DC excitation with the parallel drive system if the current flows...

Page 112: ...improvement 10 7 10 3 1 Optimal adjustment of cycle time 10 7 10 3 2 Vibration suppression method 10 10 10 3 3 Improving the cutting surface precision 10 12 10 3 4 Improvement of protrusion at quadrant changeover 10 14 10 3 5 Improvement of overshooting 10 19 10 3 6 Improvement of characteristics during acceleration deceleration 10 22 10 4 Setting for emergency stop 10 25 10 4 1 Vertical axis drop...

Page 113: ...ent command Rated stall current 2 Current command Rated stall current 3 Current feedback Rated stall current 4 Speed feedback low order m sec 5 Speed feedback high order m sec 6 Position droop low order Interpolation unit 7 Position droop high order Interpolation unit 8 Position F T low order Interpolation unit NC communication cycle 9 Position F T high order Interpolation unit NC communication cy...

Page 114: ...be obtained at the standard VGN1 VGN1 can be raised above the standard value if a 70 percent margin is maintained in respect to the machine resonance s occurrence limit The cutting accuracy can also be improved by adjusting with the disturbance observer When machine resonance occurs at the standard VGN1 Machine resonance is occurring if the shaft makes abnormal sounds when operating or stopping an...

Page 115: ... kept high set the standard value to guarantee precision especially in high speed contour cutting generally F 1000 or higher In other words a large enough value must be set in VGN1 so that the VIA does not need to be lowered in machines aimed at high speed precision When adjusting the cutting precision will be better if adjustment is carried out to a degree where overshooting does not occur and a ...

Page 116: ...vibrations To adjust the SHG control gradually raise the gain from a setting where 1 2 of a normal control PGN1 where vibration did not occur was set in PGN1 If the PGN1 setting value is more than 1 2 of the normal control PGN1 when SHG control is used there is an improvement effect in position control Note that for the settling time the improvement effect is at 1 2 or more No Abbrev Parameter nam...

Page 117: ... SHG control even if the PGN1 setting value is the same the actual position loop gain will be higher so the speed loop must have a sufficient response If the speed loop response is low vibration or overshooting could occur during acceleration deceleration in the same manner as conventional control If the speed loop gain has been lowered because machine resonance occurs lower the position loop gain...

Page 118: ...an easily occur during acceleration deceleration 2 Adjusting the cutting rate To adjust the cutting rate the CNC axis specification parameter clamp speed clamp and acceleration deceleration time constant G1t are adjusted The in position width at this time must be set to the same value as actual cutting Determining the clamp rate and adjusting the acceleration deceleration time constant Features Th...

Page 119: ... Set the accuracy required of the machine for the in position width If an unnecessarily high accuracy is set the cycle time will increase due to a delay in the settling time The in position width is effective even when the standard servo parameters are set However it may follow the CNC parameters so refer to the CNC Instruction Manual for the setting No Abbrev Parameter name Unit Explanation Setti...

Page 120: ...ontrol when the CNC is set to linear acceleration deceleration can be calculated using the following equation During SHG control estimate the settling time by multiplying PGN1 by 2 Settling time ms 10 3 PGN1 λn F 10 6 60 G0tL PGN1 2 1 exp PGN1 G0tL 10 3 PGN1 Position loop gain1 SV003 rad s F Rapid traverse rate mm min G0tL Rapid traverse linear acceleration deceleration time constant ms INP In pos...

Page 121: ...e vibration suppression functions If the VGN1 is lowered and adjusted because vibration cannot be sufficiently suppressed with the vibration suppression functions adjust the entire gain including the position loop gain again Examples of vibration occurrence A fine vibration is felt when the machine is touched or a groaning sound is heard Vibration or noise occurs during rapid traverse POINT Suppre...

Page 122: ...sation adaptive filter in combination with the machine resonance suppression filter No Abbrev Parameter name Unit Explanation Setting range SV038 FHz1 Machine resonance suppression filter center frequency 1 Hz Set the resonance frequency to be suppressed Valid at 36 or more Set 0 when the filter is not to be used 0 to 9000 Hz SV046 FHz2 Machine resonance suppression filter center frequency 2 Hz Se...

Page 123: ...ity POINT The adaptive filter is an optional function If the option is not set in the CNC alarm 37 at power ON or warning E4 Error Parameter No 105 2305 for M50 M64 Series CNC will be output 10 3 3 Improving the cutting surface precision If the cutting surface precision or roundness is poor improvements can be made by increasing the speed loop gain VGN1 VIA or by using the disturbance observer fun...

Page 124: ...speed cutting If the position droop vibrates 10 to 20Hz lower the VIA and adjust 1 to 9999 0 0687rad s 3 Disturbance observer The disturbance observer can reduce the effect caused by disturbance frictional resistance or torsion vibration during cutting by estimating the disturbance thrust and compensating it It also is effective in suppressing the vibration caused by speed leading compensation con...

Page 125: ...tion in the positive and negative directions when SV041 LMC2 is 0 3 If the compensation amount is to be changed in the direction to be compensated set LMC2 The compensation direction setting will be as shown below with the CW CCW setting in the CNC parameter If only one direction is to be compensated set the side not to be compensated as 1 No Abbrev Parameter name Explanation SV027 SSF1 The lost m...

Page 126: ...pensation will be carried out when the command reverses from the direction to the direction and when the command reverses from the direction to the direction 25 15 2 20 For the final adjustment measure the CNC sampling measurement DBB measurement or while carrying out actual cutting If the compensation amount is insufficient increase LMC1 or LMC2 by 5 at a time Note that if the setting is too high...

Page 127: ...rrent 2 The unbalance thrust value above is set for the thrust offset TOF If there is a difference in the protrusion amount according to the direction make an adjustment with LMC2 Do not adjust with TOF Assume that the load current was 40 in the direction and 20 in the direction when JOG feed was carried out at approx F1000 The unbalance thrust is as shown below so 30 is set for TOF 40 20 2 30 No ...

Page 128: ... the arc path increase LMCD by 10ms at a time to find the timing that the protrusion and compensation position match Before timing delay compensation After timing delay compensation No Abbrev Parameter name Unit Explanation Setting range SV039 LMCD Lost motion compensation timing ms Set this when the lost motion compensation timing does not match Adjust while increasing the value by 10 at a time 0...

Page 129: ...uring feed forward control In this non sensitive band control overshooting of a set width or less is ignored The model position direction change point is correctly recognized and the LMC compensation is correctly executed This parameter is meaningless when feed forward control is not being carried out Adjustment method If the compensation timing deviates during feed forward control increase the LM...

Page 130: ...he non sensitive band when the CNC is carrying out feed forward control To compensate overshooting during feed forward control refer to the following section 2 Adjusting for feed forward control Setting and adjustment methods 1 Set the special servo function selection 1 SV027 SSF1 bit 11 ovs2 OVS compensation type 2 will start 2 Observe the position droop waveform using the D A output and increase...

Page 131: ...when the LMCT is set to 0 POINT OVS compensation type 3 is used if overshooting is a problem with contour cutting during feed forward control No Abbrev Parameter name Explanation SV027 SSF1 The overshooting compensation starts with the following parameter Special servo function selection 1 15 14 13 12 11 10 9 8 7 6 5 4 3 2 1 0 aflt zrn2 afrg afse ovs2 ovs1 lmc2 lmc1 omr vfct2 vfct1 upc vcnt 2 vcnt...

Page 132: ...ing value of the other parameter the parameter not set to 0 2 To compensate in only one direction set 1 in the parameter OVS1 or OVS2 for the direction in which compensation is prohibited 3 For contour cutting the projection at the arc end point is compensated with OVS compensation LMC compensation is carried out at the arc starting point Cutting direction LMC compensation OVS compensation Workpie...

Page 133: ...e Setting ratio Setting example Explanation Setting range SV003 SV049 PGN1 PGN1sp Position loop gain 1 1 23 26 33 38 47 1 to 200 rad s SV004 SV050 PGN2 PGN2sp Position loop gain 2 8 3 62 70 86 102 125 0 to 999 SV057 SV058 SHGC SHGCsp SHG control gain 6 140 160 187 225 281 Always set a combination of 3 parameters 0 to 1200 SV008 VIA Speed loop leading compensation Set 1900 as a standard value durin...

Page 134: ...eed forward gain means that the speed loop gain during acceleration deceleration is raised equivalently Thus the thrust current command required during acceleration deceleration starts sooner The synchronization precision will improve if the FFC of the delayed side axis is raised between axes for which high precision synchronous control such as synchronous tap control and superimposition control N...

Page 135: ...B peak is a few smaller than the current command peak Inductive voltage compensation No Abbrev Parameter name Unit Explanation Setting range SV047 EC Inductive voltage compensation gain Set 100 as a standard Lower the gain if the current FB peak exceeds the current command peak 0 to 200 POINT If the current FB peak becomes larger than the current command peak over compensation an overcurrent alarm...

Page 136: ...ay not be possible in all conditions as noted above To prevent dropping in all conditions use a balance unit on the machine side etc 2 Outline of function and setting of parameters When stopped The driver s READY is turned OFF after the vertical axis drop prevention time SV048 has passed During movement Deceleration stop is carried out and then the driver s READY is turned OFF after the longer of ...

Page 137: ...048 and SV055 the drop prevention function will be invalidated 2 SV048 and SV055 are available for each axis but if the values differ for two axes in the same driver the larger value will be validated 3 If only SV048 is set the deceleration stop will be step stop ...

Page 138: ...n delay time Servo ON Detect in position and turn servo OFF Motor speed Deceleration command Emergency stop Brake operation Servo ON Tbd Tbd Brake operation delay time Rapid traverse speed Drop prevention function sequence for emergency stop Deceleration stop function sequence for emergency stop Speed command ...

Page 139: ...e constant is larger than SV048 vertical axis drop prevention time If the axis controlling the power supply axis to which CN4 cable is connected that supplies the power to the target vertical axis is another servo axis set the servo parameters SV048 055 and 056 for that axis to the same values as the vertical axis If there are multiple vertical axes set the max value When the 2 axis driver is a ve...

Page 140: ... SP Axis Parameter setting 2 axis servo driver Vertical axis 2 axis servo driver Axis connected to power supply SV48 0 Set same value as Z axis Set with adjustments SV55 0 Set same value as Z axis Set same value as SV48 SV56 0 Set same value as rapid traverse time constant Set same value as rapid traverse time constant Spindle software version A5 or above is required Set the spindle parameters SP0...

Page 141: ... axis B V14 V24 Y axis B V24 Z axis B V24 Spindle B SP Axis Parameter setting 2 axis servo driver Vertical axis 2 axis servo driver Separate power supply connection only spindle SV48 0 Set same value as Z axis Set with adjustments SV55 0 Set same value as Z axis Set same value as SV48 SV56 0 Set same value as rapid traverse time constant Set same value as rapid traverse time constant Does not rela...

Page 142: ...er supply axis differ the servo parameters must be set for both axes 3 2 When vertical axis and power supply axis are 2 axis driver X axis B V14 V24 Y axis B V24 Z axis B V24 A axis B V14 Spindle B SP Axis Parameter setting Vertical axis 2 axis servo driver Axis connected to power supply Separate power supply connection only spindle SV48 0 Set with adjustments Set same value as Y axis Set same val...

Page 143: ...48 0 Set with adjustments Set same value as Y axis Set same value as Y axis SV55 0 Set same value as SV48 Set same value as Y axis Set same value as Y axis SV56 0 Set same value as rapid traverse time constant Set same value as rapid traverse time constant Set same value as rapid traverse time constant Does not relay on software If the driver connected to the power supply is a 2 axis driver set bo...

Page 144: ...e standard value Operation When an emergency stop occurs the motor will decelerate at the same inclination from each speed No Abbrev Parameter name Unit Explanation Setting range SV055 EMGx Max delay time for emergency stop Ms Normally the same value as SV056 EMGt is set Set 0 when not using the deceleration stop function or drop prevention function 0 to 5000 ms SV056 EMGt Deceleration control tim...

Page 145: ...rust exceeds the collision detection level set with the parameters the axis will decelerate to a stop with the driver s max thrust After stopping an alarm will occur and the system will stop Method 1 can be used only when using SHG control If not using SHG control the load error alarm 58 59 will occur immediately during the acceleration deceleration With method 1 the collision detection level can ...

Page 146: ...be referred to for setting Note that this displayed value is averaged so first set a value that is approx double the displayed value Carry out no load operation at the max rapid traverse speed If an alarm occurs increment the setting unit by 20 If an alarm does not occur decrement the setting value by 10 Set a value that is approx 1 5 times the limit value where an alarm does not occur 7 SV035 SSF...

Page 147: ...tection level Stall rated current When using the collision detection function set the collision detection level for the method G0 modal as a percentage in respect to the stall rated current Set 0 when not using the collision detection function 0 to 100 POINT 1 Even when validated this function does not guarantee that the machine will not break and does not guarantee the machine accuracy after a co...

Page 148: ...4 INP In position detection width Normal µm 0 32767 SV025 MTYP Motor detector type Specifi c ations Default HEX setting SV026 OD2 Excessive error detection width during servo OFF Normal mm 0 32767 SV027 SSF1 Special servo function selection 1 Specifi c ations Normal HEX setting SV028 MSFT Linear motor pole shift amount Default µm 30000 30000 SV029 VCS Speed loop gain change start speed Normal mm s...

Page 149: ...nel 1 data No DC excitation default excitation level Normal SV062 DA2NO D A output channel 2 data No DC excitation final excitation level Normal SV063 DA1MPY D A output channel 1 output scale DC excitation default excitation time Normal ms SV064 DA2MPY D A output channel 2 output scale Normal Setting screen Specifications Set on the Servo Specifications screen Adjustment Set on the Servo Adjustmen...

Page 150: ...of standard parameters for each motor 1 to 4096 SV013 ILMT Set the current limit value as a percentage in respect to the stall rated current To use to the driver s max thrust set 800 Limit value in both and directions 0 to 999 Stall rated current SV014 ILMTsp Set the current limit value for special operations absolute position default setting stopper operation etc as a percentage in respect to the...

Page 151: ...o 32767 µm F E D C B A 9 8 7 6 5 4 3 2 1 0 spm drvall drvup mpt3 mp abs vmh vdir fdir seqh dfbx vdir2 bit Name Meaning when 0 is set Meaning when 1 is set 0 vdir2 Sub side CN3 connector feedback forward polarity Sub side CN3 connector feedback reverse polarity 1 dfbx Not used for linear motor Set to 0 2 seqh READY servo ON time normal mode READY servo ON time time reduction mode 3 Set to 0 4 fdir ...

Page 152: ...ation SV027 SSF1 ovs1 ovs2 is selected 1 to 100 Stall rated current F E D C B A 9 8 7 6 5 4 3 2 1 0 pen ent mtyp bit Name Meaning when 0 is set Meaning when 1 is set 0 1 2 3 4 5 6 7 mtyp Set the motor type Refer to 7 201 6 List of motor types 8 9 A B ent Set the speed detector type Refer to 9 2 1 6 List of detector types C D E F Pen Set the position detector type Refer to 9 2 1 6 List of detector ...

Page 153: ...djust the damping mount of the 2nd machine resonance suppression filter The effect of the machine resonance suppression filter will drop as the setting value is increased and the effect on the speed control will drop 000 010 12dB 100 6dB 110 3dB 001 18dB 011 9dB 101 4dB 111 1dB 8 9 A B dis Digital signal input selection Set this to 0000 C D E F dos Digital signal output selection 0000 For normal u...

Page 154: ...cltq Set the deceleration torque for collision detection 00 100 01 90 10 80 11 70 A clet Setting for normal use The past 2 sec estimated disturbance thrust peak value is displayed at MPOF on the Servo Monitor screen B cl2n Setting for normal use Collision detection method 2 is invalidated C D E clG1 Set the collision detection level for the collision detection method 1 G1 modal When 0 is set The m...

Page 155: ...ated current when using the collision detection function The low order 8 bits are used Set 0 when not using the collision detection function Current bias The high order 8 bits are used Ib1 This is used in combination with the SV030 and SV045 high order 8 digits Collision detection friction 0 to 100 Stall rated current Setting range 32768 to 32767 SV046 FHz2 Set the center frequency of the 2nd mach...

Page 156: ... 0 to 32767 SV060 TLMT Set the collision detection level for method 1 G0 modal as a percentage in respect to the stall rated current when using the collision detection function Set 0 when not using the collision detection function 0 to 100 Stall rated current SV061 DA1NO Set the output data No of the D A output channel 1 When 1 is set D A output will not be carried out for that axis Set the defaul...

Page 157: ...irmation 11 2 11 2 Troubleshooting at start up 11 3 11 3 List of servo alarms and warnings 11 4 11 4 Alarm details 11 6 11 5 LED display Nos at memory error 11 8 11 6 Error parameter Nos at initial parameter error 11 8 11 7 Troubleshooting for each servo alarm 11 9 ...

Page 158: ...e damaged Points of confirmation 1 What is the alarm code display 2 Can the error or trouble be repeated Check alarm history 3 Is the motor and servo driver temperature and ambient temperature normal 4 Are the servo driver control unit and motor grounded 5 Was the unit accelerating decelerating or running at a set speed What was the speed 6 Is there any difference during forward and backward run 7...

Page 159: ...Set correctly The CNC setting is incorrect Is the No of CNC controlled axes correct Set correctly Is the connector CN1A CN1B disconnected Connect correctly AA Initial communication with the CNC was not completed correctly Communication with CNC is incorrect Is the cable broken Check the conductivity with a tester Replace the cable The axis is not used the setting is for use inhibiting Is the axis ...

Page 160: ...D EEPROM LED error PR A 6C C Main circuit error PR V R 2D SDAT Data error PR A 6D D 2E SRRE ROM RAM error PR A 6E E Memory error AR V R 2F STRE Serial detector communication error PR A 6F F AD error PS error AR V R 30 OR Over regeneration PR SVJ 70 G 31 OS Overspeed PR A 71 H Instantaneous power failure external emergency stop NR V 32 PMOC Overcurrent IPM error PR A 72 I 33 OV Over voltage PR SVJ ...

Page 161: ...H erase error A3 03 Vpp error A4 04 Check sum error A5 05 Compare error A6 06 A7 07 A8 WTW Turret indexing command error warning SP 08 Bank designation error A9 09 Initial address error AA CNC initial communication No 1 phase wait 0A Bank changeover error AB CNC initial communication No 1 phase wait 0B Address error AC CNC initial communication No 2 phase wait 0C Reception timeout AD CNC initial c...

Page 162: ...position linear scale connected to the SUB side PR A 2A Sinc Incremental position detection circuit error SUB A speed exceeding the max movement speed of the absolute position linear scale connected to the SUB side was detected PR A 2B SCPU CPU error An error was detected in the data stored in the EEPROM of an absolute position linear scale connected to the MAIN side PR A 2C SLED EEPROM LED error ...

Page 163: ...absolute position linear scale PR A 83 HSC HR unit scale judgment error The MDS B HR connected to the MAIN side could not judge the analog frequency of the connected linear scale PR A 84 HCPU HR unit CPU error The CPU of the MDS B HR connected to the MAIN side is not operating correctly AR A 85 HDAT HR unit data error An error was detected in the analog interpolation data of the MDS B HR connected...

Page 164: ... displayed on the CNC Diagnosis screen The display method differs according to the CNC being used so refer to the instruction manual for the respective CNC The No displayed here is normally the parameter No SV00xx In addition there is a special 3 digit No Refer to following table In this case multiple related parameters are occurring so correctly set the related parameters No Details Related param...

Page 165: ...her the servo software version was changed recently The version was not changed Investigate item 2 The error is always repeated Replace the drive unit 2 Check the repeatability The state returns to normal once but occurs sometimes thereafter Investigate item 3 No abnormality is found in particular Replace the drive unit 3 Check if there is any abnormality in the unit s ambient environment Ex Ambie...

Page 166: ...e are disconnected The connector is not disconnected Investigate item 3 There is a connection fault Replace the detector cable 3 Turn the power OFF and check the detector cable connection with a tester The connection is normal Investigate item 4 The alarm is on the driver side Replace the drive unit 4 Connect to another normal axis driver and check whether the fault is on the driver side or detect...

Page 167: ... temperature noise grounding An abnormality was found in the ambient environment Take remedies according to the causes of the abnormality Ex High temperature Check the cooling fan Incomplete grounding Additionally ground Alarm check timing f1 f2 f3 f4 Alarm No 1C EEPROM LED error SUB An error was detected in the EEPROM of an absolute position linear position linear scale connected to the SUB side ...

Page 168: ...Correctly set the SV025 MTYP parameter 1 Check that the system is an absolute position linear scale specification system The system is the absolute position linear scale specifications Investigate item 2 The machine was operating Check the motor s mechanical brakes and machine system 2 Check whether the machine was operating when the alarm occurred The machine was not operating Investigate item 3 ...

Page 169: ...sconnected Investigate item 4 There is a connection fault Replace the detector cable 4 Turn the power OFF and check the detector cable connection with a tester The connection is normal Investigate item 5 The alarm is on the unit side Replace the drive unit 5 Connect to another normal axis unit and check whether the fault is on the unit side or detector side The alarm is on the absolute position li...

Page 170: ...he machine was operating when the alarm occurred The machine was not operating Investigate item 2 The machine was operating Investigate item 3 2 Check whether the operation is normal at low speeds The machine was not operating Check the precautions for turning the power ON Wiring check Parameter check The speed is too high Lower the speed to below the rated speed 3 Check whether the rapid traverse...

Page 171: ...rrect Correctly set 4 Check the servo parameter setting values Refer to the adjustment procedures The settings are correct Investigate item 5 The connector is disconnected or loose Correctly install 5 Wiggle the connectors by hand to check whether the detector connectors unit side and detector side are disconnected The connector is not disconnected Investigate item 6 There is a connection fault Re...

Page 172: ...nother unit to determine whether the fault is on the CNC side or units side The driver is not the cause Investigate item 5 No abnormality is found in particular Replace the MCP card on the CNC side 5 Check if there is any abnormality in the unit s ambient environment Ex Ambient temperature noise grounding An abnormality was found in the ambient environment Take remedies according to the causes of ...

Page 173: ...ming f1 f2 f3 f4 Alarm No 39 CNC communication protocol error 2 An error was detected in the axis information data sent from the CNC Investigation details Investigation results Remedies 1 Check the alarm No 34 items Alarm check timing f1 f2 f3 f4 Alarm No 3A Overcurrent An excessive current was detected in the motor drive current Investigation details Investigation results Remedies 1 Check the ala...

Page 174: ...e alarm occurs The motor is not high Investigate item 5 The connector is disconnected or loose Correctly install 5 Wiggle the connectors by hand to check whether the detector connectors unit side and motor side cannon are disconnected The connector is not disconnected Investigate item 6 There is a connection fault Replace the detector cable 6 Turn the power OFF and check the detector cable connect...

Page 175: ...eed of 45m sec or more when the CNC power was turned ON Investigation details Investigation results Remedies The system is not the absolute position linear scale specifications Correctly set the SV025 MTYP parameter 1 Check that the system is an absolute position linear scale specification system The system is the absolute position linear scale specifications Investigate item 2 The machine was ope...

Page 176: ... linear scale connectors unit side and scale side are disconnected The connector is not disconnected Investigate item 4 There is a connection fault Replace the detector cable 4 Turn the power OFF and check the detector cable connection with a tester The connection is normal Investigate item 5 The alarm is on the unit side Replace the drive unit 5 Connect to another normal axis unit and check wheth...

Page 177: ... Servo Monitor screen is an abnormally large value when stopped and operating A correct value is displayed Investigate item 6 No abnormality is found in particular Replace the motor the detector 6 Check if there is any abnormality in the unit s ambient environment Ex Ambient temperature noise grounding An abnormality was found in the ambient environment Take remedies according to the causes of the...

Page 178: ...units The value differs from the standard setting value When not using special specifications set the value to the standard setting value 3 Check the servo parameter OD1 setting value The value is the standard setting value Investigate item 4 4 Check items 3 and following for alarm No 50 Supplement Depending on the ideal machine position in respect to the command position the actual machine positi...

Page 179: ...nector is not disconnected Investigate item 7 There is a connection fault Replace the detector cable 7 Turn the power OFF and check the detector cable connection with a tester The connection is normal Investigate item 8 No abnormality is found in particular Replace the motor 8 Check if there is any abnormality in the unit s ambient environment Ex Ambient temperature noise grounding An abnormality ...

Page 180: ... traverse acceleration deceleration has reached the current limit value or whether it is 90 or more of the limit value The current is less than 90 of the current limit value Investigate item 4 The alarm does not occur 4 Readjust the collision detection function and then operate Refer to the separate collision detection function specifications The alarm occurs Investigate item 5 They are vibrating ...

Page 181: ...on has reached the current limit value or whether it is 90 or more of the limit value The current is less than 90 of the current limit value Investigate item 4 The alarm does not occur 4 Readjust the collision detection function and then operate Refer to the separate collision detection function specifications The alarm occurs Investigate item 5 They are vibrating Eliminate the vibration by adjust...

Page 182: ... B HR linear scale side The alarm is on the MDS B HR linear scale side Investigate item 4 No abnormality is found in particular Replace MDS B HR linear scale 4 Check if there is any abnormality in the unit s ambient environment Ex Ambient temperature noise grounding An abnormality was found in the ambient environment Take remedies according to the causes of the abnormality Ex High temperature Chec...

Page 183: ...ses of the abnormality Ex High temperature Check the cooling fan Incomplete grounding Additionally ground Alarm check timing f1 f2 f3 f4 Alarm No 84 HR unit CPU error The CPU of the MDS B HR connected to the MAIN side is not operating correctly Investigation details Investigation results Remedies The connector is disconnected or loose Correctly install 1 Wiggle the connectors by hand to check whet...

Page 184: ...rmality Ex High temperature Check the cooling fan Incomplete grounding Additionally ground Alarm check timing f1 f2 f3 f4 Alarm No 88 Watch dog The servo drive software processing time did not end within the specified time Investigation details Investigation results Remedies The version was changed Replace with the original software version 1 Check whether the servo software version has been chang...

Page 185: ... Remedies 1 Check the alarm No 83 items Alarm check timing f1 f2 f3 f4 Alarm No 8D HR unit CPU error SUB The CPU of the MDS B HR connected to the SUB side is not operating correctly Investigation details Investigation results Remedies 1 Check the alarm No 84 items Alarm check timing f1 f2 f3 f4 Alarm No 8E HR unit data error SUB An error was detected in the analog interpolation data of the MDS B H...

Page 186: ... The alarm is always repeated Or the state returns to normal once but then is repeated sometimes Investigate item 4 The alarm is on the unit side Replace the drive unit 4 Connect with another normal axis unit and check whether the fault is on the unit side The alarm occurs even when the unit is replaced Investigate item 5 No abnormality is found in particular Replace the motor detector 5 Check if ...

Page 187: ...is a connection fault Replace the communication cable 5 Turn the power OFF and check the connection of the detector cables between driver I F units and between I F unit and pole detector with a tester The connection is normal Investigate item 6 The alarm is on the unit side Replace the drive unit 6 Connect with another normal axis unit or MDS B HR and check whether the fault is on the unit side or...

Page 188: ... parameter adjustment procedures Alarm check timing f1 f2 f3 f4 Alarm No E7 CNC emergency stop An emergency stop signal is being sent from the CNC or an alarm is occurring in another axis Investigation details Investigation results Remedies The emergency stop state is entered Investigate item 2 1 Check whether the CNC side emergency stop switch has been applied Emergency stop has been canceled Inv...

Reviews: