background image

This guide describes the operation of the GSM telephone M430i.

Edition 1, 2004. © MITSUBISHI ELECTRIC EUROPE B.V. - French Branch, hereinafter referred to as « Mit-

subishi Electric »

Whilst every effort has been made to ensure the accuracy of the instructions contained in this guide, Mitsubishi 
Electric reserves the right to make improvements and changes to the product described in this guide and/or to 

the guide itself, without prior notice.

Mitsubishi Electric is a Mitsubishi Group Company.

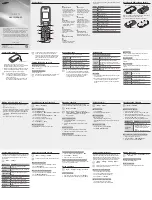
Summary of Contents for M430i

Page 1: ...red to as Mit subishi Electric Whilst every effort has been made to ensure the accuracy of the instructions contained in this guide Mitsubishi Electric reserves the right to make improvements and changes to the product described in this guide and or to the guide itself without prior notice Mitsubishi Electric is a Mitsubishi Group Company ...

Page 2: ...received SMS message ______________ 20 Reading stored SMS messages ________________ 21 Moving messages to SIM _____________________ 21 Forwarding messages ________________________ 21 Activating or deactivating the message alert tone ___ 21 Preparing the phone to send SMS messages ______ 22 Entering text Edition mode ___________________ 22 Creating text models _________________________ 26 Editing a...

Page 3: ...ing your data __________________________ 69 How to insert extract your miniSD Card _________70 How to access the miniSD Card contents _______70 How to configure your miniSD Card ____________71 Storage used _______________________________71 Page 72 Calendar Page 72 Network services Page 73 i mode User interface _______________________________73 i mode menu _______________________________73 i mode a...

Page 4: ...ll below the maximum value This is because the phone is designed to operate at multiple power levels so as to use only the power required to reach the network In general the closer you are to a base sta tion antenna the lower the power output The highest SAR value for this M430i model when tested for compliance against the standard was 0 754 W kg While there may be differences between the SAR leve...

Page 5: ...a circuit different from that to which the receiver is connect ed Consult the dealer or an experienced radio TV technician for help General safety Use of the hands free kit over extended periods of time and at high volume may seriously damage your hearing Due to the possibility of radio frequency interference it is important to follow special regulations re garding the use of radio equipment Pleas...

Page 6: ... by the phone Do not connect incompatible products The use of third party equipment or accessories not made or authorised by Mitsubishi Electric invalidates the warranty of your phone and may be a safety risk Do not remove the labels The numbers on it are important for aftersales service and other related purposes Contact an authorised service centre in case of problem AC DC adaptor charger This m...

Page 7: ...ed is then displayed Enter PUK appears PUK and PUK2 codes 8 digits Please ask your service provider for your PUK code Use it to unblock a disabled SIM card see Se curity features page 94 The PUK2 code is required to unblock the PIN2 code see above Call barring password 4 digits This password is used to bar various types of calls made or received from the phone see Call barring password page 94 Pho...

Page 8: ...o get direct access to the Camera short press and Video long press applications Left softkey to validate the item above usually an action give direct access to the Messages menu long press and to the Mail menu short press from the standby display Right softkey to validate the action above usually Exit and and give direct access to the menu displayed above to the i mode browser short press and to t...

Page 9: ...croll up down left or right to the required menu item and validate by pressing OK E g Select Camera Video scroll to the Camera Video menu item with the navigation keys Up Down Left Right and press the OK key to validate your selection Insert The indicates that more options or sub menus are available when pressing OK The at the beginning or at the end of an Options menu indicates that more options ...

Page 10: ...is empty the mobile needs recharging Signal strength level There are five strength levels These show the strength of the received signal The more bars the stronger the signal If the network cannot be found no strength level is displayed Tegic edition mode Multitap edition mode Arrow keys These icons are displayed during menu operation to indicate that more items in the menu can be accessed by pres...

Page 11: ...d Down Answering a call When receiving a phone call When a phone call is received the caller name number see Receiving caller ID page 92 picture video see Storing names and telephone numbers page 33 may be displayed if you created a Phone book card corresponding to this caller 1 Open the clamshell 2 Press and hold the On Off key A beep sounds at mobile activation When switching the mobile On for t...

Page 12: ...s and the Video application long press can be accessed by pressing the OK key in the middle of the cursor key Mail and i mode indicate that you can directly access the mailer and the i mode service by pressing the softkeys The standby display External screen The provider name as well as the time the signal strength and the battery charge levels are also displayed on the external screen when the mo...

Page 13: ... Welcome screen or as a Goodbye screen from the Pictures folder page 59 and Melodies page 60 Power saver When the phone has not been used for more than one minute the internal and external screens turn Off black screens Press any key or open the clamshell to turn the internal and external screens On However this does not prevent any operation on your mobile from taking place You can there fore rec...

Page 14: ...new event card is displayed with the following fields Title up to 10 characters De scription up to 50 characters Start date time End date time Alarm Location Repetition To view the current day s entries In the Today view each event is displayed on one line as follows a graphic representation if an alarm has been set the event starting time the first part of the event title Red events indicated tha...

Page 15: ...and alarm activation of the stored events The following actions are available An Options list is available It allows you to change the current View Create an event Export the Events in a defined period All events or Delete all events 1 Press the Menu T9 key Select Tools 2 Select Diary 3 Select Calendar 4 Select Options 5 Select View and then Week view ACTIONS PURPOSE To move down to the next time ...

Page 16: ...ging after 60 seconds It automatically restarts after a snooze time until it is stopped or up to the start finish time and date of the event task If the phone is off at alarm time it automatically switches on If the phone is locked or if the PIN setting is on the phone returns to this locked state after the alarm has rung until you use it 1 Press the Menu T9 key Select Tools 2 Select Diary 3 Selec...

Page 17: ...36 Pressing the Clear key deletes the result An integrated currency converter facility is also available See Currency converter below ACTIONS PURPOSE Delete events To delete the events of the defined time period Delete tasks To delete the tasks of the defined time period Delete all events To delete all the events stored in Calendar Delete all tasks To delete the tasks stored in the Diary 1 Press t...

Page 18: ...nu T9 key Select Tools 2 Select Currency converter 3 Select one of the first two options 4 Enter the amount to be converted Press to insert a decimal point if needed 5 Press OK The converted amount and the exchange rate information are displayed 1 Press the Menu T9 key Select Tools 2 Select Alarm clocks 3 Select Alarm 1 Alarm 2 or Alarm 3 Select On then enter the alarm time or press OK to val idat...

Page 19: ...t Infrared port The infrared port opens and the mobile automatically acknowledges the state of the opposite infrared port 1 If the infrared port is already open selecting the Infrared port item closes it 2 The Infrared port cannot be opened while using the Camera or the Video applications The Infrared port is auto matically closed when accessing the Camera or Video applications 1 Place your mobile...

Page 20: ...lly stored in the phone or in the SIM card A flashing indicates that the SIM or the phone memory are full and cannot store any further messages Delete messages to allow new messages to be delivered 1 Press the Menu T9 key Select Messages 2 Select SMS Mail MMS or Broadcast A number is displayed on the SMS and Mail MMS lines on the right of the screen It indi cates the number of unread received mess...

Page 21: ...ct Messages 2 Select SMS 3 Select Inbox or Outbox 4 Choose the message to be moved and select Options 5 Select Move to SIM 1 Press the Menu T9 key Select Messages 2 Select SMS 3 Select Inbox or SIM archive Received messages 4 Select the message to be forwarded and select Options 5 Select Forward 6 Press OK Select the To field and select one of the displayed names or in the Phone book list select O...

Page 22: ...od the quicker intuitive method called T9 text input and the Numeric mode to type numbers To select an edition mode or FIELDS DESCRIPTION DEFAULT Name To enter the profile name Profile1 Message centre To enter the centre number Empty Format To set the message format text voice fax or paging Text Validity period Time the message remains at the message centre until delivered Maximum 1 Press the Menu...

Page 23: ...ress on the Clear key Holding the Clear key deletes all the text Use the left or right arrow keys to move the cursor in the text Multitap method KEY CHARACTER Lower case Upper case _1 a b c 2 A B C 2 d e f 3 D E F 3 g h i 4 G H I 4 j k l 5 JK L 5 m n o 6 M N O 6 p q r s 7 P Q R S 7 t u v 8 T U V 8 w x y z 9 W X Y Z 9 0 0 Swap between the Upper case Lower case and Numeric edition modes Short press ...

Page 24: ...or three times Press as many times as necessary to change the symbol to or etc Example To write card Press the Menu T9 key and select Messages Select SMS Select Write new Fill in the To field see Sending a new SMS message page 26 In the Text field press on the Menu T9 key until is displayed or select Options then Input mode and choose T9 Press A appears Press Cc appears Press Car appears Press Cas...

Page 25: ...tion is not available in numeric edition modes It is however available while using the numeric mode in an alpha numeric edition context 2 The Copy all option only is available in numeric edition mode It therefore copies the full displayed number 1 From an edition screen e g while writing a mail an MMS an SMS a Phone book card select Options 2 Select Copy all The whole edition screen content is cop...

Page 26: ...g ones are lower case e g to write a surname Swap between the Multitap Multipress method and the T9 text input Clear or backspace Short press to enter a space Long press to access special characters Another matching word Smart punctuation Short press moves the cursor to the beginning or end of each word Long press moves the cursor to beginning or end of the text To move the cursor to the beginning...

Page 27: ...d the message if it is more than one Select Go on if you want to send the message or select Cancel if you do not want to send it or if you want to amend your message If you have registered an automatic signature the number of characters used is automatically added to the message length 1 Press the left arrow key to access the Phone book Scroll to one of the available names or numbers 2 Select Opti...

Page 28: ... messages stored the total available space on the Phone memory and on the SIM card 1 Press the Menu T9 key Select Messages 2 Select SMS 3 Select Drafts and use the up or down arrow keys to scroll to the required message 4 Press Options to View Delete Delete all Send Send as mail Edit Edit a copy Move to SIM for outbox messages only Numbers addresses to store or call the number s con tained in the ...

Page 29: ...y to clear the CB message displayed Press the Call key to dial the number contained in the message Press Options to display the following menu Activating deactivating the alert tone An alert tone can be set to beep every time a new or updated broadcast message is received Broadcast language All the broadcast messages can be displayed in several languages To select a language 1 Press the Menu T9 ke...

Page 30: ... Up or Down arrow keys to select the required option and follow the instructions dis played Call timers The voice Modem and GPRS call information for Line 1 and Line 2 is stored in the Call timers menu The call type and the accumulated times of outgoing and incoming calls are dis played Selecting Details displays information on calls made on your home network on National roaming and on Internation...

Page 31: ...he total calls cost and the remaining balance on your account once a credit limit has been set To display these you must first set a currency value and enter an average cost per unit only calls units are displayed if the cost information is not stored To set a currency value per Unit To set the call cost type to Units 1 Press the Menu T9 key Select Calls Times 2 Select Call timers 3 Select Balance...

Page 32: ...n a credit limit has been set the selection from the Credit limit display is Edit or Set no limit 1 Press the Menu T9 key Select Calls Times 2 Select Call costs 3 Select Show 4 Use Up and Down arrow keys to display the Last Call and All Calls and show the Remaining credits The remaining credit is shown in either units or currency as set by Cost Type menu above 1 Press the Menu T9 key Select Calls ...

Page 33: ... it with your phone card Press the Phone book key or the Left arrow key to directly access the Phone book from the standby display 1 Enter the number Select Store 2 Select New phone name 3 The Home number Mobile number Work number or FAX number list is displayed thereby allowing you to select a number type 4 Enter the card requested data and select Save to store the information 1 Press the Menu T9...

Page 34: ...er 2 You can use _ wild card spaces to store numbers wild card spaces cannot be obtained when registering a number from the standby display When calling a number containing wild card spaces select the number from the Phone book select Options or press on the Call Send key and enter the number corresponding to the wild card spaces missing figures 3 The p pause and _ characters which are accessible ...

Page 35: ...uired location 1 Press the Menu T9 key Select Phone Book 2 Select Add name Select Phone names 3 Scroll Down and select Video 4 Select the required video from the displayed list Press OK to confirm your selection 5 Select Save to store your settings 1 If you add a video and a ringtone to your Phone book card the video sequence only is played and the ringtone is deactivated on receipt of an incoming...

Page 36: ...ent When the voice patterns match Stored is displayed You may have to select the number the voice dialling pattern has to be attached if several numbers are stored on the card Select Home number Mobile number or Work number if you have registered several numbers on a Phone book card 1 Press the Left arrow key or the Phone book key to display the Phone book list 2 To access the required name either...

Page 37: ...s OK If several phone numbers are registered on a card e g Home number Mobile number or Work number select one by pressing OK 5 You are then prompted to pronounce the name at least twice pronounce it as clearly as pos sible Stored is displayed when both voice patterns match If the voice patterns do not match Failed is displayed Repeat the whole voice registration procedure again 1 Press the Menu T...

Page 38: ...p 1 Press the Menu T9 key Select Phone Book 2 Select Groups 3 Select the group to be modified and select OK then select the group name and or the ring tone Select the new parameters name melody 4 Select Save to store your settings 1 Repeat the Phone names storage procedure see Storing names and telephone numbers page 33 and fill in the Phone names card 2 Scroll down to Groups and select OK 3 Selec...

Page 39: ... in another edition screen Paste To paste a copied number Clear all To delete all the typed characters from the current edition window 1 Line 2 data and fax numbers can only be accessed if your SIM card has these subscriptions 2 My numbers availability depends on your service provider 3 Scroll down to view or enter Line 2 your data and fax numbers 1 Press the Menu T9 key Select Phone Book 2 Select...

Page 40: ...ll or with open clamshell The Camera screen and the related icons Here is the way information related to the Camera application and its state while in use is dis played The screen shot below is a preview example the Camera related icons described in the table below are the ones which can be displayed while using the Camera features The fea tures described in this table are further explained in the...

Page 41: ...icture A message is displayed if you try to launch the camera application and the cover is not open 1 Please check that the positionof the subject on the screen is correct 2 From the idle screen you can activate the Camera application by directly sliding the lens cover KEYS DESCRIPTION Camera Video side key To take a picture Menu side key To access an Options list from the Preview screen To exit a...

Page 42: ...Camera Video side key to take your picture The shutter sound is played and the red light blinks 1 Please check the macro switch position before launching the recording the image quality may vary according to its positioning 2 You cannot take a picture while a voice communication is in progress 3 The Shutter sound is a Camera like sound that is heard when a picture is captured 4 You may not be able...

Page 43: ... the seven brightness levels 3 Press the Camera Video side key to confirm your selection 1 Press the Menu side key Select Contrast 2 Select one of the seven contrast levels 3 Press the Camera Video side key to confirm your selection 1 Press the Menu side key Select Sharpness 2 Select Normal Soft or Sharp 3 Press the Camera Video side key to confirm your selection 1 Press the Up or Down side key 2 ...

Page 44: ...ing is to be used to take pictures of oneself view the stored pictures in an optimised way For picture taking with open clamshell here are the keys to be used 1 Press the Menu side key Select Self timer 2 Select ON 3 Press the Camera Video side key to launch the countdown The 10 seconds countdown is displayed on the external screen The cap ture is automatically performed when the countdown is over...

Page 45: ...anel OK key To capture your image Up navigation key To access the Zoom panel and to scroll to the next setting type Down navigation key To access the Quality panel and to scroll to the next setting type Left navigation key To access the Brightness panel Right navigation key To access the Mode panel 1 The settings described above are to be accessed via the Preview mode only 2 Please refer to the Ad...

Page 46: ...port Set as To set your picture as a standby display for your Main screen External screen as a Welcome screen or as a Goodbye screen Full screen To view your image in full screen Delete To delete the current picture Details To display information about the file Name the Title the Author the device name the Resolution width x height in pixels the Size the Storage date the File protection status the...

Page 47: ...dia box 2 Select Pictures then select the required picture 3 Press OK APPLICATIONS AVAILABLE RESOLUTION Phone Book Portrait and Messaging Settings standby screen for Main or External screen Welcome or Goodbye screen Portrait Wall paper and Messaging Mail MMS All If you wish to send an image by Mail or MMS the image may be automatically resized 1 Press the Menu T9 key Select Phone Book 2 Select Add...

Page 48: ...ot below is a preview example the Video related icons described in the table be low are the ones which can be displayed while using the Video features The features described in this table are further explained in the chapter Video recorder icons The use of the video recorder and the sending forwarding and reproducing of the videos are subject to property and privacy rights Do not make videos unles...

Page 49: ...ION Play symbol press on the OK key or on the side key to launch the playback Pause symbol press on the OK key or on the Camera Video side key to pause the recording Stop symbol press on the OK key or on the Camera Video side key to stop the recording Sound level from no sound to on main screen Sound level on external screen When in playback mode the gauge fills with green to indicate the playback...

Page 50: ...drawings above then press and hold the Menu side key or 1 Press and hold the Camera Video side key then open the lens cover or 1 Open the lens cover then press on the Menu side key and select Video recorder 2 Choose a subject 3 Press the Camera Video side key to launch the Recording The shutter sound is played and the red light is activated 4 Press the Menu side key to stop the Recording 1 Please ...

Page 51: ... video The better the quality the bigger the file size If you wish to send your video by Mail or by MMS we advise you choose the Eco nomic mode To select the brightness To select the zoom setting 1 During the recording press the Camera Video key The shutter sound is played and the recorded sequence is paused 2 Press the Camera Video key to restart the Recording The red light is deactivated during ...

Page 52: ...clearly record text Do not forget to check its positioning before recording a video 1 Press the Menu side key Select Microphone 2 Select ON or OFF 3 Press the Camera Video side key to confirm your selection 1 Press the Menu side key Select Video Size Limit 2 Select Short mail Long mail or Maximum 3 Press the Camera Video side key to confirm your selection The Short mail and Long mail values depend...

Page 53: ...e videos Subject in front of the mobile for self filming KEYS DESCRIPTION Up side key To zoom in Down side key To zoom out OK key To launch the Recording in Preview or Pause mode To launch the Pause mode in Recording Up arrow key To access the Zoom panel and to scroll to the next one Down arrow key To access the Quality panel and to scroll to the next one Left arrow key To access the Brightness pa...

Page 54: ...era Video 2 Select Film a video 1 Press and hold the OK key The infrared port automatically closes when the video application is accessed 1 From the standby display press the Menu T9 key Select Camera Video 2 Select Storage 3 Select Video storage then choose Phone memory or Memory card All the videos are then automatically stored on the selected storage space 1 Place yourself in front of the mobil...

Page 55: ... access the self timer page 52 Microphone To activate mute the microphone ITEMS DESCRIPTION Resolution To select the video frame size Select Normal or Small mode Quality To select the image quality Select Super fine Fine or Economic Shutter sound To select the shutter sound volume level Compact Light To select the intensity level of the compact white light Select High Medium or Low Info To display...

Page 56: ...tached to the video file the Copyright of the recorded video the Restriction status The empty fields are not displayed 1 When the video track cannot be played or if there is no video track the audio track only is played The Audio only message is displayed 2 During the Play mode opening or closing the clamshell sets the video to Pause Press OK to re start the playback 3 You cannot play a video whil...

Page 57: ...nloaded and or stored images to download and store images see the following sections Pictures browser The Pictures browser allows you to display the stored images as a list or as a mosaic When the pictures are displayed as a list the screen is divided into two parts the image names list and the selected image When they are displayed as a mosaic Thumbnails mode see Options My preferences below the ...

Page 58: ...es by date name size and select a view mode List Thumbnails 4 to display a 4 picture mosaic or Thumbnails 9 to display a 9 picture mosaïc and to change the Picture browser mode 1 If the selection is a sub folder an Options list is available 2 The sending of an image may not be allowed if it is exportation copyright protected the File protected message is then displayed 3 To send an image via the i...

Page 59: ...se the Up and Down arrow keys to scroll through the image names list and select one Select Options and then Set as 4 Select Main screen External screen Welcome screen or Goodbye screen 1 Select Set as then select Main screen External screen Welcome screen or Goodbye screen If the image is too big the crop screen is dis played 2 Use the cursor key to move the image up down left or right the availab...

Page 60: ...ail alert melody as a Welcome melody or a Goodbye melody Send by To send the selected melody by Mail by MMS or via the Infrared port Delete To delete the current melody Delete all To delete all the melodies of the current folder Multiple selection To select several melodies by pressing OK Press OK to unselect a ticked melody Select Options to access Send by Infrared port Delete Move to a folder of...

Page 61: ...n select a melody 4 The melody is played within 2 seconds 1 Press the Menu T9 key Select Fun Media box 2 Select Video 3 Scroll up and down to select the required video or select the required folder press OK to view its content then the required video An Options menu is then available OPTIONS DESCRIPTION Play To play the selected video Set as To set the selected video as a Main screen or a ringtone...

Page 62: ...Size the Storage date the File protection status the Description if a text is attached to the video file the Copyright of the recorded video the Restriction status The empty fields are not displayed 1 When the video track cannot be played or if there is no video track the audio track only is played The Audio only message is displayed 2 During the Play mode opening or closing the clamshell sets the...

Page 63: ...key to play the selected video 1 Press the Menu T9 key Select Fun Media box 2 Select Games applications 3 Select one of the available games applications from the list or from one of the available fold ers if any 1 Press and hold the i mode softkey from the standby display 2 Select one of the available games applications from the list or from one of the available fold ers if any 1 Depending on the ...

Page 64: ...top to end the recording 5 Enter the note name and press OK 1 Press the Menu T9 key Select Fun Media box 2 Select Speech notes 3 Scroll up or down to select the required speech note or the required folder OPTIONS DESCRIPTION Play To play the selected speech note s Record new To record a new speech note Set as To set the selected speech note as a ring tone for Line1 or Line2 as an alarm melody as a...

Page 65: ... this item is only displayed when a miniSD Card is inserted 3 Scroll up or down to select the required speech notes or choose a folder press OK to view its content then select speech note 4 Press OK or select Options then select Play It is not possible to add a frame to a video OPTIONS DESCRIPTION View To view the frame and its name Delete To delete the current frame Delete all To delete all the f...

Page 66: ...ens cover Your preview with the selected frame is dis played Capture your image please see To take a picture page 42 1 The new picture is stored in the Pictures folder as a jpg file 2 When taking a picture the preview size is automatically adapted to the selected frame size Modifying the preview size removes the frame 1 From the standby display press the OK key to access the Camera application 2 S...

Page 67: ...t send any copyright protected file the File protected message is displayed on any attempt to send copyright protected files OPTIONS DESCRIPTION View To view the file contents Store To store the selected file in the corresponding application folder Send by To send the text the selected vCards the selected vCalendars the vBookmark s and the unknown file s via the infrared port To send the current v...

Page 68: ... 2 Select View 3 The received file is displayed Select Store A received file may contain several vBookmarks Select the one s you want to keep then select Store 1 Select the vCard or the vCalendar you wish to transfer as explained in Diary page 14 Cal endar page 14 and Tasks list page 16 or select it from Others 2 Select Options 3 Select Send by then SMS A warning may be displayed regarding the num...

Page 69: ...atibility and performance After removing the card and the Adapter from equipment immediately store them in its case When storing the card insert into the Adapter Do not disassemble or remodel Do not impact bend drop or wet Do not touch the metal terminals with your hands or metal objects Do not allow dust garbage etc to get in the Adapter s slot Do not attach other labels or stickers Do not use or...

Page 70: ...d page 61 To access videos See To access videos stored on your miniSD Card page 63 To access speech notes See To access speech notes stored on your miniSD Card page 65 The miniSD Card must be formatted in your mobile before its first use please see How to configure your miniSD Card page 71 If the formatting is done via another device e g a PC you may not be able to use your miniSD Card on your M43...

Page 71: ... to transfer or to copy protected files from your mobile to your miniSD Card or other devices 1 Insert the miniSD Card in the mobile 2 The Format card screen is displayed Select Yes to format your miniSD Card If you select No your miniSD Card is not formatted and cannot be used with your mobile 1 The first time you use your miniSD Card do not format it via another device e g your PC 2 Formatting y...

Page 72: ...M card and appear on the phone menu as they are accessible from the Network serv menu Please contact your service provider for further details Some operators may provide up to two services on the same SIM card The dis played sub menus in the Network serv menu may then be named Applica tions Services or Information Three kinds of services can be registered in this menu SIM application tool kit An a...

Page 73: ...low you to access further settings or fields to be filled in as well as validation and can cellation options OK Cancel Send Save etc Scroll up or down to highlight blue highlighting the correct field select an option or enter text Depending on the menu you are in you may have to scroll down many times until you reach the correct option While browsing i mode features you can access Options menus by...

Page 74: ...profiles 3 Select one of the available profiles and select Options Left softkey 4 Choose Select Select View to view the profile details or select Delete to erase the current profile 1 Press the Menu T9 key Select i mode 2 Select New mail alert 3 Select Alert and select On Select Melody and select one of the available ring tones 4 Select Save to store the settings 1 The Alert field must be set to O...

Page 75: ...ve in PB To save the address in the phone book 7 Play animation To play the animation The items on this options list may vary according to the contents of the page displayed 1 From the Standby display select i mode 2 Select Go to webpage or press 3 Select Input Address and press OK or press then enter the required webpage address 4 Press OK to confirm connection 1 From the Standby display select i...

Page 76: ...ed page name 3 Delete To delete the selected saved page 4 Delete all To delete all the saved pages 5 Show Address To display the URL address of the saved page 6 Protect On Off To protect unprotect the selected saved page from deletion 1 From the Standby display select i mode 2 Select Settings or press 1 Select Home or press 2 Select Enable or Disable 3 Scroll down as many times as necessary until ...

Page 77: ...times as necessary until is highlighted and press OK to validate 1 Select Certificates or press 2 Select one of the displayed certificates to view its contents 3 Press Exit Right softkey to return to the certificates list 1 Select Others or press ITEMS DESCRIPTION 1 Request Timeout To set the time limit for i mode disconnection when there is no response from the network Select 60 seconds 90 second...

Page 78: ... file Each additional text or file uses the available memory space and reduces the maximum content of the mes sage text OPTIONS DESCRIPTION 1 2 1 Send To send your mail 2 Save To store your mail in the Draft folder 3 Add Address To add an addressee s 4 Address Menu To display the Address operation submenu This sub menu bears the following options Open Phone book Input address Change to To to chang...

Page 79: ... add an image to the slide This is only available if an image or a video was not already set to the slide 4 Delete Image To erase the set image 5 Add Audio To add a sound file to the slide This is only available if a sound or a video was not already set to the slide 6 Delete Audio To erase the set melody or ringtone 7 Add Video To add a video to the slide This is only available if an image or a so...

Page 80: ... a folder 2 Rename folder To change the name of the selected folder 3 Delete folder To delete the selected folder The protected and unread mails cannot be deleted 1 Select Inbox or press 2 Scroll to the required imail or iMMS and select OK to view it OPTION DESCRIPTION 1 Reply To display the following options list Reply Reply quoted to reply and attach the text contents of the received mail Reply ...

Page 81: ... MMS The availability of these options may vary according to the list contents 1 Select Sent or press 2 Scroll to the required message and select OK to view it OPTION DESCRIPTION 1 Edit To edit the selected sent message contents in order to re send it 2 Delete To delete the current message 3 Protect On Off To protect unprotect the current message this feature allows you to protect the mail from un...

Page 82: ... to be retrieved or deleted according to its their title or detailed contents The availability of this option depends on your service provider 1 From the standby display select Mail 2 Select Mail Settings or press 1 From the Standby display select i mode 2 Select Mail or press 3 Select Mail Settings or press 1 Select Edit Signature or press 2 If you want to select Auto Attach to tick the correspon...

Page 83: ... 1 Select Font Size or press 2 Select Small Normal or Large 3 Scroll down as many times as necessary until is highlighted and press OK to validate 1 Select Check Settings or press to view the contents of each parameter 1 Select Reset Settings or press to go back to the Mail main menu 1 Select i mode from the standby display 2 Press 3 Enter the site address 4 Press OK The connection is then automat...

Page 84: ...emporarily inhibited and the phone rings instead of vibrating 1 From the standby display press the Up arrow key 2 Select one of the available settings Ring Silent Vibrate Vibrate ring or Vibrate then ring and press OK to validate 1 Press the Menu T9 key Select Settings 2 Select Tones 3 Select Ringtones 4 Select Incoming call Incoming call L2 Alarm then select Melodies Speech notes or Vid eos or We...

Page 85: ...e volume level is set to 0 the icon is displayed on the Standby display 2 Setting the key tones to 0 deactivates the key tones 3 You can set the conversation volume by using the Up side key to increase the conversation volume level or the Down side key to decrease the conversation volume level 1 Press the Menu T9 key Select Settings 2 Select Tones 3 Select Volume 4 Select Ramping 5 Select On 6 Sel...

Page 86: ...n 3 Select Welcome screen 4 Select Default to set the default image as standby screen for your Welcome screen or select My picture see Pictures page 57 to select one of the stored pictures 5 Select Save to store your setting You can also set the Welcome screen from the Pictures menu see Setting a still or animated image as a standby display for the Main screen or the External screen as a Welcome s...

Page 87: ...numbers to the speed dialling keys Phone settings Language selection You can change the language on your mobile 1 Press the Menu T9 key Select Settings 2 Select Display then Standby screen 3 Select Status light 4 Select On or Off 5 Select Save to store the setting 1 Press the Menu T9 key Select Settings 2 Select Keypad 3 Select Keypad lock 4 To unlock the keypad press Unlock then 1 From the Standb...

Page 88: ...o the world time zone map based on Greenwich Mean Time Origin clock A Secondary clock is also available This feature is useful for the Diary To import or export calendar cards events and tasks sched ules must be set according to Time zones Both clocks are displayed on the same screen The date and time and the city name are dis played for both clocks 1 Press the Menu T9 key Select Settings 2 Select...

Page 89: ...ore the data 6 Select the Secondary clock or select Options then choose Edit second ary Scroll through the panels and enter the required information 7 Select Save to store the data OPTIONS ACTION Swap clocks To swap the Origin clock and the Secondary clock This feature is useful when travelling the secondary clock becomes the origin mobile clock and the origin clock becomes the secondary one Edit ...

Page 90: ...conditionally All DATA calls To divert incoming data calls unconditionally 4 Select one of these options and select OK 5 Select Activate 6 Select Voice Mail if you want the calls to be diverted to your voice mailbox Names select one of the Phone book entries or Number Enter the number to which the calls are to be diverted and select OK A validation message containing the selected number is display...

Page 91: ...he action each time a new call is received In compliance with European regulations you are obliged to inform your correspondents before recording a phone conversation You can set up and receive a new call during the conference call In these cases the conference call is put on hold OPTIONS DESCRIPTION Speaker On Off To activate deactivate the hands free mode Auto DTMF To type a new phone number and...

Page 92: ...nsfer items from this list to the preferred networks list The order and names of the networks in the preferred networks list can be edited and amended 1 Press the Menu T9 key Select Settings 2 Select GSM Services 3 Select Sending my ID 4 Select My settings 5 Select Preset The phone resets and reverts to its original network setting 1 Press the Menu T9 key Select Settings 2 Select GSM Services 3 Se...

Page 93: ...eturn to the standby display 1 You cannot select a network for manual change if it is on the forbidden list even if it is still listed as a choice 2 You cannot delete a network from the forbidden list This list is automatically updated when the manual network selection is performed 3 If the Manual search has been selected before turning the mobile off and if the manually selected network cannot be...

Page 94: ... the PIN code is required each time you turn your mobile on If an incorrect PIN code is entered three times in succession your SIM card will be blocked The 8 digit PUK code is then required to unblock your phone Please contact your service provider for this code To activate the PIN protection 1 Press the Menu T9 key Select Settings 2 Select GSM Services 3 Select Call barring 4 Select Change passwo...

Page 95: ... Summary of code password entry chart miniSD Card Please see How to configure your miniSD Card page 71 1 Press the Menu T9 key Select Settings 2 Select Security 3 Select PIN change and follow the information displayed 4 Press OK to validate your new PIN code 1 Press the Menu T9 key Select Settings 2 Select Security 3 Select PIN2 change and follow the information displayed 4 Press OK to validate yo...

Page 96: ...rnet Protocol LCD Liquid Crystal Display MMI Man Machine Interface MMS Multimedia Messaging Service PIN PIN2 Personal Identification Number Supplied by your network service provider PPP Point to Point Protocol PUK PUK2 PIN Unblocking Key Used to unlock PIN and PIN2 Supplied by your network service provider QQVGA Quarter Quarter Video Graphics Array Roaming Rm The ability to use your telephone on n...

Page 97: ... 31 Stored telephone numbers cannot be recalled Fixed Dialled Number or Call Barring features are activated Deactivate feature see page 93 The mobile is on but nothing is displayed Display contrast is too low Reset contrast see page 87 Battery icon not flashing 1 2 3 4 5 during charging May indicate a charge or battery problem Disconnect the charger Reconnect and try again May also indicate that t...

Page 98: ...changed the call barring password or You changed the call barring service status The entered password seems to be wrong or incorrect Check your request You made a request for a service that seems to be unavailable Check your subscription You tried to activate a GSM service You are requested to check your subscription regarding the related service rights of use access Connection failed Connection w...

Page 99: ...ocked A wrong PUK code has been entered 10 times The phone is now permanently blocked PIN blocked A wrong PIN code has been entered 3 times PIN2 blocked A wrong PIN2 code has been entered 3 times PUK2 blocked A wrong PUK2 code has been entered 10 times The SIM services protected by the PIN2 code have now been permanently disabled Reaching allowed credit The cost limit is about to be reached The co...

Page 100: ... by accident misuse improper installation or improper repair by a non approved repairer alteration or modification neglect failure to use the phone for normal purposes Acts of God water ingress use in adverse environmental conditions humidity or temperature d cost of or performance of any modifications to the product to adapt or adjust it to conform to national or local safety laws where such safe...

Page 101: ...5 PUK 7 95 PUK2 7 95 Compact light 40 43 46 48 52 Credit limit 32 Cropping 59 Currency converter 18 D Data exchange 68 Declaration of conformity 5 Diary Calendar 14 15 Exporting an event 16 Sending an event 16 Storage used 17 Tasks list 16 Display 12 85 Downloaded melody 61 Downloading Infrared port 59 E Editing a phone book card 36 Editing a SIM name card 36 Editing a text model 26 Edition mode 2...

Page 102: ...7 Erasing 42 46 Memory card 59 Quality 43 Size 42 Storing 42 46 Taking 42 Viewer 57 Viewing 44 47 Pictures list 33 Pictures viewer options 58 PIN code 7 94 PIN2 code 7 95 Playing a video 49 55 62 Power saver 13 PUK code 7 95 PUK2 code 7 95 R Receiving a video 63 Receiving caller ID 92 Recorded call 32 Recording a video 48 50 Rejecting a call 12 Reminder call duration 31 Ring 84 Ring tone 84 Stop 1...

Page 103: ...splay 48 Duration 48 49 Erasing 51 54 Features 49 Full screen option 56 Holding your mobile 53 Icons 48 49 Image Size 51 Loop mode 49 Macro switch setting 52 Memory card 63 70 Microphone 48 52 Pausing 48 49 51 54 Playback 49 55 62 Player 49 Quality 48 51 Receiving 63 Recording 48 50 Resolution 48 Scenery shots 49 Self timer 48 Self filming 53 54 Sending 51 Shortcuts 53 Size 48 Size limit 52 Sound ...

Page 104: ...104 Notes NOTES MQ860P014A02 ...

Reviews: