background image

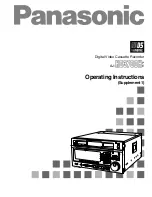
VIDEO CASSETTE RECORDER

MODEL

HS-MD3000E

INSTALLATION AND OPERATION MANUAL

Only video cassette tapes with the 

 mark or the 

 mark may be used with this model.

The included power cord is used for 220 - 230 V, 50 Hz.  Do not connect any outlet or
power supply having a different voltage or frequency.

This instruction manual is important to you.
Please read it before using your video cassette recorder.

This video cassette recorder complies with the requirements of the EC Directive 89/336/EEC,
93/42/EEC and 93/68/EEC.
The electro-magnetic susceptibility has been chosen at a level that gains proper operation in
residential areas, on business and light industrial premises and on small-scale enterprises,
inside as well as outside of the buildings.  All places of operation are characterised by their
connection to the public low voltage power supply system.

625

VHS

PAL

DEUTSCH

ENGLISH

IT

ALIANO

FRANÇAIS

CASTELLANO

NEDERLANDS

PìCCäàâPìCCäàâPìCCäàâPìCCäàâPìCCäàâ

Summary of Contents for HS-MD3000E

Page 1: ...assette recorder This video cassette recorder complies with the requirements of the EC Directive 89 336 EEC 93 42 EEC and 93 68 EEC The electro magnetic susceptibility has been chosen at a level that gains proper operation in residential areas on business and light industrial premises and on small scale enterprises inside as well as outside of the buildings All places of operation are characterise...

Page 2: ...ic shock EQUIPMENT energized from an external electrical power source CLASS I EQUIPMENT 2 The degree of protection against harmful ingress of water Ordinary EQUIPMENT enclosed EQUIPMENT without protection against ingress of water 2 The degree of safety of application in the presence of a FLAMMABLE ANAESTHETIC MIXTURE WITH AIR or WITH OXYGEN OR NITROUS OXIDE EQUIPMENT not suitable for use in the pr...

Page 3: ...irements of the standard IEC 601 1 1 If in doubt consult the technical service department or your local representative Caution for use in patient environment Patient Environment Leakage current of this unit may be exceeded the allowable value when conductively connected to other equipment To avoid increment of the leakage current separation device shall be applied THIS APPARATUS MUST BE EARTHED GR...

Page 4: ... THE POWER CORD Damage to the power cord may cause fire or shock hazard When unplugged hold by the plug only and pull out carefully UNPLUG THE POWER CORD DURING A LONG ABSENCE Turn off the power and unplug the power cord during a long absence MAINTAIN GOOD VENTILATION Do not obstruct the ventilation holes on the VCR For maximum ventilation place the unit on a hard level surface only and ensure it ...

Page 5: ...e 9 Shuttle ring 9 Field playback 9 Tracking Adjustment 9 Automatic tracking 9 Manual tracking 9 Searching Techniques 10 Blank search 10 Counter memory stop 10 Skip search 10 Index search 10 Time date search 11 Installation Connections 12 Connecting with ultrasonic inspecting instrument video monitor etc 12 Clock Setting 13 Menu Settings 14 Menu Chart 14 LANGUAGE SELECTION 15 MENU 1 15 MENU 2 15 E...

Page 6: ...ING PROGRAM MARK IN A B JOG ADJUST SHUTTLE FWD REV AUDIO DUB MENU SEARCH CLEAR ENTER FRAME FIELD COUNTER RESET REW FF STOP PLAY PAUSE REC Symbol on power connection to the mains Symbol off power disconnection from the mains AUDIO switch Use to select the audio signal output from the AUDIO OUT CH 1 L and CH 2 R terminals on the rear panel MONITOR switch Use to select the audio signal output from th...

Page 7: ... field the second field frame still When FREEZE MODE in MENU 2 is set to FIELD the freeze frame picture is switched in the order of the first field the second field frame still the first field Also use to set the menus PROGRAM button Press to set the programmed playback MENU button When the VCR is turned on press to display or exit the menus Note Press the button for about 2 seconds MARK IN A B bu...

Page 8: ... of the tape and E indicates the end of the tape Repeat indicator illuminates when playback between two marks on the tape marked with MARK A and B buttons once illuminates when playback between two marks on the tape marked with MARK A and B buttons repeatedly Automatic Tracking indicator Illuminates when the VCR adjusts the tracking automatically Hi Fi Audio indicator Illuminates during playback t...

Page 9: ...or RCA jack The audio signal selected by MONITOR switch on the front panel is output from this connector RESET button page 19 VIDEO IN connector Input connector for video signal BNC connector VIDEO OUT connector Output connector for video signal BNC connector FOOT SW jack The foot switch which is used to control recording is connected to here The foot switch shall comply with any of the following ...

Page 10: ...ENU 2 is set to AUTO Loading 1 Insert the tape into the cassette slot by holding it so that the long narrow edge with the contents label faces towards you The Cassette Status indicator illuminates on the fluorescent display when the tape is inserted Note Your VCR has a protection circuit which will eject the tape if it is loaded improperly If the VCR ejects the tape remove it completely and check ...

Page 11: ...l of AUDIO OUT CH 1 L Audio signal of both AUDIO OUT CH 1 L and CH 2 R Audio signal of AUDIO OUT CH 2 R Rewinding a tape Press REW button To stop rewinding press STOP button Fast forwarding a tape Press FF button To stop fast forwarding press STOP button Info The fast forward rewind time of a E 180 SE 180 tape is approximately 2 minutes however the time varies by the type of a tape you use Audio r...

Page 12: ...rked with MARK IN A B buttons on the front panel 1 Load the cassette 2 Search for a point where the programmed playback is to be started 3 Press MARK IN A button during playback recoding or stop mode The current counter is memorized 4 Search for a point where the programmed playback is to be stopped 5 Press MARK IN B button during playback recording or stop mode The current counter is memorized 6 ...

Page 13: ... picture or playback using the shuttle ring it takes few seconds to switch the picture page 15 for FREEZE MODE setting Shuttle ring By turning the SHUTTLE ring during playback still picture fast forwarding rewinding or stop mode you can obtain a variety of playback as shown below 1 Turn SHUTTLE to the right or left during playback still picture fast forwarding rewinding or stop mode The playback s...

Page 14: ...tion Index Fast forward Fast forward Index Approx 4 sec playback Approx 4 sec playback Fast forward Fast forward direction pressing FF button SEARCH FUNCTION BLANK SEARCH COUNTER MEMORY STOP SKIP SEARCH INDEX SEARCH TIME DATE SEARCH SEARCH FUNCTION BLANK SEARCH COUNTER MEMORY STOP SKIP SEARCH INDEX SEARCH TIME DATE SEARCH Reverse direction pressing REW button RECORDING RECORDING Present position R...

Page 15: ...tton proceeds the search in the forward direction Pressing REW button proceeds the search in the reverse direction When the recorded picture is found the VCR starts playback To quit while searching press STOP button Note To carry out the time date search set TIME CODE REC in MENU 1 to ON when the tape is recorded A time code is written on a tape when the recording is started and at each minute dur...

Page 16: ...Video input S video connector Ultrasonic inspecting instrument etc Wired remote control R 3001 optional Connecting with ultrasonic inspecting instrument video monitor etc Note To monitor the playback picture connect the video monitor to VIDEO OUT connector Set the 75ohm termination switch for S VIDEO IN LOOP THROUGH connector to OFF when the video monitor or another audio and video device is conne...

Page 17: ...The setting is now complete 11 Press MENU button several times to exit the menu Note DAYLIGHT SET will not appear when DAYLIGHT SAVINGS is set to OFF Info Press CLEAR button to select the selected item in the upward direction Clock Setting MENU 3 DAYLIGHT SAVINGS AUTO MONTH 01 DAY 01 YEAR 2002 TIME 00 00 00 DAYLIGHT SET WEEK MONTH TIME ON LST SUN 03 01 00 OFF LST SUN 10 02 00 MENU 3 DAYLIGHT SAVIN...

Page 18: ...s to exit the menu Info Use of JOG dial for menu setting Put a finger to the dimple and turn round and round Turning to the right changes the setting item to forward direction and turning to the left changes the setting item to backward direction When the setting item is not flashing turn to the right to move the cursor downwards and turn to the left to move it upwards Menu Settings MENU 2 S VHS A...

Page 19: ... mode Recording the time code TIME CODE REC ON The time code is recorded OFF The time code is not recorded MENU 1 REC TAPE END STOP TAPE END STOP TAPE IN STOP TAPE LENGTH E 180 VISS REC TIME CODE REC OFF TIME DATE DISP OFF FOOT SWITCH L E DIMMER OFF Displaying the time code TIME DATE DISP OFF The time code is not displayed TOP The time code is displayed on the top of the screen BOTTOM The time cod...

Page 20: ...ON OFF TOP BOTTOM L E H E L L OFF ON 001 00 001 01 001 02 001 03 001 04 001 05 001 06 101 00 101 01 101 02 102 00 102 01 103 00 103 01 104 00 104 01 105 00 105 01 105 02 106 00 106 01 107 00 107 01 107 02 108 00 108 01 108 02 109 00 109 01 MENU 2 MENU 3 ELAPSED TIME SEARCH FUNCTION S VHS Y NR C NR Y ENHANCER TBC COLOUR FILTER FREEZE MODE Hi Fi AUDIO NORMAL AUDIO IN DAYLIGHT SAVINGS MONTH DAY YEAR ...

Page 21: ...witch on the front panel to OFF to unlock the VCR Is the MENU indicator illuminated Press MENU button several times to turn off the MENU indicator Has the cassette s erasure prevention tab been broken off Load the cassette with its erasure prevention tab intact Has the tape run out Rewind the tape or load a new tape Is the Lock All indicator illuminated Set KEY LOCK switch on the front panel to OF...

Page 22: ...cable from the power outlet and contact your dealer immediately This error may occur when the recording is started with no video signal input or when the video signal stops during recording Check the video signal These errors may occur if there is something wrong with the state of the video cassette Eject the cassette tape and load it again This error may occur if there is something wrong with the...

Page 23: ...namic Range More than 90 dB with Hi Fi audio only General Power Source AC 100 230 V 10 50 60 Hz The included power cord is used for 220 230 V 50 Hz Power Consumption 0 4 0 2A Television System CCIR standard 625 lines 50 field PAL type colour system Colour Signal Low frequency conversion sub carrier phase shift recording Tape Format S VHS VHS 1 2 width high density video cassette tape Tape Speed 23...

Page 24: ...Italian Branch Centro Direzionale Colleoni Palazzo Perseo Ingresso 2 Via Paracelso 12 20041 Agrate Brianza Milano Italy Phone 039 60531 FAX 039 6057694 Benelux Branch Nijverheidsweg 23 A 3641 RP Postbus 222 3640 AE Mijdrecht Phone 02972 82461 FAX 02972 83936 Spanish Branch Barcelona Sucursal en españa Ctra de Rubi 76 80 Apdo 420 08190 Sant Cugat del Vallés Barcelona Spaín Phone 93 5653154 FAX 93 5...

Reviews: