background image

Before using the controller, read this 
Instruction Book carefully to ensure 
proper operation.
Retain this Instruction Book for future 
reference.
Make sure that this manual as well as the 
Installation Manual are passed on to any 
future air condition system users.
To ensure safety and proper operation of 
the unit, the unit should only be installed 
by qualified personnel.

<ORIGINAL>

Air-conditioner Control System

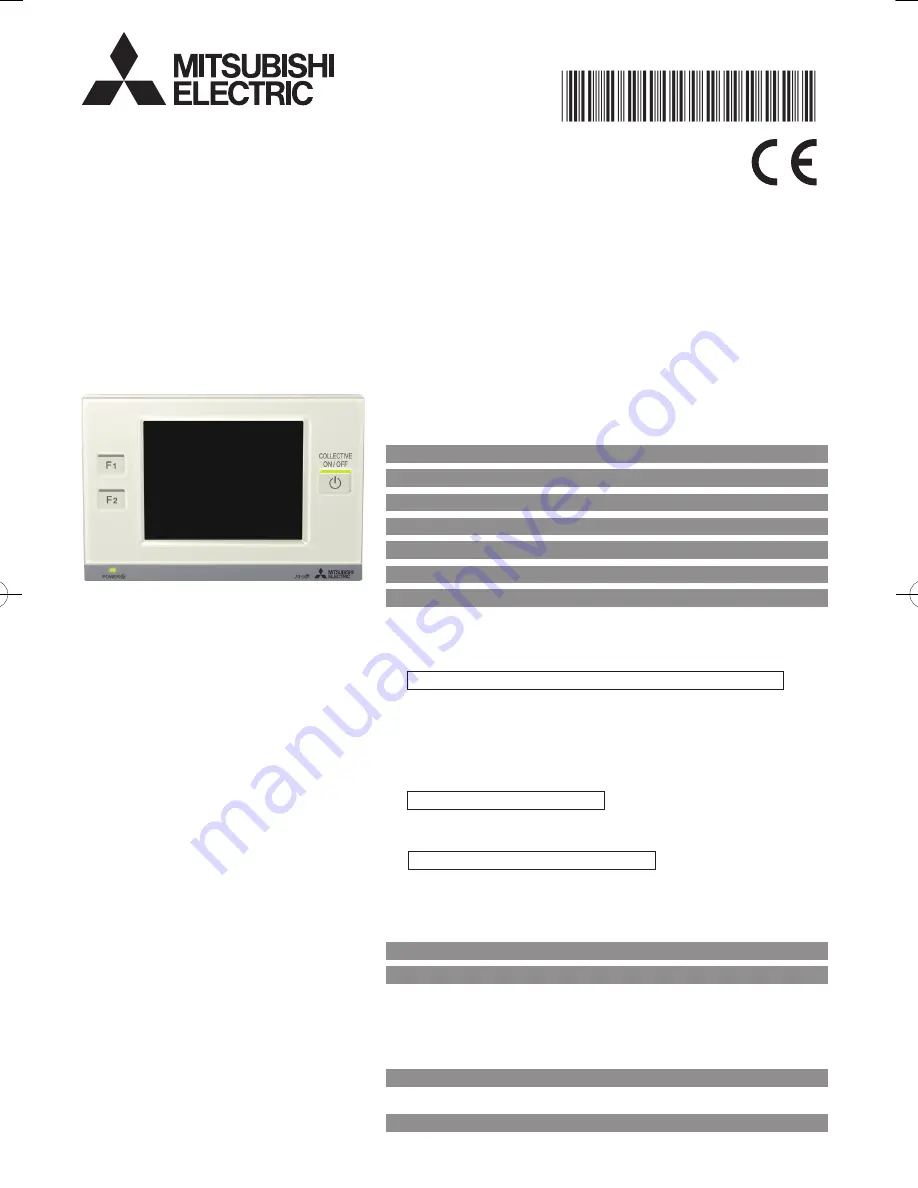
Advanced Touch Controller

MODEL

AT-50B

Instruction Book

Safety Precautions .............................................................. 2
Function List ........................................................................ 4
Names and Functions of Controller Components................ 6

Screen Configuration [HOME screen]

 ................................. 8

Buttons [HOME screen]

 ..................................................... 10

Icon Displays [HOME screen]

............................................ 12

Basic Operations ............................................................... 16

Screen selection ......................................................................... 16
Group selection .......................................................................... 17
Operation Screen (GROUP screen) ........................................... 18

Operating the Air conditioning unit group • Air To Water (PWFY) group

 .... 18

ON/OFF operation ........................................................................ 18
Mode ............................................................................................. 18
Temperature setting ...................................................................... 21

Interlocked ventilation units(LOSSNAY)/Fan speed/Air direction/Louver settings

 ....... 23

Disable-Scheduled-Operation button ........................................... 24

Operating the LOSSNAY group

 .................................................. 24

Mode ............................................................................................. 24
Fan speed setting ......................................................................... 24

Operating the general equipment group ..................................... 24

ON/OFF operation ........................................................................ 24

Multiple group selection screen .................................................. 25
Disabling functions ..................................................................... 25

Menu Screen ..................................................................... 26
Usage - Main Menu Settings ............................................. 28

Operation Setting ....................................................................... 28
Restriction Settings .................................................................... 44
Control Panel .............................................................................. 52
System Management ................................................................. 59

Maintenance ...................................................................... 64

Touch Panel Cleaning screen ..................................................... 64

Troubleshooting ................................................................. 65

Summary of Contents for AT-50B

Page 1: ... HOME screen 8 Buttons HOME screen 10 Icon Displays HOME screen 12 Basic Operations 16 Screen selection 16 Group selection 17 Operation Screen GROUP screen 18 Operating the Air conditioning unit group Air To Water PWFY group 18 ON OFF operation 18 Mode 18 Temperature setting 21 Interlocked ventilation units LOSSNAY Fan speed Air direction Louver settings 23 Disable Scheduled Operation button 24 Op...

Page 2: ... malfunctions smoke or fire do not operate the switches buttons or touch other electrical parts with wet hands To reduce the risk of fire or explosion do not place flammable materials or use flammable sprays around the controller CAUTION To reduce the risk of damage to the controller do not directly spray insecticide or other flammable sprays on the controller To reduce the risk of electric shock ...

Page 3: ... discoloration do not use benzene thinner or chemical rag to clean the controller To clean the controller wipe with a soft cloth soaked in mild detergent that is diluted with an appropriate amount of water and wipe down with a wet cloth followed by a dry cloth Do not use the detergent straight To avoid damage to the controller provide protection against static electricity If the supply cord is dam...

Page 4: ...rature Correction RC Prohibition 20 40 Time and Schedule Date and Time Sets the date time and display formats The current time will appear at the top right corner of the HOME screen 28 Weekly One day schedule Allows the user to set the weekly schedule for each group Maximum of 16 events can be scheduled for each day The types of actions that can be scheduled are as follows ON OFF Mode Set Temperat...

Page 5: ...ffers depending on the group icon setting Default is set to the Group icon setting 2 Group icon setting 1 Turns ON OFF the units in the group whose group icon is touched Group icon setting 2 Displays the check mark when group icon is touched Touch the group icons of the groups to be operated and then touch the Operate button to move to the GROUP screen Multiple groups can be selected Use this mode...

Page 6: ...l ON OFF F1 and F2 operations that control air conditioning units collectively are accessed by using buttons next to the touch panel AT 50B display screen consists of three types corresponding to the usage HOME screen Monitoring screen to monitor the operation status of the units described in this Instruction Book Main Menu screen Setting screen to set the functions such as schedule settings descr...

Page 7: ...error exists 1 Display Touch panel 3 Function 1 button F1 4 Function 2 button F2 1 2 Desired functions from the following list can be assigned to the F1 and F2 buttons Setback Schedule Mode Temperature Correction Remote Controller Prohibition The functions to assign to these buttons can be selected from the Function Key Setting on the Control Panel The indicator on the buttons indicates the enable...

Page 8: ...n 3 How to move to the Maintenance screen Refer to the Installation Manual Displays the GRID screen Displays the GRID zoom out screen Displays the GRID zoom in screen Displays the LIST screen Displays the GROUP screen Displays the Main Menu screen GRID screen Zoom out screen To the GRID zoom in screen To the GRID zoom out screen Zoom in screen ...

Page 9: ... screen To the GROUP screen To the GRID screen To the LIST screen To the GRID screen To the Main Menu screen To the HOME screen GROUP screen To the LIST screen To the GROUP screen LIST screen Main Menu screen ...

Page 10: ...ed operation status of each group with group name 5 groups on 10 pages maximum Displays the detailed operation status of each group Sets group operations When the air conditioning units or Air To Water PWFY units are controlled Note Display and vary depending on the Group icon setting Refer to P17 Group icon setting for details Sample displays above are for default setting Group icon setting 2 Gro...

Page 11: ...he popup window of interlocked ventilation LOSSNAY air direction fan speed louver setting screen Refer to P23 Interlocked ventilation units LOSSNAY Fan speed Air direction Louver settings for the popup window gInterlocked ventilation LOSSNAY Air direction Fan speed Louver setting button Operation differs depending on the group icon setting Group icon setting 1 Turns ON OFF the units in the group w...

Page 12: ... error occurs Filter sign Displays when filter needs maintenance During scheduled operation Displays When the Disable Scheduled Operation button is enabled or Timer Schedule execution is prohibited Displays Room temperature Displays the current room temperature The displayed temperature will blink when the room temperature is at or above 40 ºC 104 ºF 39 ºC 102 ºF on some models or at or below 0 ºC...

Page 13: ... OFF BG Color black ON BG Color blue OFF BG Color black ON BG Color blue OFF BG Color black Check mark LOSSNAY icon Filter sign LOSSNAY icon LOSSNAY icon Filter sign General equipment group Group No Room Group name Schedule enable disable Schedule enable disable ON BG Color blue OFF BG Color black ON BG Color blue OFF BG Color black Check mark General equipment icon General equipment icon Error BG...

Page 14: ...ter needs maintenance During scheduled operation Displays Energy saving will appear on the screen while energy save control is being performed depending on the indoor unit model When the Disable Scheduled Operation button is enabled or Timer Schedule execution is prohibited Displays Room temperature Displays the current room temperature The displayed temperature will blink when the room temperatur...

Page 15: ...y When multiple Air To Water PWFY units are registered to a group current water temperature on the main Air To Water PWFY unit is displayed When the Temperature Correction function is enabled When the Temperature Correction function is enabled the corrected temperature will appear in the green outline font Interlocked ventilation LOSSNAY Displays the operation status of the ventilation that is int...

Page 16: ...n GRID zoom out screen appears at the initial startup Select the desired screen 1 2 2 1 3 3 1 2 3 GRID zoom out screen GRID zoom in screen LIST screen When the system contains 25 groups or more the GRID zoom out screen is as shown above ...

Page 17: ...con setting 2 Refer to P43 for changing the group icon setting Group icon setting 2 appears in the area marked 2 Allows the user to select groups to be operated Moves to the GROUP screen Touch the group icon 1 to select the group to be operated Groups can be selected on the GRID or the LIST screens Touch the group icon 1 to switch between displaying check marks selected and hiding check marks dese...

Page 18: ... units work in conjunction with indoor units ON OFF Refer to P53 for Auto mode cooling heating settings To operate an indoor unit in the heating cooling mode while the indoor unit is already operating in the opposite mode the operation mode cannot be changed until all of the indoor units operate in the same mode or stop In this case the mode 1 will blink Available mode varies depending on the mode...

Page 19: ...re specified for the Cool Dry mode and the Heat mode will be used to automatically control the room temperature to stay within the set temperatures This mode is especially effective during the in between seasons when the temperature difference between the highest and the lowest is large and both heating and cooling modes are used within the same day Set temp Cool Operation pattern during Auto dual...

Page 20: ...he Collective Operation panel 2 Select the Collective Operation button on the Collective Operation panel 3 Press OK on the Collective Operation panel Go to 4 if Setback or Mode was selected Otherwise the setting is complete 4 If Setback or Mode was selected take the following steps When Setback is selected When Mode is selected Select the desired item and touch OK Scheduled Scheduled operation is ...

Page 21: ...2 Checking the status of the collective operation functions 1 On the GRID or the LIST screen touch the button that brings up the Collective Operation panel 2 Check the color of the indicator on the Collective Operation button Yellow The function is enabled Gray The function is disabled Checking the function button settings 1 On the GRID or the LIST screen touch the button that brings up the Collec...

Page 22: ...e and the heating set temperature for Auto mode dual set points 4 The cooling and heating set temperatures can be set under the following conditions The cooling set temperature is greater than the heating set temperature The difference between the cooling and heating set temperatures is equal or greater than the minimum temperature difference that varies with the indoor unit model Air To Water PWF...

Page 23: ... useable only while the unit is in operation This setting appears only when the unit has this function Available air direction varies depending on the model D Louver useable only while the unit is in operation This setting appears only when the unit has this function After completing the settings touch the OK button A C B D Stop Low High Setting 1 Setting 2 Setting 3 Setting 4 Setting 5 Swing Auto...

Page 24: ...on 5 P18 to temporarily disable the scheduled operation When the function is enabled the indicator on button 5 will light up in yellow When this function is enabled the icon will appear on the screen and the scheduled operation will not run The Timer Schedule execution is prohibited when this function is disabled and the icon is displayed Operating the LOSSNAY group Mode Touch 1 to access the mode...

Page 25: ...will be enabled Example ON OFF button locked During receiving the external input signal The ON OFF button cannot be operated in the following situations Operation restrictions If the ON OFF Mode Set Temperature Air Direction and Fan Speed buttons on the AT 50B are disabled from other controllers will appear on the buttons and these buttons will not be available for selection The buttons may not be...

Page 26: ...enance menu for service personnel Normally general users do no need to change any settings in the maintenance menu 3 Touch Panel Cleaning button P64 Touch this button to access the screen that will not respond when touched except when the numbers in the four corners are touched in a specified order allowing the user to clean the touch panel without accidentally changing the settings 2 Return butto...

Page 27: ...trollers P48 4 Operation Mode Selection Limit Limits the operation mode selection P50 3 Control Panel 1 Display Format Selects the display formats on the HOME and menu screens Display language temperature unit display or non display of room temperature and cooling heating mode icons during Auto mode and backlight timer and group names P52 2 Function Key Setting Assigns the functions to the F1 and ...

Page 28: ...ing Main Menu Operation Setting 1 2 3 A Setting the date time and display format Main Menu Operation Setting Time and Schedule Date and Time Date tab Time tab 4 8 3 2 1 Main Menu Operation Setting Time and Schedule 1 Time and Schedule A B C D 5 ...

Page 29: ... Touch the button 5 to access the Daylight saving changes screen Touching the button 6 displays a list of countries Select your country Select Not used if you do not use daylight saving time If your county does not exist in the list select Manual The buttons 7 become active Touching the buttons 7 displays the date and time setting screen Set the start and end date time 6 Touch the 8 Save button 6 ...

Page 30: ...g Time and Schedule Set Schedules Note If a specific pattern is assigned to multiple groups or days and the configuration of the pattern is changed the change will be reflected on all the groups and days Use a different pattern number to save a given configuration of events if you do not want the changes to be reflected on the groups and days to which the pattern is assigned Types of schedules Num...

Page 31: ...st be made as follows 1 Touch the Seasonal settings button on the Group and day date selection screen The Seasonal settings button appears only on the Weekly screen 2 Touch the button 1 and select the use or non use of Weekly2 Use Weekly2 Do not use Weekly2 3 Use the 2 buttons to select the use or non use of Weekly1 and the effective period for Weekly2 If Weekly2 is set to Do not use Weekly2 the e...

Page 32: ...d to another group or the schedule pattern of a specific day can be copied and pasted to another day Refer to P34 for details 4 On the Pattern selection screen select deselected or one of the 12 or 5 patterns between P01 and P12 on the Weekly tab OR between P01 and P05 on the One day tab Each pattern can be newly configured copied and pasted or edited See 1 2 and 3 below for details Touch a schedu...

Page 33: ...mber to select it then touch the OK button to return to the Group and day date selection screen To set the schedule for other groups or days date See Step 2 When setting is complete See Step 10 To edit an existing pattern Touch an existing pattern number then touch the button to access the Edit Pattern screen See Step 5 If the selected pattern number is assigned to other groups or days the message...

Page 34: ...8 Repeat Steps 5 through 7 above to set as many events and the execution time for the events as necessary 9 When finished touch the Return button to return to the Group and day date selection screen screen To set the schedule for other groups or days date See Step 2 When setting is complete See Step 10 10 To exit the screen and return to the Time and Schedule screen press on the Group and day date...

Page 35: ...2 Touch the Copy button The selected item will be highlighted in blue 3 Touch the copy destination Multiple copy destinations can be selected A red checkmark will appear on the selected item s 4 Touch the Paste button 5 Touch the OK button on the window that pops up 1 Touch the items to be deleted Items that can be deleted at once include the weekly schedule for a group the pattern assigned to a s...

Page 36: ...tion prohibition Set Temperature Local remote controller operation prohibition Filter Sign Reset On green Off black Cool Dry Fan Heat Auto Single dual set point s Bypass Heat recovery Auto Damper Quiet Low Mid High Auto Setting 1 Swing Permit Prohibit Auto Setting 2 Setting 3 Setting 4 Setting 5 Permit Prohibit Permit Prohibit Permit Prohibit Air conditioning unit groups and LOSSNAY groups General...

Page 37: ...or this unit Setback function may not function properly When the Setback control is set air conditioning group operates as shown below If Unscheduled is selected the Setback function that were set on the Setback Control screen will not be executed with the pressing of the Collective Operation button In this case the settings that were made on the Collective Operation Setback screen will override t...

Page 38: ...can be set within the following range Upper limit 19 C 30 C 19 C 30 C 67 F 87 F 67 F 87 F Lower limit 12 C 28 C 17 C 28 C 53 F 83 F 63 F 83 F in case of using Mr SLIM units The groups that do not support the Setback function cannot be selected The changes that are made while the Setback function is turned on will not be reflected To have the settings reflected turn off the Setback function and the...

Page 39: ...reen Displays the one day schedule patterns that are assigned to specific dates One day tab Day Date grid Displays scheduled patterns Weekly tab Seasonal settings Weekly only Appears only if the selected pattern has been configured The functions not supported by the selected group will appear underlined in red and they will not be executed Refer to P36 for icon definitions The effective time for t...

Page 40: ...p message and touch the OK button to confirm 3 Select the groups to include from the group buttons labeled A By default all groups are selected 4 Touch the B Save button Usage Main Menu Settings Select All button Selects all groups Show Group Name List button Shows a list of group names in a pop up window A B The DIDO controller groups that do not support the collective ON OFF function cannot be s...

Page 41: ...erature range that can be set depends on the connected units The groups that do not support the Setback function cannot be selected The changes that are made while the Setback function is turned on will not be reflected To have the settings reflected turn off the Setback function and then turn it back on Refer to P20 for how to turn on off the Setback function Select All button Selects all groups ...

Page 42: ...e groups to include from the group buttons labeled A By default all groups are selected 5 Touch the B Save button The Temperature Correction function is used to temporarily raise or lower the preset temperature setting by a certain preselected amount Positive offset is used for units that are operated in the cooling and dry modes and negative offset is used for units that are operated in the heati...

Page 43: ...n Setting 1 2 3 Main Menu Operation Setting Group Icon Setting 3To make group icon settings Touch the 3 Group Icon Setting button on the Operation Setting screen 1 Select among Group icon setting 1 Group icon setting 2 and Group icon setting 3 by touching the corresponding button labeled 1 2 Touch the 2 Save button 2 1 Group icon setting 1 Stops or starts the operation of the specific group of uni...

Page 44: ...tems whose corresponding icon is cannot be locked 5 Touch the 3 Save button Category button Item Function that will be locked Category button Item Function that will be locked ON OFF Collective ON OFF button 1 ON OFF ON OFF button 3 4 F1 Function 1 button 1 Mode Mode button 3 4 F2 Function 2 button 1 Set Temp Set temperature button 3 4 Screen Touch panel screen 2 Fan Speed Fan speed button 3 4 Mai...

Page 45: ...The initial login password is 0000 Change the password if necessary If you forget the password refer to the Installation Manual 3 1 4 2 5 6 7 8 Setting the unlock password 1 Touch the 1 Lock Buttons button on the Restriction Settings screen 2 Enter the password on the Login Page screen and touch the Login button Refer to below for the details on log in If the correct password is entered the Lock B...

Page 46: ...settings 4 Touch the 3 Edit button 1 2 Show Group Name List button Displays a list of group names in a pop up window buttons Use to flip through the pages Each page lists four groups Group buttons Displays group numbers Touch the button for a specific group to edit the settings Edit button Edits the temperature range for the selected group Select All button Selects all groups 3 Main Menu Restricti...

Page 47: ...on the controllers instead If the temperature limits are set too high or low the System Changeover function may not work properly and the units may not operate in the expected mode Cool or Heat When using the System Changeover function it is recommended not to use the temperature range limit function The DIDO controller groups the LOSSNAY groups and the Air To Water PWFY groups do not support the ...

Page 48: ... and this function is not available for selection The Operation Prohibition Setting is set to Disabled 4 Show Group Name List button Displays a list of group names in a pop up window buttons Use to flip through the pages Each page lists four groups Group buttons Displays group numbers Touch the button for a specific group to edit its settings Edit button Edits the temperature range for the selecte...

Page 49: ... permit status If an event takes place that changes the prohibit permit status of a specific item the screen display will be updated The mark will appear or disappear When this function is in use or the Operation Prohibition Setting is set to Enabled the buttons on AT 50B cannot be disabled from the system controller The display will change as follows every time the button is touched 5 Locked Unlo...

Page 50: ...n can be limited according to the season Cooling mode limit winter heating mode limit summer cooling heating mode limit between seasons 1 Touch the 4 Operation Mode Selection Limit button on the Restriction Settings screen 2 Touch the 1 button to set the operation mode limit Touch the 1 button repeatedly to select from following settings 4 2 In the following situations will appear on the Operation...

Page 51: ...groups that do not support this function cannot be selected In a group where both Air To Water PWFY and Air conditioning units are connected to Y series outdoor unit Operation Mode Selection Limit may not function properly 1Button Explanation No Limitation The limits will be cancelled No Cooling Operation Cool Dry and Auto modes cannot be selected with the Mode button No Heating Operation Heat and...

Page 52: ...d language from the language options buttons labeled 6 in the figure on the pop up screen 3 Press the 7 OK button to return to the previous screen To select the temperature unit Main Menu Control Panel Display Format Display Format screen 1 3 1 2 3 4 1 2 3 4 5 6 7 Usage Main Menu Settings Touch the 2 Temperature unit button on the Display Format screen 1 3 to toggle through ºF ºC and 1ºC ºF Temper...

Page 53: ...utomatic Mode Display Setting button to switch between Show and Hide Example HOME screen Hide Show Display Format screen 2 3 8 9 5 To set the backlight timeout time Touch the 9 Backlight Timeout Setting button to set the timeout time The backlight will go off after a specified time of non use Touch the button repeatedly to select from the following settings 1 min 3 min 5 min 7 min 10 min The backl...

Page 54: ... the group name setting screen button on the Display Format screen 3 3 2 Select a desired group name button labeled a on the Group Name Setting screen to change its group name 3 Enter the group name on the pop up window Refer to the next page for details Group names can be copied and pasted by using the b Copy and c Paste buttons 4 Touch the 5 Save button 0 Group Name Setting screen a b c 5 ...

Page 55: ...een up and down with the 3 buttons to see all characters To correct a character move the cursor over the character with the 4 button and then either delete it with the 5 Delete button or overwrite it with a new character 3 When complete touch the 6 OK button to return to the previous screen To enter character strings such as group names maximum 16 characters perform the following procedure 6 2 3 1...

Page 56: ...ction that corresponds to the checkbox is not available and the function cannot be assigned to the F1 or F2 button 1 2 3 4 2Assigning Collective Operation functions to the Function 1 button F1 and Function 2 button F2 Touch the 2 Function Key Setting button on the Control Panel screen 1 Touch the check mark that corresponds to the function to assign to F1 or F2 so that the checkmark will appear as...

Page 57: ...adjust the volume 1 2 3 Touch the 3 Volume Control button on the Control Panel screen 1 Touch the 1 Sound button on the Volume Control screen Every time the 1 Sound button is touched the sound level changes as follows Level 0 Level 1 Level 2 Level 3 2 Touch the 3 Save button 1 Touch the 2 Brightness button on the Volume Control screen Every time the 2 Brightness button is touched the brightness le...

Page 58: ...will return to the Control Panel screen 4Calibrating the touch panel Main Menu Control Panel Touch Panel Calibration If each square is not touched within one minute after the last square is touched calibration will be cancelled and the screen will return to the Control Panel screen To calibrate the screen properly use a pointy but not sharp object to touch the squares Sharp objects may scratch the...

Page 59: ... the error 1 Touch the 1 Malfunction tab 2 Touch the 2 All Reset button 3 Touch the OK button on the pop up window Those groups whose errors have been reset will have an icon indicating that they are stopped Number of errors Displays the number of errors 1 2 Error source address Displays the M NET address of the units whose Error Filter signs are turned on Error code Displays the code for the erro...

Page 60: ...cessary Refer to air conditioner or LOSSNAY manual for details When appears on the Reset button the button will not be available To reset the maintenance sign for example after cleaning the filter 4 Reset button Clears the specific maintenance sign 5 All Reset button Clears all filter signs This button is not available for the Air To Water PWFY groups 3 5 Number of maintenance signs detected Displ...

Page 61: ...majority of the group taking into consideration the capacity of each indoor unit When it is set to Representative Group the operation mode is selected based on the demand of the representative group through updating its status every 15 minutes and changing over to the cooling or heating mode as necessary Because the operation mode is selected based on the demands of the representative group or of ...

Page 62: ...e preset temperature of the representative group and the room temperature When the air conditioning units in the representative group are not operating or they are operating in the Fan or Auto mode the System Changeover function will work in the same way as when the System Changeover mode is set to Averaging When Representative Group is selected the group that is currently designated as the repres...

Page 63: ...se of groups that support the Auto dual set point mode a huge difference between the heating and cooling temperatures may delay the changeover of the operation mode It is recommended to set heating and cooling temperatures to the same value Winter Set temperature Cooling operation Heating operation Mode change Heat Cool Mode change Cool Heat Summer Summer Winter Cooling operation Heating operation...

Page 64: ...n done cleaning the touch panel touch the four numbers in the corners 1 2 3 and 4 in that order to return to the Main Menu screen To clean the touch panel The four numbers must be touched in the correct order If you touch the numbers in the wrong order start over from 1 Wipe with a soft dry cloth a cloth soaked in water with mild detergent or a cloth dampened with ethanol Do not use acidic alkalin...

Page 65: ...code and the error source address on the screen and consult your dealer Refer to P59 Touch Main Menu System Management Status List On the Malfunction tab check the error code and the error source address on the screen and consult your dealer Refer to P59 If the external input interface receives an emergency stop signal all indoor units LOSSNAY and Air To Water PWFY units that are controlled by the...

Page 66: ... 90 RH Non condensing Weight 0 5 kg 1 1 8 lbs External dimensions W x H x D 180 x 120 x 30 mm 7 3 32 x 4 23 32 x 1 3 16 in Sound Pressure Level The A weighted sound pressure level is below 70 dB 1 Not for use with a generic DC power supply device Use the power supply unit for transmission cable PAC SC51KUA etc by Mitsubishi 2 Power consumption coefficient is a coefficient to calculate the relative...

Page 67: ...rine getirebilmesi için gerekli yedek parça bulundurma süresidir Ürünün montajı için Mitsubishi Electric Turkey Elektrik Ürünleri A Ş yetkili servisine bayisine başvurunuz Servis İstasyonları ve Yedek Parça Temini Cihazınızın bakım onarım ve yedek parça ihtiyaçları için klimanızı satın aldığınız yetkili satıcıya başvurunuz Yetkili Servislerimizin listesine URL http klima mitsubishielectric com tr ...

Page 68: ...based on the following EU regulations Electromagnetic Compatibility Directive 2014 30 EU Restriction of Hazardous Substances 2011 65 EU HEAD OFFICE TOKYO BLDG 2 7 3 MARUNOUCHI CHIYODA KU TOKYO 100 8310 JAPAN MANUFACTURER MITSUBISHI ELECTRIC CORPORATION Air conditioning Refrigeration Systems Works 5 66 Tebira 6 Chome Wakayama city 640 8686 Japan ...

Reviews: