background image

Operating and installation instructions

Wine cellar
KWL 4612 S
KWL 4812 S

To avoid the risk of accidents or
damage to the appliance, it is

essential

to read these operating instructions

before it is installed or used for the
first time.

G

M.-Nr. 06 457 910

Summary of Contents for KWL 4612 S

Page 1: ...n instructions Wine cellar KWL 4612 S KWL 4812 S To avoid the risk of accidents or damage to the appliance it is essential to read these operating instructions before it is installed or used for the first time G M Nr 06 457 910 ...

Page 2: ... the active charcoal filter and dynamic cooling 14 Storing wine bottles 15 Wooden shelves 15 Descriptive labels 15 Maximum capacity 15 Alarm 16 Temperature alarm 16 Door alarm 16 Switching on the alarm system 16 Switching the alarm off early 16 Defrosting 17 Cleaning and care 18 Cleaning the outer casing the interior and accessories 18 Ventilation gaps 18 Door seal 19 Metal grille at the back of t...

Page 3: ...Installation 25 Location 25 Climate range 25 Ventilation 25 Installation 25 Aligning the appliance 25 Changing the door hinging 26 Contents ...

Page 4: ...fety lock indicator light bTemperature display cControls for setting the temperature upper button warmer lower button colder dOn Off button eLocking button fAlarm off button Description of the appliance 4 ...

Page 5: ...aInterior lighting bWooden shelf with décor strip for descriptive labels cLock dCondensate channel and drain hole eActive charcoal filter fGrille Description of the appliance 5 ...

Page 6: ... The plug must be rendered useless and the cable cut off directly behind the appliance to prevent misuse See the Warning and Safety section of this booklet for further details Electrical and electronic appliances often contain materials which if handled or disposed of incorrectly could be potentially hazardous to human health and to the environment They are however essential for the correct functi...

Page 7: ... however flammable and care must be taken during transportation and setting up of the appliance that no parts of the cooling system are damaged Leaking coolant can damage the eyes In the event of any damage avoid open fires and anything which creates a spark disconnect from the mains air the room in which the appliance is located for several minutes and contact the Service Department for advice Th...

Page 8: ...ional and local safety regulations Repairs and other work by unqualified persons could be dangerous and the manufacturer will not be held liable Ensure current is not supplied to the appliance until after maintenance or repair work has been carried out The appliance is only completely isolated from the electricity supply when it has been switched off at the wall socket and the plug has been withdr...

Page 9: ... surroundings in a clean condition at all times Any damage which may be caused by cockroaches or other vermin will not be covered by the guarantee Disposal of your old appliance Before disposing of an old appliance first make the door latch or lock unusable This way you will prevent children from accidentally locking themselves in and endangering their lives Before disposing of an old appliance un...

Page 10: ...tor section 4 to 5 C StayFresh zone approx 0 C Freezer section 18 C Use Only open the door when necessary and for as short a time as possible Frequent opening of the door for long periods will cause a loss of coldness Store food in an organised way If food is not stored in an organised way searching for an item will mean the door is open for longer Allow hot food and drinks to cool down before pla...

Page 11: ... temperature range set has been reached Switching off Press the On Off button The temperature display goes out and the cooling process is switched off If this does not happen the safety lock is still engaged Safety lock The safety lock can be engaged to prevent the temperature being changed or the appliance being switched off unintentionally To activate the safety lock Press and hold the locking b...

Page 12: ...ture of 8 43 C will ensure that a constant temperature is maintained in the appliance This is a wider temperature range than the climate range quoted on the data plate Safety features A thermostat prevents the temperature in the wine cellar falling below 2 C If the external temperature should drop below this level a heater element in the appliance switches on automatically to keep the temperature ...

Page 13: ...ll appear much brighter for approx 1 minute The level of brightness can be adjusted to be Brighter by pressing the alarm off button and whilst holding it in pressing the upper button next to the temperature display Dimmer by pressing the alarm off button and whilst holding it in pressing the lower button next to the temperature display Humidity level It is very important to store wine in an atmosp...

Page 14: ...n through the active charcoal filter and distributes it evenly around the interior Filtering the incoming air through the active charcoal filter ensures that all the air entering the appliance is fresh and free from dust Because the temperature is constant and evenly distributed throughout the unit you have the reassurance that all your wines are being kept in the same condition Replace the active...

Page 15: ...ttles around You can adjust the height of the wooden shelves to suit your individual requirements Descriptive labels Use the labels supplied to identify your wine quickly and easily Insert the labels into the wooden shelf fronts from above Additional labels can be purchased from your dealer or from the Miele Spare Parts Department Maximum capacity The following data was obtained using standard Bor...

Page 16: ...here has been a lengthy interruption to the power supply Door alarm The alarm will sound if the door is left open for more than approx 3 minutes Switching on the alarm system The alarm system is always active It does not have to be switched on manually Switching the alarm off early Once the set temperature has been reached in the appliance the alarm stops and the temperature display lights up cons...

Page 17: ...utomatically removed and defrosted by the appliance The condensate is drained away via a channel and drain hole into an evaporation system at the back of the appliance Ensure that the condensate channel and drain hole are never blocked so that condensate can flow away without hindrance Defrosting 17 ...

Page 18: ...vable parts e g shelves for cleaning Cleaning the outer casing the interior and accessories Use warm water with a little washing up liquid Accessories and shelves should all be hand washed only Clean the condensate channel and drain hole frequently so that condensate can drain away unhindered Use a straw or similar to clear the drain if necessary After cleaning wipe the outer casing the interior a...

Page 19: ...ppliance When cleaning the grille make sure that the pipework and other components do not get broken or damaged in any way Active charcoal filter Replace the active charcoal filter with a new one once a year Active charcoal filters are available from your dealer or the Miele Spare Parts Dept Turn the filter 90 clockwise or anti clockwise Remove the filter Insert a new filter with the handle in the...

Page 20: ...tion gaps have been covered over or become too dusty Check whether the metal grille heat exchanger at the back of the appliance has become too dusty Check whether the appliance door is being opened frequently Check that the door has been closed properly the alarm sounds and the temperature display flashes Has the appliance been switched on for the first time If not then the temperature inside the ...

Page 21: ...disconnect the mains fuse or remove the screw out fuse in countries where this is applicable Unscrew the lamp and replace it with a new one Lamp specification 220 240 V max 15 W E 14 fitting Screw the new lamp into the connection If you still cannot remedy the fault having followed these suggestions please contact the Miele Service Department To prevent unnecessary loss of temperature it is advisa...

Page 22: ...ise of the compressor and the coolant circulating in the system is unavoidable Noises that you can easily rectify What causes them and what can you do about them Rattling vibrating The appliance is uneven Realign the appliance using a spirit level by raising or lowering the screw feet underneath the appliance The appliance is touching another appliance or piece of furniture Move it away Drawers ba...

Page 23: ...ler or The Miele Service Department see back cover for address When contacting your Dealer or the Service Department please quote the model and serial number of your appliance This information is given on the data plate Please note that telephone calls may be monitored and recorded to improve our service Service Department 23 ...

Page 24: ...to the mains electricity supply by an extension lead Extension leads do not guarantee the required safety of the appliance e g danger of overheating The appliance must not be connected to an inverter and must not be used with a plug adapter as these can cause damage to the appliance s electronic unit Non rewireable plugs BS 1363 The fuse cover must be re fitted when changing the fuse and if the fu...

Page 25: ...t room temperature SN N ST T 10 C to 32 C 16 C to 32 C 18 C to 38 C 18 C to 43 C This appliance can operate in a wider room temperature range than indicated by the climate range A constant temperature will be maintained in the appliance at an ambient room temperature of 8 to 43 C It is important that the room temperature should be kept within this range Ventilation The appliance can be placed dire...

Page 26: ...n b can now be removed Pull side section b out of the guides on the mounting plate Loosen the 4 screws Torx 15 in the mounting plate and remove the handle Remove the cover caps from the opposite side and fit them into the empty holes Changing over the door Close the appliance door unscrew hinge bracket a and take the door off Take hinge pin b out of the hinge bracket then refit it in the second ho...

Page 27: ...ou refit the handle The door seal will be damaged if the handle is fitted incorrectly Loosely attach the handle to the opposite side of the door with the two front screws b Mounting plate c must be positioned on the side of the door so that when the door is closed it is flush with the side of the appliance If this is not the case Tighten both grub screws a with the allen key provided until mountin...

Page 28: ...seal permanently If after you have refitted the handle you find that the side section does touch the door seal when the door is opened Realign mounting plate c with grub screws a until the mounting plate and the side section of the handle d are at the correct angle and the side section does not touch the seal when the door is opened Changing the door hinging 28 ...

Page 29: ...29 ...

Page 30: ...30 ...

Page 31: ...31 ...

Page 32: ...Alteration rights reserved 4104 KWL 4612 S KWL 4812 S M Nr 06 457 910 00 en GB ...
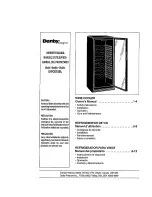
Reviews: