Miele EGW 5050-14, Operating And Installation Manual
The Miele EGW 5050-14 is a high-performance kitchen appliance with a sleek design and advanced features. To ensure a seamless user experience, make sure to download the comprehensive Operating And Installation Manual from our website. This manual is available for free download, providing you with all the necessary instructions and guidance for using your Miele EGW 5050-14 effectively and efficiently.
Share
Download


Reviews:
No comments
Related manuals for EGW 5050-14

Profile PTD915
Brand: GE Pages: 24
Profile PKD915
Brand: GE Pages: 24
WS 462
Brand: Gaggenau Pages: 24
WS 261
Brand: Gaggenau Pages: 12
DWD30
Brand: Dacor Pages: 12
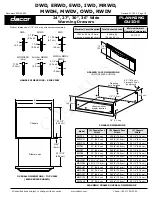
DWD30
Brand: Dacor Pages: 3
WSP 221
Brand: Gaggenau Pages: 24

WSP 221
Brand: Gaggenau Pages: 52

WS 461
Brand: Gaggenau Pages: 4
JWD7030CDX
Brand: Jenn-Air Pages: 20
JWD6030CDX
Brand: Jenn-Air Pages: 24
WD30
Brand: OCI Pages: 16
ERWD30
Brand: Dacor Pages: 16

JWD7130DDS
Brand: Jenn-Air Pages: 9
VW152
Brand: CDA Pages: 16
WS 262110
Brand: Gaggenau Pages: 14
W85747
Brand: Bull Outdoor Pages: 7
JTD915
Brand: GE Pages: 24


