background image

Operating and installation
instructions
ProLine Gas wok

To avoid the risk of accidents or damage to the appliance it is 

essen-

tial

 to read these instructions before it is installed and used for the

first time.

en-GB

M.-Nr. 11 138 530

Summary of Contents for CS 1011-1

Page 1: ...installation instructions ProLine Gas wok To avoid the risk of accidents or damage to the appliance it is essen tial to read these instructions before it is installed and used for the first time en GB M Nr 11 138 530 ...

Page 2: ...ating and installation instructions It is however set up for connection to the gas and electricity supplies in the countries specified For trouble free operation of the appliance it is best to use it in the countries spe cified for use For use in other countries please contact Miele in your country ...

Page 3: ...t cigarette lighters or matches Do not operate electrical lights or switches i e do not switch them On or Off Open all doors and windows to ventilate the area If the smell of gas persists evacuate the building In the UK you must now Call the Gas Emergency Contact Centre Tel 0 800 111 999 For any gas work in the UK always use a Gas Safe registered engineer In other countries please follow relevant ...

Page 4: ... first time 22 Pans 23 Wok ring 24 Tips on saving energy 25 Operation 26 Rapid ignition system 26 Switching on 26 Adjusting the flame 27 Switching off 27 In operation residual heat indicators 27 Safety features 28 Ignition safety 28 Optional accessories 29 Cleaning and care 30 Stainless steel trough 32 Stainless steel frame control panel 32 Rotary controls 32 Pan supports 33 Burner 33 Assembling t...

Page 5: ...in dimensions 44 CS 1011 1 44 CS 1021 1 45 Installing several ProLine elements 46 Installation 48 Gas connection 52 Burner ratings 55 Electrical connection 56 Converting to another gas type 58 Jet table 58 Changing the jets 58 Checking the first intake of air 61 Changing the small jet 61 Functional check 62 Product data sheets 63 ...

Page 6: ...nformation on safety in stallation use and maintenance This prevents both personal injury and damage to the wok In accordance with standard IEC 60335 1 Miele expressly and strongly advises that you read and follow the instructions in the chapter on installing the wok as well as the safety instructions and warnings Miele cannot be held liable for injury or damage caused by non compliance with these...

Page 7: ...c use only to cook food and keep it warm Any other use is not supported by the manufacturer and could be dangerous This wok can only be used by people with reduced physical sens ory or mental capabilities or lack of experience and knowledge if they are supervised whilst using it They may only use it unsuper vised if they have been shown how to use it in a safe way and under stand the hazards invol...

Page 8: ...hot when in use and remains hot for a while after being switched off Keep children well away from the appliance until it has cooled down and there is no danger of burning Danger of burning Do not store anything which might arouse a child s interest in stor age areas above or behind the wok Otherwise they could be temp ted into climbing onto the wok with the risk of burning themselves Risk of burni...

Page 9: ...lease have the electrical installation tested by a qualified electrician Before connecting the wok to the mains supply ensure that the connection data on the data plate voltage and frequency match the mains electricity supply This data must be checked before connecting the appliance Consult a qualified electrician if in any doubt Do not connect the wok to the mains electricity supply by a multi so...

Page 10: ...f you wish to connect it to a fused spur con nection or if the plug has been removed or the connection cable is not supplied with a plug the hob must be connected to the mains supply by a suitably qualified electrician If the mains connection cable is damaged it must be replaced with a special mains connection cable by a qualified electrician see Electrical connection in the Installation chapter D...

Page 11: ...he mains electri city and gas supply Call Service If the wok is built in behind a furniture front e g a door do not close the furniture door while the wok is in use Heat and moisture can build up behind the closed furniture door This can result in dam age to the wok the housing unit and the floor Do not close the fur niture door until the residual heat indicators have gone out ...

Page 12: ...d set the grease filters of a cooker hood on fire Do not flambé under a cooker hood Spray canisters aerosols and other inflammable substances can ignite when heated Therefore do not store such items or substances in a drawer under the wok Cutlery inserts must be heat resistant Do not heat an empty pan Do not heat up food in closed containers e g tins or sealed jars on the wok as pressure will buil...

Page 13: ...containers on the hob When a control knob is pressed down a spark is generated on the ignitor Do not press down the control knob while you are cleaning or touching the wok or a burner in the vicinity of an ignitor If a cooker hood is installed above the wok ensure that the burn ers are always covered with a pan when in use Otherwise flames could reach the cooker hood parts of which could then be d...

Page 14: ...oon as possible to avoid the risk of corrosion The use of the wok creates heat moisture and combustion products in the room where it is installed Make sure that the appli ance is installed in a location with sufficient ventilation Natural vent ilation openings should not be blocked Alternatively a mechanical ventilation device e g a cooker hood can be installed Prolonged intensive use of the wok m...

Page 15: ...Warning and Safety instructions 15 Cleaning and care Do not use a steam cleaning appliance to clean this wok The steam could reach electrical components and cause a short cir cuit ...

Page 16: ...terials They also contain specific materials com pounds and components which were essential for their correct function and safety These could be hazardous to hu man health and to the environment if disposed of with your domestic waste or if handled incorrectly Please do not therefore dispose of your old appliance with your household waste Please dispose of it at your local com munity waste collect...

Page 17: ...Guide to the appliance 17 Wok CS 1011 1 a Wok burner b Pan support c Control knob d Indicators ...

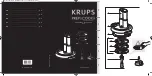
Page 18: ...Guide to the appliance 18 CS 1021 1 a Wok burner b Pan support c Control knob d Indicators ...

Page 19: ...l Description Burner off the gas supply is turned off Largest flame inner and outer burner on highest setting Large flame outer burner on lowest setting inner burner on highest setting Small flame outer burner off inner burner on highest setting Smallest flame outer burner off inner burner on lowest setting ...

Page 20: ...Guide to the appliance 20 Burner g Inner burner cap h Outer burner cap i Burner ring j Burner head k Thermocouple with ignition safety device l Ignitor m Burner base ...

Page 21: ...re available to order from Miele see Optional accessories Wok ring The wok ring supplied gives additional stability to the wok especially to woks with a rounded base Combination trivet The combination trivet supplied must be used if you are using pans with a smaller base diameter than that spe cified in the chart for suitable pans ...

Page 22: ... water and a small amount of washing up liquid applied with a soft sponge Dry all parts thoroughly after cleaning and then reassemble the burners see Cleaning and care Clean the stainless steel trough with a damp cloth and then wipe dry Switching on the ProLine ele ment for the first time The metal components have a protect ive coating which when heated for the first time will give off a slight sm...

Page 23: ...Remember when purchasing new pans that manufacturers usually refer to the diameter at the top of the pan in their documentation and not to the base diameter Any heat resistant pans can be used on a gas burner Pans with thick bases are preferable as these distribute heat more evenly With thin bases there is a danger of food overheating in places Stir the food frequently Always place cookware on the...

Page 24: ...Make sure that the wok ring is loc ated securely in its correct position See illustration The wok is unique among cookware in that it has a small base diameter and a large rim diameter usually 35 40 cm Combination trivet Use the small trivet supplied for small pans The pan will then be stable on the burner and not tip over ...

Page 25: ...heat loss Wide shallow pans are preferable to tall narrow ones They will heat up faster Cook with as little water as possible Reduce the size of the flame once the water has come to the boil or the oil is hot enough to fry in Use a pressure cooker to reduce cooking times ...

Page 26: ... large flame symbol Then press it down firmly to open the gas supply The ignition electrode will click and ig nite the gas If the burner does not ignite turn the rotary control to the Off position Air the room or wait at least 1 minute before trying again If the burner does not ignite the second time turn the control back to the position and see Problem solv ing guide You might hear the burner re ...

Page 27: ...ing it You can now select the setting you re quire To move from the low to the high set ting turn the control clockwise until it meets a resistance Then press it down and continue to turn it past the resistance before releasing it You can now select the setting you require Switching off Turn the rotary control clockwise to the position The gas supply is cut off and the flame goes out In operation ...

Page 28: ...electric flame failure monitor If a gas flame is extinguished e g by food boil ing over or by a draught and re ignition does not work the gas supply is switched off This prevents the release of gas If you turn the control to the position the burner is ready for use again ...

Page 29: ... appliances These products can be ordered through the Miele Webshop They can also be ordered from Miele see end of this booklet for contact de tails or from your Miele dealer Ceramic and stainless steel hob cleaner 250 ml Removes heavy soiling limescale de posits and aluminium residues Microfibre cloth Removes finger marks and light soiling ...

Page 30: ...onents and cause a short cir cuit Do not use a steam cleaner to clean the wok All surfaces could be discoloured or damaged if unsuitable cleaning agents are used All surfaces are susceptible to scratching Remove all cleaning agent residues immediately Never use abrasive sponges or cleaning agents When a control knob is pressed down a spark is generated on the ig nitor Do not press down the control...

Page 31: ...ging the surfaces of the appliance do not use cleaning agents containing soda am monia acids or chlorides cleaning agents containing descaling agents stain and rust removers abrasive cleaning agents e g powder cleaners and cream cleaners solvent based cleaning agents dishwasher cleaner oven sprays glass cleaning agents hard abrasive brushes or sponges e g pot scourers or sponges which have been pr...

Page 32: ...the rough side of a non scouring sponge can be used Finally dry with a clean soft cloth Stainless steel frame control panel Clean the frame and the control panel with a solution of warm water and a little washing up liquid applied with a soft sponge You can also use a ceramic and stain less steel cleaning agent We recom mend also using a stainless steel condi tioning agent to help prevent resoilin...

Page 33: ...iquid applied with a soft sponge Clean any soiling from the flame openings Danger of explosion Blocked flame openings can cause a dangerous build up of gas in the base of the hob which could ignite and cause an explosion This can lead to damage to the appliance and injury Ensure the flame openings are kept clean at all times Parts of the burner that cannot be re moved should be wiped clean with a ...

Page 34: ...Replace the burner ring Then place the burner caps and in position The burners cannot function cor rectly if they are incorrectly as sembled This can lead to damage to the appliance and injury Ensure that all parts of the burner are reassembled in the correct order Ignite all burners to check that they are burning correctly The flame must not go out on the lowest setting or when the control is tur...

Page 35: ...lt Turn all of the controls clockwise to the position and interrupt the power supply to the hob for a few seconds The burner is not correctly assembled Assemble the burner correctly The gas shut off device has not been opened Open the gas shut off device The burner is wet and or dirty Clean and dry the burner The flame openings are blocked and or wet Clean and dry the flame openings The gas flame ...

Page 36: ... has been a power outage Turn all rotary controls clockwise to the position When the power supply is restored the hob can be operated again as usual The electronic ignition device on the burner is not working The mains fuse has tripped If necessary contact a qualified electrician or Miele Service for assistance There is food residue stuck between the ignitor and the burner cap The thermocouple is ...

Page 37: ...mation can be found on the data plate Please note that telephone calls may be monitored and recorded for training pur poses and that a call out charge will be applied to service visits where the problem could have been resolved as described in this booklet Data plate Stick the extra data plate supplied with the appliance here Make sure that the model number matches the one specified on the back co...

Page 38: ...dhesive which will not dissolve or distort Any backmoulds must be of heat resistant material A deep fat fryer must not be installed directly next to a gas hob or a wok burner as the gas flames could ignite the fat in the fryer It is essential to maintain a distance of at least 288 mm between these two appliances The ProLine element must not be installed over a fridge fridge freezer freezer dishwas...

Page 39: ...Installation INSTALLATION 39 Observe carefully the safety clearances listed on the following pages ...

Page 40: ...e cooker hood above it If the cooker hood manufacturer s in structions are not available or if com bustible objects are installed above the ProLine element e g cabinets utensil rail etc a minimum safety distance of at least 760 mm must be maintained When two or more ProLine elements which have different safety distances are installed together below a cooker hood you should observe the greatest saf...

Page 41: ...nd the rear edge of the worktop 50 mm Minimum distance between the worktop cut out and a tall unit or wall to the right or left of it 40 mm CS 1212 CS 1212 1 CS 1221 CS 1221 1 CS 1234 CS 1234 1 CS 1223 CS 1222 50 mm CS 1112 CS 1122 CS 1134 CS 1326 CS 1327 CS 1411 100 mm CS 1012 CS 1012 1 CS 1012 2 150 mm CS 1421 CS 1312 CS 1322 200 mm CS 1034 CS 1034 1 250 mm CS 1011 CS 1011 1 CS 1021 CS 1021 1 CS...

Page 42: ...m must be maintained between the cut out and the cladding If the niche cladding is made from a non combustible material e g metal natural stone ceramic tiles the minimum safety distance between the cut out and the cladding will be 50 mm less the thickness of the cladding Example 15 mm niche cladding 50 mm 15 mm minimum safety distance of 35 mm a Masonry b Niche cladding dimension x thickness of th...

Page 43: ...en the Pro Line element and the worktop The sealing strip under the edge of the top part of the appliance provides a sufficient seal for the worktop Tiled worktop Grout lines and the hatched area un derneath the ProLine element frame must be smooth and even If they are not the ProLine element will not sit flush with the worktop and the sealing strip underneath the top part of the ap pliance will n...

Page 44: ...imensions All dimensions are given in mm CS 1011 1 a Spring clamps b Front c Casing depth d Casing depth including mains connection box with mains connection cable L 2000 mm e Building in depth for the gas connection R 1 2 ISO 7 1 DIN EN 10226 ...

Page 45: ...STALLATION 45 CS 1021 1 a Spring clamps b Front c Casing depth d Casing depth including mains connection box with mains connection cable L 2000 mm e Building in depth for the gas connection R 1 2 ISO 7 1 DIN EN 10226 ...

Page 46: ...g several ProLine elements Example 3 ProLine elements a Spring clamps b Spacer bars c Gap between spacer bars and worktop d Cover e ProLine element width less 8 mm f ProLine element width g ProLine element width less 8 mm h Worktop cut out ...

Page 47: ...om this figure Example 288 mm 288 mm 380 mm 956 mm 16 mm 940 mm The ProLine elements are 288 mm 380 mm or 576 mm wide depending on the ProLine elements see Building in dimensions in the Installation chapter Spacer bars When installing several ProLine elements an additional spacer bar must be fitted in between the individual ProLine elements The position for securing the spacer bar will depend on t...

Page 48: ...s Wooden worktops Seal any cut surfaces on wooden worktops with a special varnish silic one sealant or resin to prevent the wood from swelling as a result of moisture ingress The sealant must be heat resistant Make sure that the sealant does not come into contact with the top of the worktop Position the spring clamps and the spacer bars at the top edge of the cut out in the positions shown in the ...

Page 49: ...er bars Stick the tape to the top edge of the cut out in the positions shown in the diagram Position the spring clamps and spacer bars on the top edge of the cut out and press them firmly into place Apply silicone to the side and lower edges of the spring clamps and the spacer bars Then fill gap between spacer bar and the worktop with silicone ...

Page 50: ...h with the worktop on all sides This is important to en sure an effective seal all round Do not use any additional sealant e g silicone on the ProLine ele ment If the seal does not meet the worktop correctly on the corners the corner ra dius R4 can be carefully scribed to suit Installing several ProLine elements Push the built in ProLine element to the side until the holes in the spacer bar can be...

Page 51: ...ectly The flame must not go out on the lowest setting or when the control is turned quickly from the highest to the lowest setting On the highest setting the flame must have a distinctive and visible core Removing a ProLine element If the ProLine element is accessible from below push it upwards to re move it Push the back of the appli ance out first If the ProLine element is not access ible from b...

Page 52: ...aller in strict accordance with cur rent local and national safety and building regulations GasSafe in the UK The installer is responsible for ensuring that the appliance functions correctly when installed The gas connection must be in stalled so that connection can be made either from inside or outside the kitchen furniture unit The isolat ing valve must be easily accessible and visible by openin...

Page 53: ...ce and that the gas pipe and connections on the hob cannot come into contact with hot gas exhaust Risk of explosion due to dam aged gas pipes Gas can leak from damaged flexible gas pipes Attach flexible gas pipes in such a way so that they do not come into contact with any moving kitchen parts e g a drawer and are not ex posed to mechanical stress Connect the hob to the gas supply in accordance wi...

Page 54: ...e appli ance you will need to contact Miele Conversion to another type of gas is described in the section Converting to another type of gas Connecting the hob The hob is supplied with a conical gas connection point There are two connection options Fixed connection Flexible connection in accordance with DIN 3383 Part 1 maximum length 2000 mm Not for the UK Risk of explosion due to gas leakage Unsui...

Page 55: ...Installation INSTALLATION 55 Burner ratings Nominal ratings Gas type Highest setting Lowest setting kW g h kW Natural gas H 6 0 0 26 Liquid gas 5 4 394 0 26 ...

Page 56: ...or inadequacy of an on site earthing system e g electric shock This ProLine element must be con nected to the electrical supply by a qualified electrician The electrician must be familiar with and comply with the national regula tions and any additional regulations of the local electricity provider e g BS 7671 in the UK After installation ensure that all elec trical components are shielded and can...

Page 57: ...nding on installation Safety fuses Completely remove fuses Automatic circuit breakers Press the red test button until the middle black button springs out Built in circuit breakers Circuit breakers at least type B or C Switch the lever from 1 on to 0 off Residual current device RCD Switch the main switch from 1 on to 0 off or press the test button Replacing the mains connection cable When replacing...

Page 58: ... UK The installer is responsible for ensuring that the appliance functions correctly when installed Jet table The jet markings refer to a mm bore diameter Main jet Simmer ad justment jet Natural gas H 1 75 Nr 34 0 88 0 42 Liquid gas 1 12 Nr 7 0 60 0 23 Changing the jets Disconnect the hob from the electri city supply and turn off the gas sup ply When converting to another type of gas both the main...

Page 59: ...ight unit located underneath the upper section To release the light unit squeeze the two clamps together To change the main jet Unscrew the main jet anti clockwise from its housing with an SW 10 span ner while counterholding it with an SW 13 spanner see illustration Screw in the new main jet once again using the spanner to counterhold the jet housing ...

Page 60: ...with an SW 8 spanner while counterholding it with an SW 12 spanner Remove the screw fitting from part with an SW 12 spanner while counterholding it with an SW 12 spanner Remove jet disc from fitting and replace with the new jet disc see jet table Adjust air intake sleeve until the two vents have a 2 mm gap as il lustrated Reassemble the parts in reverse or der and carry out a leakage test ...

Page 61: ...en screw and slide the air in take sleeve Then retighten the screw Changing the small jet a Small diameter jet e g for liquid gas 0 23 b Large diameter jet e g for liquid gas 0 60 Using a small screwdriver unscrew the two small jets and in the gas fitting Pull out the jets with a pair of pliers Fit the new jets securely see jet ta ble Secure the jets against inadvertent loosening with sealing wax ...

Page 62: ...l burners to check that they are operating correctly The flame must not go out on the lowest setting or when the control is turned quickly from the highest to the lowest setting On the highest setting the flame must have a distinctive and visible core Adhere the label supplied with the jets stating the type of gas being used ...

Page 63: ...ntifier CS 1011 1 Number of gas burners Energy efficiency per gas burner EEgas burner 1 57 6 Energy efficiency for the gas hob calculated per kg EEgas hob 57 6 Information for domestic gas fired hobs In acc with regulation EU No 66 2014 MIELE Model name identifier CS 1021 1 Number of gas burners Energy efficiency per gas burner EEgas burner 1 57 6 Energy efficiency for the gas hob calculated per k...

Page 64: ......

Page 65: ......

Page 66: ......

Page 67: ...1 461 07 97 E Mail info miele ie Internet www miele ie Ireland Malaysia Miele Sdn Bhd Suite 12 2 Level 12 Menara Sapura Kencana Petroleum Solaris Dutamas No 1 Jalan Dutamas 1 50480 Kuala Lumpur Malaysia Phone 603 6209 0288 Fax 603 6205 3768 Miele New Zealand Limited IRD 98 463 631 8 College Hill Freemans Bay Auckland 1011 New Zealand Tel 0800 464 353 Internet www miele co nz New Zealand Miele Pte ...

Page 68: ...M Nr 11 138 530 02 en GB CS 1011 1 CS 1021 1 ...

Reviews: