


Summary of Contents for XVR01
Page 23: ...23 ...
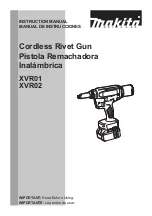
The Makita XVR01 brings unmatched power and versatility to your toolbox. With a wide range of applications, this innovative tool is a must-have for any DIY enthusiast or professional. Ensure smooth operation and maximize performance with the comprehensive Instruction Manual, available for free download at manualshive.com.
Page 23: ...23 ...