background image

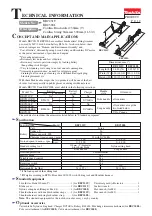
Summary of Contents for 3702B

Page 1: ...kimmer Collet chuck capacity 1 4 _ _ _ _ _ _ _ 1 4 MODEL 3702B Net weight Overall lenqth No load speed RPMI 28 000 296 mm 11 1 5 8 1 1 6 k g 13 5 lbsl INSTRUCTION MANUAL DOUBLE INSULATION SPECIFICATIONS ...

Page 2: ...job of a heavy duty tool Don t use tool for purpose not intended DRESS PROPERLY Don t wear loose clothing or jewelry They can be caught in moving parts Rubber gloves and non skid footwear are recommended when working outdoors Wear protective hair covering to contain long hair USE SAFETY GLASSES Also use face or dust mask if cutting operation is dusty DON T ABUSE CORD Never carry tool by cord or ya...

Page 3: ...r conditions that may affect its operation A guard or other part that is damaged should be properly repaired or replaced by an authorized serv ice center unless otherwise indicated elsewhere in this instruction manual Have defective switches replaced by authorized service center Don t use tool if switch does not turn it on and off 19 GUARD AGAINST ELECTRIC SHOCK Prevent body contact with grounded ...

Page 4: ... is turned 8 Before using the tool on an actual workpiece let it run for a while 9 Be careful of the bit rotating direction and the feed direction on Watch for vibration or wobbling that could indicate improperly installed bit IO Do not leave the tool running Operate the tool only when hand held 11 Always switch off and wait for the bit t o come to a complete stop before 12 Do not touch the bit im...

Page 5: ...sting bit protrusion To adjust the bit protrusion loosen the clamp screw and move the tool base up or down as desired After adjusting tighten the clamp screw firmly to secure the tool base On the tool base there are two sight windows through which you can read a graduation on the scale label Select a sight window convenient for your work and align the scale label with the selected sight window ins...

Page 6: ... switch in the OFF position rotate the collet nut on the tool several times to be sure that the bit turns freely and does not contact the tool base or trimmer shoe in any way Switch action To start the tool move the switch lever to the ON position To stop move the switch lever to the OFF position Operation Turn the tool on without the bit making any contact with the workpiece and wait untilthe bit...

Page 7: ...iece it is advisable to make a sample cut on a piece of scrap lumber This will show exactly how the cut will look as well as enable you to check dimensions When using the trimmer shoe the straight guide or the trimmer guide be sure to keep it on the right side in the feed direction This will help to keep it flush with the side of the workpiece Bit revolving direction Feed direction Workpiece Trimm...

Page 8: ...he wing nut Loosen the wing bolts and secure the tool base horizontally Attach the straight guide with the clamp screw A Loosen the wing nut on the straight guide and adjust the distance between the bit and the straight guide At the desired distance tighten the wing nut securely Flat washer I Wave washer U When cutting move the tool with the straight guide flush with the side of the workpiece 8 ...

Page 9: ...16 in radius cannot be cut using this guide Wave washer Flat washer Bolt I __ Wing nut Flat washer Center hole Guide plate Straight guide IV Bo1t For cutting circles between 70 mm 2 3 4 and 121mm 4 3 4 in radius For cuttingcircles between 121mm 4 3 4 and 221 mm 8 11 16 in radius Align the center hole in the straight guide with the center of the circle to be cut Drive a nail less than 6 mm 1 4 in d...

Page 10: ...rizontally Install the trimmer guide on the tool base with the clamp screw A Loosen the clamp screw 6 and adjust the distance between the bit and the trimmer guide by turning the adjusting screw 1 mm or about 3 64 per turn At the desired distance tighten the clamp screw 6 to secure the trimmer guide in place Clamp screw 6 I When cutting move the tool with the guide roller riding the side of the wo...

Page 11: ... tool base from the tool Loosen the wing bolts and secure the tool base horizontally Loosen the two screws on the tool base Place the templet guide on the tool base There are four convex portions on the tem plet guide Secure two of the four convex portions using the two screws Install the tool base on the tool Base I J Convex portions 11 ...

Page 12: ... I Templet guide Base r I I Distance X Workpiece 10 mm 25 64 L NOTE The workpiece will be cut a slightly different size from the templet Allow for the dis tance X between the router bit and the outside of the templet guide The distance X can be calculated by using the following equation Distance X outside diameter of the templet guide router bit diameter 2 12 ...

Page 13: ...n brushes clean and free to slip in the holders Both carbon brushes should be replaced a t the same time Use only Makita carbon brushes Use a screwdriver to remove the brush holder caps Take out the worn carbon brushes insert the new ones and secure the brush holder caps To maintain product SAFETY and RELIABILITY repairs any other maintenance or adjustment should be performed by Makita Authorized ...

Page 14: ... any other accessories or attachments might present a risk of injury to persons The accessoriesor attachments should be used only in the proper and intended manner 0 Straight guide assembly Part No 122391 0 0 Collet cone 1 4 Part No 763608 8 0 Templet guide Part No 343577 5 0 Wrench 17 Part No 781008 0 0 Wrench 10 Part No 781003 0 14 ...

Page 15: ...3 16 7116 1 318 1I 4 2 733003 EA 5 16 1 1 118 114 2 3 16 733003 4A 114 314 1 3116 114 2 118 HIGH SPEED STEEL STRAIGHT 2 Flute1 PART NO A E C D E 733233 4A 5 16 7 E 1 3 16 114 2 118 HINGE MORTISING CARBIDE TIPPED PART NO A E C D E 733006 9A 112 112 1 1 16 114 1 13 16 VEINING Single Flute SOLID CARBIDE PART NO A E C D E 733007 8A 3116 7 32 1 114 114 1 112 15 ...

Page 16: ... 15132 1 1I 4 1 4 1 718 CORE BOX 4 D C A J fI HIGH SPEED STEEL PART NO A E C D E 7 3 3 2 3 a 2 114 1 4 1 3 16 114 1 112 VEE GROOVING I D k CARBIDE TIPPED PART NO A B C D E 8 733009 2A 318 112 1 3 16 1 4 2 90 14 DOVE TAIL bc CARBIDE TIPPED PART NO A 8 C D E 733009 6A 1 2 1 2 1 114 114 1 718 16 ...

Page 17: ...6 112 1 114 1 314 114 733240 6A 15 16 3116 518 1 114 1 718 318 BEADING J n L n 7 CARBIDE TIPPED Ball Bearinq Pilot PARTNO A A2 A j 6 C D E R 733121 4A 718 112 318 318 1 114 114 1 15 16 3 16 733121 6A 1 112 318 1 2 1 114 114 2 114 REPLACEMENT BEARING NO 733132 2A COVE CARBIDE TIPPED Ball Bearing Pilot 733122 6A 718 318 318 114 1 518 REPLACEMENT BEARING NO 733132 2A HIGH SPEED STEEL Solid Pilot PART...

Page 18: ...RT NO A B C D E 733128 OA 1 4 1I 4 1 1 16 114 1 9 16 7 BEVEL TRIMMER Self Piloting SOLID CARBIDE PART NO A B C D E 733128 2A 3 16 1 4 1 1 16 1 4 1 9 16 2 FLUTE FLUSH TRIMMER i t CARBIDE TIPPED PART NO A B C D E 733128 8A 3 8 1 1 1 4 1 4 2 1 16 733129 0A 1 2 1 1 1 4 1I 4 2 51a 733128 9A 112 112 1 1 4 1I 4 2 1 16 318 REPLACEMENT BEARING NO 733132 2A 112 REPLACEMENT BEARING NO 7331324A 18 ...

Page 19: ... A B C D E 733129 2A 518 3 8 1 114 114 2 318 REPLACEMENT BEARING NO 733132 6A 3 FLUTE 22 BEVEL TRIMMER ASSEMBLY self Piloting I I REPLACEMENT BEARING NO 733132 6A SOLID CARBIDE CUTTER PARTNO A A7 B C D E Jmv I 733129 4A 718 5 8 3 8 1 114 114 2 318 I 3FLUTE FLUSHREPLACEMENTCUTTER SOLID CARBIDE I PARTNO A B D I 733129 6A 518 318 114 FOR FLUSH TRIMMER ASSEMBLY NO 733129 2A 19 ...

Page 20: ... 1 4 FOR BEVEL TRIMMER ASSEMBLY NO 733129 4A 114 REPLACEMENT ARBOR PART NO A B C D E 733131 2A 5 8 3 8 1 114 1 4 2 318 FOR FLUSH TRIMMER ASSEMBLY NO 733129 2A AND NO 733129 4A BALL BEARING PILOT D l Dz PART NO 733132 2A 3 8 O D 1 8 I D 733132 4A 1 2 0 D 3 16 I D 733132 6A 5 8 O D 114 I D 20 ...

Page 21: ...Apr 06 89 US 114 TRIMMER Model 3702B Note The switch noise suppressor and other part conflguratlons may differ f r o m country to country ...

Page 22: ...an Head Screw M4x25 IWith Washer1 Pan Head Screw M 4 x l 8 IWith Washerl Motor Housing Pan Head Screw M4x18 IWith Washer1 Strain Relief 24 25 26 27 28 29 30 31 32 33 34 35 36 37 38 39 40 41 42 43 44 45 1 1 1 2 1 2 1 2 2 2 1 1 1 1 1 2 2 2 1 2 2 1 Cord Cord Guard Name Plate Rivet 0 5 Hex Nut M 5 Pan Head Screw M4x10 IWith Washerl TRIMMER BASE ASSEMBLY Wing Nut M 5 Spring Washer 5 Flat Washer 5 Screw...

Page 23: ...r improperly maintained alterations have been made to the tool IN NO EVENT SHALL MAKITA BE LIABLE FOR ANY INDIRECT INCIDENTAL OR CON SEQUENTIAL DAMAGES FROM THE SALE OR USE OF THE PRODUCT THIS DISCLAIMER APPLIES BOTH DURING AND AFTER THE TERM OF THIS WARRANTY MAKITA DISCLAIMS LIABILITY FOR ANY IMPLIED WARRANTIES INCLUDING IMPLIED WARRANTIES O F MERCHANTABILITY AND FITNESS FOR A SPECIFIC PURPOSE AF...

Reviews: