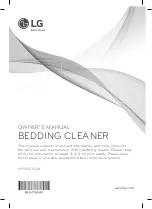
background image

www.lg.com

OWNER’S MANUAL

BEDDING CLEANER

VH9200DSW

This manual contains important information and instructions for 

the safe use and maintenance of the bedding cleaner. Please read 

all of the information on page 3, 4, 5 for your safety. Please keep 

this manual in an easily accessible place for future reference.

Summary of Contents for VH9200DSW

Page 1: ...his manual contains important information and instructions for the safe use and maintenance of the bedding cleaner Please read all of the information on page 3 4 5 for your safety Please keep this manual in an easily accessible place for future reference ...

Page 2: ...Product 8 Mounting the Cleaner at Sterilization Station 9 Using the Sterilization Station Sterilization and Charging 10 Effective cleaning methods according to the cleaning surfaces 11 How to Wash Inlet 12 Emptying Dust bin 13 Cleaning Dust bin 14 Care of Dust Filter 15 Troubleshooting Guide 16 Battery specifications 17 ...

Page 3: ...practices which could cause bodily injury or property damage IMPORTANT SAFETY INSTRUCTIONS CAUTION WARNING WARNING 1 This appliance is not intended for use by persons including children with reduced physical sensory or mental capabilities or lack of experience and knowledge unless they have been given supervision or instruction concerning use of the appliance by a person responsible for their safe...

Page 4: ...o not operate the cleaner while dust bin is taken out There is a risk of product damage or electrical shock injury Do not place power cord and the product near heating devices It can cause deformation of main body malfunction or fire Be careful that your fingers do not touch the pins when you pull out the plug from the mains outlet It can cause electrical shock Do not allow children or pets to pla...

Page 5: ... foot while the appliance is in operation Do not operate the appliance without the dust bin and its covers in place Always ensure the dust bin is cleaned when it reaches its limit or beforehand If it is used continuously while dust bin is full it will cause malfunction and overheating To avoid the risk of fire or electric shock always grip it from the plug when removing And never pull on the power...

Page 6: ...attery Touch Power Switch Cleaning Brush Dust bin Wheel Bottom Plate Brush Inlet Tank Separation Button The batteries used in cordless bedding cleaner is a consumable Battery warranty period is six months Battery replacement after the warranty period is a paid service ...

Page 7: ...7 How to use Sterilizer Station Cord Storage Groove UV Lamp Status Indicator Window UV Lamp Window ...

Page 8: ...ttery level is low the bottom one blinks repeatedly When you want to stop the operation Pressing touch power switch again sounds beep stops operation of the product and turns off the indicator Touch the power switch to operate an appliance Pressing touch power switch sounds beep starts operation of the product and lights the indicator The switch must be turned on in order to operate the product ...

Page 9: ...duct to allow the groove on the bottom of the product is caught on the protrusion of the station Place the product on the station in such a way that the front side of the product is placed first on the station to allow the gap on the vibration plate of the product to be inserted on the sill of the station 1 2 Sill Gap Groove Protrusion ...

Page 10: ...utes later the UV lamp and UV lamp status display automatically turns off at the same time Then sterilization operation is complete and the product will be charge state You can check the battery level through battery level indicator When charging is completed the battery level indicator will be turned on completely 5 minutes later the battery level indicator will be turned off The switch must be t...

Page 11: ...illows Large cushion normal cushion pillow For smaller surfaces apply an even forward and backward motion Blankets Thick cover thin cover blanket Apply an even backward and forward stroke motion Using tip Unlike general handy type products this product applies the correct weight onto the surface for the application it is designed for There is no need for additional downward hand pressure when usin...

Page 12: ... by pulling it up Hold the brush and separate it by lifting it up Wipe down the intake area with a damp cloth Wash the separated bottom plate with water and dry it with a cloth or place it outside in the shade Do not wash the main body or roller brush Clean the roller brush with a vacuum cleaner or an old unused tooth brush Insert the roller brush by matching the both side of roller brush to fixin...

Page 13: ...e Dust indicator should be observed regularly Cleaning must be carried out before or when the fine dust and debris has reached the MAX line by emptying the dust bin and cleaning it refer to next page before using the appliance again MAX ...

Page 14: ...15 if sponge filters require cleaning Completely dry it in a shady place with good ventilation for about a day Insert Filter Sponge filter HEPA filter into dust bin Insert dust bin into main body and push down If dust bin is not reassembled correctly it will impair the suction ability CAUTION Make sure that the filter inserted into the dust bin before reusing If the filter doesn t inserted into th...

Page 15: ...the HEPA filter and the gaps around the filter using the brush and a vacuum cleaner Wash the Sponge Filter in running water and completely dry it in a shady place with good ventilation for about a day before using it again Assemble in the reverse order of disassembly Store the cleaner as follows after use Place the product on the sterilizer station and insert the power code in the hole on the rear...

Page 16: ...e punching action at the tip of the nozzle This is normal If dust bin is not completely assembled noise may occur Assemble dust bin correctly and completely Odor comes out of the cleaner It might be that there is some odor coming out of cleaner after purchasing this unit for 3 months It is normal if the unit is operated Odors can also be caused by old dust in the dust bin and filters that has not ...

Page 17: ...17 Battery specifications Item Model Battery Type Lithium Ion Battery Rating 18 V 2000 mAh Number of battery cell 5 Manufacturer Neonix Merchandiser LG Electronics ...

Page 18: ... waste batteries accumulators 1 When this crossed out wheeled bin symbol is attached to batteries accumulators of Your product it means they are covered by European Directive 2006 66 CE 2 This symbol may be combined with chemical symbols for mercury Hg cadmium Cd or lead Pb if the battery Contains more that 0 0005 of mercury 0 002 of cadmium or 0 004 of lead 3 All batteries accumulators should be ...

Page 19: ...Note ...

Page 20: ...Made in Korea ...

Reviews: