background image

ENGLISH

ES

paño
L

OWNER’S MANUAL

ELECTRIC 

RANGE

Read this owner’s manual thoroughly before operating the appliance  
and keep it handy for reference at all times.

www.lg.com

MFL68881504_04

LSE4613ST
LSE4613BD

Summary of Contents for LSE4613BD

Page 1: ...NGLISH Español OWNER S MANUAL ELECTRIC RANGE Read this owner s manual thoroughly before operating the appliance and keep it handy for reference at all times www lg com MFL68881504_04 LSE4613ST LSE4613BD ...

Page 2: ...Time Delayed Timed Cook 25 Cook Time Timed Cook 26 Using the Cooktop 26 Cooking Areas 26 Hot Surface Indicator 26 Using the Cooktop Elements 27 The Recommended Surface Cooking Setting 28 Using the Proper Cookware 28 Choosing Cookware 28 Home Canning Tips 29 Using the Oven 29 Before Using the Oven 29 Oven Vent 29 Using Oven Racks 29 Bake 30 Convection Mode 31 Recommended Baking and Roasting Guide 3...

Page 3: ...OPERLY INSTALLED ANTI TIP DEVICE TO CHECK IF THE DEVICE IS INSTALLED PROPERLY REMOVE THE DRAWER BODY AND VERIFY THAT THE ANTI TIP DEVICE IS ENGAGED OR GRASP THE TOP REAR EDGE OF THE RANGE BACK GUARD AND CAREFULLY ATTEMPT TO TILT IT FORWARD Refer to the installation section for instructions It is possible for a child or adult to tip the range and be killed Verify that the anti tip device has been p...

Page 4: ... to clean the oven door glass since they can scratch the surface Scratches may cause the glass to shatter Warning If the door glass cooktop glass surface or oven heating unit of the range are damaged discontinue use of the range and call for service Do not operate the oven without the charcoal heater mesh Do not use plastic to cover food Use foil or oven safe lids only Do not allow anyone to climb...

Page 5: ...lammable liquids cleaners or aerosol sprays ELECTRICAL SAFETY CAUTION Be certain that all packing materials are removed from the appliance before operating Keep plastic clothes paper and other flammable materials away from parts of the appliance that may become hot Always disconnect power from the appliance before servicing Do not use aluminum foil or any other material to line the oven bottom Imp...

Page 6: ...hey have had sufficient time to cool This includes the cooktop and the area above the oven door Do not cook on a broken cooktop If the cooktop is broken cleaning solutions and spillovers may penetrate the broken cooktop and create a risk of electric shock Contact a qualified technician immediately Do not use the glass cooktop surface as a cutting board Do not place or store items that can melt or ...

Page 7: ... with the cooktop surface when cooking on the glass ceramic cooktop Match the size of the cooktop burner or element to the size of the cookware in use Using a large element for a small pan wastes heating energy and the exposed surface of the element is a burn or fire hazard Reduce energy use by cleaning light oven soils with the EasyClean feature instead of self clean Avoid opening the oven door m...

Page 8: ... in the self clean cycle only parts listed in this manual Before self cleaning the oven remove the broiler pan all oven racks the meat probe and any utensils or food from the oven Important Instruction The oven displays an F error code and sounds three long beeps during the self cleaning process if it malfunctions in the self clean mode Switch off the electrical power to the main fuse or breaker a...

Page 9: ...roiler pan NOTE Contact LG Customer Service at 1 800 243 0000 1 888 542 2623 in Canada if any accessories are missing For your safety and for extended product life only use authorized components The manufacturer is not responsible for product malfunction or accidents caused by the use of separately purchased unauthorized components or parts The images in this guide may be different from the actual...

Page 10: ...tric range Conduit connection plate Black White Red Terminal block 240 V Product Specifications The appearance and specifications listed in this manual may vary due to constant product improvements Oven Range Models LSE4613 Description Electric Slide In Oven Range Electrical requirements 13 5 kW 120 240 VAC Exterior Dimensions 29 7 8 W x 37 7 8 H x 26 1 2 D D with door closed 75 7 cm W x 96 cm H x...

Page 11: ...n this manual should be followed exactly Failure to do so may result in fire electrical shock property damage personal injury or death Wear gloves during the installation procedure Failure to do so can result in bodily injury Tools Needed Parts Provided Phillips screwdriver Level Template 1 Anti tip bracket kit 1 Anchor sleeves 6 Lag bolts 6 Flat blade screwdriver Adjustable wrench 1 4 Nut driver ...

Page 12: ...en flames of operating burners install a ventilation hood over the range that projects forward at least five inches beyond the front of the cabinets Make sure wall covering countertop and cabinets around the range can withstand the heat up to 194 F generated by the range Discoloration delamination or melting may occur This range has been designed to comply with the maximum allowable wood cabinet t...

Page 13: ...hen bottom of wood or metal cabinet is protected by not less than 1 4 6 4 cm flame retardant millboard covered with not less than no 28 MSG sheet steel 0 015 0 381 mm stainless steel 0 024 0 610 mm aluminum or 0 020 0 508 mm copper 15 38 1 cm minimum between countertop and adjacent cabinet bottom 30 76 2 cm 30 76 2 cm Minimum 15 38 1 cm 36 91 4 cm 36 91 4 cm 29 8 75 7 cm 24 60 9 cm Cabinet Cabinet...

Page 14: ...nsert the rear leg into the anti tip bracket Use a level to check your adjustments Place the level diagonally on the oven rack and check each direction for level First check direction Then check direction If the level doesn t show level on the rack adjust the leveling legs with a wrench 1 2 Connecting Electricity Electrical Requirements This appliance must be installed and grounded on a branch cir...

Page 15: ...50R 3 Wire receptacle 10 50R Connecting the Power Cord The rear access cover must be removed Loosen the two screws with a screwdriver The terminal block will then be accessible Access cover Use the cord conduit connection plate to install the power cord or conduit Leave the connection plate as installed for power cord installations Remove the connection plate for conduit installations and use the ...

Page 16: ...ted 120 240 volts 50 amperes and marked for use with ranges with closed loop connectors or opened spade lugs with upturned ends shall be used The white middle neutral wire of the power cord or 4 wire conduit has to be connected to the middle post of the main terminal block The other two wires of the power cord or conduit have to be connected to the outside posts of the main terminal connection blo...

Page 17: ... wire of the power cord or 4 wire conduit has to be connected to the middle post of the main terminal block The other two wires of the power cord or conduit have to be connected to the outside posts of the main terminal connection block The 4th ground wire green must be connected to the frame of the range with the ground screw Failure to do so can result in electrical shock severe personal injury ...

Page 18: ...ectrical power Check the range for proper operation Optional Rear Filler If the counter does not bridge the opening at the rear wall the rear filler kit that is provided with the slide in range will be needed NOTE If the countertop depth is greater than 25 there will be a gap between the filler kit and the back wall If the countertop depth is less than 24 the control panel will not sit flush with ...

Page 19: ...king all the surface heating elements check the locking system by pressing Clock for three seconds The oven door should lock and the cooktop should not operate while the Lockout function is turned on Pressing Clock for three seconds to disable Lockout 4 Now check the oven s operation Turn the oven mode knob to select the Bake mode 350 F appears in the display Press Start 5 The oven should finish p...

Page 20: ...mer on oven 7 Oven Light Press the button to turn oven light on or off 8 Setting Press button to select and adjust oven settings 9 Press the plus button to increase cooking time or oven temperature Press the minus button to decrease cooking time or oven temperature 10 Start Press the button to start all oven features 11 Oven Mode Knob Turn the knob to select oven operating mode Hot Surface Indicat...

Page 21: ...GLISH Knob Positions After cleaning the oven knobs make sure to replace each knob in the correct position Failure to do so can result in improper operation of the burners LSE5613ST Dual Single Single Mode Single Dual ...

Page 22: ...en light cannot be turned on if the Self Clean function is active Minimum Maximum Default Settings All of the features listed have a minimum and a maximum time or temperature setting that may be entered into the control An entry acceptance beep sounds each time a control key is pressed An entry error tone two short tones sounds if the entry of the temperature or time is below the minimum or above ...

Page 23: ... time of day Settings Set the oven mode knob to the Off position Press Setting key repeatedly to toggle through and change oven settings The Settings key allows you to set the hour mode on the clock 12 or 24 hours enable disable convection auto conversion adjust the oven temperature activate deactivate the preheating alarm light set the beeper volume switch the temperature scale between Fahrenheit...

Page 24: ...d temperature until it readjusts Turning the Preheat Alarm Light On Off When the oven reaches its set temperature the preheating alarm light flashes 5 times or until the oven door is opened 1 Touch Settings repeatedly until Pre appears in the display 2 Touch 1 to turn the light on off 3 Press Start to accept the change Adjusting the Beeper Volume 1 Set the oven mode knob to the Off position 2 Pres...

Page 25: ... meats and most fruits and vegetables Foods that can easily spoil such as milk eggs fish meat or poultry should be chilled in the refrigerator Even when chilled they should not stand in the oven for more than 1 hour before cooking begins and should be removed promptly when cooking is completed Eating spoiled food can result in sickness from food poisoning Cook Time Timed Cook Set the oven to cook ...

Page 26: ...ed to approximately 150 F CAUTION It is normal for the surface elements to cycle on and off during cooking even on higher settings This will happen more frequently if cooking on a lower temperature setting Using the Cooktop Elements CAUTION Only use cookware and dishes that are safe for oven and cooktop use Always use oven mitts when removing food from the cooktop and oven Do not place sealed cont...

Page 27: ...ZARD Bacteria may grow in food at temperatures below 140 F Always start with hot food Do not use the warm setting to heat cold food Do not use the warm setting for more than 2 hours Turning on a Warming Zone element 1 Push the Warming Zone element knob in 2 Turn the knob in either direction to the desired setting The control knob clicks when it is positioned at both Off and Hi NOTE For best result...

Page 28: ... are Aluminum Excellent heat conductor Some types of food will cause it to darken anodized aluminum cookware resists staining and pitting If aluminum pans slide across the ceramic cooktop they may leave metal marks which will resemble scratches Remove these marks immediately Copper Excellent heat conductor but discolors easily May leave metal marks on glass ceramic see Aluminum above Stainless ste...

Page 29: ...ving Racks 1 Pull the rack straight out until it stops 2 Lift up the front of the rack and pull it out Replacing Racks 1 Place the end of the rack on the support 2 Tilt the front end up and push the rack in CAUTION Replace oven racks before turning the oven on to prevent burns Do not cover the racks with aluminum foil or any other material or place anything on the bottom of the oven Doing so will ...

Page 30: ...he auto converted oven temperature 350 F and the fan icon 4 When cooking has finished or to cancel turn the oven mode knob to the Off position NOTE The oven fan runs while convection baking The fan stops when the door is open In some cases the fan may shut off during a convection bake cycle Tips for Convection Baking Use Convection Bake for faster and more even multiple rack cooking of pastries co...

Page 31: ...4 3 3 Cookies Sugar cookies Chocolate chips Brownies 4 4 4 Pizza Fresh Frozen 5 5 Pastry Crust From scratch Refrigerator 4 4 Breads Biscuit canned Biscuit from scratch Muffins 5 5 5 Desserts Fruit crisps and cobblers from scratch Pies from scratch 2 crust fruit 4 4 Custards Cheesecake crème brulée 2 Soufflés Sweet or savory 2 Casserole Frozen lasagna 5 Roasting rack guide Food Rack position Beef R...

Page 32: ...cooking the food if using broil 4 Turn the oven mode knob to the Off position to cancel at any time or when cooking is complete Smoking Due to the intense heat associated with broiling it is normal to experience smoke during the cooking process This smoke is a natural byproduct of searing and should not cause you to worry If you are experiencing more smoke than you are comfortable with use the fol...

Page 33: ...ast 7 0 5 1 0 5 Chicken 1 whole cut up 2 to 21 2 lbs split lengthwise 2 Breasts 5 5 8 10 8 10 4 6 5 7 Broil skin side down first Lobster Tails 2 4 10 to 12 oz each 5 9 12 Do not turn over Cut through back of shell Spread open Brush with melted butter before broiling and after half of broiling time Fish Fillets 1 4 to 1 2 thick 6 2 4 2 4 Handle and turn very carefully Brush with lemon butter before...

Page 34: ...n oil before cooking to improve browning Warm This function will maintain an oven temperature of 170 F The Warm function will keep cooked food warm for serving up to three hours after cooking has finished The Warm function may be used without any other cooking operations Setting the Warm Function 1 Turn the oven mode knob to select Warm 2 Press Start 3 Turn the oven mode knob to the Off position w...

Page 35: ... time is 60 65 minutes for a whole chicken weighing 3 3 lb Adjust the cook time according to the weight of the poultry Place the oven rack in position 2 Speed Roast is designed to reduce the cooking time There is no need for preheating This function is optimized for poultry so the temperature of Speed Roast cannot be changed It is normal for the fan to operate during the Speed Roast function Setti...

Page 36: ...nter the Settings menu of the smart phone and select Share connect under WIRELESS NETWORKS 2 Set NFC and Direct Android Beam to ON and select NFC 3 Check Use Read and Write P2P receive NOTE Depending on the smart phone manufacturer and Android OS version the NFC activation process may differ Refer to the manual of the smart phone for details You can activate Tag On function by using the Android 4 ...

Page 37: ...or a thick case on the phone transmission will not be good Press in the LG Smart Oven application for a more detailed guide on how to use the Tag On function Using Tag On with Applications Press an LG appliance s Tag On logo with an NFC equipped smart phone to use the LG Smart Oven application s LG Smart Diagnosis Oven Settings and EasyClean features Smart Diagnosis Allows you to diagnose and trou...

Page 38: ...tomato sauce jellies fudge candy syrups chocolate spills or plastic or foil melts on the cooktop remove the molten material IMMEDIATELY with a metal razor scraper it will not damage the decorated cooking surface while the cooking surface is still hot to avoid the risk of damage to the glass ceramic surface For your safety please use an oven mitt or pot holder while scraping the hot cooking surface...

Page 39: ... feature takes advantage of LG s new enamel to help lift soils without harsh chemicals and it runs using ONLY WATER for just 10 minutes in low temperatures to help loosen LIGHT soils before hand cleaning While EasyClean is quick and effective for small and LIGHT soils the Self Clean feature can be used to remove HEAVY built up soils The intensity and high heat of the Self Clean cycle may result in...

Page 40: ...ain non scratch scrubbing sponges such as those made of melamine foam available at your local stores can also help improve cleaning The range should be level to ensure that the bottom surface of the oven cavity is entirely covered by water at the beginning of the EasyClean cycle For best results use distilled or filtered water Tap water may leave mineral deposits on the oven bottom Soil baked on t...

Page 41: ...g 9 Clean the oven cavity immediately after the EasyClean cycle by scrubbing with a wet non scratch scouring sponge or pad The scouring side will not scratch the finish Some water may spill into the bottom vents while cleaning but it will be captured in a pan under the oven cavity and will not hurt the burner NOTE Do not use any steel scouring pads abrasive pads or cleaners as these materials can ...

Page 42: ...ing the oven door after the Self Clean cycle Stand to the side of the oven when opening the door to allow hot air or steam to escape The oven may still be VERY HOT During the Self Clean cycle the cooktop elements and warming drawer cannot be used NOTE Remove oven racks and accessories before starting the Self Clean cycle If oven racks are left in the oven cavity during the Self Clean cycle they wi...

Page 43: ...e oven door open when the lock is displayed The oven door remains locked until the oven temperature has cooled Forcing the door open will damage the door After the Self Clean Cycle The oven door remains locked until the oven temperature has cooled You may notice some white ash in the oven Wipe it off with a damp cloth or a soap filled steel wool pad after the oven cools If the oven is not clean af...

Page 44: ...il Leave it on for 30 to 60 minutes Rinse with a damp cloth and dry Do not use abrasive cleaners Stainless Steel Surfaces To avoid scratches do not use steel wool pads 1 Place a small amount of stainless steel appliance cleaner or polish on a damp cloth or paper towel 2 Clean a small area rubbing with the grain of the stainless steel if applicable 3 Dry and buff with a clean dry paper towel or sof...

Page 45: ...iler pan and grid may be cleaned with a commercial oven cleaner or in the dishwasher Removing and Replacing the Lift Off Oven Doors and Drawer CAUTION Be careful when removing and lifting the door Do not lift the door by the handle The door is very heavy Removing the Door 1 Fully open the door 2 Unlock the hinge locks rotating them as far toward the open door frame as they will go Slot Lock Unlock...

Page 46: ...aning can be done with the drawer in place however the drawer may be removed if further cleaning is needed Use warm water to thoroughly clean 1 Fully open the drawer 2 Locate the glide lever on each side of the drawer Push down on the left glide lever and pull up on the right glide lever 3 Pull the drawer away from the range Replacing the Drawer 1 Pull the bearing glides to the front of the chassi...

Page 47: ...or is opened the convection fan will stop until the door is closed Can I use aluminum foil to catch drippings in my oven cavity Never use aluminum foil to line the bottom or sides of the oven The foil will melt and stick to the bottom surface of the oven and will not be removable Use a sheet pan placed on a lower oven rack to catch drippings instead If foil has already melted onto the bottom of th...

Page 48: ...ction of your owner s manual Are there any tricks to getting some of the stubborn soils out Scraping the soils with a plastic scraper before and during hand cleaning is recommended Fully saturating soils with water is also recommended However certain types of soils are harder to clean than others For these stubborn soils the Self Clean cycle is recommended Consult the Self Clean section of your ow...

Page 49: ...ndition Turn the Oven mode knob to the Off position to clear the display and stop beeping Reprogram oven If fault recurs record fault number Turn the Oven mode knob to the Off position and contact a Service agent CODE CAUSE F 3 Key short error F 9 Oven not heating Surface units will not maintain a rolling boil or cooking is not fast enough Improper cookware being used Use pans which are flat and m...

Page 50: ...low instructions under Setting Oven Controls Meat too close to the element Reposition the rack to provide proper clearance between the meat and the element Preheat broil element for searing Meat not properly prepared Remove excess fat from meat Cut remaining fatty edges to prevent curling Insert on broiler pan wrong side up and grease not draining Always place grid on the broiler pan with ribs up ...

Page 51: ...se a blade scraper to remove soil See Cleaning the Glass Ceramic Cooktop in the MAINTENANCE section Areas of discoloration on cooktop Mineral deposits from water and food Remove using a glass ceramic cooktop cleaning creme Use cookware with clean dry bottoms Oven will not Self Clean The oven temperature is too high to set a Self Clean operation Allow the range to cool and reset the controls Oven c...

Page 52: ...ycle has been selected but the door is not closed Close the oven door LOCKED is on in the display when you want to cook The oven door is locked because the temperature inside the oven has not dropped below the locking temperature Turn the oven mode knob to the Off position Allow the oven to cool Burning or oily odor emitting from the vent This is normal in a new oven and will disappear in time To ...

Page 53: ...tion Use the home telephone for better communication performance resulting in better service Bad call quality may result in poor data transmission from your phone to the machine which could cause Smart Diagnosis to malfunction Smart Diagnosis Through the Call Center 1 Call the LG call center at LG U S 1 800 243 0000 LG Canada 1 888 542 2623 2 When instructed to do so by the call center agent hold ...

Page 54: ...e trips to deliver pick up or install or repair the product instruction to the customer on operation of the product repair or replacement of fuses or correction of wiring or plumbing or correction of unauthorized repairs installation Failure of the product to perform during power failures and interruptions or inadequate electrical service Damage caused by leaky or broken water pipes frozen water p...

Page 55: ...f repair or replacement under these excluded circumstances shall be borne by the consumer OBTAIN WARRANTY SERVICE AND ADDITIONAL INFORMATION If you do not have access to the internet and you need assistance using your product or you would like to schedule service you may contact LG Electronics at the number below For assistance or service call 1 800 243 0000 If you need further assistance you can ...

Page 56: ...56 MEMO MEMO ...
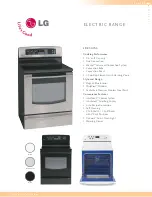
Page 57: ...L PROPIETARIO COCINA ELÉCTRICA Lea detenidamente el manual del propietario antes de poner el aparto en funcionamiento y consérvelo a mano en todo momento para su referencia www lg com MFL68881504_04 LSE4613ST LSE4613BD ...

Page 58: ...orizada retardada 25 Cook Time Tiempo de cocción Timed Cook Cocción temporizada 26 Uso de la placa de cocción 26 Áreas de cocción 26 Indicador de superficie caliente 26 Uso de las hornallas de la placa de cocción 27 Configuración recomendada de cocción en superficie 28 Uso de batería de cocina adecuada 28 Elección de la batería de cocina 28 Sugerencias para preparar conservas caseras 29 Uso del ho...

Page 59: ...NTIVUELCO ESTÉ INSTALADO CORRECTAMENTE RETIRE EL CUERPO DEL CAJÓN Y VERIFIQUE QUE EL DISPOSITIVO ANTIVUELCO ESTÉ BIEN SUJETO O TOME EL BORDE SUPERIOR TRASERO DE LA PROTECCIÓN POSTERIOR DE LA COCINA E INTENTE INCLINARLA HACIA ADELANTE CON CUIDADO Consulte las instrucciones en la sección de instalación Es posible que un niño o un adulto inclinen la cocina y el vuelco consecuente les produzca la muer...

Page 60: ...de metal para limpiar el vidrio de la puerta del horno ya que podrían rayar la superficie Los arañazos podrían hacer que el vidrio se quiebre Advertencia Si el vidrio de la puerta la vitrocerámica de la placa de cocción la superficie o la resistencia del horno están dañados deje de usar el horno y solicite servicio técnico No ponga en funcionamiento el horno sin la malla calentadora de carbón No u...

Page 61: ...os inflamables limpiadores o aerosoles SEGURIDAD ELÉCTRICA PRECAUCIÓN Asegúrese de retirar todos los materiales del embalaje antes de la puesta en funcionamiento Mantenga el plástico telas papel y otros materiales inflamables lejos de las partes del electrodoméstico que se podrían calentar Desconecte siempre la energía del electrodoméstico antes de que se efectúen tareas de mantenimiento No utilic...

Page 62: ...erficies cercanas hasta que hayan tenido tiempo suficiente para enfriarse Esto incluye la placa de cocción y el área sobre la puerta del horno No cocine sobre una placa de cocción rota Si la placa de cocción se rompe los líquidos de limpieza y los derrames podrían penetrar a través de la placa rota y provocar un riesgo de descarga eléctrica Comuníquese con un técnico calificado de inmediato No uti...

Page 63: ...cantidad de alimentos que va a cocinar y así ahorrar energía al calentarlos Calentar un litro de agua requiere más energía en una olla de tres litros que en una de un litro Utilice piezas de la batería de cocina con fondos planos para lograr el mejor contacto posible con la superficie de la placa de cocción al cocinar en la placa de cocción de vitrocerámica Haga coincidir el tamaño del quemador o ...

Page 64: ...e un ciclo de autolimpieza del horno Los gases podrían ser nocivos o fatales para las aves Traslade las aves a un ambiente bien ventilado Limpie con el ciclo de autolimpieza solo las partes indicadas en este manual Antes de realizar la autolimpieza del horno retire la asadera todos los estantes del horno la sonda para carne y cualquier otro utensilio o alimento del horno Instrucción importante El ...

Page 65: ...aya 1 c u Accesorios opcionales Rejilla Asadera NOTA Comuníquese con el Servicio de atención al cliente de LG al 1 800 243 0000 1 888 542 2623 en Canadá si faltara algún accesorio Para su seguridad y para extender la vida útil del producto solo debe utilizar componentes autorizados El fabricante no es responsable del mal funcionamiento del producto ni de accidentes causados por el uso de component...

Page 66: ...nducto Negro Blanco Rojo Bloque de bornes 240 V Especificaciones del producto La apariencia y las especificaciones detalladas en este manual podrían variar debido a mejoras constantes en el producto Modelos de cocinas con horno LSE4613 Descripción Cocina con horno eléctrica empotrable Requisitos eléctricos 13 5 kW 120 240 VAC Dimensiones exteriores 29 7 8 Ancho x 37 7 8 Alto x 26 1 2 Profundidad P...

Page 67: ...cerlo podría causar un incendio descarga eléctrica daños a la propiedad lesiones personales o la muerte Use guantes durante el procedimiento de instalación De no hacerlo podría sufrir lesiones corporales Herramientas necesarias Piezas incluidas Destornillador phillips Nivel Plantilla 1 Piezas no incluidas Cable eléctrico de 4 hilos o cable eléctrico de 3 hilos 40 o 50 A aprobado por UL Pasacables ...

Page 68: ...s encendidas instale una campana de ventilación sobre la cocina que se proyecte hacia delante cinco pulgadas al frente de los gabinetes como mínimo Asegúrese de que el revestimiento de las paredes la mesada y los gabinetes de alrededor de la cocina puedan soportar el calor hasta 194 F generado por la cocina Podría producirse cambios de color deslaminación o derretimiento Esta cocina ha sido diseña...

Page 69: ...be instalar una cocina independiente no empotrable a menos de 15 32 12 mm de distancia de cualquier superficie adyacente Dimensiones mínimas 30 76 2 cm de espacio mínimo entre la parte superior de la superficie de cocción y la parte inferior de un gabinete de madera o metal no protegido o 24 60 9 cm de espacio mínimo cuando el fondo del gabinete de madera o metal está protegido por no menos de 1 4...

Page 70: ...lice un nivelador para verificar sus ajustes Ubique el nivelador en diagonal sobre el estante el horno y verifique en todas direcciones para nivelar Primero verifique la dirección Luego verifique la dirección Si el nivelador no queda equilibrado sobre el estante ajuste las patas de nivelación con una llave 1 2 Conexión de la electricidad Requisitos eléctricos Un técnico calificado debe instalar es...

Page 71: ...para cable de 4 hilos 14 50R Receptáculo para cable de 3 hilos 10 50R Conexión del cable de alimentación Se debe retirar la cubierta de acceso trasera Afloje los dos tornillos con un destornillador El bloque de bornes debe quedar accesible Cubierta de acceso Utilice la placa de conexión del cable conducto para instalar el cable de alimentación o el conducto Deje la placa de conexión según estaba i...

Page 72: ...ectores de circuito cerrado o talones de cable pala de extremo abierto con puntas hacia arriba El hilo blanco neutro del cable de alimentación o el conducto de 4 hilos se deben conectar al poste medio del bloque de bornes principal El hilo medio neutro del cable de alimentación o conducto de 4 hilos se debe conectar al poste medio del bloque de bornes principal Los otros dos hilos del cable de ali...

Page 73: ...entación o conducto de 4 hilos se debe conectar al poste medio del bloque de bornes principal Los otros dos hilos del cable de alimentación o del conducto se deben conectar a los postes exteriores del bloque de bornes principal El cuarto cable a tierra verde se debe conectar al marco de la cocina con el tornillo de conexión a tierra El no hacerlo podría causar lesiones personales graves descargas ...

Page 74: ...un tornillo extraído en el paso 1 en la ranura de cada extremo del elemento de relleno trasero 4 Guarde los dos tornillos restantes junto con estas instrucciones para un uso futuro Colocación del dispositivo antivuelco Mueva la cocina para que quede cerca de la abertura para enchufar en el receptáculo Deslice la cocina en su posición y asegúrese de que la pata trasera se deslice por debajo del sop...

Page 75: ...ornallas verifique el sistema de bloqueo presionando el botón Clock durante tres segundos La puerta del horno debe bloquearse y la placa de cocción no debe funcionar mientras que la función Bloqueo está encendida Presione el botón Clock durante tres segundos para desactivar el bloqueo 4 Ahora verifique el funcionamiento del horno Gire la perilla de modo del horno hasta seleccionar el modo Bake 350...

Page 76: ...a luz del horno 8 Setting Ajuste Presione el botón para seleccionar y hacer ajustes en la configuración del horno 9 Presione el botón más para aumentar el tiempo de cocción o la temperatura del horno Presione el botón menos para disminuir el tiempo de cocción o la temperatura del horno 10 Start Inicio Presione el botón para iniciar todas las funciones del horno 11 Perilla de modo del horno Gire la...

Page 77: ...a Después de limpiar las perillas del horno asegúrese de volver a colocarlas en la posición correcta de lo contrario podría ocasionar un mal funcionamiento de los quemadores LSE5613ST Sim ple Doble Sim ple Doble Doble Simple Simple Modo Simple Doble ...

Page 78: ... no se puede encender si la función Self Clean está activa Configuraciones mínimas y máximas predeterminadas Todas las funciones detalladas tienen un ajuste mínimo y máximo de tiempo o temperatura que puede ingresarse en el control Cada vez que se presiona una tecla de control suena un tono de aceptación de entrada Si la entrada de temperatura o tiempo está por debajo o por encima de la configurac...

Page 79: ...do del horno en la posición Off Presione la tecla Setting varias veces para ir cambiando entre las diferentes configuraciones del horno y modificarlas La tecla Settings permite configure el modo de horas en el reloj 12 o 24 horas habilitar inhabilitar la conversión automática a convección ajustar la temperatura del horno activar desactivar la luz de alarma de precalentamiento configurar el volumen...

Page 80: ...z de alarma de precalentamiento titila 5 veces o hasta que se abra la puerta del horno 1 Toque Settings varias veces hasta que PrE aparezca en la pantalla 2 Toque 1 para encender o apagar la luz 3 Toque Start para aceptar el cambio Ajuste del volumen del indicador sonoro 1 Coloque la perilla de modo del horno en la posición Off 2 Presione Setting varias veces hasta que aparezca Beep en la pantalla...

Page 81: ...nes curadas o congeladas y la mayoría de las frutas y los vegetales Los alimentos que pueden echarse a perder fácilmente como la leche huevos pescado carne o aves se deben enfriar en el refrigerador Incluso cuando se hayan enfriado no deben permanecer en el horno durante más de 1 hora antes de iniciar la cocción y se los debe retirar rápidamente una vez que la cocción haya terminado Ingerir alimen...

Page 82: ...IÓN Es normal que las hornallas de la superficie se enciendan y apaguen durante la cocción incluso en configuraciones muy elevadas Esto sucede con más frecuencia si se cocina en un ajuste de temperatura inferior Uso de las hornallas de la placa de cocción PRECAUCIÓN Utilice únicamente batería de cocina y fuentes que sean seguras para uso en el horno y la placa de cocción Use siempre agarraderas o ...

Page 83: ...140 F pueden crecer bacterias Siempre debe comenzar con comida caliente No caliente alimentos fríos en la zona de calentamiento No utilice la configuración de calentamiento durante más de 2 horas Encendimiento de un elemento de la Zona de calentamiento 1 Empuje hacia adentro la perilla del elemento de la Zona de calentamiento 2 Gire la perilla en cualquier dirección hasta seleccionar el ajuste des...

Page 84: ...nio excelente conductor de calor Algunos tipos de alimentos pueden oscurecer este tipo de recipientes la batería de cocina de aluminio anodizado resiste las manchas y las picaduras Si las sartenes o cacerolas de aluminio se deslizan por la placa de cocción de cerámica podrían dejar marcas de metal parecidas a rayaduras Quite estas marcas de inmediato Cobre excelente conductor de calor pero se deco...

Page 85: ...stante hacia afuera sin inclinarlo hasta que se detenga 2 Levante el frente del estante y tire hacia afuera Colocación de los estantes 1 Coloque el extremo del estante sobre el soporte 2 Incline el extremo frontal hacia arriba y empuje el estante hacia dentro PRECAUCIÓN Coloque los estantes del horno antes de encenderlo para evitar quemaduras No cubra los estantes con papel de aluminio ni ningún o...

Page 86: ...0 F y el icono del ventilador 4 Al finalizar la cocción o para cancelar gire la perilla de modo del horno hasta la posición Off NOTA El ventilador del horno funciona mientras se hornea por convección El ventilador se detiene cuando la puerta está abierta En algunos casos el ventilador podría apagarse durante un ciclo de horneado por convección Sugerencias para hornear por convección Use el hornead...

Page 87: ...el de ángel 4 3 3 Galletas Galletas azucaradas Con chispas de chocolate Brownies 4 4 4 Pizza Fresca Congelada 5 5 Masa de hojaldre Casera Refrigerada 4 4 Panes Bizcochos enlatados Bizcochos caseros Muffins 5 5 5 Postres Frutas azucaradas y crujientes caseras Tartas de frutas con 2 cubiertas caseras 4 4 Cremas Cheesecake crème brulée 2 Suflés Dulce o salado 2 Cazuela Lasaña congelada 5 Guía de posi...

Page 88: ... Asar deje que el horno se precaliente durante aproximadamente cinco minutos antes de cocinar los alimentos 4 Gire la perilla de modo del horno hasta la posición Off para cancelar en cualquier momento o cuando la cocción está completa Humo Debido al calor intenso que se produce cuando se asa es normal que haya humo durante el proceso de cocción Este humo es un subproducto natural del chamuscado y ...

Page 89: ... de hasta 2 a 21 2 lb cortado a lo largo 2 pechugas 5 5 8 10 8 10 4 6 5 7 Ase primero con el lado de la piel hacia abajo Colas de langosta 2 4 10 a 12 oz cada una 5 9 12 No voltee Corte la parte trasera del caparazón Abra bien Pincele con mantequilla derretida antes de asar y a la mitad de la cocción Filetes de pescado 1 4 a 1 2 de espesor 6 2 4 2 4 Mueva y voltee con mucho cuidado Pincele con man...

Page 90: ... el leudado no es lo suficientemente alta para mantener alimentos a temperaturas seguras Use la función Calentar para mantener calientes los alimentos La función Leudar no funciona si la temperatura es inferior a 125 F La pantalla mostrará la palabra Hot Es normal que el ventilador funcione durante la función Leudar Consejos para asar Filete Los bistecs y las chuletas siempre se deben dejar reposa...

Page 91: ... todo el pollo que pesa 3 3 lb Ajuste el tiempo de cocción según el peso de aves Coloque el estande del horno del horno en posición 2 La función Rostizado rápido está diseñada para reducir el tiempo de cocción No es necesario precalentar Esta función está optimizada para cocinar aves de modo que la temperatura de la función Rostizado rápido no se puede cambiar Es normal que el ventilador funcione ...

Page 92: ...nú Settings del teléfono y seleccione Share connect en WIRELESS NETWORKS 2 Coloque NFC y Direct Android Beam en ON y seleccione NFC 3 Marque Use Read and Write P2P receive NOTA Según el fabricante del teléfono inteligente y la versión del SO Android el proceso de activación de NFC puede variar Consulte el manual del teléfono para obtener más detalles Puede usar un teléfono inteligente de Android 4...

Page 93: ...ven Horno inteligente de LG para obtener orientación más detallada sobre cómo usar la función Tag On Uso de Tag On con aplicaciones Toque el logotipo de Tag On del electrodoméstico LG con un teléfono inteligente equipado con NFC para usar las funciones LG Smart Diagnosis configuraciones del horno y EasyClean de la aplicación LG Smart Oven Horno inteligente de LG Smart Diagnosis Le permite diagnost...

Page 94: ... mermeladas dulce caramelo jarabes y chocolate o se derriten plástico o papel de aluminio en la placa de cocción quite el material derretido INMEDIATAMENTE con un raspador metálico filoso no dañará la superficie de cocción decorada mientras la superficie de cocción todavía esté caliente para evitar daños en la superficie de vitrocerámica Por su seguridad use un guante para horno o una agarradera c...

Page 95: ...neficia con el nuevo esmalte de LG para ayudar a despegar la suciedad sin usar químicos fuertes y funciona SOLAMENTE CON AGUA durante apenas 10 minutos a baja temperatura para aflojar la suciedad LEVE antes de realizar la limpieza manual Si bien la función EasyClean es rápida y eficaz para la suciedad LEVE y pequeña la función Autolimpieza se puede usar para quitar suciedad DIFÍCIL acumulada La in...

Page 96: ...a esponja blanda o una toalla Algunas esponjas que no rayan como las hechas de espuma de melamina disponibles en las tiendas locales también pueden ayudar a mejorar la limpieza La cocina debe estar nivelada para asegurar que la superficie inferior de la cavidad del horno esté completamente cubierta con agua al comienzo del ciclo EasyClean Para obtener mejores resultados use agua destilada o filtra...

Page 97: ... horno inmediatamente después del ciclo EasyClean Para ello friegue con una esponja o un paño de limpieza húmedos que no rayen El lado para refregar no rayará el acabado Se puede derramar un poco de agua en las ventilaciones de la base cuando se realice la limpieza pero se recogerá en una bandeja que está debajo de la cavidad del horno y no dañará el quemador NOTA No use esponjas de acero ni paños...

Page 98: ...Autolimpieza Póngase al lado del horno cuando abra la puerta para dejar que salgan el aire y el vapor calientes El horno todavía puede estar MUY CALIENTE Durante el ciclo de Autolimpieza no se pueden usar las hornallas de la placa de cocción ni el cajón calentador NOTA Quite los estantes del horno y los accesorios antes de iniciar el ciclo de Autolimpieza Si se dejan los estantes en la cavidad del...

Page 99: ...la puerta del horno para abrirla cuando vea el icono del candado La puerta permanece trabada hasta que baja la temperatura del horno Si abre la puerta a la fuerza se dañará Después del ciclo de Autolimpieza La puerta permanece trabada hasta que baja la temperatura del horno Es posible que note un poco de ceniza blanca en el horno Límpiela con un paño húmedo o una esponja de lana de acero con jabón...

Page 100: ... Déjelo reposar allí entre 30 y 60 minutos Enjuague con un paño húmedo y seque No use limpiadores abrasivos Superficies de acero inoxidable Para evitar hacer rayas no use esponjas de lana de acero 1 Coloque una pequeña cantidad de limpiador o pulimento para electrodomésticos de acero inoxidable en un paño o una toalla de papel húmedos 2 Limpie un área pequeña y friegue siguiendo el grano del acero...

Page 101: ...rnos comercial o en el lavavajillas Remoción y reemplazo de la puertas removible del horno y el cajón PRECAUCIÓN Tenga cuidado cuando quite y levante la puerta No levante la puerta de la manija La puerta es muy pesada Remoción de la puerta 1 Abra totalmente la puerta 2 Desbloquee las trabas de las bisagras Para ello gírelas alejándolas lo más posible del marco de la puerta abierta Ranura Traba Des...

Page 102: ... sin embargo el cajón puede extraerse si se necesita realizar una limpieza adicional Use agua caliente para limpiar a fondo 1 Abra totalmente el cajón 2 Localice las palancas de deslizamiento a ambos lados del cajón Presione la palanca de deslizamiento izquierda hacia abajo y tire hacia arriba la palanca de deslizamiento derecha Empuje hacia abajo con el dedo Levante con el dedo Palanca Palanca 3 ...

Page 103: ... la puerta Puedo usar papel de aluminio para que recolecte las gotas en la cavidad del horno Nunca utilice papel de aluminio para revestir la base o los costados del horno El papel se derretirá y se pegará a la superficie del fondo del horno y no se podrá quitar En lugar de eso coloque una bandeja sobre un estante inferior del horno y úsela para recolectar las gotas Si ya se ha derretido papel de ...

Page 104: ...la sección Autolimpieza del manual del propietario Hay algún truco para eliminar algo de la suciedad rebelde Se recomienda raspar la suciedad con un raspador plástico antes de limpiar manualmente y mientras limpia También se recomienda saturar completamente con agua la suciedad Sin embargo hay suciedad que es más difícil de limpiar que otra Para la suciedad rebelde se recomienda usar el ciclo de A...

Page 105: ...alla Gire la perilla de modo del horno hasta la posición Off para borrar la pantalla y apagar el tono Reprograme el horno Si la falla se repite registre el número de la falla Gire la perilla de modo del horno hasta la posición Off y comuníquese con un representante de servicio técnico CÓDIGO CAUSA F 3 Clave de error de cortocircuito F 9 El horno no calienta Las hornallas superficiales no mantienen...

Page 106: ...les del horno La carne está demasiado cerca de quemador Coloque el estante en otra posición para dejar un espacio suficiente entre la carne y el quemador Precaliente el asador para sellar La carne no está bien preparada Quite el exceso de grasa de la carne Corte los bordes de grasa restantes para evitar que la carne se retuerza El inserto de la asadera está al revés y la grasa no drena Siempre col...

Page 107: ...e una espátula de hoja para quitar la suciedad Consulte Limpieza de la placa de cocción de vitrocerámica de la sección MANTENIMIENTO Áreas con cambios de color en la placa de cocción Depósitos minerales de agua y comida Quítelos con una crema para limpiar placas de cocción de vitrocerámica Use baterías de cocina que tengan el fondo limpio y seco El horno no se limpia automáticamente La temperatura...

Page 108: ...an en la pantalla Se ha seleccionado el ciclo de Autolimpieza pero la puerta no está cerrada Cierre la puerta del horno Aparece Bloqueada en la pantalla cuando quiere cocinar La puerta del horno está bloqueada porque la temperatura interior no bajó a menos de la temperatura de bloqueo Gire la perilla de modo del horno hasta la posición Off Deje que el horno se enfríe Sale olor a quemado o a aceite...

Page 109: ... la función Use el teléfono del hogar para una mejor comunicación lo que permitirá un mejor servicio La mala calidad de la llamada puede producir una mala transmisión de los datos de su teléfono a la máquina lo que podría hacer que Smart Diagnosis funcione mal Smart Diagnosis a través del centro de atención 1 Llame al centro de atención de LG al LG EE UU 1 800 243 0000 LG Canadá 1 888 542 2623 2 C...

Page 110: ...buscar o instalar o reparar el producto instrucciones al cliente sobre la operación del producto reparación o reemplazo de fusibles o corrección de cableado o fontanería o corrección de reparaciones instalaciones no autorizadas Incapacidad del producto para funcionar debido a fallas e interrupciones del suministro eléctrico o a un servicio eléctrico inadecuado Daños causados por tuberías de agua r...

Page 111: ... en estas circunstancias excluidas estará a cargo del consumidor CÓMO OBTENER SERVICIO EN GARANTÍA E INFORMACIÓN ADICIONAL Si usted no tiene acceso a Internet y necesita asistencia para el uso de su producto o desea programar un servicio técnico puede comunicarse con LG Electronics al número que aparece a continuación Para obtener asistencia o servicio técnico llame al 1 800 243 0000 Si necesita m...

Page 112: ...LG Customer Information Center Register your product Online www lg com 1 800 243 0000 USA 1 888 542 2623 CANADA Printed in Korea ...

Reviews: