background image

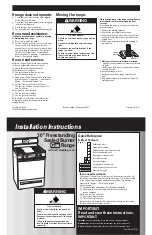
DESCRIPTION: OWNER’S MANUAL

Part No. MFL33029619

MODEL DESCRIPTION:

Product: Gas Single Oven

Project: ENTERPRISE 2

Division: Range

Customer: LGEUS

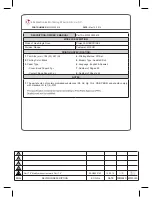
PRINTING SPECIFICATION:

1.

 Trim Size (mm): 182 (W), 257 (H)

4.

Printing Method: Off Set

2.

Printing Color: Black

5.

Bindery Type: Saddle Stitch

3.

 Paper Type:

6.

Language: English & Spanish

- Cover: Bond Paper 63 gr.

7.

 Number of Pages: 92

- Content: Bond Paper 63 gr.

8.

Number of Sheets: 46

NOTES:

1.

The part should not contain prohibited substances (Pb, Cd, Hg, Cr+6, PBB, PBDE) and should comply 

with standard LG (61)-A-9101.

PART NUMBER

: MFL33029619

DATE: 

May 16, 2014.

LG

 Electronics Monterrey, México S.A. de C.V.

REV.No

REVISION DESCRIPTION

ECO. No.

DATE

PREPARED APPROVED

EAHE500162

14.05.15

이택원

백윤건
김남형

Part ”19” Modify with correct word Part “19”

Summary of Contents for LRG3081SB

Page 1: ... Paper Type 6 Language English Spanish Cover Bond Paper 63 gr 7 Number of Pages 92 Content Bond Paper 63 gr 8 Number of Sheets 46 NOTES 1 The part should not contain prohibited substances Pb Cd Hg Cr 6 PBB PBDE and should comply with standard LG 61 A 9101 PART NUMBER MFL33029619 DATE May 16 2014 LG Electronics Monterrey México S A de C V REV No REVISION DESCRIPTION ECO No DATE PREPARED APPROVED EA...

Page 2: ...RANGE Please read this manual carefully before operating your range and retain it for future reference ENGLISH ESPAÑOL www lg com MFL33029619 REV 01 140516 LRG3085ST LRG3083ST LRG3081ST LRG3081SB LRG3081SW ESPAÑOL ENGLISH ...

Page 3: ...ks 22 Preheating and Pan Placement 23 Power Outage 23 Oven Moisture 23 Aluminum Foil 23 Bake 24 Broil 25 Broiling Chart 26 Cook Time Timed Cook 27 Start Time Delayed Timed Cook 27 Convection Bake 29 Convection Roast 30 Warm 30 Proof 31 CARE AND CLEANING 31 Gas Surface Burner 31 Removing and Replacing the Gas Surface Burner 31 Burner Heads Caps 32 After Cleaning the Burner Heads Caps 32 Burner Grat...

Page 4: ...oking Superboil can quickly bring a pot of water to a boil MULTIPLE GAS BURNER SIZES Choose a burner to fit the size of your cookware Cooking multiple items at once is possible by using different burners at the same time SELF CLEAN EasyClean Good for easy cleaning PRODUCT FEATURES ENGLISH ...

Page 5: ...ge The range could be tipped and injury might result from spilled hot liquid food or the range itself If the range is pulled away from the wall for cleaning service or any other reason ensure that the Anti Tip Device is properly reengaged when the range is pushed back against the wall y To reduce the risk of the range tipping over the range must be secured by properly installing the anti tip devic...

Page 6: ...ttempt to repair or replace any part of your range unless it is specifically mentioned in this manual All other services should be referred to a qualified technician y Make sure that all packaging materials are removed from the range before operating it to prevent fire or smoke damage should the packaging material ignite y Make sure your range is properly adjusted by a qualified service technician...

Page 7: ... carbon monoxide poisoning Aluminum foil linings may also trap heat causing a fire hazard y NEVER obstruct the flow of air for combustion and ventilation by blocking the oven vent or air intakes Doing so restricts air to the burner and may result in carbon monoxide poisoning y Large scratches or impacts to glass doors can lead to broken or shattered glass y Stepping leaning or sitting on the doors...

Page 8: ...e any items on the cooktop The hot air from the vent may ignite flammable items and will increase pressure in closed containers which may cause them to burst y Carefully watch foods being fried at a high flame setting y Always heat fat slowly and watch as it heats y If frying combinations of oils and fats stir them together before heating y Use a deep fat thermometer if possible to prevent overhea...

Page 9: ... 145 F y Fish seafood 145 F SELF CLEANING OVEN Make sure to wipe off excess spillage before operating the self clean function CAUTION y DO NOT leave food cooking utensils racks etc in the oven during the self clean cycle y DO NOT use oven cleaners No commercial oven cleaner or oven liner protective coating of any kind should be used in or around any part of the oven Residue from oven cleaners will...

Page 10: ...e stop engages then remove food items This may also help you avoid burns from touching hot surfaces of the door or oven walls y When placing or removing a griddle always wear oven mitts y When using cooking or roasting bags in the oven follow the manufacturer s directions y Use only glass cookware that is recommended for use in gas ovens y Always remove the broiler pan from the range after you fin...

Page 11: ...mponents or parts y The images in this guide may be different from the actual components and accessories and are subject to change by the manufacturer without prior notice for product improvement purposes Gas Oven Range LRG3085 Anti tip 1ea Screws 6ea Anchors 6ea Template 1ea Anti tip kit Cooktop nozzles 5ea Oven nozzles 2ea Installation guide 1ea LP nozzle conversion kit Griddle 1ea Only for LRG3...

Page 12: ...s Automatic oven light switch For model LRG3085 Storage drawer Grates Small burner Self clean latch Standard rack Standard rack Extra large burner Control panel Oven vent Medium burner Large burner Door gasket Model and serial number plate Oval burner Knobs Automatic oven light switch For model LRG3083 Anti tip bracket For model LRG3081 Storage drawer Grates Self clean latch Standard rack Standard...

Page 13: ...re touching them and also before placing any other object like a pot holder or a cleaning cloth etc on them Touching grates before they cool down may cause burns CAUTION WHAT TO DO IF YOU SMELL GAS 1 Open windows 2 DO NOT try to light any appliance 3 DO NOT touch any electrical switch 4 DO NOT use any phone in your building 5 Immediately call your gas supplier from a neighbor s phone Follow the ga...

Page 14: ...r foods that require low heat for a long cooking time Extra large burner The extra large burner is the maximum output burner Like the other four burners it can be turned down from HI to LO for a wide range of cooking applications This burner is also designed to quickly bring large amounts of liquid to a boil It can be used with cookware 10 inches or larger in diameter Oval burner The oval burner c...

Page 15: ...g methods Glass There are two types of glass cookware those for oven use only and those for top of range cooking Heatproof Glass Ceramic Can be used for either surface or oven cooking It conducts heat very slowly and cools very slowly Check cookware manufacturer s directions to be sure it can be used on gas ranges CAUTION Use extreme caution when lighting burners with a match Doing so can cause bu...

Page 16: ...iddle plate are completely cooled CAUTION The griddle plate on the cooktop may become very hot when using the cooktop oven or broiler systems Always use oven mitts when placing or removing the griddle plate How to Place the Griddle The griddle can only be used with the center burner The griddle must be properly placed on the center grate as shown in the below illustration NOTE y DO NOT remove the ...

Page 17: ... vent when cooking to allow for proper air flow Do not touch vent openings or nearby surfaces during the use of any cooking operation f DO NOT place plastic or flammable items on the cooktop they may melt or ignite if left too close to the vent f DO NOT place closed containers on the cooktop The pressure in closed containers may increase which may cause them to burst f 0HWDO LWHPV ZLOO EHFRPH YHU ...

Page 18: ...elf Clean Press the button to select the self cleaning function 8 Proof Press the button to proof bread 9 Clock Press the button to set the time of day Start Time Press this button and then press the number buttons to set a delayed start time The oven will start at the time you set q Cook Time Press this button and then press the number buttons to set the amount of time you want your food to cook ...

Page 19: ...set the time of day 4 Timer On Off Press to select the timer feature 5 START Oven Lock Must be pressed to start any cooking or cleaning function Press and hold the button for 3 seconds to activate deactivate the Oven Lockout function 6 Broil Press the button to select the broil function 7 Oven Light Press the button to turn the oven light on or off 8 Enters or changes time oven temperature Sets HI...

Page 20: ...83 1 Press and hold the Warm button for 3 seconds Then press the Warm button once and Adj will display 2 Using the number button enter the temperature amount you wish to decrease For example to decrease the oven temperature 15 degrees press 1 and 5 3 Press the Warm button again and the decreased temperature will appear in the display 4 Press the START button to set the decreased temperature For mo...

Page 21: ...ed The oven light may also be manually turned ON or OFF by pressing the Oven Light button How to Adjust the Beeper Volume For model LRG3085 LRG3083 The beeper volume feature allows you to adjust the beeper to a more acceptable volume There are four possible volume levels loud normal low and mute 1 Press and hold the Warm button for 3 seconds Then press the Warm button 4 times and BEEP will display...

Page 22: ...mum setting for the feature FEATURE MIN TEMP TIME MAX TEMP TIME DEFAULT Clock 12 Hr 1 00 Hr Min 12 59 Hr Min 24 Hr 0 00 Hr Min 23 59 Hr Min Cook Time 1 00 Min 11 59 Hr Min Timer LRG3085 LRG3083 0 01 Min 11 59 Hr Min Timer LRG3081 0 10 Min 11 59 Hr Min Conv Bake 300 F 150 C 550 F 285 C 350 F 175 C Conv Roast 300 F 150 C 550 F 285 C 350 F 175 C Broil Lo Hi Bake 170 F 80 C 550 F 285 C 350 F 175 C Pro...

Page 23: ...traight out until it stops 3 Lift up the front of the rack 4 Pull out the rack CAUTION f Replace oven racks before turning the oven on to prevent burns f DO NOT cover the racks with aluminum foil or any other material or place anything on the bottom of the oven Doing so will result in poor baking and may damage the oven bottom f Only arrange oven racks when the oven is cool Removing and Replacing ...

Page 24: ...ayed and rises in 5 degree increments Once the oven reaches the desired temperature a tone will sound and the oven light will blink on and off Oven Moisture As your oven heats up the temperature increase of the air in the oven may cause water droplets to form on the door glass These droplets are harmless and will evaporate as the oven continues to heat up Aluminum Foil NEVER cover the oven bottom ...

Page 25: ...the oven to cool during the meal for easiest cleaning Use LO Broil to cook foods such as poultry or thick cuts of meat thoroughly without over browning them NOTE If the oven door remains open for more than 15 seconds during broil the burner will shut off The broil burner will automatically come back on once the door is closed CAUTION y DO NOT use the broiler pan without the grid y DO NOT cover the...

Page 26: ...at Arrange in single layer Slash fat Slash fat Brush each side with melted butter Broil skin side down Cut through back of shell Spread open Brush with melted butter before broiling and after half of broiling time Handle and turn very carefully Brush with lemon butter before and during cooking if desired Preheat broiler to increase browning Increase time 5 to 10 minutes per side for 11 2 thick or ...

Page 27: ...erature that you set or the baking time countdown The oven will continue to cook for the set amount of time and then turn off automatically When the cooking time has elapsed END and the time of day will show in the display When WARM is set the warming function is activated after cooking for the set time For model LRG3085 LRG3083 To change the cook time while operating the oven example to change th...

Page 28: ... the START button If your oven clock is set as a 12 hour clock you can delay the cook time for 12 hours If your oven clock is set as a 24 hour clock you can delay the cook time for 24 hours Convection Bake Convection baking allows for even cooking and excellent results when using multiple racks at the same time It could also shorten cooking time Benefits of CONVECTION BAKE 1 Evenly baked results u...

Page 29: ...kened or matte finished pans will bake faster than shiny pans s Glass or ceramic pans cook more slowly When baking cookies use a flat cookie sheet instead of a pan with low sides to get the best results For recipes like oven baked chicken use a pan with low sides Hot air cannot circulate well around food in a pan with high sides NOTE y Cookies and biscuits should be baked on pans with no sides or ...

Page 30: ... fan icon 4 When cooking has finished or to cancel press the CLEAR OFF button NOTE When cooking using a convection cycle the oven temperature is automatically reduced by 25 F The display will show the changed temperature This feature is called AUTO CONVERSION Your range comes with this feature ENABLED To DISABLE the auto conversion feature see How to set convection auto conversion function in the ...

Page 31: ... WARM function NOTE The WARM function is intended to keep food warm Do not use it to cool food down NOTE If CLEAR OFF is pressed prior to the delay functions starting all settings will be canceled Proof For model LRG3085 LRG3083 Setting the PROOF function This feature maintains a warm oven for rising yeast leavened products before baking 1 Use rack B or C for proofing 2 Press the Proof button PrF ...

Page 32: ...r for 20 30 minutes For stubborn stains use a toothbrush or wire brush y The burners will not operate properly if the burner ports or electrodes are clogged or dirty Use a wire brush or pipe cleaner to unclog ports on the oval burner y Burner caps and heads should be cleaned routinely especially after bad spillovers y Burners will not light if the cap is removed CAUTION y DO NOT clean this applian...

Page 33: ...ot soapy water and rinse with clean water y The grates are dishwasher safe y After cleaning the grates let them dry completely and securely position them over the burners Cooktop Surface To avoid burns do not clean the cooktop surface until it has cooled Foods with high acid or sugar content could cause a dull spot if allowed to set Wash and rinse when the surface has cooled For other spills such ...

Page 34: ...activating the control panel during cleaning unplug the range Clean up splatters with a damp cloth using a glass cleaner Remove heavier soil with warm soapy water Do not use abrasives of any kind LRG3085 LRG3083 LRG3081 NOTE Do not block the vents and air openings of the range They provide the air inlet and outlet that are necessary for the range to operate properly with correct combustion NOTE To...

Page 35: ...ject f 6FUDWFKLQJ KLWWLQJ MDUULQJ RU VWUHVVLQJ WKH JODVV PD weaken its structure causing an increased risk of breakage at a later time Push hinge locks up to unlock Hinge arm Door frame Slot Hinge lock Removal Position About 5 Replacing the Oven Door 1 Firmly grasp both sides of the door at the top 2 With the door at the same angle as the removal position seat the indentation of the hinge arm into...

Page 36: ...each side of the drawer with the glide slots on the range 3 Push the drawer into the range until levers click approximately 2 inch 4 Pull the drawer open again to seat bearing glides into position 5 Replace the two screws WARNING Disconnect the electrical power to the range at the main fuse or circuit breaker panel Failure to do so can result in severe personal injury death or electrical shock Rem...

Page 37: ...bottom f Make sure that the oven light bulb cover is in place and the oven light is off SELF CLEAN The self clean cycle uses extremely hot temperatures to clean the oven cavity While running the Self Clean cycle you may notice smoking or an odor This is normal especially if the oven is heavily soiled During Self Clean the kitchen should be well ventilated to minimize the odors from cleaning Before...

Page 38: ...e f If oven racks were left in the oven and do not slide smoothly after a clean cycle wipe racks and rack supports with a small amount of vegetable oil to make them glide more easily f Fine lines may appear in the porcelain because it went through heating and cooling This is normal and will not affect performance Setting Self Clean with a Delayed Start For model LRG3085 LRG3083 1 Remove all racks ...

Page 39: ... SDG PD KHOS WR WDNH RII WKH EXUQW RQ VWDLQV EHWWHU WKDQ D VRIW VSRQJH RU WRZHO f HUWDLQ QRQ VFUDWFK VFUXEELQJ VSRQJHV VXFK DV WKRVH PDGH RI PHODPLQH IRDP DYDLODEOH DW RXU ORFDO VWRUHV FDQ DOVR KHOS improve cleaning f 7KH UDQJH VKRXOG EH OHYHO WR HQVXUH WKDW WKH HQWLUH VXUIDFH RI WKH ERWWRP RI WKH RYHQ FDYLW LV FRYHUHG E ZDWHU DW WKH beginning of the EasyClean cycle f RU EHVW UHVXOWV XVH GLVWLOOHG...

Page 40: ...nts while cleaning but it will be captured in a pan under the oven cavity and will not hurt the burner NOTE DO NOT USE ANY STEEL SCOURING PADS ABRASIVE PADS OR CLEANERS as these materials can permanently damage the oven surface 8 Once the oven cavity is cleaned wipe any excess water with a clean dry towel Replace racks and any other accessories 9 If some light soils remain repeat the above steps m...

Page 41: ...G y Make sure that the oven and bulb are cool y DISCONNECT the electrical power to the range at the main fuse or circuit breaker panel Failure to do so can result in severe personal injury death or electrical shock Oven Racks Remove the oven racks before operating the self clean cycle 1 Food spilled into the tracks could cause the racks to become stuck Clean with a mild abrasive cleaner 2 Rinse wi...

Page 42: ...n y Incorrect cookware or cookware of improper size being used y See the HOW TO USE section y Oven thermostat needs adjustment y See the TEMPERATURE SETTINGS section y Clock not set correctly y See the CLOCK and TIMER sections y Aluminum foil used improperly in the oven y See the CARE AND CLEANING section Food does not broil properly in the oven y Improper oven controls setting y Make sure you pre...

Page 43: ...ovens may need to self clean again or for a longer period of time CLOSE DOOR TO CONTINUE BROILING or DOOR OPENED appears in the display y The broil or self clean cycle has been selected but the door is not closed y Close the oven door DOOR LOCKED light is on when you want to cook y The oven door is locked because the temperature inside the oven has not dropped below the locking temperature y Press...

Page 44: ... normal The convection fan will shut off if the door is opened Convection fan not working convection models y Preheat temperature not reached y Fan will start automatically once the preheat temperature is reached y Operates opposite the heating cycle y This is normal Drawer does not slide smoothly or drags y The drawer is out of alignment y Fully extend the drawer and push it all the way in CARE A...

Page 45: ...AL DAMAGES OF ANY KIND INCLUDING LOST REVENUES OR PROFITS IN CONNECTION WITH THE PRODUCT SOME STATES DO NOT ALLOW LIMITATION ON HOW LONG AN IMPLIED WARRANTY LASTS OR THE EXCLUSION OF INCIDENTAL OR CONSEQUENTIAL DAMAGES SO THE ABOVE LIMITATIONS OR EXCLUSIONS MAY NOT APPLY TO YOU THIS LIMITED WARRANTY DOES NOT APPLY TO 1 Service calls to correct the installation of your appliance to instruct you how...

Page 46: ...PROPIETARIO ESTUFA DE GAS Lea detenidamente este manual antes de utilizar lo y guárdelo como referencia para el futuro ESPAÑOL www lg com LRG3085ST LRG3083ST LRG3081ST LRG3081SB LRG3081SW P No MFL33029619 ESPAÑOL ...

Page 47: ...el Horno 23 Papel de Aluminio 23 Hornear 24 Asar 25 Tabla para la Función de Asar 26 Tiempo de Cocción Cocción Temporizada 27 Hora de Inicio Cocción Temporizada Retardada 27 Horneado por Convección 29 Asado por Convección 30 Calentar 30 Fermentar 31 CUIDADO Y LIMPIEZA 31 Quemador a gas de la superficie 31 Cómo extraer y volver a colocar las quemadores a gas de la superficie 31 Cómo limpiar los cab...

Page 48: ...damente hacer hervir una olla de agua DIVERSOS TAMAÑOS DE QUEMADORES A GAS Elija la quemador que mejor se adapte al tamaño de su batería de cocina Es posible utilizar varias hornallas a la vez para cocinar distintas cosas al mismo tiempo SISTEMA DE AUTO LIMPIEZA SELF CLEAN DE LIMPIEZA FÁCIL EasyClean Excelente para la limpieza fácil del aparato CARACTERÍSTICAS DEL PRODUCTO ESPAÑOL ...

Page 49: ...l caerse líquidos o comidas calientes o la estufa en sí misma En caso de tener que separar la estufa de la pared por motivos de limpieza mantenimiento o por cualquier otra razón asegúrese de reajustar el dispositivo Anti Vuelco cuando la estufa vuelva a colocarse contra la pared y Para reducir el riesgo de que la estufa se vuelque hacia adelante ésta debe asegurarse instalando de manera apropiada ...

Page 50: ...O intente reparar o reemplazar ninguna pieza del aparato a menos que así lo indique específicamente este manual Todos los servicios a realizar en la estufa deben ser efectuados por un técnico autorizado y Asegúrese de que todos los materiales de empaque sean removidos de la estufa antes de ponerla en funcionamiento a fin de evitar que el material de empaque se incendie y provoque daños por humo o ...

Page 51: ...en papel de aluminio también pueden retener el calor ocasionando un peligro de incendio y NUNCA bloquee la ventilación del horno o las tomas de entrada de aire porque obstruiría de esta forma el flujo de combustión y la ventilación de aire Esto limitaría la circulación de aire a la hornalla y podría provocar la intoxicación por monóxido de carbono y Los fuertes rayones o impactos en las puertas de...

Page 52: ...ngún elemento sobre la estufa El aire caliente proveniente del conducto de ventilación puede encender los elementos inflamables y aumentar la presión en contenedores cerrados lo que puede provocar que éstos estallen y Vigile cuidadosamente la comida que se está friendo a fuego alto y Caliente grasas siempre a fuego lento y vigílelas mientras se calientan y Si va a freír combinaciones de aceites y ...

Page 53: ...45 F y Pescados y Mariscos 145 F AUTOLIMPIEZA DEL HORNO Asegúrese de quitar los derrames en exceso antes de iniciar la función de auto limpieza PRECAUCIÓN y NO deje comida utensilios de cocina estantes etcétera dentro del horno durante el ciclo de auto limpieza y NO utilice limpiadores de horno No debe utilizarse ningún limpiador comercial de horno ni revestimiento de protección de horno de ningún...

Page 54: ...era hasta que hagan tope Luego extraiga la comida Esto también puede ayudarle a evitar quemarse por tocar las superficies calientes de la puerta o las paredes del horno y Utilice siempre guantes de cocina cada vez que ponga o saque una bandeja rejilla del horno y Siga las instrucciones del fabricante al utilizar bolsas para asar o para cocinar en el horno y Utilice baterías de vidrio solamente cua...

Page 55: ...HQ 8 6 HQ FDVR GH TXH IDOWH DOJÇQ DFFHVRULR y Por su seguridad y para lograr una óptima durabilidad del producto utilice únicamente componentes autorizados y El fabricante no será responsable por el mal funcionamiento del producto o por accidentes causados por el uso de componentes o piezas no autorizadas compradas por separado y Las imágenes incluidas en esta guía pueden diferir de los componente...

Page 56: ... el modelo LRG3085 Para el modelo LRG3083 Para el modelo LRG3081 Cajón de almacenamiento Rejillas Quemador pequeño Seguro de autolimpieza Rejilla estándar Rejilla estándar Quemador extragrande Panel de control Ventilación del horno Quemador medio Quemador grande Junta Placa de número de modelo y serie Quemador oval Perillas Interruptor de luz automática del horno Soporte Anti vuelco Cajón de almac...

Page 57: ...da la quemadores por un largo período de tiempo sin que haya ninguna batería sobre la rejilla El acabado de la parrillas puede danárse si no hay ninguna batería que absorba el calor PRECAUCIÓN QUÉ HACER SI HUELE GAS 1 Abra las ventanas 2 NO intente encender ningún aparato 3 NO use ningún interruptor eléctrico 4 NO use ningún teléfono dentro de su edificio 5 Comuníquese de inmediato con su proveedo...

Page 58: ... hornalla más pequeña es utilizada para comidas delicadas como ser salsas o comidas que requieren poco calor por un tiempo prolongado de cocción Hornalla extra grande La hornalla extra grande es la hornalla de mayor potencia Al igual que las otras cuatro hornallas puede llevarse de nivel HI a LO para satisfacer el amplio rango de necesidades culinarias Esta hornalla también está diseñada para herv...

Page 59: ... un fósforo a la hornalla Luego presione la perilla de control 2 Gire la perilla de control a la posición de Lo Utensilios Ubicados sobre la Estufa Aluminio Se recomienda el uso de baterías de peso mediano porque se calientan de forma rápida y uniforme La mayoría de alimentos se doran de manera uniforme en una sartén de aluminio Utilice cacerolas con tapas de ajuste hermético cuando deba cocinar c...

Page 60: ...estufa y la propia parrilla se hayan enfriado por completo PRECAUCIÓN La plancha de la parrilla puede calentarse mucho al usar la estufa el horno o los sistemas de asado Use siempre guantes para horno al colocar o retirar la plancha de la parrilla Cómo Colocar la Plancha La parrilla sólo puede usarse en el quemador central La plancha debe ser colocada apropiada mente en la parrilla de la hornalla ...

Page 61: ...H ODV ROODV FDFHURODV TXH se encuentren en la cocina pueden sobrecalentarse si se dejan demasiado cerca del conducto de ventilación Apagón A medida que su horno se caliente el aumento de temperatura del aire producido dentro del horno puede generar que se produzcan gotas de agua en la puerta de vidrio del horno Estas gotas de agua no son peligrosas y se evaporarán a medida que el horno continúe co...

Page 62: ...roof Presione el botón para subir masas de pan 9 Clock Presione el botón para ajustar la hora Start Time Presione este botón y después los tecla numéricos para ajustar el tiempo de retardo para el inicio El horno se pondrá en funcionamiento en el momento que establezca q Cook Time Presione este botón y use los teclas numéricos para ajustar la cantidad de tiempo que desee emplear en la cocción de s...

Page 63: ...ght Presionelo para apagar y prender la luz del horno 8 Introduce o cambia el tiempo y la temperatura del horno Ajusta la parrilla en HI o LO alta o baja 9 EasyClean Limpia la suciedad liviana del horno automáticamente Consulte Limpieza Fácil en la sección Cuidado y limpieza q 5 2 Preionelo para cancelar todas las funciones del horno excepto el reloj y el temporizador Para el modelo LRG3081 NOTA S...

Page 64: ...Mantenga presionado el botón Warm durante 3 segundos A continuación presione una vez el botón Warm y se mostrará el indicador Adj 2 Usando los botones numéricos introduzca la cifra de temperatura que desea reducir Por ejemplo para reducir la temperatura del horno 15 presione 1 y 5 3 Presione de nuevo Warm y la reducción de temperatura aparecerá en pantalla 4 Presione el botón START para ajustar la...

Page 65: ...ucido una falla de HQHUJ D HO FWULFD 5HLQLFLH OD KRra Cómo Seleccionar Grados Fahrenheit o Celsius Para el modelo LRG3085 LRG3083 Las temperatura del horno puede configurarse en grados Fahrenheit o Celsius El ajuste predeterminado de fábrica es en grados Fahrenheit Éste puede ser cambiado por el usuario 1 Presione el botón Warm durante 3 segundos A continuación presione 5 veces el tecla Warm y se ...

Page 66: ...botón Timer On Off para iniciar la cuenta atrás La función de minutos y segundos permite ajustar un máximo de 59 minutos Para ajustar tiempos superiores a 59 minutos use la función de horas y minutos presione el botóno dos veces NOTA Si no presione Timer On Off la pantalla volverá a mostrar la hora 4 Cuando el temporizador llegue a 00 la pantalla mostrará el mensaje End El reloj emitirá 3 avisos c...

Page 67: ...a recta hasta que haga tope 3 Levante la parte delantera del estante 4 Tire del estante hacia afuera Volver a colocar los estantes 1 Usando guantes de cocina coloque el extremo del estante en el soporte 2 Incline el extremo delantero del estante hacia arriba 3 Empuje el estante hacia adentro 4 Controle que el estante esté colocado correctamente PRECAUCIÓN f Volver a colocar los estantes del horno ...

Page 68: ...r los mismos resultados para la receta que usando un producto con mayor contenido en grasa La receta podría no salir bien si las tortas pasteles repostería galletas o dulces se elaboran con margarinas de bajo contenido en grasa A menor contenido en grasa de una margarina o mantequilla más evidentes se hacen estas diferencias Los estándares federales exigen que los productos con OD HWLTXHWD PDUJDUL...

Page 69: ...o para enfriarse durante la comida y así facilitar su limpieza Use el ajuste LO Broil de potencia baja para cocinar por completo alimentos como aves o cortes gruesos de carne sin dorarlos en exceso NOTA Si la puerta permanece abierta durante más de 15 segundos cuando se está usando el grill el quemador se apagará El quemador del grill volverá a encenderse automáticamente cuando se cierre la puerta...

Page 70: ... 11 2 de grosor de 2 a 21 2 libras 1 2 libra ORQFKDV GHOJDGDV DSUR 2 1 2 de espesor 2 1 de espesor 1 libra aprox 2 1 de grosor aprox de 10 a 12 onzas 2 11 2 de grosor aprox 1 libra 1 entero de 2 a 21 2 libras corte longitudinal 4 pechugas con hueso 2 4 GH D RQ DV FDGD XQD de 1 4 a 1 2 de espesor 1 de grosor 1 2 de grosor F F F F D D D D D D E E E E B B C E C D a 7 12 13 10 12 15 25 10 13 6 10 10 1...

Page 71: ...Temporizada La función COCCIÓN TEMPORIZADA le permite configurar el horno para que cocine durante un período de tiempo específico Esta función puede utilizarse únicamente con los modos HORNEAR HORNEADO POR CONVECCIÓN ASADO POR CONVECCIÓN Para el modelo LRG3085 LRG3083 Configuración de la función COCCIÓN TEMPORIZADA por ejemplo HORNEAR a 300 F durante 30 minutos Asegúrese de que el reloj esté confi...

Page 72: ...oras usted podrá postergar el horario de cocción hasta 12 horas Si el reloj de su horno está configurado en 24 horas usted podrá postergar el horario de cocción hasta 24 horas Horneado por Convección El horneado por convección permite un cocinado parejo y por lo tanto excelentes resultados incluso usando múltiples bandejas al mismo tiempo Puede también disminuir el tiempo de cocinado operando el m...

Page 73: ...erolas con lados cortos para obtener mejores resultados Para recetas como pollo al horno use cacerolas para hornear con lados cortos El aire caliente no podrá circular libremente alrededor de la comida si se utiliza una cacerola con lados largos NOTA y Las galletas y bizcochos deben de ser horneados en hojas planas de metal o en cacerolas de metal de lados muy cortos La comida cocinada en cacerola...

Page 74: ...EAR OFF NOTA Cuando cocine con un ciclo de convección la temperatura del horno será automáticamente reducida en 25 F posteriormente la pantalla mostrara la temperatura cambiada Esta característica GH IXQFLRQDPLHQWR HV OODPDGD 872 219 56 á1 6X HVWXID viene con esta característica de funcionamiento habilitada Para deshabilitar la característica de auto conversión vea Cómo activar la función de auto ...

Page 75: ...ada 1 Seleccione la función para cocinar 2 Ingrese la temperatura del horno usando los botones numéricos 3 Presione el botón Cook Time e ingrese el tiempo de cocción usando los teclas numéricos 4 Presione el botón Warm 5 Presione el botón START 6 Al finalizar la cocción presione el botón CLEAR OFF para FDQFHODU OD IXQFLÂQ 17 5 NOTA Si presiona CLEAR OFF antes de que se inicien las funciones de ret...

Page 76: ... dientes f DV KRUQDOODV QR IXQFLRQDU Q DGHFXDGDPHQWH VL ORV SXHUWRV R HOHFWURGRV GH ODV KRUQDOODV HVW Q WDSDGRV R VXFLRV f DV WDSDV FDEH DOHV GH ODV KRUQDOODV GHEHQ OLPSLDUVH FRQ IUHFXHQFLD HVSHFLDOPHQWH OXHJR GH SURGXFLUVH GHUUDPHV f DV KRUQDOODV QR HQFHQGHU Q VL QR WLHQHQ OD WDSD SXHVWD PRECAUCIÓN y NO limpie este artefacto con blanqueadores y Para prevenir quemaduras espere hasta que la cocina ...

Page 77: ...limentos con alto contenido de ácido o los alimentos con alto contenido de azúcar pueden manchar la superficie si se dejan reposar en ésta Lave y enjuague los alimentos derramados apenas la superficie se haya enfriado Para otros derrames tales como salpicaduras de grasa y o aceite etc lave con agua y jabón cuando la superficie se haya enfriado Luego enjuague y lustre con un trapo seco Cómo Limpiar...

Page 78: ...ese de que la perilla esté en la posición OFF APAGADO centrada hacia arriba y deslice la perilla directamente sobre el vástago NOTA No obstruya los conductos y orificios de ventilación del aparato Éstos permiten la entrada y salida de aire necesarias para que el aparato funcione apropiadamente con la combustión correcta NOTA Para prevenir rayaduras no utilice limpiadores abrasivos en ninguno de es...

Page 79: ...HV R FXDOTXLHU RWUR objeto f RV UD RQHV JROSHV FKRTXHV EUXVFRV R HO WHQVDGR GHO vidrio podrían debilitar su estructura causando mayor riesgo de rotura en el futuro Sacar la Puerta del Horno 1 Abra completamente la puerta Tire de los seguros de la bisagra hacia el marco de la puerta en la posición de desbloqueo Una herramienta tal como un pequeño desarmador de punta plana puede ser necesario 2 Sost...

Page 80: ...ver a Colocar el Cajón 1 Tire de los rieles portantes hacia el frente del bastidor del riel 2 Alinee la palanca deslizante a cada lado del cajón con las ranuras de los rieles de la cocina 3 Empuje el cajón hacia la cocina hasta que las palancas hagan clic aproximadamente 2 pulgadas Tire del cajón para abrirlo nuevamente para asentar los rieles portantes en su posición 4 Si usted no oye que las pal...

Page 81: ... inferior del horno f Asegúrese de que la cubierta de la bombilla del horno esté colocada y que la luz del horno esté apagada Auto Limpieza El ciclo de auto limpieza utiliza temperaturas extremadamente elevadas para limpiar la cavidad del horno Al ejecutar el ciclo de Auto Limpieza puede percibir humo u olores Esto es normal especialmente si el horno está muy sucio Durante la Auto Limpieza la coci...

Page 82: ...no Al ejecutar el ciclo de Auto Limpieza puede percibir humo u olores Esto es normal especialmente si el horno está muy sucio f A medida que el horno se caliente podría oír sonidos de partes metálicas que se expanden y contraen Esto es normal y no dañará el horno f NO force la puerta del horno para abrirla cuando DSDUH FD HQ OD SDQWDOOD 225 2 D SXHUWD GHO horno continuará bloqueada hasta que haya ...

Page 83: ...D GHO KRUQR f 8VDQGR HO ODGR VSHUR GH XQD HVSRQMD DEUDVLYD SXHGH D XGDU D TXLWDU ODV PDQFKDV GH TXHPDGR PHMRU TXH XQD HVSRQMD VXDYH R una toalla f OJXQDV HVSRQMDV FRPR ODV GH HVSXPD GH PHODPLQD GLVSRQLEOHV HQ VX WLHQGD ORFDO WDPEL Q SXHGH D XGDU D PHMRUDU OD limpieza f D HVWXID GHEH HVWDU QLYHODGD SDUD DVHJXUDU TXH WRGD OD VXSHUILFLH GH OD SDUWH LQIHULRU GHO KRUQR VHD FXELHUWD SRU DJXD DO principi...

Page 84: ...no y no dañara el quemador NOTA NO USE ESTROPAJOS DE ACERO ESTROPAJOS ABRASIVOS O LIMPIADORES ya que estos materiales pueden dañar permanentemente la superficie del horno 8 Una vez que la cavidad del horno se encuentre limpia remueva el exceso de agua con una toalla limpia y seca Vuelva a colocar las bandejas y accesorios del horno 9 Si algunas manchas ligeras permanecen repita los pasos anteriore...

Page 85: ...jas del reloj 6 Enchufe el artefacto o reconecte la energía eléctrica Parrillas del Horno Quite las bandejas del horno antes de iniciar el ciclo de auto limpieza 1 La comida derramada sobre las bandejas puede causar que las mismas se atoren Limpie con un limpiador abrasivo suave 2 Enjuague con agua limpia y seque NOTA Si las bandejas se limpian usando el ciclo de auto limpieza no recomendado el co...

Page 86: ... Está usando utensilios de estufa inadecuados o de un tamaño incorrecto y DPLQH OD VHFFLÂQ á02 86 5 y El termostato del horno precisa ajuste y DPLQH OD VHFFLÂQ 21 85 21 6 7 03 5 785 y El reloj no está en hora y DPLQH OD VHFFLÂQ 5 2 7 0325 25 y Papel de aluminio usado incorrectamente en el horno y DPLQH OD VHFFLÂQ 8 26 03 Los alimentos no se asan al fuego directo como es se debido y Los controles d...

Page 87: ... prolongar el período de duración del mismo Aparece en pantalla el indicador CLOSE 225 72 217 18 52 1 R 225 23 1 y Ha sido escogido el ciclo asado o de autolimpieza pero la puerta no está cerrada y Cierre la puerta del horno O LQGLFDGRU 225 2 HVW DFWLYR cuando desea cocinar y La puerta del horno está bloqueada debido a que la temperatura interior del horno no ha bajado por debajo de la temperatura...

Page 88: ...n se apagará si se abre la puerta El ventilador de convección no funciona modelos de convección y No se ha alcanzado la temperatura de precalentamiento y El ventilador se pondrá en funcionamiento automáticamente al alcanzar la tempera tura de precalentamiento y Funciona de forma contraria al ciclo de calentamiento y Esto se considera normal La gaveta no desliza suavemente o se atasca y La gaveta e...

Page 89: ...DENTAL DE NINGÚN TIPO INCLUYENDO LA PÉRDIDA DE INGRESOS O GANANCIAS EN RELACIÓN CON ESTE PRODUCTO ALGUNOS ESTADOS NO PERMITEN LIMITACIONES EN LA DURACIÓN DE UNA GARANTÍA IMPLÍCITA O LA EXCLUSIÓN DE DAÑOS INCIDENTALES O RESULTANTES POR LO TANTO DICHAS LIMITACIONES O EXCLUSIONES PUEDEN NO APLICARSE EN SU CASO ESTA GARANTÍA LIMITADA NO SE APLICA A 1 Llamadas al servicio técnico para corregir la insta...

Page 90: ...ha en o 365 tro MEMO ...

Page 91: ...MEMO ...

Page 92: ...MEMO ...

Page 93: ...www lg com Register your product Online LG Customer Information Center 1 800 243 0000 1 888 542 2623 USA Consumer User CANADA Printed in Mexico ...

Reviews: