background image

Summary of Contents for DC9121GAU

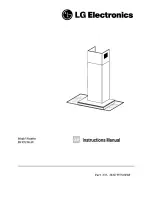
Page 1: ...Part NO 383EW5N001B Model Number DC9121GAU Instructions Manual GB ...

Page 2: ...ommendations contained in this Instruction Manual your appliance will give you constant high performance and will remain efficient for many years to come RECOMMENDATIONS AND SUGGESTIONS 13 CHARACTERISTICS 14 INSTALLATION 16 USE 19 MAINTENANCE 20 ...

Page 3: ...ed if the burner is equipped with an enclosed non removable cover and all country specific regulations are observed This restriction dose not apply to gas cookers and gas hobs Regulations concerning the discharge of air have to be fulfilled USE The extractor hood has been designed exclusively for household use to eliminate kitchen smells Never use the hood for purposes other than for which it has ...

Page 4: ...4 GB CHARACTERISTICS Dimensions ...

Page 5: ... 1 Upper Section 2 2 1 Lower Section 9 1 Reducer Flange ø 150 120 mm 10 1 Damper 14 1 2 Air Outlet Connection Extension 15 1 Air Outlet Connection Ref Q ty Installation Components 7 2 1 2 Upper Chimney Section Fixing Brackets 7 3 1 Air Outlet Connection Support 11 6 Wall Plugs 12a 6 Screws 4 2 x 44 4 12c 6 Screws 2 9 x 9 5 1 Documentation ...

Page 6: ...eight of the upper chimney section supplied aligning the centre notch with the vertical line Mark the wall at the centres of the holes in the bracket Mark a reference point as indicated at 116 mm from the vertical reference line and 306 mm above the horizontal reference line Repeat this operation on the other side Drill ø 8 mm holes at all the centre points marked Insert the wall plugs 11 in the h...

Page 7: ...o install a ø 120 mm air exhaust connection insert the reducer flange 9 on the dumper 10 Fix the pipe in position using sufficient pipe clamps not supplied Remove any activated charcoal filters RECIRCULATION VERSION AIR OUTLET Put connection 15 into the connection support 7 3 Insert the connection extension pieces laterally 14 1 in connection 15 Make sure that the outlet of the extension pieces 14...

Page 8: ... Slightly widen the two sides of the upper flue and hook them behind the brackets 7 2 1 making sure that they are well seated Secure the sides to the brackets using the 4 screws 12c 2 9 x 9 5 supplied Make sure that the outlet of the extensions pieces is aligned with the chimney outlets Lower exhaust flue Slightly widen the two sides of the flue and hook them between the upper flue and the wall ma...

Page 9: ... is pushed for about 2 seconds After 10 minutes of functioning it turns off automatically This function can be interrupted by means of pressing any of the buttons S1 Led Fixed on Indicates that the Metal grease filters saturation alarm has been triggered and the filters need to be washed The alarm is triggered after 100 working hours Reset check the Maintenance paragraph Flashing indicates that th...

Page 10: ...ilters are washable and must be cleaned when the LED S1 lights up or at least every 2 months of operation or more frequently for particularly heavy usage Remove the filters one at a time by pushing them towards the back of the group and pulling down at the same time Wash the filters taking care not to bend them Allow them to dry before refitting When refitting the filters make sure that the handle...

Page 11: ... It must be replaced when S1 flashes or at least every 4 months The alarm signal will only light up when the extractor motor is switched on Alarm signal reset Switch off the lights and extractor motor Press button T3 for at least 3 seconds until the leds start to flash Replacing the Filter Remove the metal grease filters Remove the saturated activated carbon filter by releasing the fixing hooks Fi...

Page 12: ...436002509_01 050112 ...

Reviews: