background image

관 리 자

MODEL

BRAND

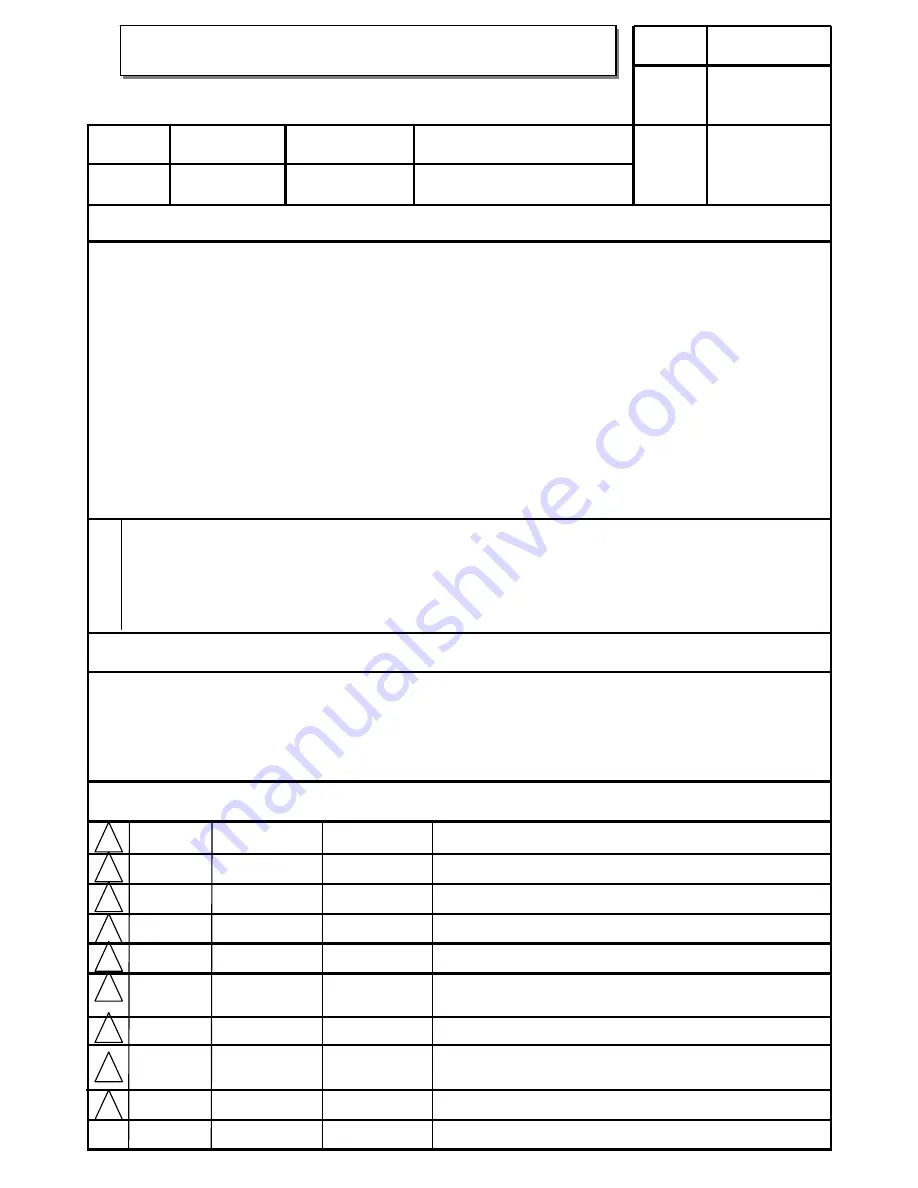
Printing Specification

1. Trim Size (Format) : 

210mm x 280 mm

2. Printing Colors

Cover : 

3 COLORS (PMS207C, PMS431C, BLACK)

Inside : 

2 COLOR (BLACK, PMS207U)

3. Stock (Paper)

Cover : 

Coated paper , Snow White 150 g/

Inside : 

Uncoated paper , 

백상지

80 g/

4. Printing Method : 

Off set

5. Bindery  : 

Perfect bind

6. Language : 

English (1)

7. Number of pages : 

104

/

뒷표지는 단면 유광 코팅

Model Description

Part No.

2

.

User’s Guide Specification

1.

User’s Guide Specification

Changes 

4.

REV.

NO.

MM/DD/YY

SIGNATURE

CHANGE NO.

CHANGE    CONTENTS

1

2

3

4

5

7

6

SUFFIX

32/37/42LC2D-AA
42/50/60PC1D-AA

LG

38289U0569A
(0701-REV06)

KIM JONG OK

07.01.09

(1) Origin Notification

* LGEDI : Printed in Indonesia       * LGEWA : Printed in U.K.
* LGESP : Printed in Brazil             * LGEMX : Printed in Mexico
* LGENT : Printed in China             * LGEIL : Printed in India
* LGEMA : Printed in Poland

8

9

Special Instructions

3

.

Product Name

AUSTRALIA

Song js

07.01.09

32/37/42LC2D, 42/50/60PC1D

Apr./03/06

Park sun young

S6-38977

Applied the LP Test results

“This part contains Eco-hazardous substances (Pb, Cd, Hg, Cr6+, PBB, PBDE, etc.) within LG standard level, 

Details should be followed Eco-SCM management standard[LG(56)-A-2524].
Especially, Part should be followed and controlled the following specification.
(1)Eco-hazardous substances test report should be submitted 

when  Part certification test and First Mass Production.

(2) Especially, Don’t use or contain lead(Pb) and cadmium(Cd) in ink.

N
O
T
E
S

Apr./18/06

Park sun young

S6-40549

1.Changed the RS-232C (#24.ISM method)

2.Added the model name (32LC2D-AA,42/50PC3D-AA)

June/14/06

Park sun young

S6-46928

Applied the LP Test results of 32LC2D-AA

June/27/06

Park sun young

S6-48217

1.Added the EPA logo 

2.Applied the LP Test results of 42PC1DG-AA

Aug./23/06

Park sun young

S6-53267

1.Changed the EPG OSD   2.Added model 60PC1D-AA 

Jan./09/01

Song ju seok

S7-68122

Added Polishing cloth in the 60PC1D-AA model

Summary of Contents for 32LC2D Series

Page 1: ...ns 3 Product Name AUSTRALIA Song js 07 01 09 32 37 42LC2D 42 50 60PC1D Apr 03 06 Park sun young S6 38977 Applied the LP Test results This part contains Eco hazardous substances Pb Cd Hg Cr6 PBB PBDE etc within LG standard level Details should be followed Eco SCM management standard LG 56 A 2524 Especially Part should be followed and controlled the following specification 1 Eco hazardous substances...

Page 2: ...Pagination sheet Pagination sheet P NO 38289U0569A Total pages 104 pages Blank page 1 Front cover LG EN LG 100 Blank page P NO Rear cover ...

Page 3: ...01 REV06 DVB is a registered trademark of the DVB Project Please read Information Manual included together before reading this manual and operating your set LCD TV PLASMA TV 32LC2D 37LC2D 42LC2D LCD TV MODELS 42PC1DG 42PC1DV 50PC1D 60PC1D ...

Page 4: ...9U0569A 2 Rev05 1 9 96 2 04 PM Page 101 ...

Page 5: ...ble D sym bol are trademarks of Dolby Laboratories HDMITM the HDMI logo and High Definition Multimedia Interface is a trademark or registered trademark of HDMI Licensing LG s own special digital image generator It consists of full digital image processor APM mode 6 different main picture quality factors R TruSurround XT R TruSurround XT 9U0569A 1 Rev05 1 9 96 2 48 PM Page 1 ...

Page 6: ...al A V Source Setup 27 DVD Setup 28 29 PC Setup 30 33 BASIC OPERATION Turning the TV On 34 Initializing setup 34 Volume Adjustment 35 Programme Selection 35 SPECIAL FUNCTIONS PIP POP Twin Picture Watching PIP POP Twin Picture 36 Selecting an Input Signal Source for PIP Twin Picture 37 TV Program Selection for PIP 37 Moving the PIP sub picture 37 Swapping PIP Twin Picture 38 Adjusting Main and Sub ...

Page 7: ...ntrol SSM User Option 64 65 Auto Volume Leveller AVL 66 Balance 67 TV Speakers On Off Setup 68 Stereo Reception In Analogue mode only 69 Sound output selection 69 Time Setting Auto Clock Setup 70 Manual Clock Setup 71 On Off Time Setup 72 Sleep Timer 73 Auto Sleep 74 Optional Features Main Picture Source Selection 75 Subtitle In Digital mode only 76 Child Lock 77 Picture Format 78 XD Demo 79 ISM I...

Page 8: ...defects will normally occur in the Plasma TV manufacturing process Several tiny minute colored dots visible on the screen should be acceptable This also occurs in other Plasma TV manufacturers products The tiny dots appearing does not mean that this Plasma TV is defective Thus a few cell defects are not sufficient cause for the Plasma TV to be exchanged or returned Our pro duction technology minim...

Page 9: ...Bracket Bolts Cable Management Refer to p 15 Twister Holder Arrange the wires with the twister holder 2 TV Brackets 2 Wall Brackets 2 Wall brackets 2 Bolts Refer to p 13 42PC1D only 4 bolts for stand assembly See below for detail information Refer to p 12 32LC2D only 2 eye bolts F Fo or r 6 60 0P PC C1 1D D 2 TV Brackets 2 Wall Brackets 4 Ring Spacer 4 bolts Polishing Cloth Polish the screen with ...

Page 10: ...WER Button INPUT Button MENU Button OK Button VOLUME F F G G Buttons PROGRAMME E E D D Buttons Power Standby Indicator Illuminates red in stand by mode When the TV is turned on the indicator blinks white and then illumi nates white before the picture is displayed This is a representation of the front panel of model 42PC1D 50PC1D 60PC1D 9U0569A 1 Rev05 1 9 96 2 50 PM Page 6 ...

Page 11: ...e on the 42PC1D 50PC1D 60PC1D Here shown may be somewhat different from your TV AV OUT Connect a second TV or monitor AV Audio Video IN 1 Connect audio video output from an externa device to these jacks S VIDEO Connect S Video out from an S VIDEO device COMPONENT IN Connect a component video audio device to these jacks HDMI DVI IN Connect a HDMI signal Or DVI VIDEO signal to the this port with a H...

Page 12: ...F G G Button PROGRAMME D D E E Button This is a front panel of 32LC2D 37LC2D 42LC2D Here shown may be somewhat different from your TV Remote Control Sensor Power Standby Indicator Illuminates red in standby mode When the TV is turned on the indicator blinks white and then illuminates white before the picture is displayed 9U0569A 1 Rev05 1 9 96 2 51 PM Page 8 ...

Page 13: ... signal from a video device 1 2 4 5 6 7 8 3 9 10 AV OUT Connect a second TV or monitor AV Audio Video IN 1 Connect audio video output from an externa device to these jacks S VIDEO Connect S Video out from an S VIDEO device COMPONENT IN Connect a component video audio device to these jacks HDMI DVI IN Connect a HDMI signal Or DVI VIDEO signal to the this port with a HDMI to DVI cable DIGITAL AUDIO ...

Page 14: ...red picture format G G p p 7 78 8 Adjusts brightness on screen G G p p 5 55 5 It returns to the default settings brightness by changing mode source Control some video cassette recorders or DVD players RECORD button is not available for DVD player Accepts your selection or displays the current mode Adjusts menu settings Selects menu item Increase decrease the sound level Returns to the previously v...

Page 15: ... BUTTONS Selects the remote operating mode TV VCR DVD Select other operating modes for the remote to operate external devices Switches to PIP POP and Twin picture modes or off mode G G p p 3 36 6 3 39 9 Shows a programme schedule G G p p 4 42 2 Shows the present screen information They are used as per the indications or functions displayed on the TV screen in the case of Text displays Teletext EPG...

Page 16: ...e electric shock If grounding methods are not possible have a qualified electrician install a separate circuit breaker Do not try to ground the unit by connecting it to telephone wires lightening rods or gas pipes Carefully place the product screen side down on a cushioned surface that will protect product and screen from damage Place the hook of the stand in the back of the product as shown Insta...

Page 17: ...ks A of the stand bot tom outward NOTE A B D C Place the set with the screen facing down on a cushion or soft cloth as shown Before unfolding the stand please make sure two locks A on the bottom of the stand push outward Pull the stand out as shown After unfolding the stand please insert and tighten the screws provided as parts of the product in the holes B on the bottom of the stand 1 2 When conn...

Page 18: ... MANAGEMENT with both hands and pull it backward as shown Connect the cables as necessary To connect an additional equipment see the Connections Setup section 1 2 Install the CABLE MANAGEMENT as shown 3 Connect the cables as necessary After connecting the cables neatly arrange the cables to the Cable Holder To connect an additional equipment see the Connections Setup section 1 9U0569A 1 Rev05 1 9 ...

Page 19: ...stall the CABLE MANAGEMENT as shown How to remove the CABLE MANAGEMENT G G Hold the CABLE MANAGEMENT with both hands and pull it upward AC IN CABLE MANAGEMENT AC IN AC IN G G Do not hold the CABLE MANAGEMENT when moving the product If the product is dropped you may be injured or the product may be broken NOTE CABLE HOLDER 37LC2D 42LC2D 32LC2D AC IN CABLE HOLDER 1 2 Bundle the cables using the supp...

Page 20: ...eye bolts or TV brackets and bolts to tighten the product to the wall as shown in the picture If your product has the bolts in the eye bolts position before inserting the eye bolts loosen the bolts Insert the eye bolts and tighten them securely in the upper holes Secure the wall brackets with the bolts not provided as parts of the product must purchase separately on the wall Match the height of th...

Page 21: ...7 42LC2D 42 50 60PC1D G G Ensure adequate ventilation by following the clearance recommendations CAUTION 4 inches 4 inches 4 inches 4 inches This function explains the features available on the 42LC2D The TV can be conveniently swivelled on its stand 30 to the left or right to provide the optimum viewing angle SWIVEL STAND 30 30 9U0569A 1 Rev05 1 9 96 2 52 PM Page 17 ...

Page 22: ...AUDIO OUT OPTICAL RS 232C IN CONTROL SERVICE VIDEO AUDIO S VIDEO AV IN 1 AV OUT ANTENNA OUT ANTENNA IN AC IN G G The TV will let you know when the analogue cable and digital programme scans are complete NOTE ANTENNA IN To improve the picture quality in a poor signal area please purchase a signal amplifier and install properly If the antenna needs to be split for two TV s install a 2 Way Signal Spl...

Page 23: ...ITCH ANT IN ANT OUT VIDEO AUDIO MONO VIDEO AUDIO COMPONENT IN S VIDEO AV IN 1 RGB PC DTV RGB IN AUDIO RGB DVI REMOTE CONTROLIN ANTENNA ANTENNA OUT OUT ANTENNA ANTENNA IN IN Connect the wall antenna socket or outdoor antenna to the TV s A AN NT TE EN NN NA A I IN N socket Connect a second TV s antenna socket to the TV s A AN NT TE EN NN NA A O OU UT T socket 1 How to connect 2 1 1 2 Wall Jack Anten...

Page 24: ... of the digital set top box to the C CO OM MP PO ON NE EN NT T I IN N V VI ID DE EO O 1 1 jacks on the set Match the jack colors Y green PB blue and PR red Connect the audio output of the digital set top box to the C CO OM MP PO ON NE EN NT T I IN N A AU UD DI IO O 1 1 jacks on the set 2 1 2 How to use Turn on the digital set top box Refer to the owner s manu al for the digital set top box Select ...

Page 25: ...o use Turn on the digital set top box Refer to the owner s manual for the digital set top box Select H HD DM MI I D DV VI I input source with using the I IN NP PU UT T button on the remote control 2 1 2 1 ANTENNA OUT ANTENNA IN L R RGB OUTPUT REMOTE CONTROLIN RGB IN RGB IN AUDIO RGB DVI AUDIO RGB DVI RGB PC RGB PC DTV DTV 1 2 ANTENNA OUT ANTENNA IN VIDEO AUDIO COMPONENT IN DIGITAL AUDIO OUT OPTICA...

Page 26: ... the DVI output of the digital set top box to the H HD DM MI I D DV VI I I IN N jack on the set Connect the audio output of the digital set top box to the A AU UD DI IO O R RG GB B D DV VI I jack on the set 1 How to connect Turn on the digital set top box Refer to the owner s manual for the digital set top box Select H HD DM MI I D DV VI I input source with using the I IN NP PU UT T button on the ...

Page 27: ...ct bearing this phenomenon L R S VIDEO VIDEO OUTPUT SWITCH ANT IN ANT OUT RGB PC DTV RGB IN AUDIO RGB DVI REMOTE CONTROLIN ANTENNA OUT ANTENNA ANTENNA IN IN Wall Jack Antenna 1 2 Connect the RF antenna out socket of the VCR to the A An nt te en nn na a socket on the set Connect the antenna cable to the RF antenna in socket of the VCR 1 How to connect Set VCR output switch to 3 or 4 and then tune T...

Page 28: ...Audio Left white and Audio Right red 1 How to connect 2 How to use Insert a video tape into the VCR and press PLAY on the VCR Refer to the VCR owner s manual Select A AV V1 1 input source with using the I IN NP PU UT T button on the remote control If connected to A AV V I IN N2 2 select A AV V2 2 input source When connecting with an S Video cable Connect the S VIDEO output of the VCR to the S S V ...

Page 29: ...UT AV OUT Connect the second TV or monitor to the TV s A AV V O OU UT T jacks See the Operating Manual of the second TV or monitor for further details regarding that device s input settings 1 How to connect G G Digital Component1 2 RGB PC RGB DTV HDMI DVI input sources cannot be used for AV out G G We recommend to use the AV OUT jacks for VCR recording NOTE 2 1 1 9U0569A 1 Rev05 1 9 96 2 52 PM Pag...

Page 30: ... the optical output port Looking at the laser beam may damage your vision CAUTION Connect one end of an optical cable to the TV Digital Audio Optical Output port Connect the other end of the optical cable to the digi tal audio optical input on the audio equipment Set the TV Speaker option Off in the AUDIO menu G G p p 6 68 8 See the external audio equipment instruction manual for operation 1 How t...

Page 31: ...ween TV and external equipment Match the jack colors Video yellow Audio Left white and Audio Right red 1 How to connect 2 How to use Select A AV V1 1 input source with using the I IN NP PU UT T button on the remote control If connected to A AV V I IN N2 2 input select A AV V2 2 input source Operate the corresponding external equipment 1 1 9U0569A 1 Rev05 1 9 96 2 52 PM Page 27 ...

Page 32: ...B PR of the DVD to the C CO OM MP PO ON NE EN NT T I IN N V VI ID DE EO O1 1 jacks on the set Match the jack colors Y green PB blue and PR red Connect the audio outputs of the DVD to the C CO OM MP PO O N NE EN NT T I IN N A AU UD DI IO O1 1 jacks on the set 1 How to connect 2 How to use Turn on the DVD player insert a DVD Select C Co om mp po on ne en nt t 1 1 input source with using the I IN NP ...

Page 33: ...on the remote control Refer to the DVD player s manual for operating instructions When connecting HDMI cable Connect the HDMI output of the DVD to the H HD DM MI I D DV VI I I IN N jack on the set No separated audio connection is necessary 1 How to connect 2 How to use Select H HD DM MI I D DV VI I input source with using the I IN NP PU UT T but ton on the remote control Refer to the DVD player s ...

Page 34: ...t on the VIDEO menu until the picture is clear If the refresh rate of the PC graphic card can not be changed change the PC graphic card or consult the manufacturer of the PC graphic card NOTE ANTENNA OUT ENNA ANTENNA N IN REMOTE CONTROLIN RGB OUTPUT AUDIO RGB PC RGB PC DTV DTV AUDIO RGB DVI AUDIO RGB DVI RGB IN RGB IN Connect the RGB output of the PC to the R RG GB B P PC C D DT TV V jack on the s...

Page 35: ...AUDIO OUT OPTICAL RS 232C IN CONTROL SERVICE ANTENNA OUT ANTENNA ANTENNA IN IN HDMI DVI IN HDMI DVI IN REMOTE CONTROLIN DVI PC OUTPUT AUDIO RGB IN RGB IN AUDIO RGB DVI AUDIO RGB DVI RGB PC DTV Connect the DVI output of the PC to the H HD DM MI I D DV VI I I IN N jack on the set Connect the PC audio output to the A AU UD DI IO O R RG GB B D DV VI I jack on the set 1 How to connect Turn on the PC an...

Page 36: ...cable connec tion No signal is displayed in the HDMI DVI Input In this case that Video Resolution is not supported If Invalid Format is displayed refer to the Source Device manual or contact your service center G G Avoid keeping a fixed image on the screen for a long period of time The fixed image may become permanently imprinted on the screen G G The synchronization input form for Horizontal and ...

Page 37: ...e Press the O OK K button Initializing Reset to original factory values Press the O OK K button and then use D D or E E button to select R Re es se et t Press the G G button and then use F F or G G button to select Y Ye es s Press the O OK K button To initialize the adjusted values This function allows you to return to the good picture repro duction programmed at the factory and cannot be change 1...

Page 38: ...cation disconnect the power plug from the wall power outlet Ensure the power cord is connected correctly When connected to power the TV switches to standby mode In standby mode press the I IN NP PU UT T P PR R button on the TV or press the P PO OW WE ER R I IN NP PU UT T D D A A I IN NP PU UT T P PR R N Nu um mb be er r 0 0 9 9 button on the remote control Select the viewing source by using the I ...

Page 39: ...them in memory on the programme list 1 VOLUME ADJUSTMENT Press the V VO OL L button to adjust the volume If you want to switch the sound off press the M MU UT TE E button You can cancel the Mute function by pressing the M MU UT TE E I I I II I or V VO OL L button OK TV D A INPUT INPUT DVD ARC EXIT VOL Q VIEW MUTE PR SLEEP LIST I II MENU TEXT PIP GUIDE VCR POWER INFO Adjust the volume to suit your ...

Page 40: ...time One source will be large and the other source will show a smaller inset image Twin Picture mode splits the screen into two images allowing two picture sources to be shown on the TV screen at the same time Each source is given half the screen PIP Off PR 2 PR 3 PR 4 SPECIAL FUNCTIONS PIP POP Twin Picture NOTE G G When the sub picture size is 1 2 of the main picture the picture quality may deter...

Page 41: ...re Sources Digital Analogue AV1 and AV2 Analogue Digital AV1 and AV2 AV1 2 Component1 2 RGB HDMI DVI Digital Analogue AV1 2 TV Program selection for PIP Moving the PIP sub picture Press the P PI IP P button Select the D Di ig gi it ta al l or A An na al lo og gu ue e option on the Sub input menu or with the P PI IP P I IN NP PU UT T button Use the P PI IP P P PR R P PI IP P P PR R button to select...

Page 42: ...nalogue or AV modes the swapping is available Main Picture Sub Picture Adjusting Main and Sub Picture Sizes for Twin Picture Use the D D E E F F G G button to change main and sub picture sizes in Twin Picture mode If the screen is adjusted to the maximal size the large screen is filled with entire program vertically as shown Main Picture Sub Picture SWAP SWAP PIP Twin Picture 1 1 9U0569A 2 Rev05 1...

Page 43: ...3 PIP screen pictures in P PO OP P mode When watching Analogue TV on Main picture Digital TV on Sub pictures are in programme scanning However when watching Digital TV on Main picture only Analogue TV on Sub picture is in programme scanning Press the E EX XI IT T button to cancel POP mode Use POP to search the programs of all the memorized programmes one by one on the 3 PIP screen display while th...

Page 44: ...progress from block to block Use the yellow button to proceed to the next group with automatic overflow to the next block With the G GR RE EE EN N button you can proceed to the next existing page with automatic overflow to the next group Alternatively the P PR R button can be used The red button permits to return to previous selection Alternatively the P PR R button can be used A A D Di ir re ec c...

Page 45: ...led infor mation such as solutions of riddles or puzzles Press this button again to remove the informa tion from the display S SI IZ ZE E Selects double height text Press this button to enlarge the top half of the page Press this button again to enlarge the bottom half of the page Press this button again to return to the normal display T TI IM ME E a When viewing a TV programme press this button t...

Page 46: ...i Digital i Information Remote Control Buttons Function RED Shows the TV or Radio programmes GREEN The detail information on or off This system has an Electronic Programme Guide EPG to help your naviga tion through all the possible viewing options The EPG supplies information such as programme listings start and end times for all available services In addition detailed information about the pro gr...

Page 47: ...tion explains the features available on the 32 37 42LC2D SETUP PICTURE SPECIAL LOCK TIME Auto programme Manual programme Programme edit Signal strength Booster Set ID PSM Color Temperature XD Advanced Video preset Auto clock Manual clock Off time On time Sleep timer Auto sleep Main input Sub input Subtitle Child lock ARC XD demo ISM method Low power AUDIO SSM AVL Balance TV Speaker Lock system Set...

Page 48: ... can be stored in this set by programme num bers 0 to 99 Once you have preset the stations you will be able to use the P PR R or NUMBER buttons to scan the stations you programmed Stations can be tuned using automatic or manual modes A password is required to gain access to Auto programme or Manual programme menu if the Lock system is turned on If you forgot your password press 7 7 7 7 on the remo...

Page 49: ...ct YES with using F F G G button Then press the O OK K button Otherwise select N NO O When the programme is stored the Programme edit menu appears on the screen See the Programme Edit section to edit the stored programme Press E EX XI IT T button to return to normal TV viewing Auto programme Manual programme G Programme edit Signal strength Booster Set ID Auto programme Manual programme Programme ...

Page 50: ...le e as required Press the G G button to select C Ch ha an nn ne el l Press the D D or E E button to select the desired channel number Press the G G button to select S Se ea ar rc ch h Press the D D or E E button to commence searching If a station is found the search will stop If this station is the one required press the F F or G G button to select Storage Select the desired pro gramme number wit...

Page 51: ...he D D or E E button to fine tune for the best picture and sound Press the O OK K button to store Press E EX XI IT T button to return to normal TV viewing 2 3 4 5 6 1 Auto programme Manual programme G Programme edit Signal strength Booster Set ID Auto programme Manual programme Programme edit Signal strength Booster Set ID Auto programme Manual programme Programme edit Signal strength Booster Set ...

Page 52: ...d blank Press the F F or G G button to select the position and make your choice of the second character and so on Press the O OK K button to store Press E EX XI IT T button to return to normal TV viewing 2 3 4 5 6 7 1 Auto programme Manual programme G Programme edit Signal strength Booster Set ID Auto programme Manual programme Programme edit Signal strength Booster Set ID Auto programme Manual pr...

Page 53: ...e The selected pro gramme is deleted all the following programmes are shifted up one position C Co op py yi in ng g a a p pr ro og gr ra am mm me e I In n A An na al lo og gu ue e M Mo od de e O On nl ly y a Select a programme to be copied with the D D E E F F G G button b Press the G GR RE EE EN N button c Move the programme to the desired programme number with the D D E E F F G G button d Press ...

Page 54: ...unable to select it using the P PR R but ton during normal TV viewing If you want to select the skipped programme directly enter the pro gramme number with the NUMBER buttons or select it in the programme edit or table menu S Se el le ec ct ti in ng g F Fa av vo ou ur ri it te e P Pr ro og gr ra am mm me e a Select your favourite programme number with D D E E F F G G button and then press the F FA...

Page 55: ...mme table menu The programme table appears on the screen Select a programme with the D D E E F F G G button The set switches to the chosen programme number 1 2 1 2 OK TV D A INPUT INPUT DVD ARC EXIT VOL SIZE INDEX TIME REVEAL PIP PR PIP INPUT SWAP PIP PR Q VIEW MUTE PR SLEEP LIST I II MENU TEXT PIP GUIDE VCR POWER 1 2 3 4 5 6 7 8 9 0 FAV INFO APM NOTE G G You may find some blue programmes They hav...

Page 56: ...l being received 2 3 1 Reveals how strong your DTV signal is and whether you need to adjust your antenna The higher the signal strength the less likely you are to experience picture degradation Digital TV Signals May not be available in all areas nor broadcast all programmes Auto programme Manual programme Programme edit Signal strength Booster Set ID Auto programme Manual programme Programme edit...

Page 57: ...X XI IT T button to return to normal TV viewing 2 4 3 1 If the reception is poor at the fringed area of TV signal select B Bo oo os st te er r to O On n When the picture condition is good do not select B Bo oo os st te er r to O On n Auto programme Manual programme Programme edit Signal strength Booster Set ID Auto programme Manual programme Programme edit Signal strength Booster G Set ID Off On O...

Page 58: ... E E button to select the P PI IC CT TU UR RE E menu Press the G G button and then use D D or E E button to select P PS SM M Press the G G button and then use D D or E E button to select D Dy yn na am mi ic c S St ta an nd da ar rd d M Mi il ld d U Us se er r1 1 or U Us se er r2 2 Press E EX XI IT T button to return to normal TV viewing 2 4 3 1 PSM G Colour temperature XD Advanced Video preset Dyn...

Page 59: ... 5 6 7 8 9 0 FAV APM TV D A INPUT INPUT DVD ARC TEXT PIP GUIDE VCR POWER INFO NOTE G G While operating the 4 split any button except P PO OW WE ER R A AP PM M O OK K E EX XI IT T D D E E F F G G V VO OL LU UM ME E D D E E M MU UT TE E button on the remote control are not usable G G APM screen will automatically disappear after approx 40 seconds unless a button is pressed 2 1 BRIGHTNESS ADJUSTMENT ...

Page 60: ...on to make appropriate adjustments Press E EX XI IT T button to return to normal TV viewing You can adjust picture Contrast Brightness Colour Sharpness and Tint options to the levels you prefer In NTSC AV Component 60Hz RGB DTV 60Hz HDMI DVI DTV 60Hz RGB PC HDMI DVI PC mode Tint is available The adjustment for PICTURE menu Contrast Brightness Colour Sharpness and Tint affect both the main and sub ...

Page 61: ...colour and XD noise PSM Colour temperature XD G Advanced Video preset Manual XD contrast On XD colour On XD noise On PSM Colour temperature XD Advanced Video preset 2 3 4 1 S Se el le ec ct ti in ng g t th he e M Ma an nu ua al l 1 Press the G G button and then use F F or G G but ton to select X XD D c co on nt tr ra as st t X XD D c co ol lo ou ur r or X XD D n no oi is se e X XD D c co on nt tr ...

Page 62: ...E menu Press the G G button and then use D D or E E button to select C Co ol lo ou ur r t te em mp pe er ra at tu ur re e Press the G G button and then use D D or E E button to select either W Wa ar rm m M Me ed di iu um m C Co oo ol l or U Us se er r Press E EX XI IT T button to return to normal TV viewing PSM Colour temperature G XD Advanced Video preset Warm Medium Cool User PSM Colour temperat...

Page 63: ...ress the G G button and then use D D or E E button to select R Re ed d G Gr re ee en n or B Bl lu ue e Press the G G button and then use F F or G G button to make appropriate adjustments The adjustment range of R Re ed d G Gr re ee en n or B Bl lu ue e is 20 20 Press E EX XI IT T button to return to normal TV viewing PSM Colour temperature XD Advanced Video preset PSM Colour temperature XD Advance...

Page 64: ...G G button and then use D D or E E button to select O On n or O Of ff f Press E EX XI IT T button to return to normal TV viewing Set up the TV for the best picture appearance for viewing movies This feature operates only in AV1 AV2 and Component480i mode PSM Colour temperature XD Advanced G Video preset Cinema Off Black level Auto PSM Colour temperature XD Advanced Video preset 2 3 4 5 1 ADVANCED ...

Page 65: ...zing the black level of the screen and set it to High or Low automatically L Lo ow w The reflection of the screen gets darker H Hi ig gh h The reflection of the screen gets brighter Press E EX XI IT T button to return to normal TV viewing Adjusting the contrast and the brightness of the screen using the black level of the screen This feature operates only in AV1 AV2 or HDMI DVI mode PSM Colour tem...

Page 66: ...e es se et t Press the G G button to reset the picture menu options to original values Use to quickly reset all the Picture menu options to their original factory preset values PSM Colour temperature XD Advanced Video preset G Selection G or presets the video configuration PSM Colour temperature XD Advanced Video preset 2 3 1 OK TV D A INPUT INPUT DVD ARC EXIT SLEEP LIST I II MENU TEXT PIP GUIDE V...

Page 67: ...NU U button and then use D D or E E button to select the A AU UD DI IO O menu Press the G G button and then use D D or E E button to select S SS SM M Press the G G button and then use D D or E E button to select S St ta an nd da ar rd d M Mu us si ic c M Mo ov vi ie e S Sp po or rt ts s or U Us se er r Press E EX XI IT T button to return to normal TV viewing SSM G AVL Balance TV Speaker Standard M...

Page 68: ... select U Us se er r Press the G G button and then use D D or E E button to select the desired sound option T Tr re eb bl le e B Ba as ss s or F Fr ro on nt t s su ur rr ro ou un nd d 2 3 4 1 SSM AVL Balance TV Speaker SSM AVL Balance TV Speaker Standard Music Movie Sports User G User Treble 50 G Bass 50 Front surround Off Press to confirm MENU MANUAL SOUND CONTROL SSM User option TV MENU OK TV D ...

Page 69: ...Retrieval System T Tr ru uS Su ur rr ro ou un nd d X XT T Press E EX XI IT T button to return to normal TV viewing Front surround SRS TruSurround XT S SR RS S T Tr ru uS Su ur rr ro ou un nd d X XT T Takes advantage of any multi channel format without needing to add extra speakers or equipment Dialog clari ty bass enrichment and the addition of stereo audio enhancement produces an immersive sound ...

Page 70: ...A AU UD DI IO O menu Press the G G button and then use D D or E E button to select A AV VL L Press the G G button and then use D D or E E button to select O Of ff f or O On n Press E EX XI IT T button to return to normal TV viewing SSM AVL G Balance TV Speaker 2 3 4 1 SSM AVL Balance TV Speaker OK TV D A INPUT INPUT DVD ARC EXIT SLEEP LIST I II MENU TEXT PIP GUIDE VCR POWER INFO 2 3 1 Off On 9U056...

Page 71: ...he G G button and then use F F or G G button to make appropriate adjustments Press E EX XI IT T button to return to normal TV viewing Adjust the left right sound of speaker to suit your taste and room situations L R Balance 0 2 3 4 1 SSM AVL Balance TV Speaker SSM AVL Balance 0 TV Speaker L R OK TV D A INPUT INPUT DVD ARC EXIT SLEEP LIST I II MENU TEXT PIP GUIDE VCR POWER INFO 2 3 1 9U0569A 2 Rev0...

Page 72: ...en use D D or E E button to select O Of ff f or O On n Press E EX XI IT T button to return to normal TV viewing Turn the TV speakers off if using external audio equipment In AV1 2 Component1 2 RGB PC DTV and HDMI DVI mode the audio signal can be outputted even though there is no video signal SSM AVL Balance TV Speaker G Off On 2 3 4 1 SSM AVL Balance TV Speaker OK TV D A INPUT INPUT DVD ARC EXIT S...

Page 73: ...dspeakers Repeatedly press the I I I II I button to select the sound output L R Audio signal from audio L input is sent to the left loud speaker and audio signal from audio R input is sent to the right loud speaker L L Audio signal from audio L input is sent to left and right loud speakers R R Audio signal from audio R input is sent to left and right loud speakers NOTE G G In digital mode repeated...

Page 74: ... G button and then use D D or E E button to select O On n Press the G G button and then use D D or E E button to select your viewing area time zone N NS SW W A AC CT T N NT T T TA AS S W WA A S SA A Q QL LD D or V VI IC C Press E EX XI IT T button to return to normal TV viewing Auto clock G Manual clock Off time On time Sleep timer Auto sleep Off On Auto clock Manual clock Off time On time Sleep t...

Page 75: ...r date or time option Once selected use the D D or E E button to set the year date and time options Press E EX XI IT T button to return to normal TV viewing If the current time setting is wrong reset the clock manu ally Auto clock Manual clock G Off time On time Sleep timer Auto sleep Year Date Time Auto clock Manual clock Off time On time Sleep timer Auto sleep 2 3 4 1 OK TV D A INPUT INPUT DVD A...

Page 76: ... programme at turn on Press the G G button and then use D D or E E to set the sound level at turn on Press E EX XI IT T button to return to normal TV viewing Auto clock Manual clock Off time On Time G Sleep timer Auto sleep Off On Time 6 30 AM PR 0 Vol 17 Auto clock Manual clock Off time On time Sleep timer Auto sleep 2 3 4 5 6 7 1 The time function operates only if the current time has been set T...

Page 77: ...e To cancel the Sleep Timer press the S SL LE EE EP P button repeatedly to select O Of ff f When you swtch the set off the set release the preset sleep time You don t have to remember to switch the set off before you go to sleep The sleep timer automatically switches the set to standby after the preset time has elapsed You can also set up the Sleep timer in the TIME menu Auto clock Manual clock Of...

Page 78: ...e D D or E E button to select A Au ut to o s sl le ee ep p Press the G G button and then use D D or E E button to select O Of ff f or O On n Press E EX XI IT T button to return to normal TV viewing Auto clock Manual clock Off time On time Sleep timer Auto sleep G Off On Auto clock Manual clock Off time On time Sleep timer Auto sleep 2 3 4 1 OK TV D A INPUT INPUT DVD ARC EXIT SLEEP LIST I II MENU T...

Page 79: ...l Analogue AV1 2 Component 1 2 RGB PC or RGB DTV or HDMI DVI mode by pressing the INPUT button Press the D A INPUT button to select digital or analogue mode Main input Sub input Subtitle Child lock ARC XD demo ISM method Low power 2 3 4 1 Main input G Sub input Subtitle Child lock ARC XD demo ISM method Low power Digital Analogue AV1 AV2 Component1 Component2 RGB PC HDMI DVI Select sources for the...

Page 80: ... button and then use D D or E E button to select O Of ff f or O On n Press E EX XI IT T button to return to normal TV viewing Main input Sub input Subtitle Child lock ARC XD demo ISM method Low power 2 3 4 1 You can select Subtitle on or off with the TEXT button in DTV mode Main input Sub input Subtitle G Child lock ARC XD demo ISM method Low power Off On OK TV D A INPUT INPUT DVD ARC EXIT SLEEP L...

Page 81: ... can be used to prevent unautho rized viewing Main input Sub input Subtitle Child lock ARC XD demo ISM method Low power 2 3 4 1 Main input Sub input Subtitle Child lock G ARC XD demo ISM method Low power Off On NOTE G G With the lock on the display C Ch hi il ld d l lo oc ck k O On n appears on the screen if any button on the front panel is pressed while viewing the TV G G The display C Ch hi il l...

Page 82: ... Choose Cinema Zoom when you want to enlarge the picture in correct proportion Note When enlarging or reducing the picture the image may become distorted You can adjust the enlarge proportion of Cinema Zoom using D D or E E button The adjustment range is 1 16 NOTE OK TV D A INPUT INPUT DVD ARC EXIT SLEEP LIST I II MENU TEXT PIP GUIDE VCR POWER INFO Press the A AR RC C button repeatedly to select t...

Page 83: ...llows you to select your preferred picture mode after compairing the four different picture Dynamic Standard Mild and User1 or User2 settings Main input Sub input Subtitle Child lock ARC XD demo ISM method Low power 2 3 4 1 Main input Sub input Subtitle Child lock ARC XD demo G ISM method Low power Selection Gor leads you to the XD demo OK TV D A INPUT INPUT DVD ARC EXIT SLEEP LIST I II MENU TEXT ...

Page 84: ...ma display panel color every 30 minutes W Wh hi it te e w wa as sh h White Wash removes permanent images from the screen Press E EX XI IT T button to return to normal TV viewing A frozen still picture from a PC video game displayed on the screen for prolonged periods will result in a ghost image Use our unique method to minimize any fixed image on the screen NOTE G G An excessive permanent image m...

Page 85: ...w p po ow we er r Press the G G button and then use D D or E E button to select O Of ff f or O On n When you select O On n the screen darkens Press E EX XI IT T button to return to normal TV viewing Main input Sub input Subtitle Child lock ARC XD demo ISM method Low power Main input Sub input Subtitle Child lock ARC XD demo ISM method Low power G Off On 2 3 4 1 OK TV D A INPUT INPUT DVD ARC EXIT S...

Page 86: ...0 0 Enter Password 1 Enter Password After inputting the password use the D D or E E button to choose L Lo oc ck k s sy ys st te em m Press the G G button and then use the D D or E E button to select O On n or O Of ff f When you select O On n the Lock System is enable Press E EX XI IT T button to return to normal TV viewing Enables or disables the blocking scheme you set up previously Lock system G...

Page 87: ...r the same 4 digits on the C Co on nf fi ir rm m The new password is memorized Press E EX XI IT T button to return to normal TV viewing Change the password by inputting a new password twice Lock system Set password Block programme Parental guidance Aux block Lock system Set password G Block programme Parental guidance Aux block New Confirm 2 3 1 2 1 NOTE G G If you ever forget your password key in...

Page 88: ... G G button to select a channel and then use the O OK K button to block or unblock it Press E EX XI IT T button to return to TV viewing or press M ME EN NU U button to return to the previous menu Lock system Set password Block programme G Parental guidance Aux block Selection G or leads you to the block programme screen Lock system Set password Block programme Parental guidance Aux block 2 3 4 1 S...

Page 89: ... Block programme Parental guidance Aux block Lock system Set password Block programme Parental guidance G Aux block G PG M MA AV R Blocking Off 2 3 1 Enables you to select a source to block from the external source devices you have hooked up After inputting the password use the D D or E E button to choose A Au ux x b bl lo oc ck k Press the G G button and then use the F F or G G button to select a...

Page 90: ...xternally Note RS 232C connection cables are not supplied with the TV HDMI DVI IN DIGITAL AUDIO OUT OPTICAL RS 232C IN RS 232C IN CONTROL CONTROL SERVICE SERVICE Type of Connector D Sub 9 Pin Male No Pin Name 1 No connection 2 RXD Receive data 3 TXD Transmit data 4 DTR DTE side ready 5 GND 6 DSR DCE side ready 7 RTS Ready to send 8 CTS Clear to send 9 No Connection 1 5 6 9 9U0569A 2 Rev05 1 9 96 2...

Page 91: ...ta Mapping1 See page 89 Set ID Communication Parameters Baud rate 9600 bps UART Data length 8 bits Parity None Stop bit 1 bit Communication code ASCII code Use a crossed reverse cable RS 232C Configurations Auto programme Manual programme Programme edit Signal strength Booster Set ID G 1 Auto programme Manual programme Programme edit Signal strength Booster Set ID 2 1 3 4 PC TV RXD 2 3 TXD TXD 3 2...

Page 92: ... ACK acknowledgement based on this for mat when receiving abnormal data from non viable functions or communication errors Data1 Illegal Code Data2 Not supported function Data3 Wait more time 01 Power k a 0 1 02 Input Select k b 0 8 03 Aspect Ratio k c See p 89 04 Screen Mute k d 0 1 05 Volume Mute k e 0 1 06 Volume Control k f 0 64 07 Contrast k g 0 64 08 Brightness k h 0 64 09 Colour k i 0 64 10 ...

Page 93: ...Set ID OK NG Data x 0 05 5 V Vo ollu um me e M Mu ut te e C Co om mm ma an nd d2 2 e e To control volume mute on off You can also adjust mute using the MUTE button on remote control Transmission k e Set ID Data Cr Data 0 Volume mute off Volume on Data 1 Volume mute on Volume off Acknowledgement e Set ID OK NG Data x 0 06 6 V Vo ollu um me e C Co on nt tr ro oll C Co om mm ma an nd d2 2 f f To adju...

Page 94: ...P P P Po os si it ti io on n C Co om mm ma an nd d2 2 q q To select sub picture position for PIP Transmission k q Set ID Data Cr Data 0 Right down on screen Data 1 Right up on screen Data 2 Left up on screen Data 3 Left down on screen Acknowledgement q Set ID OK NG Data x 1 16 6 T Tr re eb bl le e C Co om mm ma an nd d2 2 r r To adjust treble You can also adjust treble in the Audio menu Transmissi...

Page 95: ...ment p Set ID OK NG Data x 2 25 5 L Lo ow w P Po ow we er r C Co om mm ma an nd d2 2 q q Only 42PC1D 50PC1D 60PC1D models To reduce the power consumption of the set You can also adjust Low power in Special menu Transmission j q Set ID Data Cr Data 0 low power off 1 low power on Acknowledgement q Set ID OK NG Data x 2 26 6 O Or rb bi it te er r T Ti im me e S Se et tt ti in ng g C Co om mm ma an nd...

Page 96: ...ic ct tu ur re e I In np pu ut t To select input source for main picture Transmission x b Set ID Data Cr Data 00 Digital Data 41 Component2 Data 10 Analogue Data 50 RGB DTV Data 20 AV1 Data 60 RGB PC Data 21 AV2 Data 90 HDMI DVI Data 40 Component1 Acknowledgement b Set ID OK NG Data x 3 31 1 P PI IP P I In np pu ut t S Se el le ec ct t C Co om mm ma an nd d x x y y To select the input source for s...

Page 97: ... D4 D5 D6 D7 D0 D1 D2 D3 D4 D5 D6 D7 Lead code Low custom code High custom code Data code Data code Repeat code Tf 4 5 ms 9 ms 2 25 ms 9 ms 0 55 ms 0 56 ms 1 12 ms 0 56 ms 2 24 ms Tf Tf Tf 108ms 455KHz Bit 0 Bit 1 1 How to Connect Connect your wired remote control to the Remote Control port on the TV 2 Remote Control IR Codes Output waveform Single pulse modulated with 37 917KHz signal at 455KHz T...

Page 98: ...rol Button 08 POWER Remote control Button Power On Off 79 ARC Remote control Button 0E SLEEP Remote control Button 10 19 Number Key 0 9 Remote control Button 1A Q VIEW Remote control Button 09 MUTE Remote control Button 02 VOL Remote control Button 03 VOL Remote control Button 00 PR Remote control Button 01 PR Remote control Button 1E FAV Remote control Button 40 D D Remote control Button 41 E E R...

Page 99: ...you don t press any button for 20 seconds the light on the mode button will be turned off In that case you have to repeat from step 2 Enter code numbers using the number button on the remote by referring the code table on the following pages When pressing the button the light blinks at a time If the device turned off the programming is successful Press the M ME EN NU U button to store the code Aft...

Page 100: ...NOLTA 013 020 MITSUBISHI 013 020 045 046 049 051 059 061 151 MTC 034 040 MULTITECH 024 034 NEC 012 023 039 043 048 NORDMENDE 043 OPTONICA 053 054 PANASONIC 066 070 074 083 133 140 145 PENTAX 013 020 031 033 063 PHILCO 031 034 067 PHILIPS 031 033 034 054 067 071 101 PILOT 101 PIONEER 013 021 048 PORTLAND 108 PULSAR 072 QUARTZ 01 1 014 QUASAR 033 066 075 145 RCA 013 020 033 034 040 041 062 063 107 1...

Page 101: ...EK016 PRUCER 059 PTS 01 1 048 071 072 073 074 PULSAR 100 RCA 047 REGAL 049 050 REGENCY 057 REMBRANT 025 SAMSUNG 102 107 030 068 SCIENTIFIC ATLANTA 003 01 1 041 042 043 045 046 SHERITECH 022 SIGNAL 030 SIGNATURE 052 SL MARX 030 SPRUCER 047 078 STARCOM 002 004 008 009 STARGATE 008 030 TADIRAN 030 TAEKWANG 1 10 TAIHAN 105 TANDY 017 TEXSCAN 029 TOCOM 039 040 056 TOSHIBA 100 UNIKA 007 014 024 UNITED CA...

Page 102: ...ast on station tuned with Auto off activated Check whether the product is turned on Try another channel The problem may be with the broadcast Is the power cord inserted into wall power outlet Check your antenna direction and or location Test the wall power outlet plug another product s power cord into the outlet where the product s power cord was plugged in This is normal the image is muted during...

Page 103: ...t from one of the speakers T Th he er re e i is s a a p pr ro ob bl le em m i in n P PC C m mo od de e O On nl ly y P PC C m mo od de e a ap pp pl li ie ed d Adjust resolution horizontal frequency or vertical frequency Check the input source Work the Auto configure or adjust clock phase or H V position Option Check the signal cable Reinstall the PC video card The signal is out of range Screen colo...

Page 104: ...evision System Program Coverage External Antenna Impedance Environment condition Including stand Excluding stand including stand excluding stand Operating Temperature Operating Humidity Storage Temperature Storage Humidity 32LC2D 32LC2D AA 37LC2D 37LC2D AA 42LC2D 42LC2D AA MODELS 31 9 x 24 8x 9 3 inches 81 1 0 x 630 0 x 235 0mm 32 0 x 22 4 x 4 9 inches 81 1 0 x 566 8 x 123 5 mm 48 2 pounds 21 9kg ...

Page 105: ...9U0569A 2 Rev05 1 9 96 2 04 PM Page 101 ...

Reviews: