background image

COLOR TV

SERVICE MANUAL

CAUTION

BEFORE SERVICING THE CHASSIS,
READ THE SAFETY PRECAUTIONS IN THIS MANUAL.

CHASSIS : AC-02SD

MODEL : 30FZ1DC 

MODEL   :

32FZ1DC-UB

CANADA : http//biz.lgservice.com
USA        : http//www.lgservice.com

: http//lgservice.com/techsup.html

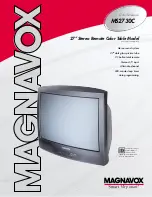
Summary of Contents for 30FZ1DC

Page 1: ...NUAL CAUTION BEFORE SERVICING THE CHASSIS READ THE SAFETY PRECAUTIONS IN THIS MANUAL CHASSIS AC 02SD MODEL 30FZ1DC MODEL 32FZ1DC UB CANADA http biz lgservice com USA http www lgservice com http lgservice com techsup html ...

Page 2: ...etc to be sure the set is safe to operate without damage of electrical shock Leakage Current Cold Check Antenna Cold Check With the instrument AC plug removed from AC source connect an electrical jumper across the two AC plug prongs Place the AC switch in the on positioin connect one lead of ohm meter to the AC plug prongs tied together and touch other ohm meter lead in turn to each exposed metall...

Page 3: ...IPTION OF CONTROLS 4 SPECIFICATIONS 9 ADJUSTMENT INSTRUCTION 10 BLOCK DIAGRAM 23 EXPLODED VIEW 26 EXPLODED VIEW PARTS LIST 27 REPLACEMENT PARTS LIST 28 SCHEMATIC DIAGRAM PRINTED CIRCUIT BOARDS TABLE OF CONTENTS ...

Page 4: ...te control sensor TV VIDEO menu vol left right Volume G G button increases the sound level and volume F F button decreases the sound level ch Channel up down 1 2 3 4 These buttons work just as they do on your remote control 5 6 7 TV VIDEO MENU VOL CH 1 2 4 3 6 7 5 Here shown may be somewhat different from your TV DESCRIPTION OF CONTROLS ...

Page 5: ...e or antenna signals to the televi sion either directly or through your cable box Video 1 2 and 3 Inputs Connects the video sig nals from various types of equipment Y PB PR DVD Component Video and HD Component Video Some top of the line DVD players use what is called component video for extremely accurate pic ture reproduction Refer to your DVD manual for further information Connecting external eq...

Page 6: ...ft Right Audio Used for stereo sound from various types of equipment Video in Connects the video signals from any piece of equipment S Video A connection available on some very high end equipment that provides better picture quality than video input When you select Front video or Front S Video the Front Audio inputs are automatically select ed as well Do not connect to both Video and S Video at th...

Page 7: ... Off 3D EchoSound System and SRS TruSurround XT MUTE Switches the Mute or the EZ mute Mute The sound is off EZ mute Turns the sound off and displays the caption THUMBSTICK UP DOWN LEFT RIGHT Allows you to navigate the on screen menus and to adjust the system settings and preferences by moving to an option withF G and selecting the highlighted option with VIDEO1 Selects the Video1 input source MODE...

Page 8: ...ghlighted options RECORD PAUSE REW FFWD PLAY STOP Control the functions on your VCR VOLUME UP DOWN Increases decreases the sound level INFO When you watch the TV displays information on top of the screen Not available in Component 1 2 and HDMI DVI SKIP LEFT RIGHT Playing CDs Selects songs Playing DVDs Selects movie chapters COMP1 Selects the Component 1 input source HDMI Selects the HDMI input sou...

Page 9: ...n W 220W Antenna 75 ohm external terminal for VHF UHF Audio Output W 7W x 2 Supplied accessories Remote control batteries 2 size AA Alkaline battery Screen Aspect Ratio 16 9 External input ports Video Audio input 3 set S Video input 2 Component input 2 set Variable audio output 1 set HDMI DVI input 1 Digital audio optical input DVI 1 Digital audio optical output 1 Calibration port 1 Cable Antenna ...

Page 10: ...n for Adjustment 1 Connect the PC and memory JIG as shown in Fig 1 2 Turn on JIG MAIN POWER SW 3 After turning on the PC and moniter operate the device programming software 3 2 Adjustment Sequence 1 Once the program is running OPTION MODE SELECTION is displayed in the window Check the Load configuration File cdf pdr in this window and click the finish button 2 When the screen displays the open win...

Page 11: ...d JIG 2 Open S W for writing DDC EDID data write read 3 Enter the Model Open in the Menu and then select EDID DATA 4 Click the Digital and cancel the ANALOG Then connect to turn on the yellow light at the board connection 5 Click the Write Data Verify and then download the EDID DATA ADJUSTMENT INSTRUCTIONS MICOM JIG Connection the Computer Program Click 3 When the program is clicked appear the win...

Page 12: ...it becomes with Normal image 16 9 and the CUT OFF DRIVE data setting 31 2 Connect the oscilloscope ground lead to GND on the CPT board and the probe to the GK pin connector of the CPT socket Using the SCREEN knob on the Flyback Transformer adjust the black level voltage to 175 2V 8 Deflection Adjustment 8 1 Preliminary Steps Select EZ Adjust 1 Raster Cent H V Size by using the ADJ key on the SVC R...

Page 13: ...peatedly to acess the Adjustment mode 2 Adjustment will set the automatically by pressing the 9 MST3586 Set of adjustment item 3 After finishing the adjustment output the MST3586 OK OSD on the screen 10 White Balance Adjustment Perform the Screen Voltage Adjustment first Color Temp must be adjusted from Medium Mode The image condition must be adjusted from Normal condition Manual adjustment is als...

Page 14: ...ot visible 11 2 Sub COLOR TINT Adjustment 1 Select EZ Adjust 6 Sub Tint Color pressing ADJ key on the SVC Remote control 2 Select SUB COLOR and adjust the 1 and 1 portion not to be classified 3 Select SUB TINT and adjust the 3 and 3 portion not to be classified ADJUSTMENT INSTRUCTIONS WHITE B M C W BK BK BK 1 1 3 3 GREENMAGENTA CYAN BLUE RED YELLOW 0 1 2 3 4 5 7 6 8 9 US14CH ...

Page 15: ...COLOR SUB TINT 13 SUB COLOR 7 ADJUSTMENT INSTRUCTIONS NO OSD DATA 1 V POSITION 31 2 V SIZE 33 3 H POSIT ION 24 4 H SIZE 36 5 UP VLIN 0 6 LO VLIN 0 7 PIN AMP 37 8 PIN PHASE 46 9 UP CPI N 37 10 LO CPIN 34 11 AFC BOW 30 12 AFC ANGLE 29 NO OSD DATA 1 R DRIVE 31 2 G DRIVE 31 Fix 3 B DRIVE 31 4 R CUTOFF 31 5 G CUTOFF 31 Fix 6 B CUTOFF 31 ...

Page 16: ...03 AFC_COMP 0 14 BRIGHT 21 59 V_SIZE 33 104 MP_P ARA_DC 0 15 S_ABL 0 60 V_ON 1 105 MP_P ARA_AMP 0 16 SHARPNESS 52 61 EW_DC 0 106 HC_PARA_DC 57 17 LTI_LEV 3 62 V_POSITION 31 107 ASP_SW 0 18 R_DRIVE 31 63 VSAW0_DCH 0 108 VDRV_SW 0 19 PLIMIT _LEV 0 64 V_LIN 7 109 HC_PARA_AMP 45 20 G_DRIVE 31 65 S_CORRECTION 2 110 HC_PARA_P HASE 31 21 ABL_MODE 2 66 H_SIZE 36 111 22 B_DRIVE 31 67 UP_UCP 0 112 23 CTI_MO...

Page 17: ...1 6 DF Gain 80 7 DF Phase 120 8 DAC2 0 9 Tilt CTR 0 10 CSCTR 48 NO OSD DATA OSD DATA NO 1 NOSEL 3 11 CHROMA_V 0 2 DDR 3 12 FREQUENCY 1 3 HDG 3 13 BRIGHTNESS 1 4 VDG 0 14 LIM 0 5 VPK 4 15 CONTR1 31 6 CORING 3 16 NOISE1 0 7 PEAKING 3 17 CLAMP1 1 8 LOWPASS 0 18 BRIBYP1 0 9 SKEWFILTER 0 19 CONBYP1 0 10 VACK 0 ...

Page 18: ... 73 BGPS 3 12 DYCOS 2 43 YPFG 10 74 VTVH 0 13 CDL 4 44 YPFT 0 75 FSCOFF 1 14 HDP 4 45 SELD2FH 0 76 NRZOFF 1 15 CPP 0 46 CLPH 0 77 NSDSW 0 16 DYGAIN 9 47 C0HS 0 78 ADPDS 1 17 DYCOR 2 48 CC3N 0 79 ADCLKS 3 18 DCGAIN 6 49 YEGS 2 80 HIZEN 0 19 DCCOR 3 50 V1PS 2 81 EXTDYCO 0 20 CNRLIN 1 51 SELD1FL 0 82 SYSPDS 0 21 CNRINY 0 52 KCTT 0 83 ADCLPSTP 0 22 CNRK 0 53 CSHDT 0 84 ADCLPFSW 0 23 YNRLIM 1 54 OVST 0...

Page 19: ... 39 9 HSYNC_OUTPUT_P ULS 32 40 10 RED_GAIN 167 41 11 GREEN_ GAIN 196 42 12 BLUE_GAIN 168 43 13 RED_OFFS ET 60 44 14 GREEN_OFF SET 48 45 15 BLUE_OFFSET 60 46 16 HSYNC_POLARITY 1 47 17 HSYNC_INP UT_POL 0 48 18 HSYNC_OUTPUT_P OL 1 49 19 ACTIVE_HSYNC_ OVER 1 50 20 ACTIVE_HSYNC_ SEL 1 51 21 VSYNC_OUTPUT_IN V 1 52 22 ACTIVE_VSYNC_ OVER 1 53 23 ACTIVE_VSYNC_ SEL 1 54 24 CLAMP_FUNCTION 0 55 25 CLAMP_POLAR...

Page 20: ...mpletely forward 5 Reconnect the internal degaussing coil 6 Position the beam bender locking rings at the 9 o clock position and the other three pairs of tabs 2 4 and 6 pole magnets at the 12 o clock position 7 Perform the following steps in the order given to prepare the receiver for the purity adjustment procedure a Face the receiver in the magnetic north direction b Externally degauss the recei...

Page 21: ...ernal degaussing coil 9 Turn the receiver on connect a signal generator to the VHF antenna terminal and apply a crosshatch signal Caution During the convergence adjustment procedure be very careful not to disturb the purity adjustment tabs Purity should be confirmed before proceeding with the convergence adjustments Note Make sure the focus is set correctly on this instrument before proceeding wit...

Page 22: ...ontal lines Fig upper right 17 Temporarily place a rubber wedge at the 5 o clock and 7 o clock positions to hold the horizontal position of the yoke 18 Check the 3 o clock and 9 o clock areas to confirm that the red and blue vertical lines are converged If the lines are not converged slightly offset the horizontal tilt of the yoke move the temporary rubber wedges if necessary to equally balance th...

Page 23: ... 23 BLOCK DIAGRAM ...

Page 24: ... 24 BLOCK DIAGRAM ...

Page 25: ... 25 BLOCK DIAGRAM ...

Page 26: ... 26 EXPLODED VIEW 550 503 174 510 943 400 170 150 913 112 530 520 560 504 501 300 120 121 600 310 320 330 ...

Page 27: ... 102 320 320 062G SPRING COIL STSC 304 D15 20 NON 330 5020V00506A BUTTON 400 3809V00608A BACK COVER ASSEMBLY 32FZ1DC UA 2P 1D AC02SD 501 4810V00311F BRACKET MAIN RN 32FZ10H NC01AA HIPS 40AF 503 4811V00186D BRACKET ASSEMBLY REAR AV 32FZ1DC UB AC02SD 504 351 009A LINK POWER S W 510 6871VSMQ28H PCB ASSEMBLY SUB CRTMIN AC02SC DU 32FZ40 CPT BOARD 520 6871VMM781A PCB ASSEMBLY MAIN AC 02SD 32FZ1DC UA M I...

Page 28: ...LOCA NO PART NO DESCRIPTION D808 IC100 IC101 IC103 IC103 IC104 IC105 IC106 IC107 IC109 IC11 IC110 IC112 IC113 IC12 IC1201 IC13 IC14 IC1401 IC1504 IC1505 IC1506 IC1602 IC17 IC18 IC19 IC20 IC200 IC202 IC203 IC2300 IC2302 IC308 IC314 IC315 IC405 IC407 IC500 IC501 IC502 IC503 IC504 IC504 IC506 IC601 IC601 0ISK100300A 0IMCRSS016A 0ISH323422A 0IMMRHY001F 0ISJ156612A 0IMMRHY001F 0IMCRKE005A 0IPH741400E 0...

Page 29: ... Y KTC1627A KRC102M TP KRC1202 KEC KTC3198 KTC1815 TO92 50V KTA1266 Y KTA1015 TO92 PNP KTC3227 Y KTC1627A KTC3227 Y KTC1627A KTA1274 Y TO 92L KTA1274 Y TO 92L KTC3227 Y KTC1627A LOCA NO PART NO DESCRIPTION Q972 Q973 D100 D1401 D1405 D1406 D1409 D1410 D1415 D1417 D1419 D1420 D1426 D1427 D1428 D1429 D1430 D1433 D1501 D1601 D1604 D1605 D1606 D1609 D1901 D1903 D1904 D1905 D1907 D1908 D1909 D1913 D1914...

Page 30: ...12 50V 10 LOCA NO PART NO DESCRIPTION C1231 C1232 C124 C125 C125 C126 C129 C130 C1301 C1302 C1303 C131 C132 C132 C1328 C1334 C1335 C1339 C135 C136 C138 C14 C140 C140 C1401 C1405 C1407 C1412 C1413 C1414 C1415 C1416 C1417 C1418 C1420 C1421 C1423 C1425 C1426 C1428 C1431 C1432 C1434 C1435 C1436 C1437 C1438 C1439 C1440 C1442 C1443 0CK104DK56A 0CE226DF618 0CE106SF6DC 0CK104DK56A 0CE106SF6DC 0CK104DK56A ...

Page 31: ...16V 20 0 1UF 2012 50V 10 100UF KME TYPE 16V 20 4700PF D 2KV 10 470PF D 2KV 10 10UF STD 250V 20 1000UF STD 16V M LOCA NO PART NO DESCRIPTION C1917 C1918 C1923 C1925 C1926 C1928 C1929 C1930 C1931 C1940 C1952 C1953 C1955 C1956 C20 C206 C21 C215 C218 C22 C222 C227 C23 C2400 C241 C244 C246 C247 C248 C249 C252 C253 C254 C2608 C2609 C2610 C2611 C2612 C2613 C2631 C27 C29 C30 C31 C364 C368 C371 C38 C384 C3...

Page 32: ...0UF STD 50V M 0 1UF 2012 50V 10 100UF STD 16V M MPE ECQ V1H564JL3 TR 50V 0 56UF J MPE ECQ V1H474JL3 TR 50V 0 47UF J LOCA NO PART NO DESCRIPTION C529 C53 C530 C531 C532 C536 C54 C541 C544 C553 C555 C556 C601 C601 C602 C603 C604 C607 C610 C611 C612 C619 C621 C628 C629 C630 C633 C634 C643 C677 C689 C700 C701 C702 C705 C732 C735 C738 C739 C800 C802 C802 C803 C806 C807 C808 C809 C810 C811 C814 C815 0CK...

Page 33: ...TD 100V 20 0 01UF D 100V 10 0 1UF 2012 50V 10 LOCA NO PART NO DESCRIPTION R1977 L001 L002 L1401 L1402 L1403 L1406 L1413 L1503 L1901 L1903 L1910 L503 L805 L806 L807 T1401 T1402 T1403 T802 T803 C2 C3 C4 C5 P005 P006 P104 P403B P405B P604B P801AB P803B P804B P901 P905 PA001 IC501 IC502 JA1201 JA1202 JA201 JA203 0CK104DK56A 0LA1000K119 0LA0102K119 6140VE0001T 0LA1001K139 150 717K 150 C04E 150 W01A 0LA...

Page 34: ...5 00 1K OHM 1 2 W 5 00 2 2 OHM 1 2 W 5 00 2 7K OHM 1 W 5 00 2 2M OHM 1 2 W 5 00 LOCA NO PART NO DESCRIPTION R1439 R1440 R1441 R1442 R1443 R1444 R1445 R1447 R1448 R1449 R1450 R1451 R1452 R1456 R1457 R1458 R1459 R1460 R1462 R1464 R1466 R1469 R1470 R1471 R1472 R1492 R1493 R1494 R1497 R1500 R1509 R1646 R1647 R1901 R1967 R1971 R1972 R1974 R1975 R1976 R1981 R1983 R1984 R1986 R1997 R1998 R1999 R506 R527 ...

Page 35: ... 2 W 5 00 LOCA NO PART NO DESCRIPTION R980 R981 R983 R986 R987 R988 ZD504 SG1401 SG1402 SG1901 SG1902 SG1903 SG1904 SG1905 SW1 SW100 SW2 SW3 SW4 SW5 SW6 SW801 FB01 FB02 L1405 L801 L801 L802 L802 L803 L804 T2400 T403 T404 T405 T406 T407 T408 T409 T410 T411 T412 T413 X100 X103 0RD3902H609 0RD3902H609 0RS1800J607 0RS3001K619 0RS3001K619 0RS3001K619 0RN4701F409 165 004A 165 004A 6918VAX002H 6918VAX002...

Page 36: ...1 B0 RESONATOR CRYSTAL HC49U 18 432MHZ RESONATOR CRYSTAL SX 1 SC14 3MHZ CABLE NT RCA R A UL 1365 AWG 26 300MM FUSE SLOW BLOW 5000MA 125V SOFT WARE 2 00 0V A8F1 CTV AC02SD SOFT WARE 2 00 0V D7F6 CTV AC02SD SOFT WARE 2 00 0V ECF9 CTV AC02SD OSCILLATOR 27MHZ 100 PPM 3 3V REMOTE CONTROLLER RECEIVER 38KHZ RELAY SDT S 105LMR OEG 5V 0 05A RELAY SDT S 105LMR OEG 5V 0 05A SOCKET CPT PCS701A 9P 14 360 THERM...

Page 37: ...nted in Korea P NO 3828VD0156K CANADA LG Electronics Canada Inc 550 Matheson Boulevard East Mississauga Ontario L4Z 4G3 USA LG Electronics Alabama Inc P O Box 240007 201 James Record Road Bldg 3 Huntsville AL 35824 ...

Page 38: ......

Page 39: ......

Page 40: ......

Page 41: ...MAIN TOP DIGITAL TOP SIDE A V DIGITAL BOTTOM MAIN BOTTOM MAIN 2 CPT CONTROL ...

Reviews: