LG 22MA33A, Owner'S Manual
The LG 22MA33A is a versatile and user-friendly monitor that guarantees an immersive visual experience. To swiftly set up and optimize your display settings, make sure to download the free Owner's Manual from manualshive.com. With detailed instructions and troubleshooting tips, you'll effortlessly harness the full potential of this exceptional product.
Share
Download


Reviews:
No comments
Related manuals for 22MA33A

49UT3E310B-T
Brand: Finlux Pages: 35
VIERA TH-L32XM5A
Brand: Panasonic Pages: 52

24phk5210
Brand: Philips Pages: 59
40PUG6700
Brand: Philips Pages: 123
47PFL6007T/12
Brand: Philips Pages: 3
BRAVIA KDL-46HX729
Brand: Sony Pages: 6
BRAVIA KDL-46HX729
Brand: Sony Pages: 176
BRAVIA KDL-55HX729
Brand: Sony Pages: 6
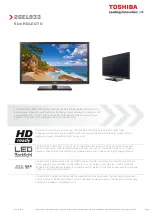
26EL933
Brand: Toshiba Pages: 3
32D153*DB
Brand: Toshiba Pages: 29
KALED50XXXVA
Brand: Kogan Pages: 18
KALED40XXXZC Series
Brand: Kogan Pages: 15
CTV 1901
Brand: AEG Pages: 96
49UF6700
Brand: LG Pages: 57
32PHH4109
Brand: Philips Pages: 3

32F22B-FHD
Brand: Technika Pages: 32

LED39F
Brand: TV Star Pages: 24
LED32RV3
Brand: TV Star Pages: 23


