


Summary of Contents for 10PFP
Page 2: ...OCT 2004 PRINTED IN KOREA P No 3828ER3035G ...
Page 27: ...26 ...
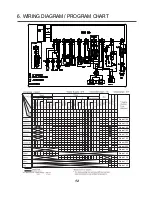
Page 28: ...Black Yellow 20 30 27 ...
Page 29: ...28 ...
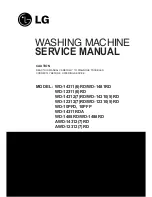
The LG 10PFP Service Manual provides comprehensive instructions and valuable insights for maximizing the performance of your LG 10PFP device. Easily download this manual for free at manualshive.com, empowering you to troubleshoot and maintain your product effortlessly. Access the expertise you need to enhance your LG 10PFP's functionality and longevity.
Page 2: ...OCT 2004 PRINTED IN KOREA P No 3828ER3035G ...
Page 27: ...26 ...
Page 28: ...Black Yellow 20 30 27 ...
Page 29: ...28 ...


