background image

KITCHENAID

ELECTRONIC

RANGE

CONTROLS

“B” & “D” LINE WALL OVENS

                                        JOB AID
                                 Part No.  4317169

Summary of Contents for KERC500B

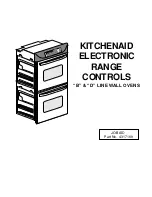
Page 1: ...KITCHENAID ELECTRONIC RANGE CONTROLS B D LINE WALL OVENS JOB AID Part No 4317169 ...

Page 2: ...panion training disk and is designed as reference material WHIRLPOOL CORPORATION assumes no responsibility for any repair made on our products by anyone other than Authorized Factory Ser vice Technicians Copyright 1995 Whirlpool Corporation FORWARD This Job Aid is a reference guide for the experienced technician It is not designed as a replacement to basic training and does not replace the Ser vic...

Page 3: ...ontrols B Line Freestanding Slide In Page 6 KitchenAid Electronic Range Controls D Line Wall Ovens Page 7 Reading The Graphic Display Page 12 KitchenAid Electronic Range Controls Easy Convect Page 13 KitchenAid Electronic Range Controls Easy Convect Meats Page 14 KitchenAid Electronic Range Controls Sabbath Mode Page 23 KitchenAid Electronic Range Controls Clean Mode Page 32 ...

Page 4: ... iv NOTES ...

Page 5: ...ock etc if the suggested procedures are not observed WARNING Fire Hazard Do not obstruct the flow of ventilation air Electrical Shock Hazard It is the customer s responsibility to Contact a qualified electrical installer Assurethatelectricalinstallationisadequate and in conformance with the National Elec trical Code ANSI NFPA 70 latest edition and all local codes and ordinances Failure to do so co...

Page 6: ...outlet on the rear wall and area for a through the wall connection for gas pipe and shutoff valve than 28 MSG sheet steel 0 015 stainless steel 0 024 aluminum or 0 020 copper A minimum clearance of 36 91 4 cm between the top of the cooking platform and the bottom of an unprotected wood or metal cabinet is required The cutout shown is for a 25 63 5 cm countertop with a 24 61 cm base cabinet and no ...

Page 7: ...quired for this range FIGURE 2 Dimensions For Installing The Freestanding Gas Range Refer to Figure 2 while you read the following installation information Proper installation is your responsibility A quali fied technician must install this range Make sure you have everything necessary for correct installa tion It is the responsibility of the installer to comply with the installation clearances sp...

Page 8: ...th Easy Convect Automatically converts standard cooking times and temperatures to convection cooking times and temperatures Full Meal Convect Ten preprogrammed cook cycles and one fa vorite cooking cycle 2nd through 5th year parts only warranty on the control Slide In Freestanding Gas Models KGRT500B KGRT507B Electric Models Available in late 1995 KERS500B KERC500B KERC507B KERH507B Gas Models KGS...

Page 9: ...Convection Full Meal Electronic Range Controls Slide In Graphic Oven Display Graphic Oven Display 1 2 3 10 11 10 11 4 5 6 7 8 9 1 2 3 1 2 3 4 5 6 7 8 9 12 0 OVEN LIGHT OVEN LIGHT Control LOCK SET START SET START 1 2 3 4 5 6 7 8 9 0 START START CANCEL OFF CANCEL OFF HR MIN MIN SEC CANCEL CANCEL CLOCK SET START CLOCK SET START 88 88 Keypad Layout Non Convection Slide In Keypad Layout Convection Slid...

Page 10: ... START NIGHT SET START 1 2 3 4 5 6 7 8 9 0 START START CANCEL OFF OFF ON CANCEL OFF HR MIN MIN SEC CANCEL CANCEL CLOCK SET START CLOCK SET START 88 88 SURFACE LIGHT Keypads 1 Bake 2 Broil 3 Clean 4 Convection Bake 5 Convection Broil 6 Convection Roast 7 Easy Convection Baked Goods 8 Easy Convection Meats 9 Easy Convection Other Foods 10 Cook Time 11 Stop Time 12 Convection Full Meal Electronic Ran...

Page 11: ... DOOR LOCKED START F COOK TIMER STOP CLEAN ON RAISING BREAD DEHYDRATE CONVECTION ENTER STANDARD COOK TIME COOK TEMP CLEAN TIME SET PROBE TEMP NIGHT LIGHT DELAY EASYCONVECT CLOSE CONTROL LOCK DOOR LOCKED START START TIME STOP TIME CHECK FOOD AT F CONVECTION MODELS NONCONVECTION MODELS NOTE Ring element used on electric models only ...

Page 12: ...IME COOK TEMP CLEAN TIME SET PROBE TEMP NIGHT LIGHT DELAY EASYCONVECT CLOSE CONTROL LOCK DOOR LOCKED START START TIME STOP TIME CHECK FOOD AT F Broiler Heat Indicator Meat Probe Indicator Time Savings Bar Indicates Of Time Remaining In Cook Cycle OR Of Time Saved With EasyConvect Ring Element Electric Convection Only Bake Heat Indicator ...

Page 13: ...y 10 and temperature by 25 F Electronic Range Controls Easy Convect 8 88 18 88 18 88 ON RAISING BREAD DEHYDRATE CONVECTION ENTER STANDARD COOK TIME COOK TEMP CLEAN TIME SET PROBE TEMP NIGHT LIGHT DELAY EASYCONVECT CLOSE CONTROL LOCK DOOR LOCKED START START TIME STOP TIME CHECK FOOD AT F 1 2 3 4 5 6 7 8 9 12 Meats 0 OVEN LIGHT START CANCEL OFF Press the Meats keypad Time of Day NOTE Ring element us...

Page 14: ...CANCEL OFF 325 Time of Day NOTE Ring element used on electric models only CONVECTION MODELS Enter the normal cooking temperature 18 88 18 88 ON RAISING BREAD DEHYDRATE CONVECTION ENTER STANDARD COOK TIME COOK TEMP CLEAN TIME SET PROBE TEMP NIGHT LIGHT DELAY EASYCONVECT CLOSE CONTROL LOCK DOOR LOCKED START START TIME STOP TIME CHECK FOOD AT F 1 2 3 4 5 6 7 8 9 12 0 OVEN LIGHT START CANCEL OFF 325 N...

Page 15: ...SE CONTROL LOCK DOOR LOCKED START START TIME STOP TIME CHECK FOOD AT F 1 2 3 4 5 6 7 8 9 12 0 OVEN LIGHT START CANCEL OFF 300 48 NOTE Ring element used on electric models only CONVECTION MODELS Press Start After the Start button is pressed the control adjusts the convection cooking time by 20 and the temperature by 25 degrees Temperature adjusted by 25 Convection Cooking Time adjusted by 20 ...

Page 16: ...on models will resume the Fa vorite Cycle No tones will sound when in this mode Touchpad responses are delayed by 1 second to prevent accidentally turning the range off 8 88 18 88 18 88 ON RAISING BREAD DEHYDRATE CONVECTION ENTER STANDARD COOK TIME COOK TEMP CLEAN TIME SET PROBE TEMP NIGHT LIGHT DELAY EASYCONVECT CLOSE CONTROL LOCK DOOR LOCKED START START TIME STOP TIME CHECK FOOD AT F 1 2 3 4 5 6...

Page 17: ...OTE Ring element used on electric models only Set the temperature you desire to use during the Sabbath Mode We will use 375 CONVECTION MODELS 8 88 375 18 88 18 88 ON RAISING BREAD DEHYDRATE CONVECTION ENTER STANDARD COOK TIME COOK TEMP CLEAN TIME SET PROBE TEMP NIGHT LIGHT DELAY EASYCONVECT CLOSE CONTROL LOCK DOOR LOCKED START START TIME STOP TIME CHECK FOOD AT F 1 2 3 4 5 6 7 8 9 12 0 OVEN LIGHT ...

Page 18: ...LOSE CONTROL LOCK DOOR LOCKED START START TIME STOP TIME CHECK FOOD AT F 1 2 3 4 5 6 7 8 9 12 0 OVEN LIGHT START CANCEL OFF Time of Day NOTE Ring element used on electric models only CONVECTION MODELS The Time of Day display changes to SAbb When the oven has finished preheating press and hold the 6 keypad for 5 seconds The Sabbath Mode can only be cancelled by pressing and holding the 6 keypad ...

Page 19: ...E CHECK FOOD AT F 1 2 3 4 5 6 7 8 9 12 0 OVEN LIGHT START CANCEL OFF Clean 3 30 4 30 8 00 CLOSE CONTROL LOCK DOOR LOCKED START The customer selects the Clean Mode on the touch panel The 3 1 2 hour default clean time will be displayed the cus tomer can select a clean cycle of between 2 1 2 and 4 1 2 hours The Start and Stop times will be displayed based on the time selected by the customer ...

Page 20: ...30 4 30 8 00 ON RAISING BREAD DEHYDRATE CONVECTION ENTER STANDARD COOK TIME COOK TEMP CLEAN TIME SET PROBE TEMP NIGHT LIGHT DELAY EASYCONVECT CLOSE CONTROL LOCK DOOR LOCKED START START TIME STOP TIME CHECK FOOD AT F 1 2 3 4 5 6 7 8 9 12 0 OVEN LIGHT START CANCEL OFF 12 1 2 3 4 5 6 7 8 9 10 11 N L1 Broil Ignitor Broil Valve Bake Ignitor Bake Valve P6 P11 Clean ...

Page 21: ...PROBE TEMP NIGHT LIGHT DELAY EASYCONVECT CLOSE CONTROL LOCK DOOR LOCKED START START TIME STOP TIME CHECK FOOD AT F 1 2 3 4 5 6 7 8 9 12 0 OVEN LIGHT START CANCEL OFF 12 1 2 3 4 5 6 7 8 9 10 11 N L1 Broil Ignitor Broil Valve Bake Ignitor Bake Valve P6 P11 Clean After 30 minutes The Bake Ignitor is ON The Bake Valve is ON The Broil Circuit is OFF ...

Page 22: ...BE TEMP NIGHT LIGHT DELAY EASYCONVECT CLOSE CONTROL LOCK DOOR LOCKED START START TIME STOP TIME CHECK FOOD AT F 1 2 3 4 5 6 7 8 9 12 0 OVEN LIGHT START CANCEL OFF 12 1 2 3 4 5 6 7 8 9 10 11 N L1 Broil Ignitor Broil Valve Bake Ignitor Bake Valve P6 P11 Clean After approximately 3 hours The display shows that the clean time remaining is 5 minutes ...

Page 23: ...HT LIGHT DELAY EASYCONVECT CLOSE CONTROL LOCK DOOR LOCKED START START TIME STOP TIME CHECK FOOD AT F 1 2 3 4 5 6 7 8 9 12 0 OVEN LIGHT START CANCEL OFF 12 1 2 3 4 5 6 7 8 9 10 11 N L1 Broil Ignitor Broil Valve Bake Ignitor Bake Valve P6 P11 Clean When the Clean Cycle ends The oven door will remain locked The display will show locked for as long as the oven is hot ...

Page 24: ...LAY EASYCONVECT CLOSE CONTROL LOCK DOOR LOCKED START START TIME STOP TIME CHECK FOOD AT F 1 2 3 4 5 6 7 8 9 12 0 OVEN LIGHT START CANCEL OFF 12 1 2 3 4 5 6 7 8 9 10 11 N L1 Broil Ignitor Broil Valve Bake Ignitor Bake Valve P6 P11 Clean After approximately 45 minutes The oven door will unlock The oven door locked display will turn off when the oven temperature is below 600 F ...

Page 25: ...owered up Convection Freestanding Slide In Convection Broil Clean Baked Goods Stop Time 1 9 0 Timer Set Start Cancel Non Convection Freestanding Slide In Clean Stop Time 0 Oven Light 1 Start Cancel This will set the board for the proper range configuration NOTE Theseprogramsequencesalsocheckallthecapacitive glass touchpad keys If the sequence does not work unplug the unit wait 10 seconds plug the ...

Page 26: ...r 1 seconds in convection bake roast The convection fan stops running if the oven door is opened The temperature sensor mounting screw is removed from the rear on freestanding models and from the front on slide in models The gas shut off lever is located on the gas safety valve All gas models are shipped with the LP conversions ori fice kit Part 9751844 packed with the Use Care materials The kit c...

Page 27: ... air from inside the base of the cabinet It forces the air up the air channel which is located under the left side panel to the opening at the end of the control panel chassis Air then flows across the chassis below the control panel and cools it Air enters through the series of holes in front of the range top flows be neath it and exits to the outside through slots in the rear panel The cooling f...

Page 28: ...GHTS 4 BAKE ELEMENT BROIL CONVECTION ELEMENTS CONTROL PANEL INDICATOR LIGHT 4 BAKE ELEMENT SHUTDOWN SWITCH STORAGE DRAWER BACKGUARD GLASS 10 000 BTU BURNER BEZEL IGNITOR 2 6 000 BTU BURNER BEZEL IGNITOR 2 OVEN SENSOR GAS VALVE 4 ELECTRONICS BOARD CONTROL PANEL OVEN LIGHT SWITCH COOLING FAN THERMAL SWITCH CONTROL PANEL SHUTDOWN SWITCH OVEN DOOR GLASS FIBERGLASS OVEN DOOR SEAL FLUORESCENT LAMP MAINT...

Page 29: ...TROL PANEL END CAP SCREW END CAP SCREW FIGURE 6 Removing The Electric Range Control Panel Refer to Figure 6 for the following steps 1 Unplug the power cord plug from the AC receptacle 2 Open the oven door and remove the three screws from under the control panel and the two from the end caps then close the oven door 3 On gas models remove the four 4 burner valve stem nuts 4 Lift the control panel a...

Page 30: ...cord plug from the AC receptacle and if necessary move the range out from the wall 2 Open the oven door and remove the three screws from under the control panel and the two from the end caps then close the oven door 3 Set the control panel on the maintop and remove the four chassis screws two on each side that are under the control panel then position the control panel back in its normal location ...

Page 31: ...G SCREWS 3 TABS TAB COMPONENTS COVER REAR PANEL ACCESS COVER FIGURE 8 Accessing Components Behind The Rear Panel Refer to Figure 8 for the following steps 1 Disconnect the power cord plug from the AC receptacle 2 Pull the range out from the wall or cabinet cutout far enough to access the back panel 3 Remove the three screws from the component and access covers that are mounted to the rear panel th...

Page 32: ...SURE REGULATOR IGNITOR MODULE COOLING FAN STORAGE DRAWER HOUSING FIGURE 9 Removing The Storage Drawer Electric Models FIGURE 10 Removing The Storage Drawer Gas Models Refer to Figures 9 or 10 for the following steps 1 Unplug the range s power cord plug from the AC receptacle 2 Remove the storage drawer from the range 3 From inside the storage area remove the three mounting screws from the housing ...

Page 33: ...CEL KEY LEVEL TOO LOW OPEN SUSPECT KEYPAD ASSEMBLY F2 E2 3 CANCEL KEY CHANNEL CANCEL KEY LOOP TEST FAILED SUSPECT KEYPAD ASSEMBLY F2 E3 5 KEY DOWN TOO LONG KEY HELD DOWN TOO LONG OR KEYBOARD SHORT SUSPECT KEYPAD ASSEMBLY F2 E4 6 KEYS UNSETTLED KEYS UNSETTLED PROBABLY DUE TO NOISE SUSPECT KEYPAD ASSEMBLY F3 E0 9 OPEN PLAT PLAT SENSOR OPEN SUSPECT KEYPAD ASSEMBLY F3 E1 8 SHORTED PLAT PLAT SENSOR SHO...

Page 34: ...l Toggles between F Fahrenheit C Celsius 0 Displays the last F E code that was used the latest ROM revision 1 Shows the type of range the control is configured for 3 Locks out the keypads so they cannot be used 6 Switches the range to the Sabbath mode 7 Changes the frequency of the tones Clock Turns off the clock time of day display Cook Time Turns off the end of cycle tones Stop Time Turns off th...

Page 35: ...d measure the continuity when the switch is heated above 104 F and then cools to below 104 F Below 104 F Ω TERMINALS BAKE ELEMENT SHUTDOWN SWITCH Below 395 F Ω Above 104 F 0 Ω Above 395 F 0 Ω Bake Broil Element Shutdown Switch OR Bake Burner Shutdown Switch Set the ohmmeter to R x 1 Connect the meter leads to the thermostat termi nals and measure the continuity when the switch is heated above 395 ...

Page 36: ...400W 22 Ω 5 Ω 7 Rad 1700W 32 Ω 5 Ω 6 Rad 1400W 39 Ω 5 Ω 7 Hal 1800W 0 Ω Dual Oval 2500W Tot Hal Inner 1500W 0 Ω Rad Outer 1000W 50 5 Ω Convection Fan Motor Set the ohmmeter to R x 1 Connect one of the meter leads to circuit board pin J1 1 Connect the other meter lead to circuit board pin J1 6 15 Ω 3 Ω CONVECTION FAN MOTOR TERMINAL TERMINAL Cooling Fan Motor Set the ohmmeter to R x 10 Connect one o...

Page 37: ... board pin P1 10 Connect the other meter lead to circuit board pin P1 11 Temp F Resist Ω 32 1 9 1000 4 0 75 2 5 1091 5 3 250 4 4 1453 8 9 350 5 4 1654 10 8 450 6 9 1853 13 5 550 8 2 2047 15 8 650 8 6 2237 18 5 800 13 6 2667 24 4 120 VAC Not Applied Ω 120 VAC Applied 0 Ω CONTROL PANEL Capacitive Glass Touch Panel Unplug the unit wait 10 seconds plug the unit back in and run the pro gram sequence on...

Page 38: ...9 10 11 12 13 14 ELECTRONIC OVEN CONTROL INNER BROIL OUTER BROIL CONVECT RING OPTIONAL BAKE BIDIRECTIONAL LATCH SOLENOID BAKE ELEMENT SHUTDOWN SW NON RESET COOLING FAN MOTOR CONVECT FAN MOTOR OVEN LIGHT G GREEN L1 BLACK L1 L1 L1 L2 L2 N WHITE DLB RELAY J1 COOLING FAN THERMAL SW N O CONTROL PANEL SHUTDOWN SW N C NON RESET RETURNS RETURNS STROBES STROBES LINK MEMBRANE KEYS OPEN CAPACITANCE GLASS KEY...

Page 39: ...AY ELECTRONICS BOARD L2 BAKE ELEMENT SHUTDOWN SWITCH STANDARD BROIL Electric Ranges L1 L2 P4 P11 P5 P6 BAKE OUTER BROIL DLB RELAY BAKE ELEMENT SHUTDOWN SWITCH ELECTRONICS BOARD L1 P4 P7 P4 P6 OUTER BROIL INNER BROIL DLB RELAY ELECTRONICS BOARD L2 BAKE ELEMENT SHUTDOWN SWITCH ...

Page 40: ...ON RELAY L1 P4 P11 P4 P6 OUTER BROIL BAKE DLB RELAY ELECTRONICS BOARD L2 BAKE ELEMENT SHUTDOWN SWITCH L1 N P4 P11 P4 J1 3 J1 6 P6 OUTER BROIL BAKE DLB RELAY ELECTRONICS BOARD M CONVECTION FAN MOTOR L2 BAKE ELEMENT SHUTDOWN SWITCH CLEAN LATCH DRIVING CIRCUIT CONVECTION ROAST PREHEAT FOR CONVECTION BAKE DEHY DRATE RAISING BREAD ...

Page 41: ...ECTION BAKE DEHY DRATE RAISING BREAD L1 N P4 P7 P4 J1 3 J1 6 P6 OUTER BROIL INNER BROIL DLB RELAY ELECTRONICS BOARD M COOLING FAN MOTOR L2 BAKE ELEMENT SHUTDOWN SWITCH L1 N P4 P7 CONV ELEMENT DLB RELAY ELECTRONICS BOARD M COOLING FAN MOTOR J1 6 J1 3 L2 BAKE ELEMENT SHUTDOWN SWITCH ...

Page 42: ... 14 ELECTRONIC OVEN CONTROL BROIL VALVE IGNITER DOOR LATCH SOLENOID COOLING FAN MOTOR CONVECT FAN MOTOR OVEN LIGHT BALLAST G GREEN L1 BLACK NEUTRAL SPARK IGNITION MODULE 120 VAC EARTH GND J1 COOLING FAN THERMAL SW N O CONTROL PANEL SHUTDOWN SW N C NON RESET RETURNS RETURNS STROBES STROBES LINK MEMBRANE KEYS OPEN CAPACITANCE GLASS KEYS BAKE VALVE BAKE BURNER SHUTDOWN SWITCH NON RESET IGNITER 1 2 3 ...

Page 43: ...KE OUTER BROIL DLB RELAY ELECTRONICS BOARD BROIL L1 N P4 P6 P5 BROIL IGNITOR BROIL VALVE ELECTRONICS BOARD CONVECTION BAKE ROAST L1 N P4 P11 P5 BAKE IGNITOR BAKE VALVE BAKE BURNER SHUTDOWN SWITCH ELECTRONICS BOARD J1 6 CONVECT FAN MOTOR Gas Ranges ...

Page 44: ...BROIL IGNITOR BROIL VALVE ELECTRONICS BOARD J1 6 CONVECT FAN MOTOR CLEAN First 30 Minutes L1 N ELECTRONICS BOARD ELECTRONICS BOARD BROIL IGNITOR BROIL VALVE L1 N P11 P6 BAKE IGNITOR BAKE VALVE BAKE BURNER SHUTDOWN SWITCH After 30 Minutes ...

Page 45: ...NG SOLENOID ELECTRONICS BOARD J1 8 J1 3 COM LOCK NC UNLOCK NO PULSE RELAY 0 1 SECONDS ACTIVATION DIRECTION RELAY COOLING FAN MOTOR L1 N COOLING FAN THERMAL SWITCH N C COM COOLING FAN MOTOR OVEN LIGHT L1 N P4 J1 5 P5 ELECTRONICS BOARD OVEN LIGHT ...

Page 46: ... are being used in otherwise an F code will occur True False 5 A cooling fan is used to maintain optimum temperatures in the console area of gas ranges only True False 6 A speed fan located in the storage drawer area is used on freestanding and slide in ranges 7 Restricting the in the cooking systems can cause prema ture failure of the controls and thermal switches 8 To set the control for Celsius...

Page 47: ... 43 NOTES ...

Page 48: ... 44 Answers 1 10 seconds 20 seconds 2 rear front 3 True 4 False 5 False 6 single 7 air flow 8 False 9 True 10 False ...

Page 49: ...ue Functions Sabbath Mode Allows the oven to be operated continuously during the Jewish Sabbath Eacy Convect Automatically converts standard cooking times and temperatures to convection cooking times and temperatures Full Meal Convect Ten preprogrammed cook cycles and one fa vorite cooking cycle 2nd through 5th year parts only warranty KitchenAid Electronic Range Controls B Line Freestanding Slide...

Page 50: ... 2 Gas Models KGST300B KGST307B Electric Models KESS300B KESC300B KESC307B KESH307B KitchenAid Electronic Range Controls B Line Slide In ...

Page 51: ...on Other Foods 10 Cook Time 11 Stop Time 12 Convection Full Meal Graphic Oven Display Graphic Oven Display 1 2 3 10 11 10 11 4 5 6 7 8 9 1 2 3 1 2 3 4 5 6 7 8 9 12 0 OVEN LIGHT OVEN LIGHT Control LOCK SET START SET START 1 2 3 4 5 6 7 8 9 0 START START CANCEL OFF CANCEL OFF HR MIN MIN SEC CANCEL CANCEL CLOCK SET START CLOCK SET START 88 88 Keypad Layout Non Convection Slide In Keypad Layout Convec...

Page 52: ... 4 KitchenAid Electronic Range Controls B Line Freestanding Electric Models Available in late 1995 KERS500B KERC500B KERC507B KERH507B Gas Models KGRT500B KGRT507B ...

Page 53: ...8 9 12 0 OVEN LIGHT OVEN LIGHT SURFACE LIGHT SET START NIGHT SET START 1 2 3 4 5 6 7 8 9 0 START START CANCEL OFF OFF ON CANCEL OFF HR MIN MIN SEC CANCEL CANCEL CLOCK SET START CLOCK SET START 88 88 SURFACE LIGHT Keypads 1 Bake 2 Broil 3 Clean 4 Convection Bake 5 Convection Broil 6 Convection Roast 7 Easy Convection Baked Goods 8 Easy Convection Meats 9 Easy Convection Other Foods 10 Cook Time 11 ...

Page 54: ...AY CONTROL DOOR LOCKED START F COOK TIMER STOP CLEAN ON RAISING BREAD DEHYDRATE CONVECTION ENTER STANDARD COOK TIME COOK TEMP CLEAN TIME SET PROBE TEMP NIGHT LIGHT DELAY EASYCONVECT CLOSE CONTROL LOCK DOOR LOCKED START START TIME STOP TIME CHECK FOOD AT F NOTE Ring element used on electric models only CONVECTION MODELS NONCONVECTION MODELS ...

Page 55: ...d Electronic Range Controls D Line Wall Ovens Electric Models 24 Ovens 27 Ovens 30 Ovens KEBI141D KEBI171D KEBI101D KEBS147D KEBS177D KEBS107D KEBS246D KEBS276D KEBS206D KEBS247D KEBS277D KEBS207D KEBS278D KEBS208D ...

Page 56: ... 5 6 7 8 9 12 0 OVEN LIGHT OVEN LIGHT Control LOCK SET START SET START 1 2 3 4 5 6 7 8 9 0 START START CANCEL OFF CANCEL OFF HR MIN MIN SEC CANCEL CANCEL CLOCK SET START CLOCK SET START 88 88 Keypads 1 Bake 2 Broil 3 Clean 4 Convection Bake 5 Convection Broil 6 Convection Roast 7 Easy Convection Baked Goods 8 Easy Convection Meats 9 Easy Convection Other Foods 10 Cook Time 11 Stop Time 12 Convecti...

Page 57: ...IGHT Control LOCK SET START SET START 1 2 3 4 5 6 7 8 9 0 START START HR MIN MIN SEC CANCEL CANCEL CLOCK SET START CLOCK SET START 88 88 UPPER OVEN LOWER OVEN UPPER OVEN CANCEL OFF LOWER OVEN CANCEL OFF UPPER OVEN CANCEL OFF LOWER OVEN CANCEL OFF Keypads 1 Bake 2 Broil 3 Clean 4 Convection Bake 5 Convection Broil 6 Convection Roast 7 Easy Convection Baked Goods 8 Easy Convection Meats 9 Easy Conve...

Page 58: ...SEC TEMP PROBE TIMED DELAY CONTROL DOOR LOCKED START F COOK TIMER STOP CLEAN ON RAISING BREAD DEHYDRATE CONVECTION ENTER STANDARD COOK TIME COOK TEMP CLEAN TIME SET PROBE TEMP DELAY EASYCONVECT CLOSE CONTROL LOCK DOOR LOCKED START START TIME STOP TIME CHECK FOOD AT F CONVECTION SINGLE NON CONVECTION SINGLE ...

Page 59: ...88 ON RAISING BREAD DEHYDRATE CONVECTION ENTER STANDARD COOK TIME COOK TEMP CLEAN TIME SET PROBE TEMP DELAY EASYCONVECT CLOSE CONTROL LOCK DOOR LOCKED START CLOSE DOOR LOCKED START TIME STOP TIME CHECK FOOD AT F EASYCONVECT 888 ON DELAY F CONVECTION DOUBLE NON CONVECTION DOUBLE ...

Page 60: ...NIGHT LIGHT DELAY EASYCONVECT CLOSE CONTROL LOCK DOOR LOCKED START START TIME STOP TIME CHECK FOOD AT F Reading The Graphic Display Broiler Heat Indicator Meat Probe Indicator Time Savings Bar Indicates Of Time Remaining In Cook Cycle OR Of Time Saved With EasyConvect Bake Heat Indicator Ring Element Electric Convection Only ...

Page 61: ...ven recipes in the convection mode Three Easy Convect cooking functions Baked Goods Converts time by 50 and temperature by 50 F Meats Converts time by 20 and temperature by 25 F Other Converts time by 10 and temperature by 25 F Let s review the operation of the Easy Convect cycle We will use the Meats cycle to show how it works ...

Page 62: ...TER STANDARD COOK TIME COOK TEMP CLEAN TIME SET PROBE TEMP NIGHT LIGHT DELAY EASYCONVECT CLOSE CONTROL LOCK DOOR LOCKED START START TIME STOP TIME CHECK FOOD AT F 1 2 3 4 5 6 7 8 9 12 Meats 0 OVEN LIGHT START CANCEL OFF CONVECTION MODELS Time of Day NOTE Ring element used on electric models only Press the Meats keypad ...

Page 63: ...IGHT DELAY EASYCONVECT CLOSE CONTROL LOCK DOOR LOCKED START START TIME STOP TIME CHECK FOOD AT F 1 2 3 4 5 6 7 8 9 12 0 OVEN LIGHT START CANCEL OFF KitchenAid Electronic Range Controls Easy Convect Meats CONVECTION MODELS Time of Day NOTE Ring element used on electric models only Temperature Enter the normal cooking temperature ...

Page 64: ... STANDARD COOK TIME COOK TEMP CLEAN TIME SET PROBE TEMP NIGHT LIGHT DELAY EASYCONVECT CLOSE CONTROL LOCK DOOR LOCKED START START TIME STOP TIME CHECK FOOD AT F 1 2 3 4 5 6 7 8 9 12 0 OVEN LIGHT START CANCEL OFF Time of Day NOTE Ring element used on electric models only Enter the normal cooking temperature CONVECTION MODELS ...

Page 65: ...NIGHT LIGHT DELAY EASYCONVECT CLOSE CONTROL LOCK DOOR LOCKED START START TIME STOP TIME CHECK FOOD AT F 1 2 3 4 5 6 7 8 9 12 0 OVEN LIGHT START CANCEL OFF KitchenAid Electronic Range Controls Easy Convect Meats Time of Day NOTE Ring element used on electric models only CONVECTION MODELS Enter the normal cooking temperature ...

Page 66: ...LIGHT DELAY EASYCONVECT CLOSE CONTROL LOCK DOOR LOCKED START START TIME STOP TIME CHECK FOOD AT F 1 2 3 4 5 6 7 8 9 12 0 OVEN LIGHT START CANCEL OFF 325 KitchenAid Electronic Range Controls Easy Convect Meats Time of Day NOTE Ring element used on electric models only CONVECTION MODELS Enter the normal cooking temperature ...

Page 67: ...GHT LIGHT DELAY EASYCONVECT CLOSE CONTROL LOCK DOOR LOCKED START START TIME STOP TIME CHECK FOOD AT F 1 2 3 4 5 6 7 8 9 12 0 OVEN LIGHT START CANCEL OFF 325 KitchenAid Electronic Range Controls Easy Convect Meats Time of Day NOTE Ring element used on electric models only Enter the normal cooking time CONVECTION MODELS ...

Page 68: ...GHT LIGHT DELAY EASYCONVECT CLOSE CONTROL LOCK DOOR LOCKED START START TIME STOP TIME CHECK FOOD AT F 1 2 3 4 5 6 7 8 9 12 0 OVEN LIGHT START CANCEL OFF 325 KitchenAid Electronic Range Controls Easy Convect Meats Time of Day NOTE Ring element used on electric models only CONVECTION MODELS Enter the normal cooking time ...

Page 69: ...GHT LIGHT DELAY EASYCONVECT CLOSE CONTROL LOCK DOOR LOCKED START START TIME STOP TIME CHECK FOOD AT F 1 2 3 4 5 6 7 8 9 12 0 OVEN LIGHT START CANCEL OFF 325 KitchenAid Electronic Range Controls Easy Convect Meats Time of Day NOTE Ring element used on electric models only CONVECTION MODELS Enter the normal cooking time ...

Page 70: ...T CLOSE CONTROL LOCK DOOR LOCKED START START TIME STOP TIME CHECK FOOD AT F 1 2 3 4 5 6 7 8 9 12 0 OVEN LIGHT START CANCEL OFF 300 48 NOTE Ring element used on electric models only CONVECTION MODELS Press Start After the Start button is pressed the control adjusts the convection cooking time by 20 and the temperature by 25 degrees Temperature adjusted by 25 Convection Cooking Time adjusted by 20 ...

Page 71: ...e range will operate nonstop as long as power is applied to the range The range will resume cooking if there is a power failure while in this mode of operation convection models will resume the Fa vorite Cycle No tones will sound when in this mode Touchpad responses are delayed by 1 second to pre vent accidentally turning the range off Let s review the operation of the Sabbath Mode ...

Page 72: ...AD DEHYDRATE CONVECTION ENTER STANDARD COOK TIME COOK TEMP CLEAN TIME SET PROBE TEMP NIGHT LIGHT DELAY EASYCONVECT CLOSE CONTROL LOCK DOOR LOCKED START START TIME STOP TIME CHECK FOOD AT F 1 2 3 4 5 6 7 8 9 12 0 OVEN LIGHT START CANCEL OFF Bake NOTE Ring element used on electric models only ...

Page 73: ...T DELAY EASYCONVECT CLOSE CONTROL LOCK DOOR LOCKED START START TIME STOP TIME CHECK FOOD AT F 1 2 3 4 5 6 7 8 9 12 0 OVEN LIGHT START CANCEL OFF KitchenAid Electronic Range Controls Sabbath Mode Time of Day NOTE Ring element used on electric models only CONVECTION MODELS Set the temperature you desire to use during the Sabbath Mode We will use 375 ...

Page 74: ... TEMP CLEAN TIME SET PROBE TEMP NIGHT LIGHT DELAY EASYCONVECT CLOSE CONTROL LOCK DOOR LOCKED START START TIME STOP TIME CHECK FOOD AT F 1 2 3 4 5 6 7 8 9 12 0 OVEN LIGHT START CANCEL OFF Time of Day NOTE Ring element used on electric models only CONVECTION MODELS Set the temperature you desire to use during the Sabbath Mode We will use 375 ...

Page 75: ...K TEMP CLEAN TIME SET PROBE TEMP NIGHT LIGHT DELAY EASYCONVECT CLOSE CONTROL LOCK DOOR LOCKED START START TIME STOP TIME CHECK FOOD AT F 1 2 3 4 5 6 7 8 9 12 0 OVEN LIGHT START CANCEL OFF Time of Day NOTE Ring element used on electric models only CONVECTION MODELS Set the temperature you desire to use during the Sabbath Mode We will use 375 ...

Page 76: ... EASYCONVECT CLOSE CONTROL LOCK DOOR LOCKED START START TIME STOP TIME CHECK FOOD AT F 1 2 3 4 5 6 7 8 9 12 0 OVEN LIGHT START CANCEL OFF KitchenAid Electronic Range Controls Sabbath Mode Time of Day NOTE Ring element used on electric models only CONVECTION MODELS Set the temperature you desire to use during the Sabbath Mode We will use 375 ...

Page 77: ...MP NIGHT LIGHT DELAY EASYCONVECT CLOSE CONTROL LOCK DOOR LOCKED START START TIME STOP TIME CHECK FOOD AT F 1 2 3 4 5 6 7 8 9 12 0 OVEN LIGHT START CANCEL OFF KitchenAid Electronic Range Controls Sabbath Mode NOTE Ring element used on electric models only CONVECTION MODELS Select Start and the oven will preheat Time of Day ...

Page 78: ...EASYCONVECT CLOSE CONTROL LOCK DOOR LOCKED START START TIME STOP TIME CHECK FOOD AT F 1 2 3 4 5 6 7 8 9 12 0 OVEN LIGHT START CANCEL OFF KitchenAid Electronic Range Controls Sabbath Mode Time of Day NOTE Ring element used on electric models only CONVECTION MODELS When the oven has finished preheating press and hold the 6 keypad for 5 seconds ...

Page 79: ...P NIGHT LIGHT DELAY EASYCONVECT CLOSE CONTROL LOCK DOOR LOCKED START START TIME STOP TIME CHECK FOOD AT F 1 2 3 4 5 6 7 8 9 12 0 OVEN LIGHT START CANCEL OFF KitchenAid Electronic Range Controls Sabbath Mode Time of Day NOTE Ring element used on electric models only CONVECTION MODELS The Time of Day display changes to SAbb ...

Page 80: ...Y EASYCONVECT CLOSE CONTROL LOCK DOOR LOCKED START START TIME STOP TIME CHECK FOOD AT F 1 2 3 4 5 6 7 8 9 12 0 OVEN LIGHT START CANCEL OFF KitchenAid Electronic Range Controls Sabbath Mode Time of Day NOTE Ring element used on electric models only CONVECTION MODELS The Sabbath Mode can only be cancelled by pressing and holding the 6 keypad ...

Page 81: ...BREAD DEHYDRATE CONVECTION ENTER STANDARD COOK TIME COOK TEMP CLEAN TIME SET PROBE TEMP NIGHT LIGHT DELAY EASYCONVECT CLOSE CONTROL LOCK DOOR LOCKED START START TIME STOP TIME CHECK FOOD AT F 1 2 3 4 5 6 7 8 9 12 0 OVEN LIGHT START CANCEL OFF How does the oven operate in the Clean Cycle ...

Page 82: ...E STOP TIME CHECK FOOD AT F 1 2 3 4 5 6 7 8 9 12 0 OVEN LIGHT START CANCEL OFF Clean KitchenAid Electronic Range Controls Clean Mode The customer selects the Clean Mode on the touch panel The 3 1 2 hour default clean time will be displayed the customer can select a clean cycle of between 2 1 2 and 4 1 2 hours The Start and Stop times will be displayed based on the time selected by the customer ...

Page 83: ...ing 3 30 4 30 8 00 ON RAISING BREAD DEHYDRATE CONVECTION ENTER STANDARD COOK TIME COOK TEMP CLEAN TIME SET PROBE TEMP NIGHT LIGHT DELAY EASYCONVECT CLOSE CONTROL LOCK DOOR LOCKED START START TIME STOP TIME CHECK FOOD AT F 1 2 3 4 5 6 7 8 9 12 0 OVEN LIGHT START CANCEL OFF Clean 12 1 2 3 4 5 6 7 8 9 10 11 N L1 Broil Ignitor Broil Valve Bake Ignitor Bake Valve P6 P11 ...

Page 84: ...TER STANDARD COOK TIME COOK TEMP CLEAN TIME SET PROBE TEMP NIGHT LIGHT DELAY EASYCONVECT CLOSE CONTROL LOCK DOOR LOCKED START START TIME STOP TIME CHECK FOOD AT F 1 2 3 4 5 6 7 8 9 12 0 OVEN LIGHT START CANCEL OFF Clean 12 1 2 3 4 5 6 7 8 9 10 11 N L1 Broil Ignitor Broil Valve Bake Ignitor Bake Valve P6 P11 ...

Page 85: ...PROBE TEMP NIGHT LIGHT DELAY EASYCONVECT CLOSE CONTROL LOCK DOOR LOCKED START START TIME STOP TIME CHECK FOOD AT F 1 2 3 4 5 6 7 8 9 12 0 OVEN LIGHT START CANCEL OFF Clean 12 1 2 3 4 5 6 7 8 9 10 11 N L1 Broil Ignitor Broil Valve Bake Ignitor Bake Valve P6 P11 KitchenAid Electronic Range Controls Clean Mode ...

Page 86: ...OSE CONTROL LOCK DOOR LOCKED START START TIME STOP TIME CHECK FOOD AT F 1 2 3 4 5 6 7 8 9 12 0 OVEN LIGHT START CANCEL OFF Clean 12 1 2 3 4 5 6 7 8 9 10 11 N L1 Broil Ignitor Broil Valve Bake Ignitor Bake Valve P6 P11 KitchenAid Electronic Range Controls Clean Mode After 30 minutes The Bake Ignitor is ON The Bake Valve is ON The Broil Circuit is OFF ...

Page 87: ...ET PROBE TEMP NIGHT LIGHT DELAY EASYCONVECT CLOSE CONTROL LOCK DOOR LOCKED START START TIME STOP TIME CHECK FOOD AT F 1 2 3 4 5 6 7 8 9 12 0 OVEN LIGHT START CANCEL OFF Clean 12 1 2 3 4 5 6 7 8 9 10 11 N L1 Broil Ignitor Broil Valve Bake Ignitor Bake Valve P6 P11 After approximately 3 hours The display shows that the clean time remaining is 5 minutes ...

Page 88: ...P NIGHT LIGHT DELAY EASYCONVECT CLOSE CONTROL LOCK DOOR LOCKED START START TIME STOP TIME CHECK FOOD AT F 1 2 3 4 5 6 7 8 9 12 0 OVEN LIGHT START CANCEL OFF Clean 12 1 2 3 4 5 6 7 8 9 10 11 N L1 Broil Ignitor Broil Valve Bake Ignitor Bake Valve P6 P11 When the Clean Cycle ends The oven door will remain locked The display will show locked for as long as the oven is hot ...

Page 89: ...P NIGHT LIGHT DELAY EASYCONVECT CLOSE CONTROL LOCK DOOR LOCKED START START TIME STOP TIME CHECK FOOD AT F 1 2 3 4 5 6 7 8 9 12 0 OVEN LIGHT START CANCEL OFF Clean 12 1 2 3 4 5 6 7 8 9 10 11 N L1 Broil Ignitor Broil Valve Bake Ignitor Bake Valve P6 P11 When the Clean Cycle ends The oven door will remain locked The display will show locked for as long as the oven is hot ...

Page 90: ...e 8 88 8 88 8 88 8 88 ON RAISING BREAD DEHYDRATE CONVECTION ENTER STANDARD COOK TIME COOK TEMP CLEAN TIME SET PROBE TEMP NIGHT LIGHT DELAY EASYCONVECT CLOSE CONTROL LOCK DOOR LOCKED START START TIME STOP TIME CHECK FOOD AT F 1 2 3 4 5 6 7 8 9 12 0 OVEN LIGHT START CANCEL OFF Clean 12 1 2 3 4 5 6 7 8 9 10 11 N L1 Broil Ignitor Broil Valve Bake Ignitor Bake Valve P6 P11 ...

Page 91: ...HT DELAY EASYCONVECT CLOSE CONTROL LOCK DOOR LOCKED START START TIME STOP TIME CHECK FOOD AT F 1 2 3 4 5 6 7 8 9 12 0 OVEN LIGHT START CANCEL OFF Clean 12 1 2 3 4 5 6 7 8 9 10 11 N L1 Broil Ignitor Broil Valve Bake Ignitor Bake Valve P6 P11 After approximately 45 minutes The oven door will unlock The oven door locked display will turn off when the oven temperature is below 600 F ...

Page 92: ...Controls B Line Freestanding Slide In D Line Built In Wall Ovens Things to Remember Replacement service controls must be programmed to meet the range configuration that they are being used in Failure to do so will result in an F code ...

Page 93: ... 45 QUESTIONS ...

Reviews: