background image

Data Size: 

B6L (182 mm x 128 mm)

Book Size: 

B6L (182 mm x 128 mm)

B5A-0885-00 (EN)

© 2015 JVC KENWOOD Corporation
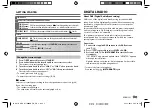
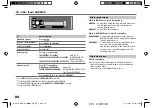
KDC-BT700DAB

CD-RECEIVER

INSTRUCTION MANUAL

AMPLI-TUNER LECTEUR DE CD

MODE D’EMPLOI

CD-RECEIVER

BEDIENUNGSANLEITUNG

JS_KWD_KDC_BT700DAB_EN_C00_1.indd   1

JS_KWD_KDC_BT700DAB_EN_C00_1.indd   1

9/11/2015   2:52:21 PM

9/11/2015   2:52:21 PM

Summary of Contents for kdc-bt700dab

Page 1: ...85 00 EN 2015 JVC KENWOOD Corporation KDC BT700DAB CD RECEIVER INSTRUCTION MANUAL AMPLI TUNER LECTEUR DE CD MODE D EMPLOI CD RECEIVER BEDIENUNGSANLEITUNG JS_KWD_KDC_BT700DAB_EN_C00_1 indd 1 JS_KWD_KDC_BT700DAB_EN_C00_1 indd 1 9 11 2015 2 52 21 PM 9 11 2015 2 52 21 PM ...

Page 2: ...ue que cette pile contient du plomb Entsorgung von gebrauchten elektrischen und elektronischen Geräten und Batterien anzuwenden in Ländern mit einem separaten Sammelsystem für solche Geräte Das Symbol durchgestrichene Mülltonne auf dem Produkt oder seiner Verpackung weist darauf hin dass dieses Produkt nicht als normaler Haushaltsabfall behandelt werden darf sondern an einer Annahmestelle für das ...

Page 3: ...ten permission THIS SOFTWARE IS PROVIDED BY THE COPYRIGHT HOLDERS AND ONTRIBUTORS AS IS AND ANY EXPRESS OR IMPLIED WARRANTIES INCLUDING BUT NOT LIMITED TO THE IMPLIED WARRANTIES OF MERCHANTABILITY AND FITNESS FOR A PARTICULAR PURPOSE ARE DISCLAIMED IN NO EVENT SHALL THE FOUNDATION OR CONTRIBUTORS BE LIABLE FOR ANY DIRECT INDIRECT INCIDENTAL SPECIAL EXEMPLARY OR CONSEQUENTIAL DAMAGES INCLUDING BUT ...

Page 4: ...ue to condensation on the laser lens eject the disc and wait for the moisture to evaporate USB rating is indicated on the main unit To view detach the faceplate 3 Depending on the types of cars the antenna will automatically extend when you turn on the unit with the antenna control wire connected 28 Turn off the unit or change the source to STANDBY when parking at a low ceiling area How to read th...

Page 5: ...PRESS VOLUME KNOB 1 Turn the volume knob to select ENG English RUS Russian or SPA Spanish then press the knob ENG is selected for the initial setup Then the display shows CANCEL DEMO PRESS VOLUME KNOB 2 Press the volume knob YES is selected for the initial setup 3 Press the volume knob again DEMO OFF appears Then the display shows the selected crossover type 2 WAY X OVER or 3 WAY X OVER To change ...

Page 6: ...vious setting item press 2 Default XX AUDIO CONTROL SWITCH PREOUT REAR SUB W Selects whether rear speakers or a subwoofer are connected to the line out terminals on the rear through an external amplifier TUNER SETTING DAB L BAND ON Receives L BAND ensemble during digital audio reception OFF Cancels DAB ANT POWER ON Supplies power to the DAB antenna Selects when using the supplied antenna OFF Does ...

Page 7: ... according to how the speakers are connected 28 If you select a wrong type The speakers may damage The output sound level may be extremely high or low GETTING STARTED DIGITAL RADIO About DAB Digital Audio Broadcasting DAB is one of the digital radio broadcasting systems available today It can deliver digital quality sound without any annoying interference or signal distortion Furthermore it can ca...

Page 8: ...h mode 2 Turn the volume knob quickly to enter Alphabet Search mode 3 Turn the volume knob or press S T to select the character to be searched for Press J K to go to the previous next page 4 Press the volume knob to start searching 5 Turn the volume knob to select a service then press the knob To cancel the Alphabet Search mode press LIST UPDATE Other settings 1 Press the volume knob to enter FUNC...

Page 9: ...CK M music EASY M music LIGHT M music CLASSICS OTHER M music WEATHER FINANCE CHILDREN SOCIAL RELIGION PHONE IN TRAVEL LEISURE JAZZ COUNTRY NATION M music OLDIES FOLK M music DOCUMENT OFF Cancels 2 Press the volume knob to enter PTY language selection 3 Turn the volume knob to select the PTY language ENGLISH FRENCH GERMAN then press the knob RELATED SERV ON Enable Soft Link function to switch to an...

Page 10: ...up OFF Cancels TI in MW LW band is for enabling traffic interruption to DIGITAL AUDIO source only PTY SEARCH 1 Press the volume knob to enter PTY language selection 2 Turn the volume knob to select the PTY language ENGLISH FRENCH GERMAN then press the knob 3 Turn the volume knob to select the available Program Type 9 4 Press S T to start searching ANALOG RADIO Search for a station 1 Press repeated...

Page 11: ...emorized automatically It will be applied the next time traffic information or news bulletin is turned on CD USB iPod ANDROID Start playback The source changes automatically and playback starts 1 KCA iP102 30 pin type KCA iP103 Lightning type 2 Do not leave the cable inside the car when not using 3 When connecting an Android device Press VIEW to install KENWOOD MUSIC PLAY APP is shown Follow the i...

Page 12: ... For CD Only for MP3 WMA AAC files CD USB iPod ANDROID Select control mode While in IPOD source press 5 repeatedly MODE ON Control iPod using the iPod itself However you can still play pause file skip fast forward or reverse from this unit MODE OFF Control iPod from this unit While in ANDROID source press 5 repeatedly BROWSE MODE Control Android device from this unit via KENWOOD MUSIC PLAY applica...

Page 13: ...the volume knob to start searching To return to the root folder first file top menu press 5 Not applicable for BT AUDIO source To return to the previous setting item press To cancel press and hold For iPod applicable only when MODE OFF is selected 10 For ANDROID applicable only when BROWSE MODE is selected 10 Listen to TuneIn Radio TuneIn Radio Pro Aupeo While listening to TuneIn Radio TuneIn Radi...

Page 14: ... SSP Up to 10 devices can be registered paired in total Once the pairing is completed the Bluetooth device will remain registered in the unit even if you reset the unit To delete the paired device 15 DEVICE DELETE Once pairing is completed Bluetooth connection is established automatically BT1 and or BT2 on the display window lights up A maximum of two Bluetooth phones and one Bluetooth audio devic...

Page 15: ...coming call and hold the current call Press Reject another incoming call Press While having two active calls End current call and activate held call Press Swap between the current call and held call Press Adjust the phone volume 00 to 35 Default 15 Turn the volume knob during a call This adjustment will not affect the volume of the other sources Switch between hands free and private talk modes Pre...

Page 16: ...s call missed Press DISP to change the display category NUMBER or NAME NO DATA appears if there is no recorded call history 2 Press the volume knob to call PHONE BOOK Applicable only if the phone supports PBAP 1 Turn the volume knob quickly to enter alphabet search mode if the phonebook contains many contacts The first menu ABCDEFGHIJK appears To go to the other menu LMNOPQRSTUV or WXYZ1 press J K...

Page 17: ...Turn the volume knob to select an item see the following table then press the knob 3 Repeat step 2 until the desired item is selected activated or follow the instructions stated on the selected item 4 Press and hold to exit To return to the previous setting item press Default XX BT MODE PHONE SELECT Selects the phone or audio device to connect or disconnect appears in front of the device name when...

Page 18: ...lity PB DL Phonebook Access profile PBAP compatibility To cancel test mode press and hold to turn off the unit BLUETOOTH Audio Audio player via Bluetooth 1 Press repeatedly to select BT AUDIO 2 Operate the Bluetooth audio player to start playback To On the faceplate Playback pause Press Select group or folder Press J K Reverse Forward skip Press S T Reverse Fast forward Press and hold S T Repeat p...

Page 19: ...alizer suitable to the music genre Select USER to use the settings made in MANUAL EQ BASS BOOST LV1 LV2 LV3 LV4 LV5 Selects your preferred bass boost level OFF Cancels LOUDNESS LV1 LV2 Selects your preferred low and high frequencies boost to produce a well balanced sound at a low volume level OFF Cancels SUBWOOFER SET ON Turns on the subwoofer output OFF Cancels AUX Preparation Select ON for BUILT...

Page 20: ...OVER For 2 way crossover SUB W LEVEL SUBWOOFER SET is selectable only if SWITCH PREOUT is set to SUB W 4 SUB W LEVEL is selectable only if SUBWOOFER SET is set to ON 17 Crossover settings Below are the available setting items for 2 way crossover and 3 way crossover SPEAKER SIZE Selects according to the connected speaker size for optimum performance The frequency and slope settings are automaticall...

Page 21: ...AL 0 GAIN 8 to 0 AUDIO SETTINGS 2 way crossover setting items SPEAKER SIZE FRONT SIZE 8CM 10CM 12CM 13CM 16CM 17CM 18CM 4 6 5 7 6 8 6 9 7 10 TWEETER SMALL MIDDLE LARGE NONE not connected REAR 8 CM 10 CM 12 CM 13 CM 16 CM 17 CM 18 CM 4 6 5 7 6 8 6 9 7 10 NONE not connected SUBWOOFER 16CM 20CM 25CM 30CM 38CM OVER NONE not connected X OVER TWEETER FRQ 1KHZ 1 6KHZ 2 5KHZ 4KHZ 5KHZ 6 3KHZ 8KHZ 10KHZ 12...

Page 22: ...ume to the optimum level Check the cords and connections MISWIRING CHECK WIRING THEN PWR ON appears Turn the power off then check to be sure the terminals of the speaker wires are insulated properly Turn the power on again PROTECTING SEND SERVICE appears Send the unit to the nearest service center Sound cannot be heard The unit does not turn on Information shown on the display is incorrect Clean t...

Page 23: ...ns NO MUSIC Connect a USB device that contains playable audio files iPod ERROR Reconnect the iPod Reset the iPod TROUBLESHOOTING Symptom Remedy ANDROID Sound cannot be heard during playback Sound output only from the Android device Reconnect the Android device If in HAND MODE launch any media player application on the Android device and start playback If in HAND MODE relaunch the current media pla...

Page 24: ...ring information from both the unit and the Bluetooth device then perform pairing again 12 Echo or noise is heard during a phone conversation Adjust the microphone unit s position 12 Check the ECHO CANCEL setting 14 Phone sound quality is poor Reduce the distance between the unit and the Bluetooth device Move the car to a place where you can get a better signal reception Voice calling method is no...

Page 25: ...vice file system FAT12 FAT16 FAT32 Even when audio files comply with the standards listed above playback may be impossible depending on the types or conditions of media or device The AAC m4a file in a USB device or a CD encoded by iTunes cannot be played on this unit Unplayable discs Discs that are not round Discs with coloring on the recording surface or discs that are dirty Recordable ReWritable...

Page 26: ...g For MP3 WMA AAC WAV FLAC files Track title Artist Album title artist Folder name File name Playing time Clock back to the beginning IPOD or ANDROID Track title Artist Album title Artist Playing time Clock back to the beginning BT AUDIO Track title Artist Album title Artist Playing time Clock back to the beginning AUX Source name Clock back to the beginning REFERENCES SPECIFICATIONS Digital radio...

Page 27: ...AC Decode FLAC file Up to 48 kHz 16 bit Bluetooth Version Bluetooth Ver 2 1 EDR Bluetooth 3 0 Frequency Range 2 402 GHz 2 480 GHz Output Power 4 dBm MAX 0 dBm AVE Power Class 2 Maximum Communication Range Line of sight approx 10 m 32 8 ft Profile HFP Hands Free Profile A2DP Advanced Audio Distribution Profile AVRCP Audio Video Remote Control Profile SPP Serial Port Profile PBAP Phonebook Access Pr...

Page 28: ... Metal parts such as the heat sink and enclosure become hot Do not connect the wires of speakers to the car chassis or Ground wire black or connect them in parallel Mount the unit at an angle of less than 30º If your vehicle wiring harness does not have the ignition terminal connect Ignition wire red to the terminal on the vehicle s fuse box which provides 12 V DC power supply and is turned on and...

Page 29: ...to the holes on both sides of the trim plate then pull it out 3 Insert the extraction keys deeply into the slots on each side then follow the arrows as shown on the right Installing the unit in dash mounting Hook on the top side Orientate the trim plate as illustrated before fitting Part list for installation A Faceplate C Mounting sleeve B Trim plate D Wiring harness E Extraction key JS_KWD_KDC_B...

Page 30: ...ct the Kenwood navigation system refer your navigations manual Yellow A4 Red Ignition wire Red A7 Yellow Battery wire Pin Color and function A4 Yellow Battery A5 Blue White Power control A7 Red Ignition ACC A8 Black Earth ground connection B1 Purple Rear speaker right For 3 way crossover Tweeter right B2 Purple black B3 Gray Front speaker right For 3 way crossover Mid range speaker right B4 Gray b...

Page 31: ...he vehicle antenna Thoroughly wipe oil and dirt from the pasting surface with the supplied cleaner I Do not bend or damage the film antenna F It may not be possible to install on certain vehicles Check the cable routing of the film antenna F and amplifier unit G before pasting Do not apply any glass cleaner after pasting the film antenna F Determine the antenna installation position The direction ...

Page 32: ...view The antenna should be installed on the passenger side for safety 2 Clean the windscreen with the supplied cleaner I I Wait until the glass surface is completely dry before proceeding Warm the surface of the windscreen with defroster if it is cold during winter 3 Remove the separator tag 1 of film antenna F horizontally and paste the antenna on the windscreen F Do not touch the pasting surface...

Page 33: ...the earth sheet so that it does not interfere with the interior parts front pillar cover Also take care that the interior parts do not interfere with the amplifier unit G G 8 Wire the antenna cables Use cable clamper H to secure the antenna to the pillar at several positions 9 Attach the front pillar cover back to its original position Be sure not to damage the earth sheet and amplifier unit G whe...

Page 34: ...er tout risque de court circuit Si une erreur de disque se produit à cause de la condensation sur l objectif laser éjectez le disque et attendez que l humidité s évapore La classe USB est indiquée sur l appareil principal Pour le voir détachez la façade 3 En fonction du type de voiture l antenne s étendra automatiquement quand vous mettrez l appareil sous tension si le câble de commande d antenne ...

Page 35: ...tre SEL LANGUAGE PRESS VOLUME KNOB 1 Tournez le bouton de volume pour sélectionner ENG anglais RUS russe ou SPA espagnol puis appuyez sur le bouton ENG est choisi pour le réglage initial Puis l affichage montre CANCEL DEMO PRESS VOLUME KNOB 2 Appuyez sur le bouton de volume YES est choisi pour le réglage initial 3 Appuyez de nouveau sur le bouton de volume DEMO OFF apparaît Puis l affichage montre...

Page 36: ...ue l élément souhaité soit sélectionné ou activé 5 Maintenez enfoncée pour quitter Pour retourner à l option de réglage précédente appuyez sur 2 Défaut XX AUDIO CONTROL SWITCH PREOUT REAR SUB W Choisitsilesenceintesarrièreouuncaissondegravesontconnectés auxprisesdesortiedeligneàl arrière àtraversunamplificateurextérieur TUNER SETTING DAB L BAND ON ReçoitunensembleL BANDpendantlaréceptionaudionumér...

Page 37: ...s enceintes 28 Si vous sélectionnez une mauvais type Les enceintes peuvent être endommagées Le niveau sonore de sortie peut être extrêmement élevé ou faible PRISE EN MAIN RADIO NUMÉRIQUE À propos du DAB Digital Audio Broadcasting DAB est l un des systèmes de radio numérique disponibles aujourd hui Il peut offrir un son de qualité numérique sans toutes les interférences gênantes ni les distorsions ...

Page 38: ...ntrer en mode de recherche de service 2 Tournez le bouton de volume rapidement pour entrer en mode de recherche alphabétique 3 Tournez le bouton du volume ou appuyez sur S T pour choisir le caractère à rechercher Appuyez sur J K pour aller à la page précédente suivante 4 Appuyez sur le bouton de volume pour démarrer la recherche 5 Tournez le bouton de volume pour choisir un service puis appuyez su...

Page 39: ...ue EASYM musique LIGHTM musique CLASSICS OTHERM musique WEATHER FINANCE CHILDREN SOCIAL RELIGION PHONE IN TRAVEL LEISURE JAZZ COUNTRY NATIONM musique OLDIES FOLKM musique DOCUMENT OFF Annulation 2 AppuyezsurleboutondevolumepourentrerenmodedesélectiondelalanguePTY 3 TournezleboutondevolumepourchoisirlalanguePTY ENGLISH FRENCH GERMAN puis appuyezsurlebouton RELATED SERV ON ActivezlafonctionSoft Link...

Page 40: ...sourceDIGITALAUDIOuniquement PTY SEARCH 1 AppuyezsurleboutondevolumepourentrerenmodedesélectiondelalanguePTY 2 TournezleboutondevolumepourchoisirlalanguePTY ENGLISH FRENCH GERMAN puisappuyezsurlebouton 3 Tournezleboutondevolumepoursélectionnerletypedeprogrammedisponible 9 4 AppuyezsurS Tpourdémarrerlarecherche RADIO ANALOGIQUE Recherchez une station 1 Appuyez répétitivement sur pour sélectionner T...

Page 41: ...atiquementmémorisé Ilseraappliquélaprochainefoisquelesinformationsroutièresoude bulletind informationserontactivées CD USB iPod ANDROID Démarrez la lecture La source change automatiquement et le lecture démarre 1 KCA iP102 Typeà30broches KCA iP103 Typed éclairage 2 Nelaissezpaslecâbleàl intérieurdelavoiturequandiln estpasutilisé 3 Lorsdelaconnexiond unpériphériqueAndroid Press VIEW toinstallKENWOO...

Page 42: ...ANDROID Sélectionnez le mode de commande Quand la source est IPOD appuyez répétitivement sur 5 MODE ON Commande l iPod en utilisant l iPod lui même Cependant vous pouvez toujours faire une lecture pause sauter des fichiers et faire une recherche rapide vers l arrière vers l avant à partir de cet appareil MODE OFF Commande l iPod à partir de cet appareil Quand la source est ANDROID appuyez répétiti...

Page 43: ...on d entrée Vous pouvez entrer un maximum de trois caractères Appuyez sur le bouton de volume pour démarrer la recherche Pour retourner au dossier racine premier fichier menu supérieur appuyez sur 5 Ne s applique pas à la source BT AUDIO Pour retourner à l option de réglage précédente appuyez sur Pour annuler maintenez enfoncée Pour l iPod applicable uniquement quand MODE OFF est sélectionné 10 Po...

Page 44: ...et appareil prend en charge le Pairage simple sécurisé SSP Un maximum de 10 appareils peuvent être enregistrés appariés en tout Une fois que le pairage est termine le périphérique Bluetooth reste enregistré sur l appareil même si vous réinitialisez l appareil Pour supprimer un périphérique apparié 15 DEVICE DELETE Une fois le pairage terminé la connexion Bluetooth est établie automatiquement BT1 e...

Page 45: ...e l appel actuel Appuyez sur Refusez un autre appel entrant Appuyez sur Quand vous avez deux appels actifs Terminez l appel actuel et activez l appel en attente Appuyez sur Commutez entre l appel actuel et l appel en attente Appuyez sur Ajustez le volume du téléphone 00 à 35 Défaut 15 Tournez le bouton de volume pendant un appel Cet ajustement n affecte pas le volume des autres sources Commute ent...

Page 46: ...indiqueunappelpassé M indiqueunappelmanqué AppuyezsurDISPpourchangerlacatégoriedel affichage NUMBERouNAME NODATA apparaîts iln yapasd historiqued appelsenregistré 2 Appuyezsurleboutondevolumepourappeler PHONE BOOK ApplicableuniquementquandletéléphoneprendenchargePBAP 1 Tournezleboutondevolumerapidementpourentrerenmodederecherchealphabétique sile répertoired adressescontientbeaucoupdecontacts Lepre...

Page 47: ...amètres 1 Appuyez sur le bouton de volume pour entrer FUNCTION 2 Tournez le bouton de volume pour sélectionner un élément voir le tableau suivant puis appuyez sur le bouton 3 Répétez l étape 2 jusqu à ce que l élément souhaité soit sélectionné activé ou suivez les instructions données pour l élément sélectionné 4 Maintenez enfoncée pour quitter Pour retourner à l option de réglage précédente appuy...

Page 48: ...nnuler le mode de vérification maintenez enfoncée pour mettre l appareil hors tension BLUETOOTH Audio Lecteur audio via Bluetooth 1 Appuyez répétitivement sur pour sélectionner BT AUDIO 2 Commandez le lecture audio Bluetooth pour démarrer la lecture Pour Sur la façade Lecture pause Appuyez sur Choisissez un groupe ou un dossier Appuyez sur J K Saut vers l arrière saut vers l avant Appuyez sur S T ...

Page 49: ...électionnez USER pourutiliserlesréglagesréalisésdans MANUAL EQ BASS BOOST LV1 LV2 LV3 LV4 LV5 Choisitvotreniveaupréféréd accentuationdesgraves OFF Annulation LOUDNESS LV1 LV2 Sélectionnervotreaccentuationspréféréepourlesbassesethautes fréquencespourproduireunsonpluséquilibréauxfaiblesniveauxdevolume OFF Annulation SUBWOOFER SET ON Metenservicelasortieducaissondegrave OFF Annulation AUX Préparation...

Page 50: ...t réglé sur SUB W 4 SUB W LEVEL peut être sélectionné uniquement si SUBWOOFER SET est réglé sur ON 17 Réglages de transition Voici les options de réglage disponibles pour la transition 2 voies et la transition 3 voies SPEAKER SIZE La sélection est faite en fonction de la taille de l enceinte connectée permettant d obtenir les performances optimales Les réglages de la fréquence et de la pente sont ...

Page 51: ...NORMAL 0 GAIN 8à0 RÉGLAGES AUDIO Options de réglage de la transition 2 voies SPEAKER SIZE FRONT SIZE 8CM 10CM 12CM 13CM 16CM 17CM 18CM 4 6 5 7 6 8 6 9 7 10 TWEETER SMALL MIDDLE LARGE NONE nonconnecté REAR 8 CM 10 CM 12 CM 13 CM 16 CM 17 CM 18 CM 4 6 5 7 6 8 6 9 7 10 NONE nonconnecté SUBWOOFER 16CM 20CM 25CM 30CM 38CM OVER NONE nonconnecté X OVER TWEETER FRQ 1KHZ 1 6KHZ 2 5KHZ 4KHZ 5KHZ 6 3KHZ 8KHZ...

Page 52: ... DE DÉPANNAGE Symptôme Remède Généralités Lesonnepeutpasêtreentendu Ajustezlevolumesurleniveauoptimum Vérifiezlescordonsetlesconnexions MISWIRINGCHECKWIRINGTHENPWRON apparaît Mettezl appareilhorstension puisassurez vousquelesprisesdescâbles d enceintesontcorrectementisolées Mettezdenouveaul appareilsous tension PROTECTINGSENDSERVICE apparaît Envoyezl appareilaucentredeserviceleplusproche Lesonnepe...

Page 53: ...rifiezlesconnexions NOMUSIC ConnectezunpériphériqueUSBquicontientdesfichiersaudio compatibles iPodERROR Reconnectezl iPod Réinitialisezl iPod GUIDE DE DÉPANNAGE Symptôme Remède ANDROID Aucunsonnepeutêtreentendu pendantlalecture Lesonsortuniquementdu périphériqueAndroid ReconnectezlepériphériqueAndroid Enmode HAND MODE lancezn importequelleapplication multimédiasurlepériphériqueAndroidetdémarrezlal...

Page 54: ...areil etlepériphériqueBluetooth Supprimezlesinformationsdepairagepourcetappareiletle périphériqueBluetooth puiseffectuezdenouveaulepairage 12 Unéchooudubruitestentendu pendantuneconversation téléphonique Ajustezlapositiondumicrophone 12 Cochezleréglage ECHO CANCEL 14 Lesondutéléphoneestde mauvaisequalité RéduisezladistanceentrecetappareiletlepériphériqueBluetooth Déplacezlavoituredansunendroitoùvo...

Page 55: ... Mêmequandlesfichiersaudiosontconformesauxnormesétabliesci dessus ilestpossiblequelalecturenesoitpaspossiblesuivantle typeoulesconditionsdusupportoupériphérique UnfichierAAC m4a dansunpériphériqueUSBouunCDcodépariTunesnepeutpasêtrelusurcetappareil Disques ne pouvant pas être lus Disquesquinesontpasronds Disquesavecdescolorationssurlasurfaced enregistrementoudisquessales Disquesenregistrables réins...

Page 56: ...isque Titredeplage Duréedelecture Horloge retouraudébut Pour les fichiers MP3 WMA AAC WAV FLAC Titredeplage Artiste Titred album Artiste Nomdedossier Nomdefichier Duréedelecture Horloge retouraudébut IPODouANDROID Titredeplage Artiste Titred album Artiste Duréedelecture Horloge retouraudébut BTAUDIO Titredeplage Artiste Titred album Artiste Duréedelecture Horloge retouraudébut AUX Nomdelasource Ho...

Page 57: ... BluetoothVer 2 1 EDR Bluetooth3 0 Plagedefréquences 2 402GHz 2 480GHz Puissancedesortie 4dBm MAX 0dBm AVE PowerClass2 Portéedecommunicationmaximale Lignedevueapproximative10m 32 8ft Profile HFP Hands FreeProfile Profilemainslibres A2DP AdvancedAudioDistributionProfile Profilede distributionaudioavancé AVRCP Audio VideoRemoteControlProfile Profilede télécommandeaudio vidéo SPP SerialPortProfile Pr...

Page 58: ...Lespartiesmétalliques commeledissipateurdechaleuretleboîtier deviennentchaudes Neconnectezpaslesfils desl enceintesauchâssisdelavoiture aufildemasse noir ouenparallèle Montezl appareilavecunangledemoinsde30 Silefaisceaudefilsdevotrevéhiculenepossèdepasdeborned allumage connectezlefild allumage rouge àla borneduboîtierdefusibledevotrevéhiculequioffreunealimentationde12VCCetquisemetenethorsservice a...

Page 59: ...côté de la plaque d assemblage puis tirez vers l extérieur 3 Insérez les clés d extraction profondément dans les fentes de chaque côté puis suivez les flèches indiquées ci à droite Installation de l appareil montage encastré Crochetsurlecôtésupérieur Orientezlaplaquedegarniturede lafaçonillustréeavantlafixation Liste des pièces pour l installation A Façade C Manchon de montage B Plaque d assemblag...

Page 60: ...stèmedenavigationKenwood reportez vousàvotremanueldenavigation Jaune A4 Rouge Câbled allumage Rouge A7 Jaune Câbledebatterie Broche Couleuretfonction A4 Jaune Pile A5 Bleu Blanc Commanded alimentation A7 Rouge Allumage ACC A8 Noir Connexionàlaterre masse B1 Violet Enceintearrière droite Pourlatransition3voies Enceintedesaigus droite B2 Violet noir B3 Gris Enceinteavant droite Pourlatransition3voie...

Page 61: ...destationdediffusionparrapportauvéhicule antenne Essuyezsoigneusementl huileetlessaletésdelasurfacedecollageaveclenettoyant fourni I Netordezpasnin endommagezl antennefilm F L installationpeutnepasêtrepossiblesurcertainsvéhicules Vérifiezlecâblagedel antennefilm F etdel amplificateur G avantlecollage N appliquezaucunnettoyantpourvitreaprèsavoircollél antennefilm F Déterminez la position d installa...

Page 62: ...tallation Pourdesraisondesécurité l antennedoitêtreinstalléeducôtépassager 2 Nettoyez le pare brise avec le nettoyant fourni I I Attendez que la surface de la vitre soit complètement sèche avant de continuer Réchauffez la surface du pare brise avec le dégivreur s il fait froid en hiver 3 Retirez le séparateur balise 1 de l antenne film F horizontalement et collez l antenne sur le pare brise F Ne t...

Page 63: ...sse afin qu elle n interfère pas avec les parties intérieures couverture de pilier avant Faites aussi attention à ce que les parties intérieures n interfèrent pas avec l amplificateur G G 8 Attachez les câbles d antenne Utilisez un serre câble H pour fixer l antenne au pilier en plusieurs points 9 Remettez en place le couvercle du pilier avant Veillez à ne pas endommager la feuille de masse et l a...

Page 64: ... ein Disc Fehler durch Kondensationsbildung auf der Laserlinse auftritt werfen Sie die Disc aus und warten Sie eine Zeit lang bis die Kondensation getrocknet ist Die USB Kennung ist auf dem Hauptgerät angegeben Zum Betrachten nehmen Sie die Frontblende ab 3 Je nach dem Typ des Fahrzeugs wird die Antenne automatisch ausgeschoben wenn Sie die Einheit mit angeschlossenem Antennensteuerkabel 28 einsch...

Page 65: ...OB 1 Drehen Sie den Lautstärke Regler zum Wählen von ENG Englisch RUS Russisch oder SPA Spanisch und drücken Sie dann den Regler ENG ist für das ursprüngliche Setup gewählt Dann erscheint folgendes in der Anzeige CANCEL DEMO PRESS VOLUME KNOB 2 Drücken Sie den Lautstärke Regler YES ist für das ursprüngliche Setup gewählt 3 Drücken Sie den Lautstärke Regler erneut DEMO OFF erscheint Danach zeigt da...

Page 66: ...tand zu treffen siehe folgende Tabelle und drücken Sie dann den Regler 4 Wiederholen Sie Schritt 3 bis der gewünschte Gegenstand gewählt oder aktiviert ist 5 Halten Sie zum Beenden gedrückt Zum Zurückschalten zum vorherigen Einstellelement drücken Sie 2 Standard XX AUDIO CONTROL SWITCH PREOUT REAR SUB W Wählt obhintereLautsprecherodereinSubwooferandieLine Out BuchsenanderRückseiteangeschlossensind...

Page 67: ...nschlusses der Lautsprecher 28 Wenn Sie einen falschen Typ wählen Die Lautsprecher können beschädigt werden Der Ausgangstonpegel kann sehr hoch oder niedrig sein ERSTE SCHRITTE DIGITAL RADIO Über DAB Digital Audio Broadcasting DAB ist eines der heute verfügbaren digitalen Rundfunksendesysteme Es kann Klang in Digitalqualität ohne störende Interferenzen oder Signalverzerrung liefern Außerdem kann d...

Page 68: ...f Dienstsuche zu schalten 2 Drehen Sie den Lautstärke Regler schnell für Alphabetsuche 3 Drehen Sie den Lautstärke Regler oder drücken Sie S T um das Zeichen auswählen nach dem gesucht werden soll Zum Weitergehen zur vorherigen nächsten Seite J K drücken 4 Drücken Sie den Lautstärke Regler zum Starten der Suche 5 Drehen Sie den Lautstärke Regler zum Wählen eines Dienstes und drücken Sie dann den R...

Page 69: ...EASYM Musik LIGHTM Musik CLASSICS OTHERM Musik WEATHER FINANCE CHILDREN SOCIAL RELIGION PHONE IN TRAVEL LEISURE JAZZ COUNTRY NATIONM Musik OLDIES FOLKM Musik DOCUMENT OFF Hebtauf 2 DrückenSiedenLautstärke ReglerzumEinschaltenderPTY Sprachauswahl 3 DrehenSiedenLautstärke ReglerzumWählenderPTY Sprache ENGLISH FRENCH GERMAN unddrückenSiedanndenRegler RELATED SERV ON AktivierenSiedieSoft Link Funktion...

Page 70: ...le PTY SEARCH 1 DrückenSiedenLautstärke ReglerzumEinschaltenderPTY Sprachauswahl 2 DrehenSiedenLautstärke ReglerzumWählenderPTY Sprache ENGLISH FRENCH GERMAN unddrückenSiedanndenRegler 3 DrehenSiedenLautstärke ReglerzumWählendesverfügbarenProgrammtyps 9 4 DrückenSieS TzumStartendesSuchlaufs ANALOG RADIO Suche nach einem Sender 1 Drücken Sie wiederholt zum Wählen von TUNER 2 Drücken Sie wiederholt ...

Page 71: ...espeichert WirddieVerkehrsfunk Funktion oderdieNachrichtensendungdasnächsteMalaufgerufen wirddieseEinstellungübernommen CD USB iPod ANDROID Starten Sie die Wiedergabe Die Quelle schaltet automatisch um und die Wiedergabe startet 1 KCA iP102 30 poligerTyp KCA iP103 Lightning Typ 2 LassenSiebeiNichtgebrauchnichtdasKabelimAutoliegen 3 WenneinAndroid Gerätangeschlossenwird wird Press VIEW toinstallKEN...

Page 72: ...ID Wählen Sie den Steuermodus Während IPOD als Quelle gewählt ist drücken Sie 5 wiederholt MODE ON Steuern Sie den iPod mit dem iPod selber Sie können aber weiterhin Wiedergabe Pause Datei Überspringen Vorspulen oder Zurückspulen von Dateien von dieser Einheit steuern MODE OFF Steuern Sie den iPod von dieser Einheit Während ANDROID als Quelle gewählt ist drücken Sie 5 wiederholt BROWSE MODE Steuer...

Page 73: ...alten Sie können bis zu 3 Zeichen eingeben Drücken Sie den Lautstärke Regler zum Starten der Suche Zum Zurückkehren zum Grundordner ersten Datei Top Menü drücken 5 Gilt nicht für BT AUDIO Quelle Zum Zurückschalten zum vorherigen Einstellelement drücken Sie Zum Abbrechen halten Sie gedrückt Beim iPod nur gültig wenn MODE OFF gewählt ist 10 Beim ANDROID nur gültig wenn BROWSE MODE gewählt ist 10 Hör...

Page 74: ...zu 10 Geräte können insgesamt registriert gepairt werden Wenn das Pairing ausgeführt ist bleibt das Bluetooth Gerät in der Einheit registriert auch wenn Sie die Einheit zurücksetzen Zum Löschen des gekoppelten Geräts 15 DEVICE DELETE Wenn der Pairing Vorgang ausgeführt ist wird die Bluetooth Verbindung automatisch hergestellt BT1 und oder BT2 im Displayfenster leuchtet auf Es können maximal zwei B...

Page 75: ...e Einen anderen ankommenden Anruf abweisen Drücken Sie Bei zwei aktiven Anrufen Aktuellen Anruf beenden und gehaltenen Anruf aktivieren Drücken Sie Umschalten zwischen aktuellem Anruf und gehaltenem Anruf Drücken Sie Stellen Sie die Telefonlautstärke ein 00 bis 35 Standard 15 Drehen Sie den Lautstärke Regler während eines Anrufs Diese Einstellung hat keine Auswirkung auf den Lautstärkepegel der an...

Page 76: ...mpfangenenAnrufan O zeigteinengetätigtenAnrufan M zeigteinenverpassten Anrufan DrückenSieDISP umdieAnzeigekategorie NUMBERoderNAME umzuschalten NODATA erscheint wennkeinaufgezeichneterVerlaufvorhandenist 2 DrückenSiedenLautstärke ReglerzumAnrufen PHONE BOOK Nurgültig wenndasTelefonPBAPunterstützt 1 DrehenSiedenLautstärke Reglerschnell umaufalphabetischeSuchezuschalten wenndas TelefonbuchvieleKonta...

Page 77: ...lungen 1 Drücken Sie den Lautstärke Regler um auf FUNCTION zu schalten 2 Drehen Sie den Lautstärke Regler um einen Gegenstand zu treffen siehe folgende Tabelle und drücken Sie dann den Regler 3 Wiederholen Sie Schritt 2 bis der gewünschte Gegenstand gewählt aktiviert ist oder folgen Sie den Anweisungen auf dem gewählten Gegenstand 4 Halten Sie zum Beenden gedrückt Zum Zurückschalten zum vorherigen...

Page 78: ...m Beenden des Testmodus halten Sie gedrückt um das Gerät auszuschalten BLUETOOTH Audio Audioplayer über Bluetooth 1 Drücken Sie wiederholt zum Wählen von BT AUDIO 2 Bedienen Sie den Bluetooth Audioplayer zum Starten der Wiedergabe Zum Auf der Frontblende Wiedergabe Pause Drücken Sie Wählen Sie die Gruppe oder den Ordner Drücken Sie J K Reverse Vorwärts Überspringen Drücken Sie S T Vorspulen Rücksp...

Page 79: ... WählenSie USER um diein MANUAL EQ vorgenommenenEinstellungenzuverwenden BASS BOOST LV1 LV2 LV3 LV4 LV5 WähltIhrenbevorzugtenBass Boost Pegel OFF Hebtauf LOUDNESS LV1 LV2 WähltIhrebevorzugtenniedrigenundhohenFrequenzen umeinegute KlangwirkungauchbeiniedrigerLautstärkezuerhalten OFF Hebtauf SUBWOOFER SET ON SchaltetdenSubwoofer Ausgangein OFF Hebtauf AUX Vorbereitung Wählen Sie ON für BUILT IN AUX ...

Page 80: ...ar wenn SWITCH PREOUT auf SUB W gestellt ist 4 SUB W LEVEL ist nur wählbar wenn SUBWOOFER SET auf ON gestellt ist 17 Übergangseinstellungen Im Folgenden werden die verfügbaren Einstellpunkte für 2 Wege Übergang und 3 Wege Übergang gezeigt SPEAKER SIZE Wählt entsprechend der Größe der angeschlossenen Lautsprecher für optimale Leistung Die Einstellungen für Frequenz und Flanke werden automatisch für...

Page 81: ...0 GAIN 8bis0 AUDIOEINSTELLUNGEN Einstellpunkte für 2 Wege Übergang SPEAKER SIZE FRONT SIZE 8CM 10CM 12CM 13CM 16CM 17CM 18CM 4 6 5 7 6 8 6 9 7 10 TWEETER SMALL MIDDLE LARGE NONE nichtangeschlossen REAR 8 CM 10 CM 12 CM 13 CM 16 CM 17 CM 18 CM 4 6 5 7 6 8 6 9 7 10 NONE nichtangeschlossen SUBWOOFER 16CM 20CM 25CM 30CM 38CM OVER NONE nichtangeschlossen X OVER TWEETER FRQ 1KHZ 1 6KHZ 2 5KHZ 4KHZ 5KHZ ...

Page 82: ...f FEHLERSUCHE Symptom Abhilfe Allgemeines EswirdkeinTongehört DieLautstärkeaufdenoptimalenPegeleinstellen PrüfenSiedieKabelundVerbindungen MISWIRINGCHECKWIRINGTHENPWRON erscheint SchaltenSiedieStromversorgungaus undprüfenSie obdieKlemmender Lautsprecherdrähterichtigisoliertsind SchaltenSiedieStromversorgung wiederein PROTECTINGSENDSERVICE erscheint ReichenSiedieEinheitbeimnächstenKundendienstzentr...

Page 83: ...lüsse NOMUSIC SchließenSieeinUSB Gerätan dasabspielbareAudiodateienenthält iPodERROR ErneutesAnschließendesiPod SetzenSiedeniPoderneutzurück FEHLERSUCHE Symptom Abhilfe ANDROID BeiWiedergabewirdkeinTon gehört TonwirdnurvomAndroid Gerät ausgegeben VerbindenSiedasAndroid Gerätneu Währendder HAND MODE eingestelltist startenSieeine MediaPlayerAnwendungaufdemAndroid GerätundstartenSie dieWiedergabe Wäh...

Page 84: ...owohlvonderEinheitalsauch demBluetooth Gerät undführenSiedanndasPairingerneutaus 12 EchooderRauschenwirdwährend einesTelefongesprächsgehört JustierenSiedieMikrofoneinheit Position 12 PrüfenSiedie ECHO CANCEL Einstellung 14 DieTelefon Tonqualitätistschlecht VerringernSiedenAbstandzwischenderEinheitunddem Bluetooth Gerät BewegenSiedasFahrzeugzueinemOrt woeinbesseresSignal empfangenwird Sprach Rufmet...

Page 85: ...LangeDateinamen MöglicheDateisystemeaufUSB Geräten FAT12 FAT16 FAT32 AuchwennAudiodateiendenobenaufgeführtenStandardsentsprechen kanndasAbspielenunterUmständenaufGrundvonTypoder ZustandderMedienbzw Gerätenichtmöglichsein DieAAC m4a DateiineinemUSB GerätodereinevoniTunescodierteCDkannnichtaufdiesemGerätabgespieltwerden Nicht abspielbare Discs DiscsmitnichtrunderForm DiscsdieaufderAufnahme Oberfläch...

Page 86: ...nfang Für MP3 WMA AAC WAV FLAC Datei Tracktitel Interpret Albumtitel Interpret Ordnername Dateiname Spielzeit Uhrzeit zurückzumAnfang IPODoder ANDROID Tracktitel Interpret Albumtitel Interpret Spielzeit Uhrzeit zurückzumAnfang BTAUDIO Tracktitel Interpret Albumtitel Interpret Spielzeit Uhrzeit zurückzumAnfang AUX Quellenname Uhrzeit zurückzumAnfang ZUR BEZUGNAHME TECHNISCHE DATEN Digitalradio DAB ...

Page 87: ...odierung Linear PCM FLAC Decodierung FLAC Datei Biszu48kHz 16Bit Bluetooth Version BluetoothVer 2 1 EDR Bluetooth3 0 Frequenzbereich 2 402GHz 2 480GHz Ausgangsleistung 4dBm MAX 0dBm AVE Leistungsklasse2 MaximalerKommunikationsbereich Sichtlinieca 10m 32 8ft Profil HFP Hands FreeProfile A2DP AdvancedAudioDistributionProfile AVRCP Audio VideoRemoteControlProfile SPP SerialPortProfile PBAP PhonebookA...

Page 88: ...erdenheiß VerbindenSienichtdie DrähtevonLautsprechernmitderKarosserie demMassekabel schwarz oderschließen sieparallelan MontierenSiedasGerätmiteinemWinkelvonwenigerals30 WennIhrFahrzeugkabelbaumnichtdieZündklemmehat verbindenSiedasZündkabel rot mitderKlemmeam SicherungskastendesFahrzeugs die12VDC VersorgungbietetunddurchdenZündschlüsselein undausgeschaltet wird HaltenSiealleKabelvonhitzeableitende...

Page 89: ... Seiten des Frontrahmens ein und ziehen Sie ihn heraus 3 Setzen Sie die Ausziehschlüssel tief in die Schlitze an jeder Seite ein und folgen dann den mit Pfeil gekennzeichneten Anweisungen wie rechts gezeigt Einbau der Einheit Einbau im Armaturenbrett HakenaufderOberseite RichtenSiedenFrontrahmenvor demAnbringenaus wieinder Abbildunggezeigt Teileliste für den Einbau A Frontblende C Einbauhalterung ...

Page 90: ...chführen BeziehenSiesichhinsichtlichdesAnschlusses andasKenwood Navigationssystemaufdie BedienungsanleitungdesbetreffendenGeräts Gelb A4 Rot Zündkabel Rot A7 Gelb Batteriekabel Stift FarbeundFunktion A4 Gelb Batterie A5 Blau Weiß Stromsteuerung A7 Rot Zündung ACC A8 Schwarz Erdungsanschluss Masse B1 Lila HintererLautsprecher rechts Für3 Wege Übergang Hochtöner rechts B2 Lila schwarz B3 Grau Vorder...

Page 91: ...itHilfedesmitgeliefertenReinigungsmittels I vonderAnbringungsflächeab BiegenoderbeschädigenSiedieFolienantenne F nicht DieInstallationkannbeibestimmtenFahrzeugenunmöglichsein PrüfenSiedieKabelführungaufderFolienantenne F undaufderVerstärkereinheit G vordemAufkleben WendenSienachdemAufklebenderFolienantenne F keinenGlasreinigeran Bestimmen Sie die Antenneneinbauposition DieRichtungderFolienantenne ...

Page 92: ...sgründenaufderBeifahrerseite installiertwerden 2 Reinigen Sie die Windschutzscheibe mit dem mitgelieferten Reiniger I I Warten Sie bis die Glasoberfläche vollständig trocken ist bevor Sie fortfahren Wärmen Sie die Oberfläche der Frontscheibe mit dem Entfroster an wenn es kalt ist im Winter 3 Entfernen Sie das Trägerblatt Zapfen 1 der Folienantenne F horizontal ab und kleben Sie die Antenne auf die...

Page 93: ...as Erdungsblatt damit es nicht Innenteile Frontsäulenabdeckung behindert Achten Sie auch darauf dass Innenteile nicht die Verstärkereinheit G behindern G 8 Verdrahten Sie die Antennenkabel Verwenden Sie die Kabelklemme H zum Sichern der Antenne an der Säule an mehreren Stellen 9 Bringen Sie die Frontsäulenabdeckung in ihrer ursprünglichen Position an Achten Sie darauf nicht das Erdungsblatt und di...

Page 94: ...JS_KWD_KDC_BT700DAB_EN_GE indd 32 JS_KWD_KDC_BT700DAB_EN_GE indd 32 01 Dec 15 1 56 29 PM 01 Dec 15 1 56 29 PM ...

Page 95: ...JS_KWD_KDC_BT700DAB_EN_GE indd 33 JS_KWD_KDC_BT700DAB_EN_GE indd 33 01 Dec 15 1 56 29 PM 01 Dec 15 1 56 29 PM ...

Page 96: ... EC Slovensky Spoločnosť JVC KENWOOD týmto vyhlasuje že KDC BT700DAB spĺňa zákldné požiadavky a ďalšie prislušné ustanovenia Direktĺvy 1999 5 EC Dansk Undertegnede JVC KENWOOD erklærer harved at følgende udstyr KDC BT700DAB overholder de væsentlige krav og øvrige relevante krav i direktiv 1999 5 EF Ελληνικά ΜΕ ΤΗΝ ΠΑΡΟΥΣΑ JVC KENWOOD ΔΗΛΩΝΕΙ ΟΤΙ KDC BT700DAB ΣΥΜΜΟΡΦΩΝΕΤΑΙ ΠΡΟΣ ΤΙΣ ΟΥΣΙΩΔΕΙΣ ΑΠΑΙΤΗ...

Reviews: