background image

1

What Do You Want To Do?

Thank you for purchasing the KENWOOD GPS NAVIGATION SYSTEM/ 

MONITOR WITH DVD RECEIVER.

In this manual, you will learn various convenient functions of the system.

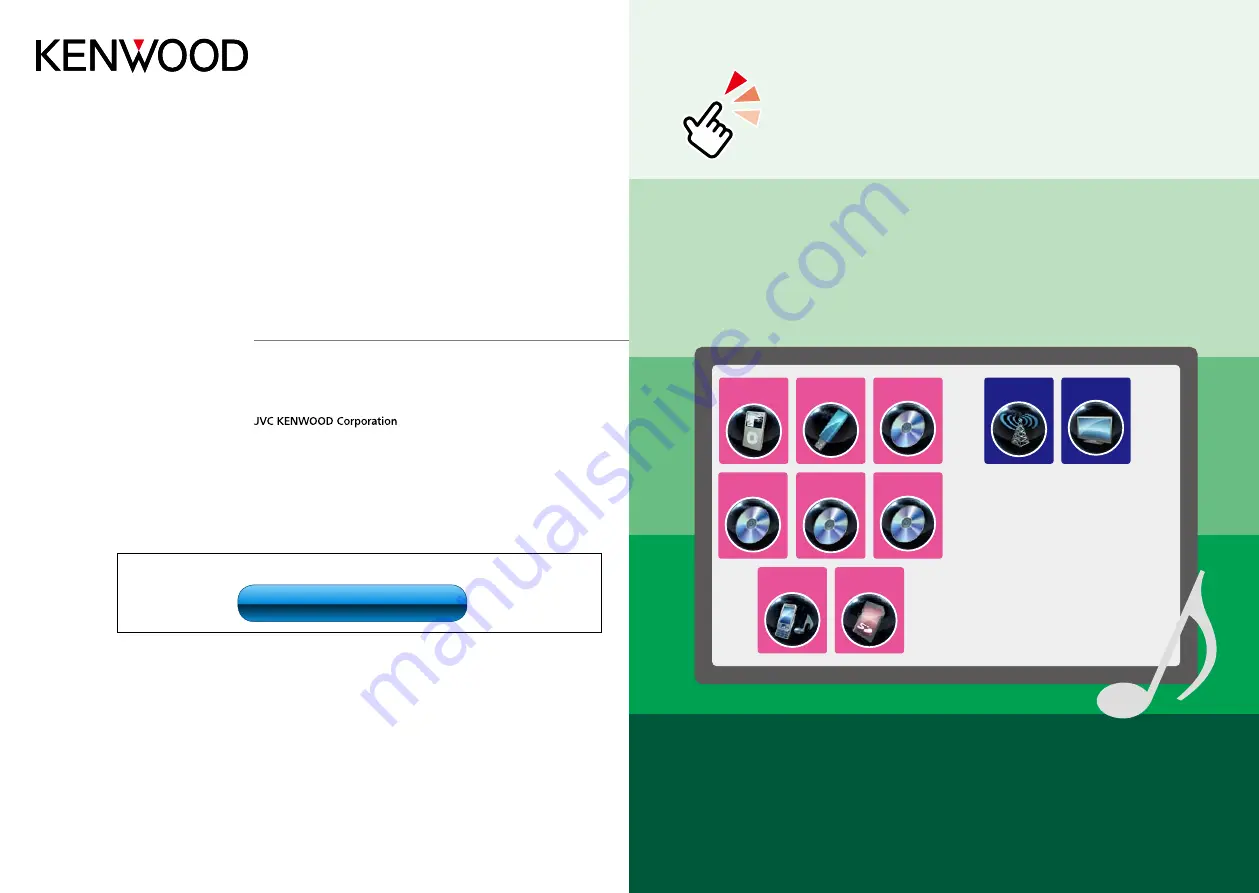
Click the icon of the media you want to play.

With one-click, you can jump to the section of each media!

iPod

USB

SD

VCD

DVD VIDEO

Music CD

Disc Media

BT Audio

Tuner

TV

12DNXMid_IM345_Ref_M_En_02 (M/M2)

© 2011 JVC KENWOOD Corporation

DNX7310BT

DNX7310BTM

DNX5310BT

DNX5310BTM

DDX7031BT

GPS NAVIGATION SYSTEM

MONITOR WITH DVD RECEIVER

INSTRUCTION MANUAL

Before reading this manual, click the button below to check the latest edition and the 
modified pages.

Check the latest edition

Summary of Contents for DDX7031BT

Page 1: ...y With one click you can jump to the section of each media iPod USB SD VCD DVDVIDEO Music CD Disc Media BT Audio Tuner TV 12DNXMid_IM345_Ref_M_En_02 M M2 2011 JVC KENWOOD Corporation DNX7310BT DNX7310BTM DNX5310BT DNX5310BTM DDX7031BT GPS NAVIGATION SYSTEM MONITOR WITH DVD RECEIVER INSTRUCTION MANUAL Before reading this manual click the button below to check the latest edition and the modified pag...

Page 2: ..._______ 54 Playing Bluetooth Audio Device________ 57 Using Hands Free Unit________________ 58 Bluetooth Setup_____________________ 61 Hands Free Control__________________ 62 Setting Up 68 Monitor Screen Setup________________ 68 System Setup_______________________ 69 Display Setup_______________________ 75 Navigation Setup____________________ 78 Camera Setup_______________________ 79 Software Infor...

Page 3: ...e disc and move outward When removing discs from this unit pull them out horizontally If the disc center hole or outside rim has burrs use the disc only after removing the burrs with a ballpoint pen etc Discs that are not round cannot be used 8 cm 3 inch discs cannot be used Discs with coloring on the recording surface or discs that are dirty cannot be used This unit can only play the CDs with Thi...

Page 4: ...he screen off 3 5 Vol Adjusts volume 4 AUD Displays Graphic Equalizer screen P 88 Pressing for 1 second switches camera view display on off 5 NAV Displays the navigation screen Pressing for 1 second switches AV out sources 5 AV Displays the source control screen Pressing for 1 second switches AV out sources 6 MENU Displays the Top Menu screen P 16 Pressing for 1 second turns the power off When the...

Page 5: ... turns the power off When the power off turns the power on 3 NAV Displays the navigation screen Pressing for 1 second switches AV out sources 4 TEL Displays the Hands Free screen P 54 Pressing for 1 second turns off the display 5 Volume Knob Pressing switches attenuation of the volume on off Turning adjusts volume up or down Pressing for 1 second displays Tone Control screen P 89 6 SCRN Displays t...

Page 6: ...T 2Touch 2 or 3 to select the desired language 3Touch Enter For detailed operation see Language setup P 71 Angle Adjust the position of the monitor Default is 0 1Touch SET 2Touch desired angle number and For detailed operation see Monitor angle control P 75 iPod AV Interface Use Set the terminal which your iPod is connected to Default is iPod 1Touch iPod or AV IN2 Color Set the screen and button i...

Page 7: ...ts To eject the disc Press the 0 button Insert the disc into the slot The unit loads the disc and playback starts To eject the disc Press the 0 button USB device Connect the USB device with the USB cable The unit reads the device and playback starts To disconnect the device Touch 0 for 1 second on the screen and disconnect the device from the cable iPod Connect the iPod with the iPod cable The uni...

Page 8: ...ton for 1 second to open the front panel 0 NOTE You can set the front panel to open automatically when the ignition is turned off See Monitor angle control P 75 Detach the panel as the diagrams below 2 3 1 4 NOTE The attaching plate closes automatically in about 10 seconds after the front panel is released Remove the panel before this happens 1 2 1 1 2 Detach the panel as the diagrams below 1 2 Af...

Page 9: ...appears NOTE You can select the hiding icon by scrolling the screen left or right From this screen you can perform the following functions Function Icon Operation Switch the audio source etc Touch the icon of the desired source Enter setup mode etc Touch the icon of the desired setup function Display navigation screen or Touch NAV or navigation information Turn off all audio function Touch STANDBY...

Page 10: ...screen Displays the control screen of current source Icon feature differs depending on the source Closes the menu List screen There are some common function keys in the list screens of most sources Scroll Scrolls the displayed text etc Touch keys with various functions are displayed here Displayed keys differ depending on the current audio source status etc For examples of functions of each key re...

Page 11: ...e the source control screen is displayed Touch the information bar The navigation screen with audio information appears 1 1 Touch or in the navigation screen Touching this area displays the audio screen Displays the navigation and control keys of the current source Displays the navigation and current video picture playback display NOTE The screen switches between playback screen and camera view ea...

Page 12: ...eat chapter repeat function off VCD PBC On Does not repeat VCD PBC Off track repeat function off Hides all keys Touch Fast forward or fast backward Touch 1 or Each time you touch the key the speed changes standard 2 times 3 times Confirms play time See DVD You can switch the time display between title play time chapter play time and title remaining time Each time you touch the display switches bet...

Page 13: ...eration You can set up some items in the DVD VIDEO disc menu 1 Touch illustrated area during playback Menu Control screen appears 2 Perform desired operation as follows Displays the top menu Touch Top Displays the menu Touch Menu Displays the previous menu Touch Return Enters selected item Touch Enter Enables direct operation Touch Highlight to enter the highlight control mode P 25 Moves the curso...

Page 14: ... disc NOTE You cannot touch the menu keys directly on the screen when zooming DVD Setup You can set up the DVD playback functions NOTE Each operation in this section can be started from the Top Menu screen For details see Operating With The Top Menu Screen P 16 1 Touch in the control screen Multi function menu appears 2 Touch SETUP SETUP Menu screen appears 3 Touch Source Source SETUP Menu screen ...

Page 15: ...l To clear the entered code touch Clear Current parental level appears as Level 3 Touch 2 or 3 to select a parental level NOTE If a disc has higher parental lock level you need to enter the code number The parental lock level varies depending on a loaded disc If a disc has no parental lock anybody can play it back even when you have set the parental lock Disc setup Performs setup when using disc m...

Page 16: ...a Touch to switch between the Simple Control and List Control screen 3 Multi function key Touch to switch the multi function menu For details on the menu see Multi function menu P 34 CD Audio And Visual Files iPod Operation 4 Multi function menu Various functions can be performed by using keys in this area For details on the menu see Multi function menu P 34 5 Sub function key Touch to display Sub...

Page 17: ...on the menu see Multi function menu P 34 4 Multi function menu Various functions can be performed by using keys in this area For details on the keys see Multi function menu P 34 5 Sub function key Touch to display Sub function menu 7 in this table 6 Contents list Displays the list and contents The contents of the list differ depending on the playback status and source 7 Sub function menu Various f...

Page 18: ...wer supply For details see External Device Control P 81 REAR Touch to mute the rear speaker Sub function menu Music CD iPod Disc media USB device and SD Card The following functions can be performed by using keys in this area Repeats the current track folder Each time you touch the key repeat mode switches in the following sequence CD iPod track repeat repeat off Disc media USB device SD Card file...

Page 19: ...rch a file of same artist album genre composer as the current track P 37 Folder List You can search a file according to hierarchy P 38 Thumbnail Viewer You can search a picture file P 38 NOTE For disc media you can display the folder list directly by touching Category search USB device SD Card and iPodonly 1 Touch the desired category from the left part of the screen 2 The list is sorted by select...

Page 20: ...selecting the album artwork 1 Touch Sub function menu appears 2 Touch Favorite screen appears 3 Touch desired artwork in the lower line NOTE The key in the upper side of the screen functions differently depending on the status When Load Albums appears You have not yet loaded any artworks Touch the key to start loading When Load More Albums appears Some artworks are not loaded Touch the key to load...

Page 21: ...m To delete the album from the favorite list touch and drag it to the lower line You can change the playing order of the favorite list by dragging the artwork in the list The favorite list mode is canceled in the following situations Playing another album from other list folder list category list etc Playing another album by touching the artwork in the lower line in the artwork list screen The fav...

Page 22: ...pears for 5 seconds when updated OFF Does not display any information iPod setup 1 Set each item as follows AudioBook Speed Sets the audio book playback speed Select from Slow Normal default and Fast Wide Screen Sets Wide Screen Set ON or OFF default On Screen iPod Sets how to display the information of the iPod Auto Default Information appears for 5 seconds when updated OFF Does not display any i...

Page 23: ...nu P 45 The bar in center tuner only shows the current frequency location 8 List switching key Touch to switch between the preset list and the information list In tuner mode radio text plus will be displayed for models with region code 2 or 3 only Multi function menu The functions of each key are as follows P1 P6 Selects the preset station Touch for 2 seconds to store the current station into the ...

Page 24: ...be performed by using keys in this area For details on the menu see Multi function menu P 47 4 Preset list analog TV only Displays the list of preset channels 5 Sub function menu The following function can be performed by using keys in this area Hide all keys Touch Switches the channel Touch 4 Switches the band Touch BAND TV screen 6 6 7 8 6 Switching channel area Touch to switch the channel 7 Swi...

Page 25: ...in The operation ends automatically if you do not operate within 10 seconds Tuner 1 Touch Sub function menu appears 2 Touch desired band key 3 Touch in the control screen The multi function menu appears 4 Touch AME in the multi function menu 5 Touch 1 or in the sub function menu Auto memory starts TV For models with region code 2 or 3 1 Touch illustrated area during playback to switch the band you...

Page 26: ...ific program type when listening to FM 1 Touch in the control screen The multi function menu appears 2 Touch PTY in the multi function menu TUNER PTY Mode screen appears 3 Select a program type from the list 4 Touch Search You can search a station of the selected program type Traffic Information FM Tuner Only You can listen and watch the traffic information automatically when a traffic bulletin st...

Page 27: ...searches for a station that can be received better Default is ON Language Select Selects a display language for the PTY function Antenna Control SETUP Allows you to turn off the Radio Data System function to prevent the motor driven antenna from extending Default is ON TV Setup You can set the TV signal receiving areas NOTE Each operation in this section can be started from the Top Menu screen For...

Page 28: ...on You can register up to 5 Bluetooth unit 1 Press the TEL button Hands Free screen appears 2 Touch BT SETUP Bluetooth SETUP screen appears See the following section for each setting Registering the Bluetooth Unit P 55 Connecting the Bluetooth unit P 56 Bluetooth Control Registering the Bluetooth Unit 1 Touch SET of Regist New Device Searched Device List screen appears NOTE A new device cannot be ...

Page 29: ... screen appears 3 Confirm the device name and touch Yes NOTE If you touch No operation is cancelled The devices not listed cannot be registered Playing Bluetooth Audio Device Bluetooth basic operation 2 2 3 3 5 Simple Control screen List Control screen 1 4 1 Information display Displays the name of the track information If the information is not available device name is displayed 2 Multi function ...

Page 30: ...e following table for each method Call by entering a phone number 1Touch Direct Number 2Enter a phone number with number keys 3Touch Call using call records 1 Touch Incoming Calls Outgoing Calls or Missed Calls 2Select the phone number from the list 3Touch Redial 1 Touch Redial to display the previously called number 2Touch Call using the phonebook 1Touch Phonebook 2Select the name from the list 1...

Page 31: ...ne input screen You can send tones by touching desired keys on the screen Call waiting If you receive a call during another call you can answer it with the current call suspended or switch between the current call and waiting call Answer the new incoming call Touch The current call is kept suspended Switch between the current and waiting call Touch again Each time you touch the calling party is sw...

Page 32: ...Hands Free phone 1 Touch TEL SETUP in the Hands Free screen Hands Free SETUP screen appears 2 Set each item as follows Auto Response 1 Sets an automatic response time to pick up an incoming call OFF Default Automatic response is not available 0 99 Set calling ring time second Call Beep Select whether to beep at an incoming call ON Default Beeps OFF Not beeps SMS Receive Beep Select whether to beep...

Page 33: ...eating a new message 1 Touch Create Message in the SMS Select screen SMS Create Menu screen appears 2 Touch or Direct Number Select from the phonebook Touch Enter the phone number Touch Direct Number 3 Touch SET of Message in the SMS Create Menu screen Create SMS Message screen appears 4 Enter a message using keys and touch SET Moves the cursor Use 2 3 Switches the keyboard layout Use 5 The layout...

Page 34: ...e Hands Free screen NOTE When there is no preset number touching the key momentarily moves to the step 2 2 Touch desired key and enter the number you want to register See the table below for explanations for each key Register from received SMS messages Touch Register from sent SMS messages Touch Register from phonebook Touch Register from outgoing calls list Touch Register from incoming call list ...

Page 35: ...SYNC Turns the dimmer function on or off according to the Navigation Day Night display setting Mode Playback screen only Select screen mode Full Full picture mode Just Justify picture mode Zoom Zoom picture mode Normal Normal picture mode NOTE Adjusting items are different depending on the current source You can perform this function only when you have applied the parking brake The image quality c...

Page 36: ... in the User Interface screen Language Setting screen appears 2 Set each item as follows Select Mode Selects the mode to select a language Easy Default Selects a language easily Advanced Allows you to select languages for respective items Language Select Selects a language If you select Advanced for Select Mode the following screen appears GUI Language Select Selects the display language used for ...

Page 37: ...dicator on the sub panel flashes when the vehicle ignition is off and the panel is detached Default is ON 3 Touch SET of Security Code Set NOTE If you have already completed the code registration CLR is displayed 4 Enter a security code with four digit number and touch Enter 5 Enter the same code again and touch Enter Security code is registered NOTE If you enter a different security code the scre...

Page 38: ...n in the setup menu 3 Follow the instruction on the screen Recall Recalls the memorized settings Memory Memorizes the current settings Clear Clears the currently memorized settings Cancel Quits memorization recalling of settings Display Setup 1 Touch Menu on any screen 2 Touch SETUP SETUP Menu screen appears 3 Touch Display Display Menu screen appears See the following section for each setting Con...

Page 39: ...gh the color spectrum 1 Touch ON of Panel Color Scan in the Color screen Panel Color Scan is set to on Changing background image You can load an image from the connected USB device and set it for the background image Before operating this procedure it is necessary to connect the device which has the image to load 1 Touch Background in the Display Menu screen Background screen appears 2 Touch STAND...

Page 40: ...follows Rear Camera 1 Selects the type of rear camera to use CMOS 3xx When the CMOS 300 series with ID 1 set is connected Other Default When the other camera is connected R CAM Interruption Sets a method for switching the display Setting values are ON and OFF ON Switches to the rear view camera video display when shifting to reverse or pressing the AUD or SCRN button for 1 second OFF Default Switc...

Page 41: ... to be displayed when you select a system that is connected via the AV INPUT port Default is VIDEO 1 This item can be set when in STANDBY source and also the iPod is disconnected 2 AV IN2 Name becomes settable when AV IN2 is selected in iPod AV Interface Use AV Output Interface Setup You can select an AV source to be output at the AV OUTPUT port Default is VIDEO1 1 Touch Menu on any screen 2 Touch...

Page 42: ...h to adjust and set each item as follows Controlling Audio Subwoofer Select if you are using a subwoofer Tweeter You can set the tweeter when you are selecting front speakers If you are using a tweeter together with the front speakers set the tweeter to ON X over Displays the speaker crossover setup screen You can adjust the crossover setup that was set automatically when you selected the speaker ...

Page 43: ... degrees when set to Reverse Gain Sets gain of each speaker HPF FREQ High Pass Filter adjustment When tweeter is selected on Speaker Select screen BPF FREQ Band Pass Filter adjustment When mid range speaker is selected on Speaker Select screen LPF FREQ Low Pass Filter adjustment When woofer is selected on Speaker Select screen Slope Sets a crossover slope Only when Subwoofer is set to ON in Speake...

Page 44: ...der Balance Adjust the volume balance around the touched area 2 and 3 adjust the right and left volume balance 5 and adjust the front and rear volume balance Volume Offset Finely adjust the volume of the current source to minimize the difference in volume between different sources Subwoofer Level Adjusts the subwoofer volume This setting is not available when subwoofer is set to None See Speaker s...

Page 45: ...etting is not available when subwoofer is set to None See Speaker setup P 82 Highway sound setting You can boost a certain range of sound that becomes hard to hear due to road noise 1 Touch Highway Sound in the Graphic Equalizer screen Highway Sound screen appears 2 Select the boost level from among High Low and OFF operation Controlling EQ curves 1 Select EQ curve from Natural Rock Pops Easy Top4...

Page 46: ...ual zone function NOTE When the rear speaker sound is switched the audio source that is output at the AV OUTPUT terminal is also switched to the same source When the dual zone function is set to on the following functions are not available Output from the subwoofer Subwoofer Level Bass Boost P 87 Equalizer Control Space Enhancer Listening Position P 88 90 92 DSP Bypass Control Speaker Setup Car Ty...

Page 47: ... and other speakers 4 Input the differences calculated in step 3 for individual speakers 5 Adjust gain for individual speakers A sound image will be shifted to the speaker with increased gain Example When Front All is selected as the listening position 50cm 80cm 150cm 70cm 0cm 100cm Listening Position You can adjust the sound effects according to your listening position 1 Touch Position Position s...

Page 48: ...stration inside the case Switching the operation mode The functions operated from the remote controller differ depending on the position of the mode switch DVD T V NAV AUD AUD mode Switch to this mode when controlling a selected source or tuner source etc DVD mode Switch to this mode when playing a disc media including DVD VCD and CD TV mode Switch to this mode when controlling TV NAV mode Switch ...

Page 49: ...DVD TV Switches the display angle each time it is pressed NAV Switches between the heading up navigation and north up navigation map displays 12 5 AUD DVD Selects the folder to be played During radio source in AUD mode switches the bands to be received TV Switches between the station of the TV band to be received 13 2 3 AUD DVD Selects the track or file to be played During radio source in AUD mode...

Page 50: ... Reason Solution The Touch Sensor Tone doesn t sound The preout jack is being used The Touch Sensor Tone cannot be output from the preout jack Error Messages When you fail to operate the unit correctly the cause of the failure appears as the message on the screen Error Message Cause Solution Protect Protective circuit has been activated because a speaker cord has shorted or it has come in contact ...

Page 51: ...t support The unit may not support the connected iPod model Confirm that the software for the iPod is the latest version See Connectable iPod iPhone P 104 Navigation Error Please turn on power again later The communication error has occurred due to severely cold temperature Turn on power again after warming your car interior Resetting The Unit If the unit or the connected unit fails to operate pro...

Page 52: ...e impossible A DualDisc is a disc with one surface containing DVD standard signals and the other surface containing music CD signals About disc format The disc format should be the one of the following ISO 9660 Level 1 2 Joliet Romeo Long file name About files The following audio video and picture files are supported Audio files AAC LC m4a MP3 mp3 WMA wma Linear PCM WAVE wav Mass storage class USB...

Page 53: ...annot connect a USB device via a USB hub and Multi Card Reader Take backups of the audio files used with this unit The files can be erased depending on the operating conditions of the USB device We shall have no compensation for any damage arising from any erased data No USB device comes with this unit You need to purchase a commercially available USB device When connecting the USB device usage of...

Page 54: ...nly 2 Models with region code 4 or 6 only TV AUTO1 Seek mode is set to AUTO1 AUTO2 Seek mode is set to AUTO2 MANUAL Seek mode is set to MANUAL DVD disc marks ALL Indicates a region number The discs with this mark can be played with any DVD player 8 Indicates the number of audio languages recorded Up to 8 languages can be recorded in a movie You can select a favorite language 32 Indicates the numbe...

Page 55: ...Turkmen tl Tagalog tn Setswana to Tongan tr Turkish ts Tsonga tt Tatar tw Twi uk Ukrainian ur Urdu uz Uzbek vi Vietnamese vo Volapuk wo Wolof xh Xhosa yo Yoruba zh Chinese zu Zulu DVD Language Codes Specifications Monitor section Picture Size DNX7310BT DNX7310BTM DDX7031BT 6 95 inches diagonal wide 156 6 mm W x 81 6 mm H DNX5310BT DNX5310BTM 6 1 inches diagonal wide 136 2 mm W x 72 mm H Display Sy...

Page 56: ...AM tuner section Frequency Range LW 153 279 kHz 9 kHz MW 531 1611 kHz 9 kHz Region code 4 model 9 kHz 531 kHz 1611 kH kHz 10 kHz 530 kHz 1700 kHz Usable Sensitivity MW 25μ LW 45μ Region code 4 model 28 dBμ Video section Color System of External Video Input NTSC PAL External Video Input Level RCA mini jack 1 Vp p 75 Ω External Audio Max Input Level RCA mini jack 2 V 25 kΩ Video Output Level RCA jac...

Page 57: ...O DivX is a digital video format created by DivX LLC a subsidiary of Rovi Corporation This is an official DivX Certified device that plays DivX video Visit divx com for more information and software tools to convert your files into DivX videos ABOUT DIVX VIDEO ON DEMAND This DivX Certified device must be registered in order to play purchased DivX Video on Demand VOD movies To obtain your registrat...

Page 58: ......

Reviews: