background image

Summary of Contents for 41516942010

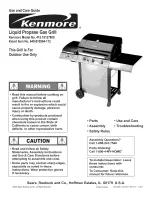
Page 1: ...esult in property damage personal injury or death Grill InformationCenter Missing Parts Assembly Questions Operation Problems Before returning grill to store call 1 800 241 7548 Tools needed for assembly Adjustable wrench not provided Screwdriver not provided 7 16 Combination wrench not provided SAVETHESEiNSTRUCTiONS See our extensiveassortment of outdoorliving products on lineat www sears comand ...

Page 2: ...installation must conform with local codes or in the absence of local codes with either the National Fuel Gas Code ANSI Z223 1 NFPA 54 Natural Gas and Propane Installation Code CSA B149 1 or Propane Storage and Handling Code B149 2 or the Standard for Recreational Vehicles ANSI A 119 2 NFPA1192 and CSAZ240 RV Series Recreational Vehicle Code as applicable All electrical accessories such as rotisse...

Page 3: ...s and additional information in the U S A call 1 800 827 6655 Coverage in Canada varies on some items For full details call Sears Canada at 1 800 361 6665 Sears Installation Service For Sears professional installation of home appliances garage door openers water heaters and other major home items in the U S A or Canada call 1 800 4 MY HOME KENMORE GRILL WARRANTY One Year Full Warranty on Kenmore G...

Page 4: ...equired measurements 12 30 5cm diameter x 18 45 7 cm tall with 20 lb 9 kg capacity maximum LP Tanks must be constructed and marked in accordance with specifications for LP Tanks of the U S Department of Transportation DOT or for Canada CAN CSA B339 tanks spheres and tubes for transportation of dangerous goods Transport Canada TC See LP Tank collar for marking LP Tankvalve must have Type 1 outlet c...

Page 5: ...al appliances During leak test keep grill away from open flames or sparks Use a clean paintbrush and a 50 50 mild soap and water solution Brush soapy solution onto areas indicated by arrows in figure below Leaks are indicated by growing bubbles If growing bubbles appear do not use or move the LP tank Contact an LP gas supplier or your fire department A Do not use household cleaning agents Damage t...

Page 6: ...nection disconnect regulator and repeat steps 5 and 6 If you are still unable to complete the connection do not use this regulator Call 1 800 4 MY HOME for identical replacement part Do not insert any tool or foreign objects into the valve outlet or safety relief valve You may damage the valve and cause a leak Leaking propane may result in explosion fire severe personal injury or death If a leak i...

Page 7: ...ookout If a bristle brush is used to clean any of the grill cooking surfaces ensure no loose bristles remain on cooking surfaces prior to grilling It is not recommended to clean cooking surfaces while grill is hot A If you notice grease or other hot material dripping from grill onto valve hose or regulator turn off gas supply at once Determine the cause correct it then clean and inspect valve hose...

Page 8: ... OFF position Turn LP cylinder OFF by turning hand wheel clockwise to a full stop Ignitor Check Turn gas off at LP cylinder Press and hold electronic ignitor button Click should be heard and spark seen each time between each collector box or burner and electrode See Troubleshooting if no click or spark Valve Check important Make sure gas is off at LP cylinder before checking valves Knobs lock in O...

Page 9: ...embly or if you have trouble igniting grill 1 Turn gas OFF at control knobs and LP cylinder 2 Remove cooking grates and flame tamers 3 Remove carryover tubes and burners 4 Detach electrode from burner NOTE Removal Detachment method will depend on the burner configuration See different configurations in illustrations below Carefully lift each burner up and away from valve openings We suggest three ...

Page 10: ...oultry and finish cooking later Cook food completely to destroy harmful bacteria When reheating takeout foods or fully cooked meats like hot dogs grill to 165 F or until steaming hot WARNING To ensure that it is safe to eat food must be cooked to the minimum internal temperatures listed in the table below USDA Safe Minimum Internal Temperatures Fish Pork Egg Dishes Steaks and Roasts of Beef Veal o...

Page 11: ...EMBLY 34 1 FRONT BRACE G518 7000 W1 35 1 RIGHT SIDE SHELF G518 1300 W1 36 1 SKIRT RIGHT SHELF G518 B600 W1 37 1 TOWEL BAR G518 0032 W1 38 1 LEFT SIDE SHELF G518 0800 W1 39 1 UPPER FASCIA SKIRT F G518 B700 W1 LEFT SHELF 40 1 DRIP PAN F SIDE BURNER G617 0035 W1 41 2 RUBBER BUMPER ROUND G501 0066 W1 F SB LID 42 1 LID F SIDE BURNER G518 0036 W1 43 1 LOWER FASCIA W ART F G528 0009 W1 LEFT SIDE SHELF 44...

Page 12: ...12 464223210 ...

Page 13: ...els to bottom shelf using three 1 4 20x1 2 screws 7ram lock washers per panel IMPORTANT Panel with hole must be on left side of bottom shelf 1 4 20xl 2 screw 7ram lock washer Qty 6 Qty 6 1 4 20x1 2 7ram lock washer Left side panel with hole I Makesure side panels are pushed as far to the rear of bottom shelf as possible before fully tightening screws I Rightside panel 464223210 13 ...

Page 14: ...g one 114 20x112 screw and 7ram lock washer 114 20xl 2 screw 7ram Qty 5 lock washer O7mm lock washer Qty 5 This step requires two people to lift and position grill head onto cart Carefully lower the grill head onto the cart aligning slots at bottom of grill head with posts on cart side panels Make sure the regulator hose is hanging inside the cart Grill head must face open side of cart Grill head ...

Page 15: ...de of firebox front shown A Insert flange on right side shelf into side shelf brackets on side of firebox shown B Attach right side shelf front using the two screws and washers which were removed from right side of fire box shown C Attach rear of shelf using one 1 4 20x1 2 screw 7ram lock washer fiber washer and 1 4 nut shown D E 1 4 20xl 2 Screw Qty 1 7ram lock washer Qty 1 Fiberwasher Qty 1 _ 4 ...

Page 16: ...f firebox shown C Attach front of side shelf using the three screws and washers which were removed from left side of firebox front shown D Attach rear of shelf using one 1 4 20x1 2 screw 7mm lock washer fiber washer and 1 4 Nut shown ElF _1 Inside of left side shelf 10x3 8 screw Qty 3 5ram lock washer Qty 3 5mmflat washer Qty 3 5ram lock washer screw l 4 20xl 2 Screw Qty 1 7ram lock washer Qty 1 F...

Page 17: ...ideburner valve bracket beneath sideburner shelf fascia so that valve stem comes through larger center hole in fascia Align the holes on valve bracket with left and right holes on fascia Secure using lock washers and screws that were removed from bracket Next place sideburner bezel over valve stem on front side of fascia Align small holes on bezel with upper and lower holes on fascia making sure O...

Page 18: ...h one Wing nut shown B Make sure burner tube engages sideburner valve shown C Wing nut Qty 1 Win nut Sideburner burner Sidebur6erdrip pan Sidebumer drip pan Under sideburner shelf attach sideburner ignitor wire to electrode shown A Place sideburner grate onto sideburner shelf aligning grate legs with holes in shelf shown B Sideburner ignitor Wire Sideburner grate 18 464223210 ...

Page 19: ...nto the back of the Electronic Ignition Module Total 5 connections shown A Connect the two wires a and b from the switch wiring harness into the back of the Electronic Ignition Module Total 2 connections shown A NOTE Switchterminals are larger than electrode terminals and should only be installed in location shown as a b Release the cap and nut from electronic ignition module Attach electronic ign...

Page 20: ...lign hinge hole on top of door and release hinge pin into door Right door Hinge pin on bottom of door Left door Place the Condiment Basket on the right door inside make sure to insert the legs of the Condiment Basket into the brackets which were attached on the door inside shown as below 20 464223210 ...

Page 21: ...ebox Note Some parts omitted for clarity of illustration Heat diffuser Place cooking grates onto the firebox as shown Insert the two wire ends at rear of warming rack into holes in back of firebox Frontwiresof warmingrackrestonsidesof firebox Note Some parts omitted for clarity of illustration Assembled warming rack Warming rack 464223210 21 ...

Page 22: ...rm the Burner Flame Check and for important safety instructions before using Always keep LP cylinders in upright position during use transport and storage CAUTION Cylinder valve must face to front of cart once tank is attached Failure to install cylinder correctly may allow gas hose to be damaged m operation resulting in the risk of fire On back of grill slide grease tray into opening in upper bac...

Page 23: ...dopento allowflamesto diedown Aftercooling cleanfood particlesand excessgreasefrominsidefireboxarea greasetray andother surfaces Troubleshooting Burner s will not light usingignitor SeeElectronicIgnition Troubleshooting also Continuedonnext page GASISSUES Tryingto lightwrongburner Burnernot engagedwithcontrolvalve Obstruction inburner Nogas flow Vaporlockat couplingnutto LPcylinder Couplingnut and...

Page 24: ...ait30secondsandlightgrill Ifflamesarestilllow turnoff knobsandLPcylindervalve Disconnectregulator Reconnect regulatorandleak test Turnon LPcylindervalve wait 30secondsandthenlightgrill Turnoff knobsandLPcylindervalve Disconnectcouplingnutfrom cylinder Reconnect andretry Turnfrontof grillto facewindor increaseflameheight RefillLPcylinder Referto Suddendropin gasflow above Cleanburnersand insideof g...

Page 25: ...arksaregenerated withnew batteryandgood wire connections moduleis faulty Are outputconnections on andtight Unscrewbuttoncap assemblyandreinstall making sure threadsarealignedandengagedfully Replacesparkmoduleassembly Removeandreconnectall outputconnections at moduleandelectrodes Outputlead connectionsnot connected Arcingto grillaway fromburner s Weakbattery Electrodesarewet Electrodescrackedor bro...

Page 26: ...26 464223210 ...

Page 27: ...464223210 27 ...

Page 28: ...8i8i_i i8i8i8i8i8i_i i8i8i8i8i8i_i i8i8i8i8i8i_i i8i8i8i8i8i_i i8i8i8i8i8i_i i8i8i8i8i8i_i i8i8i8i8i8i_i i8i8i8i8i8i_i i8i8i8i8i8i_i i8i8i8i8i8i_i i8i8i8i8i8i_i i8i8i8i8i8i_i i8i8i8i8i8i_i i8i8i8i8i8i_i 1 800 4 MY HOME 1 8oo 46e 466s iiiiiiiiiiiiiiiiiiii_ Call anytime day or night U S A and Canada Our Home For repair of carry in items like vacuums lawn equipment and electronics call anytime for th...

Reviews: