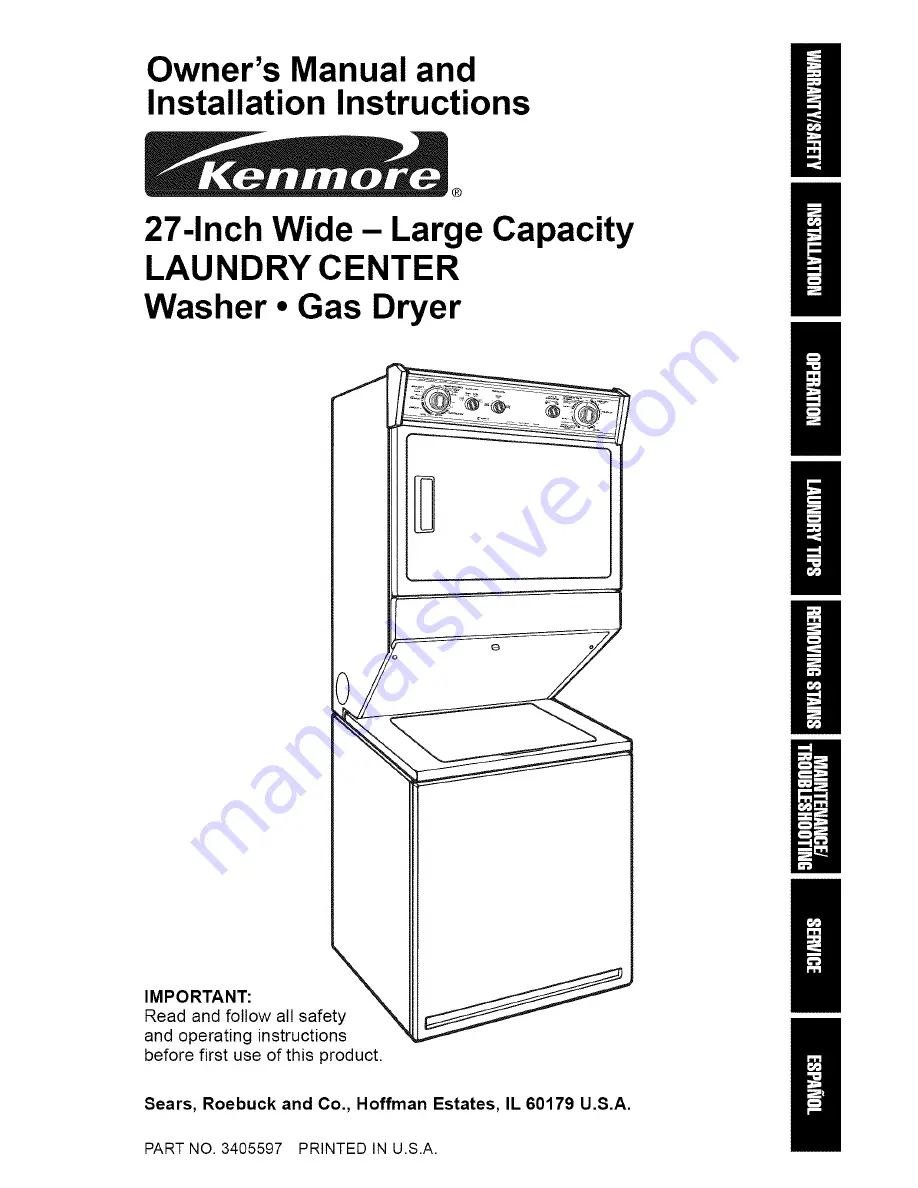
background image

Summary of Contents for 11098762790 and

Page 1: ... 27 Inch Wide Large Capacity LAUNDRY CENTER Washer Gas Dryer IMPORTANT Read and follow all safety and operating instructions before first use of this product n D Sears Roebuck and Co Hoffman Estates IL 60179 U S A PART NO 3405597 PRINTED IN U S A ...

Page 2: ...any other appliance WHATTO DO IFYOU SMELL GAS Do not try to light any appliance Do not touch any electrical switch do not use any phone in your building Clear the room building or area of all occupants Immediately call your gas supplier from a neighbor s phone Follow the gas supplier s instructions If you cannot reach your gas supplier call the fire department Installation and service must be perf...

Page 3: ... your new Kenmore Laundry Center in the safest and most economical way If you need more information about the care and operation of Kenmore appliances call your nearest Sears store You will need the complete model and serial numbers when requesting information Your laundry center s model and serial numbers are located on the Model and Serial Number Plate Use the space below to record the model num...

Page 4: ... Restriction If the laundry center is operated for any purpose other than Private Family Use all warranty coverage is effective for only 90 days Warranty Service Warranty service is available by contact ing your nearest Sears Service Center in the United States This warranty applies only while this laundry center is in use in the United States This warranty gives you specific legal rights and you ...

Page 5: ...enter is used near children Before the laundry center is removed from service or discarded remove the washer lid and dryer door Do not reach into the washer if the tub or agitator is moving Do not reach into the dryer if the drum is moving Do not install or store this laundry center where it will be exposed to the weather Do not tamper with controls Do not repair or replace any part of the laundry...

Page 6: ... list of tools and parts needed see pages 6 11 A SELECT LOCATION FOR YOUR LAUNDRY CENTER pgs 13 18 Laundry Tub Drain System p 14 Standpipe Drain System p 15 Floor Drain System p 15 Recessed Area Closet Installation Instructions pgs 16 17 ...

Page 7: ...n installation C CONNECT DRAIN HOSE pgs 20 21 AND PUSH Tools Needed Pliers that open to 19 16 inches Flashlight optional depending on installation Parts Needed supplied with laundry center 1 _drail hose___ 1 s_le 1 yellow single wire wire hose clamp hose clamp top of bottom of drain drain hose hose ...

Page 8: ...tion Parts Needed supplied with laundry center 2 water inlet hoses 4 flat water inlet hose washers E CONNECT INLET HOSES TO WATER FAUCETS p 22 Tools Needed Pliers that open oR _ to 19 _einches Parts Needed supplied with laundry center 2 water inlet hoses optional depending Flashlight optional on installation depending on installation 8 ...

Page 9: ...g Drill screwdriver on installation Parts Needed suitable for your installation _ Cable bracket d supplied with laundry center G SECURE DRAIN HOSE p 23 Tools Needed Flashlight optional depending on installation Parts Needed supplied with laundry center Shipping strap with fastener pulled from back of laundry center ...

Page 10: ...TALL GAS LINE pgs 24 26 10 Tools Needed 8 inch or lO inch pipe wrench Pipe joint compound resistant to L P gas Flashlight optional depending on installation Parts Needed Do not use pipe joint compound Use pipe joint compound 3 8 inch male pipe flare V2 inch to 3 8 inch optional depending on installation pipe reducer Rigid gas supply line approved for natural gas use NOTE additional fittings may be...

Page 11: ...Needed Tin snips Flashlight optional depending on installation Duct tape Flat bladed screwdriver 4 inch rigid or flexible heavy metal vent 4 inch outlet exhaust hood 4 inch metal elbow s optional depending on installation 4 4 inch diameter clamps 11 ...

Page 12: ...required A time delay fuse or circuit breaker is recommended Be sure fuse or circuit breaker matches the rating of your line Use a separate circuit serving only your laundry center Do not use an extension cord GROUNDING INSTRUCTIONS This appliance must be grounded In the event of malfunction or break down grounding wilt reduce the risk of electric shock by providing a path of least resistance for ...

Page 13: ...terizing Information Proper operation of dryer cycles requires temperatures above 45 F at lower temperatures the dryer may not shut off at the end of automatic cycles and drying times will be extended Use at least the minimum installation spacings described on page 17 This will ensure you have an adequate clearance for service and proper operation including flow of combustion and ventilation air a...

Page 14: ... laundry center 1 inch Hot and cold water faucets Must provide water pressure between 5 100 psi and be within 4 feet of the hot and cold water fill valves attached to the back of the laundry center Laundry tub drain l H system Needs a H minimum 20 gallon t Shut off valve least 39 inches above No further than floor and no higher than 6 feet away from 96 inches from bottom laundry center of laundry ...

Page 15: ...rry away capacity of 17 gallons per minute is required If you have Laundry tub or standpipe taller than 96 inches 1 inch diameter standpipe You may need to buy Sump pump system if not already available 2 inch diameter to 1 inch diameter standpipe adapter Part No 3363920 Overhead sewer Standard 20 gallon 39 inch tall drain tub or utility sink and sump pump available from local plumbing suppliers Fl...

Page 16: ...described on page 17 This will ensure you have an adequate clearance for service and proper operation including flow of combustion and ventilation air and that you have a sufficient distance from combustible construction Be sure your location allows for a proper exhaust installation A gas dryer must be exhausted to the outdoors See pages 26 31 for complete exhaust requirements Check code requireme...

Page 17: ... I 273 t I 1 FRONT ViEW DOOR NOT SHOWN Recessed area and closet installations require a 6 inch minimum clearance above the laundry center All installations must be exhausted outside Use at least the minimum dimensions indicated E FRONT VIEW DOOR WITH VENT J 3 T Additionalclearances forwall doorandfloor moldings maybe required Openingis minimum for closetdeer Louvereddoorwith equivalent air opening...

Page 18: ...introduction of outside air such as a nearby window should be at least twice as large as the laundry center exhaust opening This laundry center is suitable for mobile home installations The installation must conform to the Manufactured Home Construction and Safety Standard Title 24 CFR Part 3280 formerly the Federal Standard for Mobile Homes Construction and Safety Title 24 HUD Part 280 Laundry ce...

Page 19: ...se to its final location STEP 1 Read then remove the label over the shipping strap STEP 2 Pull the yellow shipping strap completely out of the laundry center There should be three cotter pins on the end of the shipping strap that comes out of the laundry center STEP 3 Cut the shipping strap about 16 inches from plug end Look for the words CUT HERE Discard end with three cotter pins You wilt use th...

Page 20: ...ce clamp over the straight end of the drain hose 1 4 inch from the end c Open clamp Twist hose back and forth while pushing onto drain connector on the side of the laundry center Continue until hose contacts the ribbed stops on the cabinet TWIST AND PUSH d Place clamp over area marked CLAMP Release clamp Soft 0upler __ If you have You will need to buy Drain hose that is too short Drain hose Part N...

Page 21: ...NNECT INLET HOSES TO LAUNDRY CENTER Proper connection of your inlet hoses will allow hot and cold water to enter your laundry center properly It also helps prevent water damage due to leaks Slip and Fall Hazard Use new water inlet hoses Failure to do so can result in head injury or broken bones NOTE Replace inlet hoses after five years of use to reduce the risk of hose failure Periodically inspect...

Page 22: ...log hoses Determine which faucet is hot and which is cold Mark the hot water faucet STEP 2 Attach the hose with the red coupling to the hot water faucet Screw on coupling by hand Make an additional two thirds turn with pliers to tighten coupling DO NOT OVERTIGHTEN this could damage the coupling STEP 3 Attach the hose with the blue coupling to the cold water faucet Screw on coupling to faucet by ha...

Page 23: ...strap STEP 2 Mark the hole locations on the wall where the bracket wilt be installed Prepare mounting holes suitable for your wall construction STEP 3 Attach the cable wire bracket to a board and mount on the wall Check that bracket is secure For some instal lations it may be easier to make the gas and exhaust vent connections before attaching cable bracket to wall NOTE Screws to attach the cable ...

Page 24: ...ode requirements GAS REQUIREMENTS Explosion Hazard Use a new AGA approved gas supply line Connect laundry center to a regulated gas supply with a shut off valve L P gas supply pressure must not exceed 13 water column Securely tighten all gas connections Failure to follow these instructions can result in death explosion or fire It is your responsibility to contact a qualified gas line installer to ...

Page 25: ...iation for connecting the laundry center to the gas supply line Flexiblegas connector A combination of pipe fittings must be used to connect the laundry center to the existing gas line 1 8 inch NPTplugged 3 8 inch male threaded tapping connect_ Gasshut off valve Reduceror 2 1ncn gas connector supply line The gas supply must have a shut off valve The valve should be in the same room as the laundry ...

Page 26: ...est all the connections by brushing on a soapy water solution liquid detergent also works well Bubbles wilt show a leak Correct any leak found Never test for gas leaks with a flame J CONNECTEXHAUST CORRECT tl WRONG WRONG y A properly exhausted laundry center will give you the shortest drying time lower your utility bill and extend the life of the laundry center Fire Hazard Use a heavy metal vent D...

Page 27: ...ached ROUTE THE VENT Typical installations exhaust from the rear of the laundry center Avoid pushing the laundry center tightly against a walt This can crush or kink the vent Use the straightest path you can where possible Avoid 90 turns Make sure exhaust hood is not plugged with lint Follow the instructions in this section to reinstall your vent system Rear exhaust installations for standard offs...

Page 28: ...the vent Use the straightest path you can where possible to avoid 90 turns DETERMINE VENT LENGTH Maximum Exhaust Lengths Rear Exhaust The maximum length of the rear exhaust system depends on the type of vent the number of elbows and the type of exhaust hood Refer to the chart below Side Exhaust Side exhaust adds a 90 turn inside the laundry center To determine maximum exhaust length add one 90 tur...

Page 29: ...easurement in order to make a connection STEP 3 Place a clamp on each end of vent elbow and connect elbow to your laundry center s exhaust outlet Tape the joint with duct tape Tighten clamp 9 STEP 4 Connect vent to elbow Tape the joint with duct tape Tighten clamp STEP 5 Install one end of elbow on vent the other end to the exhaust hood Tape joints and tighten clamps NOTE Once the exhaust vent is ...

Page 30: ...ood Tape joints and tighten clamps Tape STEP 6 Stretch the vent only as needed by pulling out from the center in each direction Do not stretch vent sections over 6 feet If distance is more than 6 feet use 2 or more sections of rigid metal vent with flexible metal vent attached at ends STEP 7 Connect the vent directly to the laundry center s exhaust outlet or to a separate elbow Tape the joints wit...

Page 31: ... exhaust vent by using a loop system A kit is available from your local Sears store or Sears Service Center LOOP SYSTEM NOTE Vent systems come in many varieties Select the type that best fits your installation Three of the most common types of installations are illustrated here Loop system with standard elbows PERISCOPE SYSTEM Loop system with one offset and one standard elbow Vent system with one...

Page 32: ...nked FINAL STEPS Plug the power supply cord into the grounded outlet or power supply Turn power supply on Wipe the interior of the dryer drum thoroughly with a damp cloth to remove any dust Remove the blue protective film on the console and any tape remaining on laundry center Take a few minutes and read the Operating Instructions pages 33 44 to fully understand your new laundry center Start the w...

Page 33: ...IONAL STEP If desired add measured liquid chlorine bleach to the liquid bleach dispenser see page 38 STEP 3 OPTIONAL STEP If desired add measured liquid fabric softener to the fabric softener dispenser see page 39 STEP 4 Close washer lid STEP 5 Set WATER LEVEL Control_ based on the size of your wash load see page 34 STEP 6 Set WATER TEMP Control_ see page 34 STEP 7 Push the Cycle Selector Control ...

Page 34: ...rtable temperature for handling the wash load WATER TEMP WARM WARM COLD WARM o COLD _ HOT COLDe __ oCOLD SELECTING WATER TEMPERATURES Wash Water Temperature Suggested Fabrics Comments HOT Work clothes Best cleaning for heavily soiled items 120 F or above Sturdy whites Removes oils perspiration greasy soils colorfast pastels and stains Diapers Prevents graying or yellowing WARM Dark non colorfast c...

Page 35: ... Use this cycle to get up to 14 minutes of wash time for sturdy or heavily soiled loads Wash combines fast and slow speed agitation and fast spin speeds PERMANENT PRESS The PERMANENT PRESS Cycle includes a load cooling process that reduces wrinkling compared to other cycles You can select up to 10 minutes of wash time Wash combines fast and stow speed agitation and slow spin speeds to reduce wrink...

Page 36: ...in use the KNIT DELICATE Cycle STEP 4 Pull Cycle Selector Control Timer Knob out to start washer HEAVY DUTY SHORT 6 REGULAR 10 AUTO PREWASH SP_NPERMANENT SPIN ONLY A drain and spin may help shorten drying times for some heavy fabrics or special care items by removing excess water STEP 1 Set the Cycle Selector Control Timer Knob to a SPIN setting For fast spin use the HEAVY DUTY Cycle For slow spin...

Page 37: ...the upper portion of the agitator During Drain The rate that water is drained from your washer depends on your installation If water is drained quickly from the washer you may hear air being pulled through the pump This happens during the end of draining After Drain and Before Spin When the cycle changes from draining to spinning you may hear a noise as the gearcase shifts Kenmore s Double Roll Ov...

Page 38: ...A cup with a pouring spout will help you avoid spilling Do not let bleach splash drip or run down into washer basket Undiluted bleach will damage any fabric it touches Start the washer Bleach wilt be diluted automatically before it comes in contact with the wash toad NOTE Do not use this dispenser to add powdered chlorine or color safe bleach to your wash toad The dispenser is for liquid chlorine ...

Page 39: ...rtion of the dispenser Fabric softener is dispensed into the first deep rinse water automatically NOTE Fabric softeners are not com patible with detergents This dispenser should never be used in the PREWASH Cycle since it would dispense fabric softener into a wash load that has not been rinsed Undiluted fabric softener spilled on fabric may result in spots that look like oil stains If you ever use...

Page 40: ...ime Drain D Partial no spin Drain Spin D Pause Fill to _ Fill for selected level cool down Rinse Wash Drain no spin Spin SOAK Fill to selected level Agitate D Soak washer automatically advances into PREWASH PREWASH Fill to selected level Wash selected time D D no spin Drain no spin Spin _ Spin _ Fillt D selected level Off reset to wash Rinse cycle and time Drain no spin Spin 4O ...

Page 41: ...er and shut door Fire Hazard No washer can completely remove oil Do not dry anything that has ever had any type of oil on it including cooking oils Items containing foam rubber or plastic must be dried on a clothesline or by using an air cycle Failure to follow these instructions can result in death or fire STEP 3 Set Cycle Selector Control Timer O see pages 42 43 STEP 4 Press PUSH TO START DRYER ...

Page 42: ...feel the dried clothes If they are damp select MORE DRY the next time you do a similar load If they are overdried select LESS DRY the next time you do a similar toad Dryness is determined by thermostats that react to the amount of moisture in the air exhausted from the dryer Moist air indicates clothes are still damp Dry air indicates that moisture has been removed The End of Cycle Signal sounds i...

Page 43: ...the following table for examples of items that require drying without heat Use the AIR DRY Cycle or place the items on a line or rack to air dry Type of Load DELICATE FABRICS Sheer curtains 2 or 3 panels gauze lace etc RUBBER PLASTIC HEAT SENSITIVE FABRICS Foam rubber Pillows padded bras stuffed toys Make sure coverings are securely stitched Shake and fluff pillows by hand several times during the...

Page 44: ...Kenmore dryers help prevent overdrying so you get outstanding fabric care In the automatic drying and timed drying cycles clothes are dried at the temperature you selected until the last few minutes of the cycle The dryer then switches to low heat PUSH TO START DRYER BUTTON Use this control to start the dryer Be sure the dryer door is closed Opening the door stops the dryer It wilt not start again...

Page 45: ...bjects on your laundry center they can damage the finish Turn pockets of heavy items inside out for even drying Turn synthetic knits inside out before washing to avoid pilling Stained or wet garments should be washed promptly for best results Place small items such as baby socks or hankies in laundry bag for easier removal Articles to be ironed should be removed from the dryer while still slightly...

Page 46: ...o maintain washer balance An off balance load can make the washer vibrate during spin Use a higher water level setting to reduce wrinkling with permanent press clothes and some synthetic knits These items should have more room to move in the water than heavy items towels jeans Reduce wash time by using a lower water level setting Loads with only a few small items need less wash time For these sugg...

Page 47: ...ully Put one fabric softener sheet on top of the toad before starting the dryer Do not add a fabric softener sheet after the drying cycle has started Instant heat can cause the fabric softener to spot fabrics Remove fabric softener stains by wetting the stains and rubbing them with liquid detergent or bar soap and rewash Some fabric softeners can clog the lint screen and stow drying Use fabric sof...

Page 48: ... turn brown with age so treat immediately Sponge or soak fresh stains with cold water Wash If stain remains soak 15 minutes in a solution of lukewarm water liquid detergent and a few drops of white vinegar Rinse Wash Blood Rinse immediately or soak in cold water with enzyme presoak for 30 minutes or longer Rinse Rub detergent into any remaining stains Rinse If stain remains put a few drops of 3 hy...

Page 49: ...Wash in water temperature and bleach safe for the fabric For acetate sponge with a nonflammable fabric cleaner If stain remains bleach with 3 hydrogen peroxide Rinse Rewash Ink or ballpoint pen ink Pretreat using a prewash stain remover or dry cleaning solvent Sponge stain continuously until all bleeding stops Let dry Repeat if necessary Wash If stain remains bleach if safe for fabric NOTE India a...

Page 50: ...hese paints cannot be removed after they have dried Rinse in warm water to flush out paint Sponge with a nonflam mable fabric cleaner Rinse Wash Oil base Scrape off fresh paint Sponge with a nonflammable fabric cleaner While stain is still wet with solvent rub liquid detergent into it Wash with hottest water safe for fabric Perspiration Remove stains before ironing Perspira tion stains may weaken ...

Page 51: ...er five years of use to reduce the risk of hose failure Periodically inspect and replace inlet hoses if you find bulges kinks cuts wear or leaks When replacing your inlet hoses mark the date of replacement on the label with a permanent marker CLEANING YOUR DRYER EXTERIOR Use a soft damp cloth to clean the cabinet and console Avoid using harsh abrasives Do not put sharp metal objects on or in your ...

Page 52: ...ill up faster Be sure to remove lint from the tint screen before and after drying new towels Wash Lint Screen As Needed Laundry detergents and fabric softeners can cause a residue buildup on the lint screen Wash the tint screen with a nylon brush if it becomes clogged due to a residue buildup To clean STEP 1 Wet both sides of lint screen with hot water STEP 2 Roll tint off the screen with your STE...

Page 53: ...st vent from the laundry center STEP 2 Clean one section of vent at a time until you reach the exhaust hood To clean out tint you can use the hose attachment on your vacuum or use a pote or wire with a feather duster or rag attached STEP 3 Reconnect vent as described inthe INSTALLATION INSTRUCTIONS of this Owner s Manual To remove accumulated lint from inside the dryer Electrical Shock Hazard Disc...

Page 54: ...h water faucets 4 Reconnect power supply cord 5 Run the washer through a complete cycle with 1 cup of detergent to clean out antifreeze NON USE OR VACATION CARE Operate your laundry center only when you are at home If you wilt be on vaca tion or not using your laundry center for an extended period of time you should Unplug the power supply cord or turn off electrical power to the laundry center Tu...

Page 55: ...tarting washer to deflect off of tub ring Laundry center not level Ensure front feet are installed and causing water to deflect off nuts are tightened Level laundry of tub ring center Reset rear legs see INSTALLATION Section G Load is unbalanced Spray Redistribute the load rinses are deflecting off of load Washer is overloaded Fills Reduce load size or spray rinses are deflecting off of load Won t...

Page 56: ...el Level laundry center Reset rear legs Rear leveling legs not set see INSTALLATION Section H Nuts on front feet not tight Tighten nuts see INSTALLATION Section H Yellow shipping strap with Remove strap with cotter pins cotter pins not completely see INSTALLATIONI Section B removed Floor not strong enough Relocate laundry center to support laundry center see INSTALLATION Section A Gears engaging a...

Page 57: ... only in one direction The top of the agitator is loose This is normal Water Level The top of the agitator is much This is normal Too Low Not higher than the highest water Completely level This creates a perception Filling of the washer not being full Tub is Tub pulled forward when Ensure tub is centered before Crooked unloading starting washer Tub moves This is normal Laundry center not level Ens...

Page 58: ...sher as soon as unloading washer promptly it stops Load is Not removing load promptly Unload the washer as soon as it stops Wrinkled Wrong cycle for fabrics Use cold rinses and cycles with slow being washed spin speeds to reduce wrinkling Overloading Loads should move freely during wash Wash smaller loads Wash water not warm enough to If safe for fabric usewarm or hotwash relax wrinkles Using warm...

Page 59: ...Use only one softener sheet per load blocking outlet grill and only use it once Dryer located in room with Move laundry center where it can temperature below 45 F operate in ambient air temperatures above 45 F Large amount of moisture Expect longer dry times with items in the load that hold more moisture cottons Cold rinse water used Expect longer dry times but you are saving energy and reducing w...

Page 60: ... items Items need to be clean before being dried Items Overdrying Match dryer settings to fabric type Shrinking see OPERATION Poor garment quality Check quality of garment before purchasing Manufacturer s care label Follow fabric care label instructions instructions not followed carefully Loads are Overloading Dry smaller loads that can tumble freely Wrinkled Overdrying Match dryer settings to fab...

Page 61: ...aundry Center with a Sears Maintenance Agreement Kenmore Laundry Centers are designed manufactured and tested for years of dependable operation Yet any appliance may require service from time to time The Sears Maintenance Agreement offers you an outstanding service program for your Kenmore Laundry Center The Sears Maintenance Agreement Is your way to buy tomorrow s service at today s prices Elimin...

Page 62: ... 800 473 7247 Forthe location of a Sears Paris and Repair Center in yourarea Call 24 hours a day 7 days a week 1 800 488 1222 For informationon purchasinga Sears MaintenanceAgreement or to inquire about an existingAgreement Call 9 am 5 pm Monday Saturday 1 800 827 6655 Whenrequesting serviceor ordering parts always give thefollowing information ProductName PartName ModelNumber Part Number 62 Ameri...

Page 63: ... cm 27 pulg de ancho Alta capacidad Lavarropas Secarropas de gas IMPORTANTE Lea y siga todas las instrucciones de seguridad y de modo de empleo antes de usar este producto por primera vez Sears Roebuck and Co Hoffman Estates IL 60179 U S A DOCUMENTONO 3405597 IMPRESOEN LOS EE UU D ...

Page 64: ..._HACEREN CASO QUE SIENTAOLORA GAS No prenda ningdn aparato electrodomesticoa gas No toque ningdn interruptor no use ningdn telefonoen su edificio Aseguresede quetodas las personassalgan del cuarto edificio o area Llame a su suministradorde gas inmediatamente desde el telefonode un vecino Siga las instruccionesque le proporcione su suministradorde gas Si no se puede comunicarsecon su suministradord...

Page 65: ...6n y funcionamiento de su nuevo Centro de Lavanderia Kenmore de ta manera mas segura y econ6mica Si se necesita informaci6n adicional sobre el cuidado y funcionamiento de los electrodomesticos Kenmore ttame al establecimiento Sears mas cercano Necesitara tener a mano los nQmeros completos del modelo y de serie de su centro de tavanderia los cuales se encuentran en la ptaca del modelo y del nQmero ...

Page 66: ...ccion de garantia Si se somete centro de lavanderia a un uso ajeno al familiar privado la cobertura de la garantia s61o tendra vigencia por 90 dias Servicio bajo la garantia Si desea servicio de reparaci6n o servicio tecnico en virtud de la garantia comuniquese con el Centro de Servicio Sears mas cercano en los EE UU Esta garantia estara vigente s61o mientras este centro de lavanderia se utilice d...

Page 67: ... de ponerlo fuera de funcionamiento o de descartarlo No introduzca la mano en el lavarropas si la tina o el agitador de aspas esta en movimiento No introduzca las manos en el secarropas cuando el tambor este en movimiento No instale ni almacene este centro de lavanderia donde estara sometido a la intemperie No trate de forzar los controles No repare ni cambie pieza alguna del centro de lavanderia ...

Page 68: ...consulte las paginas 6 11 A ELIJA LA UBICACION DEL CENTRO DE LAVANDER IA pags 13 18 Sistema de desag0e del agua por tina de lavado p_g 14 Sistema de desag0e por tuberia vertical p_g 15 Sistema de desag0e por el suelo p_g 15 Instrucciones para la instalaci6n en un espacio limitado armario p_gs 16 17 ...

Page 69: ...ags 20 21 Herramientas necesarias Pinzas que se Linterna opcional abran a 3 95 cm depende del tipo 19 16pulg de instalaci6n Y EMPUJE Piezas necesarias se proporciona con el centro de lavanderia 1 manguera de desagQe 1 abrazadera para 1 abrazadera para mangueras plateada de manguera amarilla de un doble alambre parte alambre parte superior de inferior de la manguera la manguera de desagee de desagQ...

Page 70: ...roporciona con el centro de lavanderia 2 mangueras de Ilenado 4 arandelas planas de agua para manguera de Ilenado E CONECTE LAS MANGUERAS DE ENTRADAA LOS GRIFOS DE AGUA pag 22 Herramientas necesarias Pinzas que se abran a 3 95 cm 19 16pulg Piezas necesarias se proporciona con el centro de lavanderia 2 mangueras de Ilenado opcional depende del Linterna opcional depende 8 tipo de instalaci6n del tip...

Page 71: ...ezas necesarias at rn a dSs tttt para la instalaci6n Soporte del cable __ _ _ I se proporciona con el centro de lavanderia G AJUSTE LA MANGUERA DE DESAGOE pag 23 Herramientas necesarias Linterna opcional depende del tipo de instalaci6n Piezas necesarias se proporciona con el centro de lavanderia La banda de sujeci6n para transporte con ajustador quitada del reves del centro de lavanderia ...

Page 72: ...ntas necesarias Llave ajustable para tuberia de 20 3 cm o 25 4 cm 8 o 10 pulgs Pegamento de uni6n de tubos resistente al gas L R Linterna opcional depende del tipo de instalaci6n Piezas necesarias No utilice pegamento de uni6n de tubos Utilice pegamento de uni6n de tubos Conexi6n filete macho de 0 95 cm Reducidor de 3 8de pulg opcional depende 1 27 cm a 0 95 cm del tipo de instalaci6n 1 2a 3 8de p...

Page 73: ...nterna opcional depende del tipo de instalaci6n Cinta para conductos metalicos Destornillador piano Ventilador rigido o flexible de 10 16 cm 4 pulg Capota de ventilaci6n de 10 16 cm 4 pulg Codillos de metal de 10 16 cm 4 pulg opcional depende de la instalaci6n O0 0 4 Abrazadera de 10 16 cm 4 pulg 11 ...

Page 74: ...en caso de funcionamiento defectuoso u otras fallas ya que se crea una via de resistencia menor para la corriente electrica El centro de lavanderia tiene un cable de alimentaci6n electrica que se debe conectar con un tomacorriente que se haya instalado correctamente y que este puesto a tierra de acuerdo con los c6digos y ordenanzas locales ADVERTENClA La instalaci6n incorrecta del conductor de pue...

Page 75: ...es invernales El funcionamiento adecuado de los ciclos del secarropas requieren una temperatura igual o mayor 7 22 C 45 F en temperaturas mas bajas es posible que el secarropas no se apague al final de los ciclos automaticos y se extendera el tiempo requerido para secar la ropa Use pot Io menos los espacios minimos de instalaci6n descritos en la pagina 17 Esto asegurara que haya suficiente espacio...

Page 76: ...las v lvulas de Ilenado de agua caliente y fria las cuales se conectan en la parte posterior del centro de lavanderia Piso a nivel El declive maximo permitido debajo de todo el centro de lavanderia es de 2 54 cm 1 pulg Sistema de desagiJe del agua por tina de _1 lavado Se necesita _ II una tina de lavado II con capacidad II minima de 76 litros la V_lvula de cierre A una distancia no mayor de 1 80 ...

Page 77: ...dad minima de desagQe de 64 6 litros 17 galones por minuto Si tiene Es posible que necesite adquirir Una tina de lavado o tubo vertical de altura Sistema de bomba de sumidero si ya no est superior a 2 44 m 96 pulg disponible Un tubo vertical de 2 54 cm 1 pulg de Racor de 5 08 cm 2 pulg a 2 54 cm 1 pulg di metro de diametro No de pieza 3363920 Una alcantarilla suspendida Tubo normal de desag_e de 7...

Page 78: ...a que haya suficiente espacio para reparaciones y para el funcionamiento adecuado incluyendo el flujo de combusti6n la ventilaci6n del aire y que haya suficiente distancia de materiales combustibles Asegerese de que la ubicaci6n seleccionada permita una instalaci6n con ventilaci6n adecuada Los secarropas a gas deben tener ventilaci6n hacia el exterior de la casa Vease las paginas 26 31 para obtene...

Page 79: ... instalaciones se deben ventilar hacia afuera de la casa Utilice por Io menos las dimensiones minimas indicadas 15 24 m E_W4 t J I L I _rea de _ I J I _ ventilaci6n t J I 7 minima de I I I J 155 00 em 2 L I I J 24 pulg cuad _Z 13 97 cm o i Vista de frente Vista lateral se ilustra la puerta Vista frontal puerta con apertura no se ilustra la puerta de ventilaci6n Quiz_s sea necesario de ar espacios ...

Page 80: ...na debe ser por Io menos el doble del tamafio de la abertura de ventilaci6n del centro de lavanderia Este centro de lavanderia se puede instalar en casas rodantes La instalaci6n debe ser de acuerdo con el Estandar de seguridad y construcciSn de casas manufacturadas Manufactured Home Construction and Safety Standard Titulo 24 CFR Parte 3280 anteriormente conocido como Estandar federal para la segur...

Page 81: ...tra con la banda de sujeci6n para transporte y luego quitela PASO 2 Tire de la cuerda amarilla de embalaje para quitarla completamente del centro de lavanderia Deber haber tres pasadores de chaveta en uno de los extremos de la banda de sujeci6n para transporte los cuales saldran del centro de lavanderia PASO 3 Corte la banda de sujeci6n para transporte unos 40 64 cm 16 pulg del extremo del conecto...

Page 82: ...agQe a 0 63 cm t 4 pulg o del extremo 0_ 63 cm 1 4pulg c Abra la abrazadera Gire la manguera de un lado a otro y a la vez empuje hacia abajo hacia el conectador que se encuentra en el lado del centro de lavanderia ContinQe hasta que la manguera haga contacto con el gabinete Y EIVlPUJE d Coloque la abrazadera sobre el area marcada ABRAZADERA CLAMP Suelte la abrazadera Si Ud tiene Necesitar_ adquiri...

Page 83: ...UERAS DE ENTRADA DE AGUA ALCENTRO DE LAVANDER A La conexi6n correcta de las mangueras de Ilenado permitir la admisi6n adecuada al centro de lavanderia del agua fria y caliente y adem s facilitar evitar los daffos por agua debido a p_rdidas Peligro de resbal6n y caida Use mangueras nuevas de Ilenado de agua La opci6n de no seguir estas instrucciones puede provocar lesiones en la cabeza o fracturas ...

Page 84: ...gua caliente y cual es el de agua fria Marque el grifo de agua caliente PASO 2 Conecte la manguera con el acopla miento rojo con el grifo de agua caliente Apriete el acoplamiento con la mano Luego utilice pinzas para apretar el acoplamiento otros dos tercios de giro NO LO AJUSTE EXCESIVAMENTE ya que esto puede daSar el acoplamiento PASO 3 Conecte la manguera con el acoplamiento azul con el grifo d...

Page 85: ...de paredes Seleccione el tipo de tornillo adecuado para su pared G AJUSTE LA MANGUERA DE DESAGUE Asegure la manguera de desagtie adecuadamente para proteger sus pisos contra da_os causados por fugas de agua PASO 1 Mueva el centro de lavanderia a su lugar final PASO 2 Ubique la pieza restante de la cuerda de embalaje no el extremo con los tres pasadores de chaveta del PASO 3 de la secci6n QUITE LA ...

Page 86: ...digos locales REQUISITOS DE GAS Peligro de explosi6n Utilice una linea nueva aprobada por la AGA de suministro de gas Conecte el secarropas a una linea regulada de gas La presi6n del suministro de gas L E no debe exceder una columna de agua de 33 cm 13 pulg Apriete firmemente todas las conexiones de gas La opci6n de no seguir estas instrucciones puede resultar en la muerte explosi6n incendio o que...

Page 87: ...s o Conector flexiblede gas Se debe usar una combinaci6n de conectores de tuberia para conectar el centro de lavanderia con la linea de gas existente Derivaci6n tapada NPT Tuberia macho con de 0 31 cm 1Ispulg rosca de 0 95 cm 3 spulg _ V_lvula _stro ddee _iaerre Redacidor o conector ae gas con rosca ae 1 27 cm 1 2pulg El suministro de gas tiene que tener una valvula de cierre La valvula debe encon...

Page 88: ...ay alguna fuga usted podra observar burbujas Tape cualquier fuga que encuentre Nunca haga pruebas de fuga de gas con una llama J CONEXION DE VENTILACION Si el centro de lavanderia est ventilado correctamente funcionar mejor y secar las prendas m s r pidamente tambi_n el costo de las utilidades ser m s bajo y la vida del centro de lavanderia se prolongar Peligro de incendio Utilice una abertura de ...

Page 89: ...or del centro de lavanderia No se recomienda que el secarropas se coloque demasiado cerca de la pared Esto puede prensar o doblar el conducto Trate de instalar el centro de lavanderia de modo que el conducto permanezca Io mas recto que sea posible para evitar que se doble 90 AsegOrese de que la capota de ventilaci6n no este tapada con pelusa Siga las instrucciones de esta secci6n para volver a ins...

Page 90: ...6n Ventilaci6n posterior La Iongitud maxima del sistema de ventilaci6n posterior depende del tipo de conducto del nQmero de codillos y del tipo de capota de ventilaci6n Consulte la tabla a continuaci6n Ventilaci6n lateral La ventilaci6n lateral requiere un espacio adicional para una vuelta de 90 dentro del centro de lavanderia Para determinar la Iongitud maxima del conducto de ventilaci6n afiada e...

Page 91: ...a conexi6n PASO 3 Coloque una abrazadera en cada uno de los extremos del codillo de ventilaci6n y conecte el codillo a la salida de ventilaci6n del centro de lavanderia Conecte la uni6n con cinta de conducto Apriete la abrazadera Cinta Abrazadera PASO 4 Conecte el conducto al codillo Ate la uni6n con cinta de conducto Apriete la abrazadera PASO 5 Instale un extremo del codillo sobre el conducto y ...

Page 92: ... y el otro extremo a la capota de ventilaci6n Ate las uniones y apriete las abrazaderas PASO 6 Estire el conducto del centro hacia afuera sin estirarlo demasiado No estire cada secci6n del conducto mas de 1 80 m 6 pies Si mide mas de 1 80 m 6 pies use dos secciones o mas del conducto de metal rigido con el conducto de metal flexible agregado a los extremos PASO 7 Conecte el conducto directamente a...

Page 93: ...quirir un juego de adaptaciSn para este prop6sito en la tienda Sears o en el Centro de servicio Sears SISTEMA DE BUCLE NOTA El sistema de ventilaci6n viene en muchas variedades Seleccione el tipo que coincida mejor con su instalaci6n A continuaci6n se ilustran tres de los tipos de instalaci6n mas comunes Sistema de bucIe con codilIos estandar SISTEMA PERISCOPIO i i i i i i i Sistemade bucIe un cod...

Page 94: ...imido PASOS FINALES Conecte el cable de suministro electrico en el tomacorriente puesto a tierra o en el dispositivo de suministro electrico Encienda el suministro electrico Limpie el interior del tambor minuciosamente con un trapo hQmedo para sacar todo el polvo Quite la capa protectora azul que esta en la consola y cualquier pieza de cinta que haya quedado en el centro de lavanderia T6mese algun...

Page 95: ...TIVO Si se desea vierta una medida de suavizador liquido de tejidos en el recipiente distribuidor de suavizador de tejidos vease la pag 39 PASO 4 Cierre la tapa del lavarropas PASO 5 Fije el control de nivel del agua WATER LEVEL O de acuerdo con el tamafio de la carga de ropa a lavar vease la pag 34 PASO 6 Fije el control de temperatura del agua WATER TEMPERATURE _ vease la pag 34 PASO 7 Empuje la...

Page 96: ...var WATER TEMP WARM WARM COLD WARM o COLD __ HOT COLDe _ _X_ eCOLD S SELECCION DE LAS TEMPERATURAS DEL AGUA Temperatura del agua de lavado CALIENTE 49 C 120 F o mas TIBIA De 32 a 43 C 90 110 F Tejidos sugeridos Ropas de trabajo Ropas blancas fuertes de colores pastei no destefiibles Pafiates Colores oscuros destefiibies Articulos inarrugables Nailon poliester acrilicos sedas y generos de lana Teji...

Page 97: ... de tiempo de lavado para la ropa con suciedad profunda o de tela gruesa El lavado combina una agitaci6n lenta y veloz y un centrifugado veloz INARRUGABLES PERMANENT PRESS El ciclo de inarrugables PERMANENT PRESS incluye un proceso de enfriamiento de la carga de ropa que reduce la formaci6n de arrugas mejor que cualquier otro ciclo Usted puede seleccionar un tiempo de lavado de hasta 10 minutos El...

Page 98: ...icado KNIT DELICATE PASO 4 Tire el control de selecci6n de ciclos temporizador hacia afuera para poner el lavarropas en march HEAVY DUTY SP_NPERMANENT PREWASH SOAK SOLO CENTRIFUGADO SPIN ONLY Un ciclo de desagQe y de centrifugado puede ayudar a minimizar la duraci6n de secado de ropa pesada o de prendas que requieren de cuidado especial ya que remueve el agua excesiva PASO 1 Fije el control de sel...

Page 99: ...veniente de la parte superior del agitador m Durante el desagLie La velocidad a la que se desag0e su lavarropas depende de su instalaci6n Si el lavarropas se desagua rapidamente podra escuchar aire que pasa por la bomba Esto ocurre durante el final del desagQe Despu_s del desag_ie y antes del centrifugado Cuando el ciclo cambia del desagQe al centrifugado podra escuchar un ruido cuando la caja de ...

Page 100: ...le ayudar_l a evitar derrames No deje que la lejia salpique gotee o se corra hasta al interior del tambor del lavarropas La lejia sin diluir dafiara los tejidos con los que entre en contacto Ponga en marcha el lavarropas La lejia sera distribuida automaticamente antes de que entre en contacto con la carga de lavado NOTA No use este recipiente distribuidor para afiadir cloro en polvo o lejia cromot...

Page 101: ...udo del recipiente distribuidor El suavizador de tejidos se distribuye en el primer enjuague con agua automaticamente NOTA Los suavizadores de tejidos no son compatibles con los detergentes Este distribuidor nunca se debe usar en el ciclo de prelavado PREWASH ya que distribuiria suavizador de tejidos a la carga de ropa que no se ha enjuagado El derrame de suavizador de tejidos sin diluir sobre la ...

Page 102: ...asta el nivel seleccionado _ Lavar por el tiempo seleccionado D Desaguar parcialmente D Pausa Llenar para enfriamiento Lavar Desaguar sin centrifugado _ Centrifugado _ Llenar hasta el nivel seleccionado Enjuague _ esaguar sin centrifugado _ Centrifugado Apagado REMOJO SOAK Llenar hasta el nivel seleccionado Agitar D Remojo soak el lavarropas automaticamente avanza a prelavado PREWASH PRELAVADO PRE...

Page 103: ...seque ningt_n articulo que contenga cualquier tipo de aceite incluyendo aceites para cocinar Los articulos que contengan goma espuma hule o pl_stico se deben secar al aire libre o por medio del ciclo de aire La opci6n de no seguir estas instrucciones puede causar la muerte o un incendio PASO 3 Fije la opci6n de Control de selecci6n de ciclos Cycle Selector Control Timer _en la opci6n deseada vease...

Page 104: ...s el ciclo apropiado para la mayoria de los tejidos Cuando finalice el ciclo toque la ropa seca Si todavia esta mojada seleccione mas seco MORE DRY la pr6xima vez que seque una carga de ropa parecida Si la ropa esta demasiado seca seleccione menos seca LESS DRY la pr6xima vez que seque una carga de ropa parecida La sequedad se determina por un sensor electr6nico que siente la cantidad de humedad d...

Page 105: ...se sin calor Use el ciclo de ciclo de secado con aire a H temperatura ambiente AIR DRY o cuelgue estos articulos en una cuerda o p6ngalos en un estante para que se sequen al aire libre Ciclo DE SECADO CON AIRE A TEMPERATURA AMBIENTE Clase de Carga de Ropa AIR DRY Cycle PRENDAS FINAS Cortinas diafanas sutiles 2 6 3 paneles gasa encaje etc 10 min 10 min GOMA PLASTICO TEJIDOS SENSIBLES A CALOR Gomaes...

Page 106: ...n del secado PUSH TO START DRYER END OF CYCLE SIGNAL SIGNAL SIGNAL OFF ON El sistema SOFT HEAT protege contra el secado demasiado prolongado Esto ayuda a que las telas retengan la humedad natural que necesitan previene el est_tico y reduce la formaciGn de pelotitas pequefias de pelusa en la superficie de la ropa Esto es el resultado natural del lavado y secado de la ropa Los secarropas Kenmore ayu...

Page 107: ...entro de lavanderia ya que pueden dafiar el acabado del mismo Saque los bolsillos de los articulos pesados para que se sequen en forma uniforme Vuelva al reves las prendas de punto sinteticas para evitar el empelusamiento Las prendas manchadas o mojadas deberan lavarse con prontitud para obtener los mejores resultados Coloque los articulos pequefios tales como calcetines de bebe o pafiuelos en una...

Page 108: ...iculos grandes y pequefios en cada carga Prepare una carga pareja para mantener el equilibrio del lavarropas El lavarropas puede vibrar durante el centrifugado por una carga desequilibrada Use una posici6n mayor de nivel de agua para reducir la formaci6n de arrugas en el caso de prendas inarrugables y de algunas prendas de punto sinteticas Estos articulos deberan contar con mayor espacio para circ...

Page 109: ...pa ya media seca o abrir la puerta sin necesidad El tiempo de secado se puede reducir ventilando el secarropas apropiadamente y limpiando el conducto de salida de aire y la capota exterior del conducto cuando sea necesario Mantenga el filtro de pelusa limpio Use el secarropas donde la temperatura ambiental sea mayor a 7 22 C 45 F Separe las cargas de ropa por peso y clase de tejido USO DE SUAVIZAD...

Page 110: ...siste rem6jela por 15 minutos en una soluci6n de agua tibia detergente Iiquido y unas cuantas gotas de vinagre blanco Enjuague la prenda y luego lavela Sangre Enjuaguela inmediatamente o rem6jela en agua fria con remojo previo enzimatico por 30 minutos o mas Enjuague Frote detergente en las manchas restantes Enjuague Si la mancha persiste vierta unas cuantas gotas de agua oxigenada de 3 sobre la m...

Page 111: ... que no daSe la tela Para acetato use una esponja con un quitamanchas no combustible Si la mancha persiste use cloro con agua oxigenada de 3 Enjuague la prenda y vuelva a lavarla Tinta o tinta de boligrafo Pretrate con un removador de manchas de prelavado o un solvente de lavar en seco Use una esponja para absorber continuamente hasta que no salga mas tinta Permita que se seque Repita el procedimi...

Page 112: ...ueden remover una vez que se hayan secado Remoje la prenda en agua tibia para sacar la pintura Use una esponja con un quitamanchas no combustible Rem6jela y lavela Pintura con base de acefe Raspe la pintura fresca Use una esponja con un quitamanchas no combustible Con la mancha aQn hQmeda frote detergente liquido en ella Lave la prenda con agua Io mas caliente posible y que no presente riesgos par...

Page 113: ...para reducir el riesgo de que fallen las mangueras Inspeccione peri6dicamente y reemplace las mangueras de entrada de agua si aparecen bultos arrugas cortaduras desgaste o fugas de agua AI reemplazar las mangueras de entrada de agua marque la fecha de reemplazo en la etiqueta con un marcador permanente COMO LIMPIAR EL SECARROPAS EXTERIOR Use un trapo suave y hQmedo para limpiar el gabinete y el pa...

Page 114: ...se Ilene mas rapido AsegQrese de quitar la pelusa del filtro de pelusa antes y despues de secar nuevas toallas Limpie el filtro de pelusa cuando sea necesario Los detergentes de lavanderia y suavizadores de tejidos pueden dejar un residuo en el filtro de pelusa Limpie el filtro de pelusa con un cepillo de nil6n si Ilega a taparse a causa del residuo C6mo limpiarlo PASO 1 Moje los dos lados del fil...

Page 115: ...ducto de ventilaci6n del centro de lavanderia PASO 2 Limpie una secci6n del conducto de ventilaci6n a la vez hasta que Ilegue a la capota de ventilaci6n Para limpiar la pelusa puede usar el adaptador de manguera de una aspiradora o una vara o alambre con un plomero o trapo en el extremo PASO 3 Vuelva a conectar el conducto de ventilaci6n tal como se describe en las INSTRUCCIONES DE INSTALACION de ...

Page 116: ...grifos de agua 4 Vuelva a conectar el cable de alimentaci6n 5 Ponga el lavarropas en funcionamiento por un ciclo completo con una taza de detergente para limpiar los restos de anticongelante FALTA DE USO O CUIDADO DURANTE LAS VACACIONES Ponga el centro de lavanderia en funcionamiento solamente cuando este en casa Si va a salir de vacaciones o no va a usar el centro de lavanderia por un largo perio...

Page 117: ...e poner el lavarropas el agua se saliera del anillo del en marcha tambor La centro de lavanderia no Aseg0rese de que las patas frontales est nivelada Io cual causo esten instaladas y que las tuercas que el agua se saliera del esten apretadas Nivele el centro de anillo del tambor lavanderia Ajuste las patas traseras vease la INSTALACION Seccion G La carga esta desequilibrada Redistribuya la carga L...

Page 118: ...atas nivelantes traseras no estan fijas vease la INSTALACION Secci6n H Las tuercas de las patas frontales Apriete las tuercas vease la no estan apretadas INSTALACION Secci6n H La cuerda amarilla de embalaje Quite la cuerda de embalaje con con los pasadores de chaveta no los pasadores de chaveta se ha quitado completamente vease la INSTALACION Secci6n B El piso no es Io suficientemente Reubique el ...

Page 119: ...mal esta floja El nivel del agua La parte superior del agitador Esto es normal es demasiado de aspas esta mucho m s alta bajo el lavarropas que el nivel de agua m s elevado no se Ilena EIIo crea la percepcion de que completamente el lavarropas no esta Ileno La tina est La tina se movi6 hacia adelante Cerciorese de centrar la tina antes de torcida durante la descarga poner en marcha el lavarropas E...

Page 120: ...a sale No se sac6 inmediatamente Descargue el lavarropas tan pronto arrugada la carga Ciclo incorrecto para los tejidos Use enjuagues frios y ciclos con que se estan lavando centrifugados a velocidad baja para reducir la formaci6n de arrugas Sobrecarga Las cargas deberan circular libremente durante el lavado Lave cargas mas pequeSas El agua de lavado no est Io Si la f brica Io tolera use agua de s...

Page 121: ...secarropas se encuentra en Ponga el secarropas en un ambiente un cuarto en donde la temperatura donde la temperatura del aire sea de es m s baja de 7 C 45 F m_s de 7 C 45 F Hay mucha humedad en la carga Los articulos que mantienen mas humedad de ropa tales como las prendas de algodon demoraran m s tiempo en secarse Se usa agua fria para enjuagar El secado demora m s tiempo pero est ahorrando energ...

Page 122: ...ogimiento Periodos de secado demasiado AsegQrese de que la programacion de Articulos prolongados del secarropas coincida con la clase de tejido vease el FUNCIONAMIENTO Calidad mala del tejido Fijese en la calidad del tejido antes de comprarlo No se han seguido las Siga las instrucciones de la etiqueta instrucciones de la etiqueta de de cuidado cuidadosamente cuidado de las prendas Las cargas de La...

Page 123: ... centro de lavanderia Kenmore con un Acuerdo de mantenimiento Sears Los centros de lavanderia Kenmore se han diseffado fabricado y probado para brindar afros de funcionamiento fiable Ann asi cualquier electrodomestico moderno podra necesitar servicio tecnico de vez en cuando El Acuerdo de Mantenimiento de Sears le ofrece un programa excepcional para su centro de lavanderia Automatica Kenmore El Ac...

Page 124: ...e Piezasderepuestoy ReparaciOn Sears ensuvecindario Ll_ menos las24 horasdel dia los siete dias de la semana 1 800 488 1222 mm mmmmmm mmmmmm Para obtenerinformaciOn sobrela adquisiciOn de unAcuerdode mantenimiento Searso para preguntar sobreunAcuerdovigente Ll_menos de 9 am a 5 pm de lunes a s_bado 1 800 827 6655 Cuando soliciteservicioo piezas siemprecomunique la siguiente informaciOn Nombre del ...

Reviews: