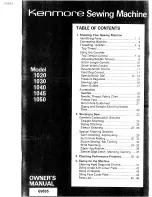
background image

Summary of Contents for 1020

Page 1: ...le Thread Fabric Chart 19 Presser Feet 20 Buttonhole Guide Feet 21 Zigzag and Straight Stitching Needle Plate 22 Starting to Sew 23 Garment Construction Stitches Straight Stitching 24 Zigzag Stitching 25 Stretch Stitching 26 28 Special Finishing Stitches Satin Stitching Appliqueing 29 Buttonhole Making 30 32 Button Sewing Bar Tacking 33 Blind Hemming 34 35 Zipper Application 36 Special Edge Stitch...

Page 2: ...zag Stitching Plate Presser Foot Thread Guide Thread Guide Thread Tension Regulator Thread Guide Face Cover Plate 11 Thread Guide 12 Take up Lever 13 Top Thread Tension Control 14 Threading Path 15 Special Stitch Dial 16 Stitch Width Control 17 Reverse Stitch Control 18 Stitch Length Control 19 Nomenclature Plate ...

Page 3: ... Power Switch 21 Connector 22 Hand Wheel 23 Bobbin Winder Shaft 24 Bobbin Winder Latch 25 Thread Spool Pin 26 Bobbin Winder Tension Disc 27 Thread Guide 28 Presser Foot Lever 29 Thread Cutter 30 Needle Clamp Screw 31 Feed Dogs 2 ...

Page 4: ...2 Turn the accessory box toward you as shown in Fig 2 3 Fig 3 shows the machine ready to sew with all the extensions in place for maximum sewing space 4 Push the plug onto three prong connector at the back of machine column 5 Plug machine cord into any 110 120 volt wall outlet Turn on power by pushing light and power switch 6 Pull up spool pin stored at top of machine 3 ...

Page 5: ...g the notch on the bobbin over locking stud on the shaft as shown in Fig 2 Push bobbin winder latch against bobbin until it clicks 4 Release clutch by pulling hand wheel or turning clutch knob as shown in Fig 4 Start machine holding onto end of thread When bobbin is slightly filled release end of thread 5 When bobbin is full winding mechanism stops 6 Push in hand wheel or turning clutch knob to re...

Page 6: ...f shuttle Insert bobbin into bobbin case mak ing sure thread is coming from bobbin as shown 7 8 Pull thread through slot of case as shown Pull thread under tension spring Holding latch open position case into shuttle and release latch Case should lock into place when latch is released Hold needle thread loosely in left hand and rotate hand wheel toward you one complete turn Bring bob bin thread up...

Page 7: ...THREADING OF TOP THREAD Model 1050 _ _ _ d_ Model1020 1030 1040 1045 _ 6 ...

Page 8: ...ontrol The higher the number the tighter the tension There are many reasons for having to reset your tension The best tension for one fabric may not be correct for another The required tension depends upon the stiffness of the fabric thickness of the fabric numbers of layers of fabric being sewn as well as the type of stitch you are making It is best to test the stitching on a scrap of the fabric ...

Page 9: ...OP TENSIONS A perfect straight stitch will have threads locked between the two layers of fabric with no loops on top or bottom _ Upper thread too tight Decrease Tension _ Upper thread too loose Increase Tension 8 ...

Page 10: ...satisfactory but the seam is puckered it may be necessary to loosen the tension on both the top and bottom threads Be sure to balance them as indicated on Page 9 When adjusting the tension on the bobbin case make slight adjustments with a screwdriver DECREASE TENSION Turn Counter Clockwise INCREASE TENSION Turn Clockwise 9 ...

Page 11: ...e of the control is the 10 1 2 stitch per inch range which is the most commonly used A basting stitch is made by using the longest possible stitch setting 6 stitches per inch The marking _ on this control is the setting used for the shortest stitches such as in Satin Stitching STITCH WIDTH CONTROL I m ilmll m m This control regulates the width of the stitch you select THE HIGHER THE NUMBER THE WID...

Page 12: ...trol clockwise and hold there during sewing The fabric will immediately start feeding backwards and seam will be fastened FEED DOG CONTROL The feed dog control is located on the machine behind accessory box There are a few times when you want to control the feeding of the fabric yourself When the control is pushed down the feed dogs drop and do not move the fabric For most of your sewing turn the ...

Page 13: ...nd THE RED DOT SETTING The Red Dot setting illustrated is the one used for most of your stitching either straight or simple zigzag When the stitch width is set on the Red Dot and the Special Stitch Dial on the Red Dot setting you may straight stitch For a simple zigzag stitch adjust the stitch width control to the desired setting with the dial remaining on the Red Dot setting 12 ...

Page 14: ...etting shown in the illustration above For more detailed instructions in blind hemming see next section of the book SPECIAL EDGE STITCH ELASTIC STRETCH STITCH j The setting illustrated is used for special edge finishing combining fabrics and so on Details on the use of this stitch are given in the next section The setting illustrated is used for special stretch stitch for sewing elastic such as sp...

Page 15: ...tting the dial to the setting indicated above See next section of this book for detailed use of the stitches STRETCH STITCH SETTING BUTTONHOLE SETTING I Stretch stitching is easily done by setting the dial to the setting indicated above Details on the use of this stitch are given in the next section of the book The three settings shown above are used in making a bar tacked button hole Detailed ins...

Page 16: ... down inner pin until a suitable pressure is obtained The pressure on the presser foot is regulated by turning the dial of this regulator which is situated in face cover plate See Fig 2 above To increase the pressure turn the dial clockwise until a suitable pressure is obtained Insufficient pressure may cause poor feeding of the fabric skipped stitches or difficulty in guiding the fabric If feed d...

Page 17: ...he switch If you are interrupted while sewing and must leave the machine unattend ed just turn off the switch and the ma chine cannot be started accidentally Fig 1 The sewing light is located inside the face cover plate as shown To replace the bulb turn light off and swing the face cover plate open Push up on the bulb slightly and turn bulb clockwise Remove bulb from socket Push in new bulb and tu...

Page 18: ...EDLE PLATE IS THE ALL IMPORTANT 5 8 SEAM LINE The corneripg guides are convenient when turning a square corner 5 8 from the fabric edge See next section of this book for directions PRESSER FOOT LEVER To aid you in the placement of heavy fabrics under the presser foot the lever can raise the foot beyond the normal up position This is also an aid in changing your presser feet 17 ...

Page 19: ...g your accessories a e x_ _ ll _ _with blue shank This special needle is to be used when sewing certain knits and certain difficult synthetic fabrics If you experience skipped stitches in any of your sewing use o x_ l l_ _ PLACEMENT OF NEEDLE Raise needle bar to its highest position by turning the hand wheel toward you Loosen the needle clamp screw Hold ing the needle with the flat side away from ...

Page 20: ...Vinyl Suitings Linen Wool Crepe Leather 50 Mercerized Cotton Mercerized Heavy Duty Polyester Synthetic Silk A 14 or 16 Medium Heavy Weight Corduroy Denim Wool Sailcloth Wool Flannel Gabardine Velvets Leather Heavy Duty Mercerized Cotton Polyester Synthetic Silk A 18 Heavy Weight Coatings Upholstery Cotton Duck Heavy Twills Canvas 16 18 or Silk Buttonhole Twist Q NEEI LE Decorative Top stitching on...

Page 21: ......

Page 22: ......

Page 23: ......

Page 24: ......

Page 25: ......

Page 26: ...en reaching the cornering guide as shown Raise the presser foot turn fabric New stitching line will align with 5 8 seam guide on side of needle plate Lower the presser foot and begin stitching in new direction ZIGZAG STITCHING 25 SETTINGS Special Stitch Dial Red Dot Stitch Width Control 1 to 4 Stitch Length Control Any Number Zigzag Presser Foot Use zigzag needle plate This type of stitching great...

Page 27: ...rol Red Dot Stitch Length Control 8 Straight Stitch Foot Use straight stitching plate Use this stretch stitch with knitted fabric and other fabrics that stretch Sew as you do with regular straight stitch seaming The seam may be pressed open as with any regular seam but will stretch if necessary This is also a good stitch to use on curved seams regardless of the type of fabric Any seam that will re...

Page 28: ... well SMOCKING STRETCH STITCHING SETTINGS Step 1 Step 2 Make a straight line of gathers across the fabric that you wish to smock Special Stitch Dial 8_ Stitch Width Control 3 to 4 Stitch Length Control 8 Zigzag Presser Foot With a narrow strip of fabric directly under the line of gathering stitch over the gathers The design will be a series of small diamonds When smocking a garment the stitch ing ...

Page 29: ...e needle pierces the fabric just short of the outside edge Raw or worn edges of older garments can be overcast to prevent further raveling ELASTIC STRETCH STITCHING SETTINGS Special Stitch Dial I_ Stitch Width Control 4 Stitch Length Control 8 Zigzag Presser Foot This is a good stitch to use in making or repairing lingerie The stitch is decora tive as well as useful Simply stitch the elastic into ...

Page 30: ... this stitch it is well to remember to loosen the tension of the top thread slightly The wider the stitch you make the looser the tension should be If you are stitching on a very soft fabric it is well to use a backing of tissue paper or interfacing for a well formed stitch Puckering of the material will be eliminated and the bobbin thread will not be visible on the right side of the fabric As wit...

Page 31: ...the upper thread under and to the back of the buttonhole guide foot See Figs 1 2 3 Note in Fig 3 that each guide foot has a dot on the right ed _ toward the back of the foot and on the left edge near the front of the foot These dots are used as a point of reference for your bartack ing steps in buttonholing See next page 4 Slide the guide foot forward until the rear edge of the presser foot is at ...

Page 32: ...on the left side of the buttonhole guide foot The toe of the presser foot will be touching the end of the guide foot Stop sewing at the left stitch and raise needle to its highest position as in Step 1 Step 3 Step 4 3 Set special stitch dial at E again and bartack several times Raise needle at its highest position as in steps 1 2 4 Set special stitch dial at G and continue sewing until the hinged ...

Page 33: ...will be in position shown in Fig 1 when buttonhole is completed To make firm well stitched button holes in heavier fabrics repeat only steps 1 and 3 on the preceding page REAR Start Fig 1 Fig 2 If the forward stitching does not exactly match the reverse stitching as shown in Fig 3 slightly adjust the stitch length control during forward sewing Always make a practice buttonhole on a scrap of fabric...

Page 34: ...heel again by hand so needle enters second hole Re adjust stitch width if necessary Stitch a number of times 5 Finish sewing with an extra two inches of thread remaining Draw these threads to reverse side of garment and tie M w I I m I I o BAR TACKING SETTINGS Special Stitch Dial Red Dot Stitch Width Control 2 to 4 Stitch Length Control Red Zone Zigzag Presser Foot Use zigzag stitching plate This ...

Page 35: ... blindstitch guide Use zigzag stitching plate After you have turned up the hem width desired turn raw edge over 1 2 and stitch this fold with a basting stitch Press Fig 1 Raw edge fold Fold hem back against right side of garmet with basted raw edge extending about 1 8 to right of garment fold Fig 2 Hem folded back 34 ...

Page 36: ... the fabric Make certain that the zigzag stitch catches the fold of the hem by adjusting the blindstitch guide slightly from left to right Fig 4 Stitching along fold with blind stitch Fig 5 Finished hem on right side of garment Remove basting and press hem Right side of garment will show only the blind stitches as in Fig 5 35 ...

Page 37: ...ot See Fig 1 Carefully follow directions given on the zipper package Fig 1 INVISIBLE ZIPPER Adjust the foot so the needle is sewing through the center hole of the foot and one groove of the foot is riding on the teeth of the zipper See Fig 2 Follow the zipper manu facturer s instructions After zipper has been inserted finish sewing seam by shifting foot to side position sewing through side notch F...

Page 38: ...he stitching catches both sides of the tear When mending a three cornered tear stitch from each end to the center It is well to use a piece of fabric under the tear for re inforcement 37 DARNING SETTINGS Special Stitch Dial Red Dot Stitch Width Control Red Dot Pressure Regulator 0 Feed Dogs Up No Presser Foot Remove presser foot stretch fabric be tween embroidery hoops with hole centered Draw the ...

Page 39: ...38 ...

Page 40: ...lace needle plate or polish off burrs completely Pulling fabric Incorrect size needle Incorrect setting of needle Loose presser foot Do not pull fabric guide it gently Choose correct size needle for thread and fabric Reset needle Reset presser foot Upper and lower threads not drawn back under presser foot before starting seam When starting a seam be sure to draw both threads under and back of pres...

Page 41: ...e Sharp eye in needle Nicks or burrs on shuttle Nicks or burrs at hole of needle plate Improper bobbin case threading Tight bobbin thread tension Lint in bobbin case or shuttle Feed dog down Light pressure on presser foot Thread knotted under fabric Start to stitch at a medium speed Rethread machine Loosen upper thread tension Choose correct size needle for thread and fabric Insert new needle Repl...

Page 42: ...area must be kept free of dust lint and occasional tangled thread Raise the needle bar to its highest point and remove the bobbin case Push levers of shuttle race aside and lift shuttle race cover and shut tle out 3 Clean the shuttle race with small brush Put a drop of oil on the center pin of the shuttle and shuttle race see arrows To Replace Shuttle Assembly Position shuttle race as illustrated ...

Page 43: ...OILING UNDER ARM COVER PLATE Remove arm cover plate to oil points indicated in top of machine head To remove cover plate lift cover 42 ...

Page 44: ...OILING UNDERSIDE Tilt machine head back and remove bottom cover to oil points indicated on underside of machine To remove bottom cover remove screws A B C D and E as shown below B 43 ...

Page 45: ...OILING IN FACE COVER PLATE Swing hinged face cover plate open and remove arm cover plate to oil points indicated in illustration ...

Page 46: ...The model number of your Sewing Machine will be shown on your nomenclature plate on the right side of your Sewing Machine See Section 1 page 3 for location WHEN ORDERING REPAIR PARTS ALWAYS GIVE THE FOLLOWING INFORMATION MODEL NUMBER NAME OF ITEM PART DESCRIPTION If the parts you need are not stocked locally your order will be electronically transmitted to a Sears Repair Parts Distribution Center ...

Reviews: