Husqvarna 966067001, Operator'S Manual
The Husqvarna 966067001 Operator's Manual is a comprehensive guide for using and maintaining your Husqvarna product. With detailed instructions and illustrations, this manual ensures safe and efficient operation. Download it for free from our website, manualshive.com, and unleash the full potential of your Husqvarna equipment.
Share
Download


Reviews:
No comments
Related manuals for 966067001
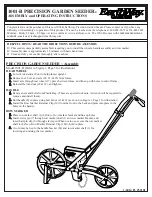
1001-B
Brand: EarthWay Pages: 5
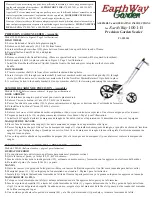
1001-B
Brand: EarthWay Pages: 5
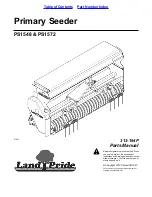
PS1548
Brand: Land Pride Pages: 34

SPS20
Brand: Land Pride Pages: 30
GT-77
Brand: Herd Pages: 8
Classen TRS-20
Brand: Little Wonder Pages: 18

ATV-48ATVPS
Brand: Field Tuff Pages: 15
Brillion SSB
Brand: Landoll Pages: 102
OS1548
Brand: Land Pride Pages: 66

Sturmvogel L Series
Brand: Rabe Pages: 12
HAYBUSTER 107C DRILL
Brand: Duratech Pages: 166
Sturmvogel 4500 L
Brand: Rabe Pages: 12
TURFMAKER Junior SLP2041
Brand: Brillion Pages: 42
PE 250
Brand: Gaspardo Pages: 42

3S-3000-3210
Brand: GREAT PLAINS Pages: 118

23511
Brand: Toro Pages: 24
Seeder none
Brand: King Kutter Pages: 28
PS1572
Brand: Land Pride Pages: 34


