background image

Address:      Huawei Industrial Base 

Bantian, Longgang 

Shenzhen 518129 

People's Republic of China

Website:      

http://www.huawei.com

Email:          

[email protected] 

No part of this document may be reproduced or transmitted in any form or by any means without prior
written consent of Huawei Technologies Co., Ltd.

and other Huawei trademarks are trademarks of Huawei Technologies Co., Ltd. 

All other trademarks and trade names mentioned in this document are the property of their respective
holders.

The purchased products, services and features are stipulated by the contract made between Huawei and
the customer. All or part of the products, services and features described in this document may not be
within the purchase scope or the usage scope. Unless otherwise specified in the contract, all statements,
information, and recommendations in this document are provided "AS IS" without warranties, guarantees
or representations of any kind, either express or implied.

The information in this document is subject to change without notice. Every effort has been made in the
preparation of this document to ensure accuracy of the contents, but all statements, information, and
recommendations in this document do not constitute a warranty of any kind, express or implied.

HUAWEI TECHNOLOGIES CO., LTD.

0

Issue

04

Date

2020-12-30

Summary of Contents for OptiX OAU 2A

Page 1: ...contract made between Huawei and the customer All or part of the products services and features described in this document may not be within the purchase scope or the usage scope Unless otherwise specified in the contract all statements information and recommendations in this document are provided AS IS without warranties guarantees or representations of any kind either express or implied The info...

Page 2: ...to corrosion if it is Within3 7 km of an ocean or a salt water lake Within3 km of a heavy pollution source such as a smelting factory or coal mine Within2 km of a medium pollution source such as a chemical rubber or electroplating plant Within1 km of a light pollution source such as a food leather processing plant or heating boiler Unpacking To prevent water vapor from accumulating inside the devi...

Page 3: ...se capacity is 10 A to 16 A Do not connect the OAU 2A to an AC power supply device Otherwise the OAU 2A may be damaged Do not connect the RTN 320 to a DC power supply device providing power beyond the range of 38 4 V to 57 6 V Otherwise the RTN 320 may be damaged Do not leave any service cable unconnected Do not leave any service cable unconnected see the followingfigure If a service port is not i...

Page 4: ...network cable Use a ground clip to ground the outdoor network about 0 5 m to 1 m away from the equipment room before leading the cable into the equipment room Indoor Signal surge protector Surge Protect Ground cable Ground clip PE When the OAU 2A is installed on a self supporting tower maintenance personnel cannot performance off tower maintenance through WLAN because the OAU 2A is installed at a ...

Page 5: ...the USB port compartment ensure that the fall prevention strip is not pinched by the USB port compartment cover If the cable trough is not used plug the cable holes with waterproof blocks Do not keep the maintenance compartment open Close the maintenance compartment after maintenance is complete DC power port NMS 210mm 290mm 102mm 4 When the GE electrical module is used and the network cable lengt...

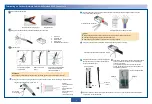
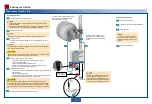
Page 6: ...or fiber cascade cable DLC UPC connector DC power cable and connector Brown black 0 V ground cable Blue 48 V Strip off the sheath of cables according to the stripping length indicator on one side of the OAU 2A to expose the shield layer Outdoor network cable 29 mm Shield layer exposed 14 mm Sheath reserved 19 mm Positive and negative cables exposed 57 mm Wires exposed 8 mm DC power cable 5 Equipme...

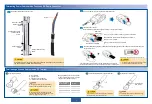
Page 7: ...h of the stripped cable 20 mm Strip off the braid shield and cut the aluminum foil and unwanted materials Remove the outer jacket Arrange the core wires according to the pin assignmentsand cut them neatly exposing a length of 12 mm 8 brown 7 white and brown 6 green 5 white and blue 4 blue 3 white and green 2 orange 1 white and orange a b c When stripping off the outer jacket take care not to damag...

Page 8: ...heath reserved 19 mm DC power cable Positive and negative cables exposed 57 mm Wires 7 Terminating a Ground Cable with an OT Terminal Strip the ground cable A OT terminal B ground cable C exposed cable conductor L1 length of the exposed cable Fit the exposed cable into the OT terminal Crimp the OT terminal lug Mapping between the cross sectional area of a cable conductor C and the length of an exp...

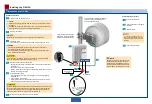
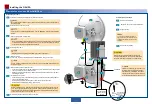
Page 9: ...o the DC power port in the maintenance compartment Lay out the DC power cable Select ground points for the DC power cable and install ground clips Attach a matte white label to the DC power cable 5 For the method of installing an XMC ODU see the RTN XMC ODU Quick Installation Guide 6 Power on the OAU 2A Installation procedure Commissioning procedure Before installing a cable bind the cable section...

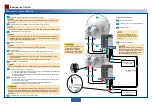
Page 10: ...ch a matte white label to the DC power cable 5 For the methods of installing an XMC ODU and a hybrid coupler see the RTN XMC ODU Quick Installation Guide Install IF cables Connect the IF ports of the OAU 2A and each XMC ODU using an IF cable 6 Installation procedure Before installing a cable bind the cable section that links the cable connector to the pole This will protect the cable connector fro...

Page 11: ...lips Attach a matte white label to the DC power cable 5 For the method of installing an XMC ODU and an OMT see the RTN XMC ODU Quick Installation Guide Install IF cables Connect the IF ports of the OAU 2A and each XMC ODU using an IF cable 6 Installation procedure Before installing a cable bind the cable section that links the cable connector to the pole This will protect the cable connectorfrom d...

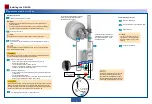
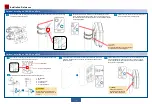
Page 12: ...nd cable before you climb up the tower Follow the antenna installation guide to install the antenna 1 Install the ODU on to the antenna 2 For the method of installing an XMC ODU see the RTN XMC ODU Quick Installation Guide 1 1 2 2 3 4 5 5 6 7 Before installing a cable bind the cable section that links the cable connector to the pole This will protect the cable connector from damage Ensure that the...

Page 13: ...OMT and the antenna 2 For the method of installing an XMC ODU see the RTN XMC ODU Quick Installation Guide 6 Install MIMO cascading cables Ensure that port MIMO1 connects to port MIMO1 and port MIMO2 connects to port MIMO2 Before installing a cable bind the cable section that links the cable connector to the pole This will protect the cable connector from damage Ensure that the length of cable run...

Page 14: ...ating points Ensure that each expansion bolt protrudes from the wall for 8 mm to 12 mm Install the pole mounting bracket onto the expansion bolts place a flat washer a spring washer and a nut on each expansion bolt and then tighten the nuts Locating point Fasten the OAU 2A box which has a conversion bracket on the pole mounting bracket using screws Then turn the box gently in both the horizontal a...

Page 15: ...cable see the RTN XMC ODU Quick Installation Guide IF1 Do not remove or insert an IF cable connectorfrom or to the OAU 2A with power on Otherwise human injuries may be caused Do not power on the OAU 2A until IF cables are properly connected Install the device side ground cable before you climb up the tower Loose the screw of the maintenance compartment 1 90 Rotate the screw with a torque less than...

Page 16: ...ct the DC power connector to the DC power port 3 Rubber cable trough PWR cable hole The shield layers of all DC power cables and outdoor network cables must be grounded using wire clips Otherwise the cables may be damaged by lightning strikes The shield layer is not exposed The exposed shield layer is so long that it extends to the waterproof cable trough The shield layer is not fastened using a w...

Page 17: ...r the cover of the maintenance compartment 1 2 Check whether cable holes and waterproof blocks meet requirements 3 Rotate the screw to the locked position 90 GE3 o cable hole COMBO cable hole Insert the SFP optical module into the GE3 o COMBO MIMO1 or MIMO2 port until you hear a click Then slightly pull the puller on the SFP optical module to check whether it is inserted securely Insert the fiber ...

Page 18: ...work cable Connect the surge end of the protector to GE electrical signals and use SFP GE electrical modules to connect the protect end to the device The connection mode is RJ45 Surge end Protect end Ground cable When installing a lightning surge protector separate the protector from the RTN device with a spacing of no less than 10 cm This ensures that cables between the protector and SFP GE elect...

Page 19: ...cable leaves the tower and runs toward the outdoor cable tray 4 About 1 m before the cable leaves the roof cable ladder Select ground points for the DC cable Ground the DC cable at the following positions 1 About 0 5 m to 1 m 1 64 feet to 3 28 feet before the cable is routed into the equipment room or outdoor cabinet 2 About 1 m before the cable leaves the tower and runs toward the outdoor cable t...

Page 20: ...s ground bar terminal and U shaped terminal are available for a ground clip Select a terminal as required If a ground clip is installed on a thin cable secure the ground clip by using the binding wire delivered with the ground clip For details about how to install ground clips see the use instructions delivered with the ground clips Ensure that the angle between a PGND cable and a power cable is 1...

Page 21: ...emplate Scribe pen Use a scribe template to determine the positions of mounting holes Install expansion bolts Chisel drilling positions Drill holes Remove the nut Install expansion bolts Ф8 drill bit Nut Flat washer Expansion tube Expansion bolt Tighten the screws and fix the case Flat washer Expansion bolt Nut 1 2 3 b c 20 Installing the Outdoor Optical Splitter Installation Reference a ...

Page 22: ...wer hold hoop Fix the upper end of the case and then the lower end Route in and fix cables Determine the holes through which fibers are routed in and remove the hole blocks Connected to the fiber outlet on the main OAU 2A Connected to the fiber outlet on the standby OAU 2A Connected to the fiber outlet on the customerequipment Hole blocks Outdoor fiber trough Fix hose clamps on outdoor fibers Hose...

Page 23: ...ndby OAU 2A 202 Connected to GE transmit port on the standby OAU 2A IN2 Customer equipment Connected to GE receive port on the customer equipment IN1 Connected to GE transmit port on the customer equipment Wrapoutdoor fibers with three layers of waterproof tapes and ensure that the tapes just fit the cable trough and the case is reliably sealed and waterproofed Schematic diagram of coding ports an...

Page 24: ...or cables below ports or near feeder windows and ensure a bend radius equal to or greater than the required minimum bend radius After you form a drip loop in a cable coil the cable into a roll with the diameter greater than 0 6 meters and bind the rollto the tower or pole for future use Check whether there is a probability that outdoor cables will be damaged by external environmental factors If ye...

Page 25: ...packing During maintenance the power off time of the equipment must not be longer than 24 hours Do not connect the OAU 2A to an AC power supply device Otherwise the OAU 2A may be damaged Do not connect the RTN 320 to a DC power supply device providing power beyond the range of 38 4 V to 57 6 V Otherwise the RTN 320 may be damaged If the PI is used to output DC power the DIP switching for setting t...

Page 26: ...he OAU 2A can connect to the Web LCT through its NMS port using a network cable or communicatewith the Web LCT through its WLAN module Close the maintenance compartment A WLAN module was inserted into the USB port before the OAU 2A was delivered Use the WLAN Connection tool delivered with the Web LCT to set up a WLAN connection between the Web LCT and OAUT 2A For details see Connecting the Web LCT...

Page 27: ...ptive screws Support rob B Objective lens tube Eye lens tube Support plate Prism table Locking ring Support rob A Alignment scopes are high precision devices for alignment Before an aiming telescope leaves the factory parts between the eye lens tube and the prism table as well between the objective lens tube and the prism table have undergone necessary anti loosing treatments Any rotating operatio...

Page 28: ...late for easy installation and partially fasten the locking ring to secure the objective lens tube in place 4 Support plate 3 Rubber plug Loosen Tighten Install only support rod A for a 0 2 m or 0 3 m antenna Install both support rods A and B for a 0 6 m or larger antenna Locking ring Secure the alignment scope to the support rod 5 Handwheel Loosen the locking ring adjust the alignment scope to th...

Page 29: ...Installing an Alignment Scope Appendix 58 59 28 Remove the alignment scope and support robs and place them into the tool box in order 8 ...

Reviews: