background image

HP Pavilion

md5020n/md5820n/md5880n/md6580n

High-Definition Microdisplay TV

User’s Guide

Summary of Contents for Pavilion md5020n

Page 1: ...HP Pavilion md5020n md5820n md5880n md6580n High Definition Microdisplay TV User s Guide ...

Page 2: ...s of Dolby Laboratories Manufactured under license from Dolby Laboratories This TV incorporates High definition Multimedia Interface HDMI technology HDMI the HDMI logo and High definition Multimedia Interface are trademarks or registered trademarks of HDMI Licensing LLC SRS TruSurround XT SRS and symbol are trademarks of SRS Labs Inc SRS TruSurround XT technology is incorporated under license from...

Page 3: ...tachments accessories specified by the manufacturer 12 Use only with the cart stand tripod bracket or table specified by the manufacturer or sold with the apparatus When a cart is used use caution when moving the cart apparatus combination to avoid injury from tip over 13 Unplug this apparatus during lightning storms or when unused for long periods of time 14 Refer all servicing to qualified servi...

Page 4: ...for proper grounding and in particular specifies that the cable ground must be connected to the grounding system of the building as close to the point of cable entry as practical If an outside antenna or cable system is connected to the TV be sure the antenna or cable system is electrically grounded to protect against voltage surges and built up static charges Article 810 of the US National Electr...

Page 5: ... 24 DVD Player or Video Gaming Device 25 Audio Stereo Sound System 26 Audio Surround Sound or AV Receiver 27 Computer 28 Using a CableCARD 29 Adding a CableCARD Slot 29 Installing a CableCARD 30 Turning the TV On and Off 31 Plugging In the Power Cord 31 Turning On the TV 31 Turning Off the TV 32 Completing the Basic Setup 32 Finding Your Channels 32 Setting the Time and Date 33 2 Using the Remote ...

Page 6: ...e Menu 54 Lock Menu 55 Setup Menu 56 5 Fixing Problems Maintaining the TV 57 Cleaning the TV 57 Replacing the Lamp Module 57 Troubleshooting 60 Warning Light Problems 60 Startup Problems 60 Picture Problems 61 Channel Problems 62 Sound Problems 63 General Problems 64 Remote Control Problems 64 Testing the Operation 65 6 Support and Warranty Support 67 Contacting HP Technical Support 67 Obtaining R...

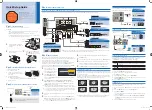
Page 7: ...e most external equipment comes with the required cables Cables are also available from HP and at most electronics stores Carrying the TV WARNING To avoid personal injury or damage to the TV use at least two people to lift or move the TV Lift with your legs To lift the 58 or 65 inch model place one hand in the recessed hand grip 2 above the vent on the side panel and hold the top front corner 1 wi...

Page 8: ...sed 5 Front cable tunnel Path for cables coming out the front of the TV 6 Back cable tunnel Path for cables going out the back of the TV 7 Connection panel Connections for video and audio equipment Located behind the access door 8 Power button Turns the TV on and off Also on remote control 9 Settings and ok buttons Combined with the Ch and Vol buttons moves and makes selections in the on screen me...

Page 9: ...ns 2 Cable input connector Connects RF coax cable from a cable service 3 Antenna input connector Connects RF coax cable from an antenna 4 Service connectors For HP service use only 5 HDMI input connectors Connects up to two HDMI or DVI D sources HDMI 2 has an optional audio input 6 Computer VGA input connectors Connects a computer to show its screen and play its audio 7 Component video input conne...

Page 10: ... to locate devices to minimize the lengths of cables connecting them to the TV Use an HP TV stand or other quality stand to keep equipment close to the TV If any cable is longer than 3 m 10 ft consider using high quality low loss cables for best video and audio quality For the ultimate home theater experience consider including a 5 1 surround sound system such as a Dolby Digital system This system...

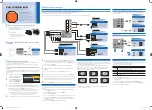
Page 11: ...The way you connect the individual components of your entertainment system depends on the devices you have The following diagram shows how several common types of devices could be connected In particular it shows individual video and audio paths between devices See Making Your Connections on page 17 for examples of systems and connections TV Signal Video Audio TV source cable antenna TV decoder ca...

Page 12: ...or open by its corners This can damage the latch Push in above the HP logo instead To plug in a cable open the access door by pushing and releasing the door Push above the HP logo For permanent connections run the cables through the tunnel toward the back of the TV 1 For temporary connections or for devices in front of the TV run the cables through the tunnel that comes out the front of the TV 2 T...

Page 13: ...nition digital picture and digital surround sound in one connection DVI D connection Highest quality high definition digital picture Requires a separate sound connection Requires a DVI to HDMI cable or adapter Component video connection YPbPr High quality high definition picture Requires a separate sound connection Computer VGA connection see Computer on page 28 High quality picture in single conn...

Page 14: ...ollowing diagrams show how to connect video devices with different types of video outputs Use the highest quality connection available on the device HDMI connection HDMI cable NOTE You can connect to the HDMI 1 and HDMI 2 inputs on the TV The HDMI cable carries both the video and audio signals ...

Page 15: ...g the TV speakers connect a DVI device only to the HDMI 2 input on the TV If you are connecting audio directly to a sound system you can connect DVI devices to the HDMI 1 and HDMI 2 inputs Component video YPbPr connection Component video cable three RCA Stereo RCA cable two RCA NOTE You can connect to the Component 1 and Component 2 inputs on the TV ...

Page 16: ...Only one S video or composite video connection is supported for each of these three inputs Composite video connection Composite video audio cable three RCA or separate video and audio cables NOTE You can connect to the Video 1 Video 2 and Video 3 inputs on the TV Only one S video or composite video connection is supported for each of these three inputs ...

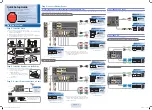
Page 17: ...connections To connect this equipment See Antenna page 18 Standard cable no set top cable box page 19 Cable with set top cable box page 20 Other connections To connect this equipment See Satellite receiver with no VCR or DVR page 21 Cable and VCR DVR page 22 Cable box and VCR DVR page 23 Satellite receiver and VCR DVR page 24 DVD player or video gaming device page 25 Audio Stereo sound system page...

Page 18: ...na has flat twin lead cable or other type of cable connect the antenna cable to a coaxial adapter then connect the adapter to the TV antenna input To do this Do this Watch channels received by the antenna Press Source and select Antenna Scan for available channels See Finding Your Channels on page 32 Connect additional equipment See Making Your Connections on page 17 ...

Page 19: ...ation This setup enables you to watch unscrambled channels NOTE Use this same connection if you install a CableCARD in your TV See Installing a CableCARD on page 30 To do this Do this Watch cable channels Press Source and select Cable Scan for available channels See Finding Your Channels on page 32 Connect additional equipment See Making Your Connections on page 17 ...

Page 20: ...formation Or you can omit the splitter and omit the connection to the TV cable input If all cable channels are scrambled connect the incoming cable directly to the cable box omit the splitter and omit the connection to the TV cable input You can eliminate the cable box if your cable provider can install a CableCARD in the TV See Installing a CableCARD on page 30 To do this Do this Watch cable box ...

Page 21: ...device has different connectors from those shown use the highest quality video connection available Observe the color coding on connectors To do this Do this Watch satellite channels Press Source and select Component 1 Program the remote control to operate the satellite receiver See Programming for Other Devices on page 36 Use the remote control to operate the satellite receiver Press Device to se...

Page 22: ...bserve the color coding on connectors If all cable channels are scrambled and you have no CableCARD installed connect the incoming cable directly to the DVR cable box omit the splitter and omit the connection to the TV cable input To do this Do this Watch cable channels Press Source and select Cable Watch VCR or DVR program Press Source and select Video 1 Scan for available channels See Finding Yo...

Page 23: ...le input If all channels are scrambled connect the incoming cable directly to the cable box omit the splitter and omit the connection to the TV cable input You can eliminate the cable box if your cable provider can install a CableCARD in the TV See Installing a CableCARD on page 30 To do this Do this Watch cable box channels Press Source and select Component 1 Watch VCR or DVR programs Press Sourc...

Page 24: ...video connections available Observe the color coding on connectors To do this Do this Watch satellite channels Press Source and select Component 1 Watch VCR or DVR channels Press Source and select Video 1 Program the remote control to operate these devices See Programming for Other Devices on page 36 Use the remote control to operate the satellite receiver Press Device to select STB Use the remote...

Page 25: ...ctions available Observe the color coding on connectors For a device connected temporarily such as a camcorder or gaming device run the cable through the tunnel under the front of the TV To do this Do this Watch video from the DVD player Press Source and select Component 2 Watch video from the gaming device Press Source and select Video 2 Program the remote control to operate the DVD player See Pr...

Page 26: ...st the volume on the stereo system If you program the remote control to operate the audio device the remote control adjusts the volume of only the audio device and stops adjusting the volume of the TV output However the volume buttons on the TV always adjust the TV output To do this Do this Program the remote control to operate the sound system See Programming for Other Devices on page 36 Use the ...

Page 27: ...ts directly to the surround sound system so you can hear surround sound You can omit the audio connections to the TV for those devices For other devices with only stereo outputs you can connect those outputs to the surround sound system or to the TV If the AV receiver also supports multiple video connections you can connect video outputs from other equipment to that device and then connect the vid...

Page 28: ...ear on the TV you might have to press a combination of keys on the computer to turn on the computer s VGA output For example on some computers you must press Fn F4 or Fn F5 For instructions refer to the user documentation provided with your computer The mini phone cable is needed only if you want to hear computer sound on the TV To do this Do this View the computer display Press Source and select ...

Page 29: ...equire a set top cable box Contect your cable provider for information about advanced features in your area Adding a CableCARD Slot Certain TV models do not have a CableCARD slot However you can add this capability by purchasing a CableCARD module from HP and installing it in your TV This enables you to install a CableCARD provided by your local cable provider CAUTION The CableCARD module is extre...

Page 30: ...ructions provided with the card 1 Hold the CableCARD with the front label facing up and then insert it into the CableCARD slot 2 Gently push the card into the slot until it stops When fully inserted the card sticks out of the slot 3 Press Settings go to Setup Channel setup Cable card and press OK Your cable provider uses the information in the CableCARD screens to activate and configure the CableC...

Page 31: ...er button on the side of the TV or On the remote control press Device until TV is selected and then press the power button The TV might take a minute or so to warm up and display a bright picture The blue power light blinks during warm up NOTE It is normal for parts of the TV and the air coming out of the vents to be very warm If the TV starts to overheat the red temperature warning light will tur...

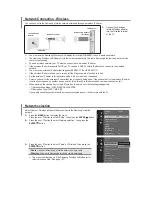
Page 32: ...buttons TIP If you have a cable box or satellite receiver you must set up that device to view channels from that source The TV tuner receives channels from only the antenna and cable inputs NOTE The following steps can take from one minute up to 30 minutes or more If you have an antenna connected to the antenna input 1 On the remote control press Settings and go to Setup Channel setup Auto search ...

Page 33: ...ion 1 Press Info to display detailed source information If the time and date are displayed and are correct stop here 2 Press Settings and go to Setup Time Clock If the setting is Auto and the time and date are correct stop here If the setting is Auto but the time or date is not correct change the setting to Manual and continue to the next step 3 In the menu under Setup Time set each of the followi...

Page 34: ...Setting Up the TV 34 ...

Page 35: ...anges the option for showing a second picture Yellow SAP Changes the secondary audio program option or language Blue SLEEP Changes the delayed shutoff option Favorites Shows the next of your favorite cable channels Sound Changes to a different combination of sound settings Source Selects an input source Press again to show all sources Picture Changes to a different combination of picture and color...

Page 36: ...the code is invalid or you pressed a wrong button the device indicator blinks rapidly for three seconds Go back to step 2 and hold down the Options and back buttons 5 Aim the remote control at your device and press the power button on the remote contol If the device turns on or off the programming is successful If other functions do not work and several device codes are listed try a different code...

Page 37: ... Sylvania Techwood Toshiba Yamaha Zenith 1007 1012 1013 1017 1069 1003 1066 1034 1003 1014 1035 1004 1022 1036 1039 1021 1037 1009 1010 1023 1025 1029 1049 1054 1016 1055 1044 1063 Set Top Cable Box Includes cable boxes with digital video recorders Indicator STB or AUX Manufacturer Code Manufacturer Code Manufacturer Code ABC GE General Instruments Hitachi 2022 2023 2022 2023 2023 2024 2031 2023 J...

Page 38: ...o Panasonic Philips Pioneer Proscan 3024 3016 3027 3034 3026 3033 3035 3006 3017 3025 3009 3010 3012 3002 3031 Quasar RCA Dimensia RCA other Sanyo Scientific Atlanta Sony Technics Toshiba Yamaha Zenith 3025 3018 3019 3030 3031 3022 3029 3013 3023 3032 3001 3025 3036 3000 3024 3028 Digital Video Recorder Indicator DVR or AUX Manufacturer Code Manufacturer Code Manufacturer Code Philips RePlay 4001 ...

Page 39: ...000 5021 5022 5023 5041 5044 5051 5021 5022 5023 5041 5044 5133 5026 5026 5060 5033 5026 5053 5006 5028 5037 5063 5021 5022 5023 5055 5063 5017 5023 5025 5026 5029 5037 5046 5047 5053 5054 5060 5034 5042 5031 5032 5038 5002 5004 5005 5031 5032 5034 5042 5044 5053 5046 5047 5046 5047 5025 5025 5029 5033 5021 5022 5023 5041 5044 5055 5026 5025 5026 5046 5047 5053 5035 5051 5053 5061 5003 5007 5028 5...

Page 40: ...ght not support all functions All devices To do this Press Control the device Device one or more times Turn device on and off Change device settings using device menu Settings then and OK Display information Info DVD player To do this Press Play Pause Stop Jump to next scene chapter Jump to previous scene chapter Fast forward Fast backward Select from DVD menu Menu then and OK While DVD or TV is s...

Page 41: ...o recorder To do this Press Play Pause Stop Record Rec Fast forward Fast backward Jump forward Jump backward one or more times Display channel list Guide Display list of recordings Menu HP projector To do this Press Change picture mode Picture Change picture source Source VCR To do this Press Play Pause Stop Record Rec Fast forward Rewind fast backward Change channel Ch or Ch Go to channel 0 throu...

Page 42: ...Using the Remote Control 42 ...

Page 43: ...ound system even if TV or AUDIO is not selected on the remote control NOTE The volume and mute buttons also affect the stereo output port but not the digital audio output NOTE The volume and mute buttons on the side of the TV control only the TV They do not control an external sound system To do this Press Browse to a channel Ch and Ch Go to a channel For standard channels 0 through 9 and then Ent...

Page 44: ...remote control one or more times to cycle through these options No captions normal sound Captions normal sound Captions only while sound is muted Depending on the program you might be able to customize the content and appearance of the captions Press Settings and go to Setup Closed caption Watching Another Video Source There are several ways to change to a different picture source To do this Press...

Page 45: ...le sources at the same time Turning Off after a Delay You can set the TV to play for up to two hours and then automatically turn off To set the sleep timer press the blue SLEEP button one or more times to select the delay and then press OK To view the timer press the blue SLEEP button once To do this Press Find the active picture or when no border is visible Change the size of the active picture o...

Page 46: ...gain If a password is set when prompted press the buttons for your password 3 Go to Lock Lock mode then select On and press OK 4 Go to Lock Rating then select one of the predefined modes and press OK 5 Go to Lock Unrated content lock or unlock this option and then press OK Note that many news sports and general interest programs are not rated Setting individual controls If you change individual lo...

Page 47: ...ges PG Parental guidance suggested some material may not be suitable for children PG 13 Parents strongly cautioned some material may be inappropriate for children under age 13 R Restricted parental guidance suggested for children under age 17 NC 17 No one age 17 or under allowed X No one age 17 or under allowed Canada English ratings E Exempt C Children all ages C8 Children age 8 and above G Gener...

Page 48: ...w that would be blocked by your normal control settings you can temporarily turn off the controls 1 Tune the TV to the desired program or channel If it is blocked a password prompt appears 2 Press the buttons for your password 3 To suspend all locks until the TV is turned off press the red CC button or to view this channel but keep all locks active press the green PIP button Changing Your Password...

Page 49: ...icture mode you want to adjust 2 Press Settings and go to Picture 3 Adjust the settings until you are satisfied with the picture TIP To exit from any on screen menu or adjustment press the Settings button Adjusting the Size of the Picture Video images come in several different sizes depending on the video content and the source device If a picture does not fit the shape of your TV screen you have ...

Page 50: ... not wash out fine detail in bright areas You can view bright clouds or textured white areas 7 Go to Advanced color Gamma Adjust to the setting that gives the best overall midrange brightness This should have minimal effect on blacks and whites 8 Go to Advanced color Color temperature Adjust to the setting where whites and colors look best 9 Go to Color saturation Adjust to the setting where color...

Page 51: ...Auto search cable is not available because the card provides complete channel information Setting Up Favorite Channels You can quickly tune to your most watched cable channels by creating a list of favorite channels Only channels received on the cable input can be included in the list of favorite channels antenna channels cannot be added to the list To tune to a favorite channel S Press Favorites ...

Page 52: ...hlight the desired menu and then press OK to go into that menu 4 Press up and down to highlight the desired setting and then press OK to start changing the setting 5 Press left and right or up and down to adjust the setting as prompted 6 To return to a previous menu press back one or more times 7 To close the on screen menu press Settings NOTE You can use the buttons on the side of the TV to work ...

Page 53: ...ts colors toward red or blue R Gain B Gain G Gain Adjusts the amount of red R blue B and green G If you change any of these settings the Color temperature setting automatically changes to Custom Brightness boost Forces higher brightness DVI color Adjusts the digital video color range when not automatically defined Set to Standard unless you are viewing DVI output from a computer or extended DVI ou...

Page 54: ...the language of the audio program Digital audio out Sets the type of signal on the digital audio output surround or stereo depending on the program Auto or always stereo PCM for certain older digital audio systems Internal speakers Sets whether the TV speakers are turned on Reset Restores all sound settings to their default settings Setting Description Visual Select Shows small pictures from all v...

Page 55: ...nputs Customize rating Adjusts individual rating permissions If you change any ratings the Rating level automatically changes to Custom USA TV Allows or blocks programs with specific US TV ratings USA Movie Allows or blocks movies with specific US movie ratings Canada English Allows or blocks programs with specific Canada English ratings Canada French Allows or blocks programs with specific Canada...

Page 56: ...tenna and cable inputs Time zone Sets the time zone Daylight savings Sets how daylight savings is configured Date Sets the calendar date Time Sets the clock time Sleep Sets or shows how long the TV will stay on before automatically turning off When activated this function operates only one time Source names Sets labels for input sources Closed Caption Configures TV closed captions for the antenna ...

Page 57: ...module at any time to bring the TV up to factory fresh brightness We recommend replacing the lamp module if a warning message displays HP replacement lamp L2114A WARNING Replacing the lamp module requires special consideration To reduce the risk of injury be careful when removing the lamp module because broken glass might be present The lamp contains a small amount of mercury If the lamp breaks ad...

Page 58: ...t 30 minutes 2 Unplug the power cord 3 Open the front access door by pressing in above the HP logo then releasing 4 Loosen the two screws 1 on the lamp cover and remove the cover 2 5 Loosen the three screws 1 on the lamp module then pull out the module using its handle 2 ...

Page 59: ...t into place and tighten the three screws 1 7 Insert the tabs on the lamp cover 2 into the openings in the case Position the cover and tighten the two screws 3 8 Plug in the power cord and turn on the TV If the lamp does not turn on after the warm up period reinstall the lamp module ...

Page 60: ...ontacting HP Technical Support on page 67 If the red lamp light is on left of the blue light Allow the TV to cool down for about three minutes after it turns off If the warning light turns on after you restart the TV remove and reinstall the lamp module Install a new lamp module If this occurs after you install a new lamp module remove and reinstall the lamp module If a new lamp module does not fi...

Page 61: ... reset press OK and select Yes If the picture is not clear ghost images smearing poor quality Check the cable connections Try a different channel or different source The source could have poor picture quality If the source device has more than one video output see Choosing Your Video Connections on page 13 If the problem occurs for the cable input on one or more cable channels press Settings and g...

Page 62: ...e Depending on your system setup you might need to tune channels on the TV or on an external device such as a set top cable box or satellite receiver If you are tuning an external device be sure the TV is showing this source If you are tuning the TV press Source and check whether you are viewing the antenna input or cable input Each of these inputs has a separate list of channels For example if yo...

Page 63: ...n the side of the TV one or more times to be sure the sound output is not muted and the volume is not too low If the audio output from the source device is connected directly to the sound system check the cable connections and settings on those two devices If the volume of the TV speakers cannot go high enough If the source device has a volume control increase its volume For example a set top cabl...

Page 64: ...he remote control does not operate Try removing and reinserting the batteries in the remote control To operate the TV press Device one or more times to select TV Move to within 9 m 30 ft of the TV Aim the remote control at the TV screen Try moving more in front of the TV rather than off to the side With the TV turned on watch the blue power light below the screen while you press the Settings butto...

Page 65: ...he proper operation of the TV 1 Turn off the TV 2 Press the following sequence of six buttons on the remote control Settings 999 OK power 3 If the TV turns on the TV is operating properly If the red warning lights on the front of the TV turn on or start blinking see Warning Light Problems on page 60 ...

Page 66: ...Fixing Problems 66 ...

Page 67: ... great way to ask a question about your specific situation Include as many details as possible about your issue Many emails are answered within one hour Step 3 HP Telephone Support HP provides telephone support at no additional cost for as long as you own your TV Standard phone company charges do apply Telephone support is available in any country where the product is distributed by HP Before Call...

Page 68: ...lies not provided or supported by HP or Operation outside the product s specifications 4 If HP receives notice of a defect in any hardware product covered by HP s warranty during the applicable warranty period HP shall either repair or replace the defective product at HP s option 5 If HP is unable to repair or replace as applicable a defective product which is covered by HP s warranty HP shall wit...

Page 69: ...cal law this Warranty Statement shall be deemed modified to be consistent with such local law Under such local law certain disclaimers and limitations of this Warranty Statement may not apply to the customer For example some states in the United States as well as some governments outside the United States including provinces in Canada may Preclude the disclaimers and limitations in this Warranty S...

Page 70: ...Support and Warranty 70 ...

Page 71: ...y Dark Video Enhancement md5880n md6580n only Connection panel Accessible from front Illuminated RF inputs 1 antenna F type 1 cable F type Video inputs 2 HDMI compatible with DVI D input 2 component video YPbPr 3 S video composite video 1 VGA 15 pin D sub Audio inputs 6 stereo left and right RCA 1 stereo mini phone Audio outputs 1 digital audio coaxial fixed level PCM Dolby Digital 5 1 surround fr...

Page 72: ... the area or handling a broken lamp Disposal of this lamp may be regulated due to environmental considerations For disposal or recycling information contact your local authorities or the Electronic Industries Alliance at www eiae org You can find safety information about the lamp at www hp com hpinfo globalcitizenship environment productdata Lamp 150 W 6000 hour average lamp life to half of origin...

Page 73: ...e For more information consult your dealer an experienced radio television technician or the following booklet prepared by the Federal Communications Commission How to Identify and Resolve Radio TV Interference Problems This booklet is available from the U S Government Printing Office Washington DC 20402 Stock Number 004 000 00345 4 At the first printing of this manual the telephone number was 202...

Page 74: ...Reference Information 74 ...

Page 75: ...evice 25 contacting technical support 67 controlling other devices 40 controlling TV 36 D digital video recorder connecting 22 controlling 41 DVD player connecting 25 controlling 40 DVI connecting 15 DVR See digital video recorder F favorite channels 51 features remote control 35 TV 8 G gaming device connecting 25 H HDMI connecting 14 connector 9 HP support 67 L lamp accessory 9 replacing 57 light...

Page 76: ...ing 16 connector 9 system setup 11 T technical support 67 temperature warning light 60 testing 65 time and date 33 troubleshooting channels 62 general 64 picture 61 remote control 64 sound 63 startup 60 warning lights 60 turning on and off 31 TV program ratings 46 V VCR connecting 22 controlling 41 VGA connector 9 video compatibility 71 video gaming device connecting 25 video source changing 44 ch...

Page 77: ......

Page 78: ......

Page 79: ......

Page 80: ... 2005 Hewlett Packard Development Company L P Printed in Taiwan www hp com 5991 0351 ...

Reviews: