background image

HP Notebook User Guide

Summary of Contents for Mini 210-2000 - PC

Page 1: ...HP Notebook User Guide ...

Page 2: ... 2010 Document Part Number 623229 001 Product notice This guide describes features that are common to most models Some features may not be available on your computer To obtain the latest information in this guide go to the HP Web site at http www hp com support Software terms By installing copying downloading or otherwise using any software product preinstalled on this computer you agree to be bou...

Page 3: ...llow another hard surface such as an adjoining optional printer or a soft surface such as pillows or rugs or clothing to block airflow Also do not allow the AC adapter to contact the skin or a soft surface such as pillows or rugs or clothing during operation The computer and the AC adapter comply with the user accessible surface temperature limits defined by the International Standard for Safety o...

Page 4: ...iv Safety warning notice ...
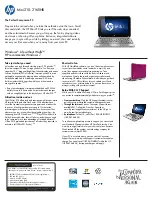
Page 5: ...nection 11 Turning wireless devices on and off 11 Using the wireless key 11 Using the Network Panel 11 Using a WLAN 12 Setting up a new WLAN 12 Connecting to a WLAN 12 Protecting your WLAN 13 Roaming to another network 13 Using Bluetooth wireless devices select models only 13 Connecting to a wired network 13 4 Keyboard and pointing devices 15 Using the keyboard 15 Identifying the hotkey 15 Identif...

Page 6: ...ng and maximizing battery life 26 Managing low battery levels 26 Identifying low battery levels 26 Resolving a low battery level 27 Resolving a low battery level when external power is available 27 Resolving a low battery level when a charged battery is available 27 Resolving a low battery level when no power source is available 27 Resolving a low battery level when the computer cannot exit Sleep ...

Page 7: ...er on password 43 Installing an optional security cable 43 11 Backup and recovery 45 Performing a system recovery 45 12 Setup Utility BIOS 46 Starting Setup Utility 46 Using Setup Utility 46 Changing the language of Setup Utility 46 Navigating and selecting in Setup Utility 46 Displaying system information 47 Restoring factory default settings in Setup Utility 47 Exiting Setup Utility 47 Updating ...

Page 8: ...etwork connection is not working 51 Contacting customer support 52 Labels 53 Appendix B Routine care 54 Cleaning the display 54 Cleaning the TouchPad and keyboard 54 Appendix C Specifications 55 Input power 55 Operating environment 55 Appendix D Electrostatic discharge 56 Index 57 viii ...

Page 9: ...er refer to the software manufacturer s instructions which may be provided with the software or on the manufacturer s Web site Update programs and drivers Update your programs and drivers with the latest versions on a regular basis When your computer is registered it will automatically be updated with the latest versions When you register you can choose to receive automatic notifications when upda...

Page 10: ... HP Web site To access this Web site go to http www hp com support Support information Ordering parts and finding additional help Software driver and BIOS Setup Utility updates Accessories available for the device Limited Warranty To access the warranty Click the Applications icon on the MeeGo panel and then click Help and Support or Go to http www hp com go orderdocuments Warranty information You...

Page 11: ...rns the TouchPad on and off Quickly double tap the TouchPad light to turn the TouchPad on and off 2 Left TouchPad button Functions like the left button on an external mouse 3 Right TouchPad button Functions like the right button on an external mouse 4 TouchPad zone Moves the pointer and selects or activates items on the screen Top 3 ...

Page 12: ...n Caps lock is on Off Caps lock is off 3 Mute light On Computer sound is off Off Computer sound is on 4 Wireless light White An integrated wireless device such as a wireless local area network WLAN device and or a Bluetooth device is on Amber All wireless devices are off 4 Chapter 2 Getting to know your computer ...

Page 13: ... information when pressed in combination with the fn key 2 fn key Displays system information when pressed in combination with the esc key 3 action keys Execute frequently used system functions Front Component Description Speakers 2 Produce sound Front 5 ...

Page 14: ...te slide the switch briefly to exit Sleep If the computer has stopped responding and operating system shutdown procedures are ineffective slide and hold the power switch for at least 5 seconds to turn off the computer To learn more about your power settings select the Devices icon on the MeeGo panel and then click All settings Click the Power and brightness icon 4 USB ports 2 Connect optional USB ...

Page 15: ...components and prevent overheating It is normal for the internal fan to cycle on and off during routine operation 5 Drive light Blinking white The hard drive is being accessed 6 USB port Connects an optional USB device 7 Audio out headphone jack Audio in microphone jack Connects optional powered stereo speakers headphones earbuds a headset or television audio Also connects an optional headset micr...

Page 16: ...res still photographs 4 Webcam light On The webcam is in use The antennas are not visible from the outside of the computer For optimal transmission keep the areas immediately around the antennas free from obstructions To see wireless regulatory notices refer to the section of the Regulatory Safety and Environmental Notices that applies to your country or region 8 Chapter 2 Getting to know your com...

Page 17: ...Bottom Component Description 1 Battery locking latch Locks the battery into the battery bay 2 Battery bay Holds the battery 3 Battery release latch Releases the battery from the battery bay Bottom 9 ...

Page 18: ...efer to Connecting to a wired network on page 13 NOTE Internet hardware and software features vary depending on computer model and your location Using an Internet service provider ISP Before you can connect to the Internet you must establish an ISP account Contact a local ISP to purchase Internet service and a modem The ISP can help set up the modem install a network cable to connect your wireless...

Page 19: ...Network panel or Setup Utility NOTE Refer to Identifying the action keys on page 16 for information on identifying the location of the wireless key on your computer Using the Network Panel To enable or disable a wireless and or wired network device 1 Click the Networks icon on the right side of the MeeGo panel 2 To enable a device drag the control button for the device to the right or to disable a...

Page 20: ... As your network grows additional wireless and wired computers can be connected to the network to access the Internet For help in setting up your WLAN refer to the information provided by your router manufacturer or your ISP Connecting to a WLAN 1 Be sure that the WLAN device is on NOTE Refer to Identifying the action keys on page 16 and Getting to know your computer on page 3 for information on i...

Page 21: ...etwork If the attempt is successful your computer is automatically connected to the new network If the operating system does not recognize the new network follow the same procedure you used initially to connect to your WLAN Using Bluetooth wireless devices select models only A Bluetooth device provides short range wireless communications that replace the physical cable connections that traditional...

Page 22: ...he network jack 1 on the computer 2 Plug the other end of the cable into a network wall jack 2 WARNING To reduce the risk of electric shock fire or damage to the equipment do not plug a modem or telephone cable into the RJ 45 network jack 14 Chapter 3 Networking ...

Page 23: ...ing the TouchPad Using the keyboard Identifying the hotkey A hotkey is a combination of the fn key 1 and the esc key 2 Hotkey Description fn esc Displays information about system hardware components and the system BIOS version number Using the keyboard 15 ...

Page 24: ...VGA video standard The f4 action key can also alternate images among other devices that are receiving video information from the computer f5 Plays the previous track of an audio CD or the previous section of a DVD f6 Plays pauses or resumes an audio CD or a DVD f7 Stops audio or video playback of a CD or a DVD f8 Plays the next track of an audio CD or the next section of a DVD f9 Decreases speaker...

Page 25: ... the pointing devices included with your computer you can use an external USB mouse purchased separately by connecting it to one of the USB ports on the computer Setting pointing device preferences To customize settings for pointing devices such as button configuration click speed and pointer options select the Devices icon on the MeeGo panel and then click All settings Click Trackpad and Mouse Us...

Page 26: ...r computer enables you to use a variety of audio features Play music Record sound Download music from the Internet Create multimedia presentations Transmit sound and images with instant messaging programs Stream radio programs select models only Create burn audio CDs using an optional external optical drive purchased separately Adjusting the volume You can adjust the volume using the volume action...

Page 27: ...ecording speak directly into the microphone and record sound in a setting free of background noise Webcam Some computers include an integrated webcam located at the top of the display With the preinstalled software you can use the webcam to take a photo or record a video You can preview and save the photo or video recording The webcam software enables you to experiment with the following features ...

Page 28: ... To connect a VGA display device connect the device cable to the external monitor port NOTE Press f4 to switch the image between the display devices connected to the computer 20 Chapter 5 Multimedia ...

Page 29: ...lick Turn off If the computer is unresponsive and you are unable to use the preceding shut down procedures try the following emergency procedures in the sequence provided Slide and hold the power switch for at least 5 seconds Disconnect the computer from external power and then remove the battery Setting power options Using power saving states The computer has one power saving state which is enabl...

Page 30: ... and brightness Using battery power When a charged battery is in the computer and the computer is not plugged into external power the computer runs on battery power When a charged battery is in the computer and the computer is plugged into external AC power the computer runs on AC power If the computer contains a charged battery and is running on external AC power supplied through the AC adapter t...

Page 31: ...ng the remaining battery charge Place the mouse pointer over the battery meter icon on the MeeGo panel to see how much battery charge remains or click the Devices icon on the MeeGo panel Using battery power 23 ...

Page 32: ...e the battery CAUTION Removing a battery that is the sole power source for the computer can cause loss of information To prevent loss of information save your work and shut down the computer through the operating system before removing the battery 1 Save your work and shut down the computer 2 Disconnect all external devices connected to the computer 3 Unplug the power cord from the AC outlet 4 Wit...

Page 33: ...w has been unused for 2 weeks or more or is much warmer or cooler than room temperature To prolong battery life and optimize the accuracy of battery charge displays follow these recommendations If you are charging a new battery charge it fully before turning on the computer NOTE If the computer is on while the battery is charging the battery meter on the MeeGo panel may show 100 percent charge bef...

Page 34: ...re not using the computer To maximize battery life 1 Select the Devices icon on the MeeGo panel 2 Click All settings 3 Click Power and brightness 4 Adjust the sliders for Idle and Sleep Managing low battery levels The information in this section describes the alerts and system responses set at the factory Identifying low battery levels When a battery that is the sole power source for the computer ...

Page 35: ... connect the AC adapter to the computer and to external power 2 Exit Sleep by briefly sliding the power switch Storing a battery CAUTION To reduce the risk of damage to a battery do not expose it to high temperatures for extended periods of time If a computer will be unused and unplugged from external power for more than 2 weeks remove the battery and store it separately To prolong the charge of a...

Page 36: ...ile you are onboard aircraft When you are charging or calibrating a battery When you are installing or modifying system software When writing information to a CD or DVD When you connect the computer to external AC power the following events occur The battery begins to charge If the computer is turned on the battery meter icon on the MeeGo panel changes appearance When you disconnect external AC po...

Page 37: ...the power switch Then shut down the computer by sliding the power switch Do not use excessive force when inserting a drive into a drive bay Do not type on the keyboard or move the computer while an optical drive is writing to a disc The write process is sensitive to vibration When the battery is the only source of power be sure that the battery is sufficiently charged before writing to media Avoid...

Page 38: ... 1 Save your work and shut down the computer 2 Disconnect all external devices connected to the computer 3 Unplug the power cord from the AC outlet 4 Remove the battery 1 see Removing the battery on page 24 5 Remove the vanity cover a Slide the release button 2 inward to release the vanity cover b Lift the bottom edge 3 of the vanity cover and then remove it from the computer 4 6 Grasp the tab on ...

Page 39: ...9 Grasp the tab on the hard drive and lift the hard drive 3 out of the hard drive bay Replacing the hard drive 31 ...

Page 40: ...drive cable connector 3 and then carefully press the hard drive cable connector onto the system board until it snaps into place 5 Replace the vanity cover a Insert the 4 tabs on the front edge of the vanity cover into the 4 slots in the base 1 b Rotate the back edge 2 of the vanity cover toward you and then firmly press it down until it snaps into place 6 Insert the battery 3 see Inserting the bat...

Page 41: ...external power and external devices 8 Turn on the computer 9 After you install the hard drive you will need to format the drive Follow the on screen instructions to format the hard drive Replacing the hard drive 33 ...

Page 42: ...l as with other computers To determine which digital card formats are supported on your computer refer to Getting to know your computer on page 3 Inserting a digital card CAUTION To reduce the risk of damage to the digital card connectors use minimal force to insert a digital card 1 Hold the digital card label side up with the connectors facing the computer 2 Insert the card into the Digital Media...

Page 43: ... or Pull the card out of the slot Using a USB device Universal Serial Bus USB is a hardware interface that can be used to connect an optional external device such as a USB keyboard mouse drive printer scanner or hub Devices can be connected to the system Some USB devices may require additional support software which is usually included with the device For more information about device specific sof...

Page 44: ...g optional external devices NOTE For more information about required software and drivers or to learn which computer port to use refer to the manufacturer s instructions To connect an external device to the computer CAUTION To reduce the risk of damage to the equipment when connecting a powered device be sure that the device is turned off and the AC power cord is unplugged 1 Connect the device to ...

Page 45: ...added by connecting the drive to a USB port on the computer NOTE HP external USB optical drives should be connected to the powered USB port on the computer USB drives include the following types Hard drive module a hard drive with an adapter attached External optical drive CD and DVD MultiBay device Using optional external devices 37 ...

Page 46: ...nsive system Shut down the computer before replacing memory modules Do not remove a memory module while the computer is on or in the Sleep state If you are not sure whether the computer is off or in Sleep turn the computer on by sliding the power switch Then shut down the computer by sliding the power switch 1 Save your work and shut down the computer 2 Disconnect all external devices connected to...

Page 47: ... the components on the memory module c To protect a memory module after removal place it in an electrostatic safe container 7 Insert a new memory module CAUTION To prevent damage to the memory module hold the memory module by the edges only Do not touch the components on the memory module a Align the notched edge 1 of the memory module with the tab in the memory module slot b With the memory modul...

Page 48: ...e be sure that you do not bend the memory module 8 Replace the vanity cover a Insert the 4 tabs on the front edge of the vanity cover into the 4 slots in the base 1 b Rotate the back edge 2 of the vanity cover toward you and then firmly press it down until it snaps into place 9 Replace the battery 3 10 Reconnect external power and external devices 11 Turn on the computer 40 Chapter 9 Memory module...

Page 49: ... drive diskette drive or internal network adapter Boot options feature in Setup Utility Unauthorized access to data Operating system updates Unauthorized access to Setup Utility f10 settings and other system identification information Administrator password in Setup Utility Unauthorized removal of the computer Security cable slot used with an optional security cable Setup Utility is a utility acce...

Page 50: ...on password NOTE A power on password is not displayed as it is set entered changed or deleted For details about each of these passwords refer to the following topics Managing an administrator password To set change or delete this password follow these steps 1 Open Setup Utility by turning on or restarting the computer While the Press the ESC key for Startup Menu message is displayed in the lower l...

Page 51: ...rd in the Enter New Password and Confirm New Password fields and then press enter To delete a power on password type your current password in the Enter Current Password field and then press enter 4 times 3 To save your changes and exit Setup Utility use the arrow keys to select Exit Exit Saving Changes Your changes take effect when the computer restarts Entering a power on password At the Enter Pa...

Page 52: ...3 Insert the cable lock into the security cable slot on the computer 3 and then lock the cable lock with the key 4 Remove the key and keep it in a safe place 44 Chapter 10 Security ...

Page 53: ...l reinstalls the original operating system and HP programs and drivers that were installed at the factory Software drivers and updates not installed by HP must be manually reinstalled Personal files must be restored from a backup To recover the original hard drive image follow these steps 1 If possible back up all personal files 2 Turn on or restart the computer 3 Press esc while the Press the ESC...

Page 54: ...ty Changing the language of Setup Utility 1 Start Setup Utility 2 Use the arrow keys to select System Configuration Language and then press enter 3 Use the arrow keys to select a language and then press enter 4 When a confirmation prompt with your language selected is displayed press enter 5 To save your change and exit Setup Utility use the arrow keys to select Exit Exit Saving Changes and then p...

Page 55: ...y use the arrow keys to select Exit Exit Saving Changes and then press enter The Setup Utility factory settings take effect when the computer restarts NOTE Your password security and language settings are not changed when you restore the factory settings Exiting Setup Utility To exit Setup Utility and save your changes from the current session If the Setup Utility menus are not visible press esc t...

Page 56: ...e arrow keys to select Exit Exit Discarding Changes and then press enter Downloading a BIOS update CAUTION To reduce the risk of damage to the computer or an unsuccessful installation download and install a BIOS update only when the computer is connected to reliable external power using the AC adapter Do not download or install a BIOS update while the computer is running on battery power docked in...

Page 57: ...r computer to a network consult the network administrator before installing any software updates especially system BIOS updates BIOS installation procedures vary Follow any instructions that are displayed on the screen after the download is complete NOTE After a message on the screen reports a successful installation you can delete the downloaded file from your hard drive Updating the BIOS 49 ...

Page 58: ...y be in the Sleep state To exit Sleep briefly slide the power switch Sleep is an energy saving feature that turns off the display Sleep can be initiated by the system while the computer is on but is not in use or when the computer has reached a low battery level To change these and other power settings click the Devices icon on the MeeGo panel The computer may not be set to display the image on th...

Page 59: ...the user accessible surface temperature limits defined by the International Standard for Safety of Information Technology Equipment IEC 60950 NOTE The fan in the computer starts up automatically to cool internal components and prevent overheating It is normal for the internal fan to cycle on and off during operation An external device is not working Follow these suggestions if an external device d...

Page 60: ...r questions you can contact HP Customer Support at http www hp com go contactHP NOTE For worldwide support click Contact HP worldwide on the left side of the page or go to http welcome hp com country us en wwcontact_us html Here you can Chat online with an HP technician NOTE When technical support chat is not available in a particular language it is available in English E mail HP Customer Support ...

Page 61: ...ixed to the bottom of the computer Regulatory label Provides regulatory information about the computer The regulatory label is affixed inside the battery bay Wireless certification label or labels select models only Provide information about optional wireless devices and the approval markings of some of the countries or regions in which the devices have been approved for use If your computer model...

Page 62: ...TouchPad can cause the pointer to jump around on the screen To avoid this clean the TouchPad with a damp cloth and wash your hands frequently when using the computer WARNING To reduce the risk of electric shock or damage to internal components do not use a vacuum cleaner attachment to clean the keyboard A vacuum cleaner can deposit household debris on the keyboard surface Clean the keyboard regula...

Page 63: ...C power within the following specifications Input power Rating Operating voltage and current 19 5 V dc 2 05 A 40W NOTE This product is designed for IT power systems in Norway with phase to phase voltage not exceeding 240 V rms NOTE The computer operating voltage and current can be found on the system regulatory label inside the battery bay of the computer Operating environment Factor Metric U S Te...

Page 64: ...uctions direct you to unplug the computer unplug it after being properly grounded and before removing a cover Keep components in their electrostatic safe containers until you are ready to install them Avoid touching pins leads and circuitry Handle electronic components as little as possible Use nonmagnetic tools Before handling components discharge static electricity by touching an unpainted metal...

Page 65: ... checking audio functions 19 components bottom 9 display 8 front 5 left side 7 right side 6 top 3 connecting to a WLAN 12 conservation power 26 corporate WLAN connection 12 critical battery level 26 D default settings restoring 47 digital card defined 34 inserting 34 removing 35 stopping 35 Digital Media Slot identifying 6 display image switching 16 drive light 7 drive media 21 drives external 37 ...

Page 66: ...5 VGA 19 power conserving 26 power connector identifying 7 power light identifying 6 power switch identifying 6 power on password creating 43 entering 43 managing 43 product name and number computer 53 public WLAN connection 12 R readable media 21 recovery 45 regulatory information regulatory label 53 wireless certification labels 53 RJ 45 network jack identifying 6 S screen brightness keys 16 scr...

Page 67: ... wireless encryption 13 wireless icon 10 wireless key identifying 16 using 11 wireless light 4 11 wireless network WLAN connecting 12 corporate WLAN connection 12 described 11 equipment needed 12 public WLAN connection 12 security 13 WLAN antennas identifying 8 WLAN device 53 WLAN label 53 writable media 21 Index 59 ...

Reviews: