HP DL760 - ProLiant - 1 GB RAM, User Manual
The HP DL760 ProLiant server, equipped with 1 GB RAM, is a reliable and high-performance solution for your business needs. Enhance your productivity with this powerful server, and easily access its User Manual for comprehensive instructions and setup guidelines. Download the manual for free from our website manualshive.com.
Share
Download


Reviews:
No comments
Related manuals for DL760 - ProLiant - 1 GB RAM

DMRE55P
Brand: Panasonic Pages: 142

SM-352B
Brand: Samsung Pages: 22

SH-S222A - Super-WriteMaster - Disk Drive
Brand: Samsung Pages: 2
SD-816B
Brand: Samsung Pages: 19
SE-S084B - DVD RW / DVD-RAM Drive
Brand: Samsung Pages: 2
SD-616Q
Brand: Samsung Pages: 2
Super-writemaster SH-S203N
Brand: Samsung Pages: 2
TS-H542A
Brand: Samsung Pages: 24
SH-W162L
Brand: Samsung Pages: 32
SH-M522C - CD-RW / DVD-ROM Combo Drive
Brand: Samsung Pages: 27

SD-816
Brand: Samsung Pages: 2

SD-616Q
Brand: Samsung Pages: 19

DVDRW
Brand: Kanguru Pages: 2

HK-DVDRW
Brand: HIKVISION Pages: 9

ND-2100
Brand: NEC Display Solutions Pages: 18

DVD-USB-01
Brand: Gembird Pages: 11
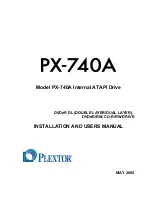
PX-740A
Brand: Plextor Pages: 82
BF-2123
Brand: Bafo Pages: 15


