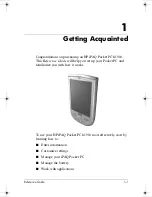
background image

reference guide

hp iPAQ Pocket PC h1910

Document Part Number: 311757-001

November 2002

311757-001.book Page i Friday, October 11, 2002 12:02 PM

Summary of Contents for 311324-001 - iPAQ Pocket PC H1910

Page 1: ...reference guide hp iPAQ Pocket PC h1910 Document Part Number 311757 001 November 2002 ...

Page 2: ...reens Use of dial up and wireless Internet e mail corporate networks and other wireless communications may require separately purchased additional hardware and other compatible equipment and a separately purchased service contract Check with your service provider for availability and coverage in your area Not all Web content may be available Some Web content may require installation of additional ...

Page 3: ...Set the Time for a Location You Are Visiting 1 13 Set the Date 1 14 Change the Backlight Settings 1 15 Manage Your iPAQ Pocket PC 1 16 Back Up Information 1 16 Perform a Normal Reset 1 18 Perform a Full Reset 1 19 Align the Screen 1 20 Manage the Battery 1 21 Install the Battery 1 22 Manually Monitor the Battery 1 25 Charge the Battery 1 25 Work with Applications 1 27 Open Applications 1 27 Minimi...

Page 4: ...cts 3 2 Edit Contact Information 3 3 Categorize Contacts 3 3 Delete Contacts 3 6 Use the Inbox 3 7 Compose Send E mail 3 8 Add an Attachment 3 10 Receive E mail 3 11 Open E mail 3 11 Delete E mail 3 12 Manage Folders 3 14 Record Voice 3 15 Make a Recording 3 16 Listen to a Recording 3 17 Take Notes 3 17 Create a Note 3 17 4 Scheduling Use the Today Screen 4 1 Create Information 4 2 Change Informat...

Page 5: ... of Tasks 4 16 5 Using Software Use Pocket Word 5 1 Create a New Document 5 2 Open a Word Document 5 4 Change the Pocket Word Options 5 4 Use Pocket Excel 5 6 Create a Workbook 5 7 Open an Excel File 5 8 Change Excel Options 5 9 Use the Windows Media Player 5 10 Copy Music to Your iPAQ Pocket PC 5 12 Play Music on Your iPAQ Pocket PC 5 13 Create Playlists 5 14 Play a Playlist 5 16 Play Video 5 16 ...

Page 6: ...Notice A 1 Modifications A 2 Cables A 2 Declaration of Conformity for Products Marked with the FCC Logo United States Only A 2 Battery Warning A 3 Airline Travel Notice A 4 B Hardware Specifications System Specifications B 1 Physical Specifications B 2 Operating Environment B 2 Index ...

Page 7: ...t PC h1910 This Reference Guide will help you set up your Pocket PC and familiarize you with how it works To use your HP iPAQ Pocket PC h1910 most effectively start by learning how to Enter information Customize settings Manage your iPAQ Pocket PC Manage the battery Work with applications ...

Page 8: ...he screen in the Notes application and from any Notes tab in the Calendar Contacts and Tasks applications As you type or write the iPAQ Pocket PC suggests words for you in a box above the Keyboard Letter Recognizer or Block Recognizer You can determine when the suggestions occur for example you can decide how many letters to enter before the Letter Recognizer makes suggestions and how many words a...

Page 9: ...enu tap Settings 2 Tap Input 3 Tap the Word Completion tab 4 Determine how many letters you want to type before a suggestion is made then tap the down arrow associated with letters 5 Determine how many words you want suggested then tap the down arrow associated with words 6 Tap OK 5 4 ...

Page 10: ...een Keyboard You can enter typed text directly on the screen by tapping letters numbers and symbols on the keyboard To type with the keyboard 1 From any application tap the up arrow next to the Input Panel icon 2 Tap Keyboard to display a keyboard on the screen ...

Page 11: ...Getting Acquainted Reference Guide 1 5 3 Tap a letter symbol or number to enter information To see the symbols tap the 123 or Shift key 4 Tap OK ...

Page 12: ...and symbols on the screen using the stylus and the Letter Recognizer You create words and sentences by writing in upper case ABC lower case abc and symbols 123 in specific areas To write with the stylus and letter recognizer 1 From any application tap the up arrow next to the Input Panel button 2 Tap Letter Recognizer ...

Page 13: ...ber or symbol between the hatch marks labeled 123 You should write characters between the dashed line and baseline for the character recognizer to work effectively If you are writing a letter like p write the top portion within the dashed line and baseline and the tail portion below the baseline If you writing a letter like b write the bottom portion within the dashed line and baseline and the top...

Page 14: ...stylus as a pen to draw and write on the screen in the Notes application or from the Notes tab in Calendar Contacts or Tasks To draw and write on the screen 1 From the Start menu tap Notes 2 Tap New Otherwise tap the Notes tab in Calendar Contacts or Tasks then tap the Pen icon ...

Page 15: ...con 5 Tap OK Convert Writing to Text Convert your writing to text when you write with the stylus in the Notes application or from the Notes tab in Calendar Contacts Tasks To convert writing to text 1 From the Start menu tap Notes Otherwise tap the Notes tab in Calendar Contacts or Tasks ...

Page 16: ...gnized word will remain written 4 Tap OK Customize Settings You can navigate through the iPAQ Pocket PC interface in three ways Tap Tap and hold Press application buttons Tap the screen with the pointed tip of your stylus to open applications and make selections For example tap the Start menu to see a list of applications available Tap and hold an area on the screen to see a pop up menu Press an a...

Page 17: ... set the time again if The battery completely discharges You perform a full reset of your iPAQ Pocket PC See Perform a Full Reset From the Today screen tap the Clock icon to set the time To set the time for home 1 From the Start menu tap Settings 2 Tap System then Clock By default the time on the host computer is synchronized with the iPAQ Pocket PC each time the two devices connect using ActiveSy...

Page 18: ...p the time zone down arrow then select your home time zone 5 Tap the hour minutes or seconds then use the up and down arrows to adjust the time You can adjust the time by moving the hands of the clock with the stylus 6 Tap AM or PM 7 Tap OK 8 Tap Yes to save the clock settings 3 4 5 ...

Page 19: ...ime for a visiting location 1 From the Start menu tap Settings 2 Tap System then Clock 3 Tap Visiting 4 Tap the time zone down arrow then select the time zone you are visiting 5 Tap the hour minutes or seconds then use the up and down arrows to adjust the time You can adjust the time by moving the hands of the clock with the stylus 6 Tap AM or PM 7 Tap OK 8 Tap Yes to save the clock settings 3 5 4...

Page 20: ...full reset of your iPAQ Pocket PC You can set the date from the Today screen Tap the Clock icon to set the date To set the date 1 From the Start menu tap Settings 2 Tap System then Clock 3 Tap the down arrow by the date 4 Tap the left or right arrow to select a month and year 5 Tap a day 6 Tap OK 7 Tap Yes to save the date settings ...

Page 21: ...h your environment or to conserve battery power The backlight settings on your iPAQ Pocket PC are synchronized with the settings on your personal computer when they connect using ActiveSync To change the backlight settings 1 From the Start menu tap Settings 2 Tap System then Backlight 3 Select the backlight settings ...

Page 22: ...k up information to your computer regularly to help reduce the chance of losing information Close all applications on your iPAQ Pocket PC before restoring your information ÅWARNING Restoring your information replaces the current information on your iPAQ Pocket PC with the information saved in your backup Changing the Backlight Settings On Select when to use the Battery Power Backlight on battery p...

Page 23: ...iPAQ Pocket PC is connected to your computer 2 From your computer open Microsoft ActiveSync From the Start menu click Programs then click Microsoft ActiveSync 3 From the Tools menu click Backup Restore 4 Click the Backup or Restore tab then select your options 5 Click Backup Now or Restore Now ...

Page 24: ...t when you want to stop all running applications A normal reset will not erase any programs or saved data To perform a normal reset 1 Locate the Reset button on the side panel of the iPAQ Pocket PC 2 Lightly press the Reset button with a stylus for two seconds The iPAQ Pocket PC will restart in approximately five seconds and display the Today screen ...

Page 25: ...l settings programs and data from memory To perform a full reset ÄCAUTION If you perform a full reset you will return to your default settings and lose all information 1 Press and hold the Power button 1 2 Press the Reset button 2 on the side panel of the iPAQ Pocket PC with the stylus 3 Hold all buttons until the displayed image begins to fade approximately four seconds ...

Page 26: ...een of your iPAQ Pocket PC for the first time you are guided through the alignment process Realign your screen if The iPAQ Pocket PC does not respond accurately to your taps You performed a restore following a data backup You performed a hard reset of your iPAQ Pocket PC To align the screen 1 From the Start menu tap Settings 2 Tap System then the Screen icon 3 Tap the Align Screen button 4 Tap the...

Page 27: ...and dispose of the lithium ion battery properly ÄCAUTION The iPAQ Pocket PC has a small backup battery which allows you to change the main battery without losing data However it is strongly recommended that you replace the main battery immediately with a fully charged battery The backup battery provides power to preserve stored data in memory The Pocket PC however will not operate on backup batter...

Page 28: ... Guide Getting Acquainted Install the Battery 1 Locate the removable rechargeable battery 2 Remove the battery cover by sliding the Battery Cover Release button up 1 and pulling the battery cover away from the unit 2 ...

Page 29: ...ting Acquainted Reference Guide 1 23 3 Slide in the battery with the label side up so that the connectors on the right side are fully seated on the pins 1 Then push the left side of the battery in place 2 ...

Page 30: ...ocket PC then snap into place The iPAQ Pocket PC will not operate if the battery cover is not installed You will need to fully charge your iPAQ Pocket PC within the next 12 hours The amber charge light is flashing blinking when your iPAQ Pocket PC is recharging the battery The charge light turns solid amber when the battery is fully charged ...

Page 31: ...y your AC Adapter and charger adapter plug with you when traveling Your iPAQ Pocket PC is shipped with a partial charge on the battery You may want to ensure that it is fully charged before synchronizing ÄCAUTION Because most of the applications and data you install on your iPAQ Pocket PC are held in memory you will need to reinstall them if the battery completely discharges We recommend that you ...

Page 32: ...charger adapter into the bottom of your iPAQ Pocket PC When inserting the charger adapter ensure that the triangle markings located on the front of the charger adapter are on the same side as the back of the iPAQ Pocket PC ÄCAUTION Incorrectly inserting the charger adapter plug into the connector on the bottom of the iPAQ Pocket PC can damage the connector pins To avoid damage to the connector pin...

Page 33: ...ly two taps away from any screen Open any application on your iPAQ Pocket PC from the Start menu ÄCAUTION If an application has been added to the Start menu it will not display on the Programs menu You can open an application by assigning it to an application button To open an application 1 Tap Start or the Microsoft logo 2 Tap Programs 3 Tap the application title or icon ...

Page 34: ...in the top right corner Close Applications Applications may close automatically as you open new applications This will depend on the amount of memory being used If your iPAQ Pocket PC is running slowly you can manually close applications To close an application 1 From the Start menu tap Settings 2 Tap System then Memory ...

Page 35: ...Getting Acquainted Reference Guide 1 29 3 Tap the Running Programs tab 4 Tap Stop All or select a particular application then tap Stop ...

Page 36: ...l applications 1 Tap the application file to install and move it to the Programs folder on your iPAQ Pocket PC 2 Follow the instructions in the installation wizard to install the program on your iPAQ Pocket PC 3 If your application does not run insert the stylus for two seconds into the Reset button on the side panel of your iPAQ Pocket PC Customize the Application Buttons You can quickly open you...

Page 37: ...Getting Acquainted Reference Guide 1 31 3 Tap the button you want to change 4 Tap the button assignment down arrow 5 Tap an application 6 Tap OK ...

Page 38: ...an wirelessly connect to your personal computer using an infrared connection You can physically connect your iPAQ Pocket PC to your personal computer using Microsoft ActiveSync and a USB cable You must have Microsoft Outlook to operate your iPAQ Pocket PC using Microsoft ActiveSync on your computer If you do not have Outlook install the Microsoft Outlook software from the HP iPAQ Pocket PC Compani...

Page 39: ...fore you connect your iPAQ Pocket PC to your computer During installation you can Create partnerships which allow you to synchronize information with multiple computers Select the information to synchronize with your iPAQ Pocket PC for example Contacts Calendar Inbox Tasks Favorites Files Notes and AvantGo If you have selected to synchronize files you should drag and drop the selected files from y...

Page 40: ... connection if you have an infrared port or an infrared USB adapter installed on your computer The infrared connection option works only on computers that have Windows 98 Me XP or 2000 operating system installed 1 Follow the steps in Sync with Personal Computer 2 Follow your computer manufacturer s instructions to install and set up an infrared port 3 From your computer open Microsoft ActiveSync 4...

Page 41: ... devices away from each other to disconnect Change Synchronization Settings You can modify your synchronization settings for Microsoft ActiveSync to Change when your iPAQ Pocket PC synchronizes with your computer Change when your iPAQ Pocket PC synchronizes with your server Change the type of connection from your iPAQ Pocket PC to your computer for example USB or infrared connections ...

Page 42: ... PC and information on your computer are handled To change synchronization settings 1 From your computer open Microsoft ActiveSync 2 From the Tools menu click Options a On the Sync Options tab select the files and information to synchronize with your computer b On the Schedule tab select when your iPAQ Pocket PC synchronizes with your computer c On the Rules tab determine how conflicts between inf...

Page 43: ...omputer using Explore in ActiveSync and Windows Explorer To move files 1 From your computer open Microsoft ActiveSync 2 Click Explore 3 Double click the My Pocket PC icon 4 Right click the Start menu on your personal computer then select Explore 5 Locate the file you want to move ...

Page 44: ...dows Explorer ActiveSync converts the files so that they can be used by the Pocket Office applications if necessary ÄCAUTION You should move your files directly into My Documents or into a folder inside your My Documents folder so the applications on your iPAQ Pocket PC can find your files ...

Page 45: ...nbox Record messages with the microphone Take notes Work with Contacts You can enter and view information about friends family members or business associates in the Contacts application You can Create a contact View and edit a contact Categorize your contacts Delete a contact Press the Contact application button to navigate quickly to Contacts ...

Page 46: ...lds 4 Tap the down arrow next to any item and enter additional details about the item For example tap the Name down arrow to enter the contact s title first middle and last name and suffix 5 Tap OK to save the contact information and return to the list of contacts View a List of Contacts 1 From the Start menu tap Contacts to display a list of your contacts from the last category selected 2 Tap the...

Page 47: ... see the contact information 3 Edit the contact information 4 Tap OK to save the contact information and return to the list of contacts Categorize Contacts You can use categories to filter your list of contacts This helps you view and edit your contact information A category will not display unless a contact has been assigned to it To categorize contacts 1 From the Start menu tap Contacts ...

Page 48: ...ence Guide Communicating 2 Tap a contact s name 3 Tap Edit to see the contact information 4 Tap the Categories field to see a list of available categories You may have to scroll down to see the Categories field ...

Page 49: ...Communicating Reference Guide 3 5 5 Tap the Add Delete tab to create a category 6 Enter the name of the new category then tap Add 7 Tap OK to place your contact in the category ...

Page 50: ...ion and return to the list of contacts Delete Contacts ÄCAUTION If you delete a contact on your iPAQ Pocket PC and synchronize Contacts with your computer you may delete the contact in Outlook on your computer To delete contacts 1 From the Start menu tap Contacts to see a list of your contacts from the last category selected 2 Tap the down arrow next to the category name to see a list of categorie...

Page 51: ...ly Use the Inbox Send and receive e mail by synchronizing your iPAQ Pocket PC with your computer using Microsoft ActiveSync Use ActiveSync to send and receive e mail You can read and compose e mail offline using your iPAQ Pocket PC The e mail remains in the Outbox until you synchronize with your personal computer You see the name of the folder you are using at the bottom of the screen ...

Page 52: ...o the Inbox on your computer E mail is saved in five default folders Inbox Outbox Deleted Items Drafts Sent Items Compose Send E mail You can compose e mail from the Inbox or Today screen To compose and send e mail 1 From the Start menu tap Inbox 2 Tap New to compose a new e mail ...

Page 53: ...Communicating Reference Guide 3 9 3 Tap Send to place the e mail in the Outbox 4 If you do not want to send your e mail yet tap OK to leave your e mail in the Drafts folder ...

Page 54: ...d an Attachment 1 From the Start menu tap Inbox 2 Tap New to write a new e mail 3 Tap Edit 4 Tap Add Attachment to see all the folders in My Documents 5 Tap the file you want to attach You may have to scroll to view your document name 4 3 ...

Page 55: ...g your iPAQ Pocket PC Inbox with your computer using ActiveSync If you are using ActiveSync you can synchronize your personal folders from Outlook on your computer with Inbox on your iPAQ Pocket PC You do not receive e mail attachments by default You can select this option in ActiveSync Open E mail 1 From the Start menu tap Inbox 2 Tap the down arrow next to Inbox to see a list of your folders ...

Page 56: ... saved the e mail 4 Tap the e mail to open it Delete E mail When you delete e mail it is placed in the Deleted Items folder but the e mail is not permanently deleted until you tap Empty Deleted Items from the Tools menu To delete e mail 1 From the Start menu tap Inbox ...

Page 57: ...ail 3 Tap and hold the e mail you want to delete 4 Tap Delete to move the e mail to the Deleted Items folder 5 Tap Tools then Empty Deleted Items to permanently delete the e mail ÄCAUTION When you delete e mail from your iPAQ Pocket PC you also delete it from your personal computer ...

Page 58: ...at you can rename or delete If you are using ActiveSync you cannot create additional folders in the Inbox However you can synchronize your personal folders from Outlook on your computer with Inbox on your iPAQ Pocket PC You cannot rename or delete these folders in Inbox 1 From the Start menu tap Inbox 2 Tap Tools then Manage Folders 3 Tap New to create a new folder ...

Page 59: ...ly delete the folder Record Voice You can record your voice or any other sound as a note within the Calendar Contacts Notes and Tasks applications In the Notes application you can create stand alone recordings which are stored as separate wav files in File Explorer To quickly make a recording follow the steps in the Make a Recording section ...

Page 60: ... button when you want to stop recording Use the software Follow the procedure below 1 From the Start menu tap Notes 2 Tap the Cassette Tape icon located at the bottom of the screen to see the recording controls 3 Tap the Record icon to start recording 4 Position the microphone to record your voice or other sounds 5 Tap the Stop icon to finish recording To improve the quality of your recording tap ...

Page 61: ... Calendar Contacts Notes and Tasks applications You can type write draw or record in your note In the Notes application you can compose an original note or a note based on a template You can create a note from the Start menu or Today screen Create a Note 1 From the Start menu tap Notes 2 Tap New 3 Tap anywhere and enter your note 4 Tap OK to save your note and place it in the list of notes ...

Page 62: ...d create reminders with the Calendar Create a task list Use the Today Screen Use the Today screen to view your Owner information Upcoming appointments Unsent messages Tasks that need to be completed When you set up your device you ll first see the Today screen You will also see the Today screen when you turn on your device for the first time each day or after four hours of inactivity ...

Page 63: ...you need for the day Create Information From the Today screen create new information including Appointments Contacts E mail Excel Workbook Information Notes Tasks Word documents Tap to create a new item Your day at a glance Tap to open an item Tap to change date and time Tap to switch to a program Tap to change volume or mute all sounds ...

Page 64: ...r information Upcoming appointments Unsent messages Tasks that need to be completed For more information on changing these items see the appropriate instructions for each task in this guide For example to create a new appointment see Schedule Appointments later in this guide 1 From the Start menu tap Today 2 Tap the information you want to change 3 Enter or change the information 4 Tap OK to save ...

Page 65: ...ation Decide when to see the Today screen To change the background 1 From the Start menu tap Settings 2 Tap Today 3 Select Use this picture as the background check box 4 Tap Browse to select a picture from File Explorer To change the order of information 1 From the Start menu tap Settings 2 Tap Today 3 Tap the Items tab to select or reorder the information on the Today screen ...

Page 66: ...o change the order of items on the Today screen You cannot change the placement of the Date on the Today screen 6 Tap the down arrow associated with Display Today screen if device is not used for hours check box to determine how many hours must pass before the Today screen displays 7 Tap OK ...

Page 67: ... view your calendar by Agenda Day Week Month Year Tap the Calendar icon on the Today screen to navigate quickly to Calendar Look at the Calendar By default the Calendar first appears in the Agenda view The Agenda view provides the most detail about your appointments From the Start menu tap Calendar to view your appointments ...

Page 68: ...the Calendar first appears in the Agenda view which provides the most detail about your appointment You can also view your calendar by Day Week Month Year 1 From the Start menu tap Calendar 2 Tap the Agenda Day Week Month or Year icon to see your calendar in that view ...

Page 69: ...r time slots deciding to use a large font and deciding to set reminders for new items You can also display several icons that give visual information about your appointments including Reminder Recurrence Note Location Attendees Private You can determine whether to send meeting requests through ActiveSync To customize the calendar appearance 1 From the Start menu tap Calendar 2 Tap Tools 3 Tap Opti...

Page 70: ...ject drop down list 4 Tap any item to enter additional information 5 Tap OK to schedule the appointment You can schedule an appointment and set a reminder from the Today screen Create Reminders You can create a reminder when you are scheduling an appointment or you can do it at a later date To create reminders 1 From the Start menu tap Calendar 2 Tap an appointment ...

Page 71: ...15 minutes Delete Appointments 1 From the Start menu tap Calendar 2 Tap an appointment 3 Tap Tools 4 Tap Delete Appointment 5 Tap Yes to confirm deletion Categorize Appointments You can use categories to filter the appointments in your calendar To categorize appointments 1 From the Start menu tap Calendar 2 Tap an appointment 3 Tap Edit ...

Page 72: ...me of the new category 7 Tap Add 8 Tap OK to place your appointment in the category 9 Tap the Categories field to place your appointment in more categories 10 Tap additional category names to select them 11 Tap OK to list the categories you selected in the Categories field 12 Tap OK to save the category information and return to the Calendar screen ...

Page 73: ... meeting request To request a meeting 1 From the Start menu tap Calendar 2 Tap Tools 3 Tap Options 4 Tap the Send meeting requests via down arrow 5 Tap the e mail service you want to use to send a meeting request then tap OK 6 Tap New to create a new appointment 7 Enter the information 8 Tap the Attendees field 9 Tap the contacts you want to invite to the meeting 10 Tap OK to add the attendees 11 ...

Page 74: ...ority subject start date and due date Create a Task You can create a task from the Today screen To create a task 1 From the Start menu tap Tasks 2 Tap New to create a new task 3 Enter a subject or select from the Subject drop down list 4 Tap any item to enter additional information 5 Tap Due to add a due date for the task 6 Tap Reminder then select Remind me ...

Page 75: ...by customizing Tasks so you see an Entry Bar at the top of the Tasks screen To quickly create a task 1 From the Start menu tap Tasks 2 Tap Tools 3 Tap Entry Bar 4 Enter the subject 5 Set a priority a For high priority tap the exclamation point b For low priority tap the down arrow icon c For normal priority do not tap an icon 6 Tap outside the Entry Bar to add the task to your task list ...

Page 76: ...enu tap Tasks 2 Tap the task you want to delete 3 Tap Tools 4 Tap Delete Task 5 Tap Yes to permanently delete the task Sort Tasks 1 From the Start menu tap Tasks 2 Tap the down arrow at the top left of the screen to sort the task list by category 3 Select a category ...

Page 77: ...status priority subject start date or due date 5 Select a sort option Change Appearance of Tasks You can change the appearance of Tasks to use a large font show the start and end dates and set reminders for new items 1 From the Start menu tap Tasks 2 Tap Tools 3 Tap Options 4 Select the Tasks options 5 Tap OK ...

Page 78: ...Pocket Word You can create new Word documents from your iPAQ Pocket PC or synchronize existing Word documents from your computer to your iPAQ Pocket PC Microsoft ActiveSync converts Word documents into the Pocket Word format and changes the doc extension to a psw extension ÄCAUTION Because ActiveSync converts Word documents into the Pocket Word format you may lose some formatting from the original...

Page 79: ...s and footers Footnotes Style sheets For more help with Pocket Word tap Help from the Start menu tap Pocket Word Create a New Document Create a new document from the Today screen by tapping New To create a new document 1 From the Start menu tap Programs 2 Tap Pocket Word 3 Tap New to create a new document ...

Page 80: ...ide 5 3 4 Tap View then tap Toolbar to format text 5 Tap OK to close and save the document The document is automatically saved as a Pocket Word Document with the first few words of your text as its name You may want to rename it ...

Page 81: ... one folder below it Files saved elsewhere cannot be displayed To open a Word document 1 From the Start menu tap Programs 2 Tap Pocket Word 3 Tap a document to open it Change the Pocket Word Options You can select A default template Whether documents are stored in main memory or on a storage card Which types of documents are displayed in the list view ...

Page 82: ...oftware Reference Guide 5 5 To change Pocket Word options 1 From the Start menu tap Programs 2 Tap Pocket Word 3 Tap Tools then Options 4 Tap the Default template down arrow to select a default template 4 5 6 ...

Page 83: ... to save the options Use Pocket Excel You can create Excel workbooks from your iPAQ Pocket PC or synchronize existing Excel workbooks from your computer to your iPAQ Pocket PC ActiveSync converts Excel workbooks into the Pocket Excel format and changes the xls extension to a pxl extension ÄCAUTION Because ActiveSync converts Excel workbooks into the Pocket Excel format you may lose some formatting...

Page 84: ...Scenarios Object charts Vertical alignment Text boxes Embedded OLE objects Hyperlinks For more help with Pocket Excel tap Help from the Start menu tap Pocket Excel Create a Workbook You can create a new workbook from the Today screen by tapping New To create a workbook 1 From the Start menu tap Programs 2 Tap Pocket Excel ...

Page 85: ...k1 Depending on how many workbooks you have created since opening Pocket Excel you may want to rename it Open an Excel File ÄCAUTION Pocket Excel only recognizes and displays documents saved in the My Documents folder or one folder below it Files saved elsewhere cannot be displayed To open an Excel file 1 From the Start menu tap Programs 2 Tap Pocket Excel 3 Tap a workbook to open ...

Page 86: ...emory or on a storage card Which types of workbooks are displayed in the list view To change Excel options 1 From the Start menu tap Programs 2 Tap Pocket Excel 3 Tap Tools then Options 4 Tap the Template for new workbook down arrow to select a template 5 Tap the Save new workbooks to down arrow to store workbooks in main memory or on a storage card 4 5 6 ...

Page 87: ...ndows Media Player you must install the Windows Media Player software from the HP iPAQ Pocket PC Companion CD You can use the Windows Media Player to listen to music or play video from your iPAQ Pocket PC by downloading files onto your personal computer and transferring them to your iPAQ Pocket PC For more information about using Windows Media Player tap the Windows icon then Help from within the ...

Page 88: ...med content in Windows Media format using WM protocols HTTP and MMS Some Internet music files are protected by licensing technology Windows Media Player uses Digital Rights Management DRM for the electronic licensing procedure Windows Media Player and Windows Media Rights Manager must be installed on the personal computer and are available on Microsoft s Web site ...

Page 89: ...he Media Player on the personal computer 1 Connect your iPAQ Pocket PC to your personal computer 2 Open Windows Media Player on your personal computer 3 Insert the audio CD into your CD drive 4 From Media Player on your personal computer select CD Audio to display the tracks on the audio CD 5 Select the tracks to copy and select Copy Music to transfer the tracks to the hard drive 6 From Media Play...

Page 90: ...ence Guide 5 13 Play Music on Your iPAQ Pocket PC 1 Tap Start then Windows Media 2 Tap Select 3 Tap the down arrow and Local Content to display media files stored on the iPAQ Pocket PC 4 Tap and highlight the desired file ...

Page 91: ... play all files stored as local content on the iPAQ Pocket PC You can repeat a file and shuffle the contents by selecting Tools then Repeat or Shuffle Create Playlists You can organize music and video files into playlists To create a playlist 1 Tap Start then Windows Media 2 Tap Select ...

Page 92: ...ftware Reference Guide 5 15 3 Tap the down arrow then Organize Playlists 4 Tap New to name your playlist then tap OK 5 Select the files to include in this playlist 6 Tap OK to display your new playlist 7 Tap OK ...

Page 93: ...isplay its contents 4 Tap OK then the Play icon to start the playlist You can delete and rename playlists by using the Organize Playlists menu option You can also edit playlists by using the Edit icon while viewing a playlist Play Video You can play and manage video files just like music You must have an Internet connection to play streaming video ...

Page 94: ...and other compatible equipment and a separately purchased service contract Check with your service provider for availability and coverage in your area Not all Web content may be available Some Web content may require installation of additional software Use Pocket IE When Connected With Pocket IE you can browse when connected to the Internet 1 Tap Start 2 Tap Internet Explorer You can use the pre i...

Page 95: ...d stored information when disconnected from the Internet This information can be viewed using the cached content or through synchronization To view the cached content 1 Tap Start 2 Tap Internet Explorer 3 Tap Tools then Options 4 In the General tab select the number of days to save the history of pages visited 5 Tap OK ...

Page 96: ...c on your personal computer click Tools then Options 2 Select the check box next to Favorites 3 In Internet Explorer on your personal computer save or move favorite links to the Mobile Favorites subfolder in the Favorites list The Favorites will be synchronized to your iPAQ Pocket PC at your next Sync connection If you add or delete a favorite link in the Mobile Favorites folder on your iPAQ Pocke...

Page 97: ...ay cause harmful interference to radio communications However there is no guarantee that interference will not occur in a particular installation If this equipment does cause harmful interference to radio or television reception which can be determined by turning the equipment off and on the user is encouraged to try to correct the interference by one or more of the following measures Reorient or ...

Page 98: ...hoods in order to maintain compliance with FCC Rules and Regulations Declaration of Conformity for Products Marked with the FCC Logo United States Only This device complies with Part 15 of the FCC Rules Operation is subject to the following two conditions 1 this device may not cause harmful interference and 2 this device must accept any interference received including interference that may cause u...

Page 99: ...ush puncture short external contacts or dispose of in fire or water Replacement should only be done by a HP authorized service provider using the HP spare part for this computer ÅWARNING To reduce the risk of personal injury electric shock fire or damage to the equipment Plug the AC Adapter into an electrical outlet that is easily accessible at all times Disconnect power from the equipment by unpl...

Page 100: ...A 4 Reference Guide Regulatory Notices Airline Travel Notice Use of electronic equipment aboard commercial aircraft is at the discretion of the airline ...

Page 101: ...y Transflective color TFT 240 x 320 pixels 64K 16 bit color support LED Backlight Multi level brightness adjustment Audio Speaker 2 5 mm audio jack with stereo sound microphone MP3 Stereo through audio jack Infrared IrDA data transfer up to 115 2 Kb per second Indicators 3 mode alarm notification Flashing green LED tone pop up message Charge active flashing solid amber LED Battery Removable rechar...

Page 102: ... 113 3 mm Width 2 75 in 69 8 mm Depth 0 50 in 12 8 mm Weight 4 23 oz 120 0 gm Environment US Metric Temperature Operating 32 to 104 F 0 to 40 C Nonoperating 22 to 140 F 20 to 60 C Relative Humidity Operating up to 80 up to 80 Nonoperating up to 80 up to 80 Maximum Altitude Operating 0 15 000 ft 0 4 572 m Nonoperating 0 15 000 ft 0 4 572 m ...

Page 103: ...dule 4 9 AvantGo 2 2 B back up Pocket PC 1 16 backlight 1 15 battery charge 1 25 install 1 22 monitor manually 1 25 C Calendar 4 6 change backlight settings 1 15 charge the battery 1 25 charging the Pocket PC 1 25 contacts 3 1 categorize 3 3 create 3 2 delete 3 6 edit 3 2 view 3 2 convert writing to text 1 9 customize application buttons 1 30 Calendar appearance 4 8 D date set 1 14 draw on screen ...

Page 104: ...dapter 1 25 install 1 22 monitor manually 1 25 monitor the battery 1 25 N normal reset 1 18 notes write 3 17 O onscreen keyboard 1 4 options change Word 5 4 word suggestions 1 2 P Pocket Excel 5 6 Pocket Word 5 1 R record voice 3 15 reminders set 4 9 4 13 reset full 1 19 hard 1 19 normal 1 18 soft 1 18 restore memory 1 16 S set date 1 14 time home 1 11 time visiting location 1 13 soft reset 1 18 s...

Page 105: ...sks 4 13 time set for home 1 11 set for visiting location 1 13 Today screen 4 1 V view contacts 3 2 voice recording 3 15 W Windows Explorer 2 6 Word 5 1 word suggestions change options 1 2 write on screen 1 8 writing convert to text 1 9 ...

Reviews: