Google Play and the Google Play logo are trademarks of Google Inc.
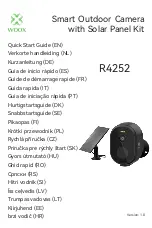
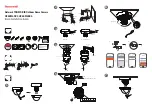
IPCAM-WOC1 HD Wi-Fi Outdoor Video Camera
Quick Installation Guide
IPCAM-WOC1 is a 1080p, full HD Wi-Fi® video camera intended for outdoor use with Honeywell Total Connect® 2.0.
•
Camera setup requires a Total Connect® 2.0 account and the Total Connect 2.0 mobile app.
Video Services
must be enabled in AlarmNet 360™.
•
Camera operation requires minimum available bandwidth of 2.1 Mbps.
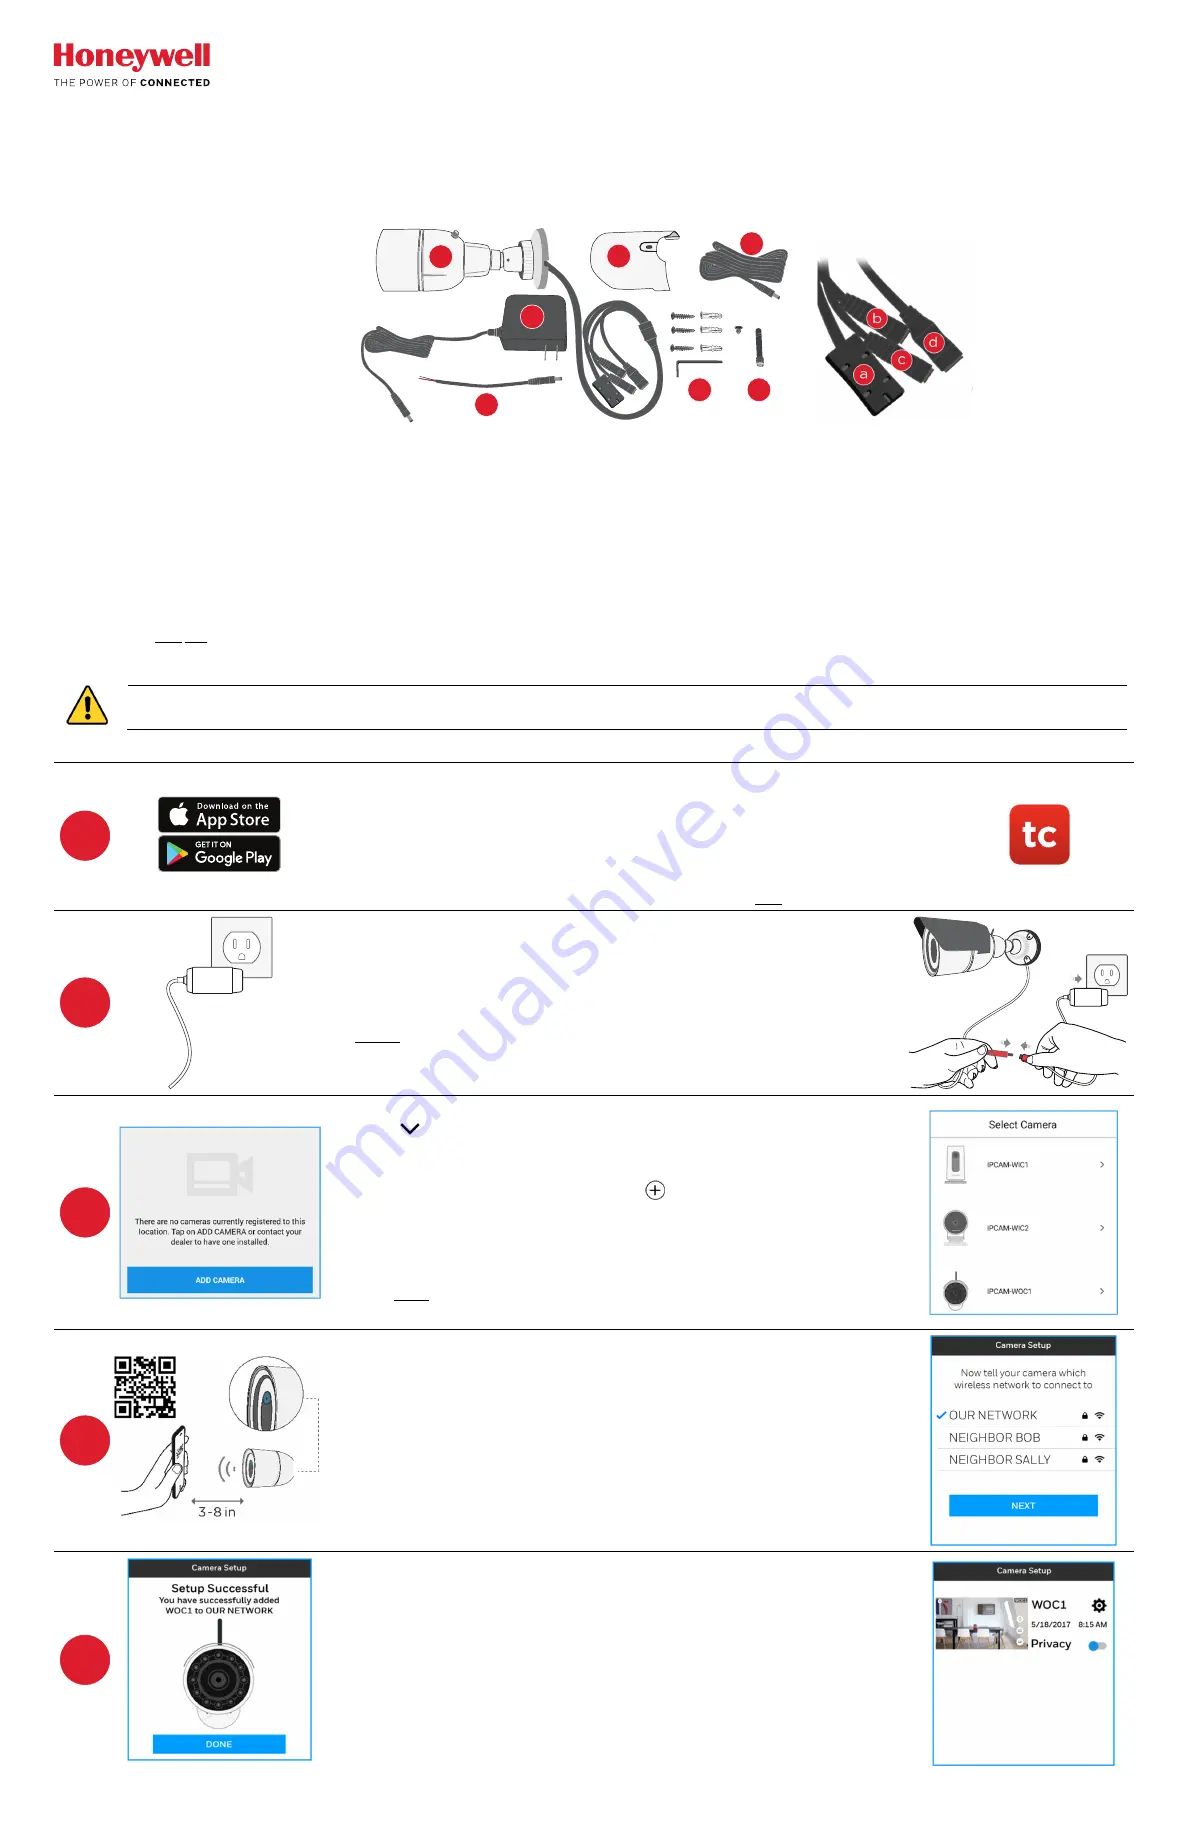
Package Contents
A.
Camera
B.
Sun shield
C.
Power cable extension [8’ cable]
D.
Power adapter with 7’ cable
E.
Pig-tail power cable
F.
Screws and Allen wrench
G.
Antenna
a.
Bluetooth antenna
b.
Not used
c.
Reset switch
d.
Power
Planning Configuration and Installation
See the other side of this sheet for more about mounting at the installation site
•
The camera should be situated within
200 feet
(61 m) of a power outlet and within the verified range of its Wi-Fi
®
connection. DO NOT mount the
camera within 1 foot (0.3 m) of any other wireless device. Depending on the specifics of your installation, a range extender may be needed to ensure
adequate Wi-Fi signal strength.
•
Pre-installation: It is strongly recommended that camera configuration be done as close as possible to the Wi-Fi router with which the camera will be
linked. After setup, use a third-party app to check signal strength at the installation site before mounting (over for more information on signal strength.)
•
The power adapter must be connected to a non-switchable power outlet.
•
Direct sunlight on the camera lens / image sensor may affect picture quality. When placing the camera, consider how the lighting can vary with time of
day and other conditions. The included sun shield can be attached to the camera to help minimize problems with sun glare.
IMPORTANT
: Use only ONE of the included power extension cables. This cable adds
8 feet
(2.44 m) to the supplied power adapter for a total of
15 feet
(4.5 m).
Alternately, you may use the pig-tail power cable to extend the power adapter cable with a maximum of
200 feet
(61 m) of
18 AWG
wire.
If the included extension cable is
not used
, you may cut and splice (observing good workmanship) the power transformer cable.
Ensure proper polarity if the pig-tail power cable is used. The pig-tail’s black (negative) wire must be connected to the negative (white
dashed) wire on the power adapter.
Wi-Fi Configuration and Camera Registration
Download the Total Connect® 2.0 app from the App Store or on Google Play.
(Look for the red Total Connect 2.0 logo.)
Note
: Significant differences between the
iOS and Android versions of the app are noted in these instructions.
For best results, configure only one camera at a time.
Check these settings when you turn on your mobile device’s Wi-Fi and Bluetooth:
•
Make sure the Bluetooth isn’t connected to another device, such as headphones
•
Also, make sure the mobile device
is NOT on Silent
(ringer and speaker should be audible)
a.
Verify that the camera’s antenna is firmly connected.
b.
Turn on your smart device’s Bluetooth and Wi-Fi
.
c.
Launch the app and sign in with your Total Connect® 2.0 account.
d.
Plug the power supply into an AC outlet,
but:
.
DON’T CONNECT THE POWER SUPPLY TO THE CAMERA YET!
When you do,
refer to the diagram at right
→
→
→
→
If your account has more than one
Location
, select the appropriate one using the
dropdown
menu at the top of the screen.
Press
CAMERAS
at the bottom (iOS) or top (Android) of the screen. (Remember that the
horizontal Navigation Order can be customized in iOS.)
a.
At upper right, press
ADD CAMERA
(iOS) or
(Android)
b.
Select the type of camera you’re installing. The names of the camera models may
vary from the illustration at right.
c.
Name the camera and press
NEXT
.
d.
Connect the power supply to the camera. The LED at the top flashes various colors.
Then,
WAIT
for the camera’s LED to flash blue
only
. This may take a couple of minutes.
e.
Press
NEXT
on the app.
a.
On the
Pair Your Camera
screen, press
Generate QR Code
. After a brief wait, the
code appears.
b.
Show the QR code on your device to the camera from 3 – 8 inches away.
If you can, keep an eye on your device’s screen; when the code is scanned
successfully, a confirmation message will appear over the QR code.
The app will also provide audible confirmation via your mobile device’s speaker.
c.
Select your Wi-Fi network and press
NEXT
.
d.
Enter the network password and press
NEXT
. Final setup begins.
When setup is complete, the LED on the camera changes from steady blue, to purple
and finally to steady green.
The app also displays
Setup Successful
*. Press
DONE
or
ADD ANOTHER CAMERA
.
After setup, go back to the
CAMERAS
page and check your newly-registered camera.
Touch the
preview image
to launch a live stream from the camera.
*The app will tell you if you need to repeat the setup process. This involves resetting
the camera, which is described in the app itself.
See the other side of this sheet for more information about the required steps.
A
B
C
D
E
F
G
1
2
3
4
5